ECO mode JEEP PATRIOT 2021 Owner handbook (in English)
[x] Cancel search | Manufacturer: JEEP, Model Year: 2021, Model line: PATRIOT, Model: JEEP PATRIOT 2021Pages: 332, PDF Size: 1.99 MB
Page 90 of 332
The system will best recognize your speech if
the windows are closed, and the heater/air
conditioning blower control is set to low.
At any point, if the system does not recognize
one of your commands, you will be prompted to
repeat it.
To hear the first available Menu, push the Voice
Command
button and say “Help” or “Main
Menu.”
CommandsThe Voice Command system understands two
types of commands, Universal commands and
Local commands. Universal commands are
available at all times. Local commands are
available if the supported radio mode is active.
Changing The Volume
To change the Voice Command volume:
1. Start a dialogue by pushing the Voice Com-
mand
button.
2. Say a command (e.g., “Help”).3.
Use the ON/OFF VOLUME rotary knob to
adjust the volume to a comfortable level while
the Voice Command system is speaking.
•Please note the volume setting for Voice
Command is different than the volume
setting for the audio system.
Main Menu
Start a dialogue by pushing the Voice Com-
mand
button. You may say “Main Menu” to
switch to the main menu.
In this mode, you can say the following com-
mands:
•“Radio AM” (to switch to the radio AM mode)
•“Radio FM” (to switch to radio FM mode)
•“Disc” (to switch to the disc mode)
•“USB” (to switch to USB mode)
•“Bluetooth Streaming” (to switch to Bluetooth
Streaming mode)
•“Memo” (to switch to the memo recorder)
•“System Setup” (to switch to system setup)Radio AM (Or Radio Long Wave Or Radio
Medium Wave — If Equipped)
To switch to the AM band, say “AM” or “Radio
AM.” In this mode, you may say the following
commands:
•“Frequency #” (to change the frequency)
•“Next Station” (to select the next station)
•“Previous Station” (to select the previous
station)
•“Menu Radio” (to switch to the radio menu)
•“Main Menu” (to switch to the main menu)
Radio FM
To switch to the FM band, say “FM” or “Radio
FM.” In this mode, you may say the following
commands:
•“Frequency #” (to change the frequency)
•“Next Station” (to select the next station)
•“Previous Station” (to select the previous
station)
•“Menu Radio” (to switch to the radio menu)
•“Main Menu” (to switch to the main menu)
86
Page 91 of 332
Disc Mode
To switch to the disc mode, say “Disc.” In this
mode, you may say the following commands:
•“Track” (#) (to change the track)
•“Next Track” (to play the next track)
•“Previous Track” (to play the previous track)
•“Main Menu” (to switch to the main menu)
USB Mode
To switch to USB mode, say “USB.” In this
mode, you may say the following commands:
•“Next Track” (to play the next track)
•“Previous Track” (to play the previous track)
•“Play” (to play an Artist Name, Playlist Name,
Album Name, Track Name, etc.)
Bluetooth Streaming (BT) Mode
To switch to Bluetooth Streaming (BT) mode,
say “Bluetooth Streaming.” In this mode, you
may say the following commands:
•“Play” (to play the current track)
•“Pause” (to pause the current track)
•“Next Track” (to play the next track)•“Previous Track” (to play the previous track)
Memo Mode
To switch to the voice recorder mode, say
“Memo.” In this mode, you may say the follow-
ing commands:
•“New Memo” (to record a new memo) —
During the recording, you may push the
Voice Command
button to stop recording.
You proceed by saying one of the following
commands:
– “Save” (to save the memo)
– “Continue” (to continue recording)
– “Delete” (to delete the recording)
•“Play Memos” (to play previously recorded
memos) — During the playback you may
push the Voice Command
button to stop
playing memos. You proceed by saying one
of the following commands:
– “Repeat” (to repeat a memo)
– “Next” (to play the next memo)
– “Previous” (to play the previous memo)
– “Delete” (to delete a memo)
– “Delete All” (to delete all memos)System Setup
To switch to system setup, you may say one of
the following:
•“Change to system setup”
•“Main menu system setup”
•“Switch to system setup”
•“Change to setup”
•“Main menu setup” or
•“Switch to setup”
In this mode, you may say the following com-
mands:
•“Language English”
•“Language French”
•“Language Spanish”
•“Language Dutch”
•“Language Deutsch”
•“Language Italian”
•“Tutorial”
•“Voice Training”
87
Page 92 of 332
NOTE:
Keep in mind that you have to push the
Voice Command
button first and wait for
the beep before speaking the “Barge In”
commands.
Voice TrainingFor users experiencing difficulty with the system
recognizing their voice commands or numbers
the Uconnect Voice “Voice Training” feature
may be used.
1. Push the Voice Command
button, say
“System Setup” and once you are in that
menu then say “Voice Training.”
•This will train your own voice to the system
and will improve recognition.
2. Repeat the words and phrases when
prompted by Uconnect Voice.
•For best results, the Voice Training ses-
sion should be completed when the ve-
hicle is parked, engine running, all win-
dows closed, and the blower fan switchedoff. This procedure may be repeated with a
new user. The system will adapt to the last
trained voice only.
SEATS
Seats are a part of the Occupant Restraint
System of the vehicle.
WARNING!
•It is dangerous to ride in a cargo area,
inside or outside of a vehicle. In a collision,
people riding in these areas are more likely
to be seriously injured or killed.
•Do not allow people to ride in any area of
your vehicle that is not equipped with seats
and seat belts. In a collision, people riding
in these areas are more likely to be seri-
ously injured or killed.
•Be sure everyone in your vehicle is in a
seat and using a seat belt properly.
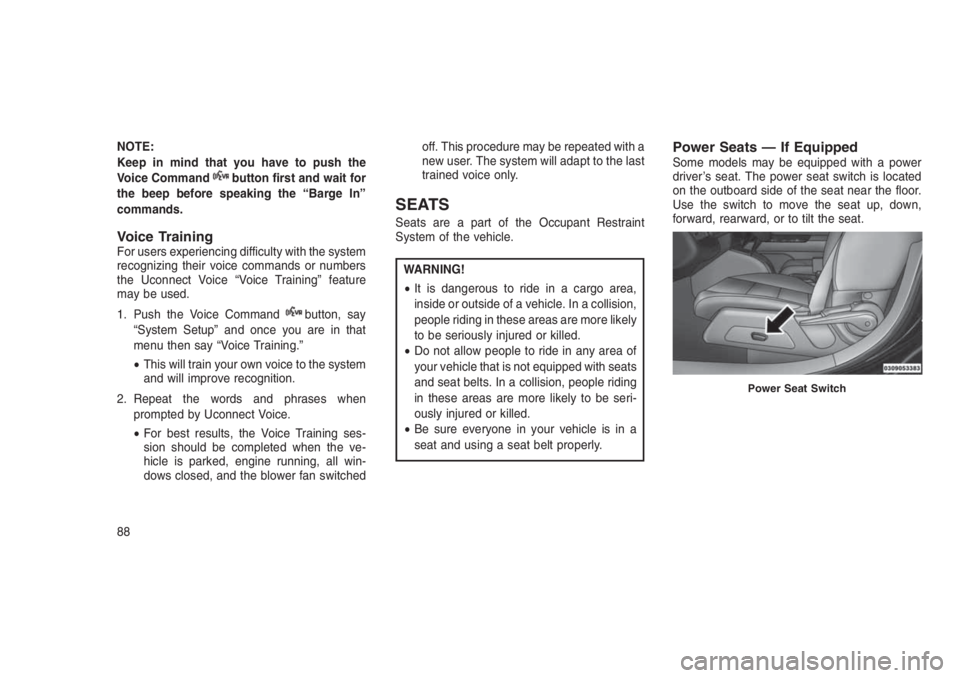
Power Seats — If EquippedSome models may be equipped with a power
driver’s seat. The power seat switch is located
on the outboard side of the seat near the floor.
Use the switch to move the seat up, down,
forward, rearward, or to tilt the seat.
Power Seat Switch
88
Page 93 of 332
WARNING!
•Adjusting a seat while driving may be
dangerous. Moving a seat while driving
could result in loss of control which could
cause a collision and serious injury or
death.
•Seats should be adjusted before fastening
the seat belts and while the vehicle is
parked. Serious injury or death could result
from a poorly adjusted seat belt.
CAUTION!
Do not place any article under a power seat
or impede its ability to move as it may cause
damage to the seat controls. Seat travel may
become limited if movement is stopped by an
obstruction in the seat’s path.
Adjusting The Seat Forward Or Rearward
The seat can be adjusted both forward and
rearward. Push the seat switch forward or rear-
ward. The seat will move in the direction of theswitch. Release the switch when the desired
position has been reached.
Adjusting The Seat Up Or Down
The height of the seats can be adjusted up or
down. Pull upward or push downward on the
seat switch. The seat will move in the direction
of the switch. Release the switch when the
desired position is reached.
Tilting The Seat Up Or Down
The angle of the seat cushion can be adjusted
in four directions. Pull upward or push down-
ward on the front or rear of the seat switch, the
front or rear of the seat cushion will move in the
direction of the switch. Release the switch when
the desired position is reached.
Heated Seats — If EquippedOn some models, the front driver and passen-
ger seats may be equipped with heaters in both
the seat cushions and seatbacks. The controls
for the front heated seats are located on the
center instrument panel area.
You can choose from HI, LO or OFF heat
settings. Amber indicator lights in each switchindicate the level of heat in use. Two indicator
lights will illuminate for HI, one for LO and none
for OFF.
Push the switch once to select HI-
level heating. Push the switch a sec-
ond time to select LO-level heating.
Push the switch a third time to shut
the heating elements OFF.
When the HI-level setting is selected, the heater
will provide a boosted heat level during the
initial stages of operation. Then, the heat output
will drop to the normal HI-level. If the HI-level
setting is selected, the system will automatically
switch to LO-level after approximately 30 min-
utes of continuous operation. At that time, the
display will change from HI to LO, indicating the
change. When the LO-level heating is selected,
the system automatically turns the heater and
the indicator light OFF after approximately 30
minutes of continuous operation.
NOTE:
Once a heat setting is selected, heat will be
felt within two to five minutes.
89
Page 108 of 332
U.S. Speed (mph)
•Pushing the SET (-) button once will result in
a 1 mph decrease in set speed. Each subse-
quent tap of the button results in a decrease
of 1 mph.
•If the button is continually pushed, the set
speed will continue to decrease until the
button is released, then the new set speed
will be established.
Metric Speed (km/h)
•Pushing the SET (-) button once will result in
a 1 km/h decrease in set speed. Each sub-
sequent tap of the button results in a de-
crease of 1 km/h.
•If the button is continually pushed, the set
speed will continue to decrease until the
button is released, then the new set speed
will be established.
Manual TransmissionPressing the clutch pedal will disengage the
speed control. A slight increase in engine RPM
before the Electronic Speed Control disen-
gages is normal.Vehicles equipped with manual transmissions
may need to be shifted into a lower gear to climb
hills without speed loss.
To Accelerate For PassingPress the accelerator as you would normally.
When the pedal is released, the vehicle will
return to the set speed.
Using Electronic Speed Control On Hills
The transmission may downshift on hills to
maintain the vehicle set speed.
NOTE:
The Electronic Speed Control system main-
tains speed up and down hills. A slight
speed change on moderate hills is normal.
On steep hills, a greater speed loss or gain may
occur so it may be preferable to drive without
Electronic Speed Control.
WARNING!
Electronic Speed Control can be dangerous
where the system cannot maintain a constant
(Continued)
WARNING!(Continued)
speed. Your vehicle could go too fast for the
conditions, and you could lose control and
have an accident. Do not use Electronic Speed
Control in heavy traffic or on roads that are
winding, icy, snow-covered or slippery.
PARKVIEW REAR BACK UP
CAMERA — IF EQUIPPED
Your vehicle may be equipped with the
ParkView Rear Back Up Camera that allows
you to see an on-screen image of the rear
surroundings of your vehicle whenever the gear
selector is put into REVERSE. The image will
be displayed on the touchscreen along with a
caution note to “check entire surroundings”
across the top of the screen. After five seconds
this note will disappear. The ParkView camera
is located on the rear of the vehicle above the
rear license plate.
When the vehicle is shifted out of REVERSE,
the rear camera mode is exited and the last
selected touchscreen appears again.
104
Page 110 of 332
NOTE:
If snow, ice, mud, or any foreign substance
builds up on the camera lens, clean the lens,
rinse with water, and dry with a soft cloth. Do
not cover the lens.
POWER SUNROOF — IF
EQUIPPED
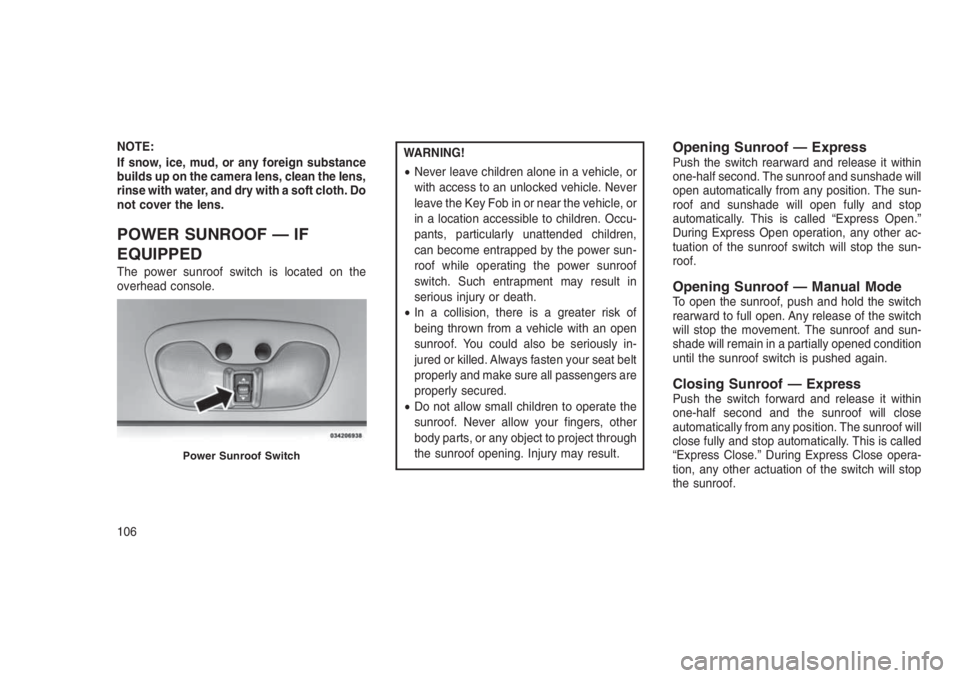
The power sunroof switch is located on the
overhead console.
WARNING!
•Never leave children alone in a vehicle, or
with access to an unlocked vehicle. Never
leave the Key Fob in or near the vehicle, or
in a location accessible to children. Occu-
pants, particularly unattended children,
can become entrapped by the power sun-
roof while operating the power sunroof
switch. Such entrapment may result in
serious injury or death.
•In a collision, there is a greater risk of
being thrown from a vehicle with an open
sunroof. You could also be seriously in-
jured or killed. Always fasten your seat belt
properly and make sure all passengers are
properly secured.
•Do not allow small children to operate the
sunroof. Never allow your fingers, other
body parts, or any object to project through
the sunroof opening. Injury may result.Opening Sunroof — ExpressPush the switch rearward and release it within
one-half second. The sunroof and sunshade will
open automatically from any position. The sun-
roof and sunshade will open fully and stop
automatically. This is called “Express Open.”
During Express Open operation, any other ac-
tuation of the sunroof switch will stop the sun-
roof.
Opening Sunroof — Manual ModeTo open the sunroof, push and hold the switch
rearward to full open. Any release of the switch
will stop the movement. The sunroof and sun-
shade will remain in a partially opened condition
until the sunroof switch is pushed again.
Closing Sunroof — ExpressPush the switch forward and release it within
one-half second and the sunroof will close
automatically from any position. The sunroof will
close fully and stop automatically. This is called
“Express Close.” During Express Close opera-
tion, any other actuation of the switch will stop
the sunroof.
Power Sunroof Switch
106
Page 111 of 332
Closing Sunroof — Manual ModeTo close the sunroof, push and hold the switch
in the forward position. Any release of the
switch will stop the movement and the sunroof
will remain in a partially closed condition until
the sunroof switch is pushed again.
Pinch Protect FeatureThis feature will detect an obstruction in the
opening of the sunroof during Express Close
operation. If an obstruction in the path of the
sunroof is detected, the sunroof will automati-
cally retract. Remove the obstruction if this
occurs. Next, push the switch forward and re-
lease to Express Close.
Venting Sunroof — ExpressPush and release the Vent button within one
half second and the sunroof will open to the
vent position. This is called “Express Vent”, and
it will occur regardless of sunroof position. Dur-
ing Express Vent operation, any other actuation
of the switch will stop the sunroof.
Sunshade OperationThe sunshade can be opened manually. How-
ever, the sunshade will open automatically as
the sunroof opens.
NOTE:
The sunshade cannot be closed if the sun-
roof is open.
Wind BuffetingWind buffeting can be described as the percep-
tion of pressure on the ears or a helicopter-type
sound in the ears. Your vehicle may exhibit wind
buffeting with the windows down, or the sunroof
(if equipped) in certain open or partially open
positions. This is a normal occurrence and can
be minimized. If the buffeting occurs with the
rear windows open, open the front and rear
windows together to minimize the buffeting. If
the buffeting occurs with the sunroof open,
adjust the sunroof opening to minimize the
buffeting or open any window.
Sunroof MaintenanceUse only a non-abrasive cleaner and a soft
cloth to clean the glass panel.
Ignition Off OperationFor Vehicles Not Equipped With The Elec-
tronic Vehicle Information Center (EVIC)
The power sunroof switch will remain active for
45 seconds after the ignition switch is turned to
the LOCK position. Opening either front door
will cancel this feature.
For Vehicles Equipped With The EVIC
The power sunroof switch will remain active for
up to approximately ten minutes after the igni-
tion switch is turned to the LOCK position.
Opening either front door will cancel this fea-
ture.
107
Page 117 of 332
WARNING!(Continued)
•The weight and position of cargo and
passengers can change the vehicle center
of gravity and vehicle handling. To avoid
loss of control resulting in personal injury,
follow these guidelines for loading your
vehicle:
•Always place cargo evenly on the cargo
floor. Put heavier objects as low and as far
forward as possible.
•Place as much cargo as possible in front of
the rear axle. Too much weight or improp-
erly placed weight over or behind the rear
axle can cause the rear of the vehicle to
sway.
•Do not pile luggage or cargo higher than
the top of the seatback. This could impair
visibility or become a dangerous projectile
in a sudden stop or collision.
(Continued)
WARNING!(Continued)
•To help protect against personal injury,
passengers should not be seated in the
rear cargo area. The rear cargo space is
intended for load carrying purposes only,
not for passengers, who should sit in seats
and use seat belts.
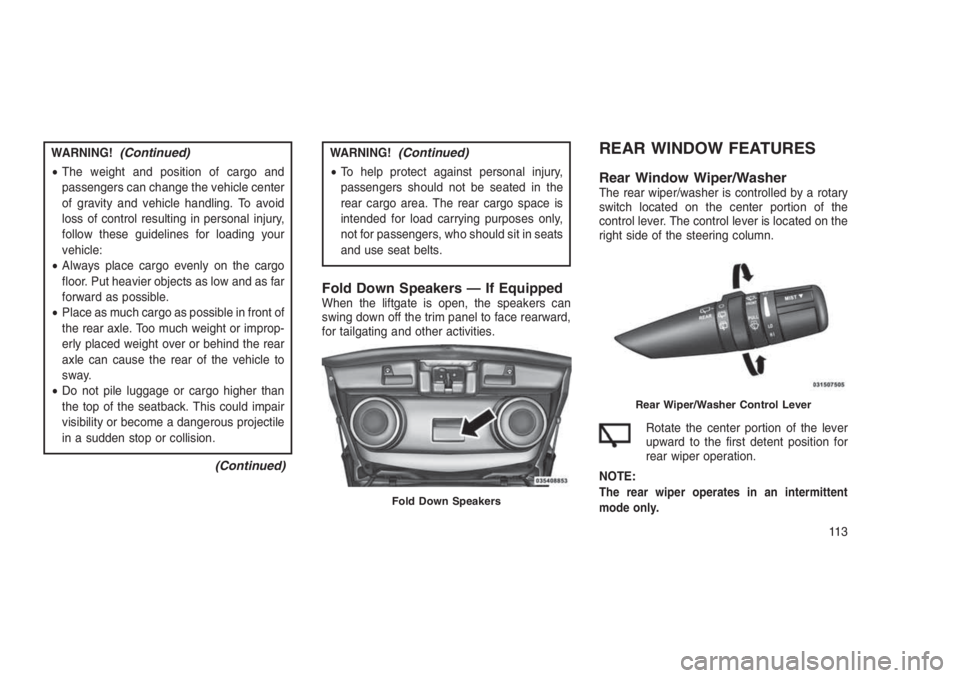
Fold Down Speakers — If EquippedWhen the liftgate is open, the speakers can
swing down off the trim panel to face rearward,
for tailgating and other activities.
REAR WINDOW FEATURES
Rear Window Wiper/WasherThe rear wiper/washer is controlled by a rotary
switch located on the center portion of the
control lever. The control lever is located on the
right side of the steering column.
Rotate the center portion of the lever
upward to the first detent position for
rear wiper operation.
NOTE:
The rear wiper operates in an intermittent
mode only.Fold Down Speakers
Rear Wiper/Washer Control Lever
11 3
Page 118 of 332
Rotate the center portion of the
lever past the first detent to acti-
vate the rear washer. The washer
pump and the wiper will continue to
operate as long as the switch is
held (for a maximum of 10 seconds). Upon
release, the wiper will continue to cycle two
times before returning to the set position.
If the rear wiper is operating when the ignition is
turned OFF, the wiper will automatically return
to the “park” position if power accessory delay is
active. Power accessory delay can be cancelled
by opening the door, if this happens the rear
wiper will stop at its current position and will not
go to “park”.
Rear Window Defroster
The rear window defroster button is
located on the climate controls mode
control knob. Push the button to turn
on the rear window defroster and the
heated outside mirrors (if equipped). An indica-
tor in the button will illuminate when the rear
window defroster is on. The rear window de-
froster automatically turns off after approxi-mately 10 minutes. For an additional five min-
utes of operation, push the button a second
time.
NOTE:
To prevent excessive battery drain, use the
rear window defroster only when the engine
is operating.
CAUTION!
Failure to follow these cautions can cause
damage to the heating elements:
•Use care when washing the inside of the
rear window. Do not use abrasive window
cleaners on the interior surface of the
window. Use a soft cloth and a mild wash-
ing solution, wiping parallel to the heating
elements. Labels can be peeled off after
soaking with warm water.
•Do not use scrapers, sharp instruments, or
abrasive window cleaners on the interior
surface of the window.
•Keep all objects a safe distance from the
window.
ROOF LUGGAGE RACK — IF
EQUIPPED
The crossbars and siderails are designed to
carry the cargo on vehicles equipped with a
luggage rack. The load must not exceed 150 lbs
(68 kg), and should be uniformly distributed
over the luggage rack crossbars.
NOTE:
If not equipped with crossbars, your autho-
rized dealer can order and install MOPAR
crossbars built specifically for this roof rack
system.
Distribute cargo weight evenly on the luggage
rack crossbars. The luggage rack does not
increase the total load carrying capacity of the
vehicle. Be sure the total load of cargo inside
the vehicle plus that on the external rack does
not exceed the maximum vehicle load capacity.
The crossbars must also be secured in one of
the seven detent positions marked with an
arrow on the siderails to prevent movement. To
move the crossbars, loosen the thumb screws
located at the upper edge of each crossbar
approximately eight turns, then move the cross-
11 4
Page 150 of 332
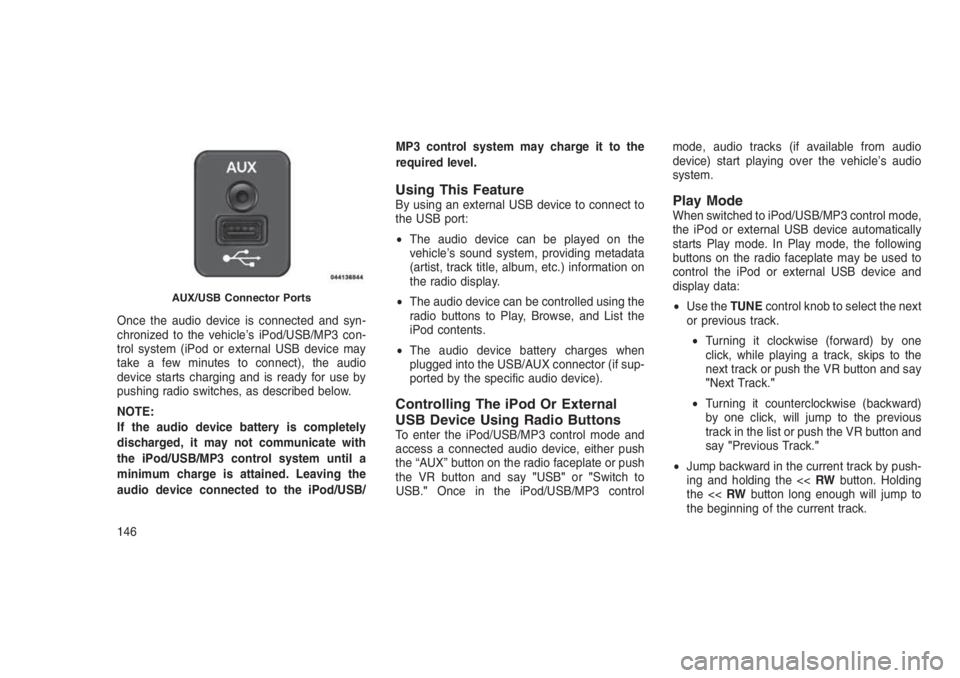
Once the audio device is connected and syn-
chronized to the vehicle’s iPod/USB/MP3 con-
trol system (iPod or external USB device may
take a few minutes to connect), the audio
device starts charging and is ready for use by
pushing radio switches, as described below.
NOTE:
If the audio device battery is completely
discharged, it may not communicate with
the iPod/USB/MP3 control system until a
minimum charge is attained. Leaving the
audio device connected to the iPod/USB/MP3 control system may charge it to the
required level.
Using This FeatureBy using an external USB device to connect to
the USB port:
•The audio device can be played on the
vehicle’s sound system, providing metadata
(artist, track title, album, etc.) information on
the radio display.
•The audio device can be controlled using the
radio buttons to Play, Browse, and List the
iPod contents.
•The audio device battery charges when
plugged into the USB/AUX connector (if sup-
ported by the specific audio device).
Controlling The iPod Or External
USB Device Using Radio Buttons
To enter the iPod/USB/MP3 control mode and
access a connected audio device, either push
the “AUX” button on the radio faceplate or push
the VR button and say"USB"or"Switch to
USB."Once in the iPod/USB/MP3 controlmode, audio tracks (if available from audio
device) start playing over the vehicle’s audio
system.
Play ModeWhen switched to iPod/USB/MP3 control mode,
the iPod or external USB device automatically
starts Play mode. In Play mode, the following
buttons on the radio faceplate may be used to
control the iPod or external USB device and
display data:
•Use theTUNEcontrol knob to select the next
or previous track.
•Turning it clockwise (forward) by one
click, while playing a track, skips to the
next track or push the VR button and say
"Next Track."
•Turning it counterclockwise (backward)
by one click, will jump to the previous
track in the list or push the VR button and
say"Previous Track."
•Jump backward in the current track by push-
ing and holding the <
AUX/USB Connector Ports
146