buttons JEEP RENEGADE 2015 1.G User Guide
[x] Cancel search | Manufacturer: JEEP, Model Year: 2015, Model line: RENEGADE, Model: JEEP RENEGADE 2015 1.GPages: 678, PDF Size: 29.84 MB
Page 350 of 678
position. Also, the transmission is locked in PARK when-
ever the ignition is in the STOP/OFF position.
Vehicles With Mechanical Key:
This vehicle is equipped with a Key Ignition Park Inter-
lock which requires the transmission to be in PARK
before the ignition can be turned to the STOP/OFF (key
removal) position. The key can only be removed from the
ignition when the ignition is in the STOP/OFF position,
and the transmission is locked in PARK whenever the
ignition is in the STOP/OFF position. If the vehicle’s
battery becomes discharged, the key will be trapped in
the ignition switch even when the shift lever is in PARK.
To extract the key, refer to “IGNITION KEY REMOVAL
OVERRIDE” in “IN CASE OF EMERGENCY”.
Brake/Transmission Shift Interlock System
This vehicle is equipped with a Brake Transmission Shift
Interlock system (BTSI) that holds the shift lever in PARK
unless the brakes are applied. To shift the transmission
out of PARK, the ignition switch must be turned to the
MAR/RUN position (engine running or not) and the
brake pedal must be pressed.
The brake pedal must also be pressed before pushing the
button on the shift lever to shift from NEUTRAL into
DRIVE or REVERSE when the vehicle is stopped or
moving at low speeds.
ELECTRONIC SPEED CONTROL — IF EQUIPPED
When engaged, the Electronic Speed Control takes over
accelerator operations at speeds greater than 25 mph
(40 km/h).
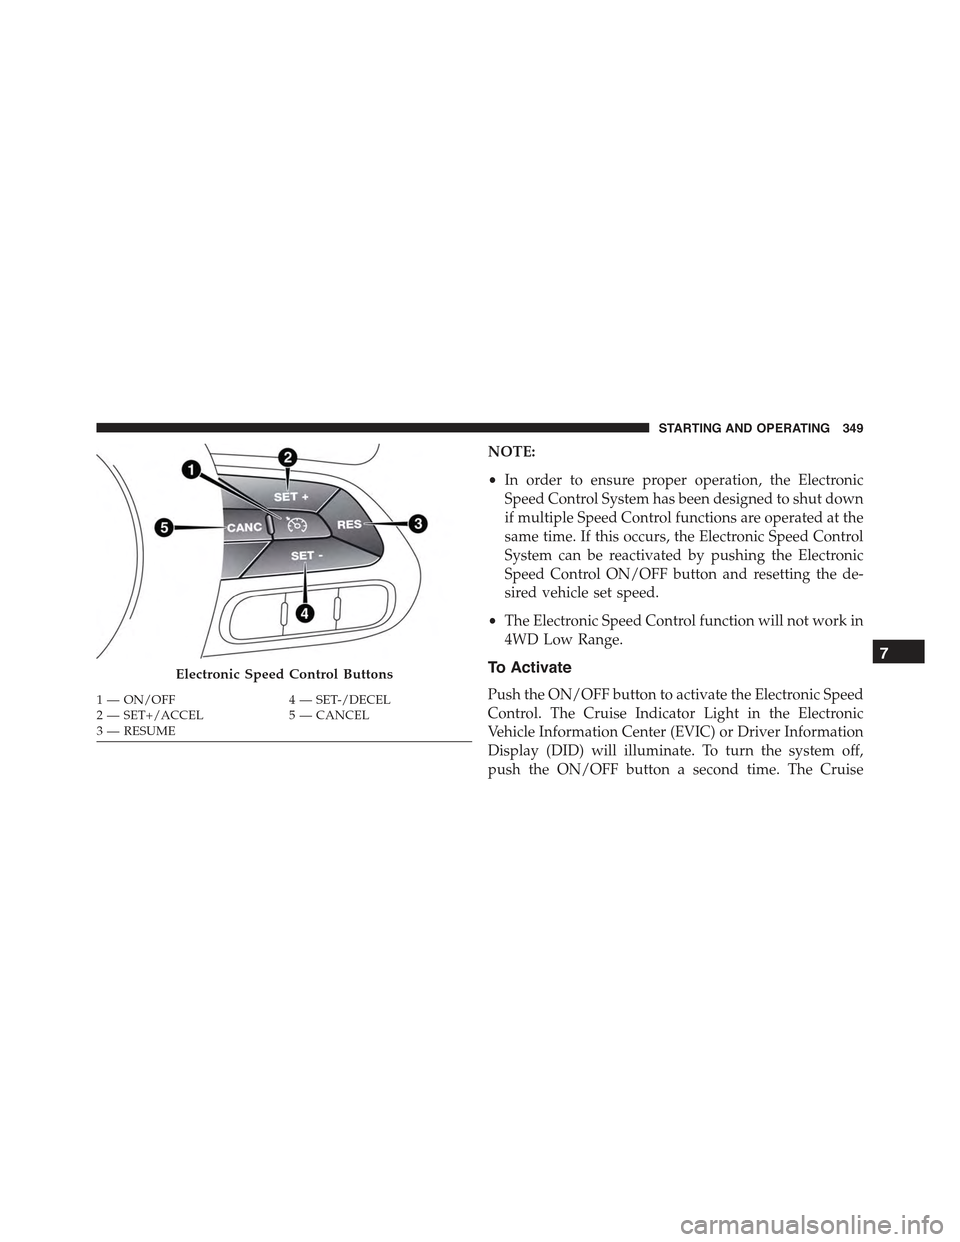
The Electronic Speed Control buttons are located on the
right side of the steering wheel.
348 STARTING AND OPERATING
Page 351 of 678
NOTE:
•In order to ensure proper operation, the Electronic
Speed Control System has been designed to shut down
if multiple Speed Control functions are operated at the
same time. If this occurs, the Electronic Speed Control
System can be reactivated by pushing the Electronic
Speed Control ON/OFF button and resetting the de-
sired vehicle set speed.
•The Electronic Speed Control function will not work in
4WD Low Range.
To Activate
Push the ON/OFF button to activate the Electronic Speed
Control. The Cruise Indicator Light in the Electronic
Vehicle Information Center (EVIC) or Driver Information
Display (DID) will illuminate. To turn the system off,
push the ON/OFF button a second time. The Cruise
Electronic Speed Control Buttons
1—ON/OFF4—SET-/DECEL2—SET+/ACCEL5—CANCEL3—RESUME
7
STARTING AND OPERATING 349
Page 356 of 678
CAUTION!
All wheels must have the same size and type tires.
Unequal tire sizes must not be used. Unequal tire
size may cause failure of the power transfer unit.
Four Wheel Drive (4X4)
The four wheel drive (4WD) is fully automatic in normal
driving mode.
NOTE:It is not possible to carry out the change of mode
when the car exceeds the speed of 75 mph (120 km/h).
Enabling Four Wheel Drive (4x4)
The buttons for the activation of four wheel drive are
located on the device Selec-Terrain™ and allow you to
select the following:
•4WD LOCK
•4WD LOW — (Trailhawk models only)
354 STARTING AND OPERATING
Page 429 of 678
HAZARD WARNING
The Hazard Warning flasher switch is located on the
switch bank below the radio.
Push the switch to turn on the Hazard Warning
Flasher. When the switch is activated, all direc-
tional turn signals will flash on and off to warn oncoming
traffic of an emergency. Push the switch a second time to
turn off the Hazard Warning flashers.
This is an emergency warning system and it should not
be used when the vehicle is in motion. Use it when your
vehicle is disabled and it is creating a safety hazard for
other motorists.
When you must leave the vehicle to seek assistance, the
Hazard Warning flashers will continue to operate even
though the ignition is placed in the STOP/OFF position.
NOTE:With extended use the Hazard Warning flashers
may wear down your battery.
ASSIST AND 9–1–1 — IF EQUIPPED
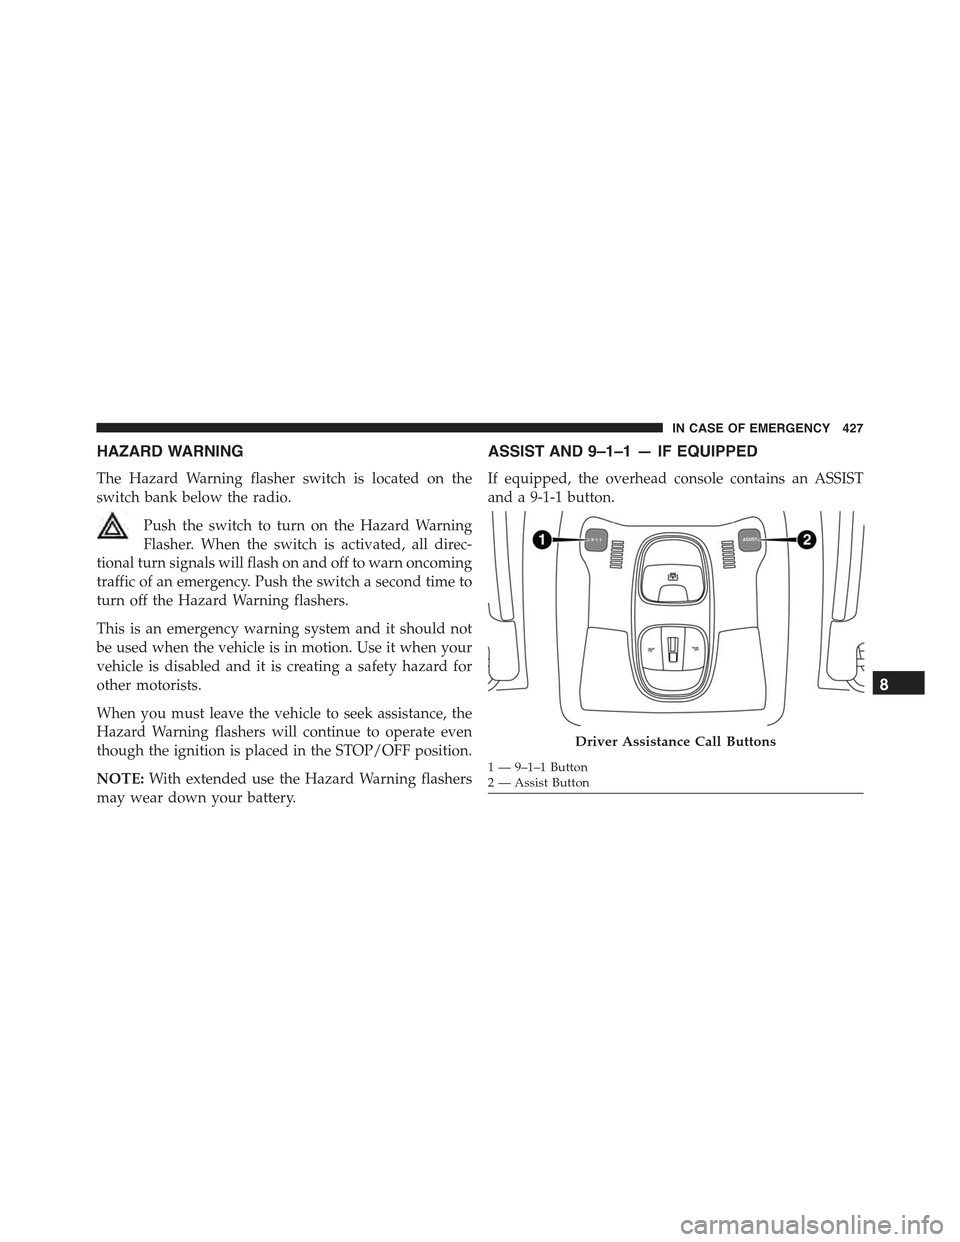
If equipped, the overhead console contains an ASSIST
and a 9-1-1 button.
Driver Assistance Call Buttons
1 — 9–1–1 Button2 — Assist Button
8
IN CASE OF EMERGENCY 427
Page 430 of 678
NOTE:The ASSIST and 9–1–1 features operate through
the Uconnect® Access service. These buttons will only
operate as long as your Uconnect® Access service is
active. Refer to your “Uconnect® Radio supplement” for
further information.
ASSIST Call
The ASSIST Button is used to automatically connect you
to any one of the following support centers:
•Roadside Assistance – If you get a flat tire, or need a
tow, just push the Assist button and you’ll be con-
nected to someone who can help. Roadside Assistance
will know what vehicle you’re driving and its location.
Additional fees may apply for Roadside Assistance.
•Uconnect® Access Customer Care – In-vehicle support
for Uconnect® Access and Uconnect® Access Via
Mobile features.
•Vehicle Customer Care – Total support for all other
vehicle issues.
9-1-1 Call
1. Push the 9-1-1 Call button on the overhead console.
NOTE:In case the 9-1-1 Call button is pushed in error,
there will be a 10 second delay before the 9-1-1 Call
system initiates a call to a 9-1-1 operator. To cancel the
9-1-1 Call connection, push the 9-1-1 Call button on the
overhead console or press the cancellation button on the
Phone Screen. Termination of the 9-1-1 Call will turn the
green LED light on the overhead console off.
2. The LED light located on the Assist and 9-1-1 buttons
in the overhead console will turn green once you push
these buttons and will remain on until the call is
ended.
428 IN CASE OF EMERGENCY
Page 433 of 678
If the 9-1-1 Call system detects a malfunction, any of the
following may occur at the time the malfunction is
detected, and at the beginning of each ignition cycle:
•The overhead console lights located on the Assist and
9-1-1 buttons will continuously be illuminated red.
•The Phone Screen will display the following message
“Vehicle phone requires service. Please contact your
dealer.”
•An In-Vehicle Audio message will state “Vehicle phone
requires service. Please contact your dealer.”
WARNING!
•Ignoring the Assist and 9-1-1 buttons light could
mean you will not have 9-1-1 Call services. If the
Assist and 9-1-1 buttons light is illuminated, have
an authorized dealer service the 9-1-1 Call system
immediately.
•The Occupant Restraint Control module turns on
the air bag Warning Light on the instrument panel
if a malfunction in any part of the system is
detected. If the air bag Warning Light is illumi-
nated, have an authorized dealer service the ORC
system immediately.8
IN CASE OF EMERGENCY 431
Page 597 of 678
MULTIMEDIA
CONTENTS
!Uconnect® SETTINGS....................597
▫Buttons On The Faceplate................598
▫Buttons On The Touchscreen..............599
▫Customer Programmable Features — Uconnect®
5.0 Settings.........................599
▫Customer Programmable Features — Uconnect®
6.5A/6.5AN Settings...................617
!Uconnect® RADIOS.....................634
!iPod®/USB/MEDIA PLAYER CONTROL.....635
!STEERING WHEEL AUDIO CONTROLS......636
▫Radio Operation......................637
▫Media Mode.........................637
!RADIO OPERATION AND MOBILE PHONES . .637
▫Regulatory And Safety Information.........638
!Uconnect® VOICE RECOGNITION QUICK
TIPS................................640
▫Introducing Uconnect®.................640
▫Get Started..........................641
▫Basic Voice Commands..................643
▫Radio..............................64411
Page 599 of 678
Uconnect® SETTINGS
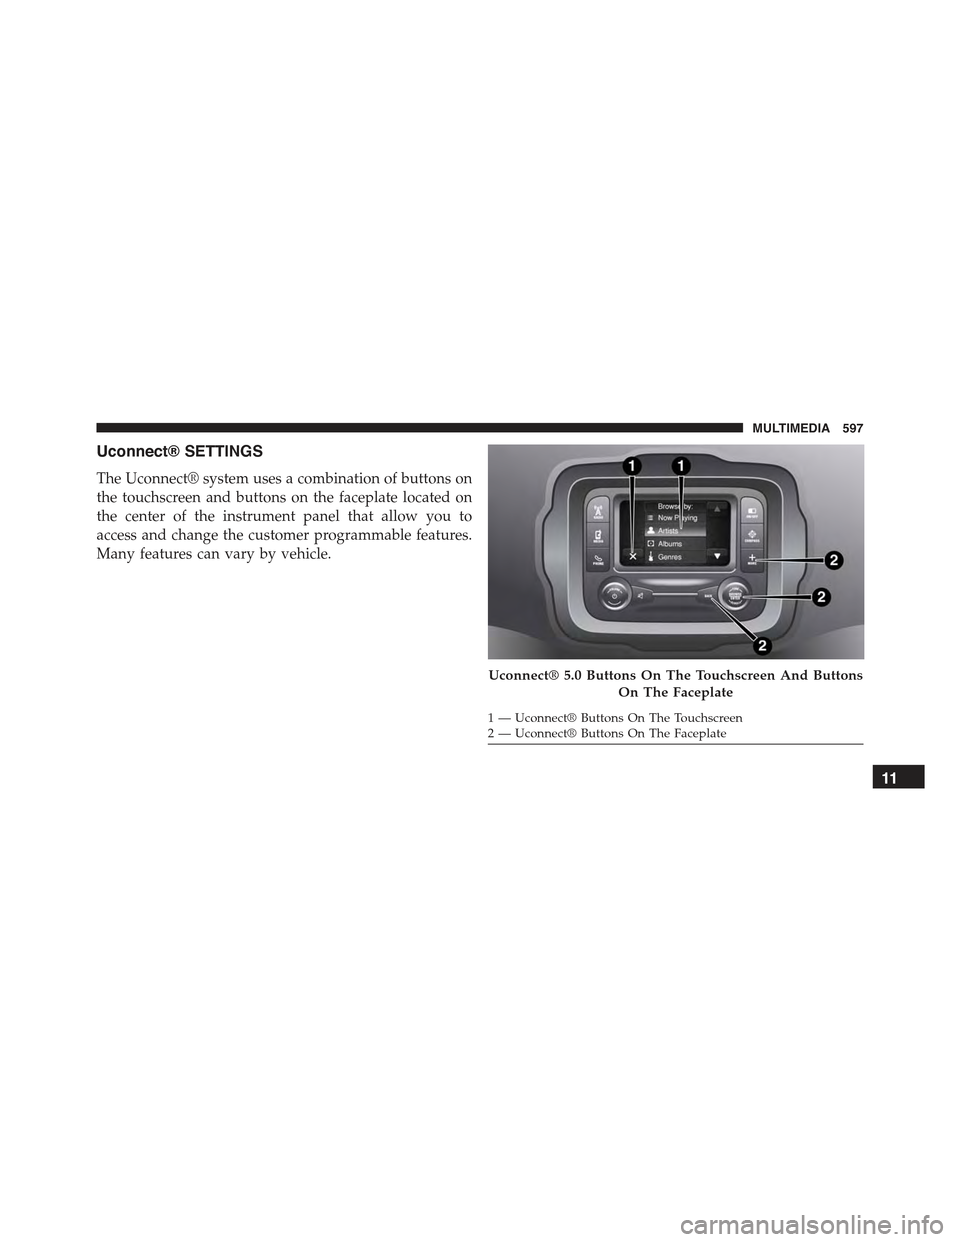
The Uconnect® system uses a combination of buttons on
the touchscreen and buttons on the faceplate located on
the center of the instrument panel that allow you to
access and change the customer programmable features.
Many features can vary by vehicle.
Uconnect® 5.0 Buttons On The Touchscreen And Buttons
On The Faceplate
1—Uconnect®ButtonsOnTheTouchscreen2—Uconnect®ButtonsOnTheFaceplate
11
MULTIMEDIA 597
Page 600 of 678
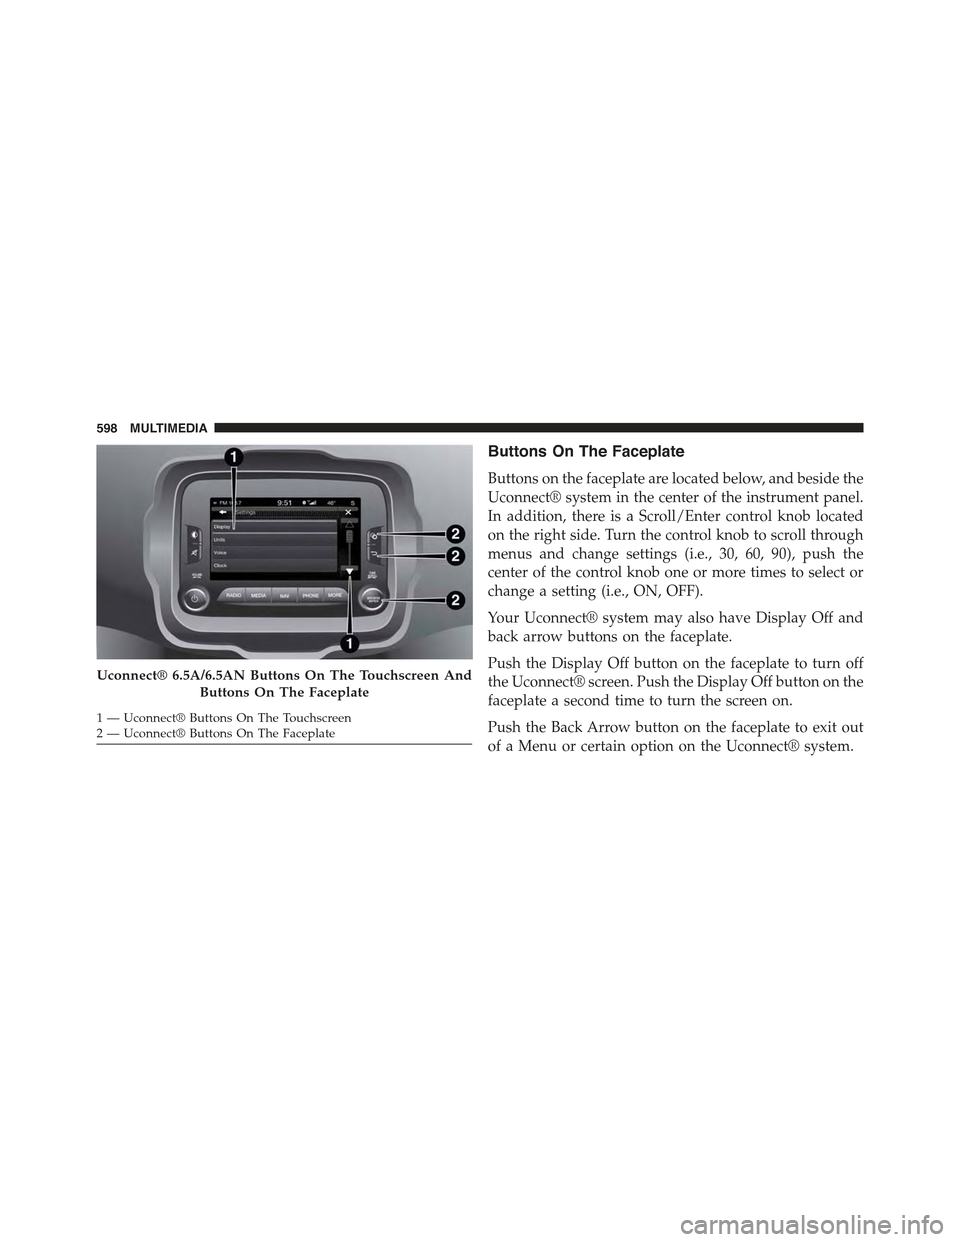
Buttons On The Faceplate
Buttons on the faceplate are located below, and beside the
Uconnect® system in the center of the instrument panel.
In addition, there is a Scroll/Enter control knob located
on the right side. Turn the control knob to scroll through
menus and change settings (i.e., 30, 60, 90), push the
center of the control knob one or more times to select or
change a setting (i.e., ON, OFF).
Your Uconnect® system may also have Display Off and
back arrow buttons on the faceplate.
Push the Display Off button on the faceplate to turn off
the Uconnect® screen. Push the Display Off button on the
faceplate a second time to turn the screen on.
Push the Back Arrow button on the faceplate to exit out
of a Menu or certain option on the Uconnect® system.
Uconnect® 6.5A/6.5AN Buttons On The Touchscreen And
Buttons On The Faceplate
1—Uconnect®ButtonsOnTheTouchscreen2—Uconnect®ButtonsOnTheFaceplate
598 MULTIMEDIA
Page 601 of 678
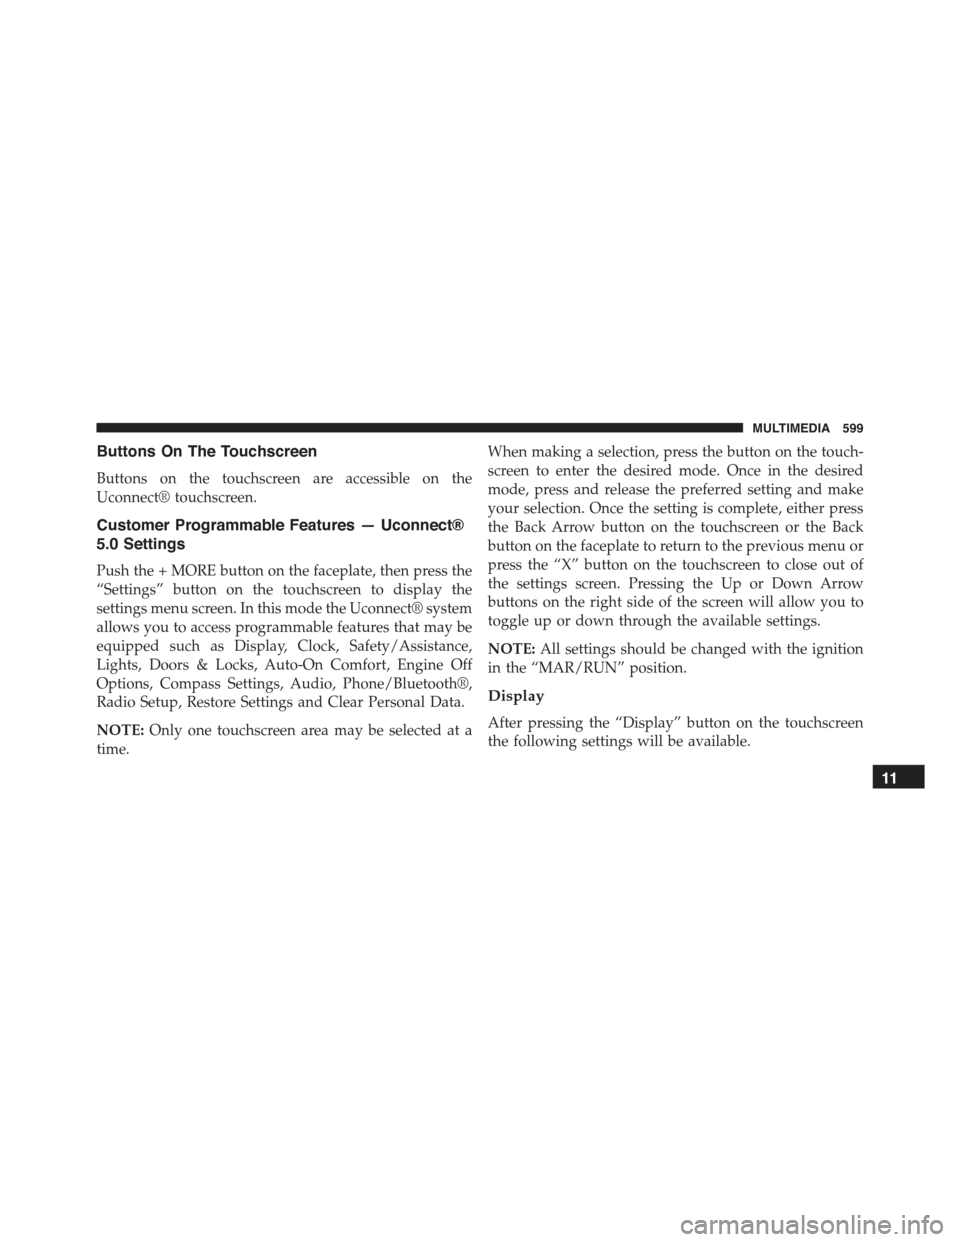
Buttons On The Touchscreen
Buttons on the touchscreen are accessible on the
Uconnect® touchscreen.
Customer Programmable Features — Uconnect®
5.0 Settings
Push the + MORE button on the faceplate, then press the
“Settings” button on the touchscreen to display the
settings menu screen. In this mode the Uconnect® system
allows you to access programmable features that may be
equipped such as Display, Clock, Safety/Assistance,
Lights, Doors & Locks, Auto-On Comfort, Engine Off
Options, Compass Settings, Audio, Phone/Bluetooth®,
Radio Setup, Restore Settings and Clear Personal Data.
NOTE:Only one touchscreen area may be selected at a
time.
When making a selection, press the button on the touch-
screen to enter the desired mode. Once in the desired
mode, press and release the preferred setting and make
your selection. Once the setting is complete, either press
the Back Arrow button on the touchscreen or the Back
button on the faceplate to return to the previous menu or
press the “X” button on the touchscreen to close out of
the settings screen. Pressing the Up or Down Arrow
buttons on the right side of the screen will allow you to
toggle up or down through the available settings.
NOTE:All settings should be changed with the ignition
in the “MAR/RUN” position.
Display
After pressing the “Display” button on the touchscreen
the following settings will be available.
11
MULTIMEDIA 599