check engine JEEP RENEGADE 2015 1.G User Guide
[x] Cancel search | Manufacturer: JEEP, Model Year: 2015, Model line: RENEGADE, Model: JEEP RENEGADE 2015 1.GPages: 678, PDF Size: 29.84 MB
Page 343 of 678
When parking on a hill, apply the EPB before shifting the
transmission to PARK, otherwise the load on the trans-
mission locking mechanism may make it difficult to
move the shift lever out of PARK. As an added precau-
tion, turn the front wheels toward the curb on a downhill
grade and away from the curb on an uphill grade.
WARNING!
•Never use the PARK position as a substitute for the
Electronic Parking Brake (EPB). Always apply the
EPB fully when parked to guard against vehicle
movement and possible injury or damage.
•Your vehicle could move and injure you and others
if it is not in PARK. Check by trying to move the
shift lever out of PARK with the brake pedal
released. Make sure the transmission is in PARK
before leaving the vehicle.
(Continued)
WARNING!(Continued)
•It is dangerous to shift out of PARK or NEUTRAL
if the engine speed is higher than idle speed. If
your foot is not firmly pressing the brake pedal, the
vehicle could accelerate quickly forward or in RE-
VERSE. You could lose control of the vehicle and
hit someone or something. Only shift into gear
when the engine is idling normally and your foot is
firmly pressing the brake pedal.
(Continued)7
STARTING AND OPERATING 341
Page 408 of 678
turning against engine compression drag. This will per-
mit you to control the vehicle speed and direction.
When descending mountains or hills, repeated braking
can cause brake fade with loss of braking control. Avoid
repeated heavy braking by downshifting the transmis-
sion whenever possible.
After Driving Off-Road
Off-road operation puts more stress on your vehicle than
does most on-road driving. After going off-road, it is
always a good idea to check for damage. That way you
can get any problems taken care of right away and have
your vehicle ready when you need it.
•Completely inspect the underbody of your vehicle.
Check tires, body structure, steering, suspension, and
exhaust system for damage.
•Inspect the radiator for mud and debris and clean as
required.
•Check threaded fasteners for looseness, particularly on
the chassis, drivetrain components, steering, and sus-
pension. Retighten them, if required, and torque to the
values specified in the Service Manual.
•Check for accumulations of plants or brush. These
things could be a fire hazard. They might hide damage
to fuel lines, brake hoses, axle pinion seals, and
propeller shafts.
•After extended operation in mud, sand, water, or
similar dirty conditions, have the radiator, fan, brake
rotors, wheels, brake linings, and axle yokes inspected
and cleaned as soon as possible.
WARNING!
Abrasive material in any part of the brakes may cause
excessive wear or unpredictable braking. You might
(Continued)
406 STARTING AND OPERATING
Page 418 of 678
WARNING!(Continued)
•Total weight must be distributed between the tow
vehicle and the trailer such that the following four
ratings are not exceeded:
1. GVWR
2. GTW
3. GAWR
4. Tongue weight rating for the trailer hitch uti-
lized.
CAUTION!
•Do not tow a trailer at all during the first 500 miles
(805 km) the new vehicle is driven. The engine, axle
or other parts could be damaged.
(Continued)
CAUTION!(Continued)
•Then, during the first 500 miles (805 km) that a
trailer is towed, do not drive over 50 mph (80 km/h)
and do not make starts at full throttle. This helps
the engine and other parts of the vehicle wear in at
the heavier loads.
Towing Requirements — Tires
•Do not attempt to tow a trailer while using a compact
spare tire.
•Proper tire inflation pressures are essential to the safe
and satisfactory operation of your vehicle. Refer to
“Tires – General Information” in “Starting And Oper-
ating” for proper tire inflation procedures.
•Check the trailer tires for proper tire inflation pres-
sures before trailer usage.
416 STARTING AND OPERATING
Page 462 of 678
FUSES
WARNING!
•When replacing a blown fuse, always use an ap-
propriate replacement fuse with the same amp
rating as the original fuse. Never replace a fuse
with another fuse of higher amp rating. Never
replace a blown fuse with metal wires or any other
material. Failure to use proper fuses may result in
serious personal injury, fire and/or property dam-
age.
•Before replacing a fuse, make sure that the ignition
is off and that all the other services are switched off
and/or disengaged.
•If the replaced fuse blows again, contact an autho-
rized dealer.
(Continued)
WARNING!(Continued)
•If a general protection fuse for safety systems (air
bag system, braking system), power unit systems
(engine system, gearbox system) or steering system
blows, contact an authorized dealer.
General Information
The fuses protect electrical systems against excessive
current.
When a device does not work you must check the
electrical circuit inside the fuse for a break/melt.
460 IN CASE OF EMERGENCY
Page 492 of 678
WARNING!(Continued)
•Tire Service Kit Sealant solution contains latex. In
case of an allergic reaction or rash, consult a phy-
sician immediately. Keep Tire Service Kit out of
reach of children. If swallowed, rinse mouth imme-
diately with plenty of water and drink plenty of
water. Do not induce vomiting! Consult a physician
immediately.
Insert the power plug into the vehicle power outlet
socket. Start the vehicle engine.
Push the Tire Service Kit power button to the “I” position.
The electric compressor will be turned on, sealant and air
will inflate the tire.
Minimum 26 psi (1.8 bar) of pressure should be reached
within 20 minutes. If the pressure has not been reached
turn off and remove the Tire Service Kit, drive the vehicle
30 feet (10 meters) back and forth, to better distribute the
sealant inside the tire.
Attach the clear flexible filling tube of the compressor
directly to the tire valve and repeat the inflation process.
When the correct pressure has been reached, start driving
the vehicle to uniformly distribute the sealant inside the
tire. After 10 minutes, stop and check the tire pressure. If
the pressure is below 19 psi (1.3 bar), do not drive the
vehicle, as the tire is too damaged, contact the nearest
Authorized Dealer.
WARNING!
Tire Service Kit is not a permanent flat tire repair.
Have the tire inspected and repaired or replaced after
using Tire Service Kit. Do not exceed 65 mph
(110 km/h) until the tire is repaired or replaced.
(Continued)
490 IN CASE OF EMERGENCY
Page 515 of 678
ONBOARD DIAGNOSTIC SYSTEM (OBD II)
Your vehicle is equipped with a sophisticated onboard
diagnostic system called OBD II. This system monitors
the performance of the emissions, engine, and automatic
transmission control systems. When these systems are
operating properly, your vehicle will provide excellent
performance and fuel economy, as well as engine emis-
sions well within current government regulations.
If any of these systems require service, the OBD II system
will turn on the “Malfunction Indicator Light (MIL).” It
will also store diagnostic codes and other information to
assist your service technician in making repairs. Al-
though your vehicle will usually be drivable and not
need towing, see your authorized dealer for service as
soon as possible.
CAUTION!
•Prolonged driving with the MIL on could cause
further damage to the emission control system. It
could also affect fuel economy and driveability.
The vehicle must be serviced before any emissions
tests can be performed.
•If the MIL is flashing, while the engine is running,
severe catalytic converter damage and power loss
will soon occur. Immediate service is required.
EMISSIONS INSPECTION AND MAINTENANCE
PROGRAMS
In some localities, it may be a legal requirement to pass
an inspection of your vehicle’s emissions control system.
Failure to pass could prevent vehicle registration.
For states that require an Inspection and Mainte-
nance (I/M), this check verifies the “Malfunction
9
MAINTAINING AND CARING FOR YOUR VEHICLE 513
Page 516 of 678
Indicator Light (MIL)” is functioning and is not on when
the engine is running, and that the OBD II system is
ready for testing.
Normally, the OBD II system will be ready. The OBD II
system maynotbe ready if your vehicle was recently
serviced, recently had a dead battery or a battery replace-
ment. If the OBD II system should be determined not
ready for the I/M test, your vehicle may fail the test.
Your vehicle has a simple ignition actuated test, which
you can use prior to going to the test station. To check if
your vehicle’s OBD II system is ready, you must do the
following:
1. Cycle the ignition switch to the ON position, but do
not crank or start the engine.
NOTE:If you crank or start the engine, you will have to
start this test over.
2. As soon as you cycle the ignition switch to the ON
position, you will see the Malfunction Indicator Light
(MIL) symbol come on as part of a normal bulb check.
3. Approximately 15 seconds later, one of two things will
happen:
•The MIL will flash for about 10 seconds and then
return to being fully illuminated until you turn OFF
the ignition or start the engine. This means that your
vehicle’s OBD II system isnot readyand you should
notproceed to the I/M station.
•The MIL will not flash at all and will remain fully
illuminated until you place the ignition in the off
position or start the engine. This means that your
vehicle’s OBD II system isreadyand you can proceed
to the I/M station.
If your OBD II system isnot ready,you should see your
authorized dealer or repair facility. If your vehicle was
514 MAINTAINING AND CARING FOR YOUR VEHICLE
Page 517 of 678
recently serviced or had a battery failure or replacement,
you may need to do nothing more than drive your
vehicle as you normally would in order for your OBD II
system to update. A recheck with the above test routine
may then indicate that the system isnow ready.
Regardless of whether your vehicle’s OBD II system is
ready or not, if the MIL is illuminated during normal
vehicle operation you should have your vehicle serviced
before going to the I/M station. The I/M station can fail
your vehicle because the MIL is on with the engine
running.
REPLACEMENT PARTS
Use of genuine parts for normal/scheduled maintenance
and repairs is highly recommended to ensure the de-
signed performance. Damage or failures caused by the
use of parts which are not quality-equivalent to genuine
parts for maintenance and repairs will not be covered by
the manufacturer ’s warranty.
DEALER SERVICE
Your authorized dealer has the qualified service person-
nel, special tools, and equipment to perform all service
operations in an expert manner. Service Manuals are
available which include detailed service information for
your vehicle. Refer to these Service Manuals before
attempting any procedure yourself.
NOTE:Intentional tampering with emissions control
systems may void your warranty and could result in civil
penalties being assessed against you.
WARNING!
You can be badly injured working on or around a
motor vehicle. Only do service work for which you
have the knowledge and the proper equipment. If
you have any doubt about your ability to perform a
service job, take your vehicle to a competent me-
chanic.
9
MAINTAINING AND CARING FOR YOUR VEHICLE 515
Page 519 of 678
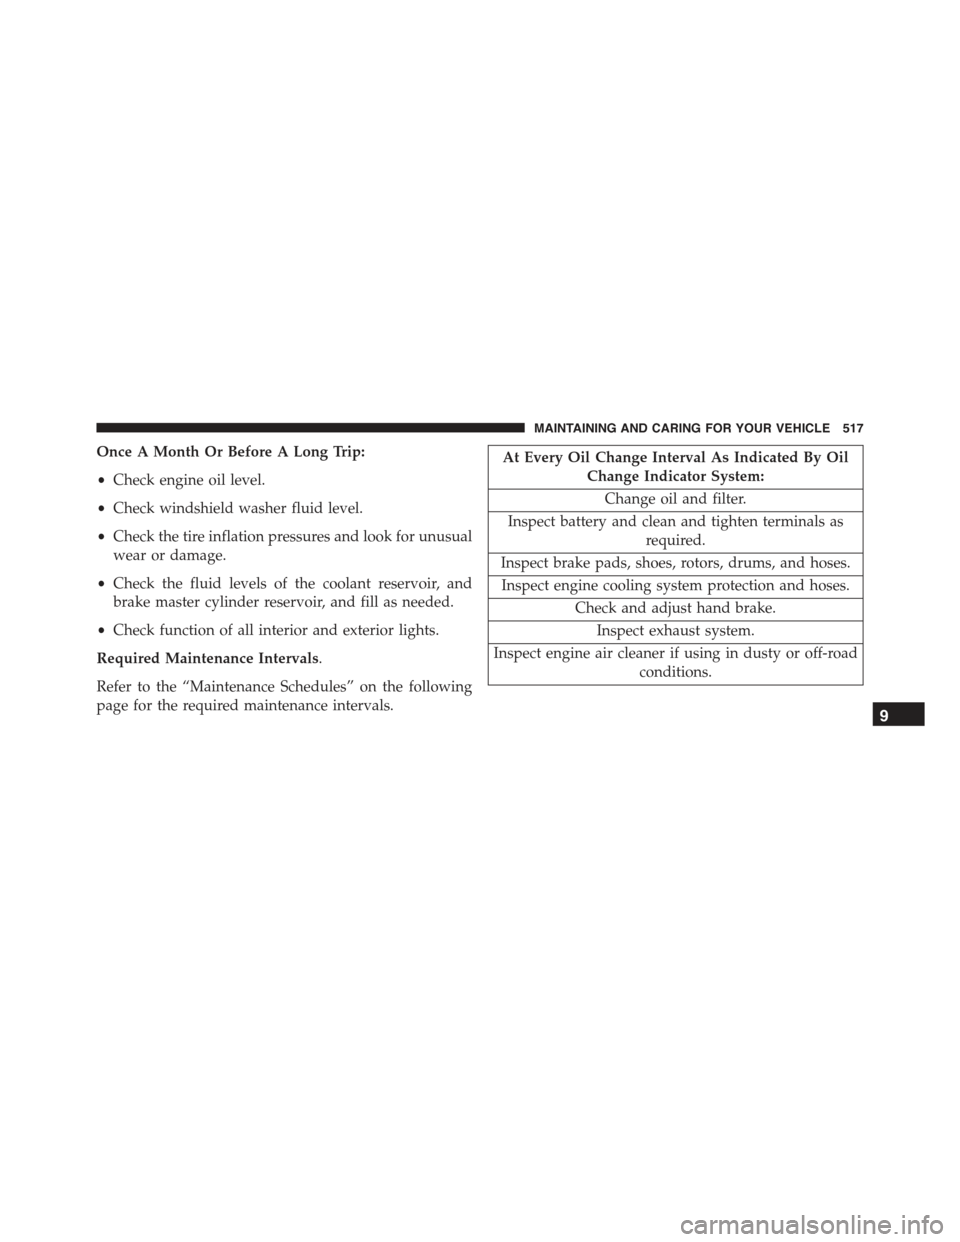
Once A Month Or Before A Long Trip:
•Check engine oil level.
•Check windshield washer fluid level.
•Check the tire inflation pressures and look for unusual
wear or damage.
•Check the fluid levels of the coolant reservoir, and
brake master cylinder reservoir, and fill as needed.
•Check function of all interior and exterior lights.
Required Maintenance Intervals.
Refer to the “Maintenance Schedules” on the following
page for the required maintenance intervals.
At Every Oil Change Interval As Indicated By Oil
Change Indicator System:
Change oil and filter.
Inspect battery and clean and tighten terminals as
required.
Inspect brake pads, shoes, rotors, drums, and hoses.
Inspect engine cooling system protection and hoses.
Check and adjust hand brake.
Inspect exhaust system.
Inspect engine air cleaner if using in dusty or off-road
conditions.
9
MAINTAINING AND CARING FOR YOUR VEHICLE 517
Page 521 of 678
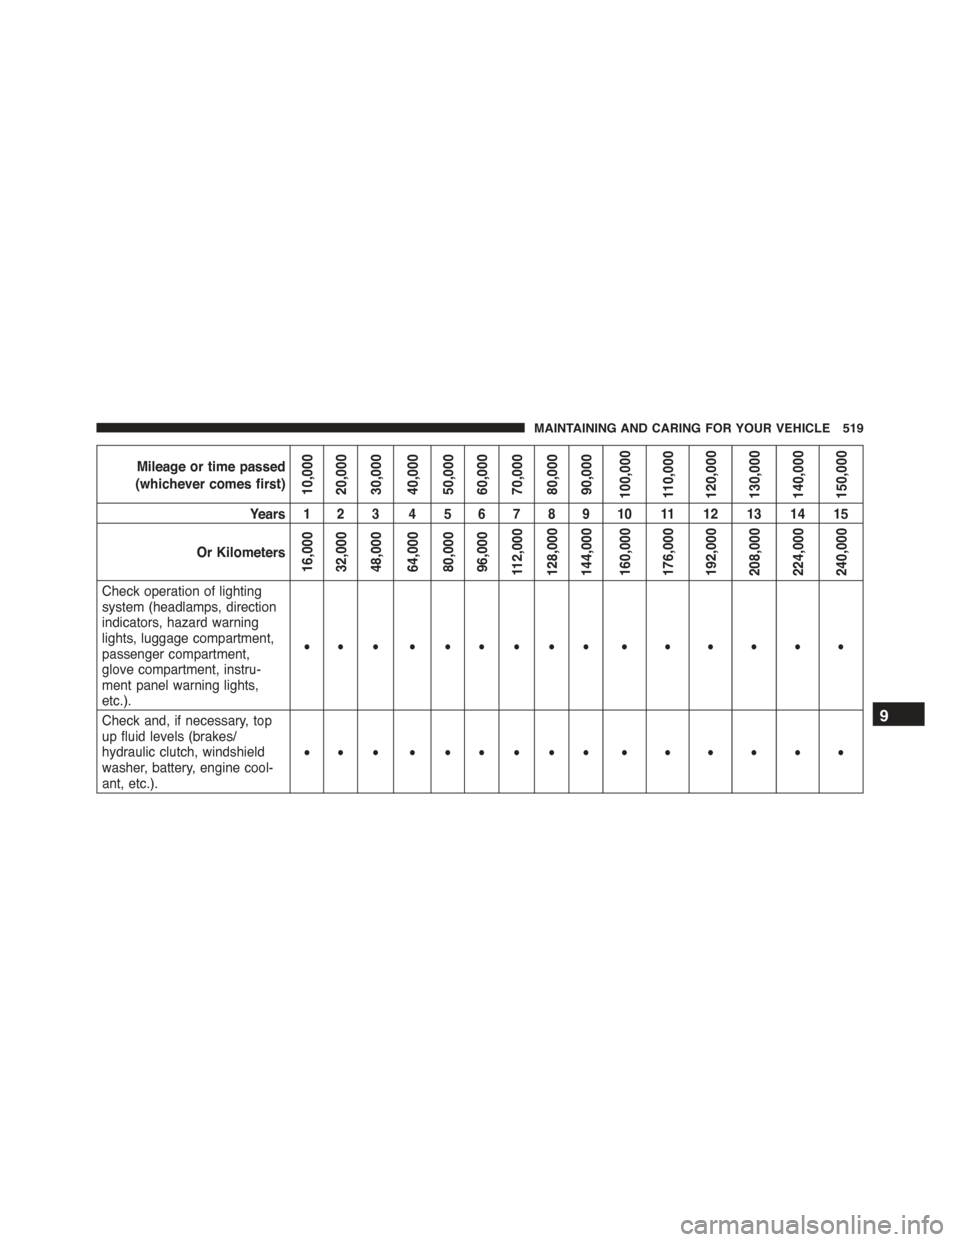
Mileage or time passed
(whichever comes first)10,00020,00030,00040,00050,00060,00070,00080,00090,000100,000110,000120,000130,000140,000150,000
Years 1 2 3 4 5 6 7 8 9 10 11 12 13 14 15
Or Kilometers16,00032,00048,00064,00080,00096,000112,000128,000144,000160,000176,000192,000208,000224,000240,000
Check operation of lightingsystem (headlamps, directionindicators, hazard warninglights, luggage compartment,passenger compartment,glove compartment, instru-ment panel warning lights,etc.).
•• • • •• • •• • • • • • •
Check and, if necessary, topup fluid levels (brakes/hydraulic clutch, windshieldwasher, battery, engine cool-ant, etc.).
•• • • •• • •• • • • • • •
9
MAINTAINING AND CARING FOR YOUR VEHICLE 519