jacking JEEP RENEGADE 2015 1.G Owners Manual
[x] Cancel search | Manufacturer: JEEP, Model Year: 2015, Model line: RENEGADE, Model: JEEP RENEGADE 2015 1.GPages: 678, PDF Size: 29.84 MB
Page 427 of 678
IN CASE OF EMERGENCY
CONTENTS
!HAZARD WARNING...................427
!ASSIST AND 9–1–1 — IF EQUIPPED........427
!BULB REPLACEMENT...................433
▫General Information....................433
▫Replacement Bulbs.....................433
▫Replacement Of An External Lamp.........435
▫Replacement Of A Internal Lamp..........453
!FUSES...............................460
▫General Information....................460
▫Access To The Fuses...................462
▫Engine Compartment Fuses/Distribution Unit . .462
▫Body Computer Fuse Center..............468
▫Rear Cargo Fuse/Relay Distribution Unit.....472
!WHEEL AND TIRE TORQUE
SPECIFICATIONS......................474
▫Torque Specifications...................474
!JACKING AND TIRE CHANGING..........476
▫Jack Location/Spare Tire Stowage.........477
▫Preparations For Jacking................478
▫Jacking Instructions...................479
8
Page 478 of 678
WARNING!
To avoid the risk of forcing the vehicle off the jack,
do not tighten the lug nuts fully until the vehicle has
been lowered. Failure to follow this warning may
result in personal injury.
JACKING AND TIRE CHANGING
WARNING!
•Do not attempt to change a tire on the side of the
vehicle close to moving traffic. Pull far enough off
the road to avoid the danger of being hit when
operating the jack or changing the wheel.
(Continued)
WARNING!(Continued)
•Being under a jacked-up vehicle is dangerous. The
vehicle could slip off the jack and fall on you. You
could be crushed. Never put any part of your body
under a vehicle that is on a jack. If you need to get
under a raised vehicle, take it to a service center
where it can be raised on a lift.
•Never start or run the engine while the vehicle is
on a jack.
•The jack is designed to be used as a tool for
changing tires only. The jack should not be used to
lift the vehicle for service purposes. The vehicle
should be jacked on a firm level surface only.
Avoid ice or slippery areas.
476 IN CASE OF EMERGENCY
Page 480 of 678
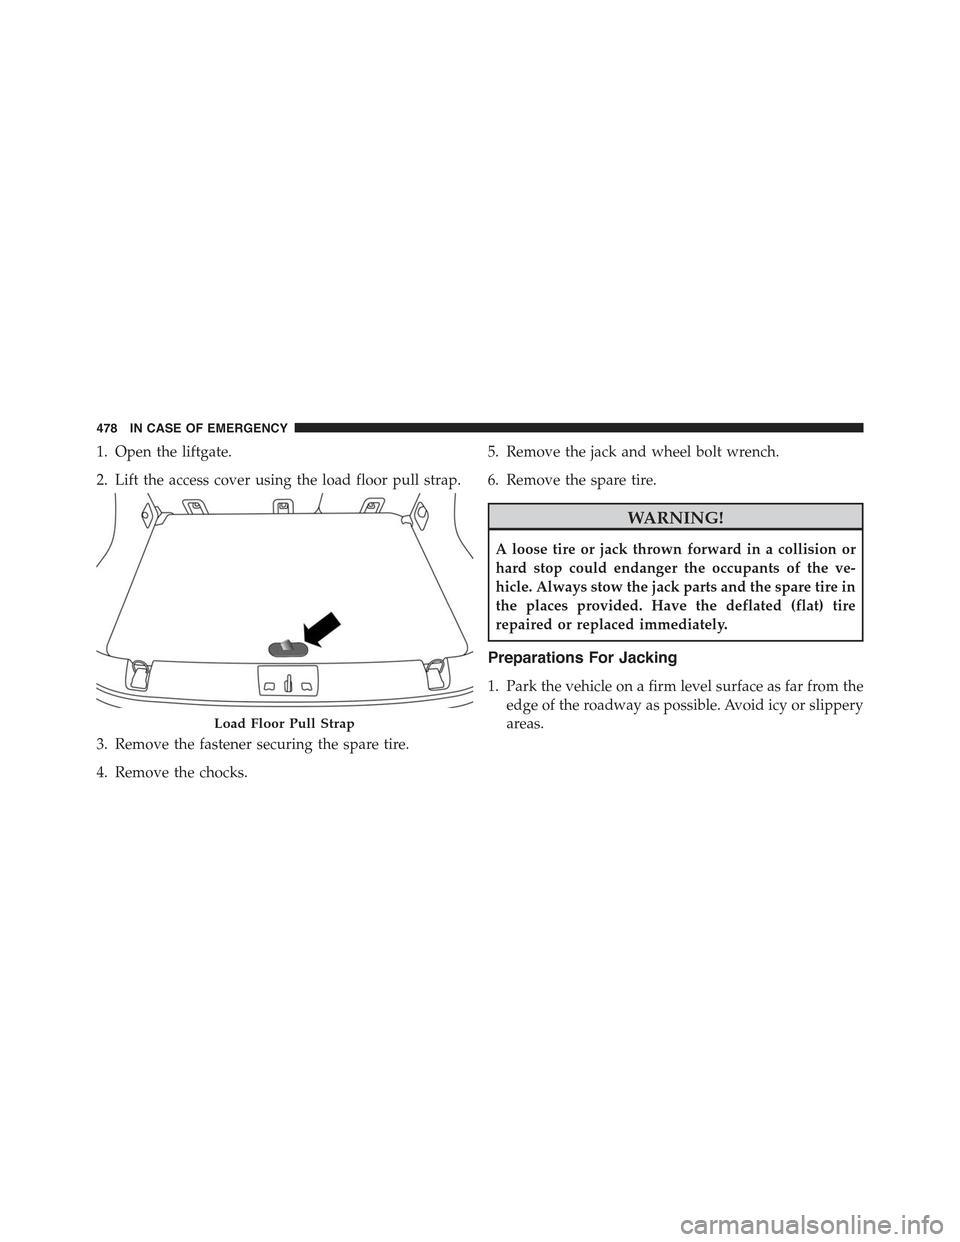
1. Open the liftgate.
2. Lift the access cover using the load floor pull strap.
3. Remove the fastener securing the spare tire.
4. Remove the chocks.
5. Remove the jack and wheel bolt wrench.
6. Remove the spare tire.
WARNING!
A loose tire or jack thrown forward in a collision or
hard stop could endanger the occupants of the ve-
hicle. Always stow the jack parts and the spare tire in
the places provided. Have the deflated (flat) tire
repaired or replaced immediately.
Preparations For Jacking
1. Park the vehicle on a firm level surface as far from the
edge of the roadway as possible. Avoid icy or slippery
areas.Load Floor Pull Strap
478 IN CASE OF EMERGENCY
Page 481 of 678
WARNING!
Do not attempt to change a tire on the side of the
vehicle close to moving traffic, pull far enough off
the road to avoid being hit when operating the jack
or changing the wheel.
2. Turn on the Hazard Warning flasher.
3. Set the Electric Park Brake.
4. Place the shift lever into PARK (automatic transmis-
sion) or REVERSE (manual transmission).
5. Turn the ignition off to the STOP/OFF position.
6. Chock both the front and rear of the wheel diagonally
opposite of the jacking position. For
example, if changing the right front
tire, chock the left rear wheel.
NOTE:Passengers should not remain in the vehicle
when the vehicle is being jacked.
Jacking Instructions
WARNING!
Carefully follow these tire changing warnings to
help prevent personal injury or damage to your
vehicle:
•Always park on a firm, level surface as far from the
edge of the roadway as possible before raising the
vehicle.
•Turn on the Hazard Warning flasher.
•Chock the wheel diagonally opposite the wheel to
be raised.
•Apply the parking brake and place an automatic
transmission in PARK.
(Continued)
8
IN CASE OF EMERGENCY 479
Page 482 of 678
WARNING!(Continued)
•Never start or run the engine with the vehicle on a
jack.
•Do not let anyone sit in the vehicle when it is on a
jack.
•Do not get under the vehicle when it is on a jack. If
you need to get under a raised vehicle, take it to a
service center where it can be raised on a lift.
•Only use the jack in the positions indicated and for
lifting this vehicle during a tire change.
•If working on or near a roadway, be extremely
careful of motor traffic.
•To assure that spare tires, flat or inflated, are
securely stowed, spares must be stowed with the
valve stem facing the ground.
CAUTION!
Do not attempt to raise the vehicle by jacking on
locations other than those indicated in the Jacking
Instructions for this vehicle.
1. Remove the spare tire, jack, and wheel bolt wrench.
2. If equipped with wheels where the center cap covers
the wheel bolts, use the wheel bolt wrench to pry the
center cap off carefully before raising the vehicle.
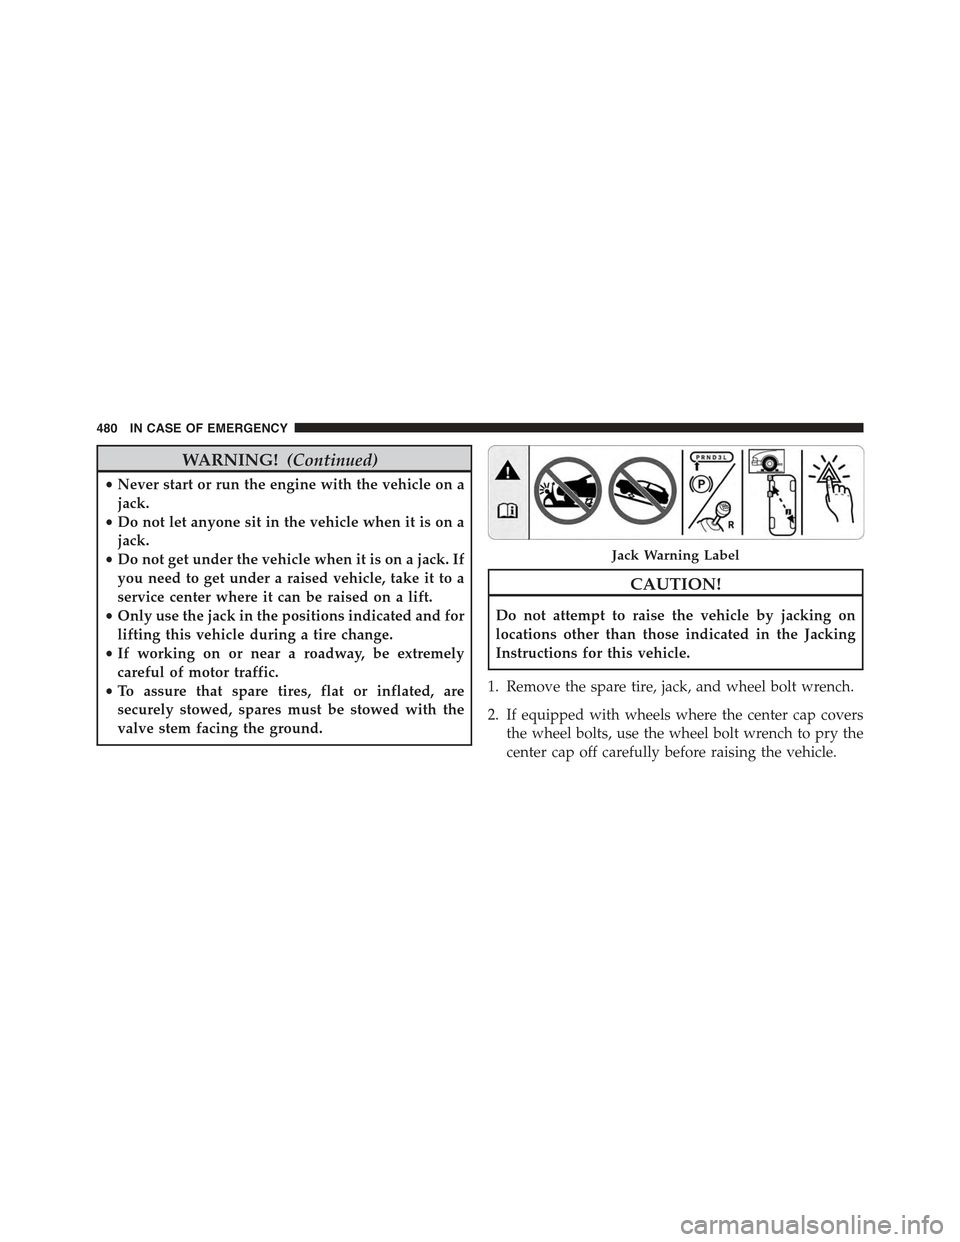
Jack Warning Label
480 IN CASE OF EMERGENCY
Page 483 of 678
3. Before raising the vehicle, use the wheel bolt wrench
to loosen, but not remove, the wheel bolts on the
wheel with the flat tire. Turn the wheel bolts counter-
clockwise one turn while the wheel is still on the
ground.
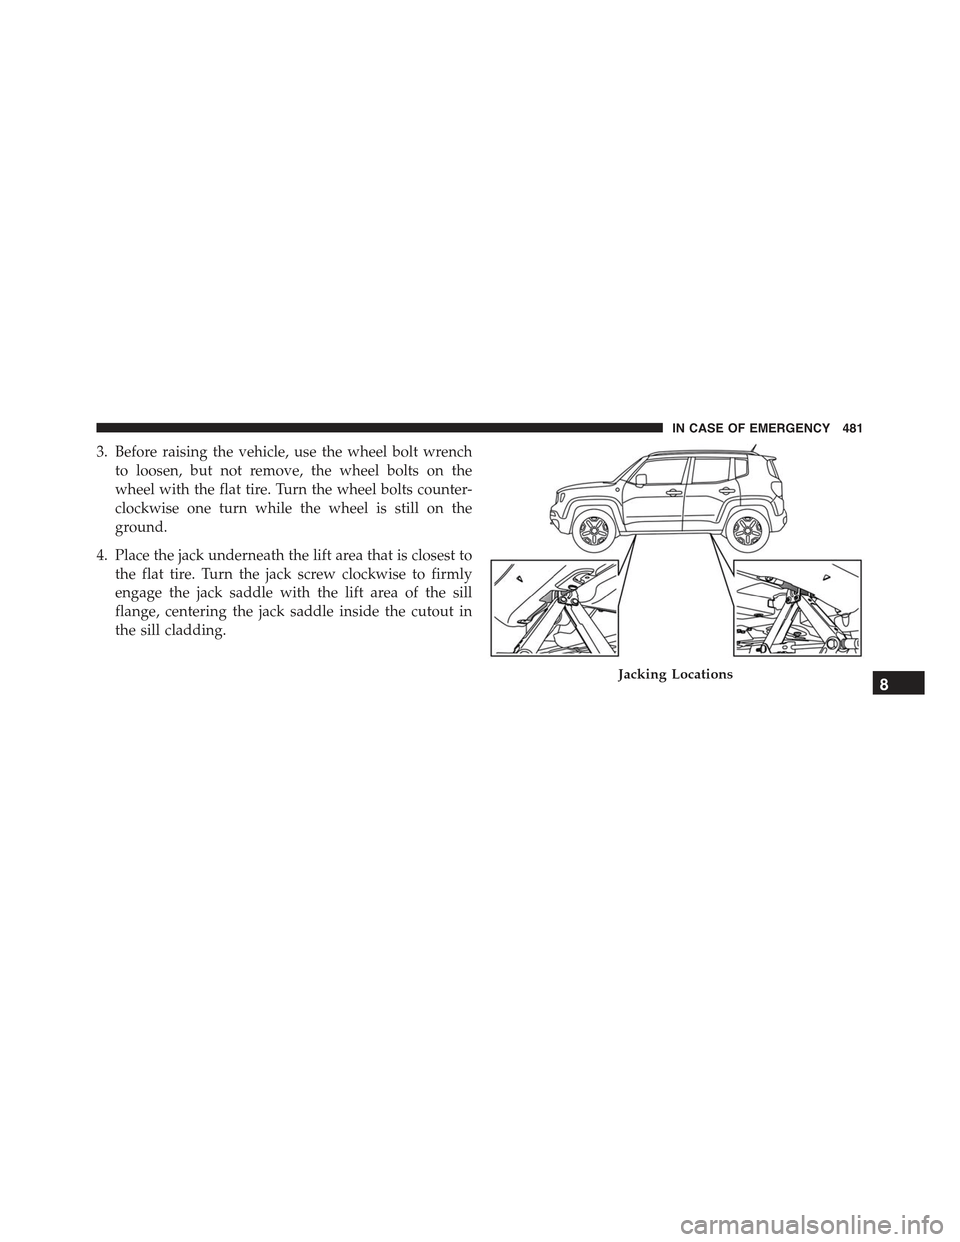
4. Place the jack underneath the lift area that is closest to
the flat tire. Turn the jack screw clockwise to firmly
engage the jack saddle with the lift area of the sill
flange, centering the jack saddle inside the cutout in
the sill cladding.
Jacking Locations8
IN CASE OF EMERGENCY 481
Page 484 of 678
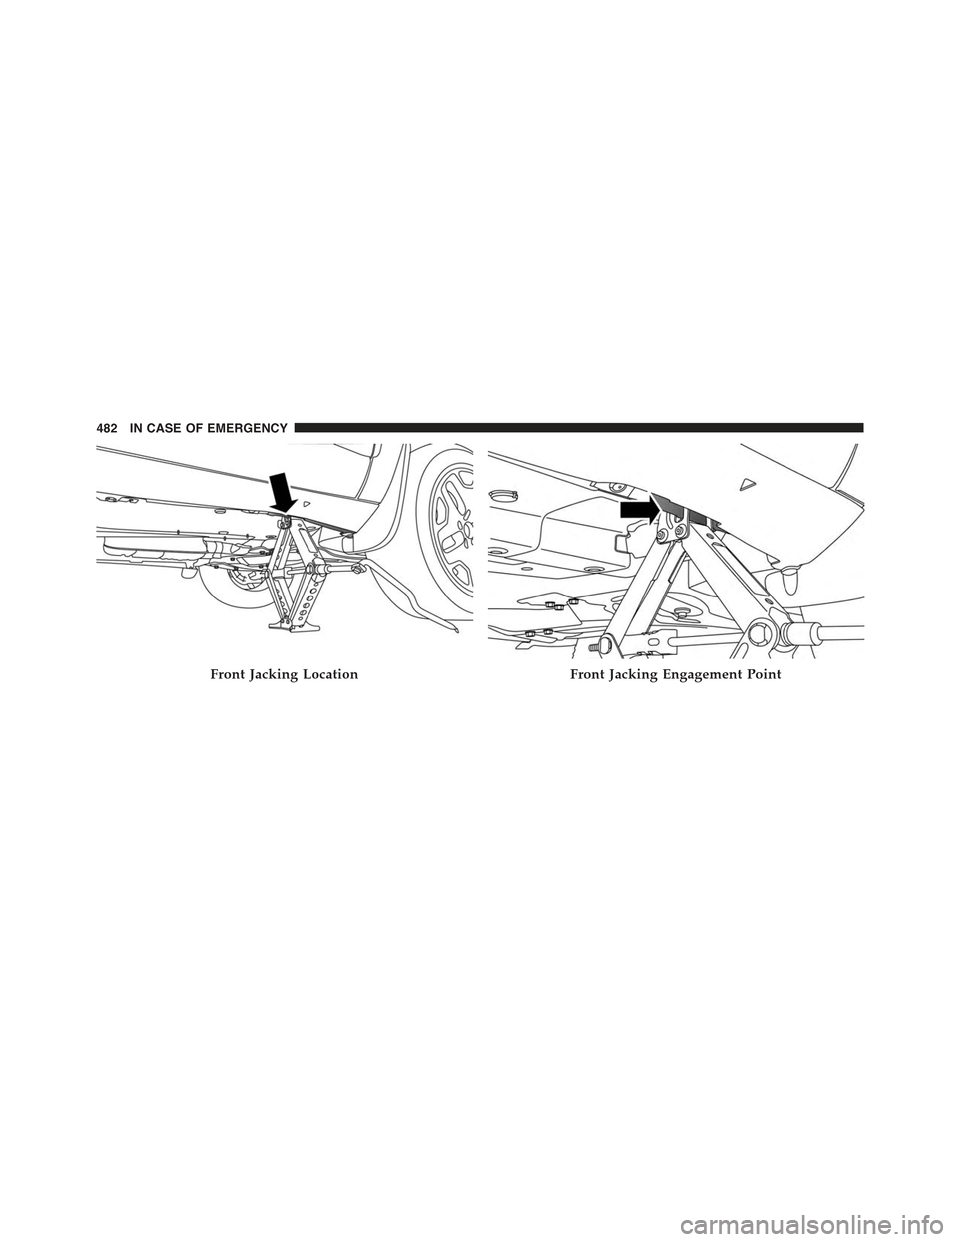
Front Jacking LocationFront Jacking Engagement Point
482 IN CASE OF EMERGENCY
Page 485 of 678
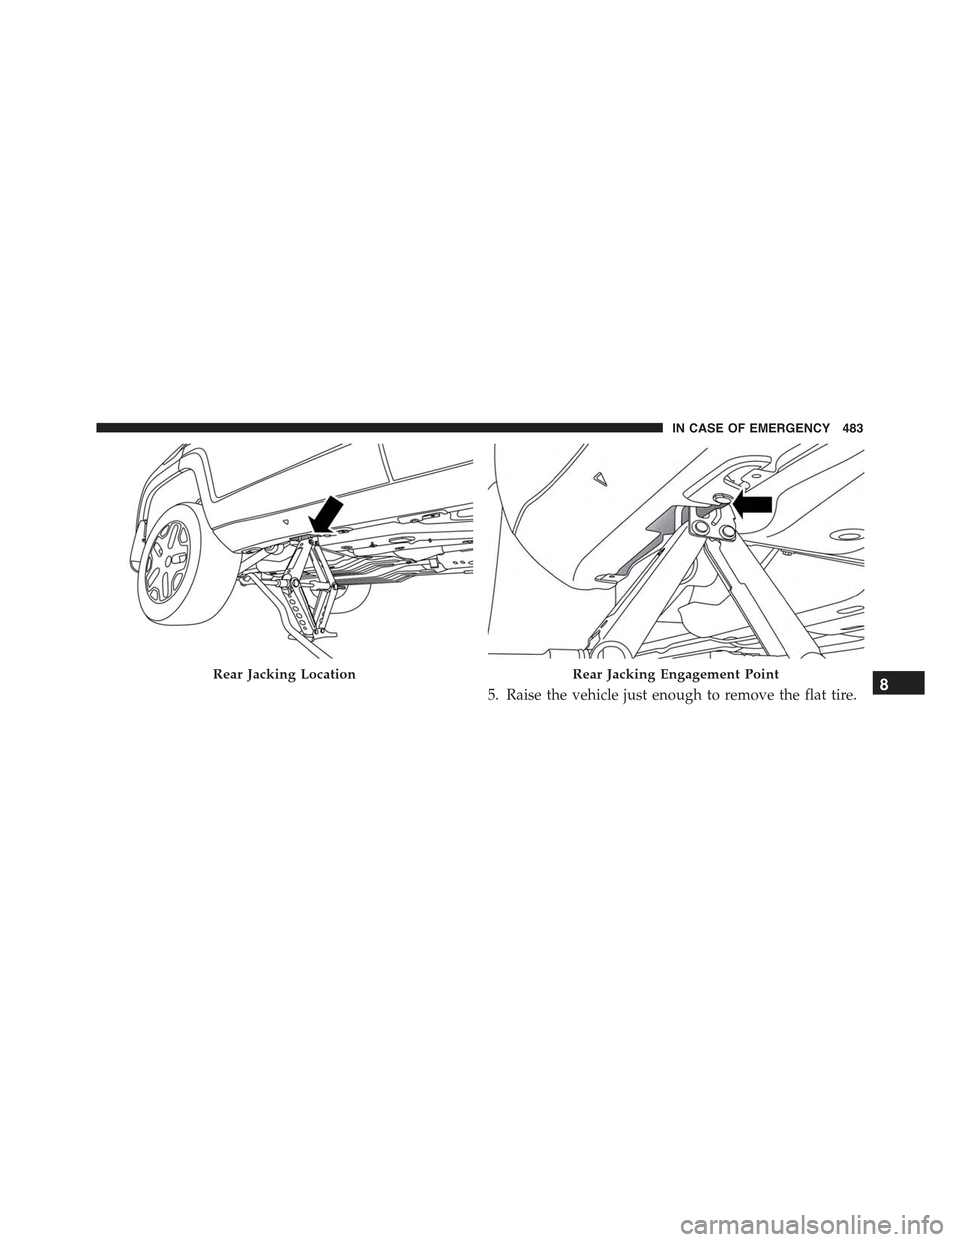
5. Raise the vehicle just enough to remove the flat tire.
Rear Jacking LocationRear Jacking Engagement Point8
IN CASE OF EMERGENCY 483
Page 664 of 678
Remote Keyless Entry (RKE)................53
Driver’s Seat Back Tilt.......................66
Driving................................402
E-85 Fuel...............................393
Electrical Outlet, Auxiliary (Power Outlet)........164
Electric Park Brake........................325
Electric Parking Brake......................325
Electronic Roll Mitigation (ERM)..............228
Electronic Speed Control (Cruise Control)........348
Electronic Stability Control (ESC)..............224
Electronic Vehicle Information Center (EVIC)......375
Electronic Vehicle Information Center (EVIC) . . . .201
Emergency, In Case of
Hazard Warning Flasher..................427
Jacking...............................476
Jump Starting..........................492
Overheating...........................498
Tow Hooks............................507
Towing..............................505
Emission Control System Maintenance..........513
Engine
Air Cleaner...........................532
Break-In Recommendations................324
Checking Oil Level......................529
Compartment..........................527
Coolant (Antifreeze).....................593
Cooling..............................542
Exhaust Gas Caution.....................310
Fails to Start...........................320
Flooded, Starting.......................320
Fuel Requirements......................388
Jump Starting..........................492
Oil . . . . . . . . . . . . . . . . . . . . . . . . . . . . . . . . ..529
Oil Filler Cap..........................531
Oil Selection...........................531
Overheating...........................498
Starting..............................319
662 INDEX
Page 667 of 678
Hill Descent Control Indicator................231
Hill Start Assist...........................229
Hitches
Trailer Towing.........................412
Holder, Coin.............................169
Holder, Cup.............................170
Hood Prop..............................146
Hood Release............................146
Ignition
Key . . . . . . . . . . . . . . . . . . . . . . . . . . . . . . . . . .41
Ignition Key Removal......................501
Immobilizer (Sentry Key)....................49
Inside Rearview Mirror......................81
Instrument Cluster........................177
Instrument Panel Cover.....................558
Instrument Panel Lens Cleaning...............558
Interior and Instrument Lights................100
Interior Appearance Care....................556
Interior Lights...........................100
Intermittent Wipers (Delay Wipers).............106
Introduction..............................4
Inverter, Power...........................165
Jacking Instructions........................479
Jack Location............................477
Jack Operation...........................476
Jump Starting............................492
Key Fob
Arm The Alarm.........................51
Keyless Entry...........................56
Programming Additional Key Fobs...........40
Programming Additional Transmitters.........40
Keyless Enter-N-Go™.......................56
Enter The Trunk.........................56
Key Fob . . . . . . . . . . . . . . . . . . . . . . . . . . . . . . .56
Lock The Vehicle’s Doors..................56
12
INDEX 665