engine JEEP RENEGADE 2015 1.G Owner's Manual
[x] Cancel search | Manufacturer: JEEP, Model Year: 2015, Model line: RENEGADE, Model: JEEP RENEGADE 2015 1.GPages: 220, PDF Size: 34.11 MB
Page 53 of 220
System Not Available
In the case of the system being temporary unavailable:
• BSM Mirror Warning Lights are turned on continuously.
• A chime will turn on.
• A instrument cluster message will display“Blind Spot Monitoring Temporary
Unavailable.”
In the case of the system being completely unavailable:
• A chime will turn on.
• A instrument cluster message will display“Blind Spot Monitoring Unavailable -
Service Required.”
NOTE:
Vehicle must be taken to the nearest authorized dealer for service.
FORWARD COLLISION WARNING (FCW) WITH
MITIGATION
Forward Collision Warning (FCW) With Mitigation Operation
The Forward Collision Warning (FCW) system with mitigation provides the driver with
audible warnings, visual warnings (within the EVIC/DID), and may apply a brake jerk
to warn the driver when it detects a potential frontal collision. The warnings and
limited braking are intended to provide the driver with enough time to react, avoid or
mitigate the potential collision.
NOTE:
FCW monitors the information from the forward looking sensors as well as the
Electronic Brake Controller (EBC), to calculate the probability of a forward colli-
sion. When the system determines that a forward collision is probable, the driver
will be provided with audible and visual warnings and may provide a brake jerk
warning.
If the driver does not take action based upon these progressive warnings, then the
system will provide a limited level of active braking to help slow the vehicle and
mitigate the potential forward collision. If the driver reacts to the warnings by braking
and the system determines that the driver intends to avoid the collision by braking
but has not applied sufficient brake force, the system will compensate and provide
additional brake force as required.
Vehicles With A Manual Transmission: After the end of the intervention of automatic
braking, the engine could stall, unless the driver can depress the clutch pedal.
Vehicles With Automatic Transmission: After the end of the intervention of automatic
braking, the transmission may remain in last gear stored: therefore the car could
lurch forward, once the brakes release a few seconds later.
OPERATING YOUR VEHICLE
51
Page 55 of 220
• Changing the Active Braking to “Off” prevents the system from providing limited
active braking, or additional brake support if the driver is not braking adequately
in the event of a potential frontal collision, but maintains the audible and visual
warnings.
• Changing the status of the system is only possible with the vehicle at a complete
stop.
NOTE:
The FCW system state is not kept in memory from one key cycle to the next. If the
system is turned OFF, it will turn On when the vehicle is restarted.
Changing FCW And Active Braking Status
By changing the settings on the menu of the Uconnect®system, you can change the
sensitivity of the system by choosing one of the following three options: "Near",
"Medium" or "Far".
The default option is "Medium". This setting provides that the system notify the driver
of a possible accident with the vehicle ahead of it when the latter is at a standard
distance, intermediate between the other two possible settings.
By setting the sensitivity of the system to "Far", the system will warn the driver of a
possible accident with the vehicle in front when the latter is at a greater distance,
giving you the chance to act on the brakes in a more limited and gradual. This setting
gives the driver the maximum possible time of reaction to prevent a possible
accident.
By changing the option to "Near", the system will warn the driver of a possible
accident with the vehicle ahead of it when the latter is a reduced distance. This
setting offers a reaction time to the driver lower than the settings "Medium" and "Far",
in the case of a potential accident, while a more dynamic driving of the car.
The setting of the sensitivity of the system is maintained in memory when the engine
is switched off.
FCW Limited Warning
If the EVIC/DID displays “FCW Limited Functionality” or “FCW Limited Functionality
Clean Front Windshield” momentarily, there may be a condition that limits FCW
functionality. Although the vehicle is still drivable under normal conditions, the
active braking may not be fully available. Once the condition that limited the system
performance is no longer present, the system will return to its full performance state.
If the problem persists, see your authorized dealer.
Service FCW Warning
If the system turns off, and the EVIC/DID displays:
• FCW Unavailable Service Required
This indicates there is an internal system fault. Although the vehicle is still drivable
under normal conditions, have the system checked by an authorized dealer.
OPERATING YOUR VEHICLE
53
Page 79 of 220
NOTE:
For security reasons, this link is valid for 72 hours from the time you’ve submitted
your email address into the radio touchscreen. If the link has expired, simply re-enter
your email address into the Uconnect®Registration App on the radio touchscreen to
receive another link. The secured registration link will take you through the
Uconnect®Access registration process step by step.
7. To unlock the full potential of Uconnect®Access in your vehicle, you will need to
create or validate an existing Mopar Owner Connect account previously (Owner
Center). Uconnect®along with Mopar Owner Connect have joined forces to create
one destination to manage all of your vehicle needs, from managing your
Uconnect®Access account, to tracking service history and finding recommended
accessories for your vehicle. If you already have a Mopar Owner Connect account,
log in to the website with your existing username/email and password. For
assistance with this web based registration process, call Uconnect®Care at
1-855-792-4241.
8. Once you are logged in to your Mopar Owner Connect account, you will create a
personal Uconnect®Security PIN. The Uconnect®Security PIN will be required
to authenticate you when accessing your account via Uconnect®Care or perform-
ing any remote services such as Remote Door Lock/Unlock, Remote Horn & Lights
or Starting and Stopping the engine.
9. If your vehicle qualifies for a trial package it will be presented. Simply agree to the
Uconnect®Terms of Service (checkbox) and then select the “Start Service”
button.
At this point your vehicle is registered with Uconnect®Access. Continue to set up Via
Mobile. Apps will be downloaded the next time you start your vehicle. If the Apps
have not appeared after 24 hours, please contact Uconnect®Care.
Download The Uconnect® Access App
The Uconnect®Access smartphone app allows you to remotely lock or unlock your
doors, start your engine (if equipped) and activate your horn and lights from virtually
anywhere. The smartphone app also features Via Mobile (if equipped) which uses
your smartphone’s data plan to access your personal Pandora®, iHeartRadio, Slacker
Radio and Aha™ by HARMAN accounts and control them using your vehicle
touchscreen.
The Uconnect®Access app is only compatible with select iPhone®and Android
smartphones. Visit UconnectPhone.com or call 1-877-855-8400 to confirm that
your smartphone is compatible with Uconnect®. Once you’ve confirmed your smart-
phone is compatible, Android and iPhone®users should visit their respective app
store and search for “Uconnect Access” to download the app.
ELECTRONICS
77
Page 86 of 220
6.Stolen Vehicle Assistance— If your vehicle is stolen, contact local law enforce-
ment immediately to file a stolen vehicle report. Once this report has been filed,
Uconnect®care can help locate your vehicle. The Uconnect®Care agent will ask
for the stolen vehicle report number issued by local law enforcement. Then, using
GPS technology and the built-in wireless connection within your vehicle, the
Uconnect®Care agent will be able to locate the stolen vehicle and work with law
enforcement to help recover it. (Vehicle must be within the United States, have
network coverage and must be registered with Uconnect®Access with an active
subscription that includes the applicable feature).
7.WiFi Hotspot— WiFi Hotspot is on-demand WiFi 3G connectivity that's built-in
and ready to go whenever you are. Once your vehicle is registered for Uconnect®
Access, you can purchase a Wifi Hotspot subscription at the Uconnect®Store.
After you've made your purchase, turn on your signal and connect your passengers
devices. It's never been easier to bring your home or office with you.
NOTE:
Your vehicle must have a working electrical system for any of the in vehicle
Uconnect®features to operate.
Uconnect® Access Remote Features
If you own a compatible iPhone®or Android®powered device, the Uconnect®Access
App allows you to remotely lock or unlock your doors, start your engine or activate
your horn and lights from virtually anywhere (Vehicle must be within the United
States and have network coverage). You can download the App from Mopar Owner
Connect or from the App Store (iPhone) or Google Play store. Visit
UconnectPhone.com to determine if your device is compatible. For Uconnect®
Phone customer support and to determine if your device is compatible.
U.S. residents - visit UconnectPhone.com or call 1-877-855-8400
Remote Start— This feature provides the ability to start the engine on your vehicle,
without the keys and from virtually any distance. You can send a request to your
vehicle in one of two ways:
1. Using the Uconnect®Access App from a compatible smartphone.
2. From the Mopar Owner Connect website.
• After 15 minutes if you have not entered your vehicle with the key, the engine
will shut off automatically.
• You can also send a command to turn-off an engine that has been remote
started.
• This remote function requires your vehicle to be equipped with a factory-
installed Remote Start system. To utilize this feature after the Uconnect®
Access App is downloaded, login with your user name and password.
ELECTRONICS
84
Page 142 of 220
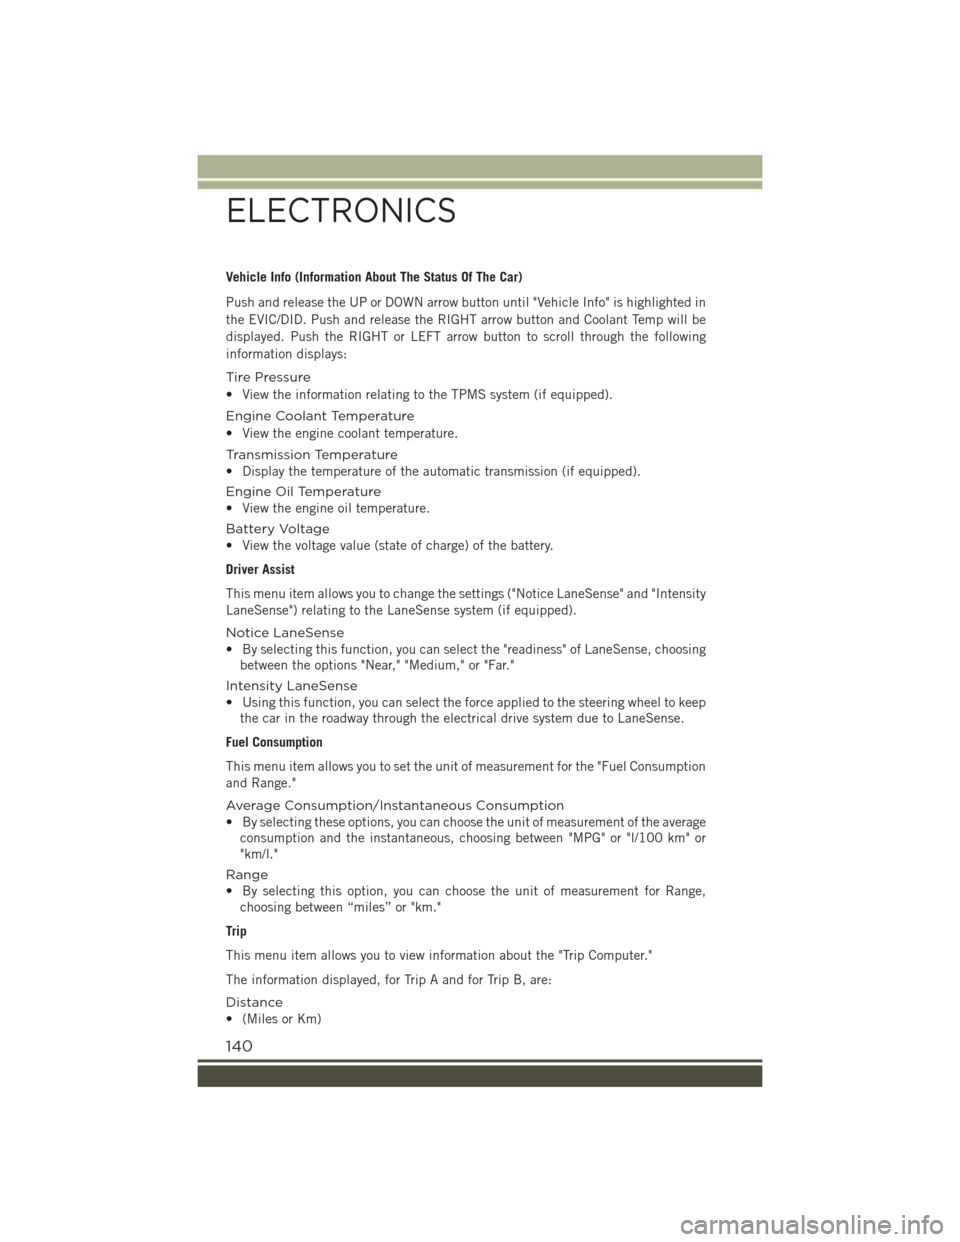
Vehicle Info (Information About The Status Of The Car)
Push and release the UP or DOWN arrow button until "Vehicle Info" is highlighted in
the EVIC/DID. Push and release the RIGHT arrow button and Coolant Temp will be
displayed. Push the RIGHT or LEFT arrow button to scroll through the following
information displays:
Tire Pressure
• View the information relating to the TPMS system (if equipped).
Engine Coolant Temperature
• View the engine coolant temperature.
Tr a n s m i s s i o n Te m p e r a t u r e
• Display the temperature of the automatic transmission (if equipped).
Engine Oil Temperature
• View the engine oil temperature.
Battery Voltage
• View the voltage value (state of charge) of the battery.
Driver Assist
This menu item allows you to change the settings ("Notice LaneSense" and "Intensity
LaneSense") relating to the LaneSense system (if equipped).
Notice LaneSense
• By selecting this function, you can select the "readiness" of LaneSense, choosing
between the options "Near," "Medium," or "Far."
Intensity LaneSense
• Using this function, you can select the force applied to the steering wheel to keep
the car in the roadway through the electrical drive system due to LaneSense.
Fuel Consumption
This menu item allows you to set the unit of measurement for the "Fuel Consumption
and Range."
Average Consumption/Instantaneous Consumption
• By selecting these options, you can choose the unit of measurement of the average
consumption and the instantaneous, choosing between "MPG" or "l/100 km" or
"km/l."
Range
• By selecting this option, you can choose the unit of measurement for Range,
choosing between “miles” or "km."
Trip
This menu item allows you to view information about the "Trip Computer."
The information displayed, for Trip A and for Trip B, are:
Distance
• (Miles or Km)
ELECTRONICS
140
Page 146 of 220
Speed Belt Buzzer:
• This function is only viewable when the Seat Belt Reminder (SBR) system is
active.
Hill Start Assist:
• Activation/Deactivation of the Hill Start Assist system.
"Safety & Assistance"
By selecting the item "Safety & Assistance," you can make the following adjustments:
• FCW: a selection of operating modes of the system Forward Collision Warning Plus
• FCW Sensitivity: a selection of the "readiness" of intervention of the Forward
Collision Warning Plus system, based on the distance to the obstacle
• ParkSense: a selection of the type of reporting provided by ParkSense
• Rear Parks. Vol.: selection of the volume of acoustic signals provided by
ParkSense
• ParkSense Vol.: a selection of the volume of acoustic signals provided by
ParkSense
• Front Parks. Vol.: selection of the volume of the beeps provided by ParkSense
• Side Dist. Warn. Vol. (If equipped) : a selection of the volume of the beeps of
SideSense system
• Side Dist. Warn. (if Equipped) : Select the type of reporting provided by SideSense
system
• Auto Wipers: enabling/disabling the automatic operation of wipers in the event of
rain
• LaneSense Warn.: a selection of the "readiness" of intervention of LaneSense
• LaneSense Force: selection of the force to be applied to the steering wheel to put
the car in the roadway through the system of electrical drive, in case of operation
of the system LaneSense
• Buzzer Volume
• Maintenance Brakes (If Equipped): activation of the procedure to carry out
braking system maintenance
• Auto Park Brake (If Equipped): enable/disable auto-insertion of the Electric
Parking Brake
"Lights"
By selecting the item "Lights," you can make the following adjustments:
• Headlight Off Delay: setting the delay for headlight shutoff after engine shutoff
• Lights in the opening: activation of the direction indicators when opening the
doors
• Headlight Sensor: adjusting the sensitivity of headlight brightness
• Auto. High Beam: activation/deactivation of the automatic main beam headlights
(If Equipped)
ELECTRONICS
144
Page 147 of 220
• Daytime Lights: activation/deactivation of daytime running lights
• Cornering lights: activation/deactivation of cornering lights (If Equipped)
"Doors & Safety"
By selecting the item "Doors & Safety," you can make the following adjustments:
• Auto Door Lock: activation/deactivation of the automatic locking of the doors with
the vehicle moving
• Auto Unlock On Exit: automatic unlocking of the doors when exiting the vehicle
• Flash Light with Lock: activation of the direction indicators when closing the doors
• Sound Horn With Lock: activation/deactivation of the horn when pushing the
LOCK button on the RKE. The options are "Off," "First Push,” and "Second Push."
• Horn With Remote Start: activation/deactivation of the horn at the Remote
Starting of the engine with the RKE.
• Unlock On First Push Of Key Fob (vehicles without Passive Entry): allows you tochoose whether to unlock all the doors or only the driver's side door on the firstpush of the UNLOCK button on the RKE
• Remote Door Unlock: allows you to open the driver door only on the first push of
the UNLOCK button on the RKE
• Passive Entry (If Equipped) : activation of the automatic locking of the doors
"Compass"
By selecting the item "Compass," you can view and change the following settings:
• Calibration
• Variance
Calibration
The compass calibrates itself automatically, so you may not need any initial
calibration. It is required to confirm the calibration by pushing the OK button and
drive in one or more 360–degree turns (in an area free from large metal or metallic
objects). The compass will now function normally.
Variance
Compass Variance is the difference between Magnetic North and Geographic North. Tocompensate for the differences, the variance should be set for the zone where thevehicle is driven, per the zone map. Once properly set, the compass will automaticallycompensate for the differences and provide the most accurate compass heading.
NOTE:
Keep magnetic materials away from the top of the instrument panel, such as iPod's,
Mobile Phones, Laptops, and Radar Detectors. This is where the compass module is
located, and it can cause interference with the compass sensor, and it may give false
readings.
ELECTRONICS
145
Page 148 of 220
PROGRAMMABLE FEATURES
Uconnect® Customer Programmable Features
The Uconnect®system allows you to access Customer Programmable feature
settings such as Display, Units, Voice, Clock, Safety & Driving Assistance, Lights,
Doors & Locks, Engine Off Options, Audio, Phone/Bluetooth®, SiriusXM Setup,
System Information, Restore Default Settings, Clear Personal Data, and Compass
(Uconnect®5.0) through buttons on the touchscreen.
• For the Uconnect 5.0 system, push the Morebutton on the faceplate, then
press the “Settings”button on the touchscreen. For the Uconnect 6.5 system,
push the Settingsbutton located on the right side of the display. When making
a selection, scroll up or down until the preferred setting is highlighted, then press
and release the preferred setting until the selection is highlighted showing that
setting has been selected. Depending on the vehicles options, the following
feature settings are available:
• Display• Audio
• Units• Phone/Bluetooth®
• Voice• SiriusXM Setup
• Clock• System Information
• Safety & Driving Assistance• Restore Default Settings
• Lights• Clear Personal Data
• Doors & Locks• Compass (Uconnect®5.0)
• Engine Off Options
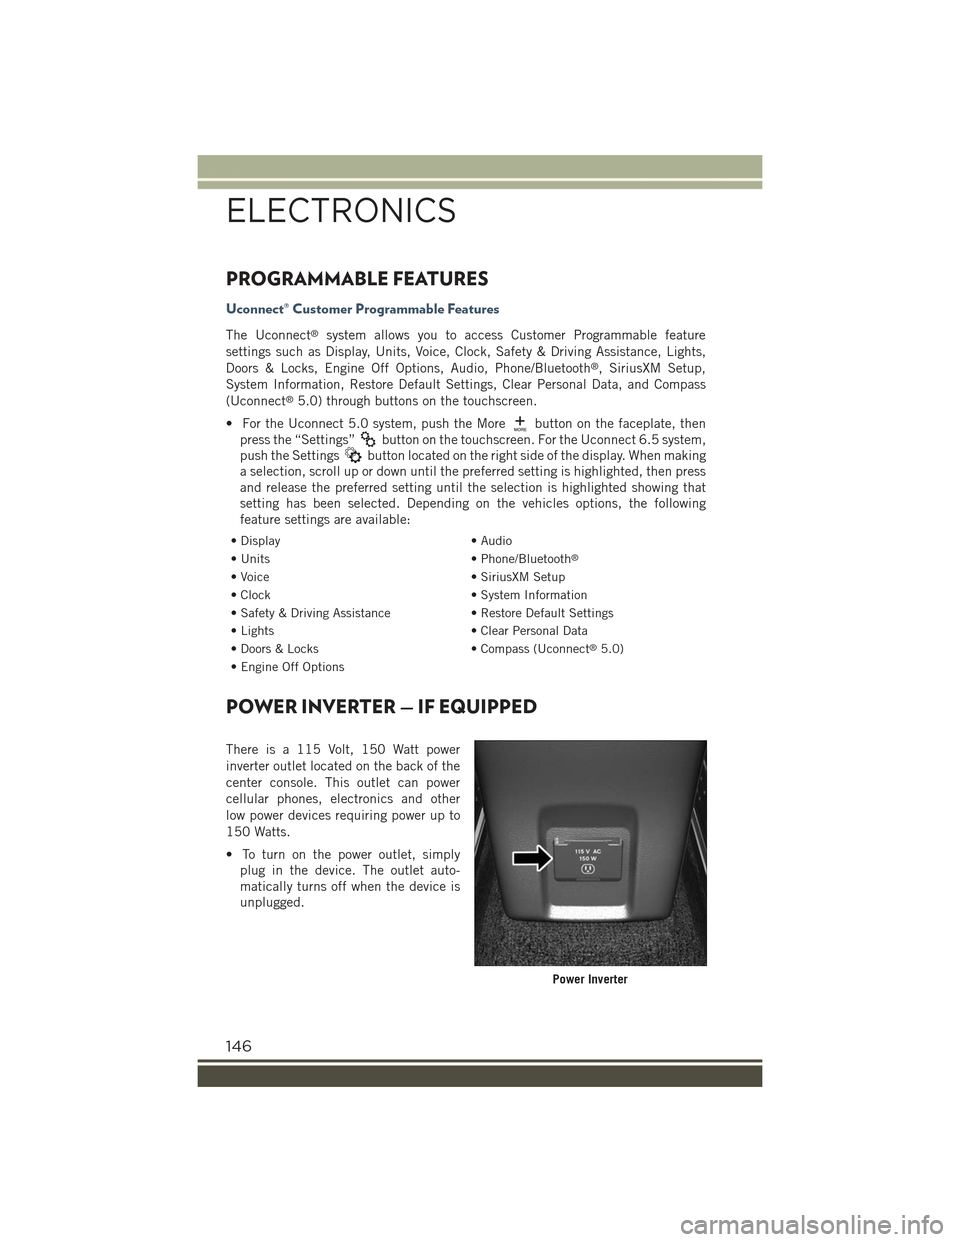
POWER INVERTER — IF EQUIPPED
There is a 115 Volt, 150 Watt power
inverter outlet located on the back of the
center console. This outlet can power
cellular phones, electronics and other
low power devices requiring power up to
150 Watts.
• To turn on the power outlet, simply
plug in the device. The outlet auto-
matically turns off when the device is
unplugged.
Power Inverter
ELECTRONICS
146
Page 150 of 220
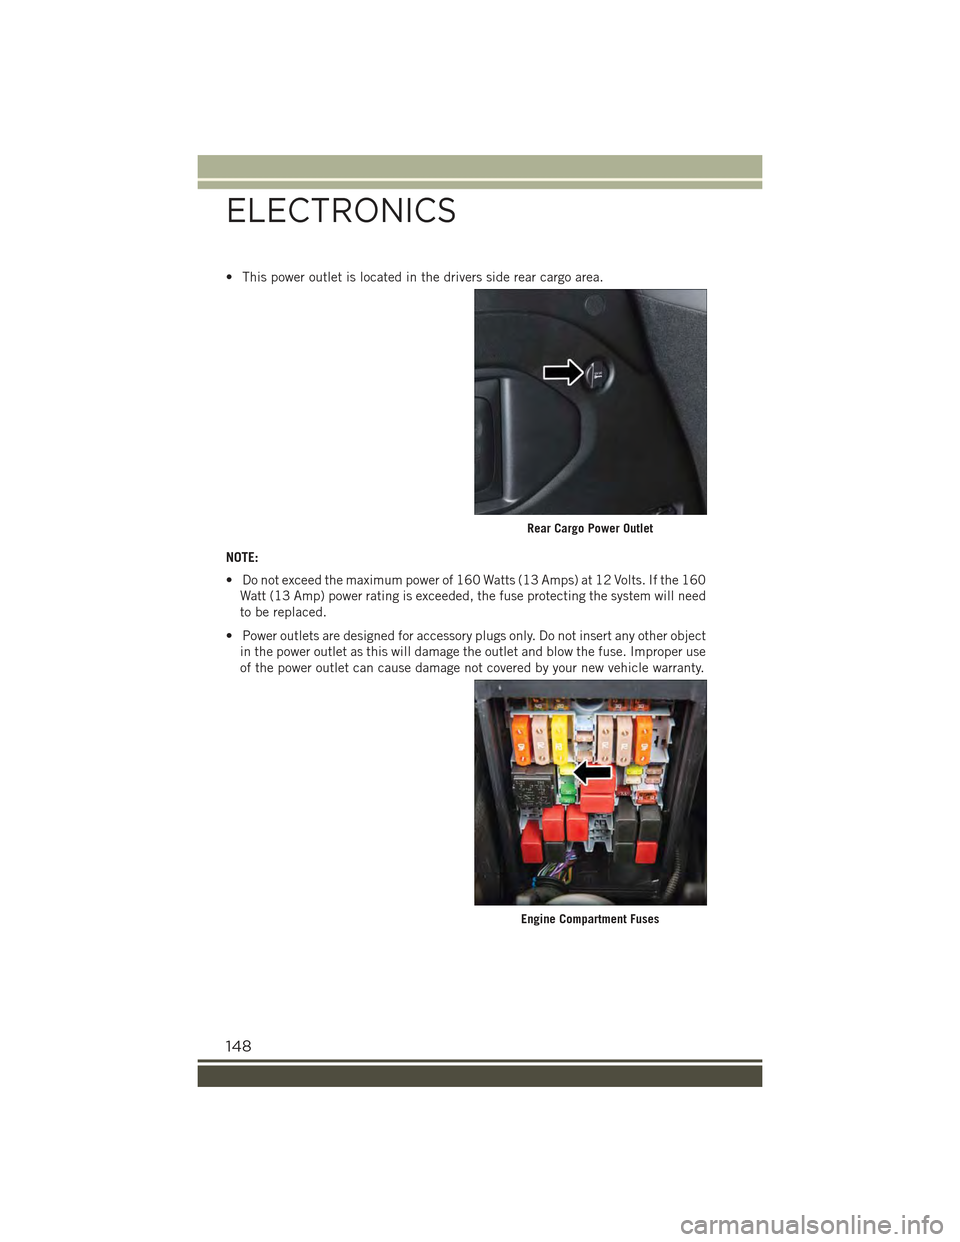
• This power outlet is located in the drivers side rear cargo area.
NOTE:
• Do not exceed the maximum power of 160 Watts (13 Amps) at 12 Volts. If the 160
Watt (13 Amp) power rating is exceeded, the fuse protecting the system will need
to be replaced.
• Power outlets are designed for accessory plugs only. Do not insert any other object
in the power outlet as this will damage the outlet and blow the fuse. Improper use
of the power outlet can cause damage not covered by your new vehicle warranty.
Rear Cargo Power Outlet
Engine Compartment Fuses
ELECTRONICS
148
Page 153 of 220
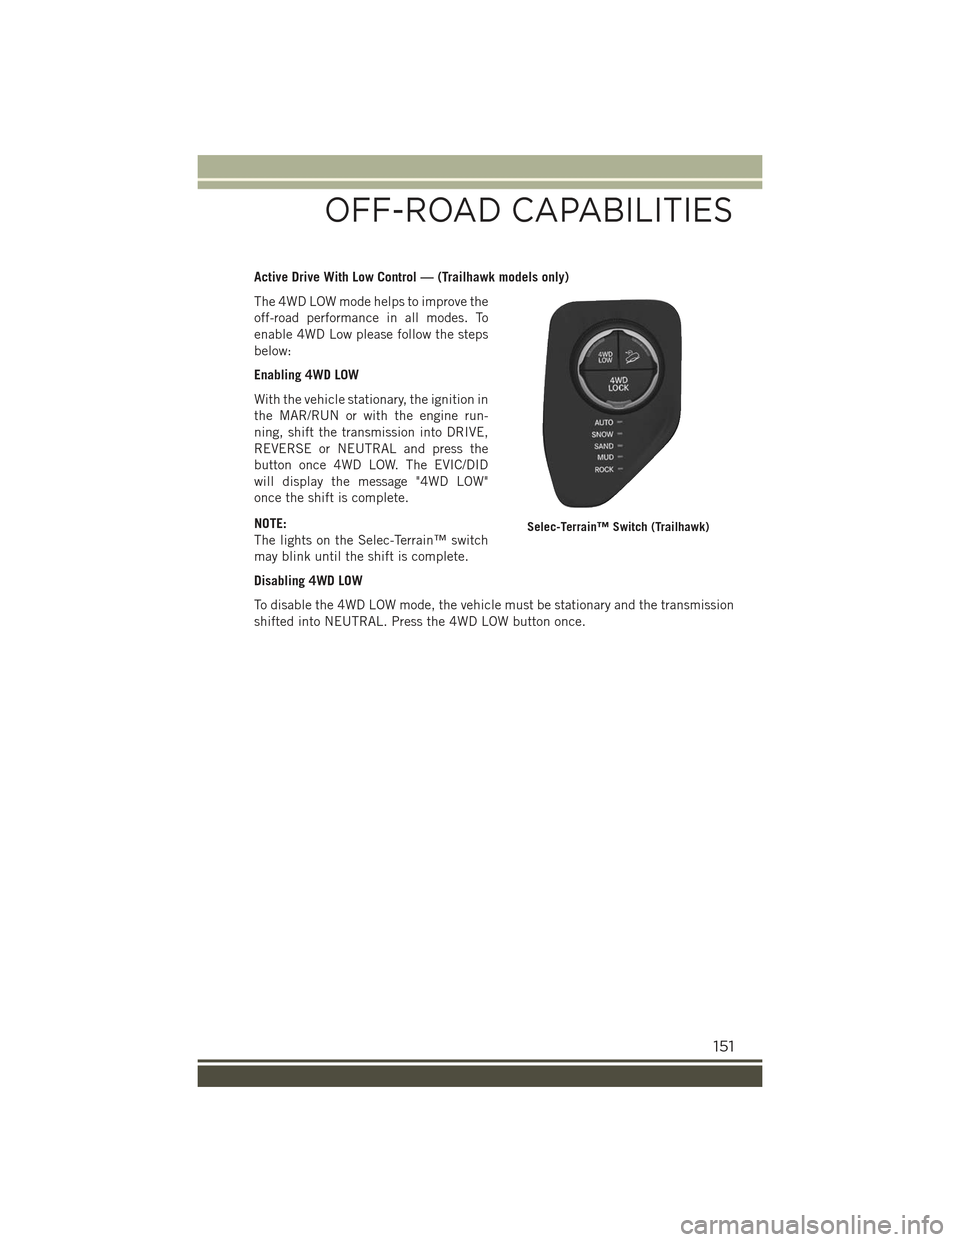
Active Drive With Low Control — (Trailhawk models only)
The 4WD LOW mode helps to improve the
off-road performance in all modes. To
enable 4WD Low please follow the steps
below:
Enabling 4WD LOW
With the vehicle stationary, the ignition in
the MAR/RUN or with the engine run-
ning, shift the transmission into DRIVE,
REVERSE or NEUTRAL and press the
button once 4WD LOW. The EVIC/DID
will display the message "4WD LOW"
once the shift is complete.
NOTE:
The lights on the Selec-Terrain™ switch
may blink until the shift is complete.
Disabling 4WD LOW
To disable the 4WD LOW mode, the vehicle must be stationary and the transmission
shifted into NEUTRAL. Press the 4WD LOW button once.
Selec-Terrain™ Switch (Trailhawk)
OFF-ROAD CAPABILITIES
151