audio JEEP RENEGADE 2015 1.G Owner's Manual
[x] Cancel search | Manufacturer: JEEP, Model Year: 2015, Model line: RENEGADE, Model: JEEP RENEGADE 2015 1.GPages: 220, PDF Size: 34.11 MB
Page 138 of 220
Voice Text Reply (Not Compatible With iPhone®)
NOTE:
Voice texting reply and voice texting features require a compatible mobile device
enabled with Bluetooth®Message Access Profile (MAP). iPhone®, and some other
smartphones, may not entirely support Bluetooth®MAP. Visit UconnectPhone.com
for the latest system and device compatibility.
• Due to the extremely large number of mobile phone manufacturers, your mobile
device may not be listed. For further assistance, contact Uconnect Customer Care
@ 1-877-855-8400 for U.S. residents or, 1-800-465-2001 (English) /
1-800-387-9983 (French) for Canadian residents.
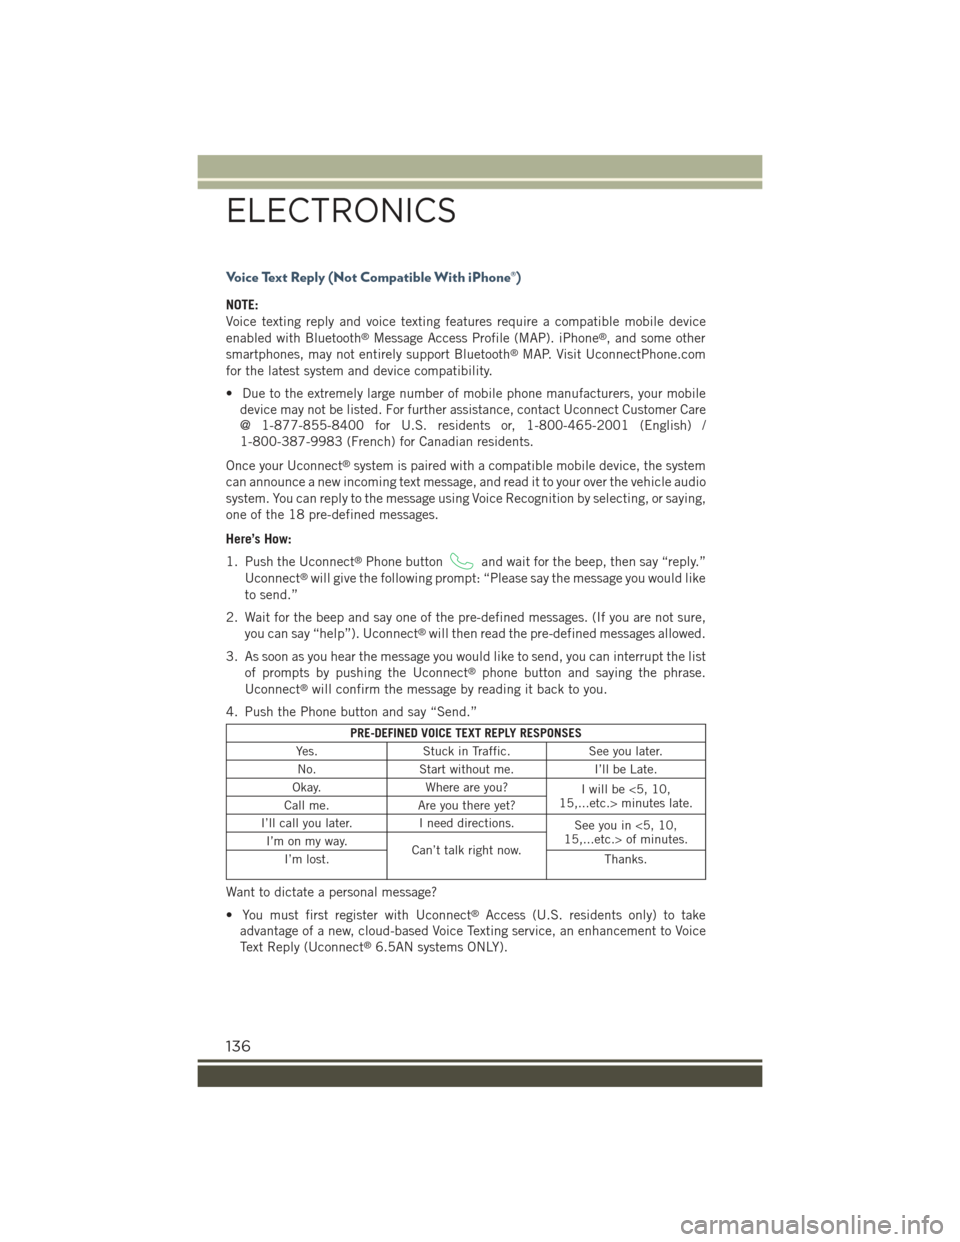
Once your Uconnect®system is paired with a compatible mobile device, the system
can announce a new incoming text message, and read it to your over the vehicle audio
system. You can reply to the message using Voice Recognition by selecting, or saying,
one of the 18 pre-defined messages.
Here’s How:
1. Push the Uconnect®Phone buttonand wait for the beep, then say “reply.”
Uconnect®will give the following prompt: “Please say the message you would like
to send.”
2. Wait for the beep and say one of the pre-defined messages. (If you are not sure,
you can say “help”). Uconnect®will then read the pre-defined messages allowed.
3. As soon as you hear the message you would like to send, you can interrupt the list
of prompts by pushing the Uconnect®phone button and saying the phrase.
Uconnect®will confirm the message by reading it back to you.
4. Push the Phone button and say “Send.”
PRE-DEFINED VOICE TEXT REPLY RESPONSES
Yes.Stuck in Traffic.See you later.
No.Start without me.I’ll be Late.
Okay.Where are you?Iwillbe<5,10,15,...etc.> minutes late.Call me.Are you there yet?
I’ll call you later.I need directions.See you in <5, 10,15,...etc.> of minutes.I’m on my way.Can’t talk right now.I’m lost.Thanks.
Want to dictate a personal message?
• You must first register with Uconnect®Access (U.S. residents only) to take
advantage of a new, cloud-based Voice Texting service, an enhancement to Voice
Text Reply (Uconnect®6.5AN systems ONLY).
ELECTRONICS
136
Page 140 of 220
STEERING WHEEL AUDIO CONTROLS
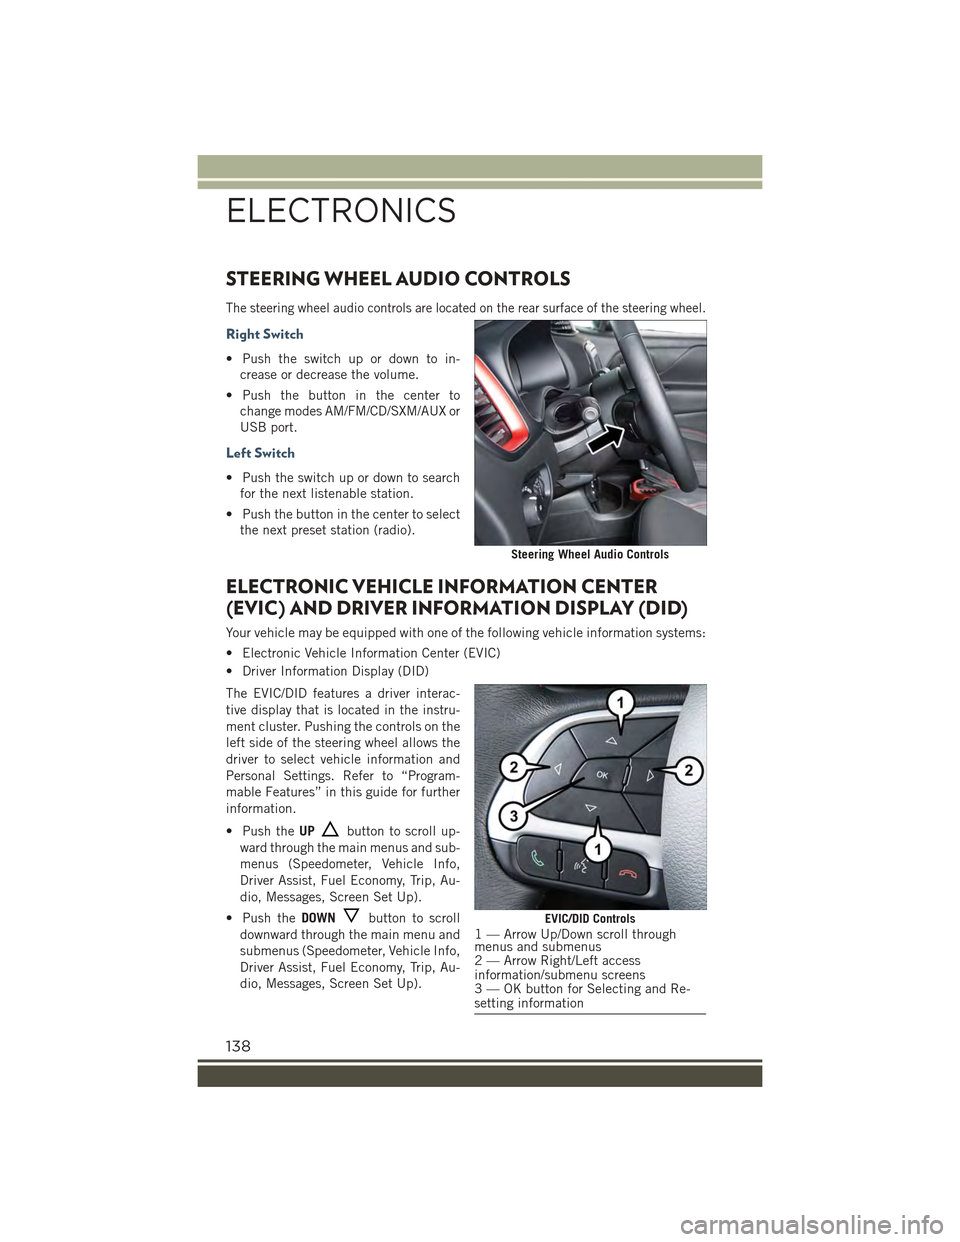
The steering wheel audio controls are located on the rear surface of the steering wheel.
Right Switch
• Push the switch up or down to in-
crease or decrease the volume.
• Push the button in the center to
change modes AM/FM/CD/SXM/AUX or
USB port.
Left Switch
• Push the switch up or down to search
for the next listenable station.
• Push the button in the center to select
the next preset station (radio).
ELECTRONIC VEHICLE INFORMATION CENTER
(EVIC) AND DRIVER INFORMATION DISPLAY (DID)
Your vehicle may be equipped with one of the following vehicle information systems:
• Electronic Vehicle Information Center (EVIC)
• Driver Information Display (DID)
The EVIC/DID features a driver interac-
tive display that is located in the instru-
ment cluster. Pushing the controls on the
left side of the steering wheel allows the
driver to select vehicle information and
Personal Settings. Refer to “Program-
mable Features” in this guide for further
information.
• Push theUPbutton to scroll up-
ward through the main menus and sub-
menus (Speedometer, Vehicle Info,
Driver Assist, Fuel Economy, Trip, Au-
dio, Messages, Screen Set Up).
• Push theDOWNbutton to scroll
downward through the main menu and
submenus (Speedometer, Vehicle Info,
Driver Assist, Fuel Economy, Trip, Au-
dio, Messages, Screen Set Up).
Steering Wheel Audio Controls
EVIC/DID Controls1 — Arrow Up/Down scroll throughmenus and submenus2 — Arrow Right/Left accessinformation/submenu screens3 — OK button for Selecting and Re-setting information
ELECTRONICS
138
Page 141 of 220
• Push theRIGHTbutton to access the information screens or submenu screens
of a main menu item.
• Push theBACK/LEFTbutton to access the information screens or submenu
screens of a main menu item.
• Push theOKbutton to access/select the information screens or submenu screens
of a main menu item. Push and hold the OK arrow button for two seconds to reset
displayed/selected features that can be reset.
EVIC/DID Main Menu
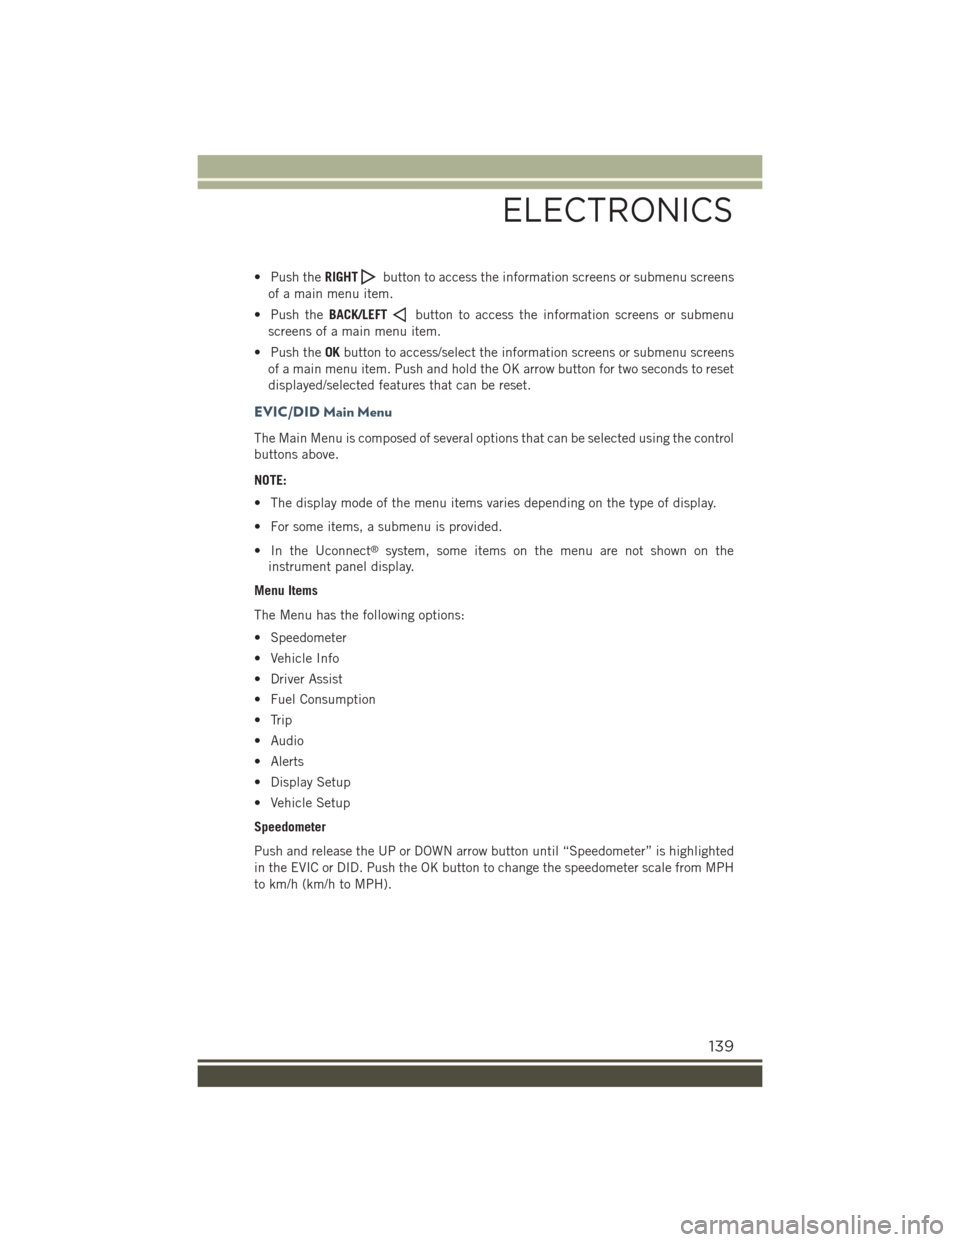
The Main Menu is composed of several options that can be selected using the control
buttons above.
NOTE:
• The display mode of the menu items varies depending on the type of display.
• For some items, a submenu is provided.
• In the Uconnect®system, some items on the menu are not shown on the
instrument panel display.
Menu Items
The Menu has the following options:
• Speedometer
• Vehicle Info
• Driver Assist
• Fuel Consumption
• Trip
• Audio
• Alerts
• Display Setup
• Vehicle Setup
Speedometer
Push and release the UP or DOWN arrow button until “Speedometer” is highlighted
in the EVIC or DID. Push the OK button to change the speedometer scale from MPH
to km/h (km/h to MPH).
ELECTRONICS
139
Page 143 of 220
Average Consumption
• (MPG, or l/ 100km or km/l)
Travel Time
• (Hour/Minute)
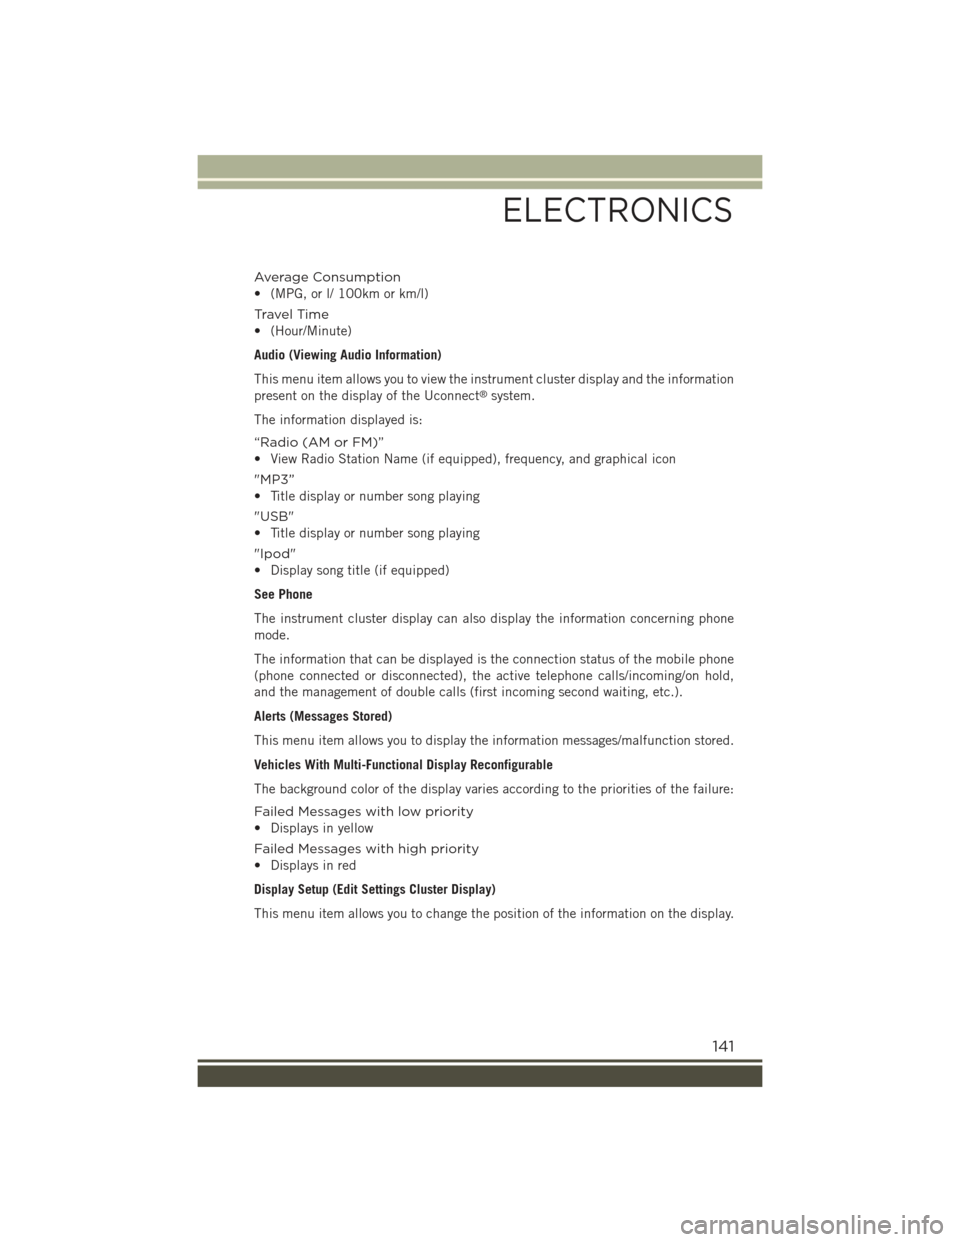
Audio (Viewing Audio Information)
This menu item allows you to view the instrument cluster display and the information
present on the display of the Uconnect®system.
The information displayed is:
“Radio (AM or FM)”
• View Radio Station Name (if equipped), frequency, and graphical icon
"MP3”
• Title display or number song playing
"USB"
• Title display or number song playing
"Ipod"
• Display song title (if equipped)
See Phone
The instrument cluster display can also display the information concerning phone
mode.
The information that can be displayed is the connection status of the mobile phone
(phone connected or disconnected), the active telephone calls/incoming/on hold,
and the management of double calls (first incoming second waiting, etc.).
Alerts (Messages Stored)
This menu item allows you to display the information messages/malfunction stored.
Vehicles With Multi-Functional Display Reconfigurable
The background color of the display varies according to the priorities of the failure:
Failed Messages with low priority
• Displays in yellow
Failed Messages with high priority
• Displays in red
Display Setup (Edit Settings Cluster Display)
This menu item allows you to change the position of the information on the display.
ELECTRONICS
141
Page 144 of 220
Display Gears (Vehicles With Reconfigurable Multi-Functional Display And Automatic
Transmission)
By selecting this item, you can select the display mode, the particulars relating to the
automatic transmission, and choose between the following options:
"Single digit"
• The right side of the display will show the letter concerning the automatic
transmission shift lever (P,N,R or D) position. After approximately two seconds, the
letter will be displayed in a central position.
"Full PNRD"
• (Default): The right side of the display the letters PNRD, the position assumed by
the shift lever will be highlighted in the display. During the operation in sequential
mode ("AutoStick"), in place of the letter D, the gear will be will be displayed.
In The Top Left/Top Right
The information relating to the following can be displayed:
• External temperature
• Compass (If Equipped)
• Date (Month/Day)
• Time (Hours/Minutes)
In the central area of the display, you can view all of the information listed above as
well as the following:
• Audio Information
• Speed Display (If Equipped)
• Date (Day/Month/Year)
• Range To Empty
• Menu Item
• Average Consumption
• Current Consumption
• Distance Traveled (Trip)
• Distance Traveled B (Trip B)
Restore Default Settings
Selecting this item, and you can reset and restore the default settings.
Vehicle Setup (Edit Settings Of The Car)
This menu item allows you to change the settings for the following:
• Display
• Units of measure
• Clock and Data
• Safety
ELECTRONICS
142
Page 148 of 220
PROGRAMMABLE FEATURES
Uconnect® Customer Programmable Features
The Uconnect®system allows you to access Customer Programmable feature
settings such as Display, Units, Voice, Clock, Safety & Driving Assistance, Lights,
Doors & Locks, Engine Off Options, Audio, Phone/Bluetooth®, SiriusXM Setup,
System Information, Restore Default Settings, Clear Personal Data, and Compass
(Uconnect®5.0) through buttons on the touchscreen.
• For the Uconnect 5.0 system, push the Morebutton on the faceplate, then
press the “Settings”button on the touchscreen. For the Uconnect 6.5 system,
push the Settingsbutton located on the right side of the display. When making
a selection, scroll up or down until the preferred setting is highlighted, then press
and release the preferred setting until the selection is highlighted showing that
setting has been selected. Depending on the vehicles options, the following
feature settings are available:
• Display• Audio
• Units• Phone/Bluetooth®
• Voice• SiriusXM Setup
• Clock• System Information
• Safety & Driving Assistance• Restore Default Settings
• Lights• Clear Personal Data
• Doors & Locks• Compass (Uconnect®5.0)
• Engine Off Options
POWER INVERTER — IF EQUIPPED
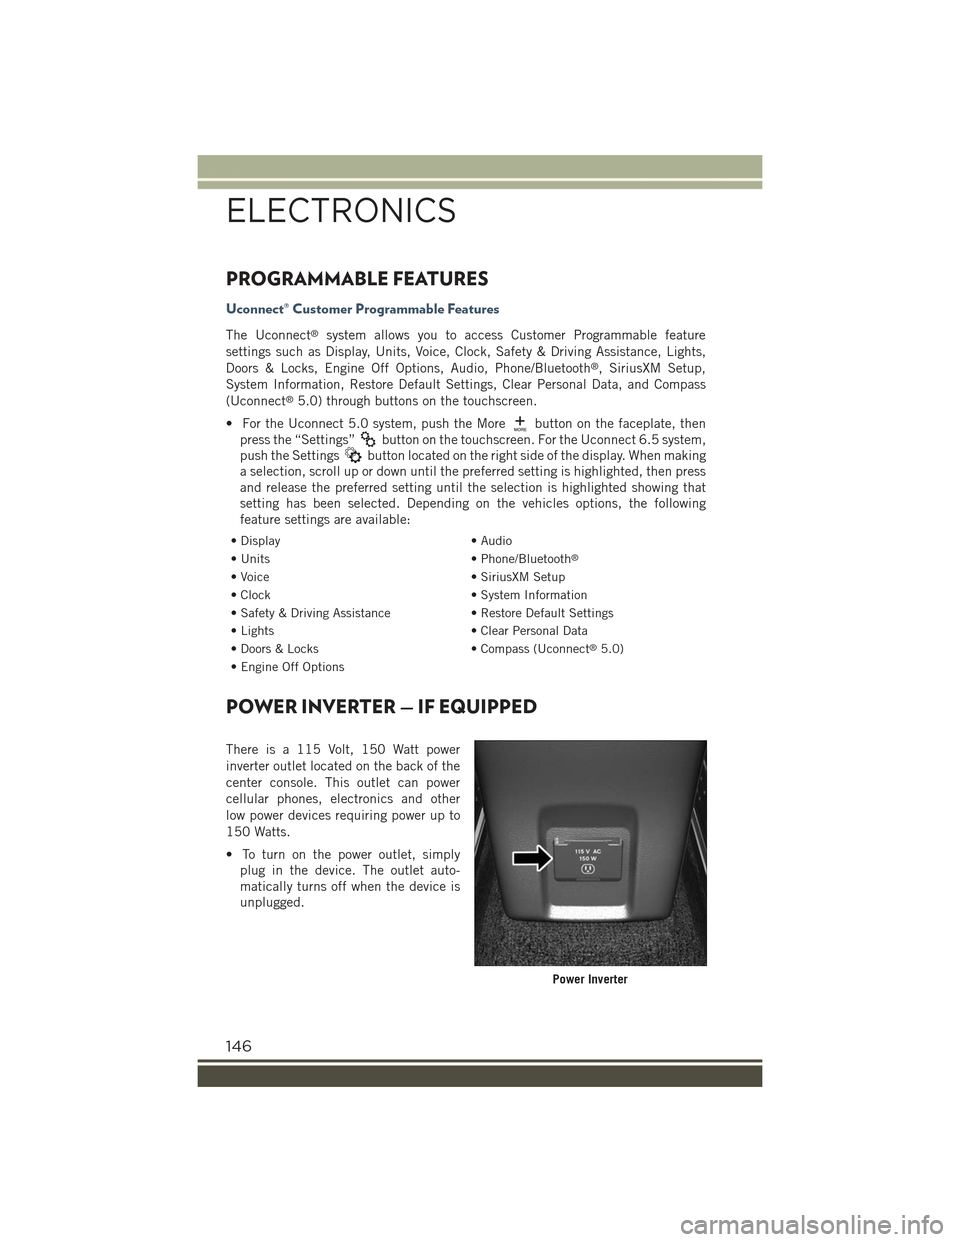
There is a 115 Volt, 150 Watt power
inverter outlet located on the back of the
center console. This outlet can power
cellular phones, electronics and other
low power devices requiring power up to
150 Watts.
• To turn on the power outlet, simply
plug in the device. The outlet auto-
matically turns off when the device is
unplugged.
Power Inverter
ELECTRONICS
146
Page 200 of 220
Rear Cargo Fuse/Relay Distribution Unit
To access the fuses, remove the access door from the left rear panel of the rear cargo
area.
The fuses are contained in two units. Fuse holder no. 1 is located closest to the rear
of the vehicle and fuse holder no. 2 is located closest to the front of the vehicle.
Fuse holders no. 1
CavityMini Fuse Description
F220 Amp Yellow Audio System
F320 Amp Yellow MY SKY
F47.5 Amp Brown Lumbar Adjustment FrontSeat (driver side)
F530 Amp Green Power Seat (driver side)
F67.5 Amp Brown Power Seat (driver side andpassenger side)
F730 Amp Green Lumbar Adjustment FrontSeats (driver side and pas-senger side)
F820 Amp Yellow Heating Front Seats
On the controller there is also a 20 amp fuse for the sun visor of the retractable roof.
Fuse holders no. 2
CavityMini Fuse Description
F110 Amp Red Controller Exterior LightingOn Trailer
F515 Amp Blue Controller Exterior LightingLights (drivers side)
F615 Amp Blue Controller Exterior LightingLights (passenger side)
MAINTAINING YOUR VEHICLE
198
Page 209 of 220
FREQUENTLY ASKED QUESTIONS
GETTING STARTED
How do I install my LATCH Equipped Child Seat? pg. 23
ELECTRONICS
Which radio is in my vehicle?
• Uconnect®3.0 pg. 91
• Uconnect®5.0 pg. 94
• Uconnect®6.5AN pg. 106
How do I activate the Audio Jack?
• Uconnect®3.0 pg. 93
• Uconnect®5.0 pg. 97
• Uconnect®6.5AN pg. 111
How do I set the clock on my radio?
• Uconnect®3.0 pg. 92
• Uconnect®5.0 pg. 94
• Uconnect®6.5AN pg. 106
How do I use the Navigation feature?
• Uconnect®6.5AN pg. 114
How do I pair my cell phone via Bluetooth®with the Uconnect®Hands-Free Voice
Activation System? pg. 130
How do I improve the Bluetooth®performance of my Uconnect®System? pg. 137
OFF-ROAD CAPABILITIES
How do I shift into different four-wheel drive selections? pg. 150
UTILITY
How do I know how much I can tow with my Jeep Renegade? pg. 153
WHAT TO DO IN EMERGENCIES
What do I do if my TPMS warning light is blinking? pg. 157
How do I change a flat tire? pg. 168
How do I Jump-Start my vehicle? pg. 174
MAINTAINING YOUR VEHICLE
Where is my Fuse Block located? pg. 194
What type of oil do I use? pg. 186
How often should I change my engine’s oil? pg. 187
What should my tire pressure be set at? pg. 200
FAQ’s
207
Page 210 of 220
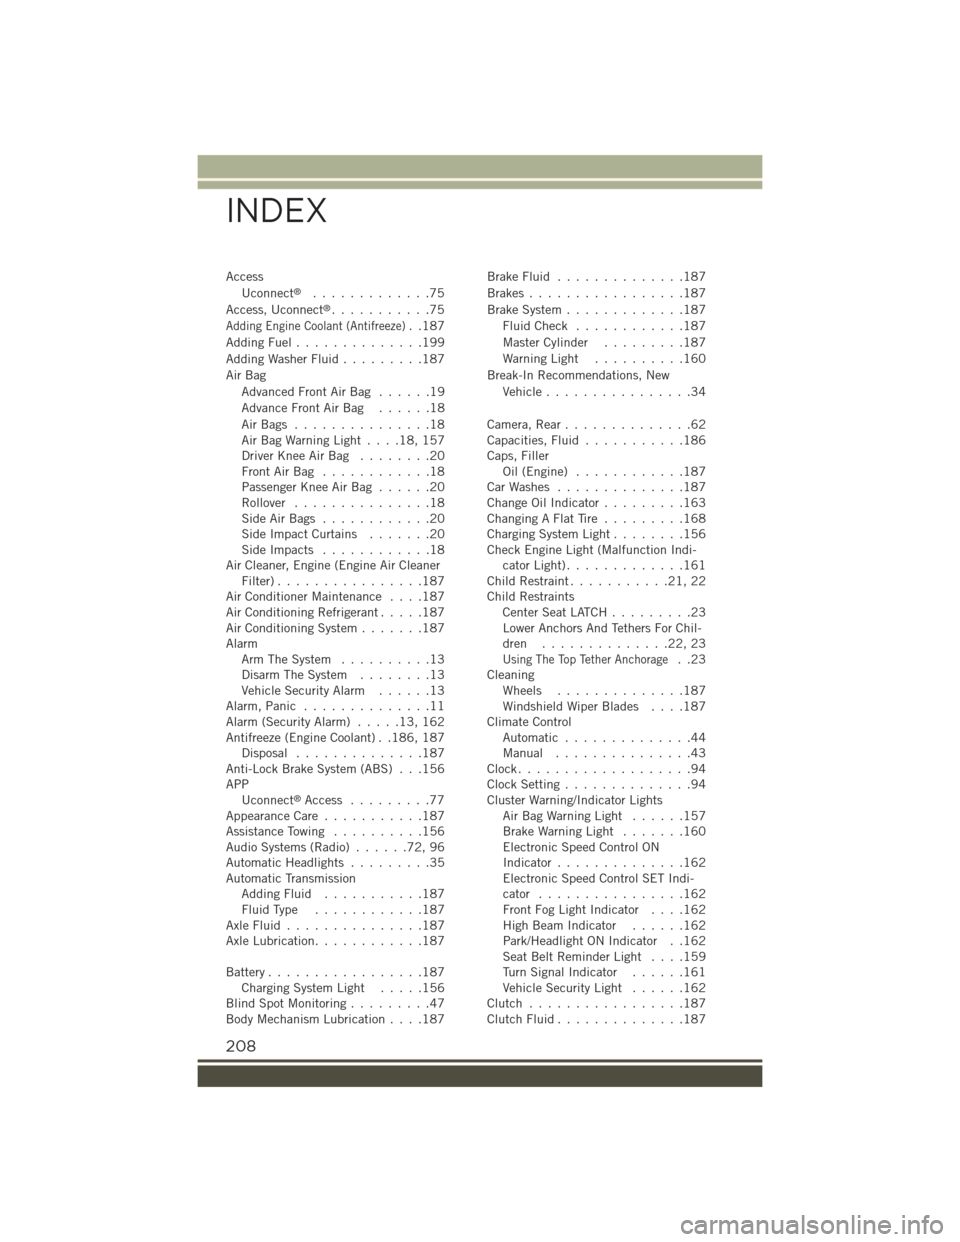
Access
Uconnect®.............75
Access, Uconnect®...........75
Adding Engine Coolant (Antifreeze)..187
Adding Fuel..............199
Adding Washer Fluid.........187
Air Bag
Advanced Front Air Bag . . . . . .19
Advance Front Air Bag . . . . . .18
Air Bags . . . . . . . . . . . . . . .18Air Bag Warning Light . . . .18, 157Driver Knee Air Bag........20Front Air Bag . . . . . . . . . . . .18Passenger Knee Air Bag......20Rollover...............18Side Air Bags . . . . . . . . . . . .20Side Impact Curtains.......20Side Impacts . . . . . . . . . . . .18Air Cleaner, Engine (Engine Air CleanerFilter)................187Air Conditioner Maintenance....187Air Conditioning Refrigerant.....187Air Conditioning System.......187AlarmArm The System..........13Disarm The System........13Vehicle Security Alarm......13Alarm, Panic..............11Alarm (Security Alarm).....13,162Antifreeze (Engine Coolant) . .186, 187Disposal . . . . . . . . . . . . . .187Anti-Lock Brake System (ABS) . . .156APPUconnect®Access . . . . . . . . .77Appearance Care...........187Assistance Towing..........156Audio Systems (Radio)......72,96Automatic Headlights.........35Automatic TransmissionAdding Fluid...........187Fluid Type . . . . . . . . . . . .187Axle Fluid . . . . . . . . . . . . . . .187Axle Lubrication............187
Battery.................187Charging System Light.....156Blind Spot Monitoring.........47Body Mechanism Lubrication....187
Brake Fluid . . . . . . . . . . . . . .187
Brakes . . . . . . . . . . . . . . . . .187
Brake System.............187
Fluid Check . . . . . . . . . . . .187
Master Cylinder.........187
Warning Light..........160
Break-In Recommendations, New
Vehicle................34
Camera, Rear..............62Capacities, Fluid...........186Caps, FillerOil (Engine)............187Car Washes . . . . . . . . . . . . . .187Change Oil Indicator.........163Changing A Flat Tire . . . . . . . . .168Charging System Light........156Check Engine Light (Malfunction Indi-cator Light).............161Child Restraint...........21,22Child RestraintsCenter Seat LATCH . . . . . . . . .23Lower Anchors And Tethers For Chil-dren . . . . . . . . . . . . . .22, 23
Using The Top Tether Anchorage..23CleaningWheels..............187Windshield Wiper Blades....187Climate ControlAutomatic..............44Manual . . . . . . . . . . . . . . .43Clock...................94Clock Setting..............94Cluster Warning/Indicator LightsAir Bag Warning Light . . . . . .157Brake Warning Light.......160Electronic Speed Control ONIndicator..............162Electronic Speed Control SET Indi-cator................162Front Fog Light Indicator....162High Beam Indicator......162Park/Headlight ON Indicator . .162Seat Belt Reminder Light . . . .159Turn Signal Indicator......161Vehicle Security Light......162Clutch . . . . . . . . . . . . . . . . .187Clutch Fluid . . . . . . . . . . . . . .187
INDEX
208
Page 212 of 220
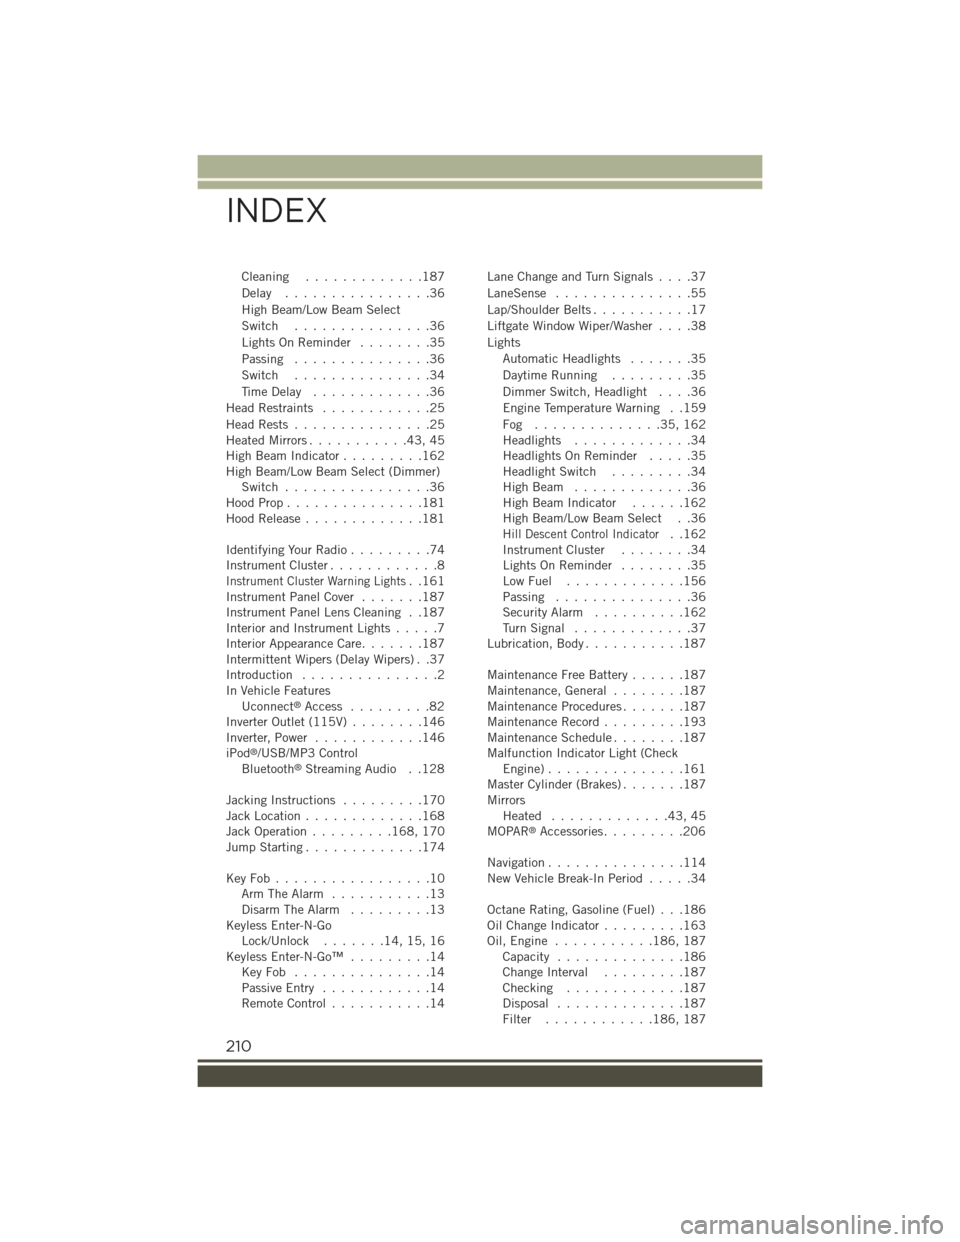
Cleaning.............187
Delay . . . . . . . . . . . . . . . .36
High Beam/Low Beam Select
Switch...............36
Lights On Reminder . . . . . . . .35
Passing...............36
Switch...............34
Time Delay.............36
Head Restraints............25
Head Rests . . . . . . . . . . . . . . .25Heated Mirrors...........43,45High Beam Indicator.........162High Beam/Low Beam Select (Dimmer)Switch................36Hood Prop . . . . . . . . . . . . . . .181Hood Release.............181
Identifying Your Radio.........74Instrument Cluster............8
Instrument Cluster Warning Lights..161Instrument Panel Cover.......187Instrument Panel Lens Cleaning . .187Interior and Instrument Lights.....7Interior Appearance Care.......187Intermittent Wipers (Delay Wipers) . .37Introduction...............2In Vehicle FeaturesUconnect®Access . . . . . . . . .82Inverter Outlet (115V)........146Inverter, Power............146iPod®/USB/MP3 ControlBluetooth®Streaming Audio . .128
Jacking Instructions.........170Jack Location.............168Jack Operation.........168, 170Jump Starting.............174
Key Fob . . . . . . . . . . . . . . . . .10Arm The Alarm...........13Disarm The Alarm.........13Keyless Enter-N-GoLock/Unlock . . . . . . .14, 15, 16Keyless Enter-N-Go™.........14Key Fob . . . . . . . . . . . . . . .14Passive Entry............14Remote Control...........14
Lane Change and Turn Signals . . . .37
LaneSense . . . . . . . . . . . . . . .55
Lap/Shoulder Belts...........17
Liftgate Window Wiper/Washer....38
Lights
Automatic Headlights.......35
Daytime Running.........35
Dimmer Switch, Headlight....36
Engine Temperature Warning . .159
Fog . . . . . . . . . . . . . .35, 162Headlights.............34Headlights On Reminder.....35Headlight Switch.........34High Beam . . . . . . . . . . . . .36High Beam Indicator......162High Beam/Low Beam Select . .36
Hill Descent Control Indicator..162Instrument Cluster........34Lights On Reminder........35Low Fuel . . . . . . . . . . . . .156Passing...............36Security Alarm..........162Tu r n S i g n a l . . . . . . . . . . . . . 3 7Lubrication, Body...........187
Maintenance Free Battery......187Maintenance, General........187Maintenance Procedures.......187Maintenance Record.........193Maintenance Schedule........187Malfunction Indicator Light (CheckEngine) . . . . . . . . . . . . . . .161Master Cylinder (Brakes).......187MirrorsHeated.............43,45MOPAR®Accessories.........206
Navigation...............114New Vehicle Break-In Period.....34
Octane Rating, Gasoline (Fuel) . . .186Oil Change Indicator.........163Oil, Engine . . . . . . . . . . .186, 187Capacity..............186Change Interval.........187Checking.............187Disposal..............187Filter............186, 187
INDEX
210