seat adjustment JEEP RENEGADE 2015 1.G User Guide
[x] Cancel search | Manufacturer: JEEP, Model Year: 2015, Model line: RENEGADE, Model: JEEP RENEGADE 2015 1.GPages: 220, PDF Size: 34.11 MB
Page 28 of 220
Front Head Restraints
Your vehicle is equipped with front driver and passenger head restraints.
To raise the head restraint, pull upward on the head restraint. To lower the head
restraint, push the adjustment button, located at the base of the head restraint, and
push downward on the head restraint.
NOTE:
The head restraints should only be removed by qualified technicians, for service
purposes only. If either of the head restraints require removal, see your authorized
dealer.
WARNING!
The head restraints for all occupants must be properly adjusted prior to operating
the vehicle or occupying a seat. Head restraints should never be adjusted while the
vehicle is in motion. Driving a vehicle with the head restraints improperly adjusted
or removed could cause serious injury or death in the event of a collision.
Rear Head Restraints
Your vehicle is equipped with 2 outboard head restraints and 1 center head restraint
for its rear passengers. The rear head restraints can be raised or lowered. When the
center seat is being occupied, the head restraint should be in the raised position.
When there are no occupants in the center seat, the head restraint can be lowered for
maximum visibility for the driver.
To raise the head restraint, pull upward on the head restraint.
To lower the head restraint, push the adjustment button, located at the base of the
head restraint, and push downward on the head restraint.
NOTE:
The head restraints should only be removed by qualified technicians, for service
purposes only. If either of the head restraints require removal, see your authorized
dealer.
GETTING STARTED
26
Page 29 of 220
SEATS
Seats are a part of the Occupant Restraint System of the vehicle.
WARNING!
•It is dangerous to ride in a cargo area, inside or outside of a vehicle. In a collision,
people riding in these areas are more likely to be seriously injured or killed.
• Do not allow people to ride in any area of your vehicle that is not equipped with
seats and seat belts. In a collision, people riding in these areas are more likely
to be seriously injured or killed.
• Be sure everyone in your vehicle is in a seat and using a seat belt properly.
Manual Front Seats
Manual Front Seat Forward/Rearward Ad-
justment
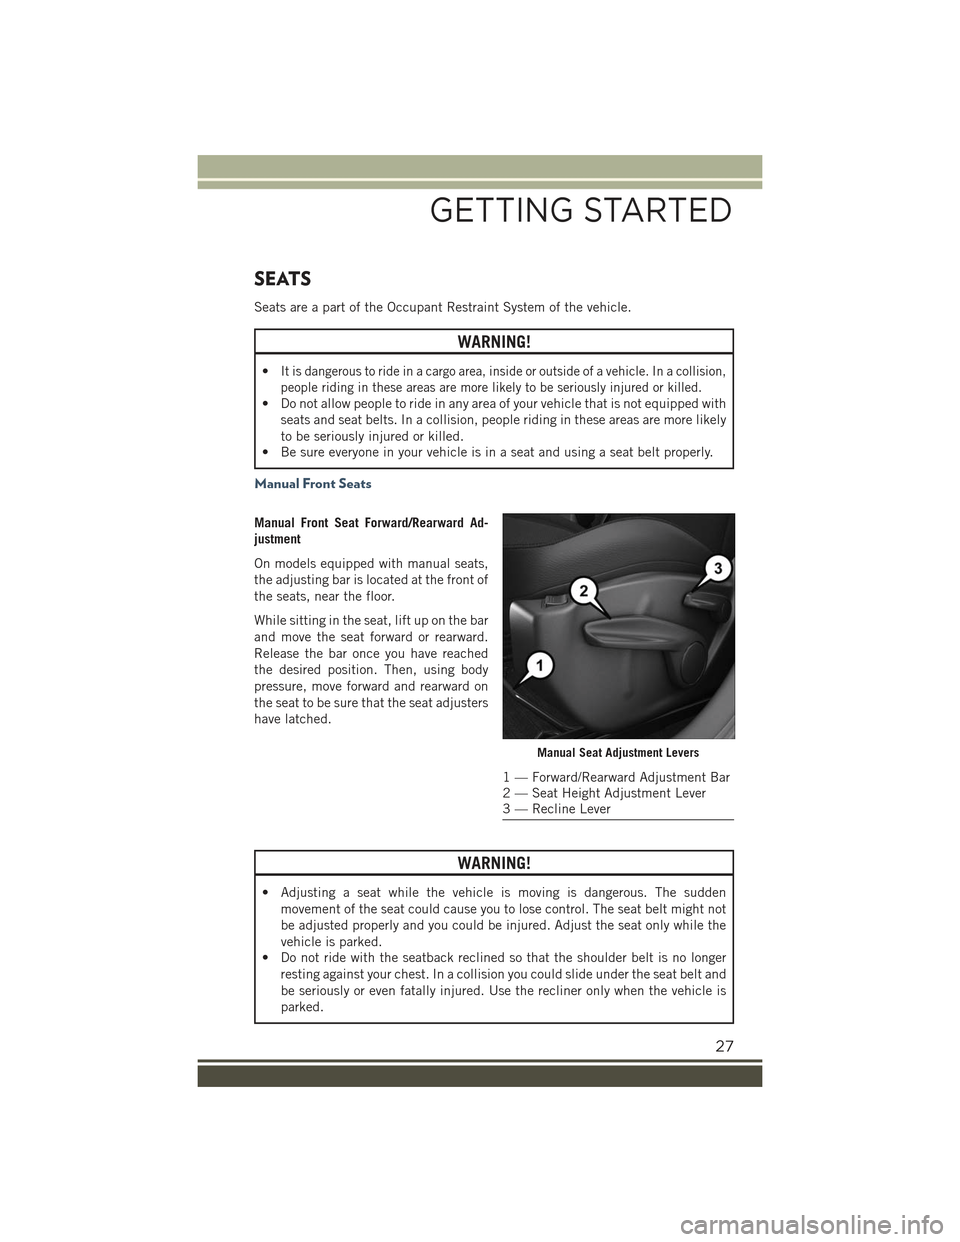
On models equipped with manual seats,
the adjusting bar is located at the front of
the seats, near the floor.
While sitting in the seat, lift up on the bar
and move the seat forward or rearward.
Release the bar once you have reached
the desired position. Then, using body
pressure, move forward and rearward on
the seat to be sure that the seat adjusters
have latched.
WARNING!
• Adjusting a seat while the vehicle is moving is dangerous. The sudden
movement of the seat could cause you to lose control. The seat belt might not
be adjusted properly and you could be injured. Adjust the seat only while the
vehicle is parked.
• Do not ride with the seatback reclined so that the shoulder belt is no longer
resting against your chest. In a collision you could slide under the seat belt and
be seriously or even fatally injured. Use the recliner only when the vehicle is
parked.
Manual Seat Adjustment Levers
1 — Forward/Rearward Adjustment Bar2 — Seat Height Adjustment Lever3 — Recline Lever
GETTING STARTED
27
Page 30 of 220
Height Adjustment
The driver’s seat height can be raised or lowered by using a lever, located on the
outboard side of the seat. Pull upward on the lever to raise the seat height or push
downward on the lever to lower the seat height.
Recline Adjustment
To adjust the seatback, lift the lever located on the outboard side of the seat, lean
back to the desired position and release the lever. To return the seatback, lift the
lever, lean forward and release the lever.
Power Seats — If Equipped
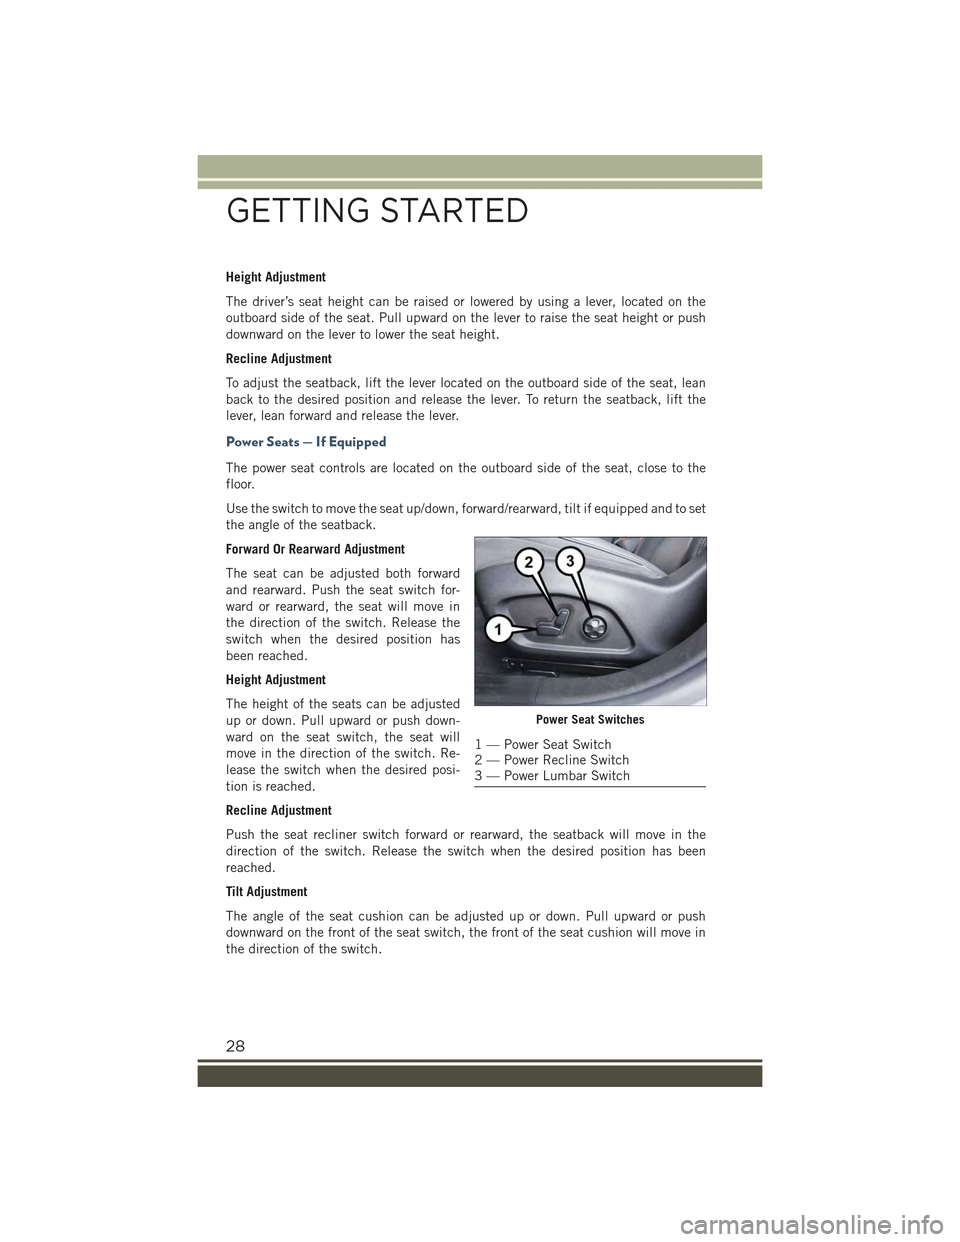
The power seat controls are located on the outboard side of the seat, close to the
floor.
Use the switch to move the seat up/down, forward/rearward, tilt if equipped and to set
the angle of the seatback.
Forward Or Rearward Adjustment
The seat can be adjusted both forward
and rearward. Push the seat switch for-
ward or rearward, the seat will move in
the direction of the switch. Release the
switch when the desired position has
been reached.
Height Adjustment
The height of the seats can be adjusted
up or down. Pull upward or push down-
ward on the seat switch, the seat will
move in the direction of the switch. Re-
lease the switch when the desired posi-
tion is reached.
Recline Adjustment
Push the seat recliner switch forward or rearward, the seatback will move in the
direction of the switch. Release the switch when the desired position has been
reached.
Tilt Adjustment
The angle of the seat cushion can be adjusted up or down. Pull upward or push
downward on the front of the seat switch, the front of the seat cushion will move in
the direction of the switch.
Power Seat Switches
1 — Power Seat Switch2 — Power Recline Switch3 — Power Lumbar Switch
GETTING STARTED
28
Page 31 of 220
Power Lumbar Adjustment
Push the switch forward or rearward to increase or decrease the lumbar support. Push
the switch upward or downward to raise or lower the lumbar support.
Heated Seats — If Equipped
The heated seat switches are located on the instrument panel.
You can choose between two heating levels:
• Push the heated seat buttononce to turn the HI setting ON.
• Push the heated seat buttona second time to turn the LO setting ON.
• Push the heated seat buttona third time to turn the heating elements OFF.
If the HI-level setting is selected, the system will automatically switch to LO-level
after approximately 145 minutes of continuous operation. At that time, the display
will change from HI to LO, indicating the change. The LO-level setting will turn OFF
automatically after approximately 60 minutes.
NOTE:
The engine must be running for the heated seats to operate.
Vehicles Equipped With Remote Start
Vehicles equipped with Remote Start, the heated seats can be programed to come on
during a Remote Start.
This feature can be programmed through the Uconnect®system. Refer to
“Uconnect®Settings” in “Multimedia” in your Owner’s Manual on the DVD for
further information.
WARNING!
• Persons who are unable to feel pain to the skin because of advanced age,
chronic illness, diabetes, spinal cord injury, medication, alcohol use, exhaus-
tion or other physical condition must exercise care when using the seat heater.
It may cause burns even at low temperatures, especially if used for long periods
of time.
• Do not place anything on the seat or seatback that insulates against heat, such
as a blanket or cushion. This may cause the seat heater to overheat. Sitting in
a seat that has been overheated could cause serious burns due to the increased
surface temperature of the seat.
GETTING STARTED
29
Page 146 of 220
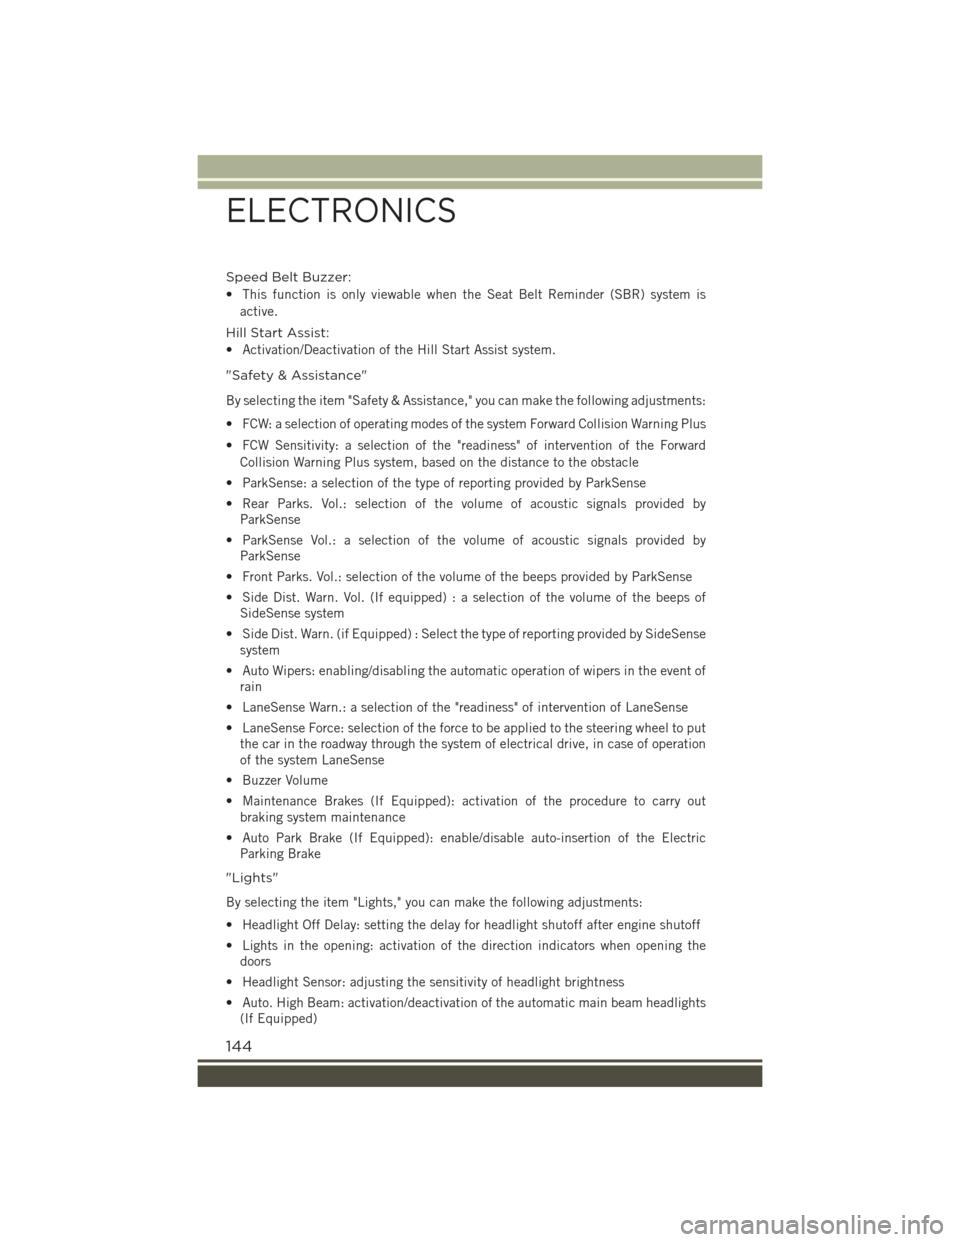
Speed Belt Buzzer:
• This function is only viewable when the Seat Belt Reminder (SBR) system is
active.
Hill Start Assist:
• Activation/Deactivation of the Hill Start Assist system.
"Safety & Assistance"
By selecting the item "Safety & Assistance," you can make the following adjustments:
• FCW: a selection of operating modes of the system Forward Collision Warning Plus
• FCW Sensitivity: a selection of the "readiness" of intervention of the Forward
Collision Warning Plus system, based on the distance to the obstacle
• ParkSense: a selection of the type of reporting provided by ParkSense
• Rear Parks. Vol.: selection of the volume of acoustic signals provided by
ParkSense
• ParkSense Vol.: a selection of the volume of acoustic signals provided by
ParkSense
• Front Parks. Vol.: selection of the volume of the beeps provided by ParkSense
• Side Dist. Warn. Vol. (If equipped) : a selection of the volume of the beeps of
SideSense system
• Side Dist. Warn. (if Equipped) : Select the type of reporting provided by SideSense
system
• Auto Wipers: enabling/disabling the automatic operation of wipers in the event of
rain
• LaneSense Warn.: a selection of the "readiness" of intervention of LaneSense
• LaneSense Force: selection of the force to be applied to the steering wheel to put
the car in the roadway through the system of electrical drive, in case of operation
of the system LaneSense
• Buzzer Volume
• Maintenance Brakes (If Equipped): activation of the procedure to carry out
braking system maintenance
• Auto Park Brake (If Equipped): enable/disable auto-insertion of the Electric
Parking Brake
"Lights"
By selecting the item "Lights," you can make the following adjustments:
• Headlight Off Delay: setting the delay for headlight shutoff after engine shutoff
• Lights in the opening: activation of the direction indicators when opening the
doors
• Headlight Sensor: adjusting the sensitivity of headlight brightness
• Auto. High Beam: activation/deactivation of the automatic main beam headlights
(If Equipped)
ELECTRONICS
144
Page 200 of 220
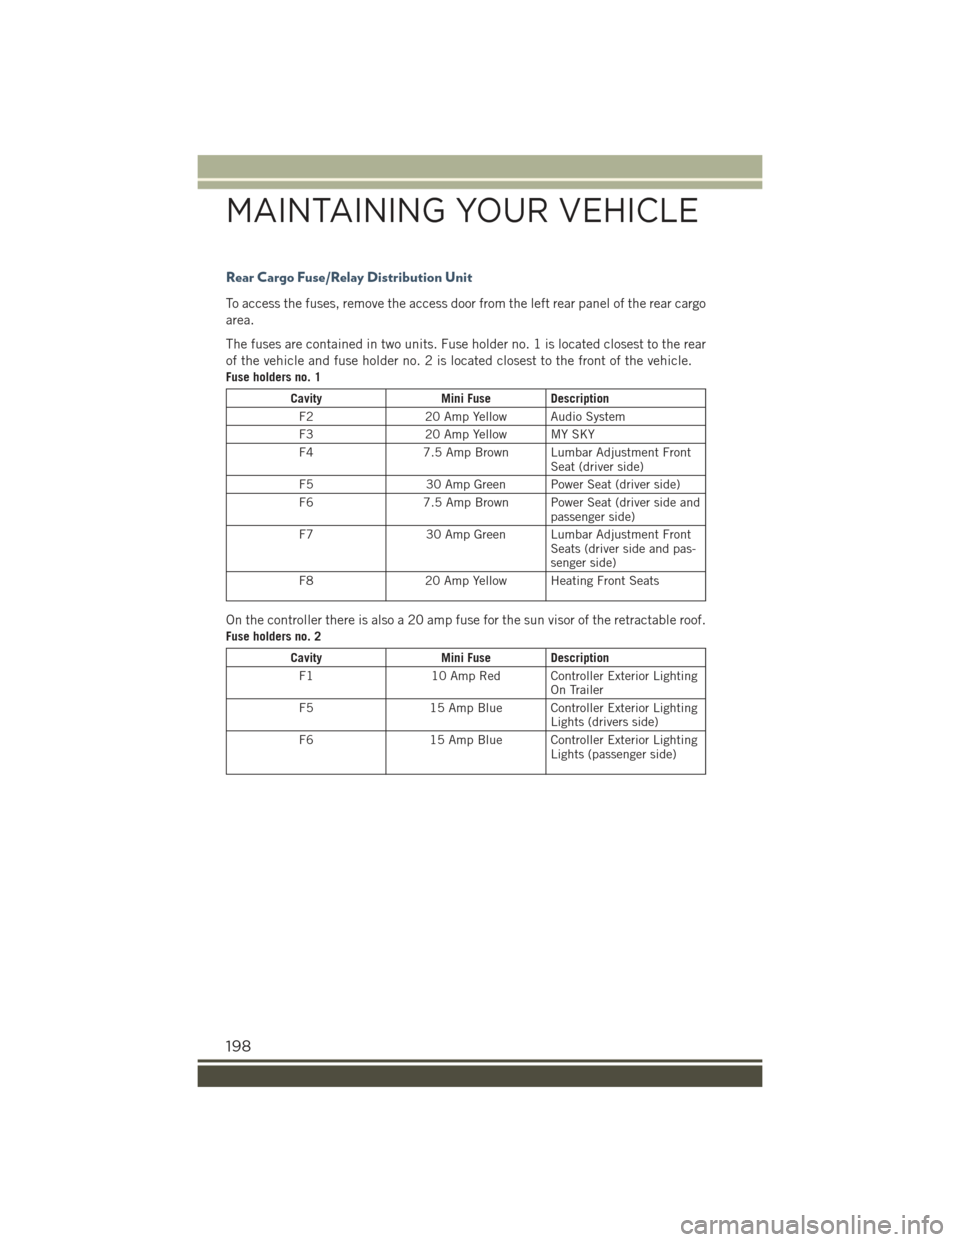
Rear Cargo Fuse/Relay Distribution Unit
To access the fuses, remove the access door from the left rear panel of the rear cargo
area.
The fuses are contained in two units. Fuse holder no. 1 is located closest to the rear
of the vehicle and fuse holder no. 2 is located closest to the front of the vehicle.
Fuse holders no. 1
CavityMini Fuse Description
F220 Amp Yellow Audio System
F320 Amp Yellow MY SKY
F47.5 Amp Brown Lumbar Adjustment FrontSeat (driver side)
F530 Amp Green Power Seat (driver side)
F67.5 Amp Brown Power Seat (driver side andpassenger side)
F730 Amp Green Lumbar Adjustment FrontSeats (driver side and pas-senger side)
F820 Amp Yellow Heating Front Seats
On the controller there is also a 20 amp fuse for the sun visor of the retractable roof.
Fuse holders no. 2
CavityMini Fuse Description
F110 Amp Red Controller Exterior LightingOn Trailer
F515 Amp Blue Controller Exterior LightingLights (drivers side)
F615 Amp Blue Controller Exterior LightingLights (passenger side)
MAINTAINING YOUR VEHICLE
198
Page 213 of 220
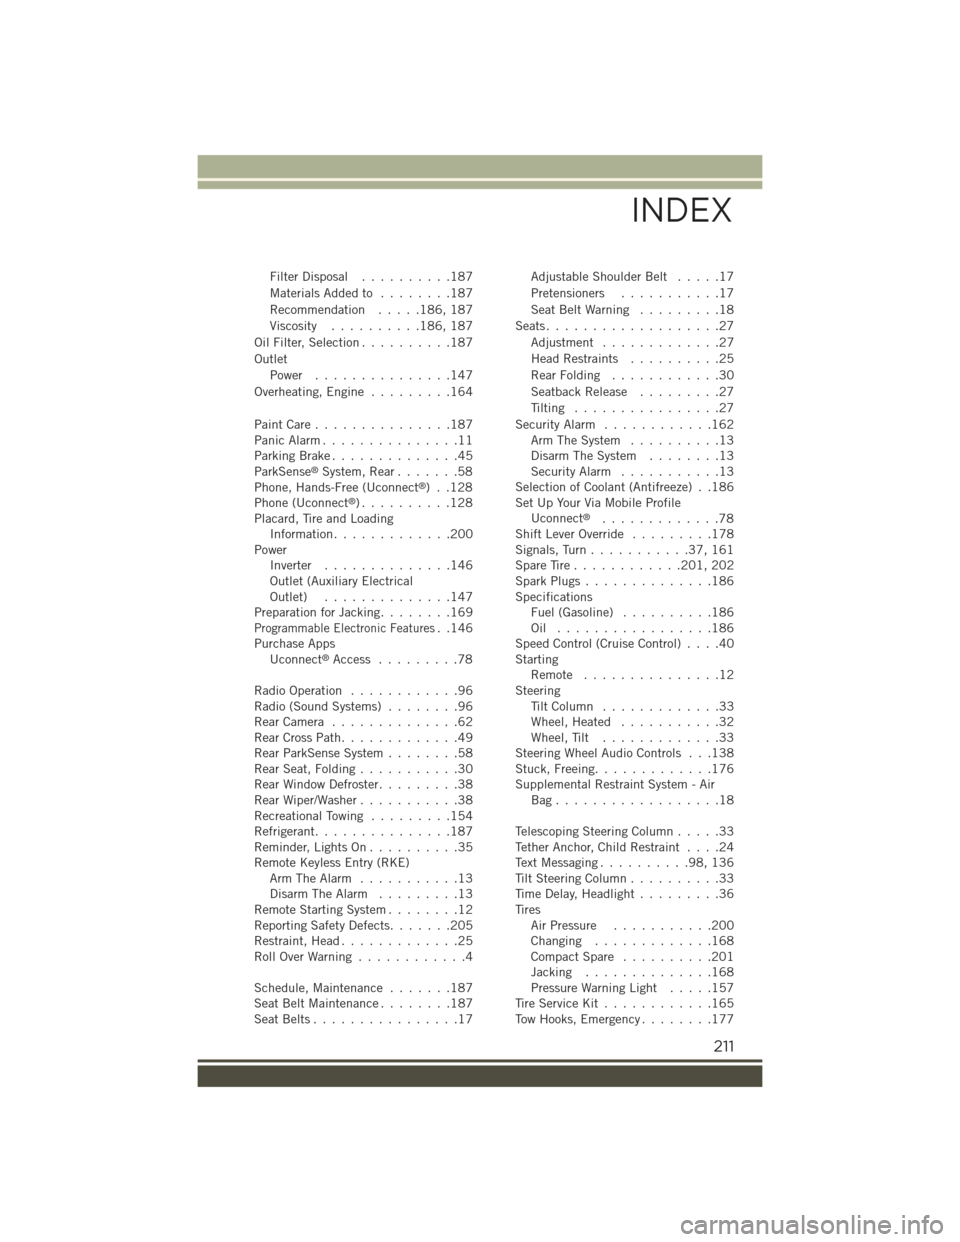
Filter Disposal..........187
Materials Added to........187
Recommendation.....186, 187
Viscosity..........186, 187
Oil Filter, Selection..........187
Outlet
Power...............147
Overheating, Engine.........164
Paint Care . . . . . . . . . . . . . . .187Panic Alarm...............11Parking Brake..............45ParkSense®System, Rear.......58Phone, Hands-Free (Uconnect®)..128Phone (Uconnect®). . . . . . . . . .128Placard, Tire and LoadingInformation.............200PowerInverter..............146Outlet (Auxiliary ElectricalOutlet)..............147Preparation for Jacking........169Programmable Electronic Features..146Purchase AppsUconnect®Access.........78
Radio Operation............96Radio (Sound Systems)........96Rear Camera . . . . . . . . . . . . . .62Rear Cross Path.............49Rear ParkSense System........58Rear Seat, Folding...........30Rear Window Defroster.........38Rear Wiper/Washer...........38Recreational Towing.........154Refrigerant...............187Reminder, Lights On . . . . . . . . . .35Remote Keyless Entry (RKE)Arm The Alarm...........13Disarm The Alarm.........13Remote Starting System........12Reporting Safety Defects.......205Restraint, Head.............25Roll Over Warning . . . . . . . . . . . .4
Schedule, Maintenance.......187Seat Belt Maintenance . . . . . . . .187Seat Belts................17
Adjustable Shoulder Belt.....17
Pretensioners...........17
Seat Belt Warning . . . . . . . . .18
Seats...................27
Adjustment . . . . . . . . . . . . .27
Head Restraints..........25
Rear Folding............30
Seatback Release.........27
Tilting................27
Security Alarm............162Arm The System..........13Disarm The System........13Security Alarm...........13Selection of Coolant (Antifreeze) . .186Set Up Your Via Mobile ProfileUconnect®.............78Shift Lever Override.........178Signals, Turn...........37,161Spare Tire . . . . . . . . . . . .201, 202Spark Plugs . . . . . . . . . . . . . .186SpecificationsFuel (Gasoline)..........186Oil . . . . . . . . . . . . . . . . .186Speed Control (Cruise Control)....40StartingRemote . . . . . . . . . . . . . . .12SteeringTi l t C o l u m n . . . . . . . . . . . . . 3 3Wheel, Heated...........32Wheel, Tilt.............33Steering Wheel Audio Controls . . .138Stuck, Freeing.............176Supplemental Restraint System - AirBag . . . . . . . . . . . . . . . . . .18
Telescoping Steering Column.....33Tether Anchor, Child Restraint....24Text Messaging..........98,136Tilt Steering Column..........33Time Delay, Headlight.........36TiresAir Pressure...........200Changing . . . . . . . . . . . . .168Compact Spare..........201Jacking..............168Pressure Warning Light.....157Tire Service Kit............165Tow Hooks, Emergency........177
INDEX
211