check engine JEEP WAGONEER 2023 User Guide
[x] Cancel search | Manufacturer: JEEP, Model Year: 2023, Model line: WAGONEER, Model: JEEP WAGONEER 2023Pages: 396, PDF Size: 15.17 MB
Page 114 of 396
112GETTING TO KNOW YOUR INSTRUMENT PANEL
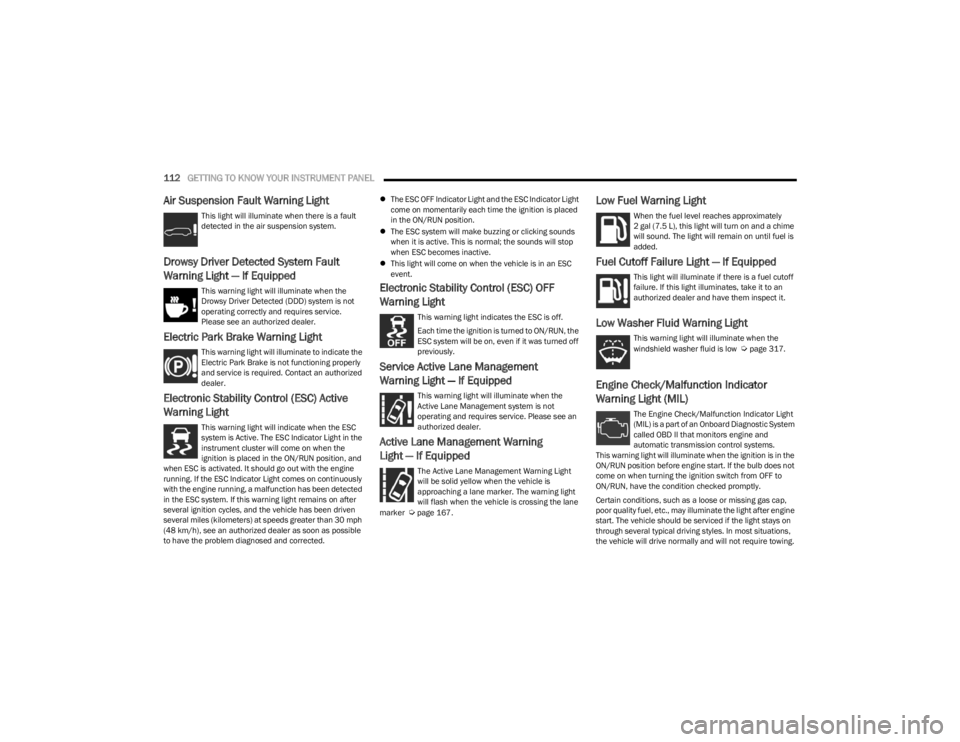
Air Suspension Fault Warning Light
This light will illuminate when there is a fault
detected in the air suspension system.
Drowsy Driver Detected System Fault
Warning Light — If Equipped
This warning light will illuminate when the
Drowsy Driver Detected (DDD) system is not
operating correctly and requires service.
Please see an authorized dealer.
Electric Park Brake Warning Light
This warning light will illuminate to indicate the
Electric Park Brake is not functioning properly
and service is required. Contact an authorized
dealer.
Electronic Stability Control (ESC) Active
Warning Light
This warning light will indicate when the ESC
system is Active. The ESC Indicator Light in the
instrument cluster will come on when the
ignition is placed in the ON/RUN position, and
when ESC is activated. It should go out with the engine
running. If the ESC Indicator Light comes on continuously
with the engine running, a malfunction has been detected
in the ESC system. If this warning light remains on after
several ignition cycles, and the vehicle has been driven
several miles (kilometers) at speeds greater than 30 mph
(48 km/h), see an authorized dealer as soon as possible
to have the problem diagnosed and corrected.
The ESC OFF Indicator Light and the ESC Indicator Light
come on momentarily each time the ignition is placed
in the ON/RUN position.
The ESC system will make buzzing or clicking sounds
when it is active. This is normal; the sounds will stop
when ESC becomes inactive.
This light will come on when the vehicle is in an ESC
event.
Electronic Stability Control (ESC) OFF
Warning Light
This warning light indicates the ESC is off.
Each time the ignition is turned to ON/RUN, the
ESC system will be on, even if it was turned off
previously.
Service Active Lane Management
Warning Light — If Equipped
This warning light will illuminate when the
Active Lane Management system is not
operating and requires service. Please see an
authorized dealer.
Active Lane Management Warning
Light — If Equipped
The Active Lane Management Warning Light
will be solid yellow when the vehicle is
approaching a lane marker. The warning light
will flash when the vehicle is crossing the lane
marker
Úpage 167.
Low Fuel Warning Light
When the fuel level reaches approximately
2 gal (7.5 L), this light will turn on and a chime
will sound. The light will remain on until fuel is
added.
Fuel Cutoff Failure Light — If Equipped
This light will illuminate if there is a fuel cutoff
failure. If this light illuminates, take it to an
authorized dealer and have them inspect it.
Low Washer Fluid Warning Light
This warning light will illuminate when the
windshield washer fluid is low Úpage 317.
Engine Check/Malfunction Indicator
Warning Light (MIL)
The Engine Check/Malfunction Indicator Light
(MIL) is a part of an Onboard Diagnostic System
called OBD II that monitors engine and
automatic transmission control systems.
This warning light will illuminate when the ignition is in the
ON/RUN position before engine start. If the bulb does not
come on when turning the ignition switch from OFF to
ON/RUN, have the condition checked promptly.
Certain conditions, such as a loose or missing gas cap,
poor quality fuel, etc., may illuminate the light after engine
start. The vehicle should be serviced if the light stays on
through several typical driving styles. In most situations,
the vehicle will drive normally and will not require towing.
23_WS_OM_EN_USC_t.book Page 112
Page 120 of 396
118GETTING TO KNOW YOUR INSTRUMENT PANEL
ONBOARD DIAGNOSTIC SYSTEM
(OBD II) C
YBERSECURITY
Your vehicle is required to have OBD II and a connection
port to allow access to information related to the
performance of your emissions controls. Authorized
service technicians may need to access this information to
assist with the diagnosis and service of your vehicle and
emissions system
Úpage 196.
EMISSIONS INSPECTION AND
MAINTENANCE PROGRAMS
In some localities, it may be a legal requirement to pass an
inspection of your vehicle's emissions control system.
Failure to pass could prevent vehicle registration.
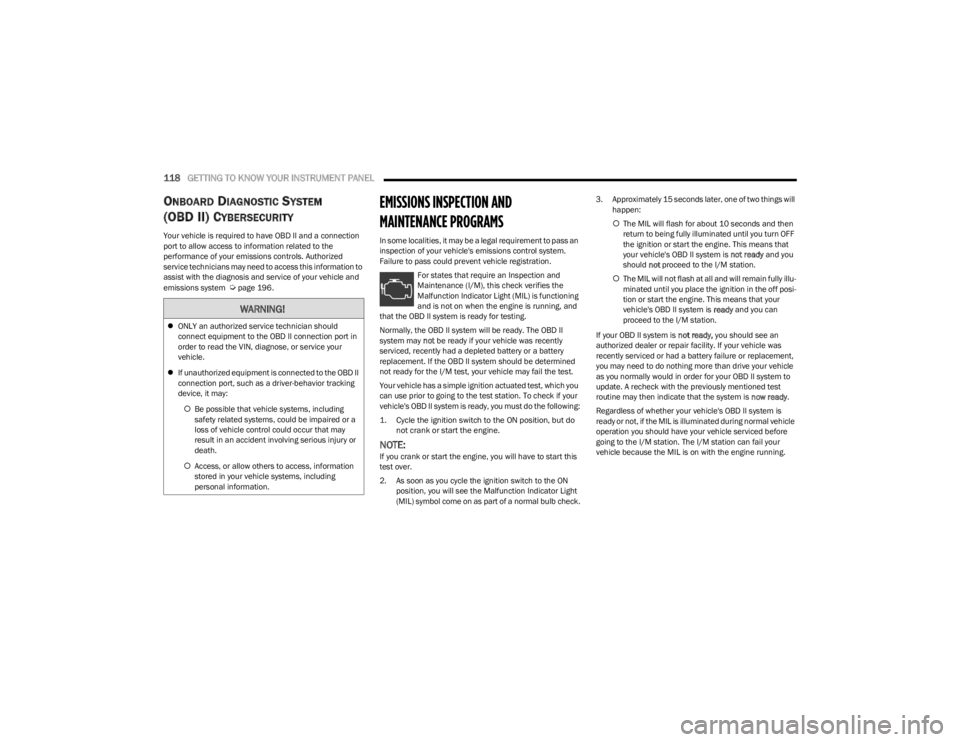
For states that require an Inspection and
Maintenance (I/M), this check verifies the
Malfunction Indicator Light (MIL) is functioning
and is not on when the engine is running, and
that the OBD II system is ready for testing.
Normally, the OBD II system will be ready. The OBD II
system may not be ready if your vehicle was recently
serviced, recently had a depleted battery or a battery
replacement. If the OBD II system should be determined
not ready for the I/M test, your vehicle may fail the test.
Your vehicle has a simple ignition actuated test, which you
can use prior to going to the test station. To check if your
vehicle's OBD II system is ready, you must do the following:
1. Cycle the ignition switch to the ON position, but do not crank or start the engine.
NOTE:If you crank or start the engine, you will have to start this
test over.
2. As soon as you cycle the ignition switch to the ON position, you will see the Malfunction Indicator Light
(MIL) symbol come on as part of a normal bulb check. 3. Approximately 15 seconds later, one of two things will
happen:
The MIL will flash for about 10 seconds and then
return to being fully illuminated until you turn OFF
the ignition or start the engine. This means that
your vehicle's OBD II system is not ready and you
should not proceed to the I/M station.
The MIL will not flash at all and will remain fully illu -
minated until you place the ignition in the off posi -
tion or start the engine. This means that your
vehicle's OBD II system is ready and you can
proceed to the I/M station.
If your OBD II system is not ready, you should see an
authorized dealer or repair facility. If your vehicle was
recently serviced or had a battery failure or replacement,
you may need to do nothing more than drive your vehicle
as you normally would in order for your OBD II system to
update. A recheck with the previously mentioned test
routine may then indicate that the system is now ready.
Regardless of whether your vehicle's OBD II system is
ready or not, if the MIL is illuminated during normal vehicle
operation you should have your vehicle serviced before
going to the I/M station. The I/M station can fail your
vehicle because the MIL is on with the engine running.
WARNING!
ONLY an authorized service technician should
connect equipment to the OBD II connection port in
order to read the VIN, diagnose, or service your
vehicle.
If unauthorized equipment is connected to the OBD II
connection port, such as a driver-behavior tracking
device, it may:
Be possible that vehicle systems, including
safety related systems, could be impaired or a
loss of vehicle control could occur that may
result in an accident involving serious injury or
death.
Access, or allow others to access, information
stored in your vehicle systems, including
personal information.
23_WS_OM_EN_USC_t.book Page 118
Page 122 of 396
120STARTING AND OPERATING
4. If the gear selector is not in PARK and the ENGINE
START/STOP button is pushed once with the vehicle
speed above 5 mph (8 km/h), the instrument cluster will display a “ Vehicle Not In Park ” message and the
engine will remain running. Never leave a vehicle out
of the PARK position, or it could roll.
NOTE:If the gear selector is not in PARK, and the ENGINE START/
STOP button is pushed once with the vehicle speed below
5 mph (8 km/h), the engine will shut off and the ignition
will remain in the ON/RUN position. If vehicle speed drops
below 1.2 mph (1.9 km/h), the vehicle may AutoPark
Úpage 120.
ENGINE START/STOP Button Functions — With Driver’s
Foot Off The Brake Pedal (In PARK Or NEUTRAL Position)
The ENGINE START/STOP button operates similar to an
ignition switch. It has two positions: OFF, and RUN. To
change the ignition positions without starting the vehicle
and use the accessories, follow these directions:
1. Start with the ignition in the OFF position.
2. Push the ENGINE START/STOP button once to place the ignition in the ON/RUN position.
3. Push the ENGINE START/STOP button a second time to return the ignition to the OFF position.
NOTE:Only press one pedal at a time while driving the vehicle.
Torque performance of the vehicle could be reduced if
both pedals are pressed at the same time. If pressure is
detected on both pedals simultaneously, a warning
message will display in the instrument cluster
Úpage 96.
AUTOPARK
AutoPark is a supplemental feature to assist in placing the
vehicle in PARK (P) should the situations on the following
pages occur. It is a back-up system and should not be
relied upon as the primary method by which the driver
shifts the vehicle into PARK.
The conditions under which AutoPark will engage are
outlined on the following pages.
If the vehicle is not in PARK and the driver turns off the
engine, the vehicle may AutoPark.
AutoPark will engage when all of these conditions are met:
Vehicle is equipped with an 8-speed transmission
Vehicle is not in PARK
Vehicle speed is 1.2 mph (1.9 km/h) or less
Ignition is switched from RUN to OFF
NOTE:For Keyless Enter ‘n Go™ equipped vehicles, the engine
will turn off and the ignition switch will change to ON/RUN
position. After 30 minutes the ignition switches to OFF
automatically, unless the driver turns the ignition
switch OFF.
If the vehicle is not in PARK and the driver exits the vehicle
with the engine running, the vehicle may AutoPark.
AutoPark will engage when all of these conditions are met:
Vehicle is equipped with an 8-speed transmission
Vehicle is not in PARK
Vehicle speed is 1.2 mph (1.9 km/h) or less
Driver’s seat belt is unbuckled
Driver’s door is ajar
Brake pedal is not pressed
The message “ AutoPark Engaged Shift To P Then Shift To
Gear ” will display in the instrument cluster.
NOTE:In some cases the ParkSense graphic will be displayed in
the instrument cluster. In these cases, the gear selector
must be returned to “P” to select desired gear.
If the driver shifts into PARK while moving, the vehicle may
AutoPark.
AutoPark will engage ONLY when vehicle speed is 1.2 mph
(1.9 km/h) or less.
The message “ Vehicle Speed Is Too High To Shift To P ” will
be displayed in the instrument cluster if vehicle speed is
above 1.2 mph (1.9 km/h).
WARNING!
Driver inattention could lead to failure to place the
vehicle in PARK. ALWAYS DO A VISUAL CHECK that
your vehicle is in PARK by verifying that a solid (not
blinking) “P” is indicated in the instrument cluster
display and on the gear selector. If the "P" indicator is
blinking, your vehicle is not in PARK. As an added
precaution, always apply the parking brake when
exiting the vehicle.
AutoPark is a supplemental feature. It is not
designed to replace the need to shift your vehicle
into PARK. It is a back up system and should not be
relied upon as the primary method by which the
driver shifts the vehicle into PARK.
23_WS_OM_EN_USC_t.book Page 120
Page 123 of 396
STARTING AND OPERATING121
4WD LOW — If Equipped
AutoPark will be disabled when operating the vehicle in
4WD LOW.
The message “AutoPark Disabled ” will be displayed in the
instrument cluster.
Additional customer warnings will be given when both of
these conditions are met:
Vehicle is not in PARK
Driver’s door is ajar
The message “ AutoPark Not Engaged ” will be displayed in
the instrument cluster. A warning chime will continue until
you shift the vehicle into PARK or the driver’s door is
closed.
ALWAYS DO A VISUAL CHECK
that your vehicle is in PARK
by looking for the "P" in the instrument cluster display and
on the gear selector. As an added precaution, always apply
the parking brake when exiting the vehicle.
EXTENDED PARK STARTING
NOTE:Extended Park condition occurs when the vehicle has not
been started or driven for at least 30 days.
1. Install a battery charger or jumper cables to the battery to ensure a full battery charge during the
crank cycle.
2. Press and hold the brake pedal while pushing the ENGINE START/STOP button once.
3. If the engine fails to start within 10 seconds, wait 10 to 15 seconds to allow the starter to cool, then
repeat the Extended Park Starting procedure.
4. If the engine fails to start after eight attempts, allow the starter to cool for at least 10 minutes, then repeat
the Extended Park Starting procedure.
IF ENGINE FAILS TO START
If the engine fails to start after you have followed the
“Normal Starting” procedure and has not experienced an
extended park condition as defined previously, it may be
flooded. Push the accelerator pedal all the way to the floor
and hold it there while the engine is cranking. This should
clear any excess fuel in case the engine is flooded.
The starter motor will engage automatically, run for
10 seconds, and then disengage. Once this occurs, release the accelerator pedal and the
brake pedal, wait 10 to 15 seconds, then repeat the
“Normal Starting” procedure.
WARNING!
If vehicle speed is above 1.2 mph (1.9 km/h), the
transmission will default to NEUTRAL until the vehicle
speed drops below 1.2 mph (1.9 km/h). A vehicle left in
the NEUTRAL position can roll. As an added precaution,
always apply the parking brake when exiting the vehicle.
CAUTION!
To prevent damage to the starter, do not crank
continuously for more than 10 seconds at a time.
Wait 10 to 15 seconds before trying again.
WARNING!
Never pour fuel or other flammable liquid into the
throttle body air inlet opening in an attempt to start
the vehicle. This could result in flash fire causing
serious personal injury.
Do not attempt to push or tow your vehicle to get it
started. Vehicles equipped with an automatic trans -
mission cannot be started this way. Unburned fuel
could enter the catalytic converter and once the
engine has started, ignite and damage the converter
and vehicle.
If the vehicle has a discharged battery, booster
cables may be used to obtain a start from a booster
battery or the battery in another vehicle. This type of
start can be dangerous if done improperly
Úpage 301.
CAUTION!
To prevent damage to the starter, do not continuously
crank the engine for more than 10 seconds at a time.
Wait 10 to 15 seconds before trying again.
4
23_WS_OM_EN_USC_t.book Page 121
Page 124 of 396
122STARTING AND OPERATING
COLD WEATHER OPERATION
(B
ELOW –22°F OR −30°C)
To ensure reliable starting at these temperatures, use of
an externally powered electric engine block heater
(available from an authorized dealer) is recommended.
AFTER STARTING
The idle speed is controlled automatically, and it will
decrease as the engine warms up.
TURBOCHARGER “COOL DOWN” —
3.0L E
NGINE ONLY
The 3.0L engine is equipped with an after-run pump to
cool the turbocharger after the engine is shut off.
Depending on the type of driving and the amount of cargo,
the pump will run for up to 20 minutes after the engine
has been shut off to circulate coolant through the
turbocharger. Although the pump is rubber-mounted for
quiet operation, it is normal to hear it running during this
time.
ENGINE BLOCK HEATER — IF EQUIPPED
The engine block heater warms the engine, and permits
quicker starts in cold weather. Connect the cord to a
standard 110-115 Volt AC electrical outlet with a
grounded, three-wire extension cord.
The engine block heater must be plugged in at least one
hour to have an adequate warming effect on the engine. The engine block heater cord is coiled and strapped right
behind the engine air cleaner filter assembly from the
manufacturer.
ENGINE BREAK-IN RECOMMENDATIONS
An initial break-in period is recommended for the
powertrain (engine, transmission, axle, etc.) in your
vehicle. Adhering to the following guidelines will contribute
to improved longevity, fuel economy, and performance.
Drive moderately during the first 100 miles (160 km).
After that, for the first 500 miles (800 km), avoid long
periods at constant speed. Varying speed, engine RPM,
and throttle position is desirable.
Avoid high performance, severe off-road, and towing for
the first 500 miles (800 km).
NOTE:A new engine may consume some oil during its first few
thousand miles (km) of operation. This should be
considered a normal part of the break-in and not inter -
preted as a problem. For engines not equipped with an oil
level sensor, please check your oil level frequently during
the break-in period. Add manufacturer-approved oil as
required
Úpage 376.
PARKING BRAKE
ELECTRIC PARK BRAKE (EPB)
Your vehicle is equipped with an EPB that offers simple
operation, and some additional features that make the
parking brake more convenient and useful.
The parking brake is primarily intended to prevent the
vehicle from rolling while parked. Before leaving the
vehicle, make sure that the parking brake is applied. Also,
be certain to leave the transmission in PARK.
You can engage the parking brake in two ways:
Manually, by applying the EPB switch.
Automatically, by enabling the Auto Park Brake feature
in the customer programmable features section of the
Uconnect settings.
WARNING!
Remember to disconnect the engine block heater cord
before driving. Damage to the 110-115 Volt electrical
cord could cause electrocution.
CAUTION!
Never use Non-Detergent Oil or Straight Mineral Oil in
the engine or damage may result. ONLY USE OILS THAT
ARE API APPROVED
Úpage 376.
23_WS_OM_EN_USC_t.book Page 122
Page 127 of 396
STARTING AND OPERATING125
(Continued)
The following conditions must be met for Auto Hold to
activate:
Driver’s door is closed
Driver's seat belt is fastened
Vehicle is at a standstill
Forward gear is selected
ACC is not engaged
EPB is not applied
ParkSense Active Park Assist System auto parking
maneuver is not activated
Brake Maintenance Mode
We recommend having your brakes serviced by an
authorized dealer. You should only make repairs for which
you have the knowledge and the right equipment. You
should only enter Brake Maintenance mode during brake
service.
When servicing your rear brakes, it may be necessary for
you or your technician to push the rear piston into the rear
caliper bore. With the EPB system, this can only be done
after retracting the EPB actuator. Fortunately, actuator
retraction can be done easily by entering the Brake
Maintenance mode through the Uconnect Settings in your
vehicle. This menu-based system will guide you through
the steps necessary to retract the EPB actuator in order to
perform rear brake service. Maintenance mode has requirements that must be met in
order to be activated:
The vehicle must be at a standstill.
The parking brake must be unapplied.
The transmission must be in PARK or NEUTRAL.
While in Maintenance mode, the EPB Warning Light will
flash continuously while the ignition is ON.
When brake service work is complete, the following steps
must be followed to reset the parking brake system to
normal operation:
Ensure the vehicle is at a standstill.
Press the brake pedal with moderate force.
Apply the EPB switch.
AUTOMATIC TRANSMISSION
You must press and hold the brake pedal while shifting out
of PARK.
WARNING!
You can be badly injured working on or around a motor
vehicle. Do only that service work for which you have
the knowledge and the right equipment. If you have any
doubt about your ability to perform a service job, take
your vehicle to a competent mechanic.
WARNING!
Never use the PARK (P) position as a substitute for
the parking brake. Always apply the parking brake
fully when exiting the vehicle to guard against vehicle
movement and possible injury or damage.
Your vehicle could move and injure you and others if
it is not in PARK. Check by trying to move the trans -
mission gear selector out of PARK with the brake
pedal released. Make sure the transmission is in
PARK before exiting the vehicle.
The transmission may not engage PARK if the vehicle
is moving. Always bring the vehicle to a complete
stop before shifting to PARK, and verify that the
transmission gear position indicator solidly indicates
PARK without blinking. Ensure that the vehicle is
completely stopped, and the PARK position is prop -
erly indicated, before exiting the vehicle.
It is dangerous to shift out of PARK or NEUTRAL (N) if
the engine speed is higher than idle speed. If your
foot is not firmly pressing the brake pedal, the
vehicle could accelerate quickly forward or in
reverse. You could lose control of the vehicle and hit
someone or something. Only shift into gear when the
engine is idling normally and your foot is firmly
pressing the brake pedal.
4
23_WS_OM_EN_USC_t.book Page 125
Page 138 of 396
136STARTING AND OPERATING
NOTE:
Even if the power steering assistance is no longer oper -
ational, it is still possible to steer the vehicle. Under
these conditions there will be a substantial increase in
steering effort, especially at low speeds and during
parking maneuvers.
If the condition persists, see an authorized dealer for
service.
If the Steering icon is displayed and the “POWER
STEERING SYSTEM OVER TEMP” message is displayed on
the instrument cluster screen, they indicate that extreme
steering maneuvers may have occurred which caused an
over temperature condition in the electric power steering
system. Once driving conditions are safe, pull over and let
the vehicle idle for a few moments until the icon and
message turn off.
STOP/START SYSTEM — IF EQUIPPED
The Stop/Start function is developed to reduce fuel
consumption. The system will stop the engine
automatically during a vehicle stop if the required
conditions are met. Releasing the brake pedal or pressing
the accelerator pedal will automatically restart the engine
Úpage 136.
This vehicle has been upgraded with a heavy-duty starter,
enhanced battery, and other upgraded engine parts, to
handle the additional engine starts.
AUTOSTOP MODE
The Stop/Start feature is enabled after every normal
customer engine start. At that time, the system will go into
STOP/START READY and if all other conditions are met,
can go into a STOP/START AUTOSTOP ACTIVE Autostop
mode.
To Activate The Autostop Mode, The Following Must Occur:
The system must be in STOP/START READY state. A
“STOP/START READY” message will be displayed in the
instrument cluster display within the Stop/Start
section
Úpage 99.
The vehicle must be completely stopped.
The gear selector must be in a forward gear and the
brake pedal pressed.
The engine will shut down, the tachometer will move to the
zero position, and the Stop/Start telltale will illuminate
indicating you are in Autostop. Customer settings will be
maintained upon return to an engine-running condition.
POSSIBLE REASONS THE ENGINE DOES
N
OT AUTOSTOP
Prior to engine shut down, the system will check many
safety and comfort conditions to see if they are fulfilled.
Detailed information about the operation of the Stop/Start
system may be viewed in the instrument cluster display
Stop/Start Screen. In the following situations, the engine
will not stop:
Driver’s seat belt is not buckled.
Driver’s door is not closed.
Battery temperature is too warm or cold.
Battery charge is low.
The vehicle is on a steep grade.
Cabin heating or cooling is in process and an accept -
able cabin temperature has not been achieved.
HVAC is set to full defrost mode at a high blower speed.
HVAC is set to MAX A/C.
Engine has not reached normal operating temperature.
The transmission is not in a forward gear.
Hood is open.
Vehicle is in 4WD LOW, or an off-road
Selec-Terrain mode.
Brake pedal is not pressed with sufficient pressure.
Accelerator pedal input.
Engine temperature is too high.
5 mph (8 km/h) threshold has not been achieved from
previous Autostop.
Steering angle is beyond threshold.
It may be possible for the vehicle to be driven several
times without the Stop/Start system going into a
STOP/START READY state under more extreme conditions
of the items listed above.
TO START THE ENGINE WHILE IN
A
UTOSTOP MODE
While in a forward gear, the engine will start when the
brake pedal is released or the throttle pedal is pressed.
The transmission will automatically re-engage upon
engine restart.
23_WS_OM_EN_USC_t.book Page 136
Page 139 of 396
STARTING AND OPERATING137
Conditions That Will Cause The Engine To Start
Automatically While In Autostop Mode:
The transmission selector is moved out of DRIVE.
To maintain cabin temperature comfort.
HVAC is set to full defrost mode.
HVAC system temperature or fan speed is manually
adjusted.
Battery voltage drops too low.
Stop/Start OFF switch is pushed.
A Stop/Start system error occurs.
4WD LOW, or an off-road Selec-Terrain mode is
selected.
An off-road Selec-Terrain mode is selected.
Steering angle is beyond threshold.
TO MANUALLY TURN OFF THE
S
TOP/START SYSTEM
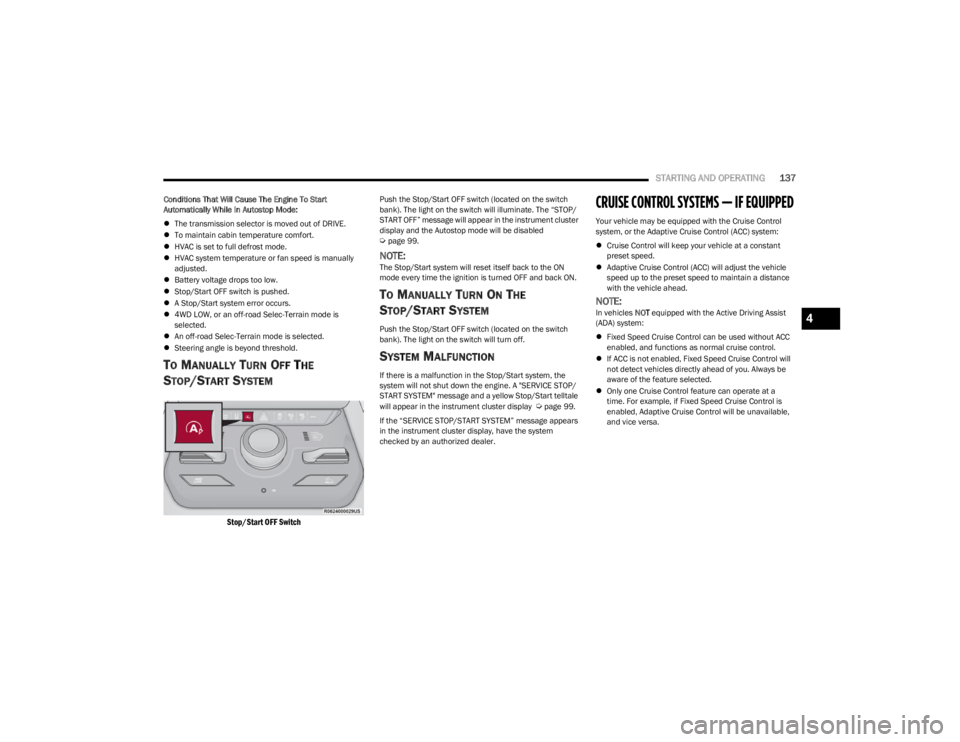
Stop/Start OFF Switch
Push the Stop/Start OFF switch (located on the switch
bank). The light on the switch will illuminate. The “STOP/
START OFF” message will appear in the instrument cluster
display and the Autostop mode will be disabled
Úpage 99.
NOTE:The Stop/Start system will reset itself back to the ON
mode every time the ignition is turned OFF and back ON.
TO MANUALLY TURN ON THE
S
TOP/START SYSTEM
Push the Stop/Start OFF switch (located on the switch
bank). The light on the switch will turn off.
SYSTEM MALFUNCTION
If there is a malfunction in the Stop/Start system, the
system will not shut down the engine. A "SERVICE STOP/
START SYSTEM" message and a yellow Stop/Start telltale
will appear in the instrument cluster display
Úpage 99.
If the “SERVICE STOP/START SYSTEM” message appears
in the instrument cluster display, have the system
checked by an authorized dealer.
CRUISE CONTROL SYSTEMS — IF EQUIPPED
Your vehicle may be equipped with the Cruise Control
system, or the Adaptive Cruise Control (ACC) system:
Cruise Control will keep your vehicle at a constant
preset speed.
Adaptive Cruise Control (ACC) will adjust the vehicle
speed up to the preset speed to maintain a distance
with the vehicle ahead.
NOTE:In vehicles NOT equipped with the Active Driving Assist
(ADA) system:
Fixed Speed Cruise Control can be used without ACC
enabled, and functions as normal cruise control.
If ACC is not enabled, Fixed Speed Cruise Control will
not detect vehicles directly ahead of you. Always be
aware of the feature selected.
Only one Cruise Control feature can operate at a
time. For example, if Fixed Speed Cruise Control is
enabled, Adaptive Cruise Control will be unavailable,
and vice versa.4
23_WS_OM_EN_USC_t.book Page 137
Page 195 of 396
STARTING AND OPERATING193
Shifting Out Of N (Neutral)
Use the following procedure to prepare your vehicle for
normal usage:
1. Bring the vehicle to a complete stop, leaving it
connected to the tow vehicle.
2. Apply the Electric Park Brake.
3. Start the engine.
NOTE:
Steps 1 through 5 are requirements that must be
met before pushing the N (Neutral) button, and
must continue to be met until the shift has been
completed. If any of these requirements are not
met before pushing the N (Neutral) button or are
no longer met during the shift, the N (Neutral) indi -
cator light will flash continuously until all require -
ments are met or until the N (Neutral) button is
released.
The ignition must be in the ON/RUN position for a
shift to take place and for the position indicator
lights to be operable. If the ignition is not in the
ON/RUN position, the shift will not take place and
no position indicator lights will be on or flashing.
A flashing N (Neutral) position indicator light indi-
cates that shift requirements have not been met.
4. Press and hold the brake pedal.
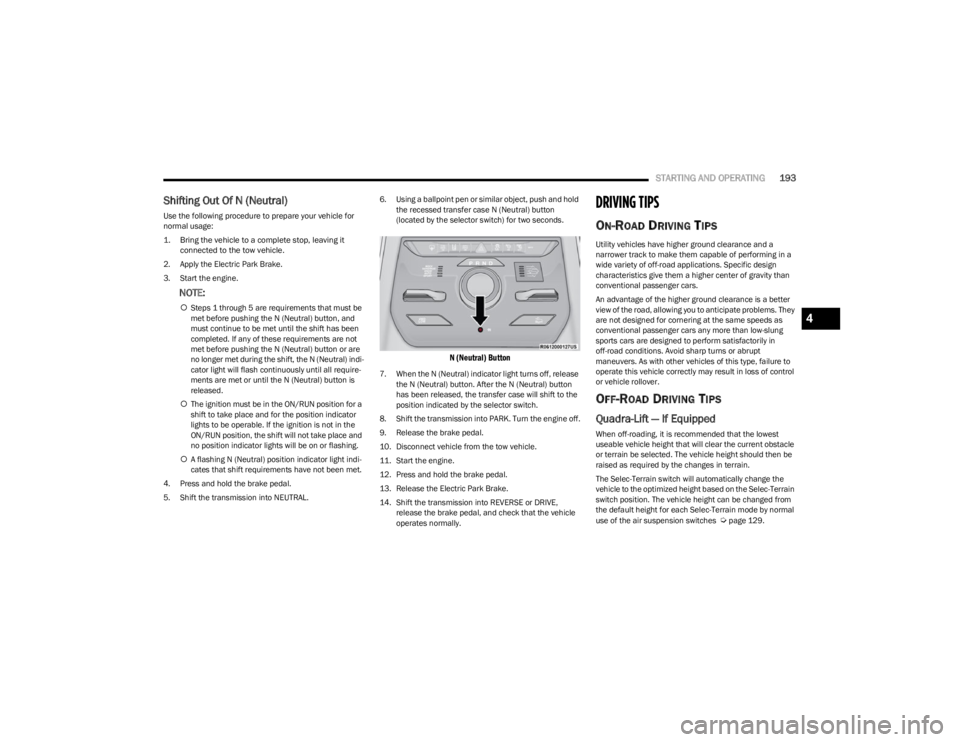
5. Shift the transmission into NEUTRAL. 6. Using a ballpoint pen or similar object, push and hold
the recessed transfer case N (Neutral) button
(located by the selector switch) for two seconds.
N (Neutral) Button
7. When the N (Neutral) indicator light turns off, release the N (Neutral) button. After the N (Neutral) button
has been released, the transfer case will shift to the
position indicated by the selector switch.
8. Shift the transmission into PARK. Turn the engine off.
9. Release the brake pedal.
10. Disconnect vehicle from the tow vehicle.
11. Start the engine.
12. Press and hold the brake pedal.
13. Release the Electric Park Brake.
14. Shift the transmission into REVERSE or DRIVE, release the brake pedal, and check that the vehicle
operates normally.
DRIVING TIPS
ON-ROAD DRIVING TIPS
Utility vehicles have higher ground clearance and a
narrower track to make them capable of performing in a
wide variety of off-road applications. Specific design
characteristics give them a higher center of gravity than
conventional passenger cars.
An advantage of the higher ground clearance is a better
view of the road, allowing you to anticipate problems. They
are not designed for cornering at the same speeds as
conventional passenger cars any more than low-slung
sports cars are designed to perform satisfactorily in
off-road conditions. Avoid sharp turns or abrupt
maneuvers. As with other vehicles of this type, failure to
operate this vehicle correctly may result in loss of control
or vehicle rollover.
OFF-ROAD DRIVING TIPS
Quadra-Lift — If Equipped
When off-roading, it is recommended that the lowest
useable vehicle height that will clear the current obstacle
or terrain be selected. The vehicle height should then be
raised as required by the changes in terrain.
The Selec-Terrain switch will automatically change the
vehicle to the optimized height based on the Selec-Terrain
switch position. The vehicle height can be changed from
the default height for each Selec-Terrain mode by normal
use of the air suspension switches
Úpage 129.
4
23_WS_OM_EN_USC_t.book Page 193
Page 196 of 396
194STARTING AND OPERATING
When To Use 4WD LOW — If Equipped
When off-road driving, shift to 4WD LOW for additional
traction. This range should be limited to extreme
situations such as deep snow, mud, or sand where
additional low speed pulling power is needed. Vehicle
speeds in excess of 25 mph (40 km/h) should be avoided
when in 4WD LOW.
Driving Through Water
Although your vehicle is capable of driving through water,
there are a number of precautions that must be
considered before entering the water.
NOTE:Your vehicle is capable of water fording in up to 20 inches
(51 cm) of water, while crossing small rivers or streams. To
maintain optimal performance of your vehicle's heating
and ventilation system it is recommended to switch the
system into recirculation mode during water fording. Driving through water more than a few inches/
centimeters deep will require extra caution to ensure
safety and prevent damage to your vehicle. If you must
drive through water, try to determine the depth and the
bottom condition (and location of any obstacles) prior to
entering. Proceed with caution and maintain a steady
controlled speed less than 5 mph (8 km/h) in deep water
to minimize wave effects.
Flowing Water
If the water is swift flowing and rising (as in storm run-off),
avoid crossing until the water level recedes and/or the
flow rate is reduced. If you must cross flowing water avoid
depths in excess of 9 inches (23 cm). The flowing water
can erode the streambed, causing your vehicle to sink into
deeper water. Determine exit point(s) that are
downstream of your entry point to allow for drifting.
Standing Water
Avoid driving in standing water deeper than 24 inches
(60 cm), and reduce speed appropriately to minimize
wave effects. Maximum speed is 5 mph (8 km/h).Maintenance
After driving through deep water, inspect your vehicle
fluids and lubricants (engine oil, transmission oil, axle,
transfer case) to ensure the fluids have not been
contaminated. Contaminated fluid (milky, foamy in
appearance) should be flushed/changed as soon as
possible to prevent component damage.
Driving In Snow, Mud And Sand
In heavy snow, when pulling a load, or for additional
control at slower speeds, shift the transmission to a low
gear and shift the transfer case to 4WD LOW if necessary
Úpage 129. Only shift into a lower gear to maintain
forward motion. Over-revving the engine can spin the
wheels and traction will be lost.
Avoid abrupt downshifts on icy or slippery roads, because
engine braking may cause skidding and loss of control.
Hill Climbing
NOTE:Before attempting to climb a hill, determine the conditions
at the crest and/or on the other side.
Before climbing a steep hill, shift the transmission to a
lower gear and shift the transfer case to 4WD LOW. Use
FIRST gear and 4WD LOW for very steep hills.
WARNING!
Do not drive in 4WD LOW on dry pavement; driveline
damage may result. 4WD LOW locks front and rear
drivelines together and does not allow for differential
action between the front to rear driveshafts. Driving in
4WD LOW on pavement will cause driveline binding;
use only on wet or slippery surfaces.
CAUTION!
When driving through water, do not exceed 5 mph
(8 km/h). Always check water depth before entering as
a precaution, and check all fluids afterward. Driving
through water may cause damage that may not be
covered by the New Vehicle Limited Warranty.
23_WS_OM_EN_USC_t.book Page 194