key JEEP WAGONEER 2023 Service Manual
[x] Cancel search | Manufacturer: JEEP, Model Year: 2023, Model line: WAGONEER, Model: JEEP WAGONEER 2023Pages: 396, PDF Size: 15.17 MB
Page 97 of 396
GETTING TO KNOW YOUR VEHICLE95
REMOVING THE CROSSBARS
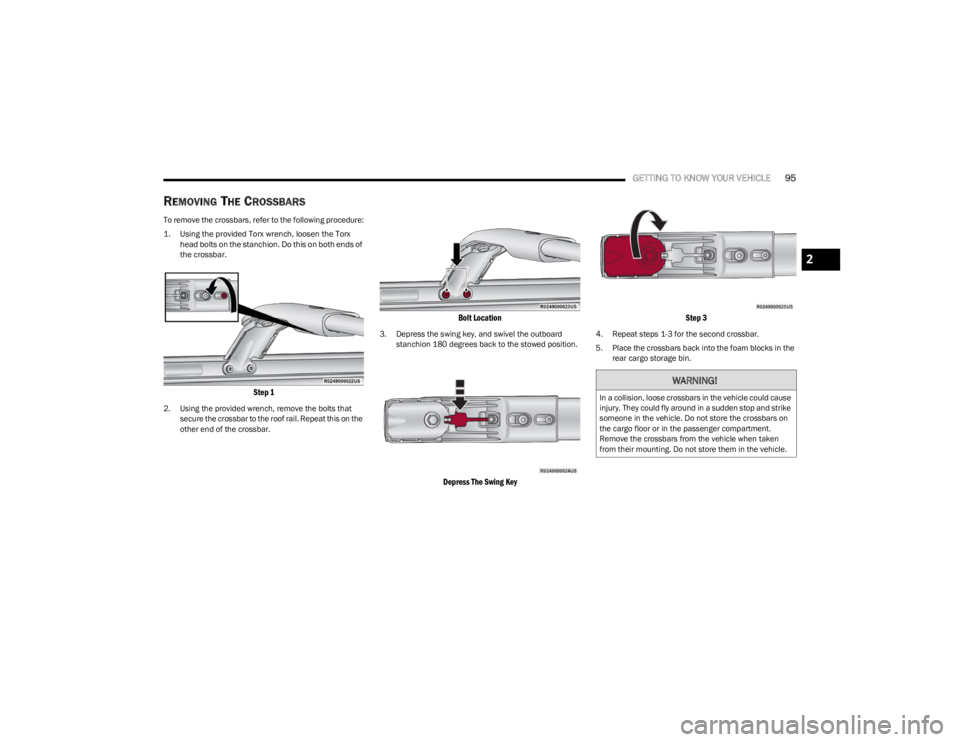
To remove the crossbars, refer to the following procedure:
1. Using the provided Torx wrench, loosen the Torx
head bolts on the stanchion. Do this on both ends of
the crossbar.
Step 1
2. Using the provided wrench, remove the bolts that secure the crossbar to the roof rail. Repeat this on the
other end of the crossbar.
Bolt Location
3. Depress the swing key, and swivel the outboard stanchion 180 degrees back to the stowed position.
Depress The Swing Key Step 3
4. Repeat steps 1-3 for the second crossbar.
5. Place the crossbars back into the foam blocks in the
rear cargo storage bin.
WARNING!
In a collision, loose crossbars in the vehicle could cause
injury. They could fly around in a sudden stop and strike
someone in the vehicle. Do not store the crossbars on
the cargo floor or in the passenger compartment.
Remove the crossbars from the vehicle when taken
from their mounting. Do not store them in the vehicle.
2
23_WS_OM_EN_USC_t.book Page 95
Page 99 of 396
GETTING TO KNOW YOUR INSTRUMENT PANEL97
Use this QR code to access your digital
experience.
INSTRUMENT CLUSTER
D
ESCRIPTIONS
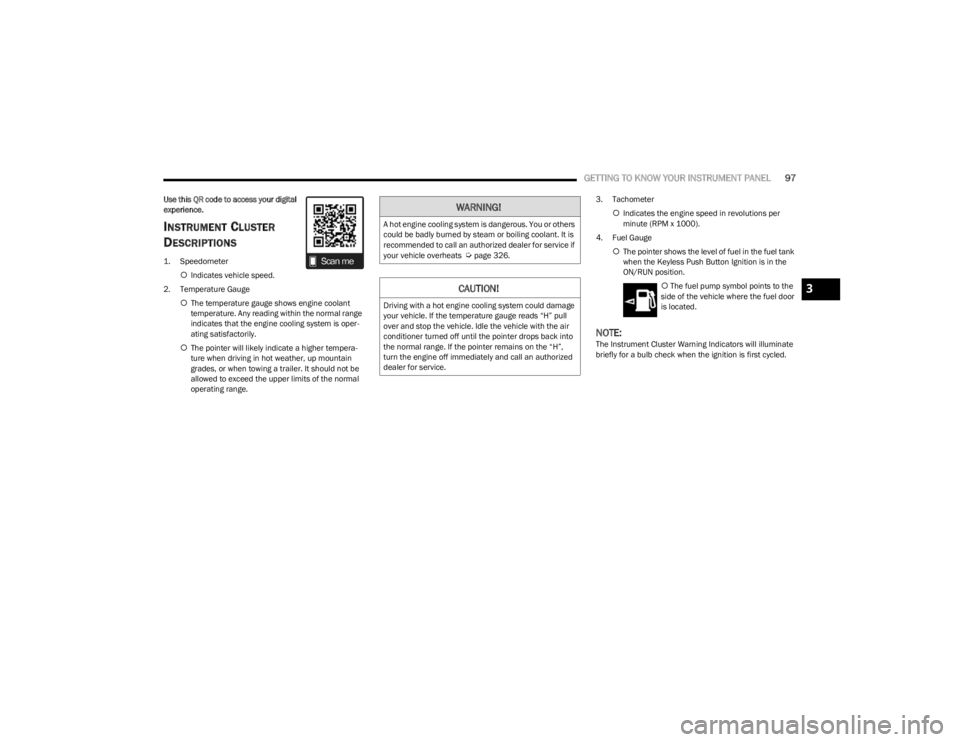
1. Speedometer
Indicates vehicle speed.
2. Temperature Gauge The temperature gauge shows engine coolant
temperature. Any reading within the normal range
indicates that the engine cooling system is oper -
ating satisfactorily.
The pointer will likely indicate a higher tempera -
ture when driving in hot weather, up mountain
grades, or when towing a trailer. It should not be
allowed to exceed the upper limits of the normal
operating range. 3. Tachometer
Indicates the engine speed in revolutions per
minute (RPM x 1000).
4. Fuel Gauge The pointer shows the level of fuel in the fuel tank
when the Keyless Push Button Ignition is in the
ON/RUN position.
The fuel pump symbol points to the
side of the vehicle where the fuel door
is located.
NOTE:The Instrument Cluster Warning Indicators will illuminate
briefly for a bulb check when the ignition is first cycled.
WARNING!
A hot engine cooling system is dangerous. You or others
could be badly burned by steam or boiling coolant. It is
recommended to call an authorized dealer for service if
your vehicle overheats
Úpage 326.
CAUTION!
Driving with a hot engine cooling system could damage
your vehicle. If the temperature gauge reads “H” pull
over and stop the vehicle. Idle the vehicle with the air
conditioner turned off until the pointer drops back into
the normal range. If the pointer remains on the “H”,
turn the engine off immediately and call an authorized
dealer for service.
3
23_WS_OM_EN_USC_t.book Page 97
Page 101 of 396
GETTING TO KNOW YOUR INSTRUMENT PANEL99
INSTRUMENT CLUSTER DESCRIPTIONS
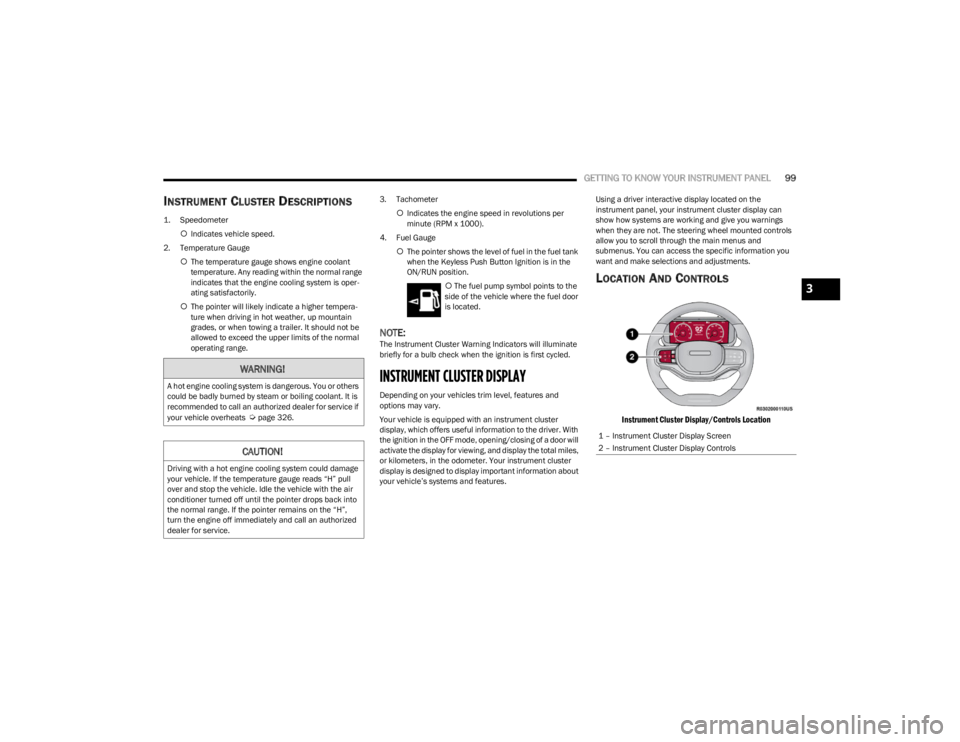
1. Speedometer
Indicates vehicle speed.
2. Temperature Gauge The temperature gauge shows engine coolant
temperature. Any reading within the normal range
indicates that the engine cooling system is oper -
ating satisfactorily.
The pointer will likely indicate a higher tempera -
ture when driving in hot weather, up mountain
grades, or when towing a trailer. It should not be
allowed to exceed the upper limits of the normal
operating range. 3. Tachometer
Indicates the engine speed in revolutions per
minute (RPM x 1000).
4. Fuel Gauge The pointer shows the level of fuel in the fuel tank
when the Keyless Push Button Ignition is in the
ON/RUN position.
The fuel pump symbol points to the
side of the vehicle where the fuel door
is located.
NOTE:The Instrument Cluster Warning Indicators will illuminate
briefly for a bulb check when the ignition is first cycled.
INSTRUMENT CLUSTER DISPLAY
Depending on your vehicles trim level, features and
options may vary.
Your vehicle is equipped with an instrument cluster
display, which offers useful information to the driver. With
the ignition in the OFF mode, opening/closing of a door will
activate the display for viewing, and display the total miles,
or kilometers, in the odometer. Your instrument cluster
display is designed to display important information about
your vehicle’s systems and features. Using a driver interactive display located on the
instrument panel, your instrument cluster display can
show how systems are working and give you warnings
when they are not. The steering wheel mounted controls
allow you to scroll through the main menus and
submenus. You can access the specific information you
want and make selections and adjustments.
LOCATION AND CONTROLS
Instrument Cluster Display/Controls Location
WARNING!
A hot engine cooling system is dangerous. You or others
could be badly burned by steam or boiling coolant. It is
recommended to call an authorized dealer for service if
your vehicle overheats
Úpage 326.
CAUTION!
Driving with a hot engine cooling system could damage
your vehicle. If the temperature gauge reads “H” pull
over and stop the vehicle. Idle the vehicle with the air
conditioner turned off until the pointer drops back into
the normal range. If the pointer remains on the “H”,
turn the engine off immediately and call an authorized
dealer for service.
1 – Instrument Cluster Display Screen
2 – Instrument Cluster Display Controls
3
23_WS_OM_EN_USC_t.book Page 99
Page 104 of 396
102GETTING TO KNOW YOUR INSTRUMENT PANEL
Vehicles Equipped With Keyless Enter ‘n Go™ Ignition
Use the steering wheel instrument cluster display controls
for the following procedure(s):
1. Without pressing the brake pedal, push the ENGINE
START/STOP button and place the ignition in the
ON/RUN position (do not start the engine).
2. Push and release the down arrow button to scroll
downward through the main menu to “Vehicle Info”.
3. Push and release the right arrow button to access
the “Oil Life” screen.
4. Push and hold the OK button to reset oil life. If
conditions are met, the gauge and numeric display
will update to show 100%. If conditions are not met a
pop-up message of “To reset oil life engine must be
off with ignition in run” will be displayed (for five
seconds), and the user will remain at the Oil Life
screen.
5. Push and release the up or down arrow button
to exit the submenu screen.
NOTE:If the indicator message illuminates when you start the
vehicle, the oil change indicator system did not reset. If
necessary, repeat this procedure.
Secondary Method Of Resetting Engine Oil Life
1. Without pressing the brake pedal, push the ENGINE START/STOP button and place the ignition to the
ON/RUN position (do not start the engine).
2. Fully press the accelerator pedal, slowly, three times within 10 seconds. 3. Without pushing the brake pedal, push the ENGINE
START/STOP button once to return the ignition to the
OFF position.
NOTE:If the indicator message illuminates when you start the
vehicle, the oil change indicator system did not reset. If
necessary, repeat this procedure.
DISPLAY AND MESSAGES
The instrument cluster display is located in the center
portion of the cluster and consist of multiple sections:
Main Screen — The inner ring of the display will illumi -
nate in black under normal conditions, yellow for non
critical warnings and red for critical warnings
Submenu Dots — Whenever there are submenus avail -
able, the position within the submenus is shown here
Reconfigurable Telltales/Information
Gear Selector Status (PRND)
Driver Interactive Display (Compass, Temp, Range to
Empty, Trip A, Trip B, Average Fuel Economy, Current
Fuel Economy and Time)
Air Suspension Status — If Equipped
Four-Wheel Drive (4WD) Status — If Equipped
The instrument cluster display will normally display the
main menu or the screens of a selected feature of the
main menu. The main display area also displays pop-up
messages and warning or information messages. These
pop-up messages fall into several categories:
Five Second Stored Messages
When the appropriate conditions occur, this type of
message takes control of the main display area for five
seconds and then returns to the previous screen. Most
of the messages of this type are then stored (as long as
the condition that activated it remains active) and can
be reviewed from the “Messages” main menu item.
Examples of this message type are “Right Front Turn
Signal Lamp Out” and “Low Tire Pressure”.
Unstored Messages
This message type is displayed indefinitely or until the
condition that activated the message is cleared. Exam -
ples of this message type are “Turn Signal On” (if a turn
signal is left on) and “Lights On” (if driver leaves the
vehicle with the lights on).
Unstored Messages Until RUN
These messages deal primarily with the Remote Start
feature. This message type is displayed until the igni -
tion is in the RUN state. Examples of this message type
are “Remote Start Canceled - Door Ajar” and “Press
Brake Pedal and Push Button to Start”.
Five Second Unstored Messages
When the appropriate conditions occur, this type of
message takes control of the main display area for five
seconds and then returns to the previous screen. An
example of this message type is “Automatic High
Beams On”.
23_WS_OM_EN_USC_t.book Page 102
Page 121 of 396
119
STARTING AND OPERATING
STARTING THE ENGINE
Before starting your vehicle, adjust your seat, adjust the inside
and outside mirrors, fasten your seat belt, and if present,
instruct all other occupants to buckle their seat belts.
AUTOMATIC TRANSMISSION
The gear selector must be in the NEUTRAL (N) or PARK (P)
position before you can start the engine. Apply the brakes
before shifting into any driving gear.
KEYLESS ENTER ‘N GO™ — IGNITION
This feature allows the driver to operate the ignition
switch with the push of a button, as long as the Remote
Start/Keyless Enter ‘n Go™ key fob is in the passenger
compartment.
NORMAL STARTING
To Turn On The Engine Using The ENGINE START/STOP
Button
1. The transmission must be in PARK (P).
2. Press and hold the brake pedal while pushing the ENGINE START/STOP button once.
3. The system takes over and attempts to start the vehicle. If the vehicle fails to start, the starter will
disengage automatically after 10 seconds.
4. If you wish to stop the cranking of the engine prior to the engine starting, push the ENGINE START/STOP
button again.
To Turn Off The Engine Using The ENGINE START/STOP
Button
1. Place the gear selector in PARK, then push and release the ENGINE START/STOP button.
2. The ignition will return to the OFF position.
3. If the gear selector is not in PARK, the ENGINE START/STOP button must be held for two seconds or
three short pushes in a row with the vehicle speed
above 5 mph (8 km/h) before the engine will shut off.
The ignition will remain in the ON/RUN position until
the gear selector is in PARK and the button is pushed
twice to the OFF position.
WARNING!
Before exiting a vehicle, always come to a complete
stop, then shift the automatic transmission into PARK
and apply the parking brake.
Always make sure the keyless ignition node is in the
OFF position, key fob is removed from the vehicle and
vehicle is locked.
Never leave children alone in a vehicle, or with access
to an unlocked vehicle. Leaving children in a vehicle
unattended is dangerous for a number of reasons. A
child or others could be seriously or fatally injured.
Children should be warned not to touch the parking
brake, brake pedal or the gear selector.
Do not leave the key fob in or near the vehicle, or in a
location accessible to children, and do not leave the
ignition of a vehicle equipped with Keyless
Enter ‘n Go™ in the ON/RUN position. A child could
operate power windows, other controls, or move the
vehicle.
Do not leave children or animals inside parked vehi -
cles in hot weather. Interior heat build-up may cause
serious injury or death.
CAUTION!
Damage to the transmission may occur if the following
precautions are not observed:
Do not shift from REVERSE (R), PARK, or NEUTRAL
into any forward gear when the engine is above idle
speed.
Shift into PARK only after the vehicle has come to a
complete stop.
Shift into or out of REVERSE only after the vehicle has
come to a complete stop and the engine is at idle
speed.
Before shifting into any gear, make sure your foot is
firmly on the brake pedal.4
23_WS_OM_EN_USC_t.book Page 119
Page 122 of 396
120STARTING AND OPERATING
4. If the gear selector is not in PARK and the ENGINE
START/STOP button is pushed once with the vehicle
speed above 5 mph (8 km/h), the instrument cluster will display a “ Vehicle Not In Park ” message and the
engine will remain running. Never leave a vehicle out
of the PARK position, or it could roll.
NOTE:If the gear selector is not in PARK, and the ENGINE START/
STOP button is pushed once with the vehicle speed below
5 mph (8 km/h), the engine will shut off and the ignition
will remain in the ON/RUN position. If vehicle speed drops
below 1.2 mph (1.9 km/h), the vehicle may AutoPark
Úpage 120.
ENGINE START/STOP Button Functions — With Driver’s
Foot Off The Brake Pedal (In PARK Or NEUTRAL Position)
The ENGINE START/STOP button operates similar to an
ignition switch. It has two positions: OFF, and RUN. To
change the ignition positions without starting the vehicle
and use the accessories, follow these directions:
1. Start with the ignition in the OFF position.
2. Push the ENGINE START/STOP button once to place the ignition in the ON/RUN position.
3. Push the ENGINE START/STOP button a second time to return the ignition to the OFF position.
NOTE:Only press one pedal at a time while driving the vehicle.
Torque performance of the vehicle could be reduced if
both pedals are pressed at the same time. If pressure is
detected on both pedals simultaneously, a warning
message will display in the instrument cluster
Úpage 96.
AUTOPARK
AutoPark is a supplemental feature to assist in placing the
vehicle in PARK (P) should the situations on the following
pages occur. It is a back-up system and should not be
relied upon as the primary method by which the driver
shifts the vehicle into PARK.
The conditions under which AutoPark will engage are
outlined on the following pages.
If the vehicle is not in PARK and the driver turns off the
engine, the vehicle may AutoPark.
AutoPark will engage when all of these conditions are met:
Vehicle is equipped with an 8-speed transmission
Vehicle is not in PARK
Vehicle speed is 1.2 mph (1.9 km/h) or less
Ignition is switched from RUN to OFF
NOTE:For Keyless Enter ‘n Go™ equipped vehicles, the engine
will turn off and the ignition switch will change to ON/RUN
position. After 30 minutes the ignition switches to OFF
automatically, unless the driver turns the ignition
switch OFF.
If the vehicle is not in PARK and the driver exits the vehicle
with the engine running, the vehicle may AutoPark.
AutoPark will engage when all of these conditions are met:
Vehicle is equipped with an 8-speed transmission
Vehicle is not in PARK
Vehicle speed is 1.2 mph (1.9 km/h) or less
Driver’s seat belt is unbuckled
Driver’s door is ajar
Brake pedal is not pressed
The message “ AutoPark Engaged Shift To P Then Shift To
Gear ” will display in the instrument cluster.
NOTE:In some cases the ParkSense graphic will be displayed in
the instrument cluster. In these cases, the gear selector
must be returned to “P” to select desired gear.
If the driver shifts into PARK while moving, the vehicle may
AutoPark.
AutoPark will engage ONLY when vehicle speed is 1.2 mph
(1.9 km/h) or less.
The message “ Vehicle Speed Is Too High To Shift To P ” will
be displayed in the instrument cluster if vehicle speed is
above 1.2 mph (1.9 km/h).
WARNING!
Driver inattention could lead to failure to place the
vehicle in PARK. ALWAYS DO A VISUAL CHECK that
your vehicle is in PARK by verifying that a solid (not
blinking) “P” is indicated in the instrument cluster
display and on the gear selector. If the "P" indicator is
blinking, your vehicle is not in PARK. As an added
precaution, always apply the parking brake when
exiting the vehicle.
AutoPark is a supplemental feature. It is not
designed to replace the need to shift your vehicle
into PARK. It is a back up system and should not be
relied upon as the primary method by which the
driver shifts the vehicle into PARK.
23_WS_OM_EN_USC_t.book Page 120
Page 125 of 396
STARTING AND OPERATING123
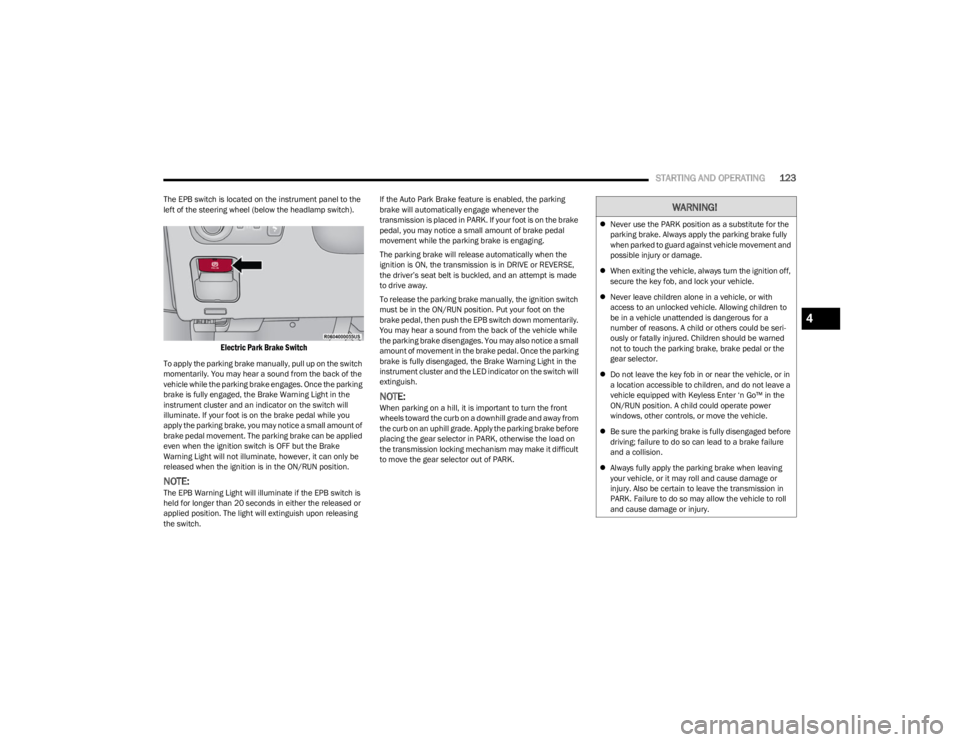
The EPB switch is located on the instrument panel to the
left of the steering wheel (below the headlamp switch).
Electric Park Brake Switch
To apply the parking brake manually, pull up on the switch
momentarily. You may hear a sound from the back of the
vehicle while the parking brake engages. Once the parking
brake is fully engaged, the Brake Warning Light in the
instrument cluster and an indicator on the switch will
illuminate. If your foot is on the brake pedal while you
apply the parking brake, you may notice a small amount of
brake pedal movement. The parking brake can be applied
even when the ignition switch is OFF but the Brake
Warning Light will not illuminate, however, it can only be
released when the ignition is in the ON/RUN position.
NOTE:The EPB Warning Light will illuminate if the EPB switch is
held for longer than 20 seconds in either the released or
applied position. The light will extinguish upon releasing
the switch. If the Auto Park Brake feature is enabled, the parking
brake will automatically engage whenever the
transmission is placed in PARK. If your foot is on the brake
pedal, you may notice a small amount of brake pedal
movement while the parking brake is engaging.
The parking brake will release automatically when the
ignition is ON, the transmission is in DRIVE or REVERSE,
the driver’s seat belt is buckled, and an attempt is made
to drive away.
To release the parking brake manually, the ignition switch
must be in the ON/RUN position. Put your foot on the
brake pedal, then push the EPB switch down momentarily.
You may hear a sound from the back of the vehicle while
the parking brake disengages. You may also notice a small
amount of movement in the brake pedal. Once the parking
brake is fully disengaged, the Brake Warning Light in the
instrument cluster and the LED indicator on the switch will
extinguish.
NOTE:When parking on a hill, it is important to turn the front
wheels toward the curb on a downhill grade and away from
the curb on an uphill grade. Apply the parking brake before
placing the gear selector in PARK, otherwise the load on
the transmission locking mechanism may make it difficult
to move the gear selector out of PARK.
WARNING!
Never use the PARK position as a substitute for the
parking brake. Always apply the parking brake fully
when parked to guard against vehicle movement and
possible injury or damage.
When exiting the vehicle, always turn the ignition off,
secure the key fob, and lock your vehicle.
Never leave children alone in a vehicle, or with
access to an unlocked vehicle. Allowing children to
be in a vehicle unattended is dangerous for a
number of reasons. A child or others could be seri -
ously or fatally injured. Children should be warned
not to touch the parking brake, brake pedal or the
gear selector.
Do not leave the key fob in or near the vehicle, or in
a location accessible to children, and do not leave a
vehicle equipped with Keyless Enter ‘n Go™ in the
ON/RUN position. A child could operate power
windows, other controls, or move the vehicle.
Be sure the parking brake is fully disengaged before
driving; failure to do so can lead to a brake failure
and a collision.
Always fully apply the parking brake when leaving
your vehicle, or it may roll and cause damage or
injury. Also be certain to leave the transmission in
PARK. Failure to do so may allow the vehicle to roll
and cause damage or injury.
4
23_WS_OM_EN_USC_t.book Page 123
Page 128 of 396

126STARTING AND OPERATING
IGNITION PARK INTERLOCK
This vehicle is equipped with an Ignition Park Interlock
which requires the transmission to be in PARK (P) before
the ignition can be turned to the OFF position. This helps
the driver avoid inadvertently leaving the vehicle without
placing the transmission in PARK. This system also locks
the transmission in PARK whenever the ignition is in the
OFF position.
NOTE:The transmission is NOT locked in PARK when the ignition
is in the ON/RUN position (even though the engine will be
off). Ensure that the transmission is in PARK, and the
ignition is OFF (not in ON/RUN position) before exiting the
vehicle.
BRAKE/TRANSMISSION SHIFT
I
NTERLOCK (BTSI) SYSTEM
This vehicle is equipped with a BTSI system that holds the
transmission gear selector in PARK unless the brakes are
applied. To shift the transmission out of PARK, the engine
must be running and the brake pedal must be pressed.
The brake pedal must also be pressed to shift from
NEUTRAL into DRIVE or REVERSE when the vehicle is
stopped or moving at low speeds.
8-SPEED AUTOMATIC TRANSMISSION
The transmission is controlled using a rotary electronic
gear selector located on the center console. The
transmission gear range (PRND) is displayed both above
the gear selector and in the instrument cluster. To select
a gear range, simply rotate the gear selector. You must
press the brake pedal to shift the transmission out of
PARK (or NEUTRAL, when the vehicle is stopped or moving
at low speeds). To shift past multiple gear ranges at once
(such as PARK to DRIVE), simply rotate the gear selector
to the appropriate detent. Select the DRIVE range for
normal driving.
NOTE:In the event of a mismatch between the gear selector
position and the actual transmission gear (for example,
driver selects PARK while driving), the position indicator
will blink continuously until the selector is returned to the
proper position, or the requested shift can be completed.
Unintended movement of a vehicle could injure
those in or near the vehicle. As with all vehicles, you
should never exit a vehicle while the engine is
running. Before exiting a vehicle, always come to a
complete stop, then apply the parking brake, shift
the transmission into PARK, and turn the ignition
OFF. When the ignition is in the OFF position, the
transmission is locked in PARK, securing the vehicle
against unwanted movement.
When exiting the vehicle, always make sure the igni -
tion is in the OFF position, remove the key fob from
the vehicle, and lock the vehicle.
Never leave children alone in a vehicle, or with
access to an unlocked vehicle. Allowing children to
be in a vehicle unattended is dangerous for a
number of reasons. A child or others could be seri -
ously or fatally injured. Children should be warned
not to touch the parking brake, brake pedal or the
transmission gear selector.
Do not leave the key fob in or near the vehicle (or in
a location accessible to children), and do not leave
the ignition in the ON/RUN position. A child could
operate power windows, other controls, or move the
vehicle.
WARNING!CAUTION!
Damage to the transmission may occur if the following
precautions are not observed:
Shift into or out of PARK or REVERSE (R) only after
the vehicle has come to a complete stop.
Do not shift between PARK, REVERSE, NEUTRAL, or
DRIVE (D) when the engine is above idle speed.
Before shifting into any gear, make sure your foot is
firmly pressing the brake pedal.
23_WS_OM_EN_USC_t.book Page 126
Page 129 of 396
STARTING AND OPERATING127
The electronically controlled transmission adapts its shift
schedule based on driver inputs, along with environmental
and road conditions. The transmission electronics are
self-calibrating; therefore, the first few shifts on a new
vehicle may be somewhat abrupt. This is a normal
condition, and precision shifts will develop within a few
hundred miles (kilometers).
Only shift from DRIVE to PARK or REVERSE when the
accelerator pedal is released and the vehicle is stopped.
Be sure to keep your foot on the brake pedal when shifting
between these gears.
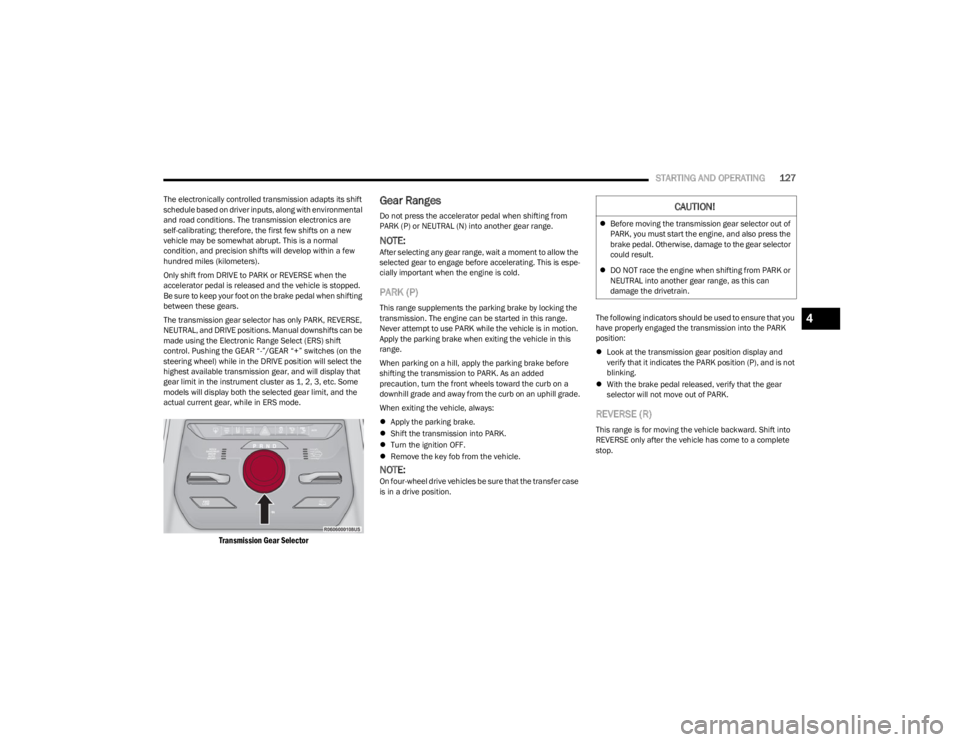
The transmission gear selector has only PARK, REVERSE,
NEUTRAL, and DRIVE positions. Manual downshifts can be
made using the Electronic Range Select (ERS) shift
control. Pushing the GEAR “-”/GEAR “+” switches (on the
steering wheel) while in the DRIVE position will select the
highest available transmission gear, and will display that
gear limit in the instrument cluster as 1, 2, 3, etc. Some
models will display both the selected gear limit, and the
actual current gear, while in ERS mode.
Transmission Gear Selector
Gear Ranges
Do not press the accelerator pedal when shifting from
PARK (P) or NEUTRAL (N) into another gear range.
NOTE:After selecting any gear range, wait a moment to allow the
selected gear to engage before accelerating. This is espe -
cially important when the engine is cold.
PARK (P)
This range supplements the parking brake by locking the
transmission. The engine can be started in this range.
Never attempt to use PARK while the vehicle is in motion.
Apply the parking brake when exiting the vehicle in this
range.
When parking on a hill, apply the parking brake before
shifting the transmission to PARK. As an added
precaution, turn the front wheels toward the curb on a
downhill grade and away from the curb on an uphill grade.
When exiting the vehicle, always:
Apply the parking brake.
Shift the transmission into PARK.
Turn the ignition OFF.
Remove the key fob from the vehicle.
NOTE:On four-wheel drive vehicles be sure that the transfer case
is in a drive position. The following indicators should be used to ensure that you
have properly engaged the transmission into the PARK
position:
Look at the transmission gear position display and
verify that it indicates the PARK position (P), and is not
blinking.
With the brake pedal released, verify that the gear
selector will not move out of PARK.
REVERSE (R)
This range is for moving the vehicle backward. Shift into
REVERSE only after the vehicle has come to a complete
stop.
CAUTION!
Before moving the transmission gear selector out of
PARK, you must start the engine, and also press the
brake pedal. Otherwise, damage to the gear selector
could result.
DO NOT race the engine when shifting from PARK or
NEUTRAL into another gear range, as this can
damage the drivetrain.
4
23_WS_OM_EN_USC_t.book Page 127
Page 203 of 396

MULTIMEDIA201
Phone Pop-ups Displayed In Cluster This setting will display smartphone notifications and messages in the Instrument
Cluster Display.
Message Pop-ups Displayed with Button Press This setting will turn message notifications on or off.
System Text Size This setting will allow you to change the text on the radio to “Standard”, “Large”, or
“Taller”.
Time Format This setting will allow you to set the time format (AM/PM). Sync Time With GPS must be
Off for this setting to be available. The “12 hrs” setting will set the time to a 12-hour
format. The “24 hrs” setting will set the time to a 24-hour format.
Voice Options This setting will allow you to change the voice options for the radio to “Male” or “Female”.
Wake Up Word This setting will allow you to set the system’s “Wake Up” word. An available option is “Hey
Uconnect”.
Voice Barge-in This setting will allow Voice Barge-in to be turned on or off. For more information about
Voice Barge-in, refer to your Uconnect Radio Instruction Manual.
Show Command List This setting will allow the Command List to be shown on or off.
Ambient Color Personalization This setting will redirect to a new menu that will allow you to change the ambient lighting
color in the cabin.
Radio Off Delay This setting will keep the radio on for the selected amount of time after vehicle shut off.
The available options are “0 sec”, “45 sec”, “5 min”, and “10 min”.
Radio Off with Door This setting will keep the radio on when a door is opened or until the Radio Off Delay time
is reached. The available settings are “On” and “Off”.
Key Off Power Delay This setting will keep certain electrical features running after the engine is turned off.
When any door is opened, the electronics will deactivate. The available settings are “0
sec”, “45 sec”, “5 min”, and “10 min”.
App Drawer Favoriting Pop-ups This setting will allow you to favorite app drawer pop-ups with “On” and “Off” options.
App Drawer Unfavoritings Pop-ups This setting will allow you to unfavorite app drawer pop-ups with “On” and Off” options.
New Text Message Pop-ups This setting will allow you to have pop-up notifications for new text messages. Setting
options are “On” and “Off”.
Setting Name
Description
5
23_WS_OM_EN_USC_t.book Page 201