sensor JEEP WAGONEER 2023 Service Manual
[x] Cancel search | Manufacturer: JEEP, Model Year: 2023, Model line: WAGONEER, Model: JEEP WAGONEER 2023Pages: 396, PDF Size: 15.17 MB
Page 274 of 396

272SAFETY
Vehicle damage by itself is not a good indicator of whether
or not Side Air Bags should have deployed.The Side Air
Bags will not deploy in all side collisions, including some
collisions at certain angles, or some side collisions that do
not impact the area of the passenger compartment. The
Side Air Bags may deploy during angled or offset frontal
collisions where the front air bags deploy.
Side Air Bags are a supplement to the seat belt restraint
system. Side Air Bags deploy in less time than it takes to
blink your eyes.
NOTE:Air bag covers may not be obvious in the interior trim, but
they will open during air bag deployment.
Rollover Events
Side Air Bags and seat belt pretensioners are designed to
activate in certain rollover events. The Occupant Restraint
Controller (ORC) determines whether deployment in a
particular rollover event is appropriate, based on the
severity and type of collision. Vehicle damage by itself is
not a good indicator of whether or not Side Air Bags and
seat belt pretensioners should have deployed.
The Side Air Bags and seat belt pretensioners will not
deploy in all rollover events. The rollover sensing system
determines if a rollover event may be in progress and
whether deployment is appropriate. In the event the vehicle experiences a rollover or near
rollover event, and deployment is appropriate, the rollover
sensing system will deploy the side air bags and seat belt
pretensioners on both sides of the vehicle.
The SABICs may help reduce the risk of partial or complete
ejection of vehicle occupants through side windows in
certain rollover or side impact events.
Air Bag System Components
NOTE:The Occupant Restraint Controller (ORC) monitors the
internal circuits and interconnecting wiring associated
with electrical Air Bag System Components listed below:
Occupant Restraint Controller (ORC)
Air Bag Warning Light
Steering Wheel and Column
Instrument Panel
Knee Impact Bolsters
Driver and Front Passenger Air Bags
Seat Belt Buckle Switch
Supplemental Side Air Bags
Supplemental Knee Air Bags
Front and Side Impact Sensors
Seat Belt Pretensioners
Seat Track Position Sensors
Occupant Classification SystemWARNING!
Occupants, including children, who are up against or
very close to Side Air Bags can be seriously injured or
killed. Occupants, including children, should never
lean on or sleep against the door, side windows, or
area where the side air bags inflate, even if they are
in an infant or child restraint.
Seat belts (and child restraints where appropriate)
are necessary for your protection in all collisions.
They also help keep you in position, away from an
inflating Side Air Bag. To get the best protection from
the Side Air Bags, occupants must wear their seat
belts properly and sit upright with their backs against
the seats. Children must be properly restrained in a
child restraint or booster seat that is appropriate for
the size of the child.
WARNING!
Side Air Bags need room to inflate. Do not lean
against the door or window. Sit upright in the center
of the seat.
Being too close to the Side Air Bags during deploy -
ment could cause you to be severely injured or killed.
Relying on the Side Air Bags alone could lead to more
severe injuries in a collision. The Side Air Bags work
with your seat belt to restrain you properly. In some
collisions, Side Air Bags won’t deploy at all. Always
wear your seat belt even though you have Side
Air Bags.
23_WS_OM_EN_USC_t.book Page 272
Page 319 of 396

SERVICING AND MAINTENANCE317
NOTE:
After adding oil to the engine, always reinstall the oil
cap securely by rotating clockwise until it stops. Never
run the engine without the oil fill cap as this could
cause an oil leak.
Because the oil level is automatically detected only
when the engine has been off and restarted (after four
minutes), the system cannot immediately detect a
sudden drop in oil level while driving (for example, if the
oil pan starts to leak due to damage during an off-road
event).
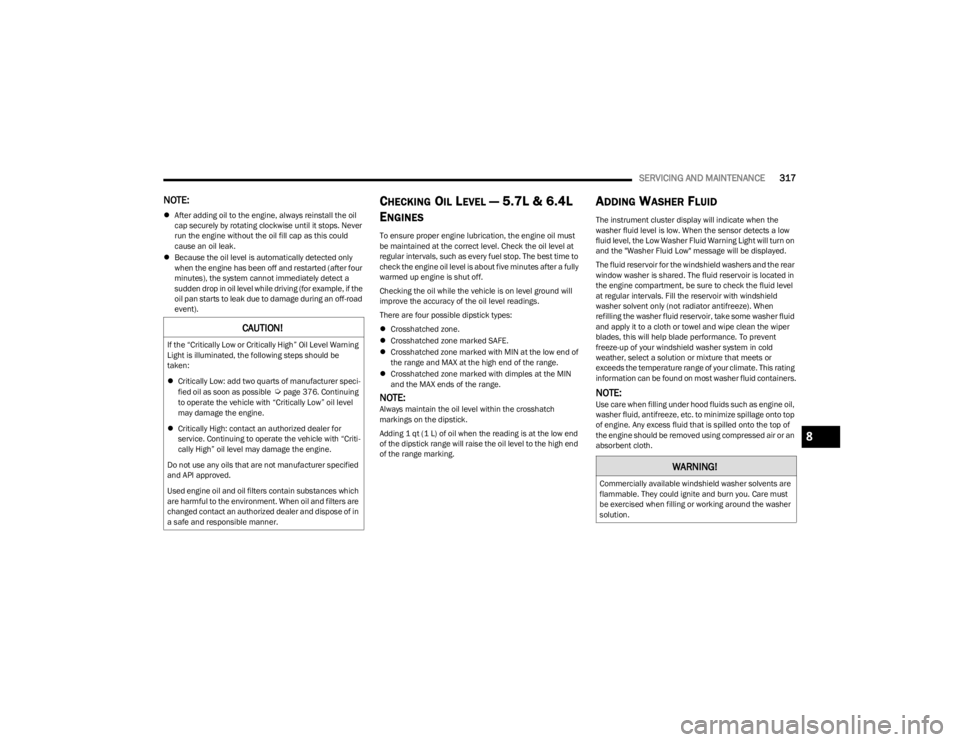
CHECKING OIL LEVEL — 5.7L & 6.4L
E
NGINES
To ensure proper engine lubrication, the engine oil must
be maintained at the correct level. Check the oil level at
regular intervals, such as every fuel stop. The best time to
check the engine oil level is about five minutes after a fully
warmed up engine is shut off.
Checking the oil while the vehicle is on level ground will
improve the accuracy of the oil level readings.
There are four possible dipstick types:
Crosshatched zone.
Crosshatched zone marked SAFE.
Crosshatched zone marked with MIN at the low end of
the range and MAX at the high end of the range.
Crosshatched zone marked with dimples at the MIN
and the MAX ends of the range.
NOTE:Always maintain the oil level within the crosshatch
markings on the dipstick.
Adding 1 qt (1 L) of oil when the reading is at the low end
of the dipstick range will raise the oil level to the high end
of the range marking.
ADDING WASHER FLUID
The instrument cluster display will indicate when the
washer fluid level is low. When the sensor detects a low
fluid level, the Low Washer Fluid Warning Light will turn on
and the "Washer Fluid Low" message will be displayed.
The fluid reservoir for the windshield washers and the rear
window washer is shared. The fluid reservoir is located in
the engine compartment, be sure to check the fluid level
at regular intervals. Fill the reservoir with windshield
washer solvent only (not radiator antifreeze). When
refilling the washer fluid reservoir, take some washer fluid
and apply it to a cloth or towel and wipe clean the wiper
blades, this will help blade performance. To prevent
freeze-up of your windshield washer system in cold
weather, select a solution or mixture that meets or
exceeds the temperature range of your climate. This rating
information can be found on most washer fluid containers.
NOTE:Use care when filling under hood fluids such as engine oil,
washer fluid, antifreeze, etc. to minimize spillage onto top
of engine. Any excess fluid that is spilled onto the top of
the engine should be removed using compressed air or an
absorbent cloth.
CAUTION!
If the “Critically Low or Critically High” Oil Level Warning
Light is illuminated, the following steps should be
taken:
Critically Low: add two quarts of manufacturer speci -
fied oil as soon as possible
Úpage 376. Continuing
to operate the vehicle with “Critically Low” oil level
may damage the engine.
Critically High: contact an authorized dealer for
service. Continuing to operate the vehicle with “Criti -
cally High” oil level may damage the engine.
Do not use any oils that are not manufacturer specified
and API approved.
Used engine oil and oil filters contain substances which
are harmful to the environment. When oil and filters are
changed contact an authorized dealer and dispose of in
a safe and responsible manner.
WARNING!
Commercially available windshield washer solvents are
flammable. They could ignite and burn you. Care must
be exercised when filling or working around the washer
solution.
8
23_WS_OM_EN_USC_t.book Page 317
Page 338 of 396

336SERVICING AND MAINTENANCE
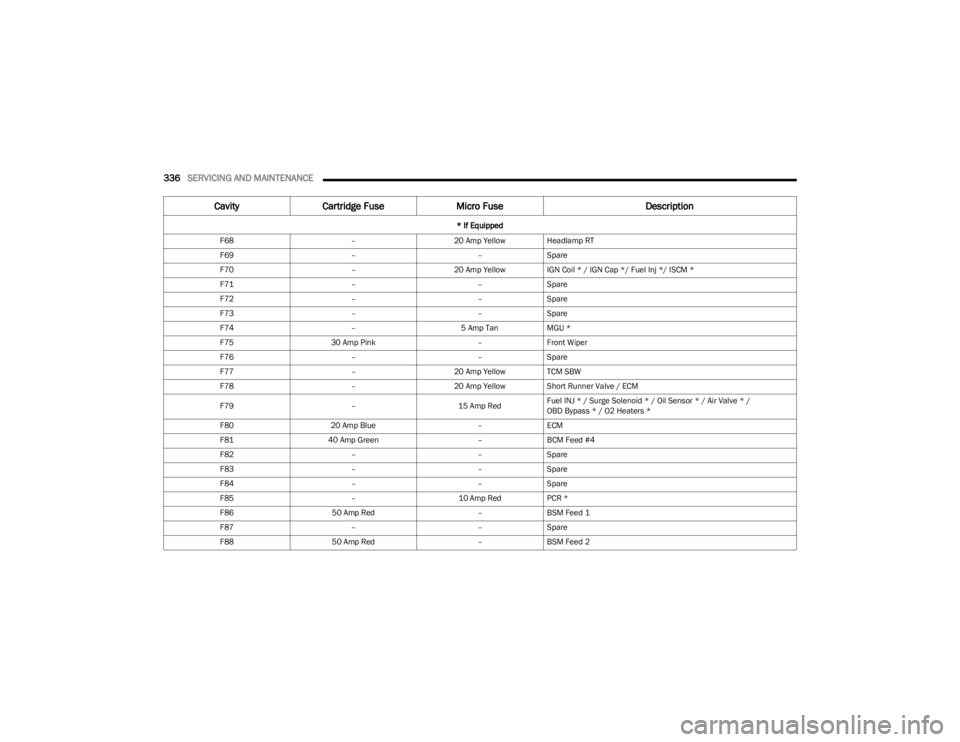
F68 –20 Amp Yellow Headlamp RT
F69 ––Spare
F70 –20 Amp Yellow IGN Coil * / IGN Cap */ Fuel Inj */ ISCM *
F71 ––Spare
F72 ––Spare
F73 ––Spare
F74 –5 Amp TanMGU *
F75 30 Amp Pink –Front Wiper
F76 ––Spare
F77 –20 Amp Yellow TCM SBW
F78 –20 Amp Yellow Short Runner Valve / ECM
F79 –15 Amp RedFuel INJ * / Surge Solenoid * / Oil Sensor * / Air Valve * /
OBD Bypass * / O2 Heaters *
F80 20 Amp Blue –ECM
F81 40 Amp Green –BCM Feed #4
F82 ––Spare
F83 ––Spare
F84 ––Spare
F85 –10 Amp RedPCR *
F86 50 Amp Red –BSM Feed 1
F87 ––Spare
F88 50 Amp Red –BSM Feed 2
Cavity Cartridge Fuse Micro Fuse Description
* If Equipped
23_WS_OM_EN_USC_t.book Page 336
Page 342 of 396

340SERVICING AND MAINTENANCE
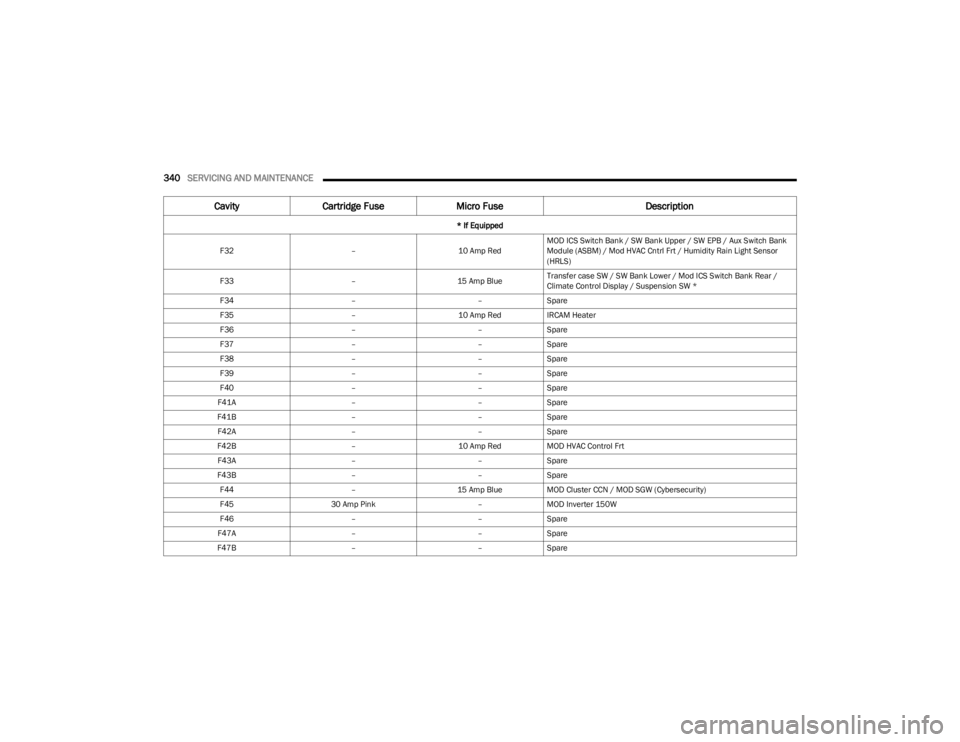
F32 –10 Amp RedMOD ICS Switch Bank / SW Bank Upper / SW EPB / Aux Switch Bank
Module (ASBM) / Mod HVAC Cntrl Frt / Humidity Rain Light Sensor
(HRLS)
F33 –15 Amp BlueTransfer case SW / SW Bank Lower / Mod ICS Switch Bank Rear /
Climate Control Display / Suspension SW *
F34 ––Spare
F35 –10 Amp RedIRCAM Heater
F36 ––Spare
F37 ––Spare
F38 ––Spare
F39 ––Spare
F40 ––Spare
F41A ––Spare
F41B ––Spare
F42A ––Spare
F42B –10 Amp RedMOD HVAC Control Frt
F43A ––Spare
F43B ––Spare
F44 –15 Amp BlueMOD Cluster CCN / MOD SGW (Cybersecurity)
F45 30 Amp Pink –MOD Inverter 150W
F46 ––Spare
F47A ––Spare
F47B ––Spare
Cavity Cartridge Fuse Micro Fuse Description
* If Equipped
23_WS_OM_EN_USC_t.book Page 340
Page 360 of 396

358SERVICING AND MAINTENANCE
Check tire pressures more often if subject to a wide range
of outdoor temperatures, as tire pressures vary with
temperature changes.
Tire pressures change by approximately 1 psi (7 kPa) per
12°F (7°C) of air temperature change. Keep this in mind
when checking tire pressure inside a garage, especially in
the Winter.
Example: If garage temperature = 68°F (20°C) and the
outside temperature = 32°F (0°C) then the cold tire
inflation pressure should be increased by 3 psi (21 kPa),
which equals 1 psi (7 kPa) for every 12°F (7°C) for this
outside temperature condition.
Tire pressure may increase from 2 to 6 psi (13 to 40 kPa)
during operation. DO NOT reduce this normal pressure
build up or your tire pressure will be too low.
Tire Pressures For High Speed Operation
The manufacturer advocates driving at safe speeds and
within posted speed limits. Where speed limits or
conditions are such that the vehicle can be driven at high
speeds, maintaining correct tire inflation pressure is very
important. Increased tire pressure and reduced vehicle
loading may be required for high-speed vehicle operation.
Refer to an authorized tire dealer or original equipment
vehicle dealer for recommended safe operating speeds,
loading and cold tire inflation pressures.
Radial Ply Tires
Tire Repair
If your tire becomes damaged, it may be repaired if it
meets the following criteria:
The tire has not been driven on when flat.
The damage is only on the tread section of your tire
(sidewall damage is not repairable).
The puncture is no greater than a quarter of an inch
(6 mm). Consult an authorized tire dealer for tire repairs and
additional information.
Damaged Run Flat tires, or Run Flat tires that have
experienced a loss of pressure should be replaced
immediately with another Run Flat tire of identical size and
service description (Load Index and Speed Symbol).
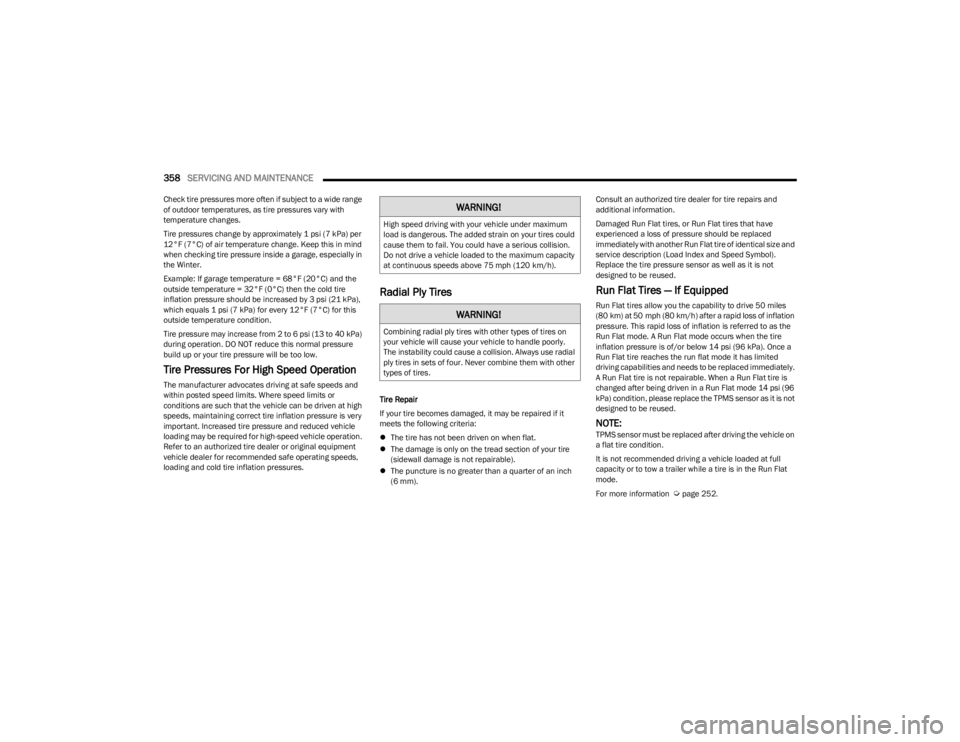
Replace the tire pressure sensor as well as it is not
designed to be reused.
Run Flat Tires — If Equipped
Run Flat tires allow you the capability to drive 50 miles
(80 km) at 50 mph (80 km/h) after a rapid loss of inflation
pressure. This rapid loss of inflation is referred to as the
Run Flat mode. A Run Flat mode occurs when the tire
inflation pressure is of/or below 14 psi (96 kPa). Once a
Run Flat tire reaches the run flat mode it has limited
driving capabilities and needs to be replaced immediately.
A Run Flat tire is not repairable. When a Run Flat tire is
changed after being driven in a Run Flat mode 14 psi (96
kPa) condition, please replace the TPMS sensor as it is not
designed to be reused.
NOTE:TPMS sensor must be replaced after driving the vehicle on
a flat tire condition.
It is not recommended driving a vehicle loaded at full
capacity or to tow a trailer while a tire is in the Run Flat
mode.
For more information
Úpage 252.
WARNING!
High speed driving with your vehicle under maximum
load is dangerous. The added strain on your tires could
cause them to fail. You could have a serious collision.
Do not drive a vehicle loaded to the maximum capacity
at continuous speeds above 75 mph (120 km/h).
WARNING!
Combining radial ply tires with other types of tires on
your vehicle will cause your vehicle to handle poorly.
The instability could cause a collision. Always use radial
ply tires in sets of four. Never combine them with other
types of tires.
23_WS_OM_EN_USC_t.book Page 358
Page 389 of 396

387
Fog .............................................................................. 60
Hazard Warning Flasher ......................................... 290
Headlights On With Wipers .......................................59
High Beam/Low Beam Select ...................................58
Hill Descent Control Indicator ................................ 243
Illuminated Entry........................................................62
Interior ........................................................................60
Lights On Reminder ...................................................59
Malfunction Indicator (Check Engine) ................... 112
Multicolor Ambient ....................................................62
Park .................................................................. 59
, 116
Passing ....................................................................... 58
Reading ...................................................................... 61
Seat Belt Reminder ................................................ 111
Security Alarm ......................................................... 111 Service ..................................................................... 349
Traction Control ...................................................... 243
Turn Signals ..................................... 57
, 60, 116, 289
Vanity Mirror............................................................... 50
Warning Instrument Cluster Descriptions ............. 110
Load Shed Battery Saver Mode .................................. 107
Load Shed Battery Saver On ....................................... 107
Load Shed Electrical Load Reduction......................... 107
Load Shed Intelligent Battery Sensor ......................... 107
Loading Vehicle ............................................................ 178 Tires ......................................................................... 354
Locks Child Protection .........................................................30
Manual ....................................................................... 26
Power Door .................................................................27
Lubrication, Body ......................................................... 323
Lug Nuts/Bolts ............................................................. 371
MMaintenance ................................................................... 85 Maintenance Free Battery ...........................................318
Maintenance Schedule ................................................ 309
Malfunction Indicator Light (Check Engine) ...... 112
, 118
Manual Park Release............................................................303Service .....................................................................381
McIntosh ....................................................................... 226
Media Hub....................................................................... 76
Memory Feature (Memory Seats) .................................. 31
Memory Seat ................................................................... 31 Memory Seats And Radio............................................... 31
Methanol ....................................................................... 373
Mirrors ............................................................................. 50 Conversation .............................................................. 51
Electric Remote ......................................................... 52
Exterior Folding.......................................................... 51
Heated........................................................................ 53
Outside ....................................................................... 51
Rearview ...........................................................50
, 290
Tilt In Reverse ............................................................ 53
Vanity.......................................................................... 50
Modifications/Alterations Vehicle........................................................................ 10
Monitor, Tire Pressure System..................................... 252
Mopar Parts .................................................................. 381
MP3 Control .................................................................... 76 Multi-Function Control Lever .......................................... 57
NNew Vehicle Break-In Period ....................................... 122
Night Vision Camera..................................................... 172
OOccupant Restraints .................................................... 256
Octane Rating, Gasoline (Fuel) .................................... 372
Off-Road Pages ............................................................. 236
Oil Change Indicator ..................................................... 101 Reset........................................................................ 101
Oil Filter, Change .......................................................... 319
Oil Filter, Selection ....................................................... 319
Oil Pressure Light ......................................................... 111
Oil, Engine ..................................................................... 319 Capacity ................................................................... 375
Checking .........................................................316
, 317
Dipstick ...........................................................316, 317
Disposal ................................................................... 319
Filter ......................................................................... 319
Filter Disposal.......................................................... 319
Identification Logo .................................................. 319
Materials Added To ................................................. 319 Pressure Warning Light .......................................... 111Recommendation...........................................319
, 375
Synthetic .................................................................. 319
Viscosity ................................................................... 375
Onboard Diagnostic System ........................................ 117
Operating Precautions ................................................. 117
Operator Manual Owner's Manual ...................................................... 381
Outside Rearview Mirrors .............................................. 51
11
23_WS_OM_EN_USC_t.book Page 387