adding oil JEEP WAGONEER 2023 Owners Manual
[x] Cancel search | Manufacturer: JEEP, Model Year: 2023, Model line: WAGONEER, Model: JEEP WAGONEER 2023Pages: 396, PDF Size: 15.17 MB
Page 8 of 396
6
SAFETY
SAFETY FEATURES........................................................... 239
Anti-Lock Brake System (ABS) ................................. 239Rear Seat Reminder Alert (RSRA) ............................ 240
Drowsy Driver Detection (DDD) — If Equipped ........ 240
Electronic Brake Control (EBC) System .................. 241
AUXILIARY DRIVING SYSTEMS ...................................... 247 Blind Spot Monitoring (BSM) .................................... 247
Forward Collision Warning (FCW)
With Mitigation .......................................................... 250
Tire Pressure Monitoring System (TPMS) ................ 252
OCCUPANT RESTRAINT SYSTEMS ................................ 256 Occupant Restraint Systems Features ................... 256Important Safety Precautions .................................. 256Seat Belt Systems .................................................... 257
Supplemental Restraint Systems (SRS) .................. 264Child Restraints ........................................................ 275
SAFETY TIPS ..................................................................... 287 Transporting Passengers .......................................... 287
Transporting Pets ...................................................... 287Connected Vehicles .................................................. 287
Safety Checks You Should Make Inside
The Vehicle ............................................................... 287
Periodic Safety Checks You Should Make
Outside The Vehicle .................................................. 289
Exhaust Gas .............................................................. 289Carbon Monoxide Warnings ..................................... 289
IN CASE OF EMERGENCY
HAZARD WARNING FLASHERS ..................................... 290
ASSIST AND SOS SYSTEM— IF EQUIPPED ................... 290
JACKING AND TIRE CHANGING...................................... 293 Preparations For Jacking ......................................... 293
Jack And Tools Location ........................................... 294Spare Tire Stowage................................................... 295
Spare Tire Removal .................................................. 295Jacking Instructions ................................................. 296
JUMP STARTING ............................................................. 300 Preparations For Jump Start .................................... 300Jump Starting Procedure.......................................... 301
REFUELING IN EMERGENCY........................................... 302
IF YOUR ENGINE OVERHEATS ........................................ 303
MANUAL PARK RELEASE .............................................. 303
FREEING A STUCK VEHICLE .......................................... 305
TOWING A DISABLED VEHICLE ..................................... 306 Rear-Wheel Drive Models......................................... 307
Four-Wheel Drive Models ......................................... 307
Emergency Tow Hooks — If Equipped ..................... 308
ENHANCED ACCIDENT RESPONSE SYSTEM
(EARS) .............................................................................. 308
EVENT DATA RECORDER (EDR) ..................................... 308
SERVICING AND MAINTENANCE
SCHEDULED SERVICING .................................................. 309 Maintenance Plan ..................................................... 310
ENGINE COMPARTMENT ................................................. 313 3.0L Engine................................................................ 313
5.7L Engine................................................................ 314
6.4L Engine................................................................ 315
Checking Oil Level — 3.0L Engines .......................... 316
Checking Oil Level — 5.7L & 6.4L Engines .............. 317
Adding Washer Fluid ................................................ 317
Maintenance-Free Battery ....................................... 318Pressure Washing ..................................................... 318
VEHICLE MAINTENANCE .................................................. 318 Engine Oil .................................................................. 319
Engine Oil Filter ....................................................... 319
Engine Air Cleaner Filter ........................................ 319Air Conditioner Maintenance ................................. 320
Accessory Drive Belt Inspection ............................... 323Body Lubrication ....................................................... 323
Windshield Wiper Blades ......................................... 324
Exhaust System ........................................................ 325
Cooling System .......................................................... 326
Brake System ........................................................... 328
Automatic Transmission ........................................... 329
Front/Rear Axle Fluid ............................................... 330Transfer Case ............................................................ 330Fuses .......................................................................... 331Bulb Replacement .................................................... 349
23_WS_OM_EN_USC_t.book Page 6
Page 318 of 396
316SERVICING AND MAINTENANCE
CHECKING OIL LEVEL — 3.0L ENGINES
The 3.0L engine does not have a traditional “dipstick” and
there is no need to manually check the oil level. If it is
desired to check engine oil level, it can be seen on the
instrument cluster display by navigating to the appropriate
screen under “Vehicle Information”. Use the up or
down arrow buttons within the steering wheel controls
to find the “Vehicle Information” menu. Then use the
right or left arrow buttons until you reach the “Oil
Level” sub-menu.
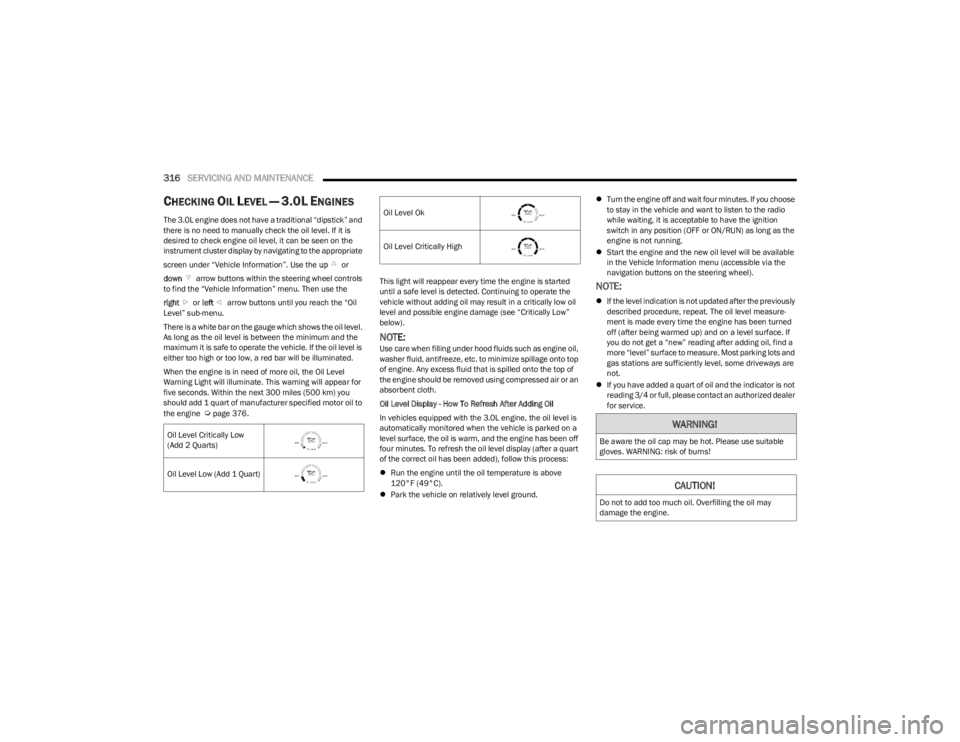
There is a white bar on the gauge which shows the oil level.
As long as the oil level is between the minimum and the
maximum it is safe to operate the vehicle. If the oil level is
either too high or too low, a red bar will be illuminated.
When the engine is in need of more oil, the Oil Level
Warning Light will illuminate. This warning will appear for
five seconds. Within the next 300 miles (500 km) you
should add 1 quart of manufacturer specified motor oil to
the engine
Úpage 376. This light will reappear every time the engine is started
until a safe level is detected. Continuing to operate the
vehicle without adding oil may result in a critically low oil
level and possible engine damage (see “Critically Low”
below).
NOTE:Use care when filling under hood fluids such as engine oil,
washer fluid, antifreeze, etc. to minimize spillage onto top
of engine. Any excess fluid that is spilled onto the top of
the engine should be removed using compressed air or an
absorbent cloth.
Oil Level Display - How To Refresh After Adding Oil
In vehicles equipped with the 3.0L engine, the oil level is
automatically monitored when the vehicle is parked on a
level surface, the oil is warm, and the engine has been off
four minutes. To refresh the oil level display (after a quart
of the correct oil has been added), follow this process:
Run the engine until the oil temperature is above
120°F (49°C).
Park the vehicle on relatively level ground.
Turn the engine off and wait four minutes. If you choose
to stay in the vehicle and want to listen to the radio
while waiting, it is acceptable to have the ignition
switch in any position (OFF or ON/RUN) as long as the
engine is not running.
Start the engine and the new oil level will be available
in the Vehicle Information menu (accessible via the
navigation buttons on the steering wheel).
NOTE:
If the level indication is not updated after the previously
described procedure, repeat. The oil level measure -
ment is made every time the engine has been turned
off (after being warmed up) and on a level surface. If
you do not get a “new” reading after adding oil, find a
more “level” surface to measure. Most parking lots and
gas stations are sufficiently level, some driveways are
not.
If you have added a quart of oil and the indicator is not
reading 3/4 or full, please contact an authorized dealer
for service.
Oil Level Critically Low
(Add 2 Quarts)
Oil Level Low (Add 1 Quart)
Oil Level Ok
Oil Level Critically High
WARNING!
Be aware the oil cap may be hot. Please use suitable
gloves. WARNING: risk of burns!
CAUTION!
Do not to add too much oil. Overfilling the oil may
damage the engine.
23_WS_OM_EN_USC_t.book Page 316
Page 319 of 396
SERVICING AND MAINTENANCE317
NOTE:
After adding oil to the engine, always reinstall the oil
cap securely by rotating clockwise until it stops. Never
run the engine without the oil fill cap as this could
cause an oil leak.
Because the oil level is automatically detected only
when the engine has been off and restarted (after four
minutes), the system cannot immediately detect a
sudden drop in oil level while driving (for example, if the
oil pan starts to leak due to damage during an off-road
event).
CHECKING OIL LEVEL — 5.7L & 6.4L
E
NGINES
To ensure proper engine lubrication, the engine oil must
be maintained at the correct level. Check the oil level at
regular intervals, such as every fuel stop. The best time to
check the engine oil level is about five minutes after a fully
warmed up engine is shut off.
Checking the oil while the vehicle is on level ground will
improve the accuracy of the oil level readings.
There are four possible dipstick types:
Crosshatched zone.
Crosshatched zone marked SAFE.
Crosshatched zone marked with MIN at the low end of
the range and MAX at the high end of the range.
Crosshatched zone marked with dimples at the MIN
and the MAX ends of the range.
NOTE:Always maintain the oil level within the crosshatch
markings on the dipstick.
Adding 1 qt (1 L) of oil when the reading is at the low end
of the dipstick range will raise the oil level to the high end
of the range marking.
ADDING WASHER FLUID
The instrument cluster display will indicate when the
washer fluid level is low. When the sensor detects a low
fluid level, the Low Washer Fluid Warning Light will turn on
and the "Washer Fluid Low" message will be displayed.
The fluid reservoir for the windshield washers and the rear
window washer is shared. The fluid reservoir is located in
the engine compartment, be sure to check the fluid level
at regular intervals. Fill the reservoir with windshield
washer solvent only (not radiator antifreeze). When
refilling the washer fluid reservoir, take some washer fluid
and apply it to a cloth or towel and wipe clean the wiper
blades, this will help blade performance. To prevent
freeze-up of your windshield washer system in cold
weather, select a solution or mixture that meets or
exceeds the temperature range of your climate. This rating
information can be found on most washer fluid containers.
NOTE:Use care when filling under hood fluids such as engine oil,
washer fluid, antifreeze, etc. to minimize spillage onto top
of engine. Any excess fluid that is spilled onto the top of
the engine should be removed using compressed air or an
absorbent cloth.
CAUTION!
If the “Critically Low or Critically High” Oil Level Warning
Light is illuminated, the following steps should be
taken:
Critically Low: add two quarts of manufacturer speci -
fied oil as soon as possible
Úpage 376. Continuing
to operate the vehicle with “Critically Low” oil level
may damage the engine.
Critically High: contact an authorized dealer for
service. Continuing to operate the vehicle with “Criti -
cally High” oil level may damage the engine.
Do not use any oils that are not manufacturer specified
and API approved.
Used engine oil and oil filters contain substances which
are harmful to the environment. When oil and filters are
changed contact an authorized dealer and dispose of in
a safe and responsible manner.
WARNING!
Commercially available windshield washer solvents are
flammable. They could ignite and burn you. Care must
be exercised when filling or working around the washer
solution.
8
23_WS_OM_EN_USC_t.book Page 317
Page 329 of 396
SERVICING AND MAINTENANCE327
Adding Coolant
Your vehicle has been built with an improved engine
coolant (OAT coolant conforming to MS.90032) that
allows extended maintenance intervals. This engine
coolant (antifreeze) can be used up to 10 years or
150,000 miles (240,000 km) before replacement. To
prevent reducing this extended maintenance period, it is
important to use the same engine coolant (OAT coolant
conforming to MS.90032) throughout the life of your
vehicle.
Please review these recommendations for using Organic
Additive Technology (OAT) engine coolant that meets the
requirements of the manufacturer Material Standard
MS.90032. When adding engine coolant:
We recommend using Mopar® Antifreeze/Coolant
10 Year/150,000 Mile (240,000 km) Formula OAT
that meets the requirements of the manufacturer
Material Standard MS.90032.
Mix a minimum solution of 50% OAT engine coolant
that meets the requirements of the manufacturer
Material Standard MS.90032 and distilled water. Use
higher concentrations (not to exceed 70%) if tempera -
tures below −34°F (−37°C) are anticipated. Please
contact an authorized dealer for assistance.
Use only high purity water such as distilled or deionized
water when mixing the water/engine coolant solution.
The use of lower quality water will reduce the amount
of corrosion protection in the engine cooling system.
NOTE:
It is the owner's responsibility to maintain the proper
level of protection against freezing according to the
temperatures occurring in the area where the vehicle is
operated.
Use care when filling under hood fluids such as engine
oil, washer fluid, antifreeze, etc. to minimize spillage
onto top of engine. Any excess fluid that is spilled onto
the top of the engine should be removed using
compressed air or an absorbent cloth.
Some vehicles require special tools to add coolant
properly. Failure to fill these systems properly could
lead to severe internal engine damage. If any coolant is
needed to be added to the system, please contact a
local authorized dealer.
Mixing engine coolant types is not recommended and
can result in cooling system damage. If HOAT and OAT
coolant are mixed in an emergency, have an authorized
dealer drain, flush, and refill with OAT coolant
(conforming to MS.90032) as soon as possible.
Cooling System Pressure Cap
The cap must be fully tightened to prevent loss of engine
coolant (antifreeze), and to ensure that engine coolant will
return to the radiator from the coolant expansion bottle/
recovery tank (if equipped).
The cap should be inspected and cleaned if there is any
accumulation of foreign material on the sealing surfaces.
Disposal Of Used Coolant
Used ethylene glycol-based coolant (antifreeze) is a
regulated substance requiring proper disposal. Check with
your local authorities to determine the disposal rules for
your community. To prevent ingestion by animals or
children, do not store ethylene glycol-based coolant in
open containers or allow it to remain in puddles on the
ground, clean up any ground spills immediately. If
ingested by a child or pet, seek emergency assistance
immediately.
WARNING!
Do not open a hot engine cooling system. Never add
engine coolant (antifreeze) when the engine is over -
heated. Do not loosen or remove the cap to cool an
overheated engine. Heat causes pressure to build up
in the cooling system. To prevent scalding or injury,
do not remove the pressure cap while the system is
hot or under pressure.
Do not use a pressure cap other than the one speci -
fied for your vehicle. Personal injury or engine
damage may result.
8
23_WS_OM_EN_USC_t.book Page 327
Page 332 of 396
330SERVICING AND MAINTENANCE
FRONT/REAR AXLE FLUID
For normal service, periodic fluid level checks are not
required. When the vehicle is serviced for other reasons
the exterior surfaces of the axle assembly should be
inspected. If gear oil leakage is suspected inspect the fluid
level.
Front Axle Fluid Level Check
The front axle oil level needs to be no lower than 1/8 inch
(3 mm) below the bottom of the fill hole.
The front axle fill and drain plugs should be tightened to
22 to 29 ft-lb (30 to 40 N·m).
Rear Axle Fluid Level Check
The rear axle oil level needs to be no lower than 1/8 inch
(3 mm) below the bottom of the fill hole.
The rear axle fill and drain plugs should be tightened to
22 to 29 ft-lb (30 to 40 N·m).
Selection Of Lubricant
Use only the manufacturer's recommended fluid Úpage 377.
TRANSFER CASE
Fluid Level Check
For normal service, periodic fluid level checks are not
required. When the vehicle is serviced for other reasons
the exterior surfaces of the transfer case assembly should
be inspected. If oil leakage is suspected inspect the fluid
level.
Adding Fluid
Add fluid at the filler hole, until it runs out of the hole, when
the vehicle is in a level position.
Drain
First remove fill plug, then remove drain plug.
Recommended tightening torque for drain and fill plugs is
15 to 25 ft-lb (20 to 34 N·m).
Selection Of Lubricant
Use only the manufacturer's recommended fluid Úpage 377.
CAUTION!
Do not overtighten the plugs as it could damage them
and cause them to leak.
CAUTION!
Do not overtighten the plugs as it could damage them
and cause them to leak.CAUTION!
When installing plugs, do not overtighten. You could
damage them and cause them to leak.
23_WS_OM_EN_USC_t.book Page 330
Page 386 of 396
384 B
Base Instrument Cluster
b
........................................97
Battery ................................................................. 109, 318
Charging System Light............................................ 109
Keyless Key Fob Replacement .................................18
Battery Saver Feature ..................................................... 60
Belts, Seat .................................................................... 287
Body Mechanism Lubrication...................................... 323
B-Pillar Location ........................................................... 354
Brake Assist System .................................................... 241
Brake Control System, Electronic ............................... 241
Brake Fluid .......................................................... 328
, 377
Brake System ...................................................... 328, 371
Anti-Lock (ABS)........................................................ 371 Fluid Check.............................................................. 328
Master Cylinder ....................................................... 328
Parking .................................................................... 122
Warning Light .......................................................... 109
Brake/Transmission Interlock..................................... 126
Bulb Replacement ....................................................... 349
Bulbs, Light................................................................... 289
CCamera, Night Vision ................................................... 172
Camera, Rear ...................................................... 170, 175
Capacities, Fluid ........................................................... 375
Caps, Filler Oil (Engine) .............................................................. 313
Radiator (Coolant Pressure)................................... 327
Car Washes .................................................................. 368
Carbon Monoxide Warning .......................................... 289
Cargo Area Cover .............................................. 89
, 90, 91
Cargo Compartment ....................................................... 89 Light ............................................................................89 Cargo Light ...................................................................... 89
Cargo Net ........................................................................ 91
Cargo Tie-Downs ............................................................. 89
Cellular Phone............................................................... 238
Center Console Cooler.................................................... 75
Center Console Safe ....................................................... 75
Center Console Safe — If Equipped
b
...................... 75
Chains, Tire ...................................................................364
Chart, Tire Sizing ...........................................................350
Check Engine Light (Malfunction Indicator Light) ...... 118
Checking Your Vehicle For Safety ................................ 287
Checks, Safety .............................................................. 287
Child Restraint .............................................................. 275
Child Restraints Booster Seats .......................................................... 277
Child Seat Installation ............................................. 285How To Stow An unused ALR Seat Belt .................283Infant And Child Restraints ..................................... 276
Locating The LATCH Anchorages............................ 281
Lower Anchors And Tethers For Children............... 279
Older Children And Child Restraints....................... 277
Seating Positions ..................................................... 278
Child Safety Locks .......................................................... 30
Clean Air Gasoline ........................................................ 373
Cleaning Wheels .....................................................................362
Climate Control ............................................................... 64 Automatic ................................................................... 64
Cold Weather Operation ............................................... 122
Compact Spare Tire ...................................................... 361
Contract, Service .......................................................... 380
Cooling Pressure Cap (Radiator Cap) ..........................327
Cooling System ............................................................. 326 Adding Coolant (Antifreeze) ....................................327
Coolant Level ...........................................................328 Cooling Capacity...................................................... 375
Disposal Of Used Coolant ....................................... 327
Drain, Flush, And Refill ........................................... 326
Inspection .......................................................326
, 328
Points To Remember .............................................. 328
Pressure Cap ........................................................... 327
Radiator Cap............................................................ 327
Selection Of Coolant (Antifreeze) ........ 326
, 375, 376
Corrosion Protection .................................................... 368
Cruise Control (Speed Control) ........................... 137
, 138
Cruise Light ................................................................... 116
Customer Assistance ................................................... 378
Customer Programmable Features ............................. 197
Cybersecurity ................................................................ 196
DDaytime Running Lights ................................................. 58 Defroster, Windshield .................................................. 288
De-Icer, Remote Start .................................................... 23
Deluxe Security Alarm .................................................... 25
Diagnostic System, Onboard ....................................... 117
Digital Rearview Mirror .................................................. 50
Dipsticks Oil (Engine) ..................................................... 316
, 317
Disabled Vehicle Towing .............................................. 306
Disposal Antifreeze (Engine Coolant) .................................... 327
Door Ajar .............................................................. 109
, 110
Door Ajar Light ..................................................... 109, 110
Door Locks ............................................................... 26, 30
Child-Protection Door Lock — Rear Doors ............... 30
Doors ............................................................................... 26
Driver’s Seat Back Tilt .................................................... 33
Driving ........................................................................... 193
23_WS_OM_EN_USC_t.book Page 384