high JEEP WAGONEER 2023 Manual PDF
[x] Cancel search | Manufacturer: JEEP, Model Year: 2023, Model line: WAGONEER, Model: JEEP WAGONEER 2023Pages: 396, PDF Size: 15.17 MB
Page 253 of 396
SAFETY251
FCW Braking Status And Sensitivity
The FCW Sensitivity and Active Braking status are
programmable through the Uconnect system
Úpage 197.
The default sensitivity of FCW is the “Medium” setting and
the system status is “Warning & Braking”. This allows the
system to warn the driver of a possible collision with the
vehicle in front using audible/visual warnings and it
applies autonomous braking.
Changing the FCW status to the “Far” setting allows the
system to warn the driver of a possible collision with the
vehicle in front using an audible/visual warning when the
latter is at a farther distance than “Medium” setting. This
provides the most reaction time to avoid a possible
collision.
NOTE:The “Far” setting may result in a greater number of FCW
possible collision warnings experienced. Changing the FCW status to the “Near” setting allows the
system to warn the driver of a possible collision with the
vehicle in front when the distance between the vehicle in
the front is much closer. This setting provides less reaction
time than the “Far” and “Medium” settings, which allows
for a more dynamic driving experience.
NOTE:The “Near” setting may result in a lesser number of
FCW possible collision warnings experienced.
NOTE:
Changing the FCW status to “Only Warning” prevents
the system from providing limited active braking, or
additional brake support if the driver is not braking
adequately in the event of a potential frontal collision,
but maintains the audible and visual warnings.
Changing the FCW status to “Off” prevents the system
from providing autonomous braking, or additional
brake support if the driver is not braking adequately in
the event of a potential frontal collision.
The system will retain the last setting selected by the
driver after ignition shut down.
FCW may not react to irrelevant objects such as over -
head objects, ground reflections, objects not in the
path of the vehicle, stationary objects that are far away,
oncoming traffic, or leading vehicles with the same or
higher rate of speed.
FCW will be disabled like ACC, with the unavailable
screens.
FCW Limited Warning
If the instrument cluster displays “ACC/FCW Limited
Functionality” or “ACC/FCW Limited Functionality Clean
Front Windshield” momentarily, there may be a condition
that limits FCW functionality. Although the vehicle is still
drivable under normal conditions, the active braking may
not be fully available. Once the condition that limited the
system performance is no longer present, the system will
return to its full performance state. If the problem persists,
see an authorized dealer.
Service FCW Warning
If the system turns off, and the instrument cluster
displays:
ACC/FCW Unavailable Service Required
Cruise/FCW Unavailable Service Required
This indicates there is an internal system fault. Although
the vehicle is still drivable under normal conditions, have
the system checked by an authorized dealer.
WARNING!
Forward Collision Warning (FCW) is not intended to
avoid a collision on its own, nor can FCW detect every
type of potential collision. The driver has the
responsibility to avoid a collision by controlling the
vehicle via braking and steering. Failure to follow this
warning could lead to serious injury or death.
6
23_WS_OM_EN_USC_t.book Page 251
Page 261 of 396
SAFETY259
(Continued)
Lap/Shoulder Belt Operating Instructions
1. Enter the vehicle and close the door. Sit back and
adjust the seat.
2. The seat belt latch plate is above the back of the front seat, and next to your arm in the rear seat (for
vehicles equipped with a rear seat). Grab the latch
plate and pull out the seat belt. Slide the latch plate
up the webbing as far as necessary to allow the seat
belt to go around your lap.
Pulling Out The Latch Plate
3. When the seat belt is long enough to fit, insert the latch plate into the buckle until you hear a “click.”
Inserting Latch Plate Into Buckle
WARNING!
A lap belt worn too high can increase the risk of injury
in a collision. The seat belt forces won’t be at the
strong hip and pelvic bones, but across your
abdomen. Always wear the lap part of your seat belt
as low as possible and keep it snug.
A twisted seat belt may not protect you properly. In a
collision, it could even cut into you. Be sure the seat
belt is flat against your body, without twists. If you
can’t straighten a seat belt in your vehicle, take it to
an authorized dealer immediately and have it fixed.
A seat belt that is buckled into the wrong buckle will
not protect you properly. The lap portion could ride
too high on your body, possibly causing internal inju -
ries. Always buckle your seat belt into the buckle
nearest you.
A seat belt that is too loose will not protect you prop -
erly. In a sudden stop, you could move too far
forward, increasing the possibility of injury. Wear
your seat belt snugly.
A seat belt that is worn under your arm is dangerous.
Your body could strike the inside surfaces of the
vehicle in a collision, increasing head and neck
injury. A seat belt worn under the arm can cause
internal injuries. Ribs aren’t as strong as shoulder
bones. Wear the seat belt over your shoulder so that
your strongest bones will take the force in a collision.A shoulder belt placed behind you will not protect you
from injury during a collision. You are more likely to
hit your head in a collision if you do not wear your
shoulder belt. The lap and shoulder belt are meant to
be used together.
A frayed or torn seat belt could rip apart in a collision
and leave you with no protection. Inspect the seat
belt system periodically, checking for cuts, frays, or
loose parts. Damaged parts must be replaced imme -
diately. Do not disassemble or modify the seat belt
system. If your vehicle is involved in a collision, or if
you have questions regarding seat belt or retractor
conditions, take your vehicle to an authorized FCA
dealer or authorized FCA Certified Collision Care
Program facility for inspection.
WARNING!
6
23_WS_OM_EN_USC_t.book Page 259
Page 262 of 396
260SAFETY
4. Position the lap belt so that it is snug and lies low
across your hips, below your abdomen. To remove
slack in the lap belt portion, pull up on the shoulder
belt. To loosen the lap belt if it is too tight, tilt the latch
plate and pull on the lap belt. A snug seat belt
reduces the risk of sliding under the seat belt in a
collision.
Positioning The Lap Belt
5. Position the shoulder belt across the shoulder and chest with minimal, if any slack so that it is
comfortable and not resting on your neck. The
retractor will withdraw any slack in the shoulder belt.
6. To release the seat belt, push the red button on the buckle. The seat belt will automatically retract to its
stowed position. If necessary, slide the latch plate
down the webbing to allow the seat belt to retract
fully.
Lap/Shoulder Belt Untwisting Procedure
Use the following procedure to untwist a twisted lap/
shoulder belt.
1. Position the latch plate as close as possible to the anchor point.
2. At about 6 to 12 inches (15 to 30 cm) above the latch plate, grab and twist the seat belt webbing
180 degrees to create a fold that begins immediately
above the latch plate.
3. Slide the latch plate upward over the folded webbing. The folded webbing must enter the slot at the top of
the latch plate.
4. Continue to slide the latch plate up until it clears the folded webbing and the seat belt is no longer twisted.
Adjustable Upper Shoulder Belt Anchorage
In the driver and outboard front passenger seats, the top
of the shoulder belt can be adjusted upward or downward
to position the seat belt away from your neck. Push or
squeeze the anchorage button to release the anchorage,
and move it up or down to the position that serves you
best.
Adjustable Upper Anchorage
As a guide, if you are shorter than average, you will prefer
the shoulder belt anchorage in a lower position, and if you
are taller than average, you will prefer the shoulder belt
anchorage in a higher position. After you release the
anchorage button, try to move it up or down to make sure
that it is locked in position.
NOTE:The adjustable upper shoulder belt anchorage is equipped
with an Easy Up feature. This feature allows the shoulder
belt anchorage to be adjusted in the upward position
without pushing or squeezing the release button. To verify
the shoulder belt anchorage is latched, pull downward on
the shoulder belt anchorage until it is locked into position.
23_WS_OM_EN_USC_t.book Page 260
Page 268 of 396
266SAFETY
Driver And Passenger Front Air Bag
Features
The Advanced Front Air Bag system has multistage driver
and front passenger air bags. This system provides output
appropriate to the severity and type of collision as
determined by the Occupant Restraint Controller (ORC),
which may receive information from the front impact
sensors (if equipped) or other system components.
The first stage inflator is triggered immediately during an
impact that requires air bag deployment. A low energy
output is used in less severe collisions. A higher energy
output is used for more severe collisions. This vehicle may be equipped with a driver and/or front
passenger seat belt buckle switch that detects whether
the driver or front passenger seat belt is buckled. The seat
belt buckle switch may adjust the inflation rate of the
Advanced Front Air Bags.
This vehicle may be equipped with driver and/or front
passenger seat track position sensors that may adjust the
inflation rate of the Advanced Front Air Bags based upon
seat position.
This vehicle is equipped with a right front passenger
Occupant Classification System (“OCS”) that is designed
to provide Passenger Advanced Front Air Bag output
appropriate to the occupant’s seated weight input, as
determined by the OCS.
Front Air Bag Operation
Front Air Bags are designed to provide additional
protection by supplementing the seat belts. Front air bags
are not expected to reduce the risk of injury in rear, side,
or rollover collisions. The front air bags will not deploy in all
frontal collisions, including some that may produce
substantial vehicle damage — for example, some pole
collisions, truck underrides, and angle offset collisions.
On the other hand, depending on the type and location of
impact, front air bags may deploy in crashes with little
vehicle front-end damage but that produce a severe initial
deceleration.
Because air bag sensors measure vehicle deceleration
over time, vehicle speed and damage by themselves are
not good indicators of whether or not an air bag should
have deployed.
Seat belts are necessary for your protection in all
collisions, and also are needed to help keep you in
position, away from an inflating air bag.
When the Occupant Restraint Controller (ORC) detects a
collision requiring the front air bags, it signals the inflator
units. A large quantity of non-toxic gas is generated to
inflate the front air bags.
The steering wheel hub trim cover and the upper
passenger side of the instrument panel separate and fold
out of the way as the air bags inflate to their full size. The
front air bags fully inflate in less time than it takes to blink
your eyes. The front air bags then quickly deflate while
helping to restrain the driver and front passenger.WARNING!
Being too close to the steering wheel or instrument
panel during front air bag deployment could cause
serious injury, including death. Air bags need room to
inflate. Sit back, comfortably extending your arms to
reach the steering wheel or instrument panel.
Never place a rear-facing child restraint in front of an
air bag. A deploying passenger front air bag can
cause death or serious injury to a child 12 years or
younger, including a child in a rear-facing child
restraint.
Never install a rear-facing child restraint in the front
seat of a vehicle. Only use a rear-facing child
restraint in the rear seat. If the vehicle does not have
a rear seat, do not transport a rear-facing child
restraint in that vehicle.
WARNING!
No objects should be placed over or near the air bag
on the instrument panel or steering wheel because
any such objects could cause harm if the vehicle is in
a collision severe enough to cause the air bag to
inflate.
Do not put anything on or around the air bag covers
or attempt to open them manually. You may damage
the air bags and you could be injured because the air
bags may no longer be functional. The protective
covers for the air bag cushions are designed to open
only when the air bags are inflating.
Relying on the air bags alone could lead to more
severe injuries in a collision. The air bags work with
your seat belt to restrain you properly. In some colli -
sions, air bags won’t deploy at all. Always wear your
seat belts even though you have air bags.
23_WS_OM_EN_USC_t.book Page 266
Page 273 of 396
SAFETY271
The SABs may help to reduce the risk of occupant injury
during certain side impacts, in addition to the injury
reduction potential provided by the seat belts and body
structure.
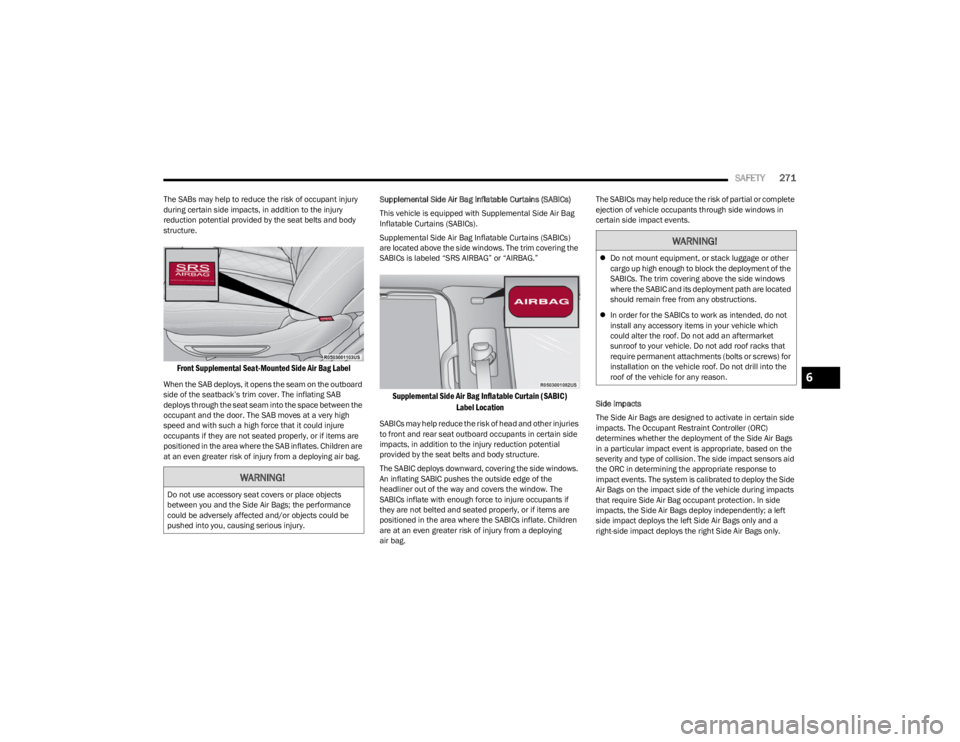
Front Supplemental Seat-Mounted Side Air Bag Label
When the SAB deploys, it opens the seam on the outboard
side of the seatback’s trim cover. The inflating SAB
deploys through the seat seam into the space between the
occupant and the door. The SAB moves at a very high
speed and with such a high force that it could injure
occupants if they are not seated properly, or if items are
positioned in the area where the SAB inflates. Children are
at an even greater risk of injury from a deploying air bag. Supplemental Side Air Bag Inflatable Curtains (SABICs)
This vehicle is equipped with Supplemental Side Air Bag
Inflatable Curtains (SABICs).
Supplemental Side Air Bag Inflatable Curtains (SABICs)
are located above the side windows. The trim covering the
SABICs is labeled “SRS AIRBAG” or “AIRBAG.”
Supplemental Side Air Bag Inflatable Curtain (SABIC)
Label Location
SABICs may help reduce the risk of head and other injuries
to front and rear seat outboard occupants in certain side
impacts, in addition to the injury reduction potential
provided by the seat belts and body structure.
The SABIC deploys downward, covering the side windows.
An inflating SABIC pushes the outside edge of the
headliner out of the way and covers the window. The
SABICs inflate with enough force to injure occupants if
they are not belted and seated properly, or if items are
positioned in the area where the SABICs inflate. Children
are at an even greater risk of injury from a deploying
air bag. The SABICs may help reduce the risk of partial or complete
ejection of vehicle occupants through side windows in
certain side impact events.
Side Impacts
The Side Air Bags are designed to activate in certain side
impacts. The Occupant Restraint Controller (ORC)
determines whether the deployment of the Side Air Bags
in a particular impact event is appropriate, based on the
severity and type of collision. The side impact sensors aid
the ORC in determining the appropriate response to
impact events. The system is calibrated to deploy the Side
Air Bags on the impact side of the vehicle during impacts
that require Side Air Bag occupant protection. In side
impacts, the Side Air Bags deploy independently; a left
side impact deploys the left Side Air Bags only and a
right-side impact deploys the right Side Air Bags only.
WARNING!
Do not use accessory seat covers or place objects
between you and the Side Air Bags; the performance
could be adversely affected and/or objects could be
pushed into you, causing serious injury.
WARNING!
Do not mount equipment, or stack luggage or other
cargo up high enough to block the deployment of the
SABICs. The trim covering above the side windows
where the SABIC and its deployment path are located
should remain free from any obstructions.
In order for the SABICs to work as intended, do not
install any accessory items in your vehicle which
could alter the roof. Do not add an aftermarket
sunroof to your vehicle. Do not add roof racks that
require permanent attachments (bolts or screws) for
installation on the vehicle roof. Do not drill into the
roof of the vehicle for any reason.
6
23_WS_OM_EN_USC_t.book Page 271
Page 278 of 396
276SAFETY
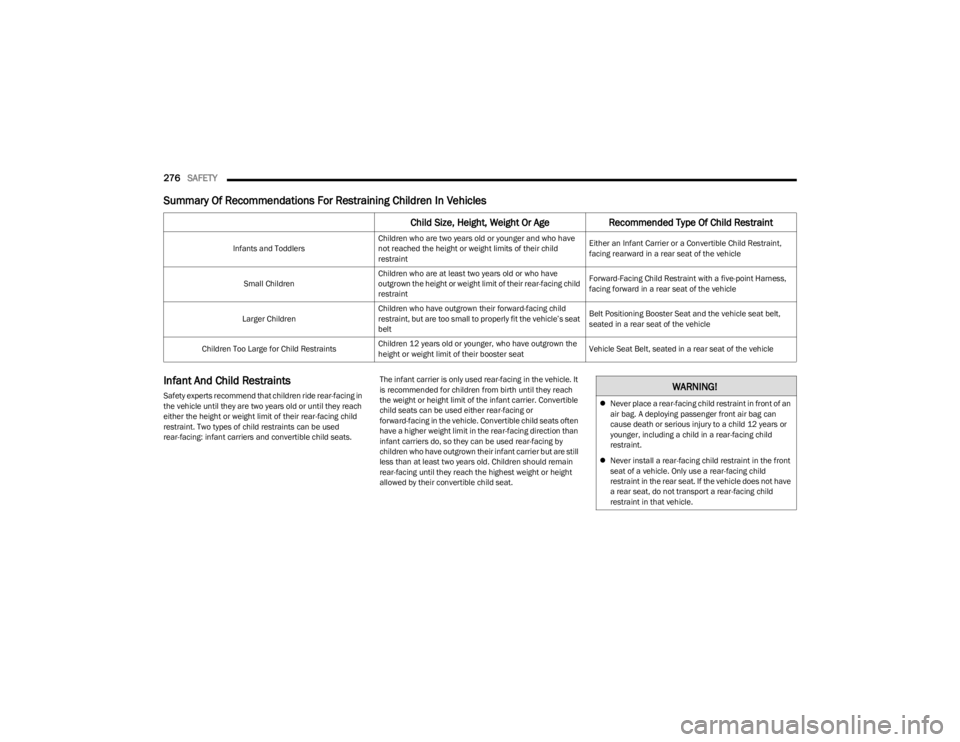
Summary Of Recommendations For Restraining Children In Vehicles
Infant And Child Restraints
Safety experts recommend that children ride rear-facing in
the vehicle until they are two years old or until they reach
either the height or weight limit of their rear-facing child
restraint. Two types of child restraints can be used
rear-facing: infant carriers and convertible child seats. The infant carrier is only used rear-facing in the vehicle. It
is recommended for children from birth until they reach
the weight or height limit of the infant carrier. Convertible
child seats can be used either rear-facing or
forward-facing in the vehicle. Convertible child seats often
have a higher weight limit in the rear-facing direction than
infant carriers do, so they can be used rear-facing by
children who have outgrown their infant carrier but are still
less than at least two years old. Children should remain
rear-facing until they reach the highest weight or height
allowed by their convertible child seat.
Child Size, Height, Weight Or Age
Recommended Type Of Child Restraint
Infants and ToddlersChildren who are two years old or younger and who have
not reached the height or weight limits of their child
restraint Either an Infant Carrier or a Convertible Child Restraint,
facing rearward in a rear seat of the vehicle
Small Children Children who are at least two years old or who have
outgrown the height or weight limit of their rear-facing child
restraint Forward-Facing Child Restraint with a five-point Harness,
facing forward in a rear seat of the vehicle
Larger Children Children who have outgrown their forward-facing child
restraint, but are too small to properly fit the vehicle’s seat
belt Belt Positioning Booster Seat and the vehicle seat belt,
seated in a rear seat of the vehicle
Children Too Large for Child Restraints Children 12 years old or younger, who have outgrown the
height or weight limit of their booster seat Vehicle Seat Belt, seated in a rear seat of the vehicle
WARNING!
Never place a rear-facing child restraint in front of an
air bag. A deploying passenger front air bag can
cause death or serious injury to a child 12 years or
younger, including a child in a rear-facing child
restraint.
Never install a rear-facing child restraint in the front
seat of a vehicle. Only use a rear-facing child
restraint in the rear seat. If the vehicle does not have
a rear seat, do not transport a rear-facing child
restraint in that vehicle.
23_WS_OM_EN_USC_t.book Page 276
Page 279 of 396
SAFETY277
(Continued)
Older Children And Child Restraints
Children who are two years old or who have outgrown their
rear-facing convertible child seat can ride forward-facing
in the vehicle. Forward-facing child seats and convertible
child seats used in the forward-facing direction are for
children who are over two years old or who have outgrown
the rear-facing weight or height limit of their rear-facing
convertible child seat. Children should remain in a
forward-facing child seat with a harness for as long as
possible, up to the highest weight or height allowed by the
child seat.
All children whose weight or height is above the
forward-facing limit for the child seat should use a
belt-positioning booster seat until the vehicle’s seat belts
fit properly. If the child cannot sit with knees bent over the
vehicle’s seat cushion while the child’s back is against the
seatback, they should use a belt-positioning booster seat.
The child and belt-positioning booster seat are held in the
vehicle by the seat belt.
Children Too Large For Booster Seats
Children who are large enough to wear the shoulder belt
comfortably, and whose legs are long enough to bend over
the front of the seat when their back is against the
seatback, should use the seat belt in a rear seat. Use this
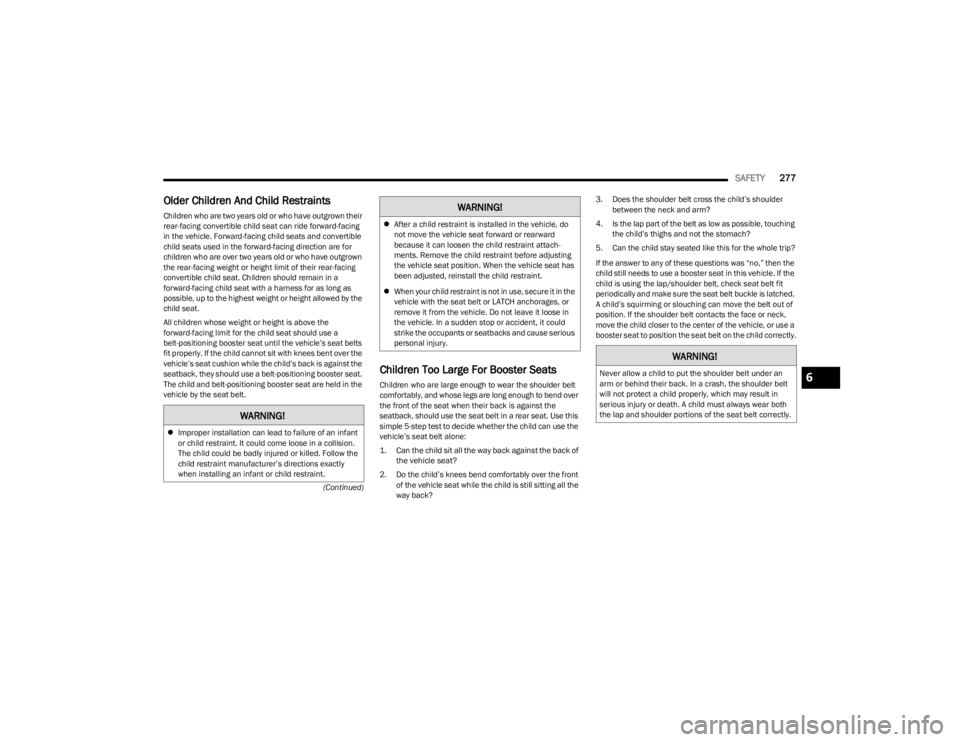
simple 5-step test to decide whether the child can use the
vehicle’s seat belt alone:
1. Can the child sit all the way back against the back of
the vehicle seat?
2. Do the child’s knees bend comfortably over the front of the vehicle seat while the child is still sitting all the
way back? 3. Does the shoulder belt cross the child’s shoulder
between the neck and arm?
4. Is the lap part of the belt as low as possible, touching the child’s thighs and not the stomach?
5. Can the child stay seated like this for the whole trip?
If the answer to any of these questions was “no,” then the
child still needs to use a booster seat in this vehicle. If the
child is using the lap/shoulder belt, check seat belt fit
periodically and make sure the seat belt buckle is latched.
A child’s squirming or slouching can move the belt out of
position. If the shoulder belt contacts the face or neck,
move the child closer to the center of the vehicle, or use a
booster seat to position the seat belt on the child correctly.
WARNING!
Improper installation can lead to failure of an infant
or child restraint. It could come loose in a collision.
The child could be badly injured or killed. Follow the
child restraint manufacturer’s directions exactly
when installing an infant or child restraint.
After a child restraint is installed in the vehicle, do
not move the vehicle seat forward or rearward
because it can loosen the child restraint attach-
ments. Remove the child restraint before adjusting
the vehicle seat position. When the vehicle seat has
been adjusted, reinstall the child restraint.
When your child restraint is not in use, secure it in the
vehicle with the seat belt or LATCH anchorages, or
remove it from the vehicle. Do not leave it loose in
the vehicle. In a sudden stop or accident, it could
strike the occupants or seatbacks and cause serious
personal injury.
WARNING!
WARNING!
Never allow a child to put the shoulder belt under an
arm or behind their back. In a crash, the shoulder belt
will not protect a child properly, which may result in
serious injury or death. A child must always wear both
the lap and shoulder portions of the seat belt correctly.6
23_WS_OM_EN_USC_t.book Page 277
Page 290 of 396
288SAFETY
(Continued)
(Continued)
Defroster
Check operation by selecting the defrost mode and place
the blower control on high speed. You should be able to
feel the air directed against the windshield. See an
authorized dealer for service if your defroster is
inoperable.
Floor Mat Safety Information
Always use floor mats designed to fit your vehicle. Only use
a floor mat that does not interfere with the operation of the
accelerator, brake or clutch pedals. Only use a floor mat
that is securely attached using the floor mat fasteners so
it cannot slip out of position and interfere with the
accelerator, brake or clutch pedals or impair safe
operation of your vehicle in other ways.
WARNING!
An improperly attached, damaged, folded, or stacked
floor mat, or damaged floor mat fasteners may cause
your floor mat to interfere with the accelerator, brake, or
clutch pedals and cause a loss of vehicle control. To
prevent SERIOUS INJURY or DEATH: ALWAYS securely attach your floor mat
using the floor mat fasteners. DO NOT
install your floor mat upside down or turn
your floor mat over. Lightly pull to confirm
mat is secured using the floor mat fasteners on a
regular basis.
ALWAYS REMOVE THE EXISTING FLOOR
MAT FROM THE VEHICLE before installing
any other floor mat. NEVER install or stack
an additional floor mat on top of an
existing floor mat.
ONLY install floor mats designed to fit your vehicle.
NEVER install a floor mat that cannot be properly
attached and secured to your vehicle. If a floor mat
needs to be replaced, only use a FCA approved floor
mat for the specific make, model, and year of your
vehicle.
ONLY use the driver’s side floor mat on the driver’s
side floor area. To check for interference, with the
vehicle properly parked with the engine off, fully
depress the accelerator, the brake, and the clutch
pedal (if present) to check for interference. If your
floor mat interferes with the operation of any pedal,
or is not secure to the floor, remove the floor mat
from the vehicle and place the floor mat in your
trunk.
ONLY use the passenger’s side floor mat on the
passenger’s side floor area.
WARNING!
ALWAYS make sure objects cannot fall or slide into
the driver’s side floor area when the vehicle is
moving. Objects can become trapped under acceler -
ator, brake, or clutch pedals and could cause a loss
of vehicle control.
NEVER place any objects under the floor mat (e.g.,
towels, keys, etc.). These objects could change the
position of the floor mat and may cause interference
with the accelerator, brake, or clutch pedals.
If the vehicle carpet has been removed and
re-installed, always properly attach carpet to the floor
and check the floor mat fasteners are secure to the
vehicle carpet. Fully depress each pedal to check for
interference with the accelerator, brake, or clutch
pedals then re-install the floor mats.
It is recommended to only use mild soap and water
to clean your floor mats. After cleaning, always check
your floor mat has been properly installed and is
secured to your vehicle using the floor mat fasteners
by lightly pulling mat.
WARNING!
23_WS_OM_EN_USC_t.book Page 288
Page 291 of 396
SAFETY289
PERIODIC SAFETY CHECKS YOU SHOULD
M
AKE OUTSIDE THE VEHICLE
Tires
Examine tires for excessive tread wear and uneven wear
patterns. Check for stones, nails, glass, or other objects
lodged in the tread or sidewall. Inspect the tread for cuts
and cracks. Inspect sidewalls for cuts, cracks, and bulges.
Check the lug nut/bolt torque for tightness. Check the
tires (including spare) for proper cold inflation pressure.
Lights
Have someone observe the operation of brake lights and
exterior lights while you work the controls. Check turn
signal and high beam indicator lights on the instrument
panel.
Door Latches
Check for proper closing, latching, and locking.
Fluid Leaks
Check area under the vehicle after overnight parking for
fuel, coolant, oil, or other fluid leaks. Also, if gasoline
fumes are detected or if fuel or brake fluid leaks are
suspected, the cause should be located and corrected
immediately.
EXHAUST GAS
The best protection against carbon monoxide entry into
the vehicle body is a properly maintained engine exhaust
system. Whenever a change is noticed in the sound of the exhaust
system, when exhaust fumes can be detected inside the
vehicle, or when the underside or rear of the vehicle is
damaged, have an authorized dealer inspect the complete
exhaust system and adjacent body areas for broken,
damaged, deteriorated, or mispositioned parts. Open
seams or loose connections could permit exhaust fumes
to seep into the passenger compartment. In addition,
inspect the exhaust system each time the vehicle is raised
for lubrication or oil change. Replace as required.
CARBON MONOXIDE WARNINGS
WARNING!
Exhaust gases can injure or kill. They contain carbon
monoxide (CO), which is colorless and odorless.
Breathing it can make you unconscious and can
eventually poison you. To avoid breathing (CO), follow
these safety tips:
Do not run the engine in a closed garage or in
confined areas any longer than needed to move your
vehicle in or out of the area.
If you are required to drive with the trunk/liftgate/
rear doors open, make sure that all windows are
closed and the climate control BLOWER switch is set
at high speed. DO NOT use the recirculation mode.
If it is necessary to sit in a parked vehicle with the
engine running, adjust your heating or cooling
controls to force outside air into the vehicle. Set the
blower at high speed.
WARNING!
Carbon monoxide (CO) in exhaust gases is deadly.
Follow the precautions below to prevent carbon
monoxide poisoning:
Do not inhale exhaust gases. They contain carbon
monoxide, a colorless and odorless gas, which can
kill. Never run the engine in a closed area, such as a
garage, and never sit in a parked vehicle with the
engine running for an extended period. If the vehicle
is stopped in an open area with the engine running
for more than a short period, adjust the ventilation
system to force fresh, outside air into the vehicle.
Guard against carbon monoxide with proper mainte -
nance. Have the exhaust system inspected every
time the vehicle is raised. Have any abnormal condi -
tions repaired promptly. Until repaired, drive with all
side windows fully open.
6
23_WS_OM_EN_USC_t.book Page 289
Page 300 of 396
298IN CASE OF EMERGENCY
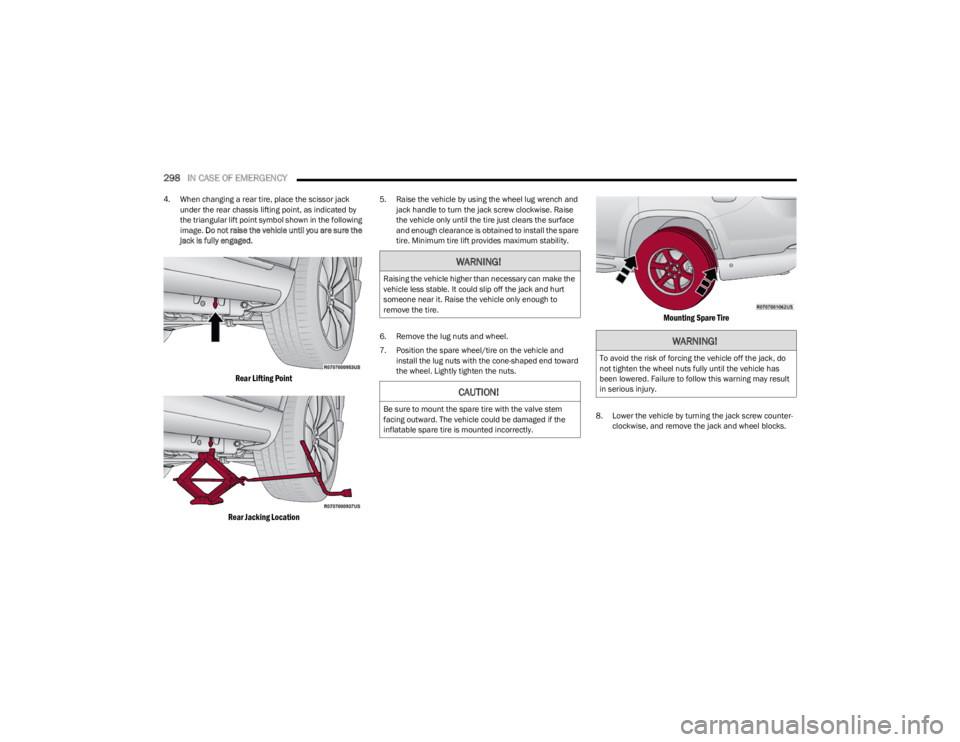
4. When changing a rear tire, place the scissor jack
under the rear chassis lifting point, as indicated by
the triangular lift point symbol shown in the following
image. Do not raise the vehicle until you are sure the
jack is fully engaged.
Rear Lifting Point
Rear Jacking Location
5. Raise the vehicle by using the wheel lug wrench and jack handle to turn the jack screw clockwise. Raise
the vehicle only until the tire just clears the surface
and enough clearance is obtained to install the spare
tire. Minimum tire lift provides maximum stability.
6. Remove the lug nuts and wheel.
7. Position the spare wheel/tire on the vehicle and install the lug nuts with the cone-shaped end toward
the wheel. Lightly tighten the nuts.
Mounting Spare Tire
8. Lower the vehicle by turning the jack screw counter -
clockwise, and remove the jack and wheel blocks.
WARNING!
Raising the vehicle higher than necessary can make the
vehicle less stable. It could slip off the jack and hurt
someone near it. Raise the vehicle only enough to
remove the tire.
CAUTION!
Be sure to mount the spare tire with the valve stem
facing outward. The vehicle could be damaged if the
inflatable spare tire is mounted incorrectly.
WARNING!
To avoid the risk of forcing the vehicle off the jack, do
not tighten the wheel nuts fully until the vehicle has
been lowered. Failure to follow this warning may result
in serious injury.
23_WS_OM_EN_USC_t.book Page 298