android auto JEEP WAGONEER 2023 Owners Manual
[x] Cancel search | Manufacturer: JEEP, Model Year: 2023, Model line: WAGONEER, Model: JEEP WAGONEER 2023Pages: 396, PDF Size: 15.17 MB
Page 78 of 396

76GETTING TO KNOW YOUR VEHICLE
The keypad will then turn red again, and return to the
locked mode when the safe lid is closed.
NOTE:The keypad will flash red if an incorrect lock code is
entered. If the incorrect code is entered ten times in a row,
the user will be locked out from further attempts for
approximately 30 minutes.
To revert the safe back to the unlocked mode:
1. Enter the programmed 6-digit code.
2. Press and hold the Door Open button for two
seconds. The keypad will flash red and change to
pink.
3. Enter the 6-digit code and press the Door Open button. The keypad will flash white.
Once this procedure is completed, the safe will no longer
lock when the lid is closed.
Lock Code Override
If you forget the 6-digit code, there is a way to override the
code, using the emergency key stored inside your key fob:
1. Remove the emergency key from the key fob
Ú
page 18.
2. Use the emergency key to open the safe door.
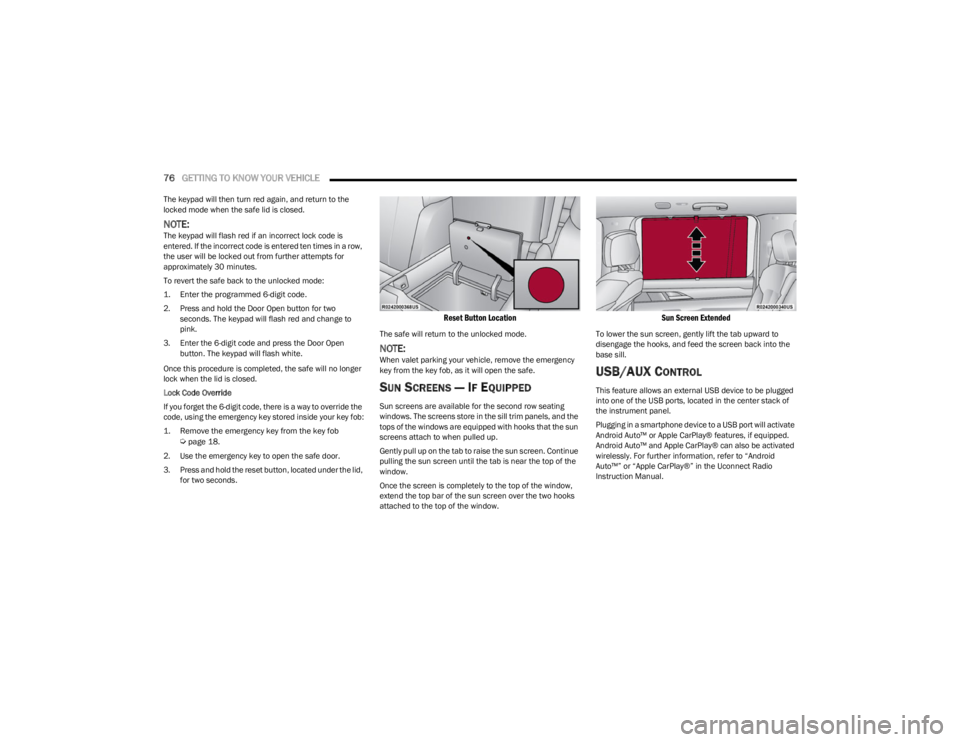
3. Press and hold the reset button, located under the lid, for two seconds.
Reset Button Location
The safe will return to the unlocked mode.
NOTE:When valet parking your vehicle, remove the emergency
key from the key fob, as it will open the safe.
SUN SCREENS — IF EQUIPPED
Sun screens are available for the second row seating
windows. The screens store in the sill trim panels, and the
tops of the windows are equipped with hooks that the sun
screens attach to when pulled up.
Gently pull up on the tab to raise the sun screen. Continue
pulling the sun screen until the tab is near the top of the
window.
Once the screen is completely to the top of the window,
extend the top bar of the sun screen over the two hooks
attached to the top of the window.
Sun Screen Extended
To lower the sun screen, gently lift the tab upward to
disengage the hooks, and feed the screen back into the
base sill.
USB/AUX CONTROL
This feature allows an external USB device to be plugged
into one of the USB ports, located in the center stack of
the instrument panel.
Plugging in a smartphone device to a USB port will activate
Android Auto™ or Apple CarPlay® features, if equipped.
Android Auto™ and Apple CarPlay® can also be activated
wirelessly. For further information, refer to “Android
Auto™” or “Apple CarPlay®” in the Uconnect Radio
Instruction Manual.
23_WS_OM_EN_USC_t.book Page 76
Page 227 of 396

MULTIMEDIA225
HDMI PROJECTING
HDMI lets you connect a device to the provided HDMI port,
using an HDMI cable, and project the device directly to the
Passenger Screen. To begin, plug a a device into the HDMI
port. Then, press the HDMI button on the touchscreen.
HDMI will continue to show the menu bar and Headphone
Paring button.
NOTE:
The HDMI Card will not automatically launch when a
new device is connected. The HDMI Card will show a
device connected, and the Card will need to be
pressed.
If the user disconnects a device from the HDMI port
while the HDMI Card is in full screen, the system will
close HDMI and reload the Home screen.
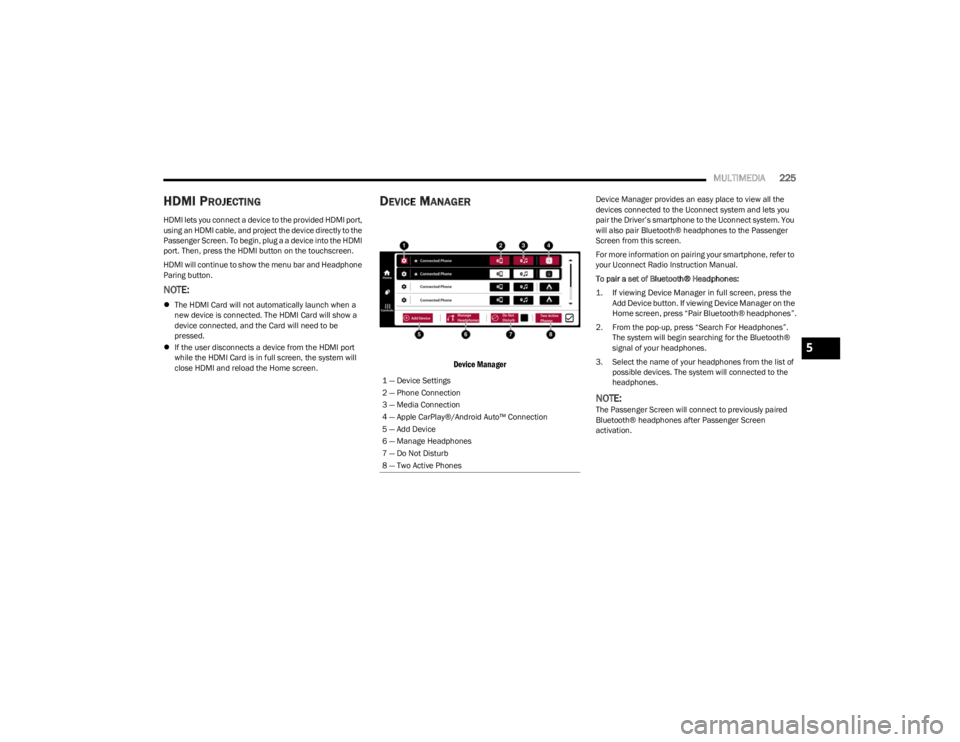
DEVICE MANAGER
Device Manager
Device Manager provides an easy place to view all the
devices connected to the Uconnect system and lets you
pair the Driver’s smartphone to the Uconnect system. You
will also pair Bluetooth® headphones to the Passenger
Screen from this screen.
For more information on pairing your smartphone, refer to
your Uconnect Radio Instruction Manual.
To pair a set of Bluetooth® Headphones:
1. If viewing Device Manager in full screen, press the
Add Device button. If viewing Device Manager on the
Home screen, press “Pair Bluetooth® headphones”.
2. From the pop-up, press “Search For Headphones”. The system will begin searching for the Bluetooth®
signal of your headphones.
3. Select the name of your headphones from the list of possible devices. The system will connected to the
headphones.
NOTE:The Passenger Screen will connect to previously paired
Bluetooth® headphones after Passenger Screen
activation.
1 — Device Settings
2 — Phone Connection
3 — Media Connection
4 — Apple CarPlay®/Android Auto™ Connection
5 — Add Device
6 — Manage Headphones
7 — Do Not Disturb
8 — Two Active Phones
5
23_WS_OM_EN_USC_t.book Page 225