navigation system JEEP WAGONEER 2023 Owners Manual
[x] Cancel search | Manufacturer: JEEP, Model Year: 2023, Model line: WAGONEER, Model: JEEP WAGONEER 2023Pages: 396, PDF Size: 15.17 MB
Page 7 of 396
5
SURROUND VIEW CAMERA SYSTEM —
IF EQUIPPED ..................................................................... 175Zoom View ................................................................. 176
REFUELING THE VEHICLE .............................................. 177
VEHICLE LOADING ........................................................ 178 Gross Vehicle Weight Rating (GVWR) ..................... 178
Payload ...................................................................... 178
Gross Axle Weight Rating (GAWR)............................ 178
Tire Size ..................................................................... 178Rim Size ..................................................................... 178Inflation Pressure ...................................................... 178Curb Weight ............................................................... 178
Loading ...................................................................... 178
TRAILER TOWING............................................................. 178 Common Towing Definitions .................................... 179
Trailer Hitch Classification........................................ 182Trailer Towing Weights (Maximum Trailer
Weight Ratings) ......................................................... 182
Trailer Hitch Receiver Cover Removal —
If Equipped ................................................................ 184
Trailer And Tongue Weight ...................................... 185
Towing Requirements .............................................. 185
Towing Tips ............................................................... 189
RECREATIONAL TOWING (BEHIND MOTORHOME) ..... 190 Towing This Vehicle Behind Another Vehicle .......... 190
Recreational Towing — Two-Wheel
Drive Models ............................................................. 190Recreational Towing — Quadra-Trac I
(Single-Speed Transfer Case) Four-Wheel
Drive Models ............................................................. 191Recreational Towing — Quadra–Trac II/
Quadra–Drive II Four-Wheel Drive Models .............. 191
DRIVING TIPS ................................................................... 193 On-Road Driving Tips ................................................ 193Off-Road Driving Tips ................................................ 193MULTIMEDIA
UCONNECT SYSTEMS ..................................................... 196
CYBERSECURITY ............................................................. 196
UCONNECT SETTINGS ..................................................... 197 Customer Programmable Features ......................... 197
STEERING WHEEL AUDIO CONTROLS .......................... 221 Radio Operation ........................................................ 221Media Mode .............................................................. 221
PASSENGER SCREEN — IF EQUIPPED .......................... 221 Passenger Screen Permissions ............................... 222
Home Screen ............................................................ 222
Audio And Video ........................................................ 223Rear Seat Entertainment with Amazon Fire TV
Built-in — If Equipped................................................ 224
HDMI Projecting ........................................................ 225Device Manager........................................................ 225Navigation ................................................................. 226Camera ...................................................................... 226
3RD PARTY APPS — IF EQUIPPED ................................ 226
REAR SEAT ENTERTAINMENT (RSE) WITH
AMAZON FIRE TV BUILT-IN — IF EQUIPPED.................. 228 Overview .................................................................... 228
Getting Started.......................................................... 228
Accessing Rear Seat Entertainment with
Fire TV built-in from the Front Radio Screen........... 228
Accessing Rear Seat Entertainment with
Fire TV built-in from the Rear Screens .................... 229
Accessing Rear Seat Entertainment with
Fire TV built-in from the Passenger Screen —
If Equipped ................................................................ 229 First Time Starting Up
(Using the Rear Screens) .......................................... 229
Alexa Voice Control.................................................... 230
Listen Via Vehicle Speakers ..................................... 230
Quick Menu................................................................ 230
Parental Controls (Using the Rear Screens) ............ 230
Voice Remote with Alexa Pairing
(Using the Rear Screens) .......................................... 230
Media Sources Input (Using the Front Radio
and Rear Screens)..................................................... 230
Voice Remote with Alexa........................................... 231
Replacing the Voice Remote with
Alexa Batteries........................................................... 231
Rear Seat Entertainment with Fire TV Built-In
streaming (Using the Front Radio and
Rear Screens) ............................................................ 232Fire TV Apps/Games
(Using the Rear Screens) .......................................... 233
Are We There Yet? ..................................................... 233Using The Video USB Port ......................................... 233
Play Video Games...................................................... 233Headphones Operation ............................................. 233
Rear Climate Controls ............................................... 234Legal & Compliance .................................................. 235
OFF-ROAD PAGES — IF EQUIPPED .................................236 Off-Road Pages Status Bar ....................................... 236Vehicle Dynamics ...................................................... 236Accessory Gauges ..................................................... 237Pitch & Roll ................................................................ 237
Selec-Terrain — If Equipped ...................................... 237Suspension — If Equipped ........................................ 238
RADIO OPERATION AND MOBILE PHONES ..................238 Regulatory And Safety Information .......................... 238
23_WS_OM_EN_USC_t.book Page 5
Page 51 of 396
GETTING TO KNOW YOUR VEHICLE49
Uconnect Voice Command Buttons
ADDITIONAL INFORMATION
© 2022 FCA US LLC. All rights reserved. Mopar and
Uconnect are registered trademarks and Mopar Owner
Connect is a trademark of FCA US LLC. SiriusXM® and all
related marks and logos are trademarks of SiriusXM®
Radio Inc.
Úpage 382.
For Uconnect system support, call 1-877-855-8400
(24 hours a day 7 days a week) or visit DriveUconnect.com
(US) or DriveUconnect.ca (Canada).
DRIVER ADJUSTABLE PEDALS
The adjustable pedals system is designed to allow a
greater range of driver comfort for steering wheel tilt and
seat position. This feature allows the brake and
accelerator pedals to move toward or away from the driver
to provide improved position with the steering wheel.
The adjustable pedal switch is located on the instrument
panel, next to the headlight switch.
Adjustable Pedals Switch
The pedals can be adjusted with the ignition in the OFF
position.
The pedals cannot be adjusted when the vehicle is in
REVERSE or when the Cruise Control system or Adap -
tive Cruise Control system is on. If there is an attempt
to adjust the pedals when the system is locked out, the
following messages will appear:
Adjustable Pedal Disabled — Cruise Control
Engaged
Adjustable Pedal Disabled — Vehicle In Reverse
NOTE:
Always adjust the pedals to a position that allows full
movement of the pedal.
Further small adjustments may be necessary to find
the best possible seat/pedal position.
For vehicles equipped with Driver Memory Settings
Úpage 31, you can use your key fob or the memory
switch on the driver’s door trim panel to return the
adjustable pedals to saved positions.
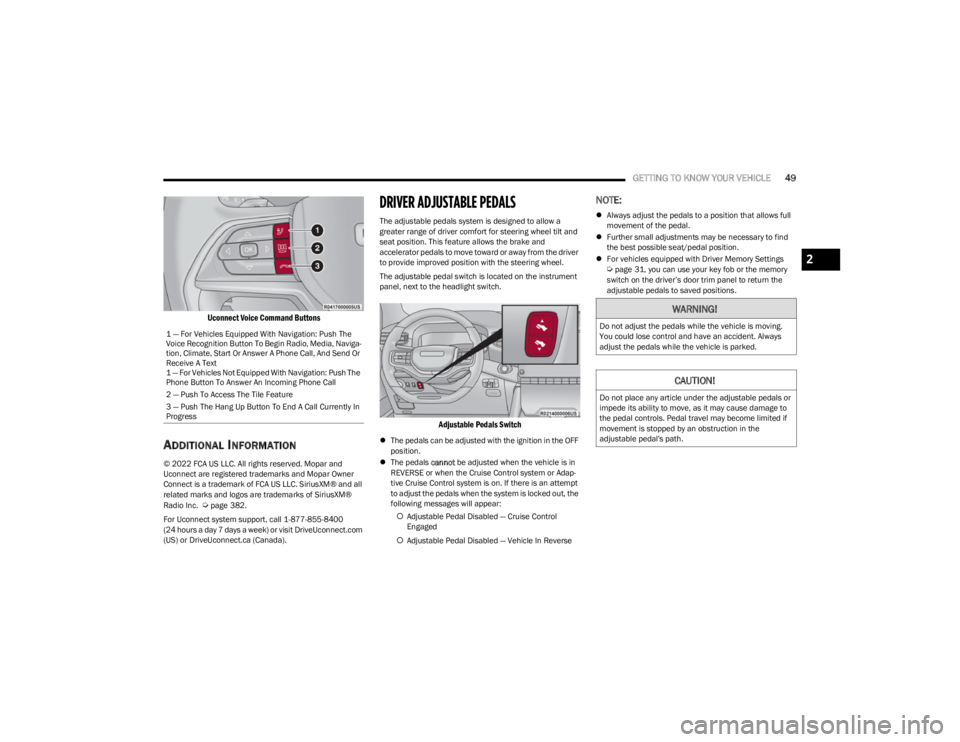
1 — For Vehicles Equipped With Navigation: Push The
Voice Recognition Button To Begin Radio, Media, Naviga -
tion, Climate, Start Or Answer A Phone Call, And Send Or
Receive A Text
1 — For Vehicles Not Equipped With Navigation: Push The
Phone Button To Answer An Incoming Phone Call
2 — Push To Access The Tile Feature
3 — Push The Hang Up Button To End A Call Currently In
Progress
WARNING!
Do not adjust the pedals while the vehicle is moving.
You could lose control and have an accident. Always
adjust the pedals while the vehicle is parked.
CAUTION!
Do not place any article under the adjustable pedals or
impede its ability to move, as it may cause damage to
the pedal controls. Pedal travel may become limited if
movement is stopped by an obstruction in the
adjustable pedal's path.
2
23_WS_OM_EN_USC_t.book Page 49
Page 103 of 396
GETTING TO KNOW YOUR INSTRUMENT PANEL101
Navigate Left or Right to highlight desired tile
Press OK to select the tile and navigate to the selected
submenu and press OK again to add your selection to
your tile view
The main menu options of the home screen are Driver
Info, Vehicle Info, Navigation — If Equipped, Audio, and
Off Road
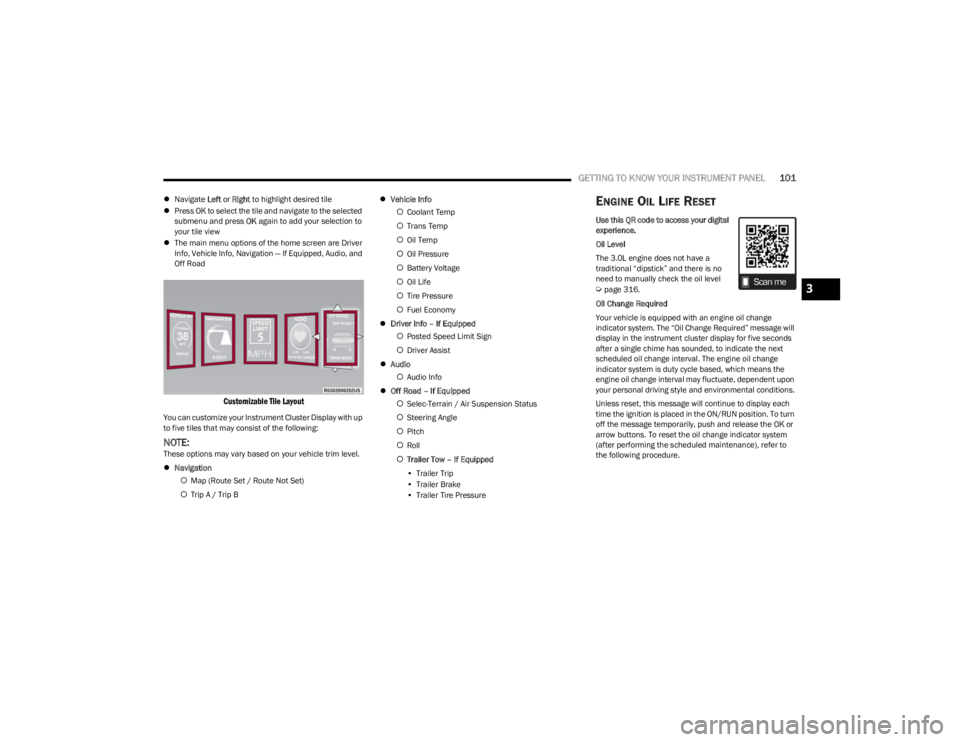
Customizable Tile Layout
You can customize your Instrument Cluster Display with up
to five tiles that may consist of the following:
NOTE:These options may vary based on your vehicle trim level.
Navigation
Map (Route Set / Route Not Set)
Trip A / Trip B
Vehicle Info
Coolant Temp
Trans Temp
Oil Temp
Oil Pressure
Battery Voltage
Oil Life
Tire Pressure
Fuel Economy
Driver Info – If Equipped
Posted Speed Limit Sign
Driver Assist
Audio
Audio Info
Off Road – If Equipped
Selec-Terrain / Air Suspension Status
Steering Angle
Pitch
Roll
Trailer Tow – If Equipped
• Trailer Trip
• Trailer Brake
• Trailer Tire Pressure
ENGINE OIL LIFE RESET
Use this QR code to access your digital
experience.
Oil Level
The 3.0L engine does not have a
traditional “dipstick” and there is no
need to manually check the oil level
Úpage 316.
Oil Change Required
Your vehicle is equipped with an engine oil change
indicator system. The “Oil Change Required” message will
display in the instrument cluster display for five seconds
after a single chime has sounded, to indicate the next
scheduled oil change interval. The engine oil change
indicator system is duty cycle based, which means the
engine oil change interval may fluctuate, dependent upon
your personal driving style and environmental conditions.
Unless reset, this message will continue to display each
time the ignition is placed in the ON/RUN position. To turn
off the message temporarily, push and release the OK or
arrow buttons. To reset the oil change indicator system
(after performing the scheduled maintenance), refer to
the following procedure.3
23_WS_OM_EN_USC_t.book Page 101
Page 106 of 396
104GETTING TO KNOW YOUR INSTRUMENT PANEL
INSTRUMENT CLUSTER DISPLAY MENU
I
TEMS
The instrument cluster display can be used to view the
main menu items for several features. Use the up and
down arrow buttons to scroll through the driver
interactive display menu options until the desired menu is
reached.
NOTE:Depending on the vehicle’s options, feature settings may
vary.
Main Menu
DRIVER INFO
Push and release the up or down arrow button until
the Driver Info icon/title is highlighted in the instrument
cluster display. Push the left or right arrow button to
scroll through the information submenus.
Speedometer
Push and release the OK button to toggle units (mph or
km/h) of the speedometer. Hold the OK button to toggle
between Analog and Digital speedometer. Night Vision — If Equipped
Arrow buttons and submenu indicators
disappear after five seconds of menu
navigation inactivity. Pedestrian/Animal icons
will be displayed in the top left location
Úpage 172.
Driver Assist — If Equipped
The Driver Assist screen indicates the current status of
ACC, Active Lane Management and Active Driving Assist/
Assist+/Pilot
Úpage 247.
VEHICLE INFO
Push and release the up or down arrow button until
the Vehicle Info icon/title is highlighted in the instrument
cluster display. Push the left or right arrow button to
scroll through the information submenus.
Fuel Economy
Average Fuel Economy
Current Fuel Economy
Range To Empty
Press the OK button to reset the average fuel economy
NOTE:The Range feature is not able to be reset through the
instrument cluster display controls. Gauge Summary
Coolant Temperature — If Equipped
Displays the current temperature of the coolant.
Transmission Temperature
Displays the actual transmission temperature.
Oil Temperature
Displays the actual oil temperature.
Oil Pressure
Displays the actual oil pressure.
Battery Voltage
Displays the current voltage level of the battery.
Oil Life
Displays the current oil life of the vehicle.
Tire Pressure Monitoring System
If tire pressure is OK for all tires a vehicle icon is
displayed with tire pressure values in each corner of
the icon.
If one or more tires have low pressure, “Inflate Tire To
XX” is displayed with the vehicle icon and the tire pres -
sure values in each corner of the icon with the pressure
value of the low tire are displayed in a different color
than the other tire pressure value.
If the Tire Pressure system requires service, “Service
Tire Pressure System” is displayed.
Tire Pressure is an information only function, and cannot
be reset
Úpage 252.
Stop/Start Status — If Equipped
Display current status of Stop/Start system.
23_WS_OM_EN_USC_t.book Page 104
Page 108 of 396
106GETTING TO KNOW YOUR INSTRUMENT PANEL
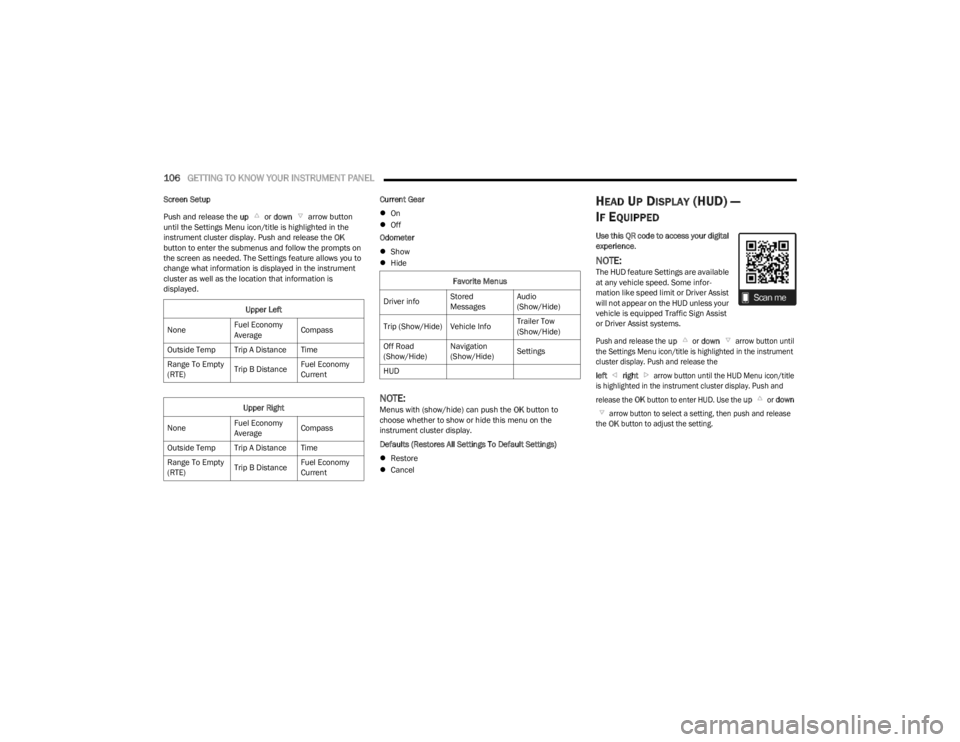
Screen Setup
Push and release the up or down arrow button
until the Settings Menu icon/title is highlighted in the
instrument cluster display. Push and release the OK
button to enter the submenus and follow the prompts on
the screen as needed. The Settings feature allows you to
change what information is displayed in the instrument
cluster as well as the location that information is
displayed. Current Gear
On
Off
Odometer
Show
Hide
NOTE:Menus with (show/hide) can push the OK button to
choose whether to show or hide this menu on the
instrument cluster display.
Defaults (Restores All Settings To Default Settings)
Restore
Cancel
HEAD UP DISPLAY (HUD) —
I
F EQUIPPED
Use this QR code to access your digital
experience .
NOTE:The HUD feature Settings are available
at any vehicle speed. Some infor -
mation like speed limit or Driver Assist
will not appear on the HUD unless your
vehicle is equipped Traffic Sign Assist
or Driver Assist systems.
Push and release the
up
or
down
arrow button until
the Settings Menu icon/title is highlighted in the instrument
cluster display. Push and release the
left
right
arrow button until the HUD Menu icon/title
is highlighted in the instrument cluster display. Push and
release the
OK
button to enter HUD. Use the
up
or
down
arrow button to select a setting, then push and release
the
OK
button to adjust the setting.
Upper Left
None Fuel Economy
AverageCompass
Outside Temp Trip A Distance Time
Range To Empty
(RTE) Trip B DistanceFuel Economy
Current
Upper Right
None Fuel Economy
AverageCompass
Outside Temp Trip A Distance Time
Range To Empty
(RTE) Trip B DistanceFuel Economy
CurrentFavorite Menus
Driver info Stored
MessagesAudio
(Show/Hide)
Trip (Show/Hide) Vehicle Info Trailer Tow
(Show/Hide)
Off Road
(Show/Hide) Navigation
(Show/Hide)
Settings
HUD
23_WS_OM_EN_USC_t.book Page 106
Page 109 of 396
GETTING TO KNOW YOUR INSTRUMENT PANEL107
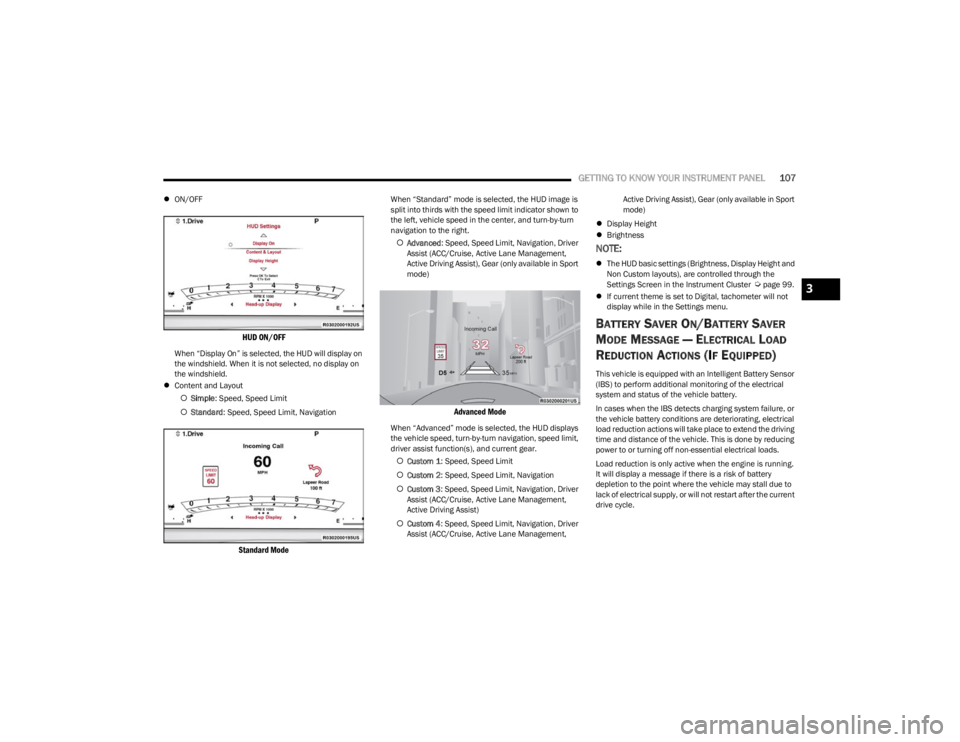
ON/OFF
HUD ON/OFF
When “Display On” is selected, the HUD will display on
the windshield. When it is not selected, no display on
the windshield.
Content and Layout
Simple : Speed, Speed Limit
Standard : Speed, Speed Limit, Navigation
Standard Mode
When “Standard” mode is selected, the HUD image is
split into thirds with the speed limit indicator shown to
the left, vehicle speed in the center, and turn-by-turn
navigation to the right.
Advanced : Speed, Speed Limit, Navigation, Driver
Assist (ACC/Cruise, Active Lane Management,
Active Driving Assist), Gear (only available in Sport
mode)
Advanced Mode
When “Advanced” mode is selected, the HUD displays
the vehicle speed, turn-by-turn navigation, speed limit,
driver assist function(s), and current gear.
Custom 1 : Speed, Speed Limit
Custom 2 : Speed, Speed Limit, Navigation
Custom 3 : Speed, Speed Limit, Navigation, Driver
Assist (ACC/Cruise, Active Lane Management,
Active Driving Assist)
Custom 4 : Speed, Speed Limit, Navigation, Driver
Assist (ACC/Cruise, Active Lane Management, Active Driving Assist), Gear (only available in Sport
mode)
Display Height
Brightness
NOTE:
The HUD basic settings (Brightness, Display Height and
Non Custom layouts), are controlled through the
Settings Screen in the Instrument Cluster
Úpage 99.
If current theme is set to Digital, tachometer will not
display while in the Settings menu.
BATTERY SAVER ON/BATTERY SAVER
M
ODE MESSAGE — ELECTRICAL LOAD
R
EDUCTION ACTIONS (IF EQUIPPED)
This vehicle is equipped with an Intelligent Battery Sensor
(IBS) to perform additional monitoring of the electrical
system and status of the vehicle battery.
In cases when the IBS detects charging system failure, or
the vehicle battery conditions are deteriorating, electrical
load reduction actions will take place to extend the driving
time and distance of the vehicle. This is done by reducing
power to or turning off non-essential electrical loads.
Load reduction is only active when the engine is running.
It will display a message if there is a risk of battery
depletion to the point where the vehicle may stall due to
lack of electrical supply, or will not restart after the current
drive cycle.
3
23_WS_OM_EN_USC_t.book Page 107
Page 148 of 396
146STARTING AND OPERATING
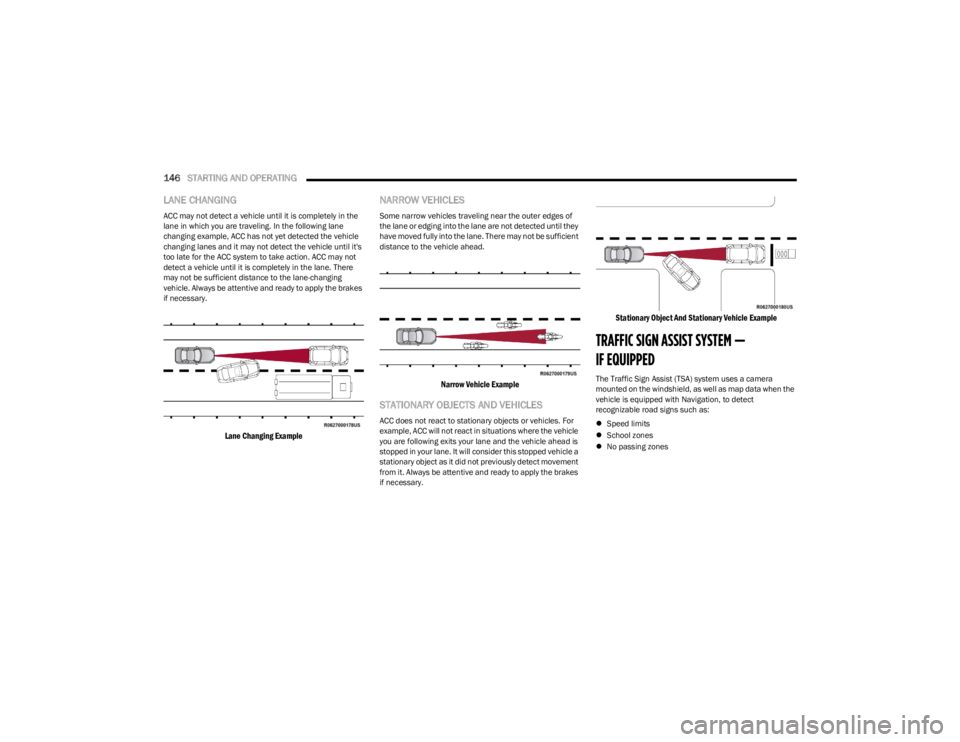
LANE CHANGING
ACC may not detect a vehicle until it is completely in the
lane in which you are traveling. In the following lane
changing example, ACC has not yet detected the vehicle
changing lanes and it may not detect the vehicle until it's
too late for the ACC system to take action. ACC may not
detect a vehicle until it is completely in the lane. There
may not be sufficient distance to the lane-changing
vehicle. Always be attentive and ready to apply the brakes
if necessary.
Lane Changing Example
NARROW VEHICLES
Some narrow vehicles traveling near the outer edges of
the lane or edging into the lane are not detected until they
have moved fully into the lane. There may not be sufficient
distance to the vehicle ahead.
Narrow Vehicle Example
STATIONARY OBJECTS AND VEHICLES
ACC does not react to stationary objects or vehicles. For
example, ACC will not react in situations where the vehicle
you are following exits your lane and the vehicle ahead is
stopped in your lane. It will consider this stopped vehicle a
stationary object as it did not previously detect movement
from it. Always be attentive and ready to apply the brakes
if necessary.
Stationary Object And Stationary Vehicle Example
TRAFFIC SIGN ASSIST SYSTEM —
IF EQUIPPED
The Traffic Sign Assist (TSA) system uses a camera
mounted on the windshield, as well as map data when the
vehicle is equipped with Navigation, to detect
recognizable road signs such as:
Speed limits
School zones
No passing zones
23_WS_OM_EN_USC_t.book Page 146
Page 149 of 396
STARTING AND OPERATING147
NOTE:
The TSA system will automatically display the
detected road sign using the unit of measurement
(mph or km/h) selected within Uconnect Settings, or
within the instrument cluster display.
If no speed limit signs are detected, the system will
revert to the speed limit signs that are stored in the
Navigation system.
The system always checks the traffic signs indicating
the current speed limit. The system is able to recognize
and display up to two different road signs in the instru -
ment cluster display. These road signs can be found on
the Driver Assist page.
ACTIVATION/DEACTIVATION
The TSA System can be enabled/disabled within the
Uconnect system through the Safety/Driver Assistance
menu. System ON is signaled by road signs shown on the
instrument cluster display.
NOTE:Even if the system is OFF, the speed limit sign will be
displayed when the driver selects it in the HOME screen.
TRAFFIC SIGN ASSIST MODES
TSA has three selectable modes of operation that are
available through the Uconnect system Úpage 197.
Visual
When Visual is selected, the system will alert the driver
when the current speed of the vehicle exceeds the
detected speed limit by showing a graphic in the
instrument cluster display. Visual + Chime
When Visual + Chime is selected, the system will alert the
driver when the current speed of the vehicle exceeds the
detected speed limit by showing a graphic in the
instrument cluster display and by sounding an audible
alert. The audible alert will last for 10 seconds, and the
visual alert will remain on as long as the vehicle is
exceeding the speed limit.
TSA Off
When the TSA system is turned off, the system will not
show any traffic signs (unless selected in the HOME
screen, which will show detected speed limit signs), and
no alerts will be issued to the driver.
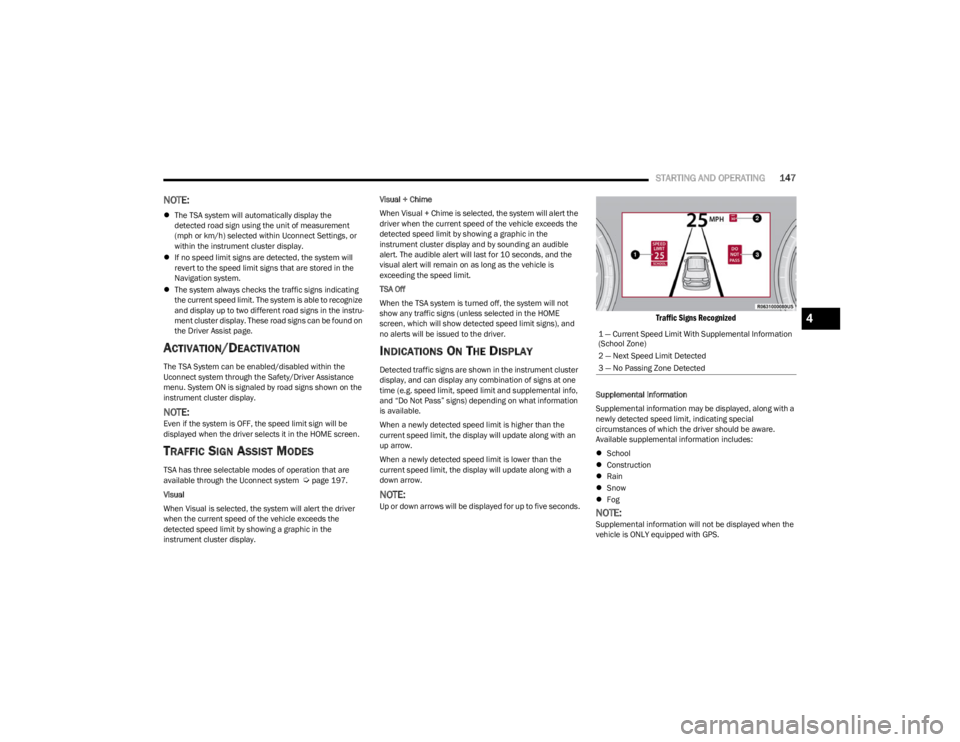
INDICATIONS ON THE DISPLAY
Detected traffic signs are shown in the instrument cluster
display, and can display any combination of signs at one
time (e.g. speed limit, speed limit and supplemental info,
and “Do Not Pass” signs) depending on what information
is available.
When a newly detected speed limit is higher than the
current speed limit, the display will update along with an
up arrow.
When a newly detected speed limit is lower than the
current speed limit, the display will update along with a
down arrow.
NOTE:Up or down arrows will be displayed for up to five seconds.
Traffic Signs Recognized
Supplemental Information
Supplemental information may be displayed, along with a
newly detected speed limit, indicating special
circumstances of which the driver should be aware.
Available supplemental information includes:
School
Construction
Rain
Snow
Fog
NOTE:Supplemental information will not be displayed when the
vehicle is ONLY equipped with GPS.1 — Current Speed Limit With Supplemental Information
(School Zone)
2 — Next Speed Limit Detected
3 — No Passing Zone Detected
4
23_WS_OM_EN_USC_t.book Page 147
Page 172 of 396
170STARTING AND OPERATING
NOTE:
The Active Lane Management system operates with
similar behavior for a right lane departure.
If the turn signal is activated, and the vehicle begins to
depart the lane at the same time the Blind Spot Moni -
toring (BSM) system detects another vehicle in the
BSM zones, the system will provide haptic steering
wheel vibration and/or steering assist torque (if
programmed in Uconnect Settings).
CHANGING ACTIVE LANE MANAGEMENT
S
TATUS
Configurable settings for the Active Lane Management
system are available within the Uconnect system
Úpage 197.
Selectable Warning Types:
Vibration Only
Steering Assist Only
Vibration And Steering Assist
Other configurable settings for this system are for the
intensity of the vibration (high/med/low), steering assist
strength (hi/med/low), and the warning zone sensitivity
(early/medium/late).
NOTE:
The system will not apply vibration and/or steering
assist to the steering wheel whenever a safety system
engages (Anti-Lock Brakes, Traction Control System,
Electronic Stability Control, Forward Collision Warning,
etc.).
The Blind Spot Monitoring system will be forced on
when the ALM system is enabled.
The ALM system will be suppressed when the Active
Driving Assist system (if equipped) is engaged.
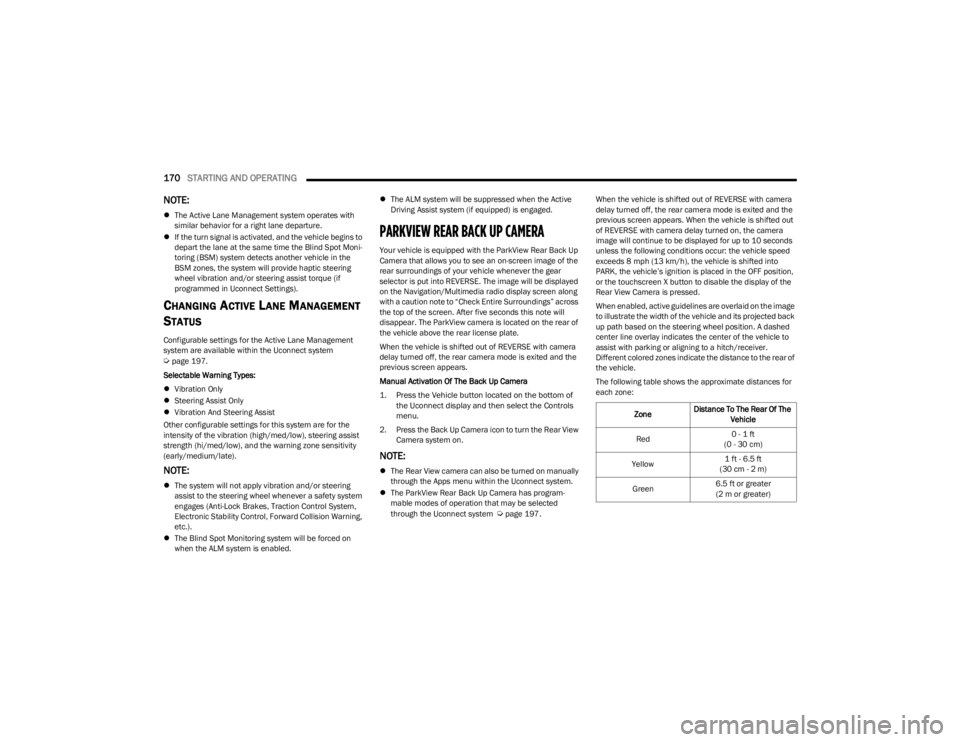
PARKVIEW REAR BACK UP CAMERA
Your vehicle is equipped with the ParkView Rear Back Up
Camera that allows you to see an on-screen image of the
rear surroundings of your vehicle whenever the gear
selector is put into REVERSE. The image will be displayed
on the Navigation/Multimedia radio display screen along
with a caution note to “Check Entire Surroundings” across
the top of the screen. After five seconds this note will
disappear. The ParkView camera is located on the rear of
the vehicle above the rear license plate.
When the vehicle is shifted out of REVERSE with camera
delay turned off, the rear camera mode is exited and the
previous screen appears.
Manual Activation Of The Back Up Camera
1. Press the Vehicle button located on the bottom of
the Uconnect display and then select the Controls
menu.
2. Press the Back Up Camera icon to turn the Rear View Camera system on.
NOTE:
The Rear View camera can also be turned on manually
through the Apps menu within the Uconnect system.
The ParkView Rear Back Up Camera has program -
mable modes of operation that may be selected
through the Uconnect system
Úpage 197. When the vehicle is shifted out of REVERSE with camera
delay turned off, the rear camera mode is exited and the
previous screen appears. When the vehicle is shifted out
of REVERSE with camera delay turned on, the camera
image will continue to be displayed for up to 10 seconds
unless the following conditions occur: the vehicle speed
exceeds 8 mph (13 km/h), the vehicle is shifted into
PARK, the vehicle’s ignition is placed in the OFF position,
or the touchscreen X button to disable the display of the
Rear View Camera is pressed.
When enabled, active guidelines are overlaid on the image
to illustrate the width of the vehicle and its projected back
up path based on the steering wheel position. A dashed
center line overlay indicates the center of the vehicle to
assist with parking or aligning to a hitch/receiver.
Different colored zones indicate the distance to the rear of
the vehicle.
The following table shows the approximate distances for
each zone:
Zone Distance To The Rear Of The
Vehicle
Red 0 - 1 ft
(0 - 30 cm)
Yellow 1 ft - 6.5 ft
(30 cm - 2 m)
Green 6.5 ft or greater
(2 m or greater)
23_WS_OM_EN_USC_t.book Page 170
Page 201 of 396
MULTIMEDIA199
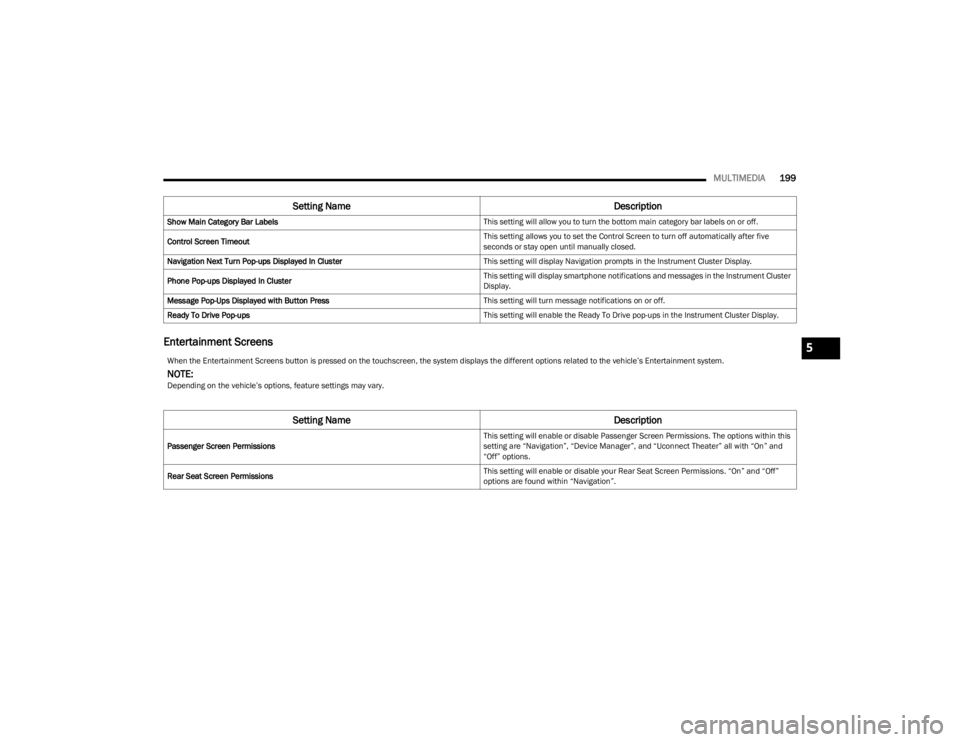
Entertainment Screens
Show Main Category Bar Labels This setting will allow you to turn the bottom main category bar labels on or off.
Control Screen Timeout This setting allows you to set the Control Screen to turn off automatically after five
seconds or stay open until manually closed.
Navigation Next Turn Pop-ups Displayed In Cluster This setting will display Navigation prompts in the Instrument Cluster Display.
Phone Pop-ups Displayed In Cluster This setting will display smartphone notifications and messages in the Instrument Cluster
Display.
Message Pop-Ups Displayed with Button Press This setting will turn message notifications on or off.
Ready To Drive Pop-ups This setting will enable the Ready To Drive pop-ups in the Instrument Cluster Display.
Setting NameDescription
When the Entertainment Screens button is pressed on the touchscreen, the system displays the different options related to the vehicle’s Entertainment system.
NOTE:Depending on the vehicle’s options, feature settings may vary.
Setting NameDescription
Passenger Screen Permissions This setting will enable or disable Passenger Screen Permissions. The options within this
setting are “Navigation”, “Device Manager”, and “Uconnect Theater” all with “On” and
“Off” options.
Rear Seat Screen Permissions This setting will enable or disable your Rear Seat Screen Permissions. “On” and “Off”
options are found within “Navigation”.
5
23_WS_OM_EN_USC_t.book Page 199