inflation pressure JEEP WRANGLER 2007 JK / 3.G User Guide
[x] Cancel search | Manufacturer: JEEP, Model Year: 2007, Model line: WRANGLER, Model: JEEP WRANGLER 2007 JK / 3.GPages: 467, PDF Size: 8.83 MB
Page 314 of 467
Keep unmounted tires in a cool, dry place with as little
exposure to light as possible. Protect tires from contact
with oil, grease and gasoline.
Replacement Tires
The tires on your new vehicle provide a balance of many
characteristics. They should be inspected regularly for
wear and correct cold tire inflation pressure. The manu-
facturer strongly recommends that you use tires equiva-
lent to the originals in size, quality and performance
when replacement is needed (see the paragraph on tread
wear indicators). Refer to the Tire and Loading Informa-
tion placard for the size designation of your tire. The
service description and load identification will be found
on the original equipment tire. Failure to use equivalent
replacement tires may adversely affect the safety, han-
dling, and ride of your vehicle. We recommend that you
contact your original equipment or an authorized tire
dealer with any questions you may have on tire specifi-
cations or capability.
WARNING!
•Do not use a tire, wheel size or rating other than that
specified for your vehicle. Some combinations of
unapproved tires and wheels may change suspension
dimensions and performance characteristics, result-
ing in changes to steering, handling, and braking of
your vehicle. This can cause unpredictable handling
and stress to steering and suspension components.
You could lose control and have an accident resulting
in serious injury or death. Use only the tire and wheel
sizes with load ratings approved for your vehicle.
•Never use a tire with a smaller load index or capacity,
other than what was originally equipped on your
vehicle. Using a tire with a smaller load index could
result in tire overloading and failure. You could lose
control and have an accident.
•Failure to equip your vehicle with tires having ad-
equate speed capability can result in sudden tire
failure and loss of vehicle control.
314 STARTING AND OPERATING
Page 317 of 467
TIRE PRESSURE MONITOR SYSTEM (TPMS) — IF
EQUIPPED
The Tire Pressure Monitoring System (TPMS) will warn
the driver of a low tire pressure based on the vehicle
recommended cold placard pressure.
The tire pressure will vary with temperature by about 1
psi (6.9 kPa) for every 12°F (6.5°C). This means that when
the outside temperature decreases, the tire pressure will
decrease. Tire pressure should always be set based on
cold inflation tire pressure. This is defined as the tire
pressure after a vehicle has not been driven for more than
3 hours - and in outside ambient temperature. Refer to
the “Tires — General Information” in this section for
information on how to properly inflate the vehicle’s tires.
The tire pressure will also increase as the vehicle is
driven, this is normal and there should be no adjustment
for this increased pressure.The TPM System will warn the driver of a low tire
pressure if the tire pressure falls below the low pressure
warning threshold for any reason, including low tem-
perature effects.
The TPM System will continue to warn the driver of low
tire pressure as long as the condition exists, and will not
turn off until the tire pressure is at or above recom-
mended cold placard pressure. Once the low tire pressure
warning has been illuminated, the tire pressure must be
increased to the recommended cold placard pressure in
order for the “Tire Pressure Monitoring Telltale Light” to
be turned off. The system will automatically update and
the “Tire Pressure Monitoring Telltale Light” will extin-
guish once the updated tire pressures have been received.
The vehicle may need to be driven for up to 10 minutes
above 15 mph (25 km/h) to receive this information.
For example, your vehicle may have a recommended
cold (parked for more than 3 hours) air pressure of 35 psi
STARTING AND OPERATING 317
5
Page 319 of 467
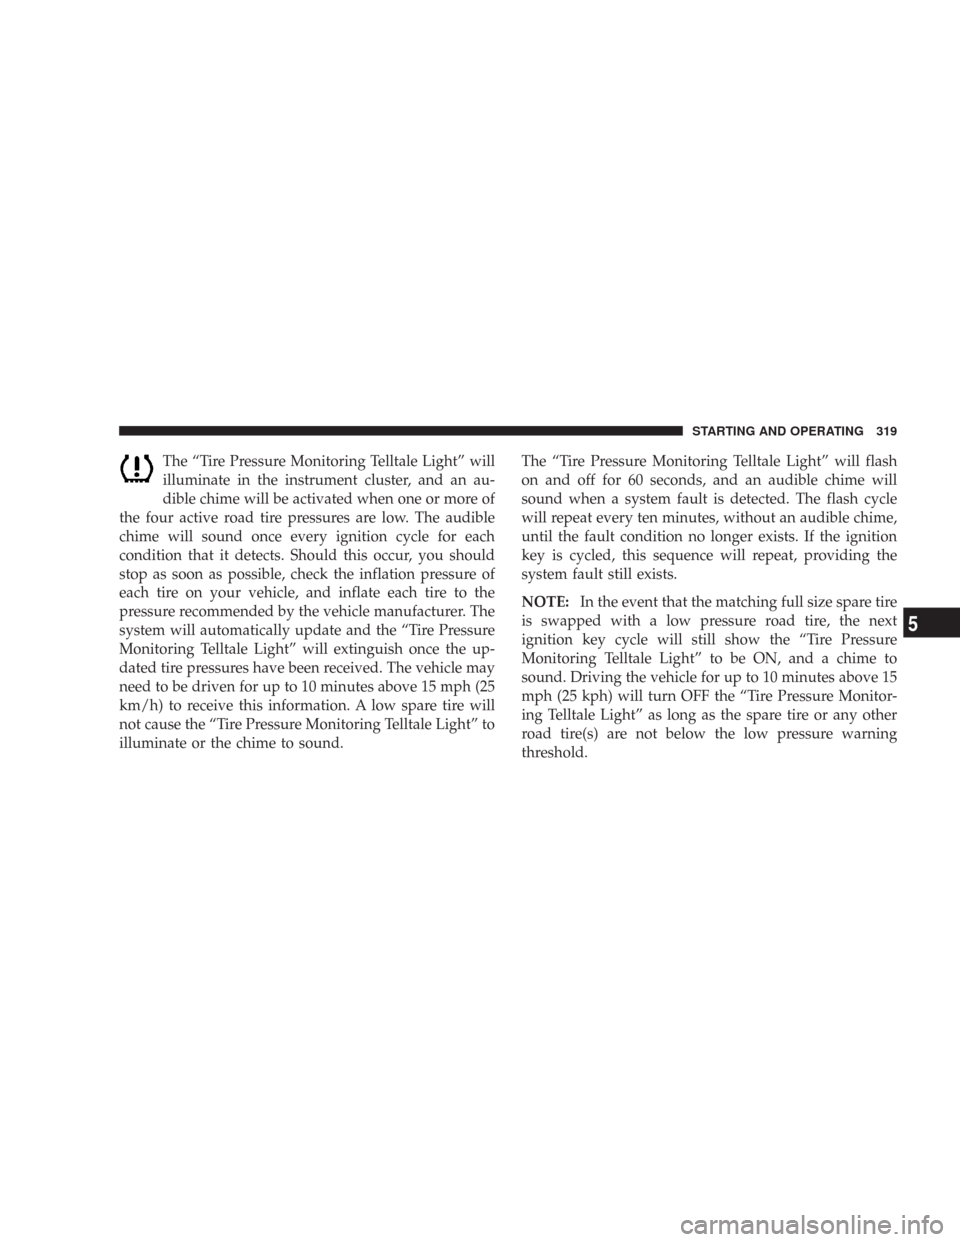
The “Tire Pressure Monitoring Telltale Light” will
illuminate in the instrument cluster, and an au-
dible chime will be activated when one or more of
the four active road tire pressures are low. The audible
chime will sound once every ignition cycle for each
condition that it detects. Should this occur, you should
stop as soon as possible, check the inflation pressure of
each tire on your vehicle, and inflate each tire to the
pressure recommended by the vehicle manufacturer. The
system will automatically update and the “Tire Pressure
Monitoring Telltale Light” will extinguish once the up-
dated tire pressures have been received. The vehicle may
need to be driven for up to 10 minutes above 15 mph (25
km/h) to receive this information. A low spare tire will
not cause the “Tire Pressure Monitoring Telltale Light” to
illuminate or the chime to sound.The “Tire Pressure Monitoring Telltale Light” will flash
on and off for 60 seconds, and an audible chime will
sound when a system fault is detected. The flash cycle
will repeat every ten minutes, without an audible chime,
until the fault condition no longer exists. If the ignition
key is cycled, this sequence will repeat, providing the
system fault still exists.
NOTE:In the event that the matching full size spare tire
is swapped with a low pressure road tire, the next
ignition key cycle will still show the “Tire Pressure
Monitoring Telltale Light” to be ON, and a chime to
sound. Driving the vehicle for up to 10 minutes above 15
mph (25 kph) will turn OFF the “Tire Pressure Monitor-
ing Telltale Light” as long as the spare tire or any other
road tire(s) are not below the low pressure warning
threshold.
STARTING AND OPERATING 319
5
Page 321 of 467
Under-inflation also reduces fuel efficiency and tire
tread life, and may affect the vehicle’s handling and
stopping ability.
•The TPMS is not a substitute for proper tire mainte-
nance, and it is the driver ’s responsibility to maintain
correct tire pressure, even if under-inflation has not
reached the level to trigger illumination of the “Tire
Pressure Monitoring Telltale Light.”
General Information
This device complies with part 15 of the FCC rules and
RSS 210 of Industry Canada. Operation is subject to the
following conditions:
•This device may not cause harmful interference.
•This device must accept any interference received,
including interference that may cause undesired op-
eration.The tire pressure sensors are covered under one of the
following licenses:
United States.....................KR5S120123
Canada........................2671-S120123
FUEL REQUIREMENTS
Your engine is designed to meet all emis-
sions regulations and provide excellent
fuel economy and performance when us-
ing high quality unleaded gasoline having
an octane rating of 87. The use of premium
gasoline is not recommended. The use of
premium gasoline will provide no benefit over high
quality regular gasoline, and in some circumstances may
result in poorer performance.
STARTING AND OPERATING 321
5
Page 329 of 467
Tire Size
The tire size on the Label represents the actual tire size on
your vehicle. Replacement tires must be equal to the load
capacity of this tire size.
Rim Size
This is the rim size that is appropriate for the tire size
listed.
Inflation Pressure
This is the cold tire inflation pressure for your vehicle for
all loading conditions up to full GAWR.
Curb Weight
The curb weight of a vehicle is defined as the total weight
of the vehicle with all fluids, including vehicle fuel, at full
capacity conditions, and with no occupants or cargo
loaded into the vehicle. The front and rear curb weight
values are determined by weighing your vehicle on a
commercial scale before any occupants or cargo are
added.
Loading
The actual total weight and the weight of the front and
rear of your vehicle at the ground can best be determined
by weighing it when it is loaded and ready for operation.
The entire vehicle should first be weighed on a commer-
cial scale to insure that the GVWR has not been exceeded.
The weight on the front and rear of the vehicle should
then be determined separately to be sure that the load is
properly distributed over front and rear axle. Weighing
the vehicle may show that the GAWR of either the front
or rear axles has been exceeded but the total load is
within the specified GVWR. If so, weight must be shifted
from front to rear or rear to front as appropriate until the
specified weight limitations are met. Store the heavier
items down low and be sure that the weight is distributed
equally. Stow all loose items securely before driving.
STARTING AND OPERATING 329
5
Page 341 of 467
2. GTW
3. GAWR
4. Tongue weight rating for the trailer hitch utilized
(This requirement may limit the ability to always
achieve the 10% to 15% range of tongue weight as a
percentage of total trailer weight).
Towing Requirements — Tires
Do not attempt to tow a trailer while using a compact
spare tire.
Proper tire inflation pressures are essential to the safe
and satisfactory operation of your vehicle. Refer to the
Tires–General Information section of this manual on
Tire Pressures for proper tire inflation procedures.
Also, check the trailer tires for proper tire inflation
pressures before trailer usage.
Check for signs of tire wear or visible tire damage
before towing a trailer. Refer to the Tires–General
Information section of this manual on Tread Wear
Indicators for the proper inspection procedure.
When replacing tires, refer to the Tires–General Infor-
mation section of this manual on Replacement Tires for
proper tire replacement procedures. Replacing tires
with a higher load carrying capacity will not increase
the vehicle’s GVWR and GAWR limits.
Towing Requirements — Trailer Brakes
Donotinterconnect the hydraulic brake system or
vacuum system of your vehicle with that of the trailer.
This could cause inadequate braking and possible
personal injury.
An electronically actuated trailer brake controller is
required when towing a trailer with electronically
STARTING AND OPERATING 341
5
Page 456 of 467
Odometer........................... 208
Speedometer......................... 202
Tachometer.......................... 205
Gear Ranges........................271,276
General Information...................... 321
Glass Cleaning.......................... 397
Gross Axle Weight Rating.................. 331
Gross Vehicle Weight Rating................ 330
GVWR............................... 328
HardTop ............................. 125
Hard Top, Modular...................... 125
Hard Top Removal....................... 129
Hazard Warning Flasher................... 350
Head Restraints.......................... 90
Head Rests............................. 90
Headlights
Bulb Replacement...................... 409
Dimmer Switch....................... 100Replacing............................ 409
Switch............................... 99
Heater............................... 252
Heater, Engine Block..................... 269
High Beam Indicator..................... 203
Hitches
Trailer Towing........................ 334
Holder, Cup........................... 117
Hood Release........................... 96
Hoses.............................385,386
Hydraulic Clutch Fluid.................... 390
Ignition............................... 14
Key ................................. 14
Ignition Key Removal..................... 14
Illuminated Entry........................ 20
Infant Restraint.......................... 65
Inflation Pressure Tires.................... 309
Inside Rearview Mirror.................... 85
456 INDEX
Page 464 of 467
Theft System Disarming.................... 19
Tilt Steering Column..................... 103
Tip Start.............................. 266
Tire and Loading Information Placard......304,305
Tire Identification Number (TIN)............. 303
Tire Markings.......................... 300
Tire Safety Information.................... 300
Tires ..............................308,446
Air Pressure.......................... 309
Alignment and Balance.................. 315
Chains.............................. 315
Changing............................ 352
General Information.................... 308
High Speed.......................... 311
Inflation Pressures..................... 309
Jacking...........................352,354
Load Capacity.....................304,305
Pressure Monitor System (TPMS)........... 317
Pressure Warning Light.................. 206Quality Grading....................... 446
Radial.............................. 312
Replacement......................... 314
Rotation............................. 316
Safety.............................. 300
Sizes............................... 301
Spare Tire........................... 353
Spinning............................ 312
Tread Wear Indicators................... 312
To Open Hood.......................... 96
Tongue Weight/Trailer Weight.............. 338
Torque Converter Clutch.................. 280
Tow Hooks, Emergency................... 358
Towing............................330,359
Disabled Vehicle....................... 359
Guide.............................. 335
Recreational.......................... 346
Weight.............................. 335
Trac-Lok Rear Axle...................... 284
464 INDEX
Page 467 of 467

INTRODUCTION INTRODUCTION Roll Over WarningHOW TO USE THIS MANUAL WARNINGS AND CAUTIONS VEHICLE IDENTIFICATION NUMBER VEHICLE MODIFICATIONS/ALTERATIONS THINGS TO KNOW BEFORE STARTING YOUR VEHICLE A WORD
ABOUT YOUR KEYS Ignition Key RemovalKey-In-Ignition ReminderSTEERING WHEEL LOCK - IF EQUIPPED To Manually Lock the Steering WheelTo Release the Steering Wheel LockSENTRY KEY IMMOBILIZER SYSTEM Important Note About ServiceReplacement
KeysCustomer Key ProgrammingGeneral InformationSECURITY ALARM SYSTEM - IF EQUIPPED To Set the AlarmTo Disarm the SystemILLUMINATED ENTRY REMOTE KEYLESS ENTRY - IF EQUIPPED To Unlock the Doors and Swing GateTo Lock the Doors and
Swing GateUsing The Panic AlarmTo Turn Off Flash Lights With LockProgramming Additional TransmittersGeneral InformationBattery ReplacementDOORS Front Door RemovalRear Door Removal (4 Door Models)DOOR LOCKS Manual Door LocksPower Door Locks -
If EquippedWINDOWS Power Windows - If EquippedWind BuffetingREAR SWING GATE OCCUPANT RESTRAINTS Lap/Shoulder BeltsRear Center Lap/Shoulder BeltRetractor Lock-OutAdjustable Upper Shoulder Belt AnchorageSeat Belt PretensionersEnhanced Seat
Belt Use Reminder System (BeltAlert)Seat Belts And Pregnant WomenSeat Belt ExtenderDriver And Front Passenger Supplemental Restraint Systems (SRS) Child RestraintENGINE BREAK-IN RECOMMENDATIONS SAFETY TIPS Exhaust GasSafety Checks You Should
Make Inside The VehicleSafety Checks You Should Make Outside The VehicleUNDERSTANDING THE FEATURES OF YOUR VEHICLE MIRRORS Inside Day/Night MirrorOutside MirrorsSEATS Front Seat AdjustmentManual Seat Height Adjustment - If EquippedFront Seat
Back ReclineFront Passenger Easy Entry Seat (2 Door Models)Head RestraintsFold And Tumble Rear Seat (2 Door Models)Removing the Rear Seat (2 Door Models)Replacing the Rear Seat (2 Door Models)60/40 Split Folding Rear Seat (4 Door Models)To Raise the Rear
SeatTO OPEN AND CLOSE THE HOOD LIGHTS Interior LightsMulti-Function Control LeverParking Lights, Instrument Panel Lights, and HeadlightsLights-On ReminderHeadlight Dimmer SwitchPassing LightFront Fog Lights - If EquippedTurn SignalsDaytime Running Lights
- If EquippedWINDSHIELD WIPERS AND WASHERS Intermittent Wiper SystemWindshield Wiper OperationWindshield WashersMist FeatureTILT STEERING COLUMN ELECTRONIC SPEED CONTROL - IF EQUIPPED To ActivateTo Set At A Desired SpeedTo Deactivate
To Resume SpeedTo Vary The Speed SettingManual TransmissionTo Accelerate For PassingELECTRONIC BRAKE CONTROL SYSTEM ABS (Anti-Lock Brake System)TCS (Traction Control System)BAS (Brake Assist System)ERM (Electronic Roll Mitigation)ESP (Electronic
Stability Program)ESP/BAS Warning LampELECTRICAL POWER OUTLET Electrical Outlet Use With Engine OffCUP HOLDERS STORAGE Console Storage CompartmentRear Storage CompartmentDUAL TOP - IF EQUIPPED Removing The Soft TopInstalling the Soft
TopFREEDOM TOP 3- PIECE MODULAR HARD TOP Front Panel(s) RemovalFront Panel(s) InstallationFront Panel(s) Installation Only (With Rear Hard Top Removed)Rear Panel RemovalRear Panel InstallationDOOR FRAME Door Frame Removal (2 Door Models)Door
Frame Installation (2 Door Models)Door Frame Removal (4 Door Models)Door Frame Installation (4 Door Models)SOFT TOP (2 DOOR MODELS) Folding Down TheSoft Top Putting Up The Soft Top SUNRIDER - 4 DOOR MODELS SOFT TOP (4 DOOR MODELS) Folding
Down The Soft Top Putting Up The Soft Top FOLDING WINDSHIELD Lowering the Windshield and Removing Side BarsRaising The Windshield And Replacing Side BarsREAR WINDOW FEATURES - HARD TOP ONLY Rear Window Wiper/Washer - If EquippedRear Window
Defroster - If EquippedUNDERSTANDING YOUR INSTRUMENT PANEL INSTRUMENT PANEL AND CONTROLS INSTRUMENT CLUSTER INSTRUMENT CLUSTER DESCRIPTION COMPASS AND TRIP COMPUTER - IF EQUIPPED Control ButtonsTrip Conditions
Compass Temperature DisplayRADIO GENERAL INFORMATION Radio Broadcast SignalsTwo Types of SignalsElectrical DisturbancesAM ReceptionFM ReceptionSALES CODE REQ - AM/FM STEREO RADIO AND 6-DISC CD/DVD CHANGER (MP3/WMA AUX JACK)
Operating Instructions - Radio ModeOperation Instructions - (DISC MODE for CD and MP3/WMA Audio Play, DVD-VIDEO)Notes On Playing MP3/WMA FilesLISTButton (DISC Mode for MP3/WMA Play)INFO Button (DISC Mode for MP3/WMA Play)SALES CODE RES
- AM/FM STEREO RADIO WITH CD PLAYER (MP3 AUX JACK) Operating Instructions - Radio ModeOperation Instructions - CD MODE for CD and MP3 Audio PlayNotes OnPlaying MP3 FilesLIST Button (CD Mode for MP3 Play)INFO Button (CD Mode for MP3 Play)
SALES CODE RER - AM/FM/CD/DVD RADIO WITH NAVIGATION SYSTEM - IF EQUIPPED Operating Instructions - Satellite RadioClock Setting ProcedureSATELLITERADIO - IF EQUIPPED System ActivationElectronic Serial Number/Sirius Identification Number
(ENS/SID)Selecting Satellite Mode (RSC Radios)Satellite AntennaReception QualityOperating Instructions - Satellite ModeOperating Instructions - Hands Free Phone (If Equipped)Operating Instructions - Video Entertainment System (VES) (If Equipped)CD/DVD DISC
MAINTENANCE RADIO OPERATION AND CELLULAR PHONES CLIMATE CONTROLS Manual Heater OnlyManual Air Conditioning and Heating System - If EquippedOperating TipsSTARTING AND OPERATING STARTING PROCEDURES Manual TransmissionAutomatic
TransmissionNormal StartingExtreme Cold Weather (below -20 degrees F or -29 degrees C)If Engine Fails to StartAfter StartingENGINE BLOCK HEATER - IF EQUIPPED MANUAL TRANSMISSION 6-Speed Manual TransmissionAUTOMATIC TRANSMISSION Shift Lock
Manual OverrideBrake/Transmission Interlock SystemAutomatic Transmission with OverdriveFOUR-WHEEL DRIVE OPERATION (COMMAND-TRAC OR ROCK-TRAC) - IF EQUIPPED Operating Instructions/PrecautionsShift PositionsShifting ProcedureTRAC-LOK REAR
AXLE - IF EQUIPPED AXLE LOCK (TRU-LOK) - RUBICON MODELS REAR AXLE LOCK - 4WD NON-RUBICON MODELS (IF EQUIPPED) ELECTRONIC SWAY BAR DISCONNECT - IF EQUIPPED ON-ROAD DRIVING TIPS OFF-ROAD DRIVING TIPS When To Use
4L (Low) RangeDriving Through WaterDriving In Snow, Mud and SandHill ClimbingTraction DownhillAfter Driving Off-RoadPARKING BRAKE ANTI-LOCK BRAKE SYSTEM POWER STEERING TIRE SAFETY INFORMATION Tire Markings Tire Identification Number (TIN)
Tire Loading and Tire PressureTIRES - GENERAL INFORMATION Tire PressureTire Inflation Pressures Tire Pressures for High Speed OperationRadial-Ply TiresTire SpinningTread Wear IndicatorsLife of TireReplacement TiresAlignment and BalanceTIRE CHAINS TIRE
ROTATION RECOMMENDATIONS TIRE PRESSURE MONITOR SYSTEM (TPMS) - IF EQUIPPED Base System - If EquippedGeneral InformationFUEL REQUIREMENTS Reformulated GasolineGasoline/Oxygenate BlendsMMT In GasolineMaterials Added To FuelFuel
System CautionsCarbon Monoxide WarningsADDING FUEL Fuel Filler Cap (Gas Cap)VEHICLE LOADING Certification LabelTRAILER TOWING Common Towing DefinitionsTrailer Hitch ClassificationTrailer Towing Weights (Maximum Trailer Weight Ratings)Trailer and
Tongue WeightTowing RequirementsTowing TipsRECREATIONAL TOWING (BEHIND MOTORHOME, ETC.) Towing - 2WD ModelsTowing - 4WD ModelsShifting Out Of Neutral (N)WHAT TO DO IN EMERGENCIES HAZARD WARNING FLASHERS IF YOUR ENGINE
OVERHEATS JACKING AND TIRE CHANGING Jack LocationSpare Tire StowagePreparations For JackingJacking InstructionsJUMP STARTING EMERGENCY TOW HOOKS - IF EQUIPPED TOWING A DISABLED VEHICLE MAINTAINING YOUR VEHICLE ENGINE
COMPARTMENT - 3.8L ONBOARD DIAGNOSTIC SYSTEM - OBD II Loose Fuel Filler Cap MessageEMISSIONS INSPECTION AND MAINTENANCE PROGRAMS REPLACEMENT PARTSDEALER SERVICE MAINTENANCE PROCEDURES Engine OilDrive Belts - Check
Condition and TensionSpark PlugsCatalytic ConverterCrankcase Emission Control SystemFuel FilterEngine Air Cleaner FilterMaintenance-Free BatteryAir Conditioner MaintenancePower Steering Fluid CheckDriveline And Steering Component LubricationBody Lubrication
Windshield Wiper BladesWindshield WashersExhaust SystemCooling SystemHoses and Vacuum/Vapor HarnessesBrake SystemAutomatic TransmissionHydraulic Clutch Fluid - Manual TransmissionManual TransmissionTransfer CaseFront/Rear Axle FluidAppearance Care
And Protection From CorrosionFUSES (TOTALLY INTEGRATED POWER MODULE) VEHICLE STORAGE REPLACEMENT BULBS - IF EQUIPPED BULB REPLACEMENT Head LightFront Park/Turn SignalFront Side MarkerFront Fog LightRear Tail, Stop, Turn Signal,
and Back-Up LightsCenter High Mounted Stop Light (CHMSL)FLUID CAPACITIES FLUIDS, LUBRICANTS AND GENUINE PARTS EngineChassisMAINTENANCE SCHEDULES EMISSION CONTROL SYSTEM MAINTENANCE MAINTENANCE SCHEDULES Schedule
BSchedule AIF YOU NEED CONSUMER ASSISTANCE SUGGESTIONS FOR OBTAINING SERVICE FOR YOUR VEHICLE Prepare For The AppointmentPrepare A ListBe Reasonable With RequestsIF YOU NEED ASSISTANCE WARRANTY INFORMATION (U.S. Vehicles
Only) MOPAR PARTS REPORTING SAFETY DEFECTS In CanadaPUBLICATION ORDER FORMS DEPARTMENT OF TRANSPORTATION UNIFORM TIRE QUALITY GRADES TreadwearTraction GradesTemperature GradesINDEX