tow JEEP WRANGLER 2010 JK / 3.G User Guide
[x] Cancel search | Manufacturer: JEEP, Model Year: 2010, Model line: WRANGLER, Model: JEEP WRANGLER 2010 JK / 3.GPages: 554, PDF Size: 10.76 MB
Page 131 of 554
To install the head restraint, insert the head restraint rods
into each guide, apply pressure down on the headrest
until the head restraint reaches the first lock position,
push the large button in and push down and adjust head
restraint to desired position.
NOTE:Ensure that the front of the head restraint is
facing toward the front of the vehicle.
WARNING!
Driving a vehicle with the head restraints removed or
improperly adjusted could cause serious injury or
death in the event of a collision. The head restraints
should always be checked prior to operating the
vehicle and never adjusted while the vehicle is in
motion. Always adjust the head restraints when the
vehicle is in PARK.
Fold and Tumble Rear Seat — Two Door Models
NOTE:
•Prior to folding the rear seat, it may be necessary to
reposition the front seats.
•Be sure that the front seats are fully upright and
positioned forward. This will allow the rear seat to
fold down easily.
1. Lift the seatback release lever and fold the seatback
forward.
130 UNDERSTANDING THE FEATURES OF YOUR VEHICLE
Page 135 of 554
NOTE:
•Prior to folding the rear seat, it may be necessary to
reposition the front seat to its mid-track position.
•Be sure that the front seats are fully upright and
positioned forward. This will allow the rear seat to
fold down easily.
WARNING!
•It is extremely dangerous to ride in a cargo area,
inside or outside of a vehicle. In a collision, people
riding in these areas are more likely to be seri-
ously injured or killed.
•Do not allow people to ride in any area of your
vehicle that is not equipped with seats and seat
belts.
•Be sure everyone in your vehicle is in a seat and
using a seat belt properly.
To Fold Down the Rear Seat
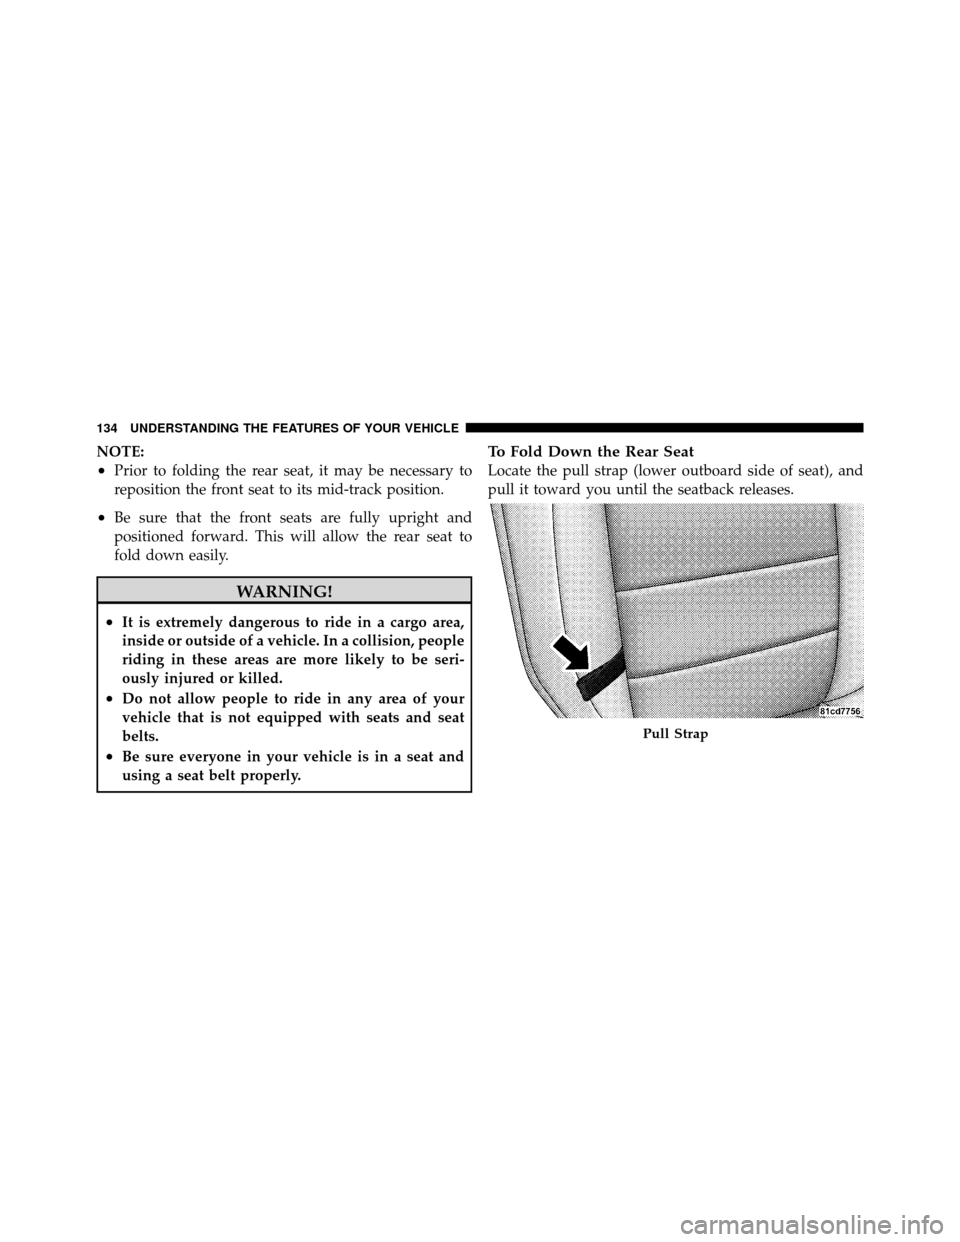
Locate the pull strap (lower outboard side of seat), and
pull it toward you until the seatback releases.
Pull Strap
134 UNDERSTANDING THE FEATURES OF YOUR VEHICLE
Page 139 of 554
NOTE:
•If either light remains on and does not flash, or there is
a very fast flash rate, check for a defective outside light
bulb. If an indicator fails to light when the lever is
moved, it would suggest that the indicator bulb is
defective.
•A tone will chime if the turn signals are left on for
more than 1 mile (2 km).
Lane Change Assist
Tap the lever up or down once, without moving beyond
the detent, and the turn signal (right or left) will flash
three times then automatically turn off.
Lights-On Reminder
If the headlights or parking lights are on after the ignition
is turned OFF, a chime will sound when the driver’s door
is opened.
High/Low Beam Switch
Push the multifunction lever away from you to switch
the headlights to high beam. Pull the lever toward you to
switch the headlights back to low beam.
Flash-To-Pass
You can signal another vehicle with your headlights by
lightly pulling the multifunction lever toward the steer-
ing wheel. This will turn on the high beam headlights
until the lever is released.
Front Fog Lights — If Equipped
The front fog light switch is located on the multi-
function lever. To activate the front fog lights, turn
on the parking or low beam headlights and pull
out the end of the lever.
NOTE: The fog lights will only operate with the parking
lights or the headlights on low beam. Selecting high
beam headlights will turn off the fog lights.
138 UNDERSTANDING THE FEATURES OF YOUR VEHICLE
Page 144 of 554
CAUTION!
In cold weather, always turn off the wiper switch and
allow the wipers to return to the park position before
turning off the engine. If the wiper switch is left on
and the wipers freeze to the windshield, damage to
the wiper motor may occur when the vehicle is
restarted.
Intermittent Wiper System
Use the intermittent wiper when weather conditions
make a single wiping cycle, with a variable pause be-
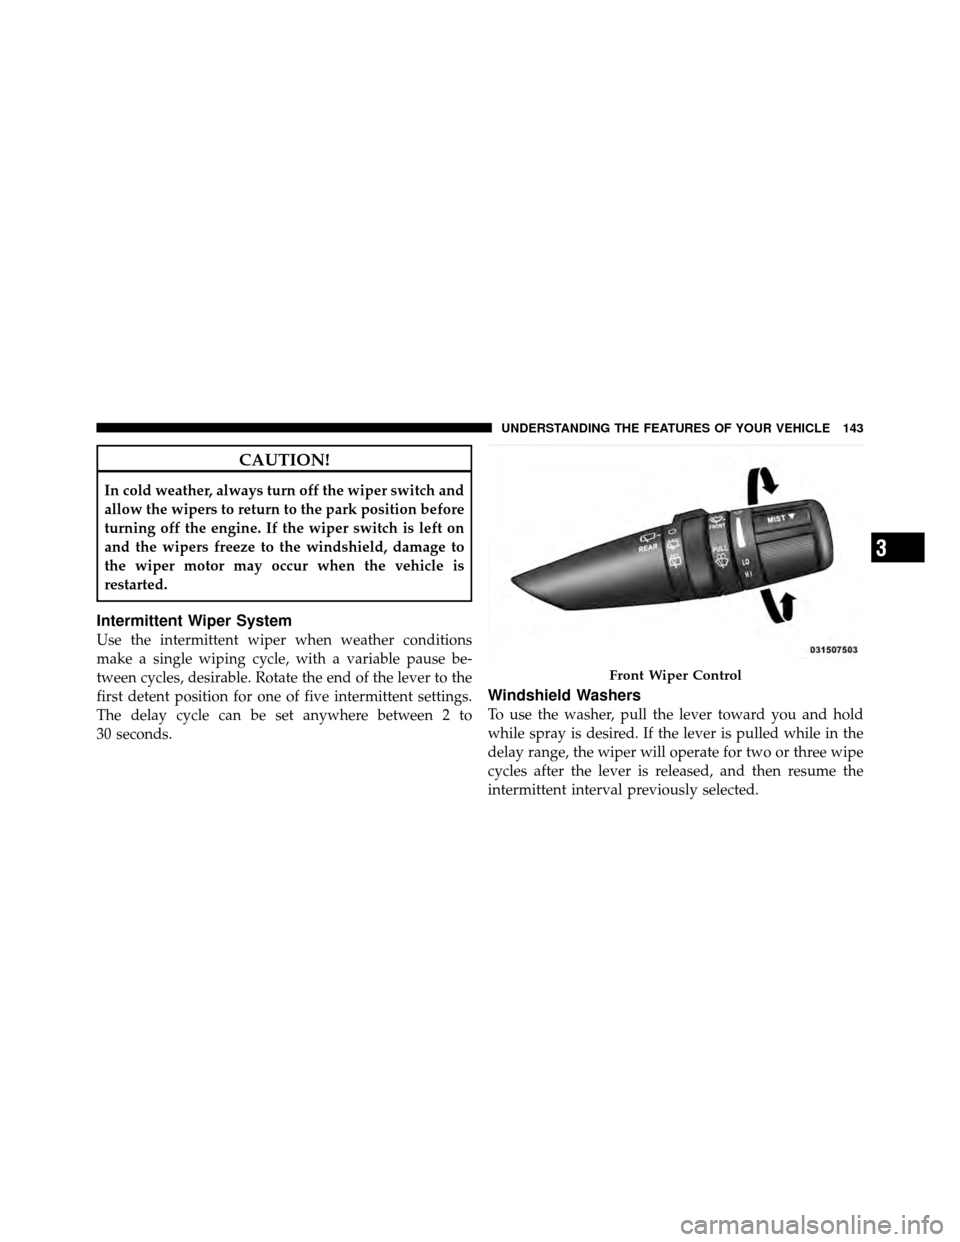
tween cycles, desirable. Rotate the end of the lever to the
first detent position for one of five intermittent settings.
The delay cycle can be set anywhere between 2 to
30 seconds.
Windshield Washers
To use the washer, pull the lever toward you and hold
while spray is desired. If the lever is pulled while in the
delay range, the wiper will operate for two or three wipe
cycles after the lever is released, and then resume the
intermittent interval previously selected.
Front Wiper Control
3
UNDERSTANDING THE FEATURES OF YOUR VEHICLE 143
Page 148 of 554
System can be reactivated by pushing the Electronic
Speed Control ON/OFF button and resetting the desired
vehicle set speed.
To Activate
Push the ON/OFF button. The Cruise Indicator Light in
the instrument cluster will illuminate. To turn the Elec-
tronic Speed Control system off, push the ON/OFF
button a second time. The cruise indicator light will turn
off. The Electronic Speed Control system should be
turned off when not in use.
WARNING!
Leaving the Electronic Speed Control system on
when not in use is dangerous. You could accidentally
set the system or cause it to go faster than you want.
You could lose control and have an accident. Always
leave the Electronic Speed Control system off when
you are not using it.
To Set a Desired Speed
Turn the Electronic Speed Control ON. When the vehicle
has reached the desired speed, press down on the lever
and release. Release the accelerator and the vehicle will
operate at the selected speed.
NOTE:The vehicle should be traveling at a steady
speed and on level ground before pressing the SET lever.
To Deactivate
A soft tap on the brake pedal, pulling the Electronic
Speed Control lever toward you, or normal brake or
clutch pressure while slowing the vehicle will deactivate
Electronic Speed Control without erasing the set speed
memory. Pressing the ON/OFF button or turning the
ignition switch OFF erases the set speed memory.
To Resume Speed
To resume a previously set speed, push the RESUME
ACCEL lever up and release. Resume can be used at any
speed above 25 mph (40 km/h).
3
UNDERSTANDING THE FEATURES OF YOUR VEHICLE 147
Page 174 of 554
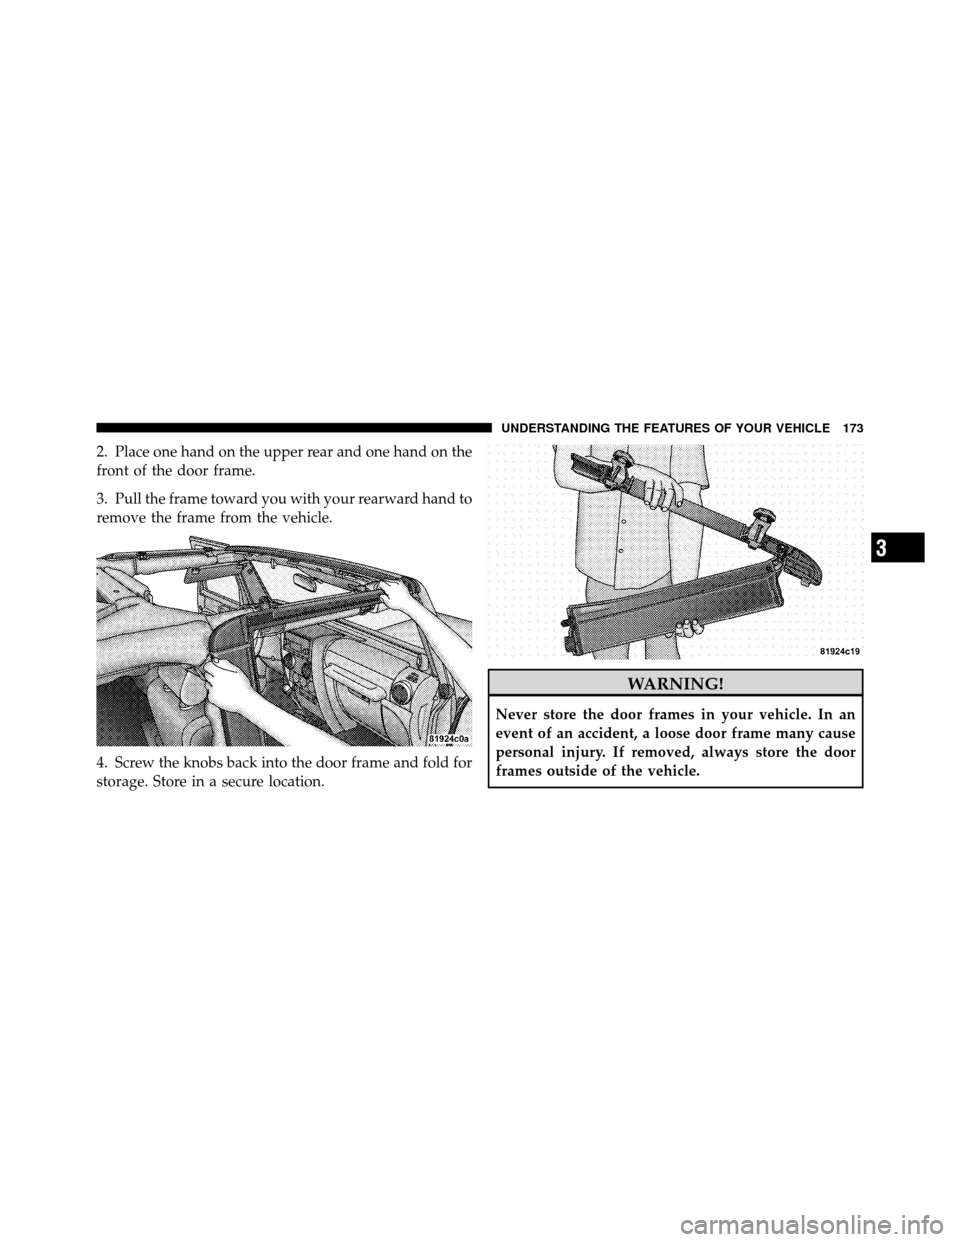
2. Place one hand on the upper rear and one hand on the
front of the door frame.
3. Pull the frame toward you with your rearward hand to
remove the frame from the vehicle.
4. Screw the knobs back into the door frame and fold for
storage. Store in a secure location.
WARNING!
Never store the door frames in your vehicle. In an
event of an accident, a loose door frame many cause
personal injury. If removed, always store the door
frames outside of the vehicle.
3
UNDERSTANDING THE FEATURES OF YOUR VEHICLE 173
Page 177 of 554
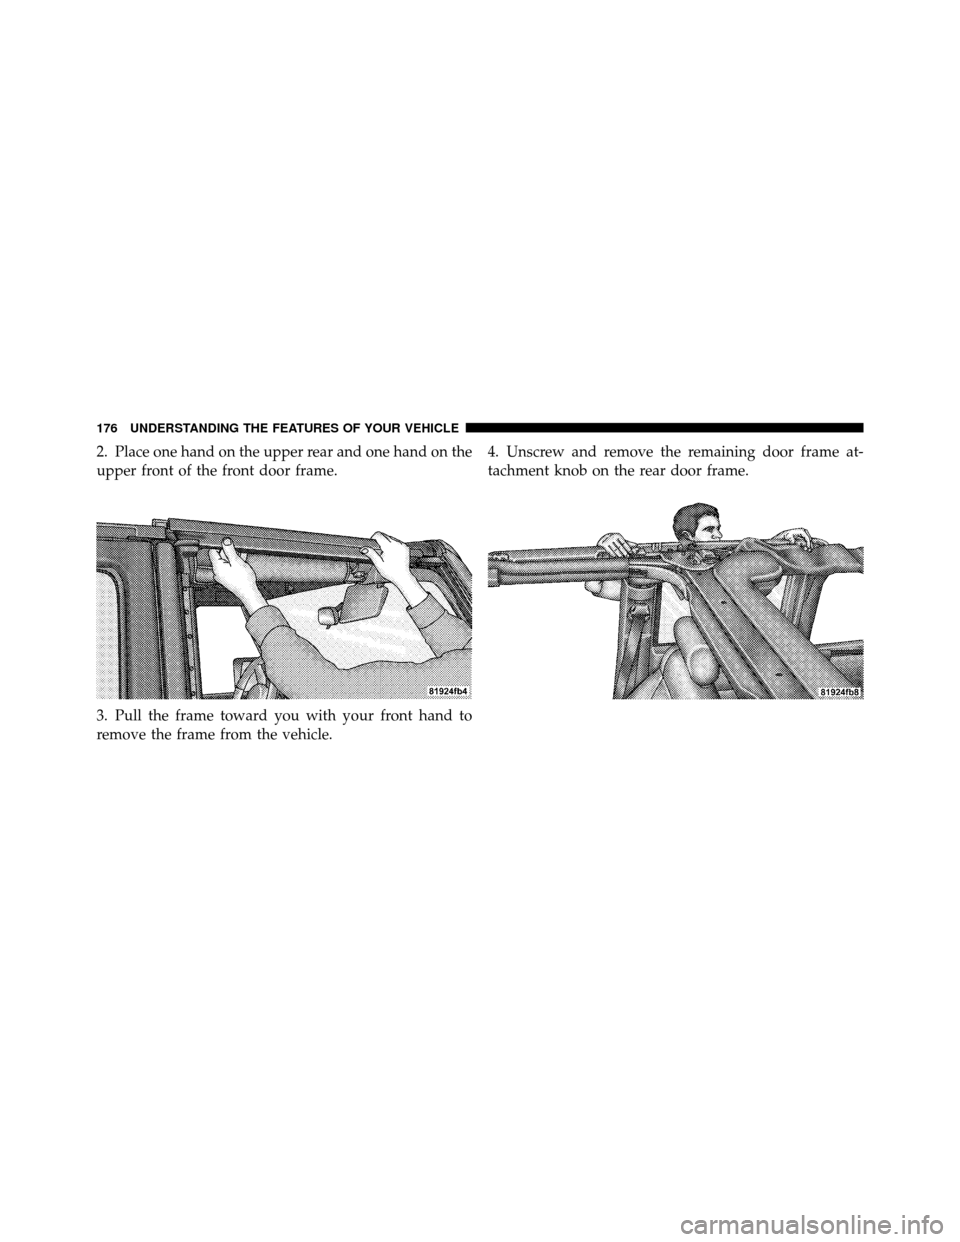
2. Place one hand on the upper rear and one hand on the
upper front of the front door frame.
3. Pull the frame toward you with your front hand to
remove the frame from the vehicle.4. Unscrew and remove the remaining door frame at-
tachment knob on the rear door frame.
176 UNDERSTANDING THE FEATURES OF YOUR VEHICLE
Page 178 of 554
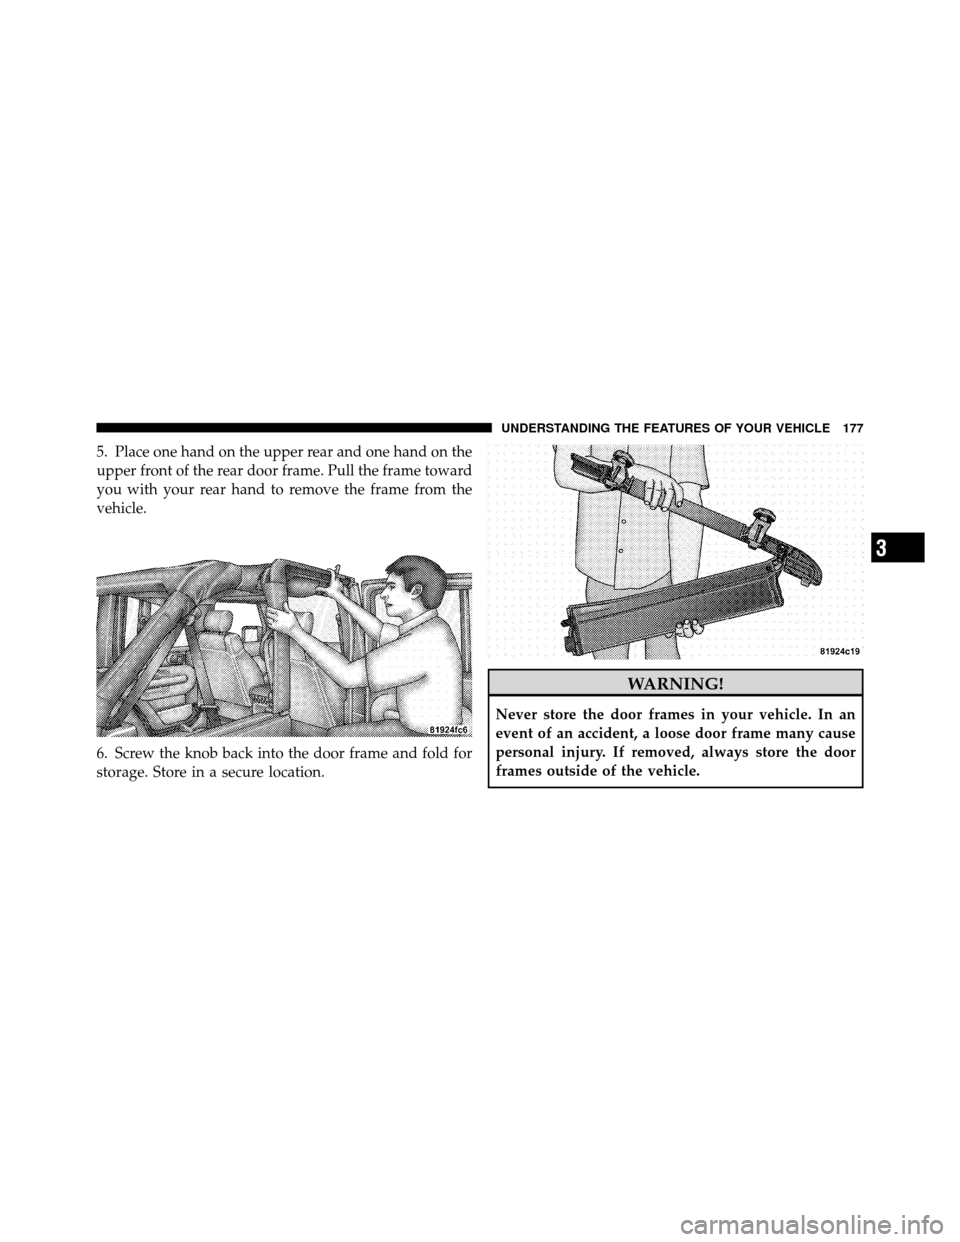
5. Place one hand on the upper rear and one hand on the
upper front of the rear door frame. Pull the frame toward
you with your rear hand to remove the frame from the
vehicle.
6. Screw the knob back into the door frame and fold for
storage. Store in a secure location.
WARNING!
Never store the door frames in your vehicle. In an
event of an accident, a loose door frame many cause
personal injury. If removed, always store the door
frames outside of the vehicle.
3
UNDERSTANDING THE FEATURES OF YOUR VEHICLE 177
Page 190 of 554
NOTE:Clean side and rear windows before removal to
assist in preventing scratching during removal of the soft
top. If zippers are difficult to operate due to road dust,
etc., clean them with a mild soap solution and a small
brush. Cleaning products are available through your
authorized dealer.
1. If your vehicle has half doors, remove each half-door
window by opening the door and lifting the half-door
window out.
NOTE: Stow the half-door windows carefully outside of
the vehicle, never inside, to avoid scratches.
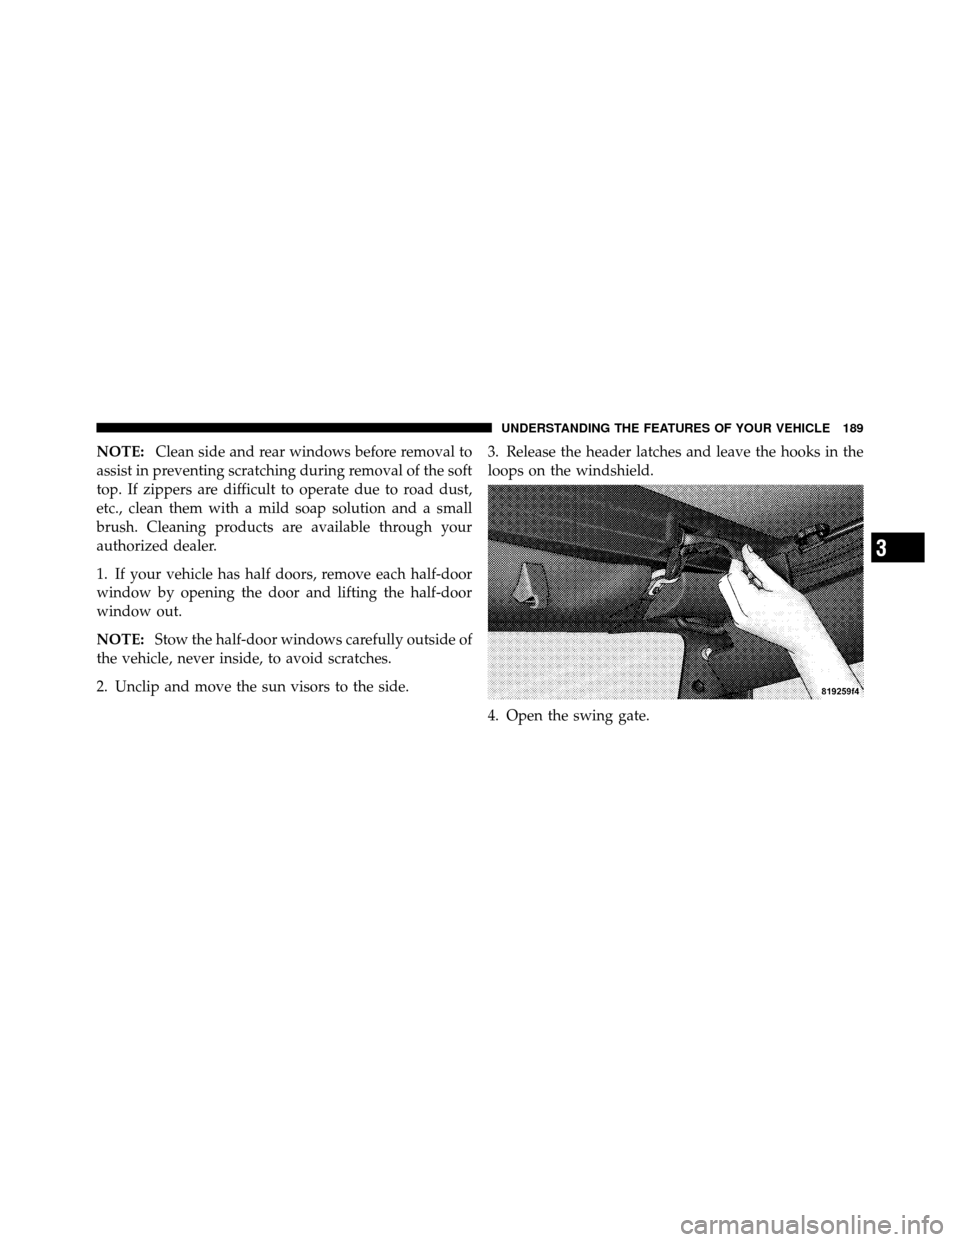
2. Unclip and move the sun visors to the side. 3. Release the header latches and leave the hooks in the
loops on the windshield.
4. Open the swing gate.
3
UNDERSTANDING THE FEATURES OF YOUR VEHICLE 189
Page 191 of 554
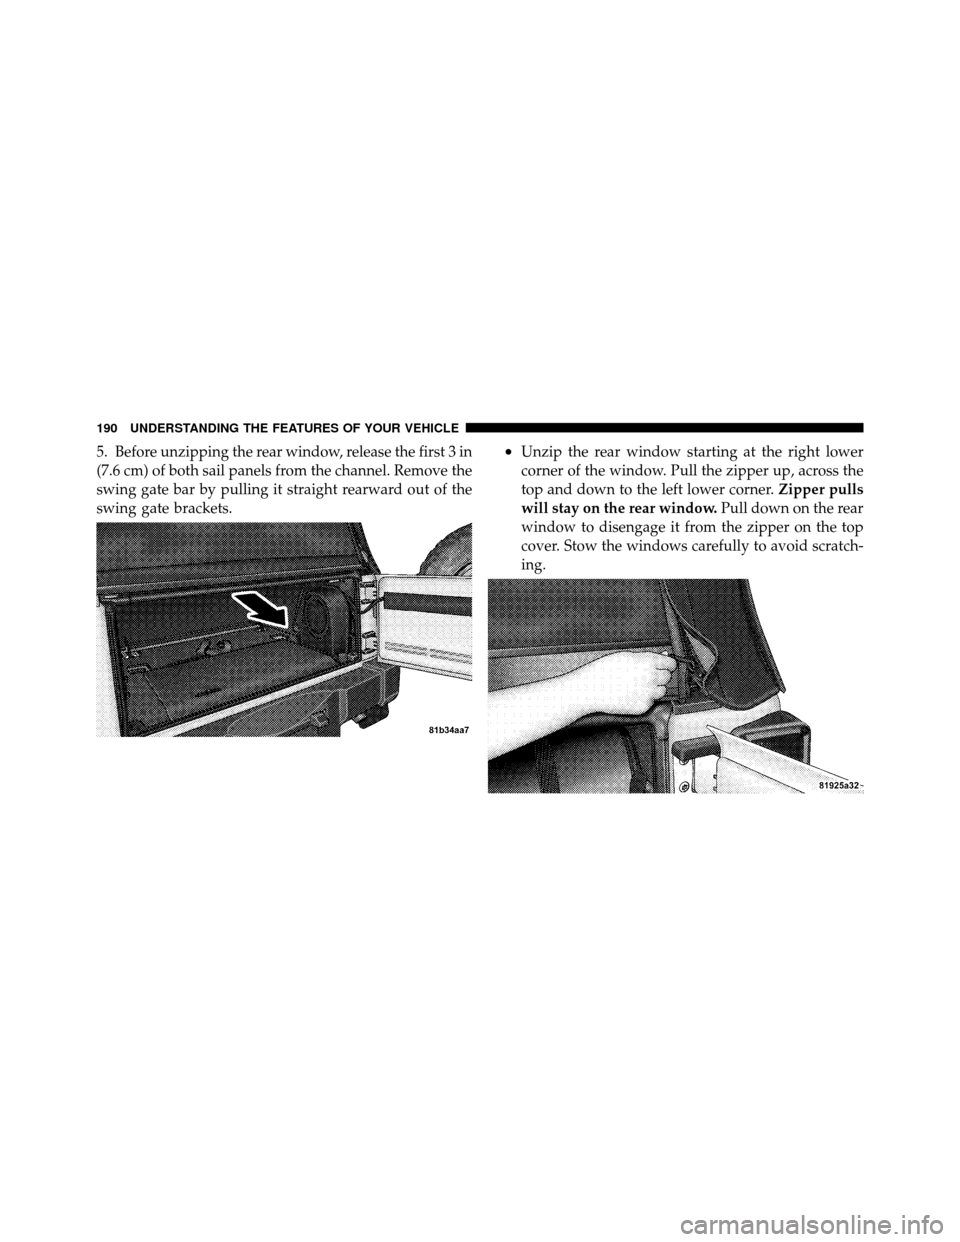
5. Before unzipping the rear window, release the first 3 in
(7.6 cm) of both sail panels from the channel. Remove the
swing gate bar by pulling it straight rearward out of the
swing gate brackets.•Unzip the rear window starting at the right lower
corner of the window. Pull the zipper up, across the
top and down to the left lower corner.Zipper pulls
will stay on the rear window. Pull down on the rear
window to disengage it from the zipper on the top
cover. Stow the windows carefully to avoid scratch-
ing.
190 UNDERSTANDING THE FEATURES OF YOUR VEHICLE