JEEP WRANGLER 2015 JK / 3.G Owners Manual
Manufacturer: JEEP, Model Year: 2015, Model line: WRANGLER, Model: JEEP WRANGLER 2015 JK / 3.GPages: 695, PDF Size: 20.64 MB
Page 181 of 695
WARNING!
Do not adjust the steering column while driving.
Adjusting the steering column while driving or driv-
ing with the steering column unlocked, could cause
the driver to lose control of the vehicle. Failure to
follow this warning may result in serious injury or
death.
ELECTRONIC SPEED CONTROL — IF EQUIPPED
When engaged, the Electronic Speed Control takes over
accelerator operations at speeds greater than 25 mph
(40 km/h).
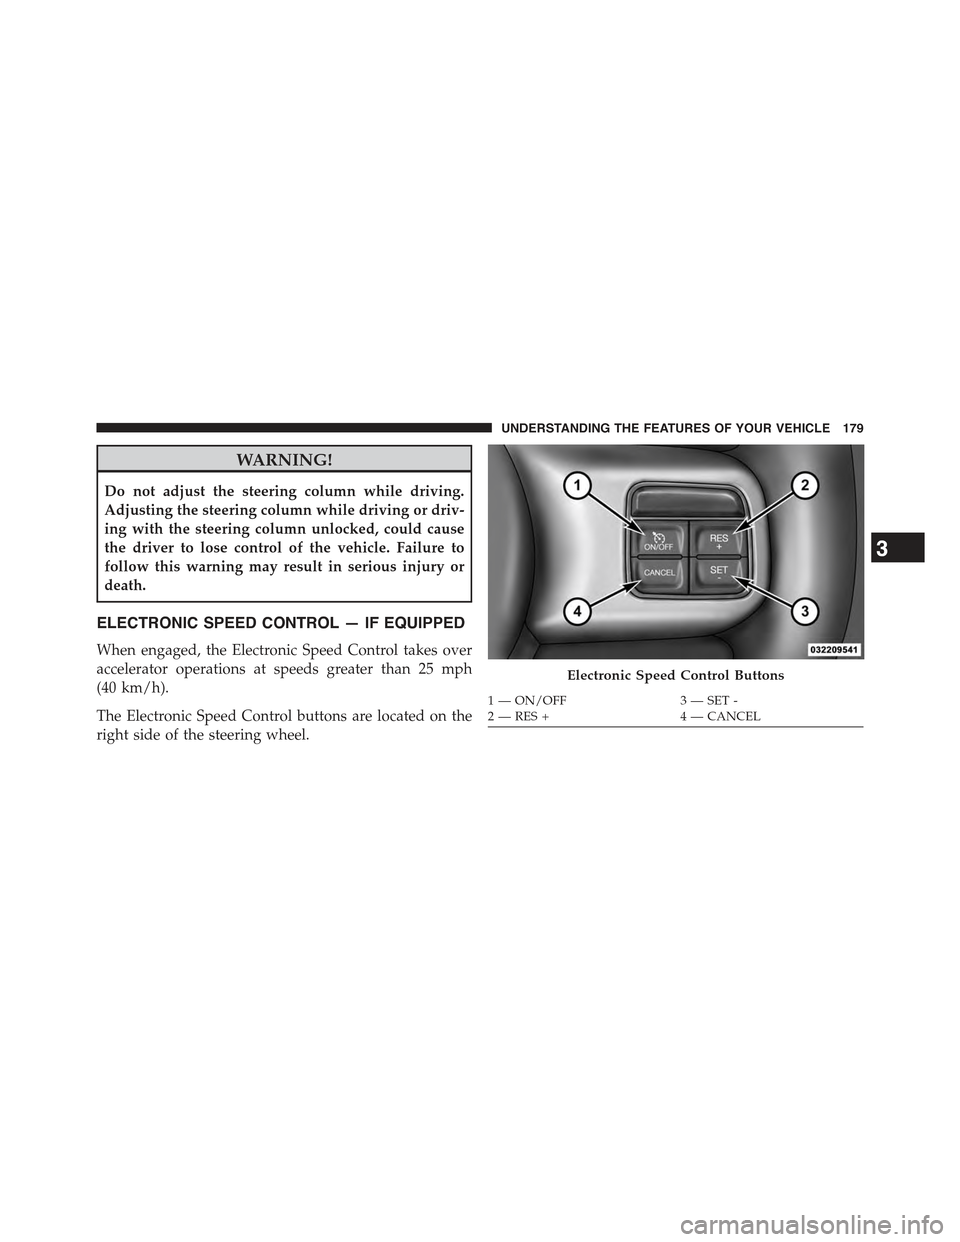
The Electronic Speed Control buttons are located on the
right side of the steering wheel.
Electronic Speed Control Buttons
1—ON/OFF3—SET-2—RES+4—CANCEL
3
UNDERSTANDING THE FEATURES OF YOUR VEHICLE 179
Page 182 of 695
NOTE:In order to ensure proper operation, the Elec-
tronic Speed Control System has been designed to shut
down if multiple Speed Control functions are operated at
the same time. If this occurs, the Electronic Speed Control
System can be reactivated by pushing the Electronic
Speed Control ON/OFF button and resetting the desired
vehicle set speed.
To Activate
Push the ON/OFF button. The Cruise Indicator Light in
the instrument cluster will illuminate. To turn the system
off, push the ON/OFF button a second time. The Cruise
Indicator Light will turn off. The system should be
turned off when not in use.
WARNING!
Leaving the Electronic Speed Control system on
when not in use is dangerous. You could accidentally
set the system or cause it to go faster than you want.
You could lose control and have an accident. Always
leave the system OFF when you are not using it.
To Set A Desired Speed
Turn the Electronic Speed Control ON. When the vehicle
has reached the desired speed, press the SET (-) button
and release. Release the accelerator and the vehicle will
operate at the selected speed.
NOTE:The vehicle should be traveling at a steady speed
and on level ground before pressing the SET (-) button.
180 UNDERSTANDING THE FEATURES OF YOUR VEHICLE
Page 183 of 695
To Deactivate
A soft tap on the brake pedal, pushing the CANCEL
button, or normal brake pressure while slowing the
vehicle will deactivate the Electronic Speed Control with-
out erasing the set speed from memory.
Pressing the ON/OFF button or turning the ignition
switch OFF erases the set speed from memory.
To Resume Speed
To resume a previously set speed, push the RES (+)
button and release. Resume can be used at any speed
above 20 mph (32 km/h).
To Vary The Speed Setting
To Increase Speed
When the Electronic Speed Control is set, you can in-
crease speed by pushing the RES (+) button.
The speed increment shown is dependant on the chosen
speed unit of U.S. (mph) or Metric (km/h):
U.S. Speed (mph)
•Pressing the RES (+) button once will result ina1mph
increase in set speed. Each subsequent tap of the
button results in an increase of 1 mph.
•If the button is continually pressed, the set speed will
continue to increase until the button is released, then
the new set speed will be established.
Metric Speed (km/h)
•Pressing the RES (+) button once will result in a
1 km/h increase in set speed. Each subsequent tap of
the button results in an increase of 1 km/h.
•If the button is continually pressed, the set speed will
continue to increase until the button is released, then
the new set speed will be established.
3
UNDERSTANDING THE FEATURES OF YOUR VEHICLE 181
Page 184 of 695
To Decrease Speed
When the Electronic Speed Control is set, you can de-
crease speed by pushing the SET (-) button.
The speed decrement shown is dependant on the chosen
speed unit of U.S. (mph) or Metric (km/h):
U.S. Speed (mph)
•Pressing the SET (-) button once will result ina1mph
decrease in set speed. Each subsequent tap of the
button results in a decrease of 1 mph.
•If the button is continually pressed, the set speed will
continue to decrease until the button is released, then
the new set speed will be established.
Metric Speed (km/h)
•Pressing the SET (-) button once will result in a 1 km/h
decrease in set speed. Each subsequent tap of the
button results in a decrease of 1 km/h.
•If the button is continually pressed, the set speed will
continue to decrease until the button is released, then
the new set speed will be established.
To Accelerate For Passing
Press the accelerator as you would normally. When the
pedal is released, the vehicle will return to the set speed.
Using Electronic Speed Control On Hills
The transmission may downshift on hills to maintain the
vehicle set speed.
NOTE:The Electronic Speed Control system maintains
speed up and down hills. A slight speed change on
moderate hills is normal.
On steep hills, a greater speed loss or gain may occur so
it may be preferable to drive without Electronic Speed
Control.
182 UNDERSTANDING THE FEATURES OF YOUR VEHICLE
Page 185 of 695
WARNING!
Electronic Speed Control can be dangerous where the
system cannot maintain a constant speed. Your ve-
hicle could go too fast for the conditions, and you
could lose control and have an accident. Do not use
Electronic Speed Control in heavy traffic or on roads
that are winding, icy, snow-covered or slippery.
ELECTRICAL POWER OUTLET
There are two 12 Volt (13 Amp) auxiliary power outlets
that can provide power for accessories designed for use
with the standard power outlet adapters.
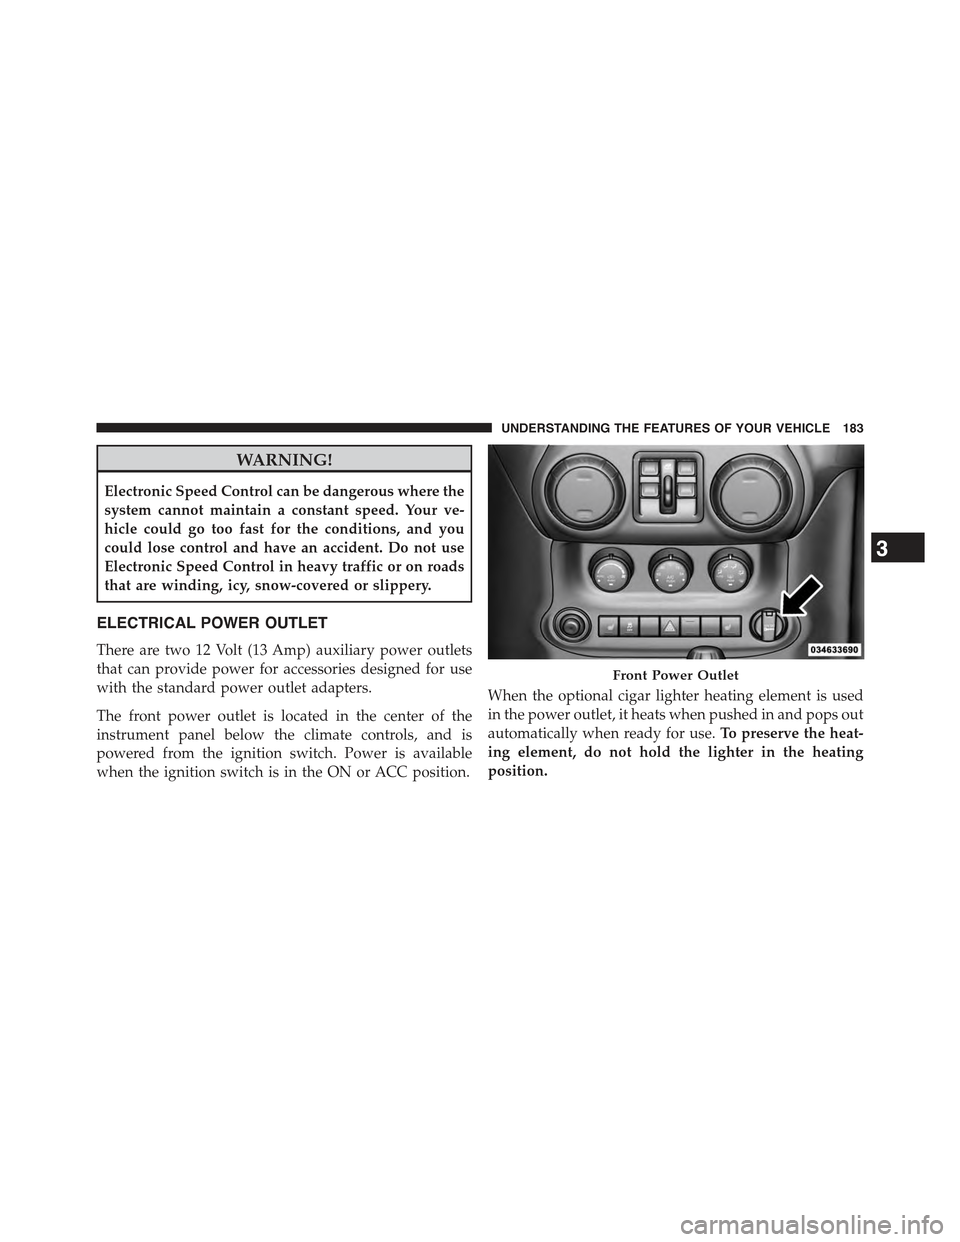
The front power outlet is located in the center of the
instrument panel below the climate controls, and is
powered from the ignition switch. Power is available
when the ignition switch is in the ON or ACC position.
When the optional cigar lighter heating element is used
in the power outlet, it heats when pushed in and pops out
automatically when ready for use.To preserve the heat-
ing element, do not hold the lighter in the heating
position.
Front Power Outlet
3
UNDERSTANDING THE FEATURES OF YOUR VEHICLE 183
Page 186 of 695
A second power outlet is located inside the center console
and is powered directly from the vehicle battery.
CAUTION!
•Do not exceed the maximum power of 160 Watts (13
Amps) at 12 Volts. If the 160 Watt (13 Amp) power
rating is exceeded the fuse protecting the system
will need to be replaced.
•Power outlets are designed for accessory plugs
only. Do not insert any other object in the power
outlets as this will damage the outlet and blow the
fuse. Improper use of the power outlet can cause
damage not covered by your New Vehicle Limited
Warranty.
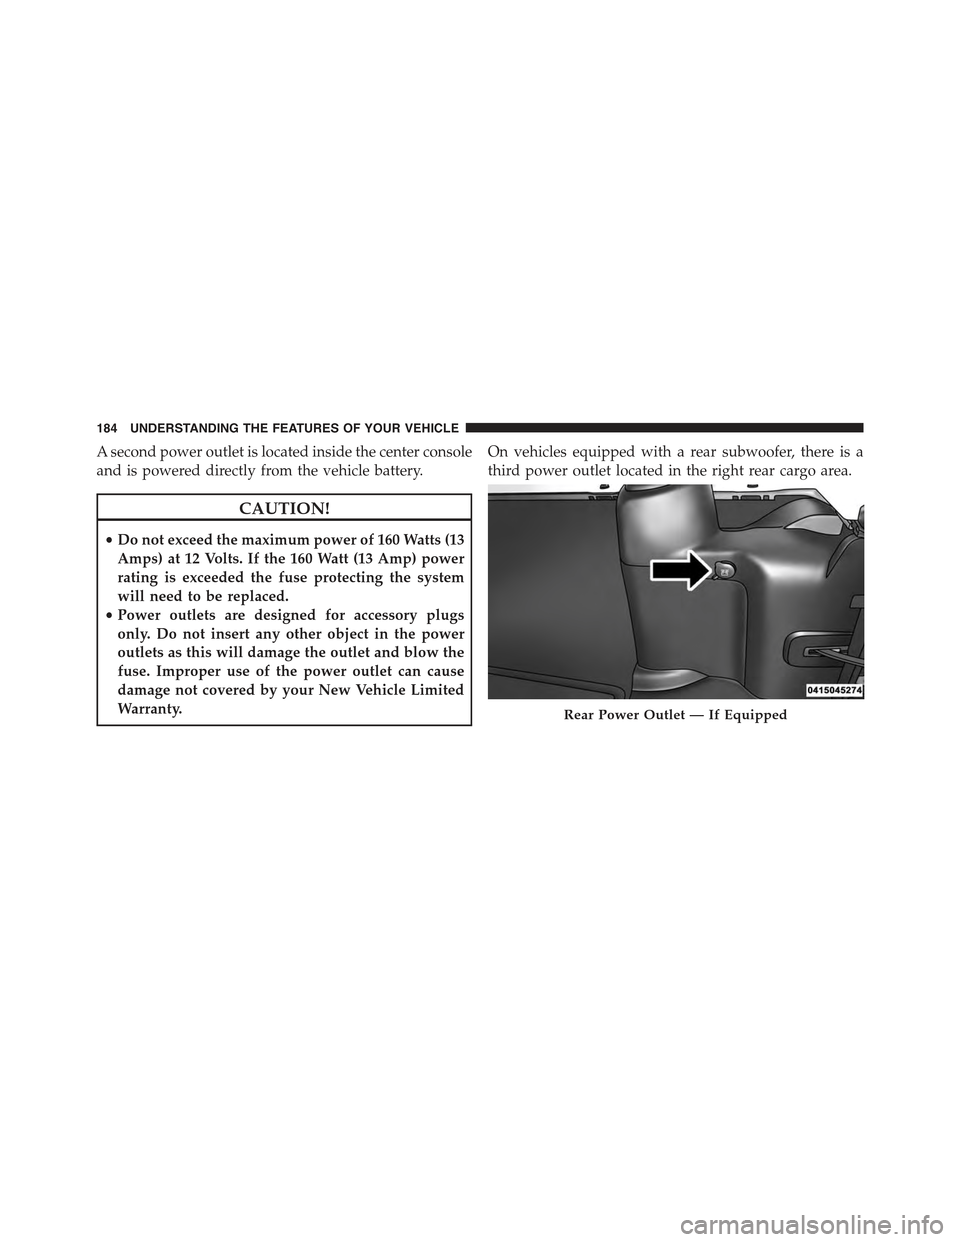
On vehicles equipped with a rear subwoofer, there is a
third power outlet located in the right rear cargo area.
Rear Power Outlet — If Equipped
184 UNDERSTANDING THE FEATURES OF YOUR VEHICLE
Page 187 of 695
WARNING!
To avoid serious injury or death:
•Only devices designed for use in this type of outlet
should be inserted into any 12 Volt outlet.
•Do not touch with wet hands.
•Close the lid when not in use and while driving the
vehicle.
•If this outlet is mishandled, it may cause an electric
shock and failure.
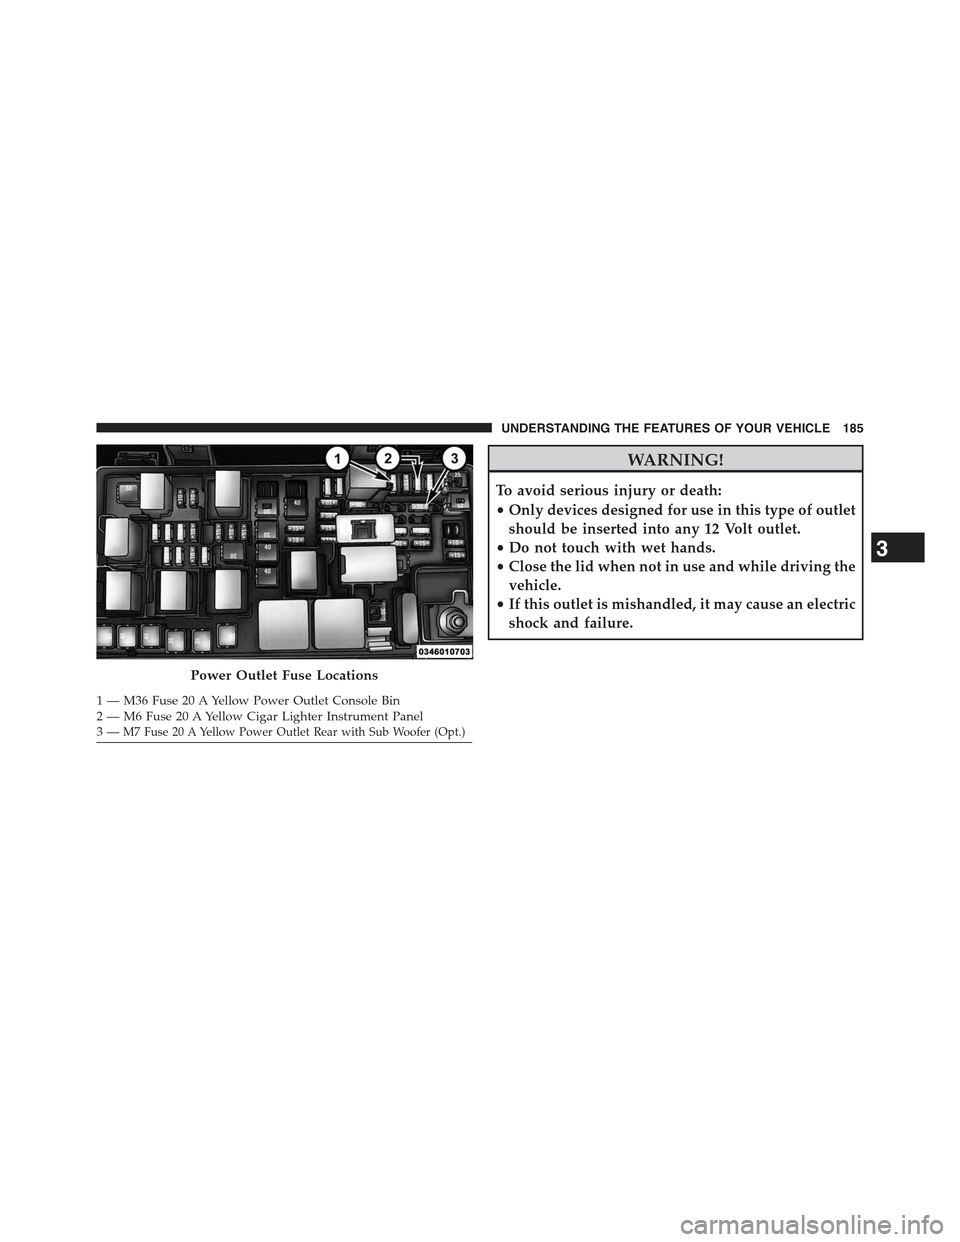
Power Outlet Fuse Locations
1 — M36 Fuse 20 A Yellow Power Outlet Console Bin2 — M6 Fuse 20 A Yellow Cigar Lighter Instrument Panel3—M7 Fuse 20 A Yellow Power Outlet Rear with Sub Woofer (Opt.)
3
UNDERSTANDING THE FEATURES OF YOUR VEHICLE 185
Page 188 of 695
CAUTION!
•Many accessories that can be plugged in draw
power from the vehicle’s battery, even when not in
use (i.e., mobile phones, etc.). Eventually, if
plugged in long enough, the vehicle’s battery will
discharge sufficiently to degrade battery life and/or
prevent the engine from starting.
•Accessories that draw higher power (i.e., coolers,
vacuum cleaners, lights, etc.), will degrade the
battery even more quickly. Only use these intermit-
tently and with greater caution.
•After the use of high-power draw accessories, or
long periods of the vehicle not being started (with
accessories still plugged in), the vehicle must be
driven a sufficient length of time to allow the
alternator to recharge the vehicle’s battery.
(Continued)
CAUTION!(Continued)
•Power outlets are designed for accessory plugs
only. Do not hang any type of accessory or acces-
sory bracket from the plug.
POWER INVERTER — IF EQUIPPED
There is a 115 Volt, 150 Watt inverter outlet located on the
front of the center console to convert DC current to AC
current. This outlet can power cellular phones, electron-
ics and other low power devices requiring power up to
150 Watts. Certain high-end video games, such as Play-
station3 and XBox360 will exceed this power limit, as will
most power tools.
186 UNDERSTANDING THE FEATURES OF YOUR VEHICLE
Page 189 of 695
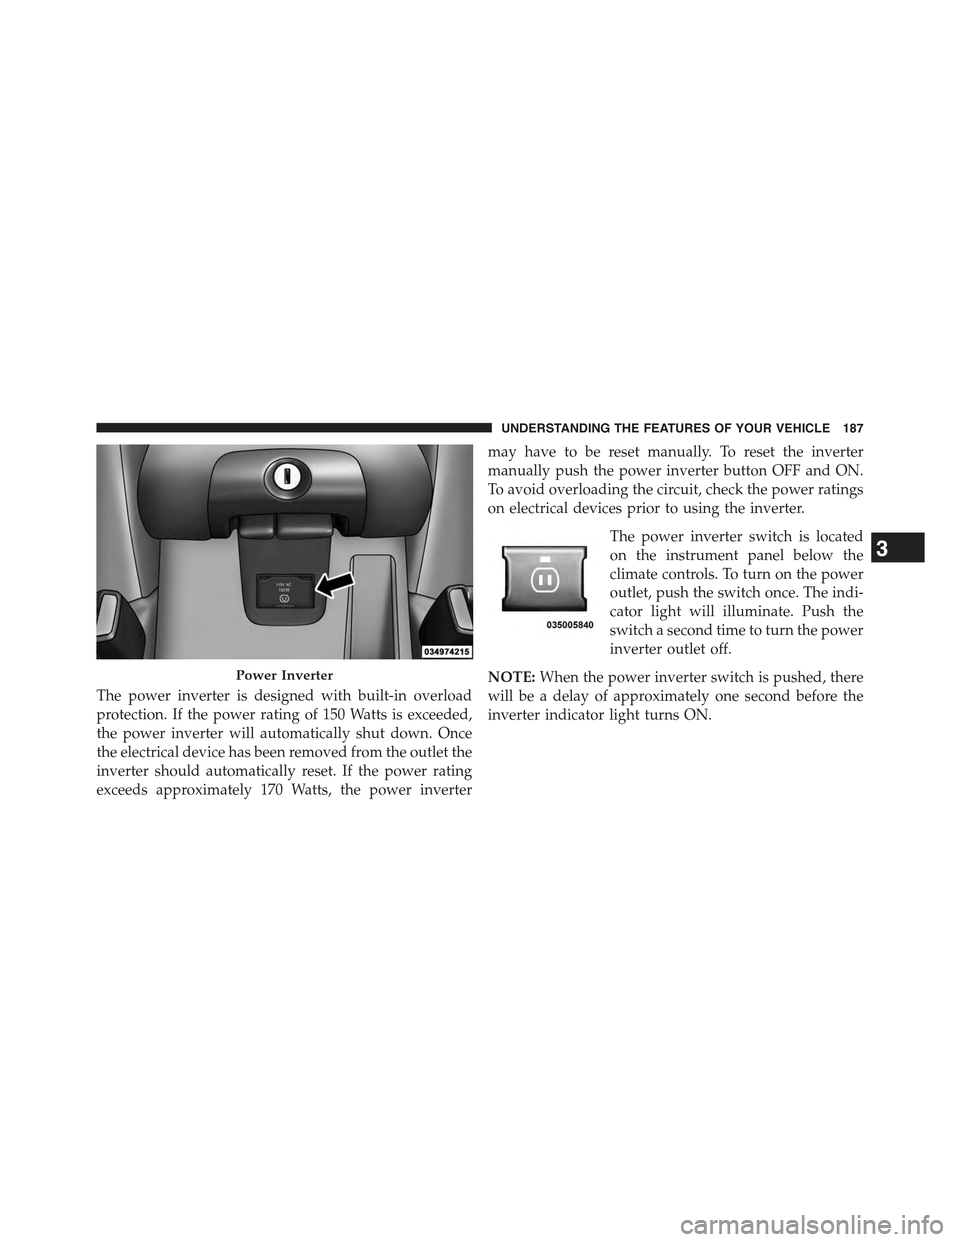
The power inverter is designed with built-in overload
protection. If the power rating of 150 Watts is exceeded,
the power inverter will automatically shut down. Once
the electrical device has been removed from the outlet the
inverter should automatically reset. If the power rating
exceeds approximately 170 Watts, the power inverter
may have to be reset manually. To reset the inverter
manually push the power inverter button OFF and ON.
To avoid overloading the circuit, check the power ratings
on electrical devices prior to using the inverter.
The power inverter switch is located
on the instrument panel below the
climate controls. To turn on the power
outlet, push the switch once. The indi-
cator light will illuminate. Push the
switch a second time to turn the power
inverter outlet off.
NOTE:When the power inverter switch is pushed, there
will be a delay of approximately one second before the
inverter indicator light turns ON.
Power Inverter
3
UNDERSTANDING THE FEATURES OF YOUR VEHICLE 187
Page 190 of 695
WARNING!
To avoid serious injury or death:
•Do not insert any objects into the receptacles.
•Do not touch with wet hands.
•Close the lid when not in use.
•If this outlet is mishandled, it may cause an electric
shock and failure.
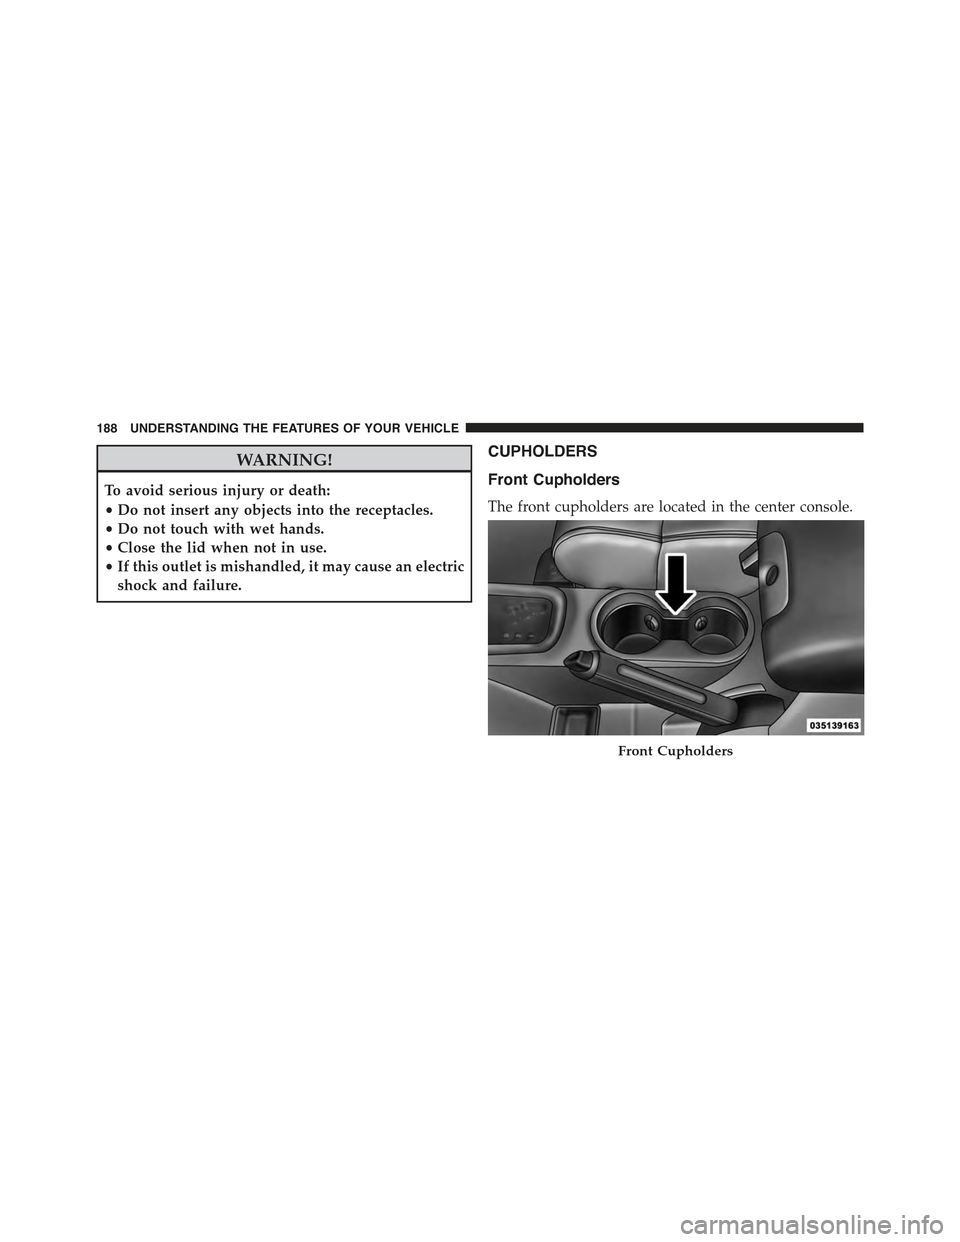
CUPHOLDERS
Front Cupholders
The front cupholders are located in the center console.
Front Cupholders
188 UNDERSTANDING THE FEATURES OF YOUR VEHICLE