torque JEEP WRANGLER 2015 JK / 3.G Owners Manual
[x] Cancel search | Manufacturer: JEEP, Model Year: 2015, Model line: WRANGLER, Model: JEEP WRANGLER 2015 JK / 3.GPages: 695, PDF Size: 20.64 MB
Page 217 of 695
CAUTION!
The removal of the Freedom Top™ requires four
adults located on each corner. Failure to follow this
caution could damage the Freedom Top™.
Rear Hard Top Installation
NOTE:If the door frames are installed from soft top
usage, they must be removed prior to installation of the
hard top.
1. Inspect the hard top seals for damage and replace if
necessary.
2. Install the hard top using the same steps for removal
in reverse order.
Make sure that the hard top is sitting flush with the body
at the sides and check to ensure that there is a uniform
gap between the lift glass and hard top.
NOTE:
•The Torx® fasteners that attach the hard top to the
body should be torqued to 88 in lb +/- 22 in lb
(10 N·m +/- 2.5 N·m).
•It is not necessary to pinch connection when rein-
stalling washer hose. Push on until click is heard.
DOOR FRAME
CAUTION!
Failure to follow these cautions may cause interior
water damage, stains or mildew:
•Opening a door or lowering a window while the
top is wet may allow water to drip into the vehicle’s
interior.
(Continued)
3
UNDERSTANDING THE FEATURES OF YOUR VEHICLE 215
Page 318 of 695
occur when operating the vehicle in a high torque
converter slip condition, such as 4-wheel drive operation
(e.g., snow plowing, off-road operation). If this “HOT-
OIL” message turns on, stop the vehicle and run the
engine at idle or faster with the transmission in NEU-
TRAL until the message turns off.
CAUTION!
Continuous driving with the Transmission Tempera-
ture “HOTOIL” Warning message illuminated will
eventually cause severe transmission damage or
transmission failure.
WARNING!
If the Transmission Temperature “HOTOIL” Warn-
ing message is illuminated and you continue operat-
ing the vehicle, in some circumstances you could
cause the fluid to boil over, come in contact with hot
engine or exhaust components and cause a fire.
gASCAP
If the vehicle diagnostic system determines that the fuel
filler cap is loose, improperly installed, or damaged, a
“gASCAP” message will display in the odometer display
area. Tighten the fuel filler cap properly and press the
TRIP ODOMETER button to turn off the message. If the
problem continues, the message will appear the next time
the vehicle is started.
316 UNDERSTANDING YOUR INSTRUMENT PANEL
Page 448 of 695
TRAC-LOK® REAR AXLE — IF EQUIPPED
The Trac-Lok® rear axle provides a constant driving force
to both rear wheels and reduces wheel spin caused by the
loss of traction at one driving wheel. If traction differs
between the two rear wheels, the differential automati-
cally proportions the usable torque by providing more
torque to the wheel that has traction.
Trac-Lok® is especially helpful during slippery driving
conditions. With both rear wheels on a slippery surface, a
slight application of the accelerator will supply maxi-
mum traction.
WARNING!
On vehicles equipped with a limited-slip differen-
tial, never run the engine with one rear wheel off the
ground. The vehicle may drive through the rear
wheel remaining on the ground and cause you to lose
control of your vehicle.
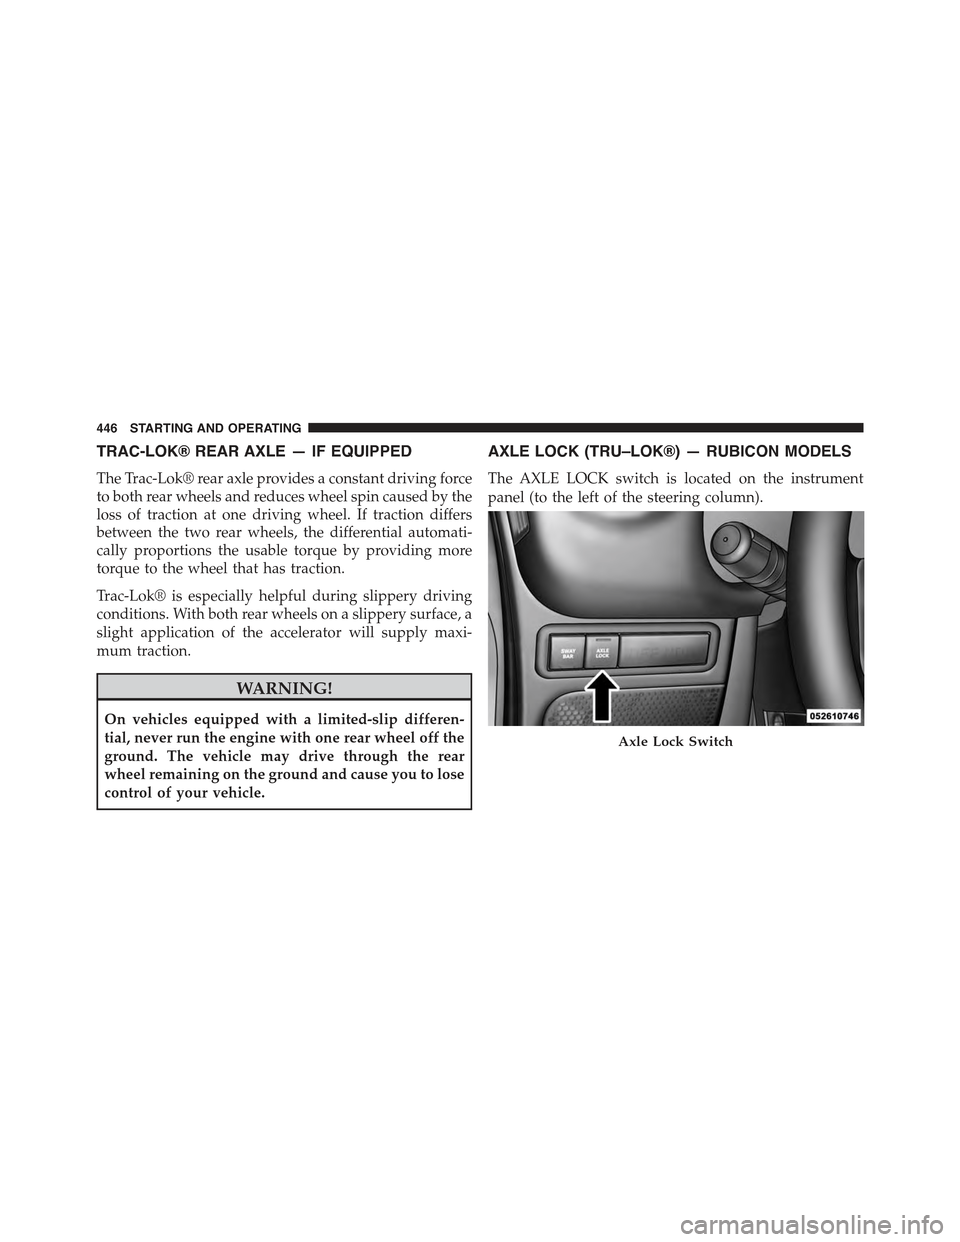
AXLE LOCK (TRU–LOK®) — RUBICON MODELS
The AXLE LOCK switch is located on the instrument
panel (to the left of the steering column).
Axle Lock Switch
446 STARTING AND OPERATING
Page 451 of 695
To disconnect the stabilizer/sway bar, shift to either 4H
or 4L and press the SWAY BAR switch to obtain the
off-road position. Refer to “Four-Wheel Drive Operation”
in “Starting and Operating” for further information. The
“Sway Bar Indicator Light” will flash until the stabilizer/
sway bar has been fully disconnected.
NOTE:The stabilizer/sway bar may be torque locked
due to left and right suspension height differences. This
condition is due to driving surface differences or vehicle
loading. In order for the stabilizer/sway bar to
disconnect/reconnect, the right and left halves of the bar
must be aligned. This alignment may require that the
vehicle be driven onto level ground or rocked from side
to side.
To return to on-road mode, press the SWAY BAR switch
again.
WARNING!
If the stabilizer/sway bar will not return to on-road
mode, the “Sway Bar Indicator Light” will flash in
the instrument cluster and vehicle stability is greatly
reduced. Do not attempt to drive the vehicle over
18 mph (29 km/h). Driving faster than 18 mph
(29 km/h) may cause loss of control of the vehicle,
which could result in serious injury. Contact your
local authorized dealer for assistance.
ON-ROAD DRIVING TIPS
Utility vehicles have higher ground clearance and a
narrower track to make them capable of performing in a
wide variety of off-road applications. Specific design
characteristics give them a higher center of gravity than
ordinary cars.
5
STARTING AND OPERATING 449
Page 465 of 695
•Inspect the radiator for mud and debris and clean as
required.
•Check threaded fasteners for looseness, particularly on
the chassis, drivetrain components, steering, and sus-
pension. Retighten them, if required, and torque to the
values specified in the Service Manual.
•Check for accumulations of plants or brush. These
things could be a fire hazard. They might hide damage
to fuel lines, brake hoses, axle pinion seals, and
propeller shafts.
•After extended operation in mud, sand, water, or
similar dirty conditions, have the radiator, fan, brake
rotors, wheels, brake linings, and axle yokes inspected
and cleaned as soon as possible.
WARNING!
Abrasive material in any part of the brakes may cause
excessive wear or unpredictable braking. You might
not have full braking power when you need it to
prevent a collision. If you have been operating your
vehicle in dirty conditions, get your brakes checked
and cleaned as necessary.
•If you experience unusual vibration after driving in
mud, slush or similar conditions, check the wheels for
impacted material. Impacted material can cause a
wheel imbalance and freeing the wheels of it will
correct the situation.
5
STARTING AND OPERATING 463
Page 473 of 695
CAUTION!
The Anti-Lock Brake System is subject to possible
detrimental effects of electronic interference caused
by improperly installed aftermarket radios or tele-
phones.
NOTE:During severe braking conditions, a pulsing sen-
sation may occur and a clicking noise will be heard. This
is normal, indicating that the Anti-Lock Brake System is
functioning.
Traction Control System (TCS)
This system monitors the amount of wheel spin of each of
the driven wheels. If wheel spin is detected, brake
pressure is applied to the slipping wheel(s) and engine
power is reduced to provide enhanced acceleration and
stability.
A feature of the TCS system, Brake Limited Differential
(BLD), functions similar to a limited slip differential and
controls the wheel spin across a driven axle. If one wheel
on a driven axle is spinning faster than the other, the
system will apply the brake of the spinning wheel. This
will allow more engine torque to be applied to the wheel
that is not spinning. This feature remains active even if
TCS and ESC are in either the “Partial Off” or “Full Off”
modes. Refer to “Electronic Stability Control (ESC)” in
this section for further information.
Brake Assist System (BAS)
The BAS is designed to optimize the vehicle’s braking
capability during emergency braking maneuvers. The
system detects an emergency braking situation by sens-
ing the rate and amount of brake application and then
applies optimum pressure to the brakes. This can help
reduce braking distances. The BAS complements the
anti-lock brake system (ABS). Applying the brakes very
5
STARTING AND OPERATING 471
Page 482 of 695
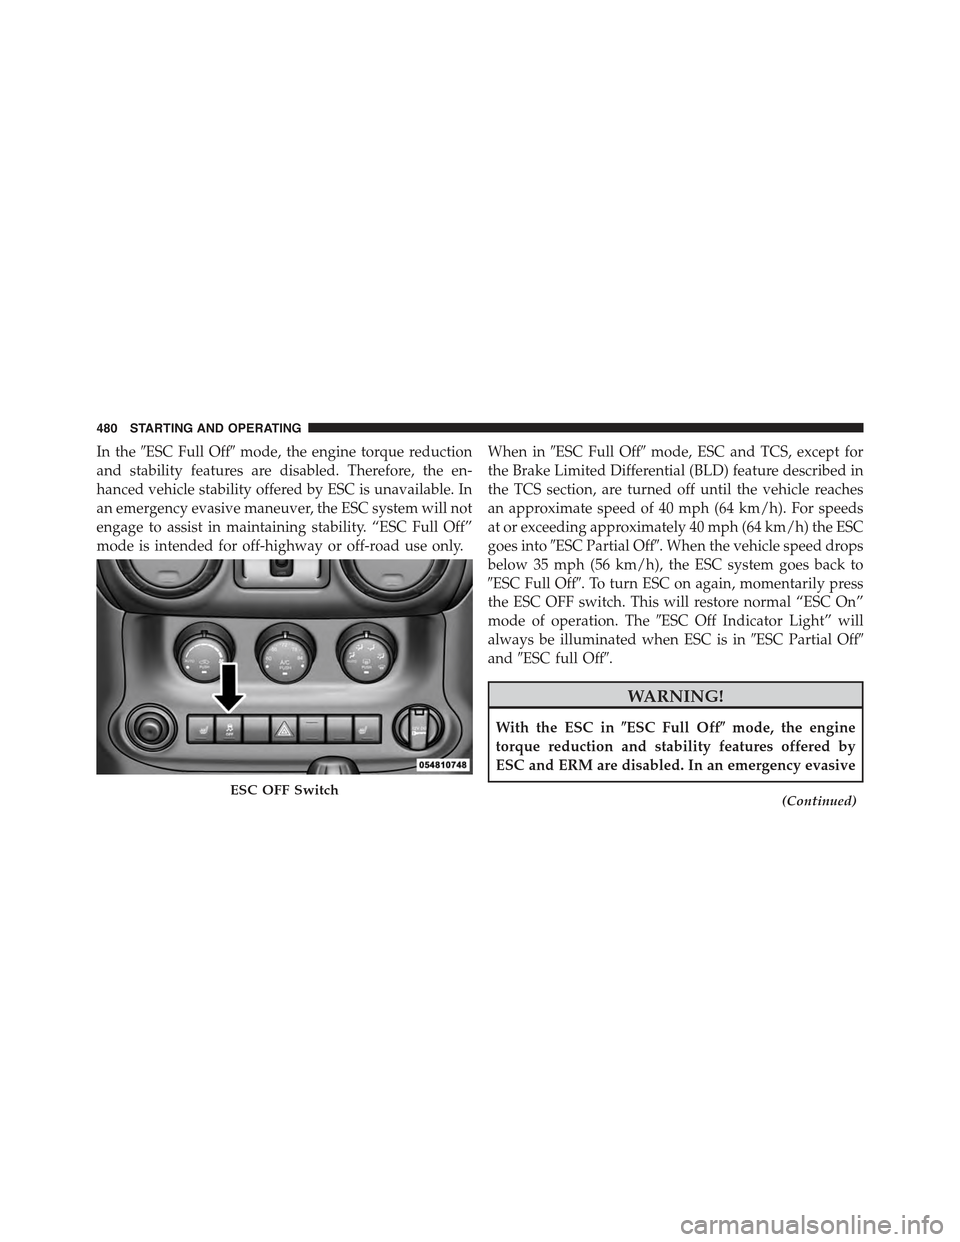
In the#ESC Full Off#mode, the engine torque reduction
and stability features are disabled. Therefore, the en-
hanced vehicle stability offered by ESC is unavailable. In
an emergency evasive maneuver, the ESC system will not
engage to assist in maintaining stability. “ESC Full Off”
mode is intended for off-highway or off-road use only.
When in#ESC Full Off#mode, ESC and TCS, except for
the Brake Limited Differential (BLD) feature described in
the TCS section, are turned off until the vehicle reaches
an approximate speed of 40 mph (64 km/h). For speeds
at or exceeding approximately 40 mph (64 km/h) the ESC
goes into#ESC Partial Off#. When the vehicle speed drops
below 35 mph (56 km/h), the ESC system goes back to
#ESC Full Off#. To turn ESC on again, momentarily press
the ESC OFF switch. This will restore normal “ESC On”
mode of operation. The#ESC Off Indicator Light” will
always be illuminated when ESC is in#ESC Partial Off#
and#ESC full Off#.
WARNING!
With the ESC in%ESC Full Off%mode, the engine
torque reduction and stability features offered by
ESC and ERM are disabled. In an emergency evasive
(Continued)ESC OFF Switch
480 STARTING AND OPERATING
Page 483 of 695
WARNING!(Continued)
maneuver, the ESC and ERM systems will not engage
to assist in maintaining stability. The%ESC Full Off%
mode is intended for off-road use only.
4L Range (4WD Models)
ESC Full Off
This is the normal operating mode for ESC in 4L range.
Whenever the vehicle is started in 4L range, or the
transfer case (if equipped) is shifted from 4H range or
NEUTRAL to 4L range, the ESC system will be in this
mode. In 4L range, ESC and TCS, except for the Brake
Limited Differential (BLD) feature described in the TCS
section, are turned off until the vehicle reaches an ap-
proximate speed of 40 mph (64 km/h). For speeds at or
exceeding approximately 40 mph (64 km/h) the ESC goes
into#ESC Partial Off#When the vehicle speed drops
below 35 mph (56 km/h), the ESC system goes back to
#ESC Full Off#. The ESC is in#ESC Full Off#at low vehicle
speeds in 4L range so that it will not interfere with
off-road driving, but the ESC function returns to provide
the stability feature at speeds above 40 mph (64 km/h).
The “ESC OFF Indicator Light” will always be illumi-
nated in 4L range when ESC is in#ESC Full Off#or#ESC
Partial Off#.
NOTE:The “ESC OFF” message will display and an
audible chime will sound when the shift lever is placed in
the PARK position from any position other than PARK,
and then moved out of the PARK position. This will
occur even if the message was previously cleared.
WARNING!
With the ESC in%ESC Full Off%mode, the engine
torque reduction and stability features offered by
ESC and ERM are disabled. In an emergency evasive
(Continued)
5
STARTING AND OPERATING 481
Page 561 of 695
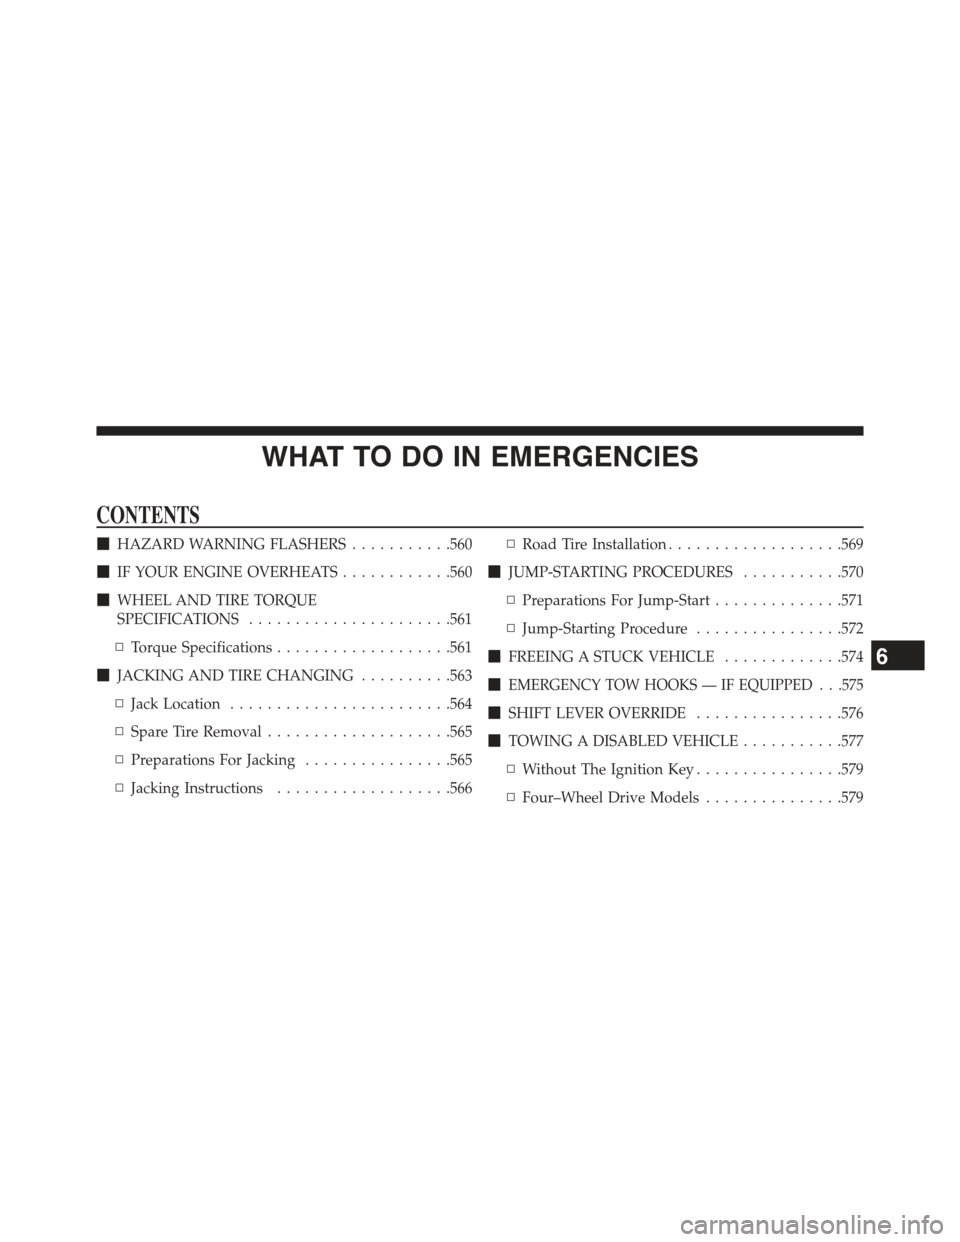
WHAT TO DO IN EMERGENCIES
CONTENTS
!HAZARD WARNING FLASHERS...........560
!IF YOUR ENGINE OVERHEATS............560
!WHEEL AND TIRE TORQUE
SPECIFICATIONS......................561
▫Torque Specifications...................561
!JACKING AND TIRE CHANGING..........563
▫Jack Location........................564
▫Spare Tire Removal....................565
▫Preparations For Jacking................565
▫Jacking Instructions...................566
▫Road Tire Installation...................569
!JUMP-STARTING PROCEDURES...........570
▫Preparations For Jump-Start..............571
▫Jump-Starting Procedure................572
!FREEING A STUCK VEHICLE.............574
!EMERGENCY TOW HOOKS — IF EQUIPPED . . .575
!SHIFT LEVER OVERRIDE................576
!TOWING A DISABLED VEHICLE...........577
▫Without The Ignition Key................579
▫Four–Wheel Drive Models...............579
6
Page 563 of 695
NOTE:There are steps that you can take to slow down
an impending overheat condition:
•If your air conditioner (A/C) is on, turn it off. The A/C
system adds heat to the engine cooling system and
turning the A/C off can help remove this heat.
•You can also turn the temperature control to maximum
heat, the mode control to floor and the blower control
to high. This allows the heater core to act as a
supplement to the radiator and aids in removing heat
from the engine cooling system.
WARNING!
You or others can be badly burned by hot engine
coolant (antifreeze) or steam from your radiator. If
you see or hear steam coming from under the hood,
do not open the hood until the radiator has had time
to cool. Never try to open a cooling system pressure
cap when the radiator or coolant bottle is hot.
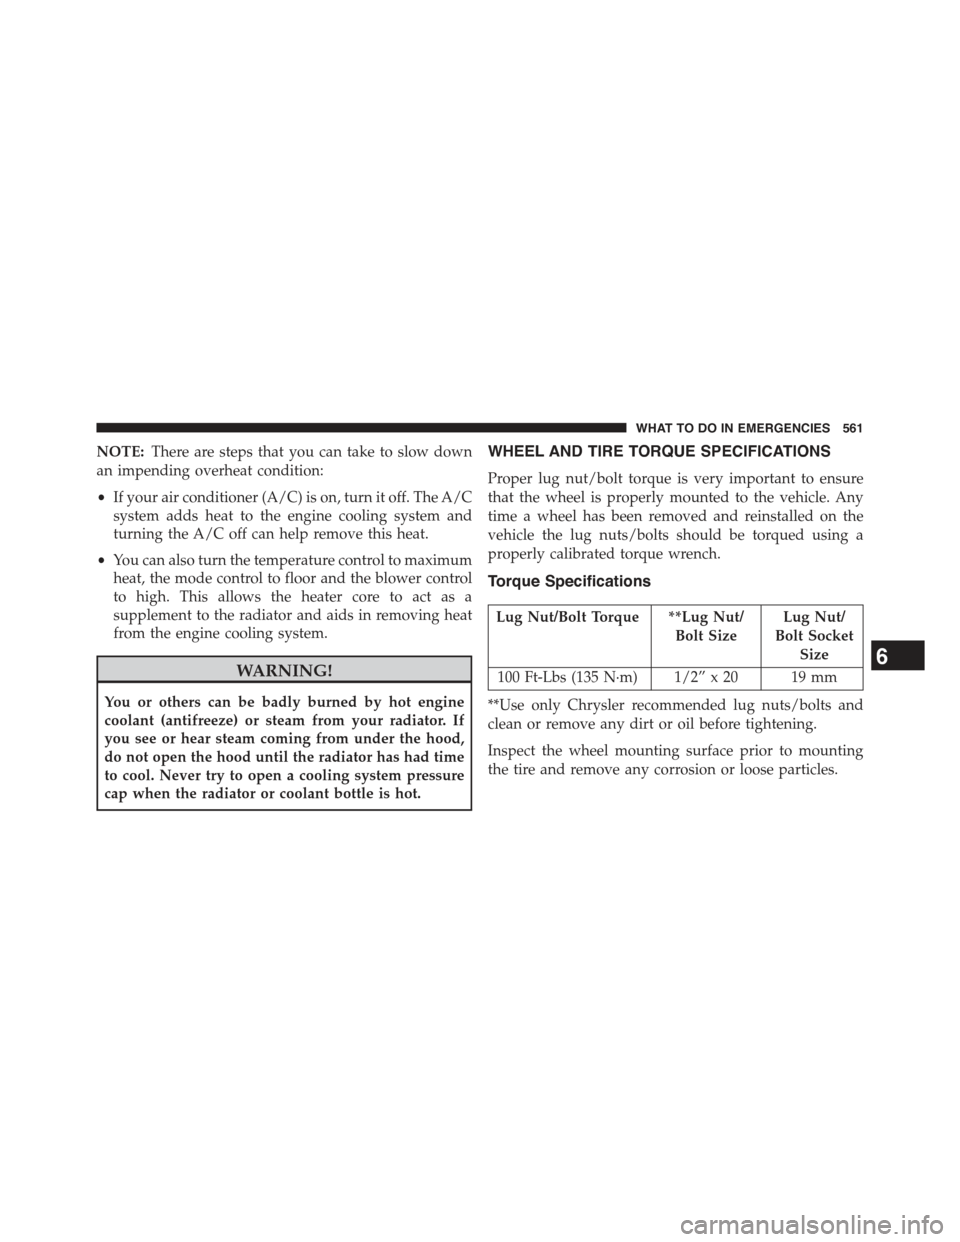
WHEEL AND TIRE TORQUE SPECIFICATIONS
Proper lug nut/bolt torque is very important to ensure
that the wheel is properly mounted to the vehicle. Any
time a wheel has been removed and reinstalled on the
vehicle the lug nuts/bolts should be torqued using a
properly calibrated torque wrench.
Torque Specifications
Lug Nut/Bolt Torque **Lug Nut/
Bolt Size
Lug Nut/
Bolt Socket
Size
100 Ft-Lbs (135 N·m) 1/2” x 20 19 mm
**Use only Chrysler recommended lug nuts/bolts and
clean or remove any dirt or oil before tightening.
Inspect the wheel mounting surface prior to mounting
the tire and remove any corrosion or loose particles.
6
WHAT TO DO IN EMERGENCIES 561