wipers JEEP WRANGLER 2015 JK / 3.G Owners Manual
[x] Cancel search | Manufacturer: JEEP, Model Year: 2015, Model line: WRANGLER, Model: JEEP WRANGLER 2015 JK / 3.GPages: 695, PDF Size: 20.64 MB
Page 109 of 695
▫Replacing The Rear Seat — Two-Door
Models............................163
▫60/40 Split Folding Rear Seat — Four-Door
Models............................163
!TO OPEN AND CLOSE THE HOOD.........165
!LIGHTS.............................166
▫Multifunction Lever....................166
▫Headlights And Parking Lights............167
▫Automatic Headlights — If Equipped.......168
▫Turn Signals.........................169
▫Lane Change Assist...................169
▫Lights-On Reminder...................169
▫High/Low Beam Switch................170
▫Flash-To-Pass........................170
▫Front Fog Lights......................170
▫Instrument Panel Dimmer...............170
▫Daytime Running Lights — If Equipped.....171
▫Interior Lights.......................171
!WINDSHIELD WIPERS AND WASHERS......174
▫Windshield Wiper Operation.............175
▫Intermittent Wiper System...............176
▫Windshield Washers....................177
▫Mist Feature.........................177
!TILT STEERING COLUMN...............178
!ELECTRONIC SPEED CONTROL —
IF EQUIPPED.........................179
▫To Activate..........................180
3
UNDERSTANDING THE FEATURES OF YOUR VEHICLE 107
Page 176 of 695
When a door is open and the interior lights are on,
rotating the dimmer control to the extreme bottom posi-
tion will cause all the interior lights to turn off. This is
also known as the “Party” mode because it allows the
doors to stay open for extended periods of time without
discharging the vehicle’s battery.
WINDSHIELD WIPERS AND WASHERS
The windshield wiper/washer control lever is located on
the right side of the steering column. The front wipers are
operated by rotating a switch, located at the end of the
lever. For information on using the rear window wiper/
washer, refer to “Rear Window Features” in “Under-
standing The Features Of Your Vehicle”.
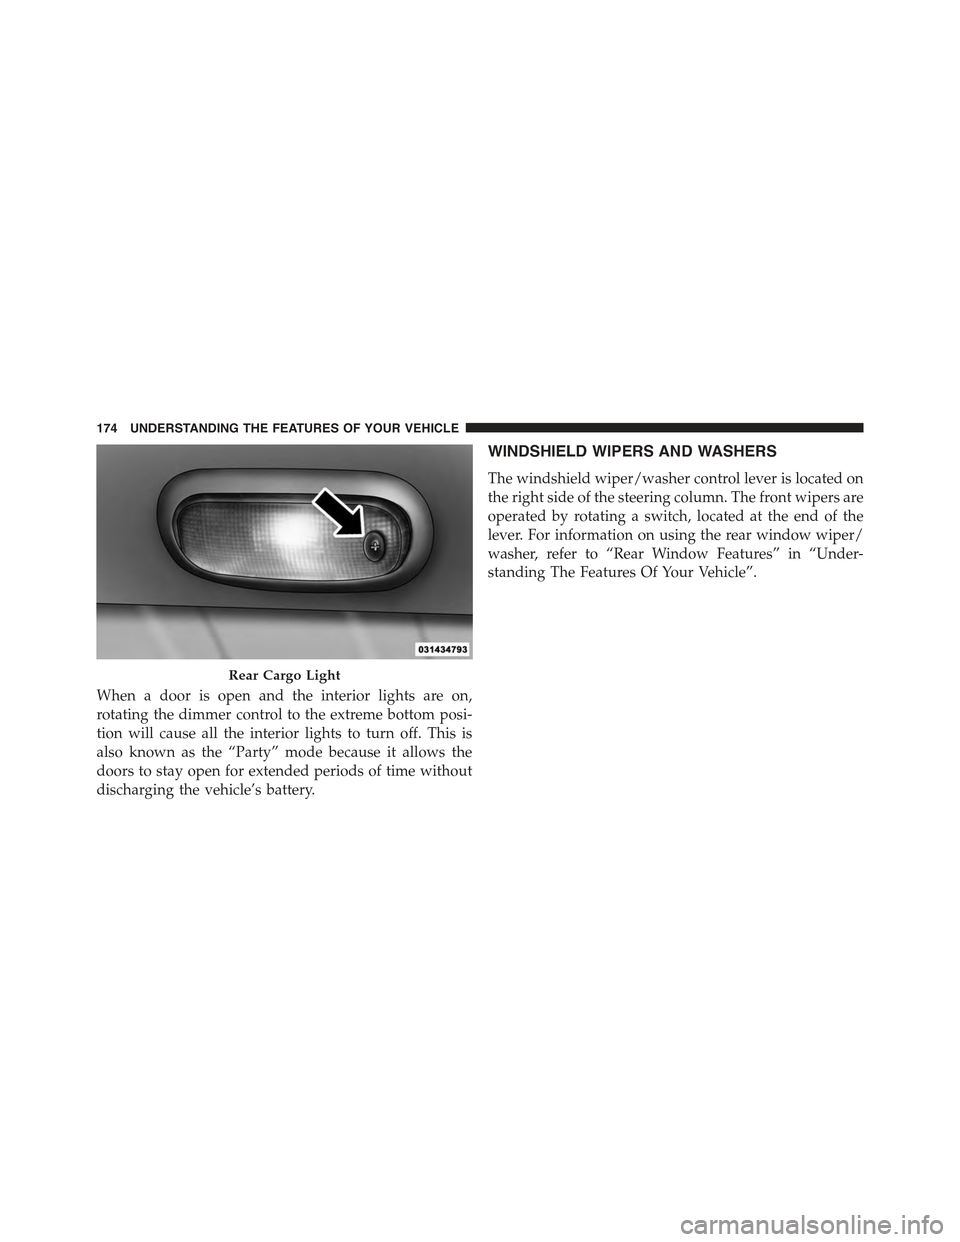
Rear Cargo Light
174 UNDERSTANDING THE FEATURES OF YOUR VEHICLE
Page 178 of 695
CAUTION!
In cold weather, always turn off the wiper switch and
allow the wipers to return to the park position before
turning off the engine. If the wiper switch is left on
and the wipers freeze to the windshield, damage to
the wiper motor may occur when the vehicle is
restarted.
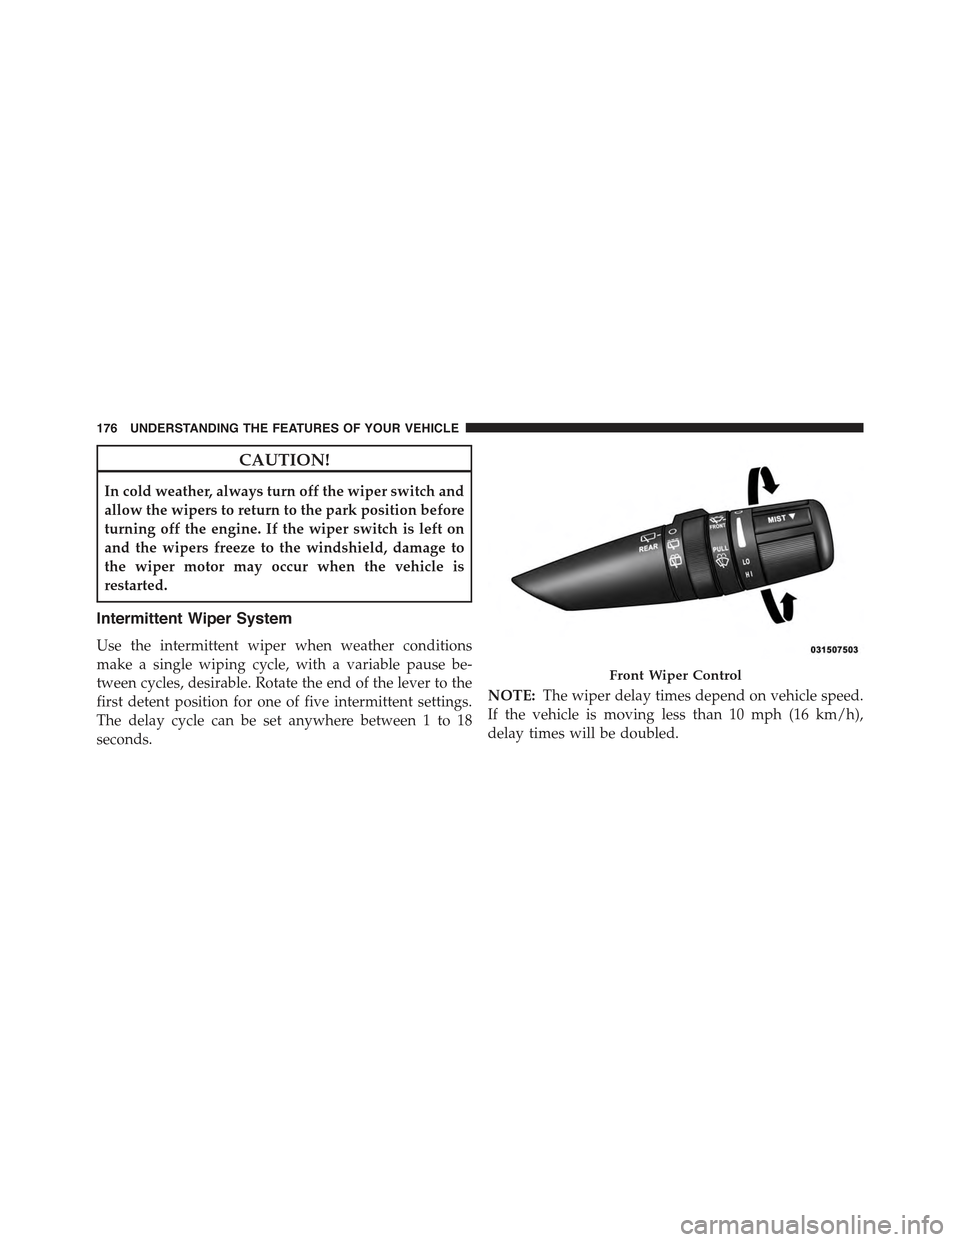
Intermittent Wiper System
Use the intermittent wiper when weather conditions
make a single wiping cycle, with a variable pause be-
tween cycles, desirable. Rotate the end of the lever to the
first detent position for one of five intermittent settings.
The delay cycle can be set anywhere between 1 to 18
seconds.
NOTE:The wiper delay times depend on vehicle speed.
If the vehicle is moving less than 10 mph (16 km/h),
delay times will be doubled.
Front Wiper Control
176 UNDERSTANDING THE FEATURES OF YOUR VEHICLE
Page 179 of 695
Windshield Washers
To use the washer, pull the lever toward you and hold
while spray is desired. If the lever is pulled while in the
delay range, the wiper will start and continue to operate for
two or three wipe cycles after the lever is released, and then
resume the intermittent interval previously selected.
If the lever is pulled while in the off position, the wipers
will operate for two or three wipe cycles and then turn
off.
WARNING!
Sudden loss of visibility through the windshield
could lead to a collision. You might not see other
vehicles or other obstacles. To avoid sudden icing of
the windshield during freezing weather, warm the
windshield with defroster before and during wind-
shield washer use.
Mist Feature
Push down on the wiper lever to activate a single wipe to
clear off road mist or spray from a passing vehicle. As
long as the lever is held down, the wipers will continue
to operate.
NOTE:The mist feature does not activate the washer
pump; therefore, no washer fluid will be sprayed on the
windshield. The wash function must be used in order to
spray the windshield with washer fluid.
3
UNDERSTANDING THE FEATURES OF YOUR VEHICLE 177
Page 294 of 695
WARNING!
Carefully follow these warnings to help protect
against personal injury:
•Do not drive your vehicle on-road with the wind-
shield down.
•Do not drive your vehicle unless the windshield is
securely fastened, either up or down.
•Eye protection, such as goggles, should be worn at
all times when the windshield is down.
•Be sure that you carefully follow the instructions
for raising the windshield. Make sure that the
folding windshield, windshield wipers, side bars,
and all associated hardware and fasteners are cor-
rectly and tightly assembled before driving your
vehicle. Failure to follow these instructions may
prevent your vehicle from providing you and your
passengers protection in some accidents.
(Continued)
WARNING!(Continued)
•If you remove the doors, store them outside the
vehicle. In the event of an accident, a loose door
may cause personal injury.
Lowering The Windshield And Removing Side
Bars
1. Lower the fabric top or remove the hard top following
the instructions in this manual.
NOTE:To assist in properly reinstalling side bars, mark
the original locations prior to removing.
292 UNDERSTANDING THE FEATURES OF YOUR VEHICLE
Page 342 of 695
Headlamps with Wipers (Available with Auto
Headlights Only)
When on is selected, and the headlight switch is in the
AUTO position, the headlights will turn on approxi-
mately 10 seconds after the wipers are turned on. If the
headlights were turned on by this feature they will also
turn off when the wipers are turned off. To make your
selection, press and release the SELECT button until
“ON” or “OFF” appears.
NOTE:Turning the headlights on during the daytime
causes the instrument panel lights to dim. To increase the
brightness, refer to “Lights” in “Understanding The
Features Of Your Vehicle.”
Key Off Power Delay
When this feature is selected, the power window
switches, radio, hands–free system (if equipped), DVD
video system (if equipped), power sunroof (if equipped),
and power outlets will remain active for up to 10 minutes
after the ignition switch is turned to the LOCK position.
Opening either front vehicle door will cancel this feature.
To make your selection, press and release the SELECT
button until “Off,” “45 sec.,” “5 min.,” or “10 min.”
appears.
Illumin. Approach
When this feature is selected, the headlights will activate
and remain on for up to 90 seconds when the doors are
unlocked with the RKE transmitter. To make your selec-
tion, press and hold the SELECT button until “Off,” “30
sec,” “60 sec,” or “90 sec” appears.
Hill Start Assist (HSA) — If Equipped
When on is selected, the HSA system is active. Refer to
“Electronic Brake Control System” in “Starting And
Operating” for system function and operating informa-
tion. To make your selection, push and release the
SELECT button until “On” or “Off” appears.
340 UNDERSTANDING YOUR INSTRUMENT PANEL
Page 580 of 695
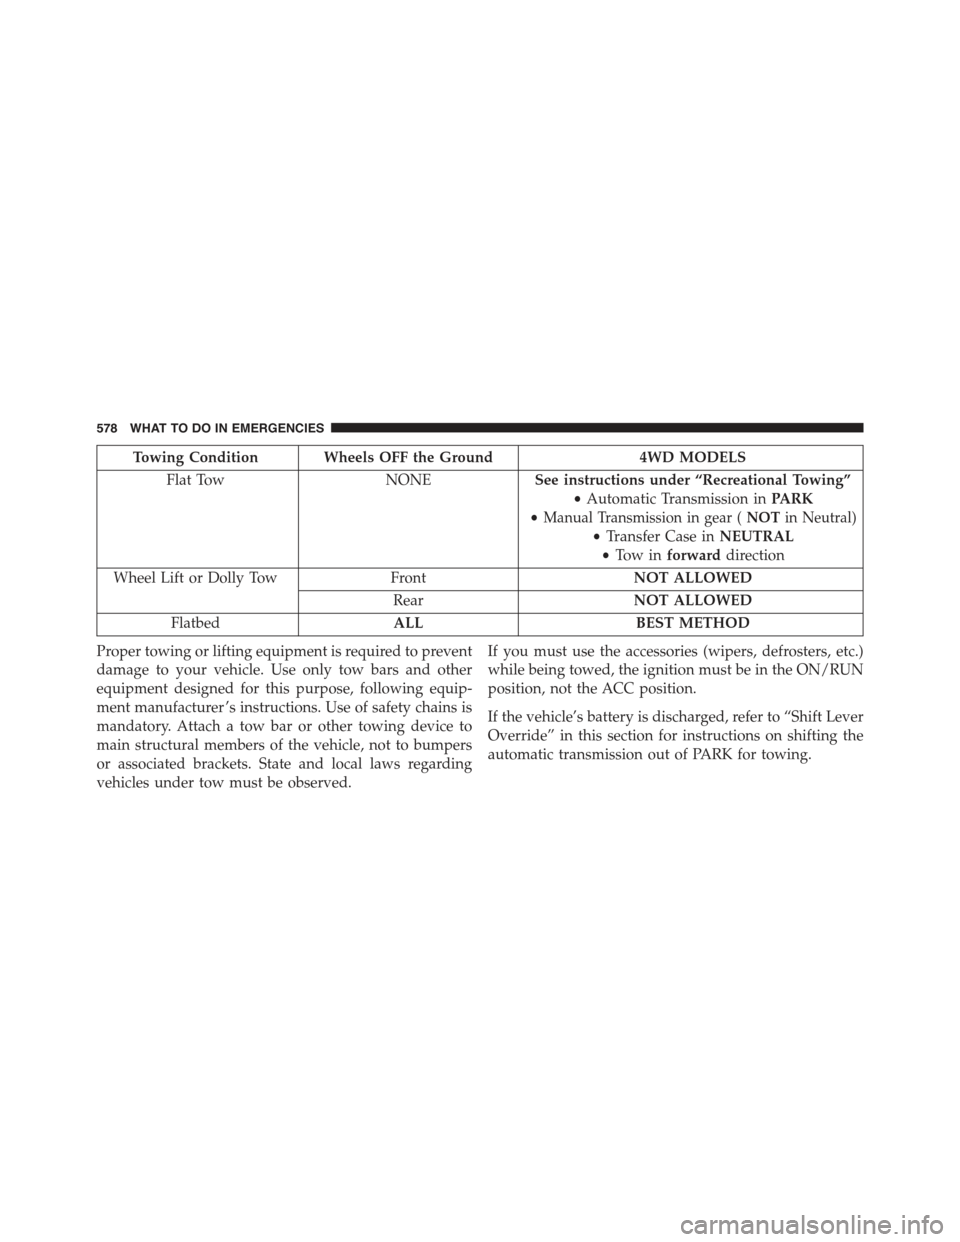
Towing Condition Wheels OFF the Ground4WD MODELS
Flat TowNONESee instructions under “Recreational Towing”
•Automatic Transmission inPARK
•Manual Transmission in gear (NOTin Neutral)
•Transfer Case inNEUTRAL
•To w i nforwarddirection
Wheel Lift or Dolly Tow FrontNOT ALLOWED
RearNOT ALLOWED
FlatbedALLBEST METHOD
Proper towing or lifting equipment is required to prevent
damage to your vehicle. Use only tow bars and other
equipment designed for this purpose, following equip-
ment manufacturer ’s instructions. Use of safety chains is
mandatory. Attach a tow bar or other towing device to
main structural members of the vehicle, not to bumpers
or associated brackets. State and local laws regarding
vehicles under tow must be observed.
If you must use the accessories (wipers, defrosters, etc.)
while being towed, the ignition must be in the ON/RUN
position, not the ACC position.
If the vehicle’s battery is discharged, refer to “Shift Lever
Override” in this section for instructions on shifting the
automatic transmission out of PARK for towing.
578 WHAT TO DO IN EMERGENCIES
Page 604 of 695
operation and to protect against rust and wear. Prior to
the application of any lubricant, the parts concerned
should be wiped clean to remove dust and grit; after
lubricating excess oil and grease should be removed.
Particular attention should also be given to hood latching
components to ensure proper function. When performing
other underhood services, the hood latch, release mecha-
nism and safety catch should be cleaned and lubricated.
The external lock cylinders should be lubricated twice a
year, preferably in the Fall and Spring. Apply a small
amount of a high quality lubricant, such as MOPAR®
Lock Cylinder Lubricant directly into the lock cylinder.
Windshield Wiper Blades
Clean the rubber edges of the wiper blades and the
windshield periodically with a sponge or soft cloth and a
mild nonabrasive cleaner. This will remove accumula-
tions of salt or road film.
Operation of the wipers on dry glass for long periods
may cause deterioration of the wiper blades. Always use
washer fluid when using the wipers to remove salt or dirt
from a dry windshield.
Avoid using the wiper blades to remove frost or ice from
the windshield. Keep the blade rubber out of contact with
petroleum products such as engine oil, gasoline, etc.
NOTE:Life expectancy of wiper blades varies depending
on geographical area and frequency of use. Poor perfor-
mance of blades may be present with chattering, marks,
water lines or wet spots. If any of these conditions are
present, clean the wiper blades or replace as necessary.
The wiper blades and wiper arms should be inspected
periodically, not just when wiper performance problems
are experienced. This inspection should include the fol-
lowing points:
•Wear Or Uneven Edges
602 MAINTAINING YOUR VEHICLE
Page 607 of 695
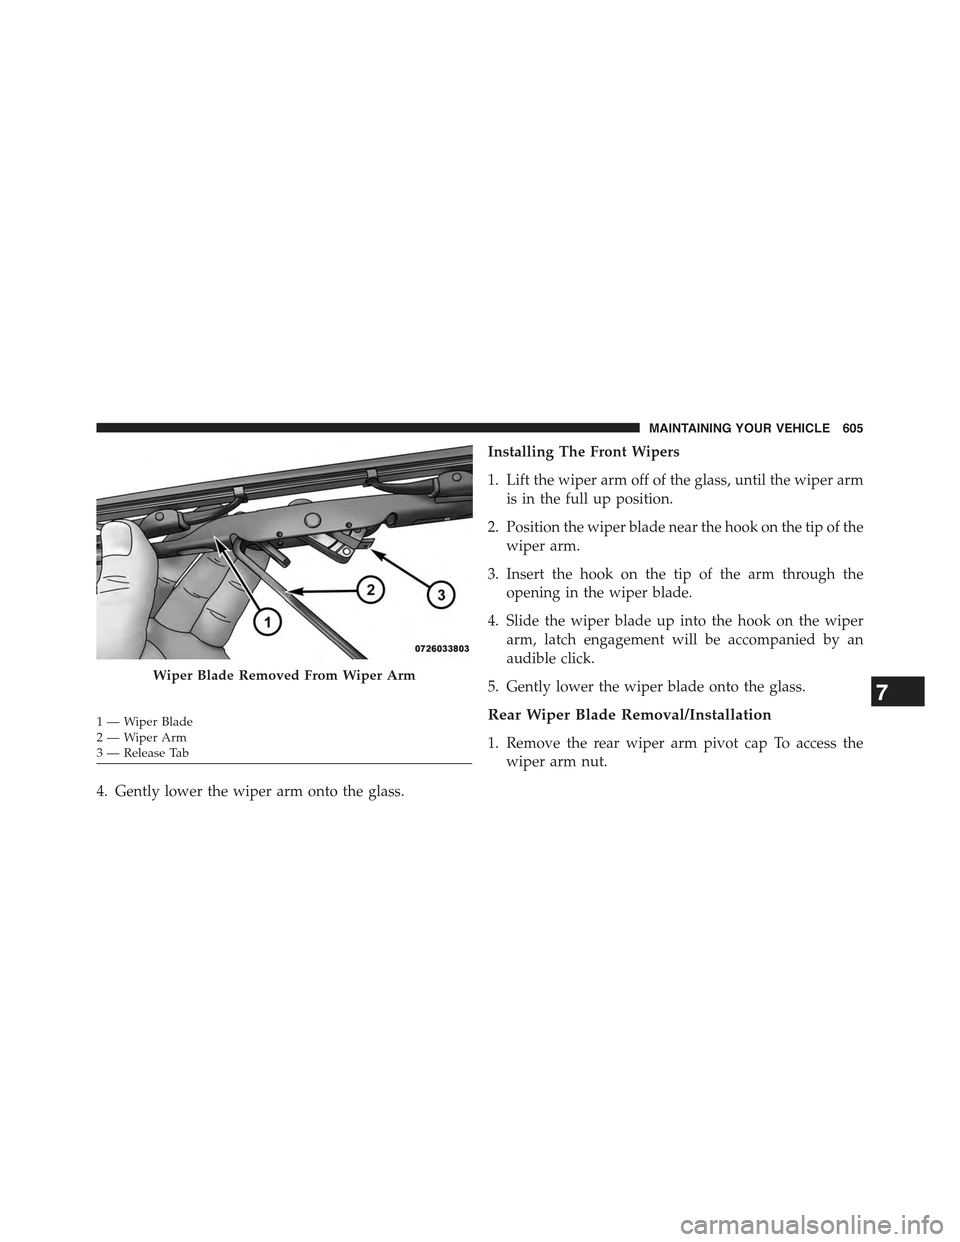
4. Gently lower the wiper arm onto the glass.
Installing The Front Wipers
1. Lift the wiper arm off of the glass, until the wiper arm
is in the full up position.
2. Position the wiper blade near the hook on the tip of the
wiper arm.
3. Insert the hook on the tip of the arm through the
opening in the wiper blade.
4. Slide the wiper blade up into the hook on the wiper
arm, latch engagement will be accompanied by an
audible click.
5. Gently lower the wiper blade onto the glass.
Rear Wiper Blade Removal/Installation
1. Remove the rear wiper arm pivot cap To access the
wiper arm nut.
Wiper Blade Removed From Wiper Arm
1—WiperBlade2—WiperArm3 — Release Tab
7
MAINTAINING YOUR VEHICLE 605
Page 677 of 695
Compact Disc (CD) Maintenance..............397
Compact Spare Tire........................505
Compass...............................322
Compass Calibration.......................325
Compass Variance.........................324
Computer, Trip/Travel......................321
Connector
UCI . . . . . . . . . . . . . . . . . . . . . . . . . . . . . . . ..389
Universal Consumer Interface (UCI)..........389
Console................................189
Console, Floor...........................189
Contract, Service..........................665
Coolant Pressure Cap (Radiator Cap)...........615
Cooling System...........................611
Adding Coolant (Antifreeze)...............614
Coolant Capacity.......................646
Coolant Level..........................616
Disposal of Used Coolant.................616
Drain, Flush, and Refill...................612
Inspection............................612
Points to Remember.....................616
Pressure Cap..........................615
Radiator Cap..........................615
Selection of Coolant (Antifreeze).............613
Corrosion Protection.......................625
Cruise Light.............................318
Cupholders.............................188
Customer Assistance.......................663
Data Recorder, Event.......................75
Daytime Running Lights....................171
Dealer Service............................586
Defroster, Rear Window.....................298
Defroster, Windshield......................101
Delay (Intermittent) Wipers..................176
Diagnostic System, Onboard.................584
10
INDEX 675