tire pressure JEEP WRANGLER 2015 JK / 3.G User Guide
[x] Cancel search | Manufacturer: JEEP, Model Year: 2015, Model line: WRANGLER, Model: JEEP WRANGLER 2015 JK / 3.GPages: 156, PDF Size: 23.54 MB
Page 3 of 156
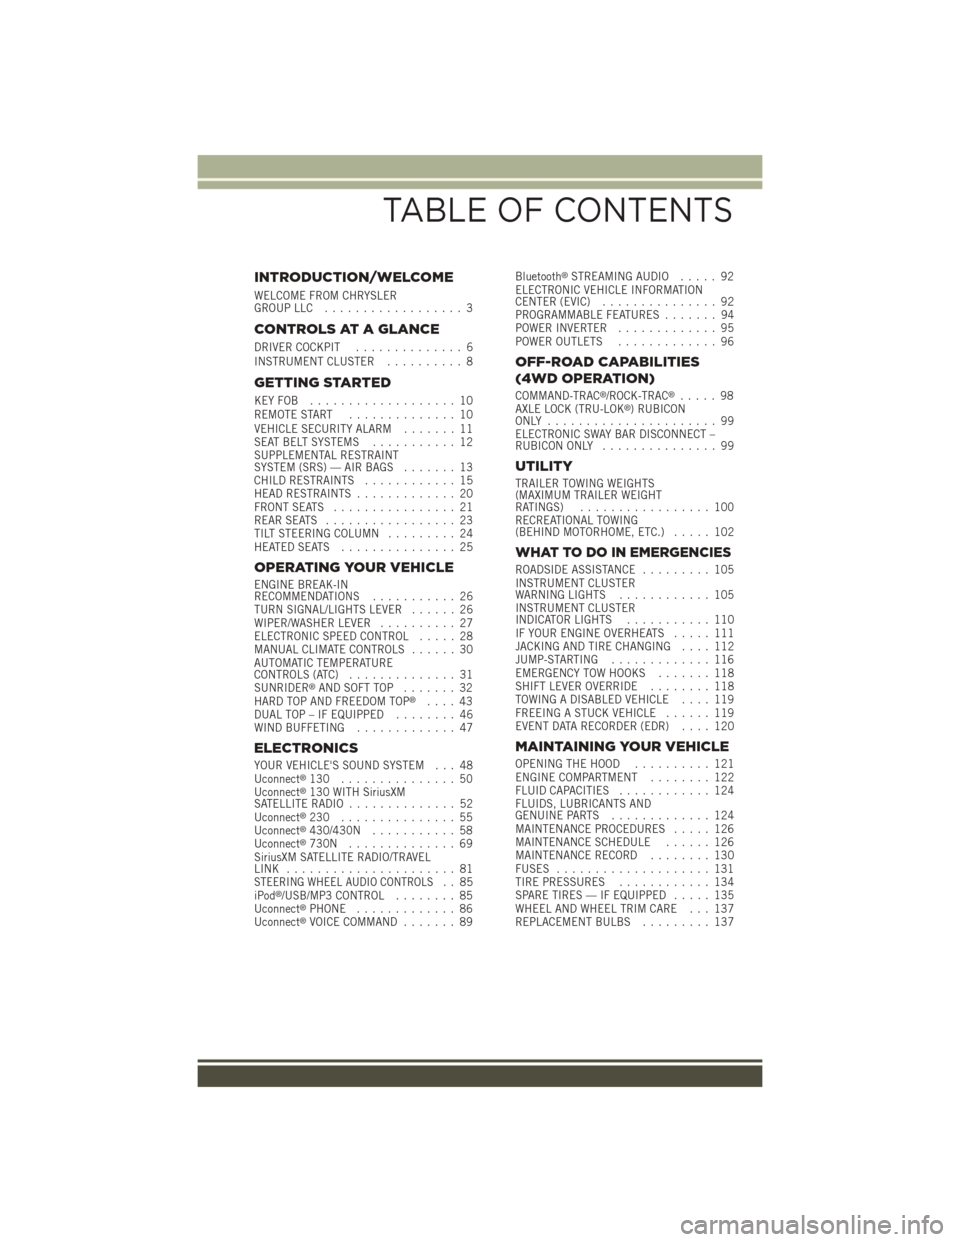
INTRODUCTION/WELCOME
WELCOME FROM CHRYSLERGROUP LLC.................. 3
CONTROLS AT A GLANCE
DRIVER COCKPIT.............. 6INSTRUMENT CLUSTER.......... 8
GETTING STARTED
KEY FOB . . . . . . . . . . . . . . . . . . . 10REMOTE START.............. 10VEHICLE SECURITY ALARM....... 11SEAT BELT SYSTEMS........... 12SUPPLEMENTAL RESTRAINTSYSTEM (SRS) — AIR BAGS....... 13CHILD RESTRAINTS............ 15HEAD RESTRAINTS............. 20FRONT SEATS................ 21REAR SEATS................. 23TILT STEERING COLUMN......... 24HEATED SEATS . . . . . . . . . . . . . . . 25
OPERATING YOUR VEHICLE
ENGINE BREAK-INRECOMMENDATIONS........... 26TURN SIGNAL/LIGHTS LEVER...... 26WIPER/WASHER LEVER.......... 27ELECTRONIC SPEED CONTROL..... 28MANUAL CLIMATE CONTROLS...... 30AUTOMATIC TEMPERATURECONTROLS (ATC).............. 31SUNRIDER®AND SOFT TOP....... 32HARD TOP AND FREEDOM TOP®.... 43DUAL TOP – IF EQUIPPED........ 46WIND BUFFETING............. 47
ELECTRONICS
YOUR VEHICLE'S SOUND SYSTEM . . . 48Uconnect®130 . . . . . . . . . . . . . . . 50Uconnect®130 WITH SiriusXMSATELLITE RADIO.............. 52Uconnect®230 . . . . . . . . . . . . . . . 55Uconnect®430/430N........... 58Uconnect®730N.............. 69SiriusXM SATELLITE RADIO/TRAVELLINK . . . . . . . . . . . . . . . . . . . . . . 81STEERING WHEEL AUDIO CONTROLS.. 85iPod®/USB/MP3 CONTROL........ 85Uconnect®PHONE............. 86Uconnect®VOICE COMMAND....... 89
Bluetooth®STREAMING AUDIO..... 92ELECTRONIC VEHICLE INFORMATIONCENTER (EVIC)............... 92PROGRAMMABLE FEATURES....... 94POWER INVERTER............. 95POWER OUTLETS............. 96
OFF-ROAD CAPABILITIES
(4WD OPERATION)
COMMAND-TRAC®/ROCK-TRAC®..... 98AXLE LOCK (TRU-LOK®)RUBICONONLY . . . . . . . . . . . . . . . . . . . . . . 99ELECTRONIC SWAY BAR DISCONNECT –RUBICON ONLY............... 99
UTILITY
TRAILER TOWING WEIGHTS(MAXIMUM TRAILER WEIGHTRATINGS)................. 100RECREATIONAL TOWING(BEHIND MOTORHOME, ETC.)..... 102
WHAT TO DO IN EMERGENCIES
ROADSIDE ASSISTANCE......... 105INSTRUMENT CLUSTERWARNING LIGHTS............ 105INSTRUMENT CLUSTERINDICATOR LIGHTS........... 110IF YOUR ENGINE OVERHEATS..... 111JACKING AND TIRE CHANGING.... 112JUMP-STARTING............. 116EMERGENCY TOW HOOKS....... 118SHIFT LEVER OVERRIDE........ 118TOWING A DISABLED VEHICLE.... 119FREEING A STUCK VEHICLE...... 119EVENT DATA RECORDER (EDR).... 120
MAINTAINING YOUR VEHICLE
OPENING THE HOOD.......... 121ENGINE COMPARTMENT........ 122FLUID CAPACITIES............ 124FLUIDS, LUBRICANTS ANDGENUINE PARTS............. 124MAINTENANCE PROCEDURES..... 126MAINTENANCE SCHEDULE...... 126MAINTENANCE RECORD........ 130FUSES.................... 131TIRE PRESSURES............ 134SPARE TIRES — IF EQUIPPED..... 135WHEEL AND WHEEL TRIM CARE . . . 137REPLACEMENT BULBS......... 137
TABLE OF CONTENTS
Page 94 of 156
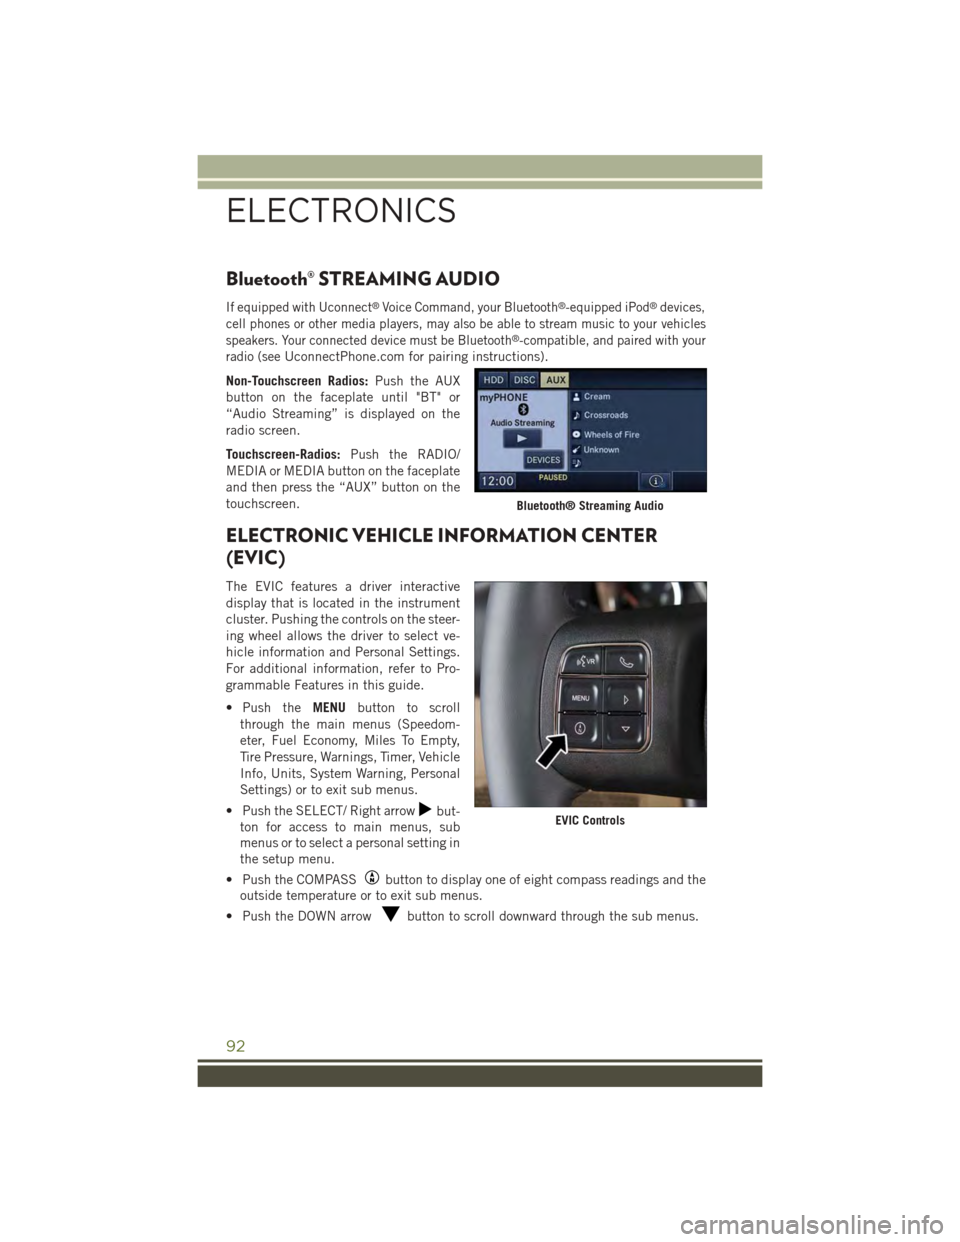
Bluetooth® STREAMING AUDIO
If equipped with Uconnect®Voice Command, your Bluetooth®-equipped iPod®devices,
cell phones or other media players, may also be able to stream music to your vehicles
speakers. Your connected device must be Bluetooth®-compatible, and paired with your
radio (seeUconnectPhone.com for pairing instructions).
Non-Touchscreen Radios:Push the AUX
button on the faceplate until "BT" or
“Audio Streaming” is displayed on the
radio screen.
Touchscreen-Radios:Push the RADIO/
MEDIA or MEDIA button on the faceplate
and then press the “AUX” button on the
touchscreen.
ELECTRONIC VEHICLE INFORMATION CENTER
(EVIC)
The EVIC features a driver interactive
display that is located in the instrument
cluster. Pushing the controls on the steer-
ing wheel allows the driver to select ve-
hicle information and Personal Settings.
For additional information, refer to Pro-
grammable Features in this guide.
• Push theMENUbutton to scroll
through the main menus (Speedom-
eter, Fuel Economy, Miles To Empty,
Tire Pressure, Warnings, Timer, Vehicle
Info, Units, System Warning, Personal
Settings) or to exit sub menus.
• Push the SELECT/ Right arrowbut-
ton for access to main menus, sub
menus or to select a personal setting in
the setup menu.
• Push the COMPASSbutton to display one of eight compass readings and the
outside temperature or to exit sub menus.
• Push the DOWN arrowbutton to scroll downward through the sub menus.
Bluetooth® Streaming Audio
EVIC Controls
ELECTRONICS
92
Page 95 of 156
EVIC Main Menu
To step to each main menu feature push the MENU button once for each step. A step
from the last item in the list will cause the first item in the feature list to be displayed.
The following features are in the Main menu:
• Compass, Outside Temperature, and ECO display
• Digital Speedometer
• Average Fuel Economy
• Distance to Empty
• Elapsed Time
• Vehicle Information
• Coolant Temp
• Oil Pressure
• Transmission Temp
• Oil Life Remaining (Automatic Oil Change Indicator)
• EVIC Units Selection
• System Status
• Personal Settings
• Tire PSI
Compass Calibration
This compass is self-calibrating, which eliminates the need to set the compass
manually. When the vehicle is new, the compass may appear erratic and the EVIC will
display “CAL” until the compass is calibrated.
You may also calibrate the compass by completing one or more 360 degree turns
(in an area free from large metal or metallic objects) until the “CAL” message
displayed in the EVIC turns off. The compass will now function normally.
ECO
The ECO message will appear in your EVIC display whenever you are driving in a fuel
efficient manner.
This feature allows you to monitor when you are driving in a fuel efficient manner, and
it can be used to modify driving habits in order to increase fuel economy.
ELECTRONICS
93
Page 107 of 156
ROADSIDE ASSISTANCE
Dial toll-free 1-800-521-2779 for U.S. Residents or 1-800-363-4869 for Canadian
Residents.
• Provide your name, vehicle identification number, license plate number, and your
location, including the telephone number from which you are calling.
• Briefly describe the nature of the problem and answer a few simple questions.
• You will be given the name of the service provider and an estimated time of arrival.
If you feel you are in an “unsafe situation”, please let us know. With your consent,
we will contact local police or safety authorities.
INSTRUMENT CLUSTER WARNING LIGHTS
-ElectronicStabilityControl(ESC)Activation/MalfunctionIndicatorLight
If the “ESC Activation/Malfunction Indicator Light” comes on continuously with the
engine running, a malfunction has been detected in the ESC system. If this light
remains on after several ignition cycles, and the vehicle has been driven several miles
(kilometers) at speeds greater than 30 mph (48 km/h), we recommend you drive to
the nearest service center and have the vehicle serviced immediately.
The “ESC Activation/Malfunction Indicator Light” starts to flash as soon as the tires
lose traction and the ESC system becomes active. If the light begins to flash during
acceleration, ease up on the accelerator and apply as little throttle as possible.
Be sure to adapt your speed and driving to the prevailing road conditions. The light
also flashes when TCS is active. To improve the vehicle's traction when starting off in
deep snow, sand or gravel, it may be desirable to switch the ESC system to Partial Off
mode by momentarily pressing the ESC Offswitch.
-TirePressureMonitoringSystem(TPMS)Light
Each tire, including the spare (if provided), should be checked monthly when cold
and inflated to the inflation pressure recommended by the vehicle manufacturer on
the vehicle placard or tire inflation pressure label. (If your vehicle has tires of a
different size than the size indicated on the vehicle placard or tire inflation pressure
label, you should determine the proper tire inflation pressure for those tires.)
As an added safety feature, your vehicle has been equipped with a tire pressure
monitoring system (TPMS) that illuminates a low tire pressure telltale when one or
more of your tires is significantly under-inflated. Accordingly, when the low tire
pressure telltale illuminates, you should stop and check your tires as soon as possible,
and inflate them to the proper pressure. Driving on a significantly under-inflated tire
causes the tire to overheat and can lead to tire failure. Under-inflation also reduces fuel
efficiency and tire tread life, and may affect the vehicle’s handling and stopping ability.
WHAT TO DO IN EMERGENCIES
105
Page 108 of 156
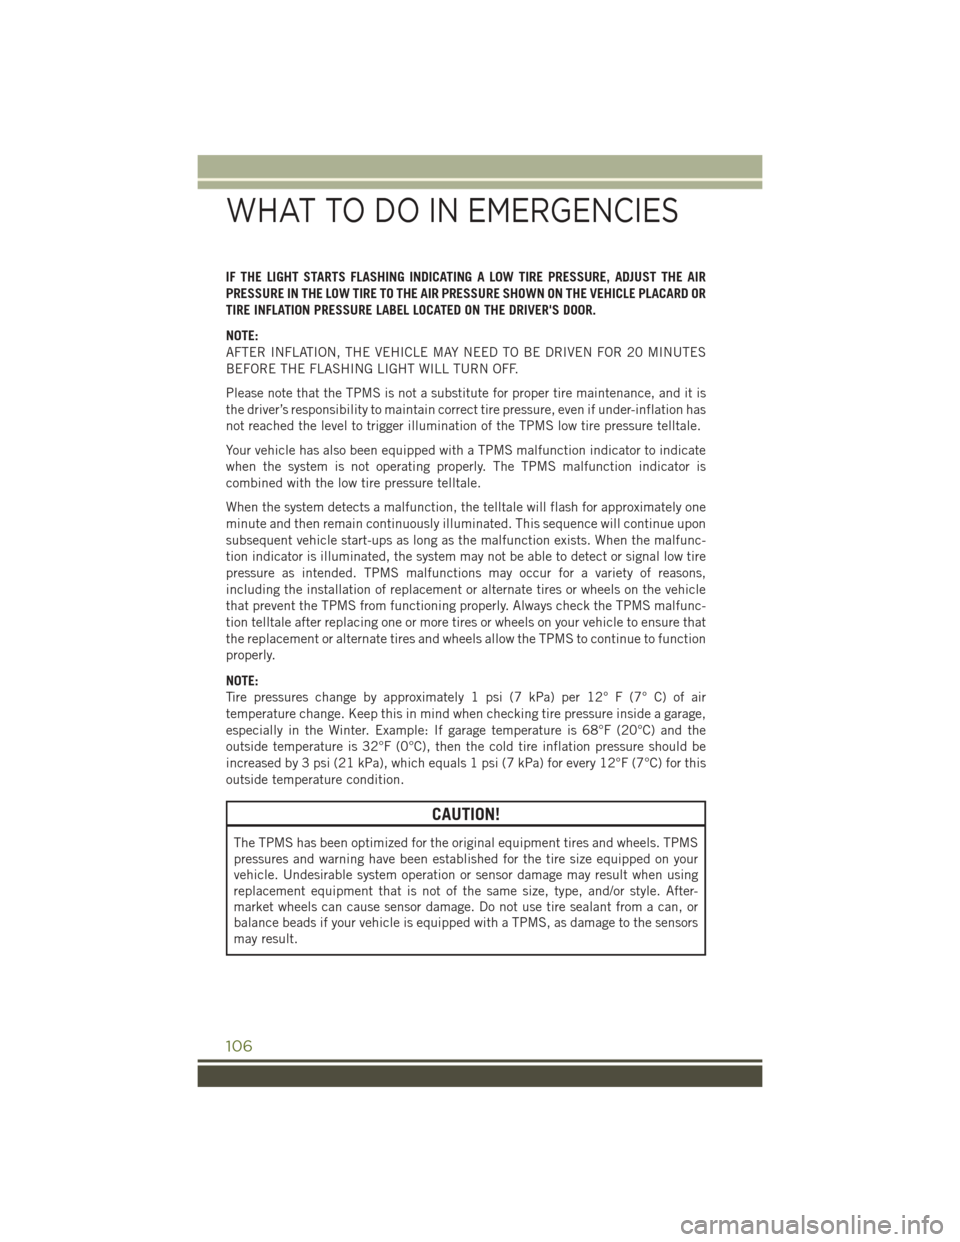
IF THE LIGHT STARTS FLASHING INDICATING A LOW TIRE PRESSURE, ADJUST THE AIR
PRESSURE IN THE LOW TIRE TO THE AIR PRESSURE SHOWN ON THE VEHICLE PLACARD OR
TIRE INFLATION PRESSURE LABEL LOCATED ON THE DRIVER'S DOOR.
NOTE:
AFTER INFLATION, THE VEHICLE MAY NEED TO BE DRIVEN FOR 20 MINUTES
BEFORE THE FLASHING LIGHT WILL TURN OFF.
Please note that the TPMS is not a substitute for proper tire maintenance, and it is
the driver’s responsibility to maintain correct tire pressure, even if under-inflation has
not reached the level to trigger illumination of the TPMS low tire pressure telltale.
Your vehicle has also been equipped with a TPMS malfunction indicator to indicate
when the system is not operating properly. The TPMS malfunction indicator is
combined with the low tire pressure telltale.
When the system detects a malfunction, the telltale will flash for approximately one
minute and then remain continuously illuminated. This sequence will continue upon
subsequent vehicle start-ups as long as the malfunction exists. When the malfunc-
tion indicator is illuminated, the system may not be able to detect or signal low tire
pressure as intended. TPMS malfunctions may occur for a variety of reasons,
including the installation of replacement or alternate tires or wheels on the vehicle
that prevent the TPMS from functioning properly. Always check the TPMS malfunc-
tion telltale after replacing one or more tires or wheels on your vehicle to ensure that
the replacement or alternate tires and wheels allow the TPMS to continue to function
properly.
NOTE:
Tire pressures change by approximately 1 psi (7 kPa) per 12° F (7° C) of air
temperature change. Keep this in mind when checking tire pressure inside a garage,
especially in the Winter. Example: If garage temperature is 68°F (20°C) and the
outside temperature is 32°F (0°C), then the cold tire inflation pressure should be
increased by 3 psi (21 kPa), which equals 1 psi (7 kPa) for every 12°F (7°C) for this
outside temperature condition.
CAUTION!
The TPMS has been optimized for the original equipment tires and wheels. TPMS
pressures and warning have been established for the tire size equipped on your
vehicle. Undesirable system operation or sensor damage may result when using
replacement equipment that is not of the same size, type, and/or style. After-
market wheels can cause sensor damage. Do not use tire sealant from a can, or
balance beads if your vehicle is equipped with a TPMS, as damage to the sensors
may result.
WHAT TO DO IN EMERGENCIES
106
Page 121 of 156
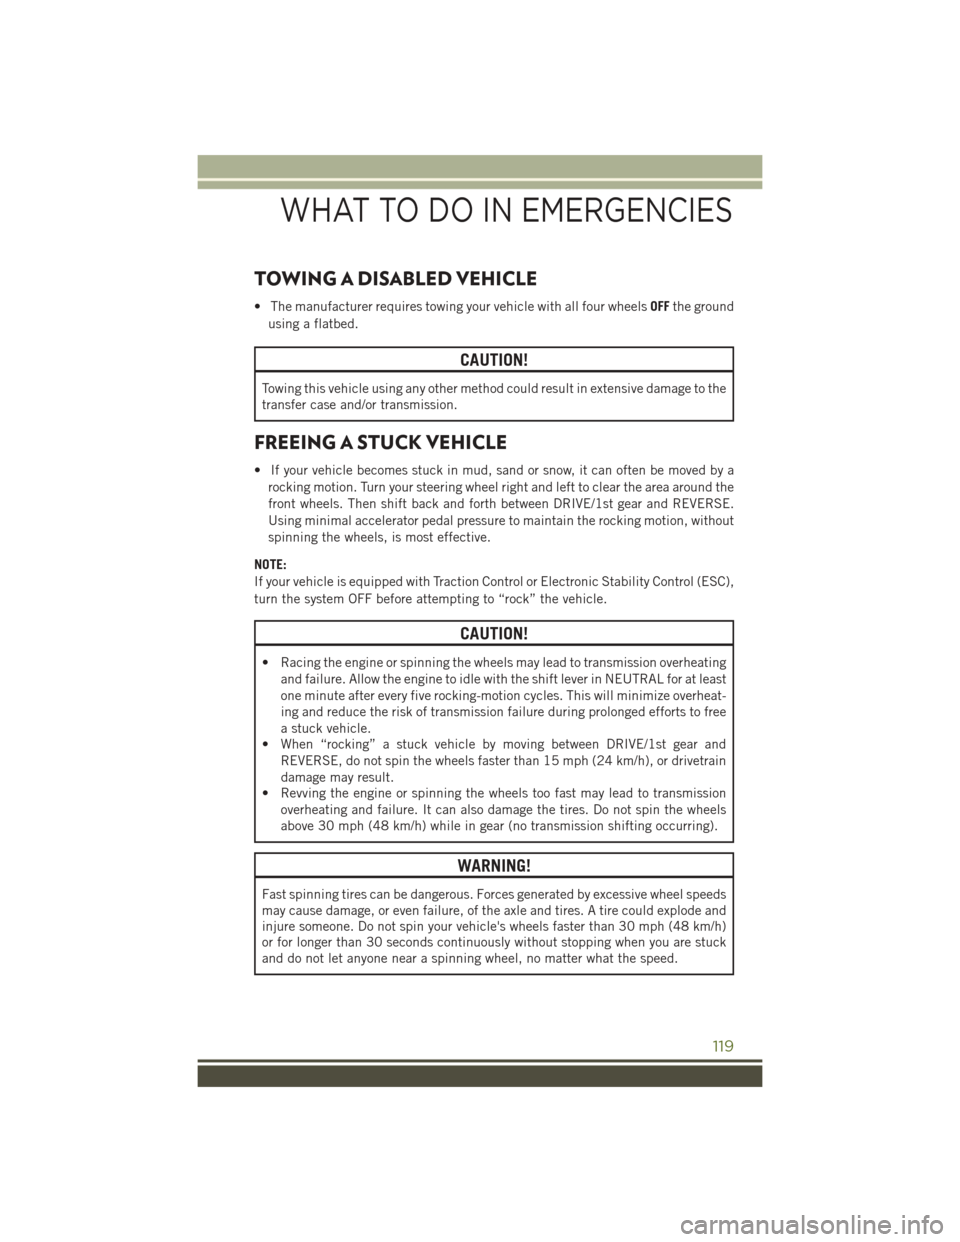
TOWING A DISABLED VEHICLE
• The manufacturer requires towing your vehicle with all four wheelsOFFthe ground
using a flatbed.
CAUTION!
Towing this vehicle using any other method could result in extensive damage to the
transfer case and/or transmission.
FREEING A STUCK VEHICLE
• If your vehicle becomes stuck in mud, sand or snow, it can often be moved by a
rocking motion. Turn your steering wheel right and left to clear the area around the
front wheels. Then shift back and forth between DRIVE/1st gear and REVERSE.
Using minimal accelerator pedal pressure to maintain the rocking motion, without
spinning the wheels, is most effective.
NOTE:
If your vehicle is equipped with Traction Control or Electronic Stability Control (ESC),
turn the system OFF before attempting to “rock” the vehicle.
CAUTION!
• Racing the engine or spinning the wheels may lead to transmission overheating
and failure. Allow the engine to idle with the shift lever in NEUTRAL for at least
one minute after every five rocking-motion cycles. This will minimize overheat-
ing and reduce the risk of transmission failure during prolonged efforts to free
a stuck vehicle.
• When “rocking” a stuck vehicle by moving between DRIVE/1st gear and
REVERSE, do not spin the wheels faster than 15 mph (24 km/h), or drivetrain
damage may result.
• Revving the engine or spinning the wheels too fast may lead to transmission
overheating and failure. It can also damage the tires. Do not spin the wheels
above 30 mph (48 km/h) while in gear (no transmission shifting occurring).
WARNING!
Fast spinning tires can be dangerous. Forces generated by excessive wheel speeds
may cause damage, or even failure, of the axle and tires. A tire could explode and
injure someone. Do not spin your vehicle's wheels faster than 30 mph (48 km/h)
or for longer than 30 seconds continuously without stopping when you are stuck
and do not let anyone near a spinning wheel, no matter what the speed.
WHAT TO DO IN EMERGENCIES
119
Page 129 of 156
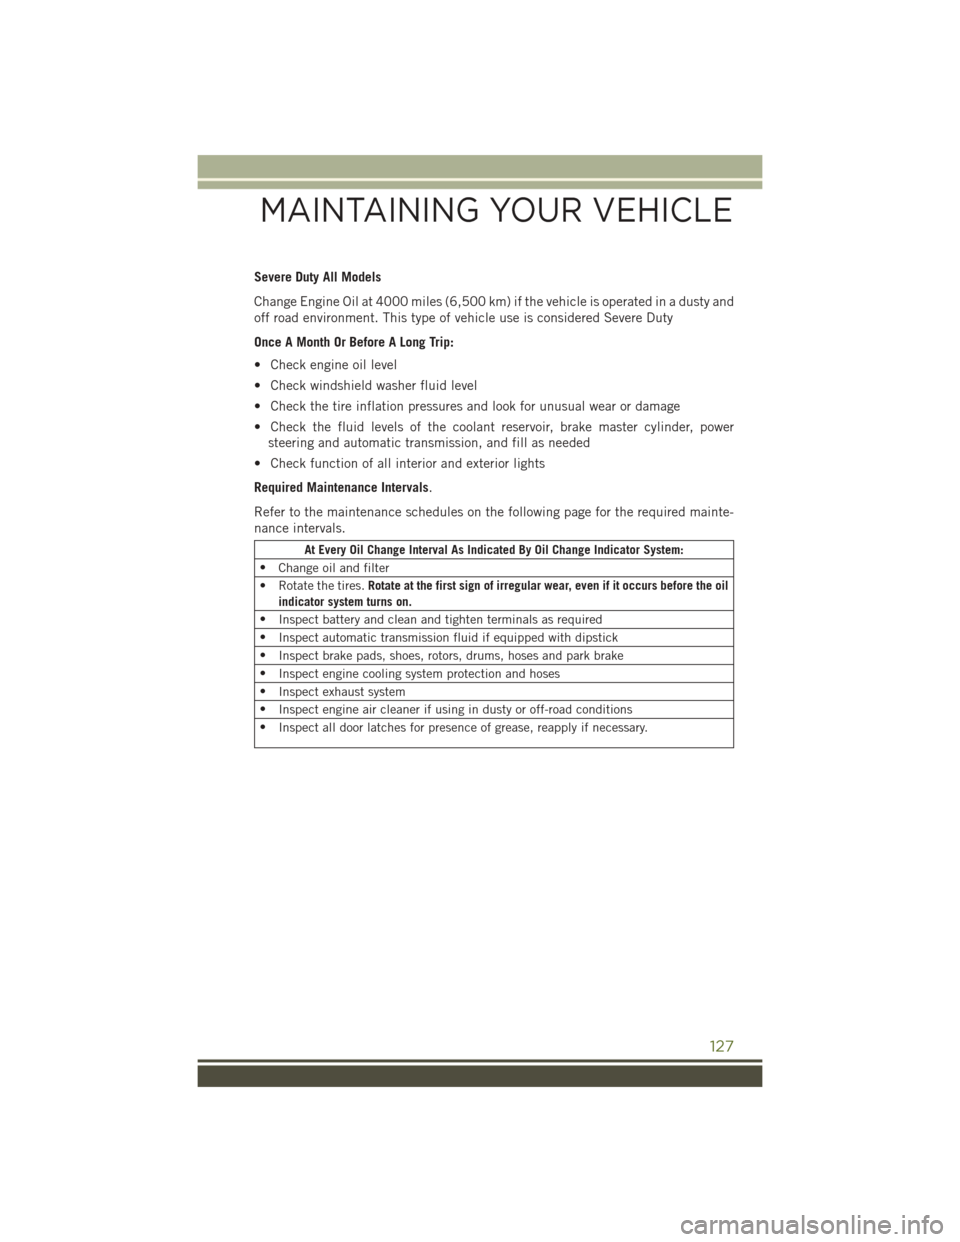
Severe Duty All Models
Change Engine Oil at 4000 miles (6,500 km) if the vehicle is operated in a dusty and
off road environment. This type of vehicle use is considered Severe Duty
Once A Month Or Before A Long Trip:
• Check engine oil level
• Check windshield washer fluid level
• Check the tire inflation pressures and look for unusual wear or damage
• Check the fluid levels of the coolant reservoir, brake master cylinder, power
steering and automatic transmission, and fill as needed
• Check function of all interior and exterior lights
Required Maintenance Intervals.
Refer to the maintenance schedules on the following page for the required mainte-
nance intervals.
At Every Oil Change Interval As Indicated By Oil Change Indicator System:
•Change oil and filter
• Rotate the tires.Rotate at the first sign of irregular wear, even if it occurs before the oil
indicator system turns on.
•Inspect battery and clean and tighten terminals as required
•Inspect automatic transmission fluid if equipped with dipstick
•Inspect brake pads, shoes, rotors, drums, hoses and park brake
•Inspect engine cooling system protection and hoses
•Inspect exhaust system
•Inspect engine air cleaner if using in dusty or off-road conditions
•Inspect all door latches for presence of grease, reapply if necessary.
MAINTAINING YOUR VEHICLE
127
Page 134 of 156
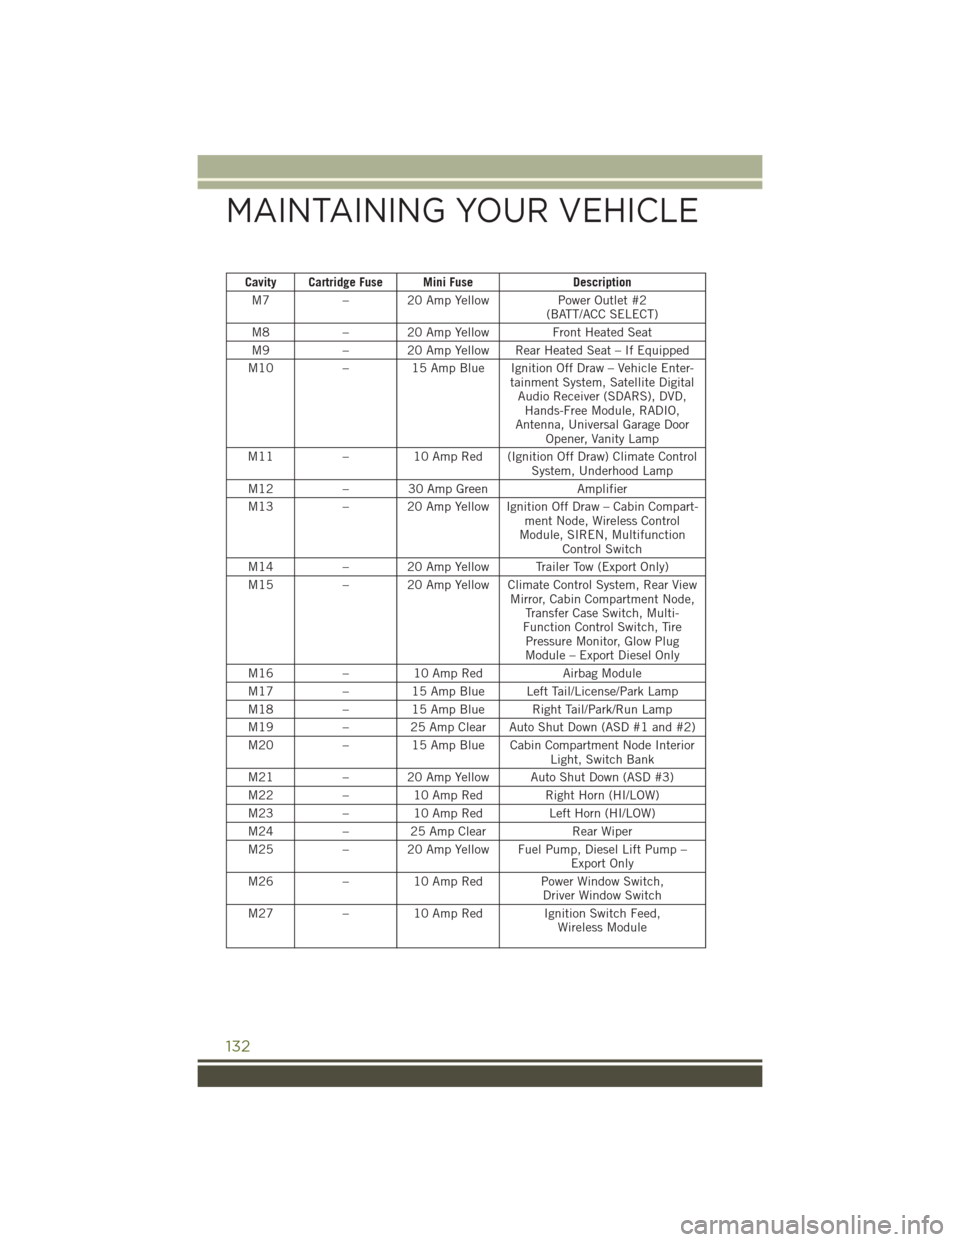
Cavity Cartridge Fuse Mini FuseDescription
M7–20AmpYellowPower Outlet #2(BATT/ACC SELECT)
M8– 20 Amp YellowFront Heated Seat
M9– 20 Amp Yellow Rear Heated Seat – If Equipped
M10–15 Amp Blue Ignition Off Draw – Vehicle Enter-tainment System, Satellite DigitalAudio Receiver (SDARS), DVD,Hands-Free Module, RADIO,Antenna, Universal Garage DoorOpener, Vanity Lamp
M11–10 Amp Red (Ignition Off Draw) Climate ControlSystem, Underhood Lamp
M12–30AmpGreenAmplifier
M13– 20 Amp Yellow Ignition Off Draw – Cabin Compart-ment Node, Wireless ControlModule, SIREN, MultifunctionControl Switch
M14– 20 Amp Yellow Trailer Tow (Export Only)
M15– 20 Amp Yellow Climate Control System, Rear ViewMirror, Cabin Compartment Node,Transfer Case Switch, Multi-Function Control Switch, TirePressure Monitor, Glow PlugModule – Export Diesel Only
M16–10 Amp RedAirbag Module
M17–15 Amp Blue Left Tail/License/Park Lamp
M18–15 Amp Blue Right Tail/Park/Run Lamp
M19–25AmpClearAutoShutDown(ASD#1and#2)
M20–15 Amp Blue Cabin Compartment Node InteriorLight, Switch Bank
M21–20AmpYellowAutoShutDown(ASD#3)
M22–10 Amp Red Right Horn (HI/LOW)
M23–10 Amp RedLeft Horn (HI/LOW)
M24–25AmpClearRear Wiper
M25–20AmpYellowFuelPump,DieselLiftPump–Export Only
M26–10 Amp Red Power Window Switch,Driver Window Switch
M27–10 Amp Red Ignition Switch Feed,Wireless Module
MAINTAINING YOUR VEHICLE
132
Page 136 of 156
TIRE PRESSURES
• Check the inflation pressure of each tire, including the spare tire, at least monthly
and inflate to the recommended pressure for your vehicle.
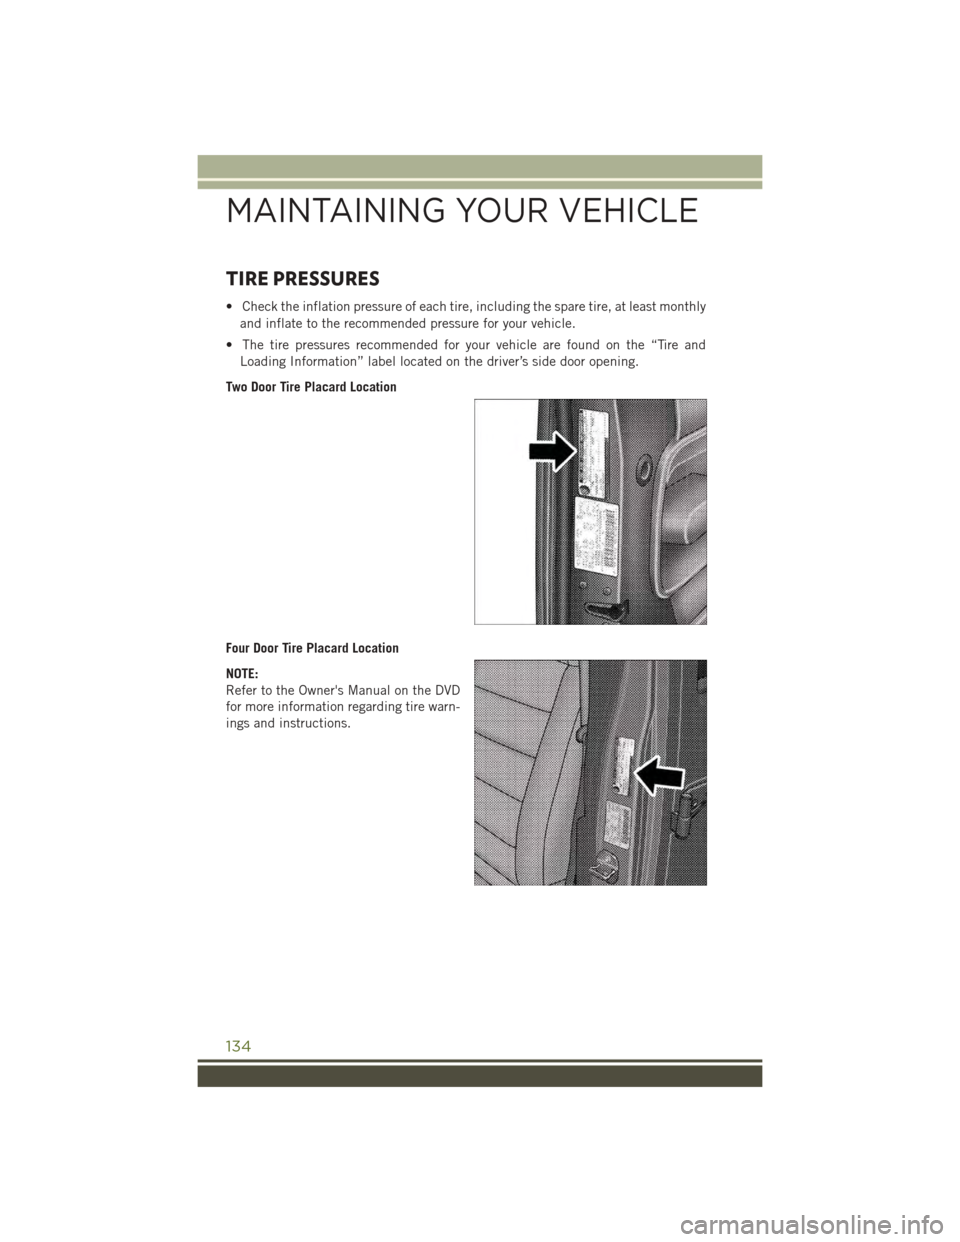
• The tire pressures recommended for your vehicle are found on the “Tire and
Loading Information” label located on the driver’s side door opening.
Two Door Tire Placard Location
Four Door Tire Placard Location
NOTE:
Refer to the Owner's Manual on the DVD
for more information regarding tire warn-
ings and instructions.
MAINTAINING YOUR VEHICLE
134
Page 137 of 156
WARNING!
• Overloading of your tires is dangerous. Overloading can cause tire failure,
affect vehicle handling, and increase your stopping distance. Use tires of the
recommended load capacity for your vehicle. Never overload them.
•Improperly inflated tires are dangerous and can cause collisions. Under-inflation
is the leading cause of tire failure and may result in severe cracking, component
separation, or “blow out”. Over-inflation reduces a tire’s ability to cushion shock.
Objects on the road and chuck holes can cause damage that results in tire failure.
Unequal tire pressures can cause steering problems. You could lose control of
your vehicle. Over-inflated or under-inflated tires can affect vehicle handling and
can fail suddenly, resulting in loss of vehicle control.
SPARE TIRES — IF EQUIPPED
NOTE:
For vehicles equipped with Tire Service Kit instead of a spare tire, please refer to “Tire
Service Kit” in “What To Do In Emergencies” on your DVD for further information.
CAUTION!
Because of the reduced ground clearance, do not take your vehicle through an
automatic car wash with a compact or limited-use temporary spare installed.
Damage to the vehicle may result.
Spare Tire Matching Original Equipped Tire And Wheel — If Equipped
Your vehicle may be equipped with a spare tire and wheel equivalent in look and
function to the original equipment tire and wheel found on the front or rear axle of
your vehicle. This spare tire may be used in the tire rotation for your vehicle. If your
vehicle has this option, refer to an authorized tire dealer for the recommended tire
rotation pattern.
Compact Spare Tire — If Equipped
The compact spare is for temporary emergency use only. You can identify if your
vehicle is equipped with a compact spare by looking at the spare tire description on
the Tire and Loading Information Placard located on the driver’s side door opening or
on the sidewall of the tire. Compact spare tire descriptions begin with the letter “T”
or “S” preceding the size designation. Example: T145/80D18 103M.
T, S = Temporary Spare Tire
Since this tire has limited tread life, the original equipment tire should be repaired
(or replaced) and reinstalled on your vehicle at the first opportunity.
MAINTAINING YOUR VEHICLE
135