ECU JEEP WRANGLER 2015 Owners Manual
[x] Cancel search | Manufacturer: JEEP, Model Year: 2015, Model line: WRANGLER, Model: JEEP WRANGLER 2015Pages: 693, PDF Size: 5.13 MB
Page 77 of 693
These data can help provide a better understanding of
the circumstances in which crashes and injuries occur.
NOTE:EDR data are recorded by your vehicle only if a
non-trivial crash situation occurs; no data are recorded by
the EDR under normal driving conditions and no per-
sonal data (e.g., name, gender, age, and crash location)
are recorded. However, other parties, such as law en-
forcement, could combine the EDR data with the type of
personally identifying data routinely acquired during a
crash investigation.
To read data recorded by an EDR, special equipment is
required, and access to the vehicle or the EDR is needed.
In addition to the vehicle manufacturer, other parties,
such as law enforcement, that have the special equip-
ment, can read the information if they have access to the
vehicle or the EDR.Child Restraints
Everyone in your vehicle needs to be buckled up at all
times, including babies and children.
Every state in the United States, and every Canadian
province, requires that small children ride in proper
restraint systems. This is the law, and you can be pros-
ecuted for ignoring it.
Children 12 years or younger should ride properly
buckled up in a rear seat, if available. According to crash
statistics, children are safer when properly restrained in
the rear seats rather than in the front.
Page 92 of 693
4. If the child restraint has a tether strap, connect it to thetop tether anchorage. See the section “Installing Child
Restraints Using the Top Tether Anchorage” for direc-
tions to attach a tether anchor.
5. Tighten all of the straps as you push the child restraint rearward and downward into the seat. Remove slack
in the straps according to the child restraint manufac-
turer ’s instructions.
6. Test that the child restraint is installed tightly by pulling back and forth on the child seat at the belt
path. It should not move more than 1 inch (25.4 mm)
in any direction.
How To Stow An Unused ALR Seat Belt:
When using the LATCH attaching system to install a
child restraint, stow all ALR seat belts that are not being
used by other occupants or being used to secure child
restraints. An unused belt could injure a child if they play with it and accidentally lock the seat belt retractor. Before
installing a child restraint using the LATCH system,
buckle the seat belt behind the child restraint and out of
the child’s reach. If the buckled seat belt interferes with
the child restraint installation, instead of buckling it
behind the child restraint, route the seat belt through the
child restraint belt path and then buckle it. Do not lock
the seat belt. Remind all children in the vehicle that the
seat belts are not toys and that they should not play with
them.
Page 103 of 693
not lit during starting, see your authorized dealer. If the
light stays on, flickers, or comes on while driving, have
the system checked by an authorized dealer.
Defroster
Check operation by selecting the defrost mode and place
the blower control on high speed. You should be able to
feel the air directed against the windshield. See your
authorized dealer for service if your defroster is inoper-
able.
Floor Mat Safety Information
Always use floor mats designed to fit the footwell of your
vehicle. Use only floor mats that leave the pedal area
unobstructed and that are firmly secured so that they
cannot slip out of position and interfere with the pedals
or impair safe operation of your vehicle in other ways.
Page 162 of 693
WARNING!
•A loose head restraint thrown forward in a colli-
sion or hard stop could cause serious injury or
death to occupants of the vehicle. Always securely
stow removed head restraints in a location outside
the occupant compartment.
• ALL the head restraints MUST be reinstalled in the
vehicle to properly protect the occupants. Follow
the re-installation instructions above prior to oper-
ating the vehicle or occupying a seat.
NOTE: Do not reposition the head restraint 180 degrees
to the incorrect position in an attempt to gain additional
clearance to the back of the head.
Rear Head Restraints — 2 Door Model
The rear seat head restraints are not adjustable. They can
be removed to make it easier to take out the rear seat. To
remove the head restraint, push the button on each of the two head restraint guides and pull upward on the head
restraint. Replace the head restraint before driving the
vehicle with passengers in the rear seat. To replace the
head restraint, insert the head restraint rods into the
guides and push downward on the head restraint until
locked. Refer to “Occupant Restraints” in “Things to
Know Before Starting Your Vehicle” for information on
child seat tether routing.
Page 168 of 693
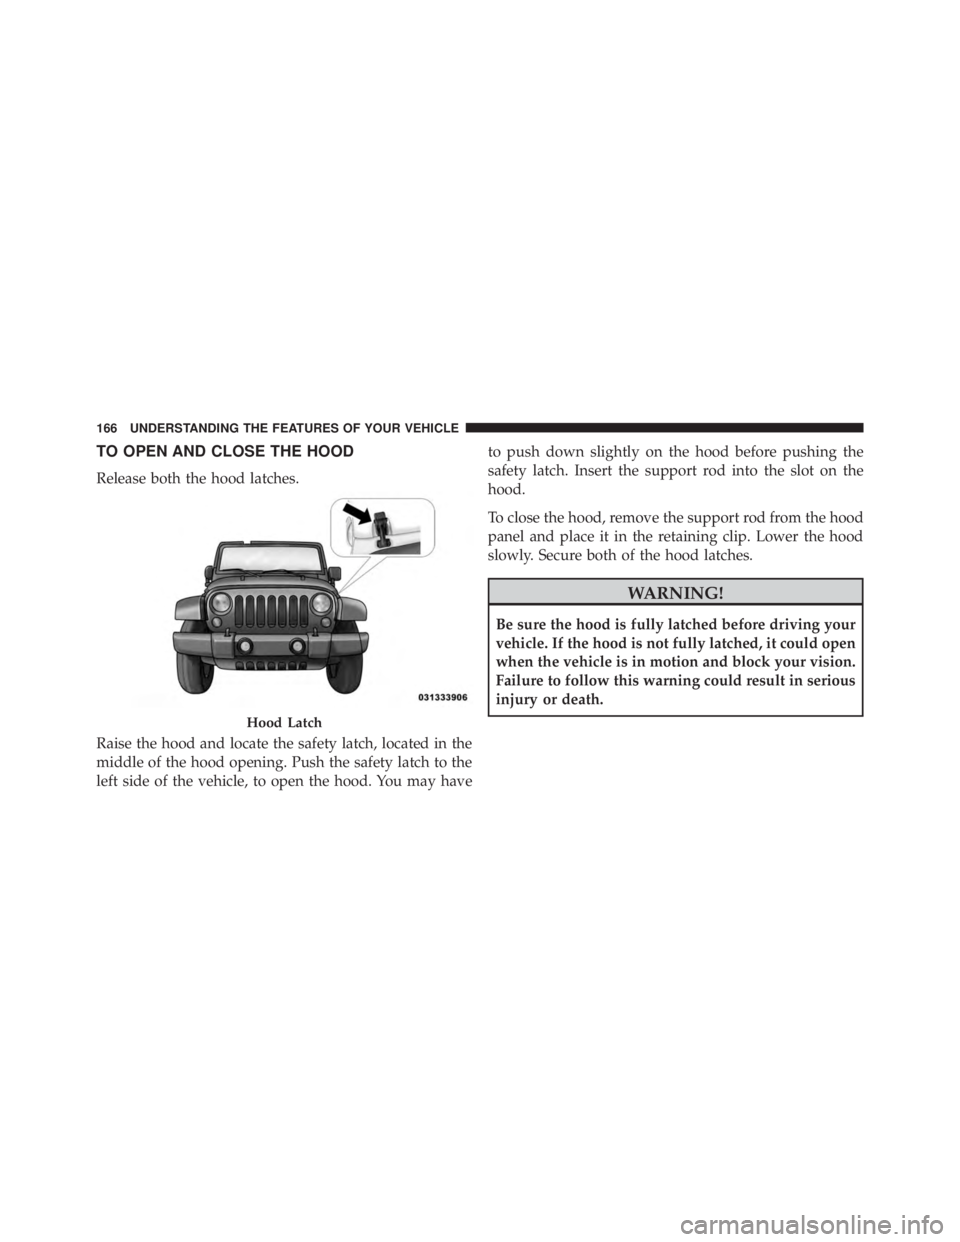
TO OPEN AND CLOSE THE HOOD
Release both the hood latches.
Raise the hood and locate the safety latch, located in the
middle of the hood opening. Push the safety latch to the
left side of the vehicle, to open the hood. You may haveto push down slightly on the hood before pushing the
safety latch. Insert the support rod into the slot on the
hood.
To close the hood, remove the support rod from the hood
panel and place it in the retaining clip. Lower the hood
slowly. Secure both of the hood latches.
Page 219 of 693
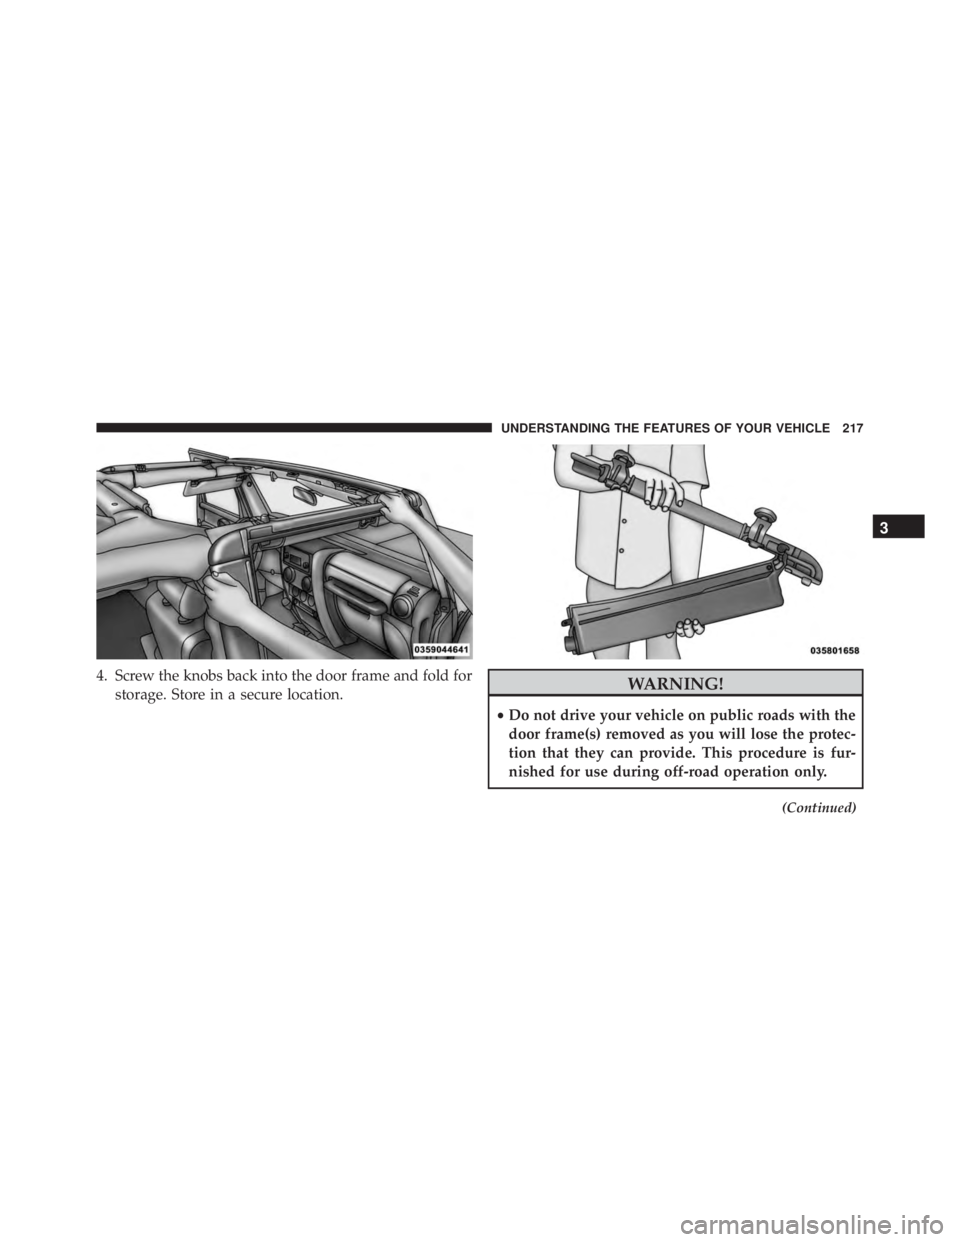
4. Screw the knobs back into the door frame and fold forstorage. Store in a secure location.
3
UNDERSTANDING THE FEATURES OF YOUR VEHICLE 217
Page 258 of 693
CAUTION!(Continued)
•Do not use any tools (screwdrivers, etc.) to pry or
force any of the clamps, clips, or retainers securing
the soft top. Do not force or pry the soft top
framework when opening or closing. Damage to
the top may result.
Page 295 of 693
WARNING!
You or others could be injured if you carry the side
bars loose in your vehicle. Remove the side bars from
the vehicle or securely store them as described or
they may cause personal injury if an accident occurs.
See your authorized dealer for the cinch straps.
10. Remove the windshield wiper arms by first pulling the wiper away from the windshield and out to the
“lock” position. Unsnap the wiper arm nut caps, and
remove the retaining nuts. Lift the wiper arms off and
store them in the center console or securely behind
the rear seat.
NOTE: It may be necessary to use a battery terminal
puller tool in order to separate the wiper arms from the
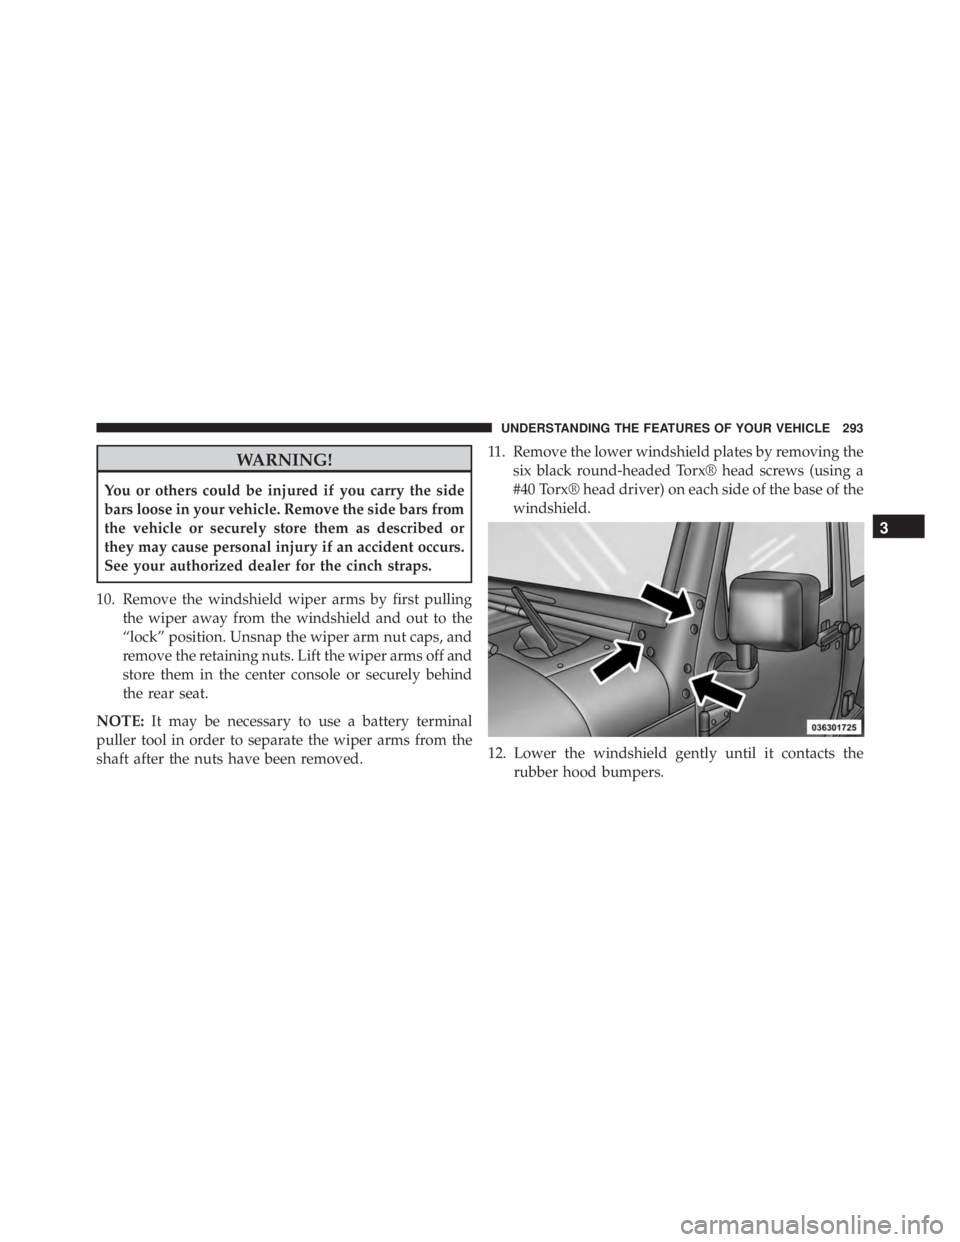
shaft after the nuts have been removed. 11. Remove the lower windshield plates by removing the
six black round-headed Torx® head screws (using a
#40 Torx® head driver) on each side of the base of the
windshield.
12. Lower the windshield gently until it contacts the rubber hood bumpers.
3
UNDERSTANDING THE FEATURES OF YOUR VEHICLE 293
Page 430 of 693
WARNING!(Continued)
locked in PARK, securing the vehicle against un-
wanted movement.
• When leaving the vehicle, always remove the igni-
tion key from the vehicle and lock the vehicle.
• Never leave children alone in a vehicle, or with
access to an unlocked vehicle. Allowing children to
be in a vehicle unattended is dangerous for a
number of reasons. A child or others could be
seriously or fatally injured. Children should be
warned not to touch the parking brake, brake pedal
or the transmission gear selector.
• Do not leave the ignition key in or near the vehicle
(or in a location accessible to children). A child
could operate power windows, other controls, or
move the vehicle.
Key Ignition Park Interlock
This vehicle is equipped with a Key Ignition Park Inter-
lock which requires the transmission to be in PARK
before the ignition switch can be turned to the LOCK/
OFF (key removal) position. The key can only be re-
moved from the ignition when the ignition is in the
LOCK/OFF position, and once removed the transmission
is locked in PARK.
NOTE: If a malfunction occurs, the system will trap the
key in the ignition switch to warn you that this safety
feature is inoperable. The engine can be started and
stopped but the key cannot be removed until you obtain
service.
Brake/Transmission Shift Interlock System
This vehicle is equipped with a Brake Transmission Shift
Interlock System (BTSI) that holds the shift lever in PARK
unless the brakes are applied. To shift the transmission
428 STARTING AND OPERATING
Page 451 of 693
WARNING!
Always wear your seat belt and firmly tie down
cargo. Unsecured cargo can become projectiles in an
off-road situation.
When To Use 4L (Low) Range
When off-road driving, shift into 4L (Low) for additional
traction and control on slippery or difficult terrain,
ascending or descending steep hills, and to increase low
speed pulling power. This range should be limited to
extreme situations such as deep snow, mud, steep in-
clines, or sand where additional low speed pulling power
is needed. Vehicle speeds in excess of 25 mph (40 km/h)
should be avoided when in 4L (Low) range.