steering JEEP WRANGLER 2016 JK / 3.G Owner's Manual
[x] Cancel search | Manufacturer: JEEP, Model Year: 2016, Model line: WRANGLER, Model: JEEP WRANGLER 2016 JK / 3.GPages: 156, PDF Size: 8.82 MB
Page 85 of 156
Transfer Ongoing Call Between Handset And Vehicle
• During a call, push the “Voice Command” button.
• After the BEEP, say “transfer call.”
Changing The Volume
• Start a dialogue by pushing the “Phone” button, then adjust the volume
during a normal call.
• Use the radio ON/OFF VOLUME rotary knob to adjust the volume to a comfortable level while the Uconnect system is speaking. Please note the volume setting for
Uconnect is different than the audio system.
WARNING!
• Any voice commanded system should be used only in safe driving conditions following applicable laws regarding phone use. Your attention should be
focused on safely operating the vehicle. Failure to do so may result in a
collision causing you and others to be severely injured or killed.
• In an emergency, to use Uconnect Phone, your mobile phone must be:
• turned on
• paired to Uconnect Phone
• have network coverage
UCONNECT VOICE COMMAND
Voice Command Operation
The Uconnect Voice Command system allows you to control your AM, FM radio,
satellite radio, disc player, HDD, Uconnect Phone, a memo recorder, and supported
portable media devices.
• When you push the “Voice Command” button
located on the radio faceplate
or steering wheel, you will hear a beep. The beep is your signal to give a command.
If you do not say a command within a few seconds, the system will present you with
a list of options. If you ever want to interrupt the system while it lists options, push
the “Voice Command” button
, listen for the BEEP, and say your command.
NOTE:
U.S. residents visit driveuconnect.com for more info on which voice command
features apply to your vehicle. Canadian residents visit driveuconnect.ca for more
info on which voice command features apply to your vehicle.
• Start a dialogue by pushing the “Voice Command” button
, you will hear a
beep. The beep is your signal to give a command. Below are a list of voice
commands for each of the different modes:
ELECTRONICS
83
Page 95 of 156
AXLE LOCK (TRU-LOK) RUBICON ONLY
The AXLE LOCK switch is located on the instrument panel (to the left of the steering
column).
This feature will only activate when the following conditions are met:
• Key in Run Position, vehicle in 4L (Low) range.
• Vehicle speed at 10 mph (16 km/h) or less.
Push the bottom of the AXLE LOCK switch once to lock the rear axle only and a
second time to lock the front axle (the rear and front axle lock indicator lights will
illuminate).
After the rear axle lock is engaged, pushing the bottom of the locker switch will cycle
the front axle lock on and off. To disengage any of the axle locks, push the top of the
axle lock switch.
The indicator light will flash until the axles are fully locked or unlocked.
ELECTRONIC SWAY BAR DISCONNECT – RUBICON
ONLY
Off-Road
This feature will only activate when the following conditions are met:
• Key in Run position, vehicle in 4L (Low) or 4H (High) range.
• Vehicle speed under 18 mph (29 km/h).
• Push the SWAY BAR switch, located on the instrument panel (to the left of thesteering column), once to disconnect the Sway Bar.
• The Sway Bar indicator light will illuminate in the instrument cluster.
On-Road
Push the SWAY BAR switch a second time to reconnect the Sway Bar.
The Sway Bar should remain in on-road mode during normal driving conditions.
OFF-ROAD CAPABILITIES (4WD OPERATION)
93
Page 121 of 156
FREEING A STUCK VEHICLE
If your vehicle becomes stuck in mud, sand or snow, it can often be moved using a
rocking motion. Turn the steering wheel right and left to clear the area around the
front wheels. Then shift back and forth between DRIVE and REVERSE (with
automatic transmission) or 2nd gear and REVERSE (with manual transmission),
while gently pressing the accelerator. Use the least amount of accelerator pedal
pressure that will maintain the rocking motion, without spinning the wheels, or racing
the engine.
CAUTION!
Racing the engine or spinning the wheels may lead to transmission overheating
and failure. Allow the engine to idle with the transmission in NEUTRAL for at least
one minute after every five rocking-motion cycles. This will minimize overheating
and reduce the risk of clutch or transmission failure during prolonged efforts to
free a stuck vehicle.
NOTE:
Push the "ESC Off" switch, to place the Electronic Stability Control (ESC) system in
"Partial Off" mode, before rocking the vehicle. Refer to “Electronic Brake Control” in
“Starting And Operating” in the Owner’s Manual on the DVD for further information.
Once the vehicle has been freed, push the "ESC Off" switch again to restore "ESC On"
mode.
CAUTION!
• When “rocking” a stuck vehicle by shifting between DRIVE/2nd gear and REVERSE, do not spin the wheels faster than 15 mph (24 km/h), or drivetrain
damage may result.
• Revving the engine or spinning the wheels too fast may lead to transmission
overheating and failure. It can also damage the tires. Do not spin the wheels
above 30 mph (48 km/h) while in gear (no transmission shifting occurring).
WARNING!
Fast spinning tires can be dangerous. Forces generated by excessive wheel speeds
may cause damage, or even failure, of the axle and tires. A tire could explode and
injure someone. Do not spin your vehicle's wheels faster than 30 mph (48 km/h)
or for longer than 30 seconds continuously without stopping when you are stuck
and do not let anyone near a spinning wheel, no matter what the speed.
WHAT TO DO IN EMERGENCIES
119
Page 125 of 156
6. Washer Fluid Reservoir
7. Engine Coolant Reservoir
8. Air Cleaner Filter
9. Coolant Pressure Cap
10. Power Steering Fluid Reservoir
MAINTAINING YOUR VEHICLE
123
Page 127 of 156
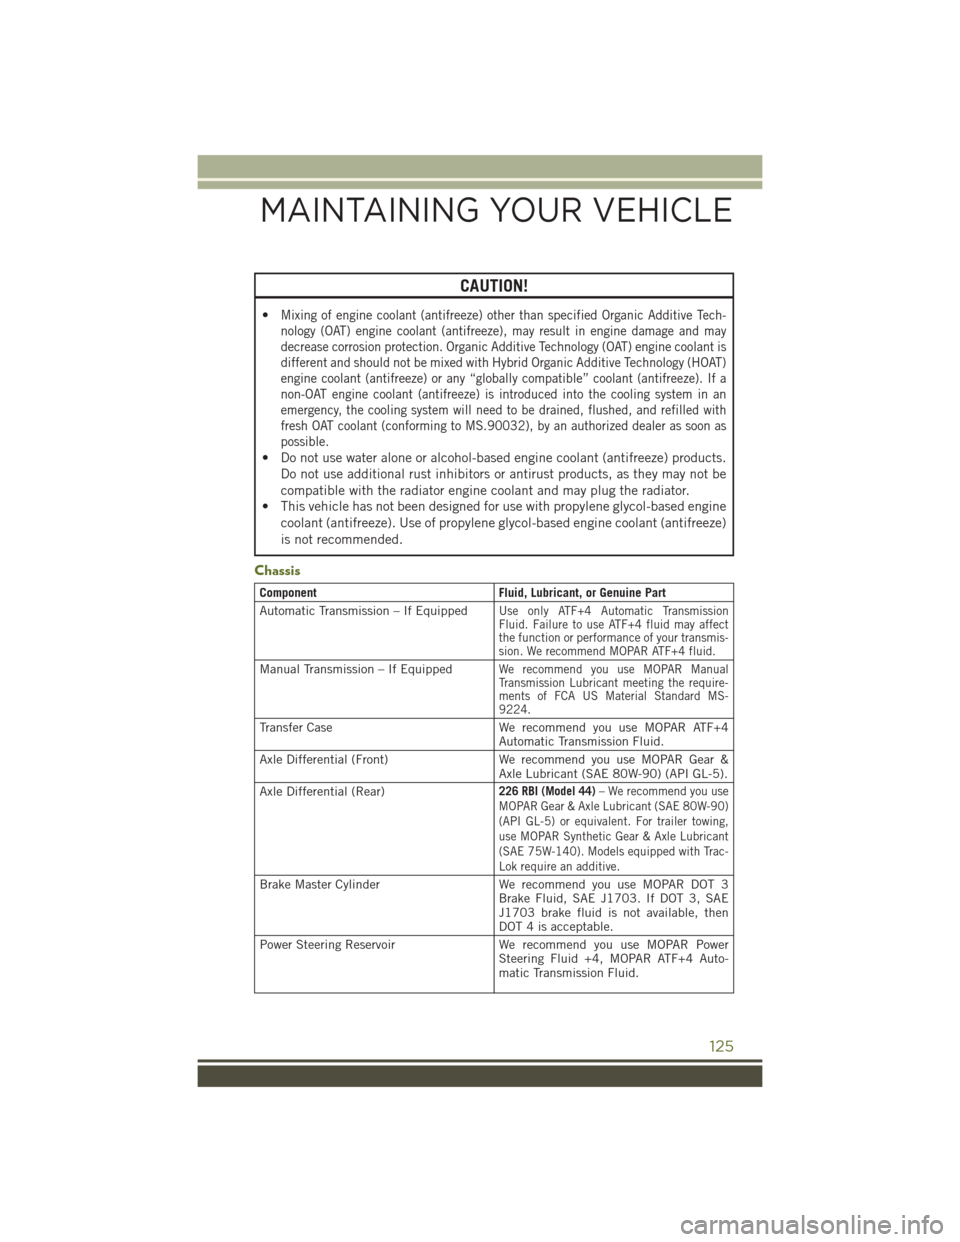
CAUTION!
•Mixing of engine coolant (antifreeze) other than specified Organic Additive Tech-
nology (OAT) engine coolant (antifreeze), may result in engine damage and may
decrease corrosion protection. Organic Additive Technology (OAT) engine coolant is
different and should not be mixed with Hybrid Organic Additive Technology (HOAT)
engine coolant (antifreeze) or any “globally compatible” coolant (antifreeze). If a
non-OAT engine coolant (antifreeze) is introduced into the cooling system in an
emergency, the cooling system will need to be drained, flushed, and refilled with
fresh OAT coolant (conforming to MS.90032), by an authorized dealer as soon as
possible.
• Do not use water alone or alcohol-based engine coolant (antifreeze) products.Do not use additional rust inhibitors or antirust products, as they may not be
compatible with the radiator engine coolant and may plug the radiator.
• This vehicle has not been designed for use with propylene glycol-based engine
coolant (antifreeze). Use of propylene glycol-based engine coolant (antifreeze)
is not recommended.
Chassis
Component Fluid, Lubricant, or Genuine Part
Automatic Transmission – If Equipped
Use only ATF+4 Automatic Transmission
Fluid. Failure to use ATF+4 fluid may affect
the function or performance of your transmis-
sion. We recommend MOPAR ATF+4 fluid.
Manual Transmission – If EquippedWe recommend you use MOPAR Manual
Transmission Lubricant meeting the require-
ments of FCA US Material Standard MS-
9224.
Transfer Case We recommend you use MOPAR ATF+4
Automatic Transmission Fluid.
Axle Differential (Front) We recommend you use MOPAR Gear &
Axle Lubricant (SAE 80W-90) (API GL-5).
Axle Differential (Rear)
226 RBI (Model 44) – We recommend you use
MOPAR Gear & Axle Lubricant (SAE 80W-90)
(API GL-5) or equivalent. For trailer towing,
use MOPAR Synthetic Gear & Axle Lubricant
(SAE 75W-140). Models equipped with Trac-
Lok require an additive.
Brake Master Cylinder We recommend you use MOPAR DOT 3
Brake Fluid, SAE J1703. If DOT 3, SAE
J1703 brake fluid is not available, then
DOT 4 is acceptable.
Power Steering Reservoir We recommend you use MOPAR Power
Steering Fluid +4, MOPAR ATF+4 Auto-
matic Transmission Fluid.
MAINTAINING YOUR VEHICLE
125
Page 129 of 156
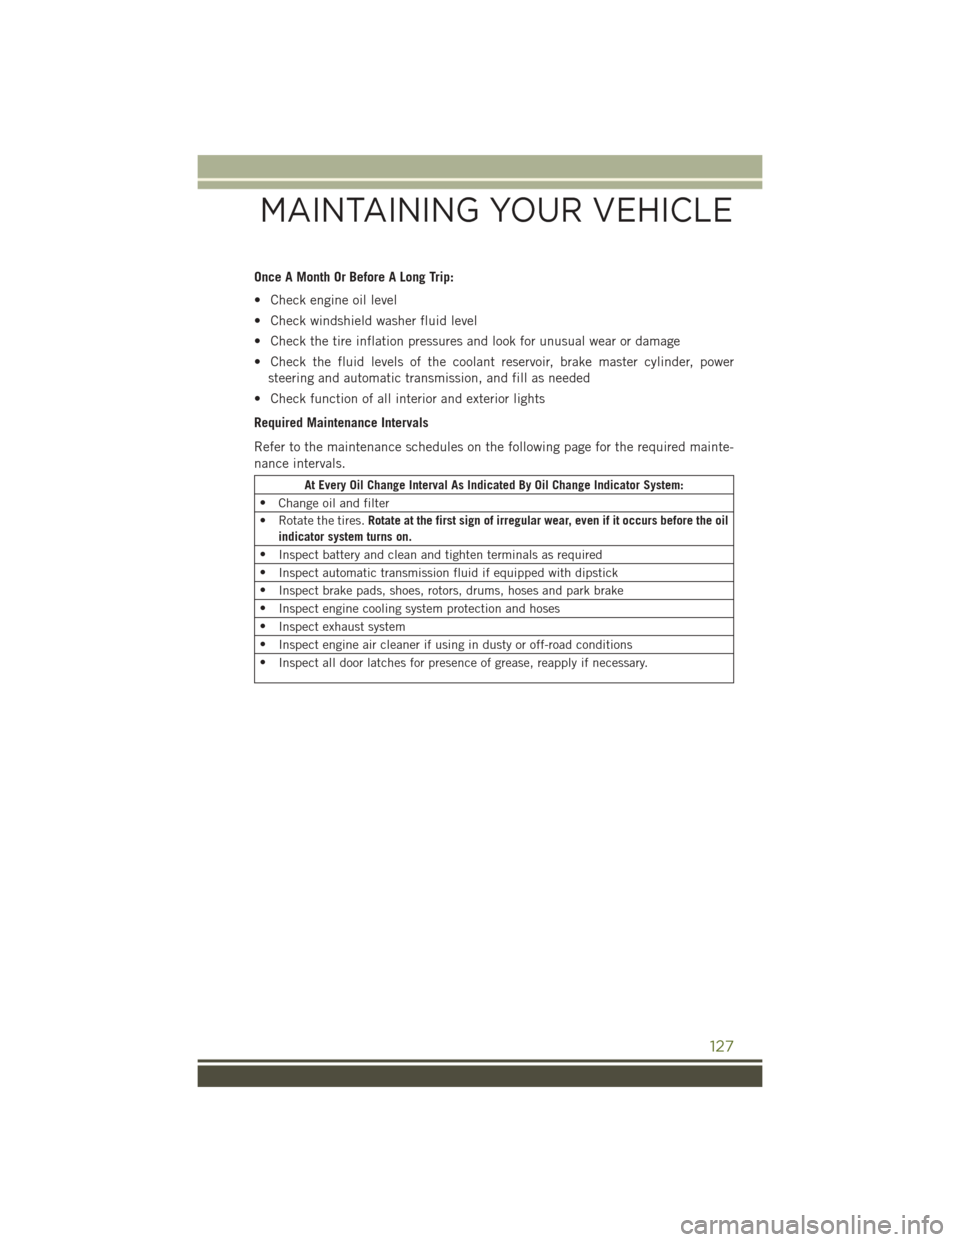
Once A Month Or Before A Long Trip:
• Check engine oil level
• Check windshield washer fluid level
• Check the tire inflation pressures and look for unusual wear or damage
• Check the fluid levels of the coolant reservoir, brake master cylinder, powersteering and automatic transmission, and fill as needed
• Check function of all interior and exterior lights
Required Maintenance Intervals
Refer to the maintenance schedules on the following page for the required mainte-
nance intervals.
At Every Oil Change Interval As Indicated By Oil Change Indicator System:
• Change oil and filter
• Rotate the tires. Rotate at the first sign of irregular wear, even if it occurs before the oil
indicator system turns on.
• Inspect battery and clean and tighten terminals as required
• Inspect automatic transmission fluid if equipped with dipstick
• Inspect brake pads, shoes, rotors, drums, hoses and park brake
• Inspect engine cooling system protection and hoses
• Inspect exhaust system
• Inspect engine air cleaner if using in dusty or off-road conditions
• Inspect all door latches for presence of grease, reapply if necessary.
MAINTAINING YOUR VEHICLE
127
Page 134 of 156
FUSES
WARNING!
• When replacing a blown fuse, always use an appropriate replacement fuse withthe same amp rating as the original fuse. Never replace a fuse with another
fuse of higher amp rating. Never replace a blown fuse with metal wires or any
other material. Failure to use proper fuses may result in serious personal injury,
fire and/or property damage.
• Before replacing a fuse, make sure that the ignition is off and that all the other
services are switched off and/or disengaged.
• If the replaced fuse blows again, contact an authorized dealer.
• If a general protection fuse for safety systems (air bag system, braking system),
power unit systems (engine system, gearbox system) or steering system blows,
contact an authorized dealer.
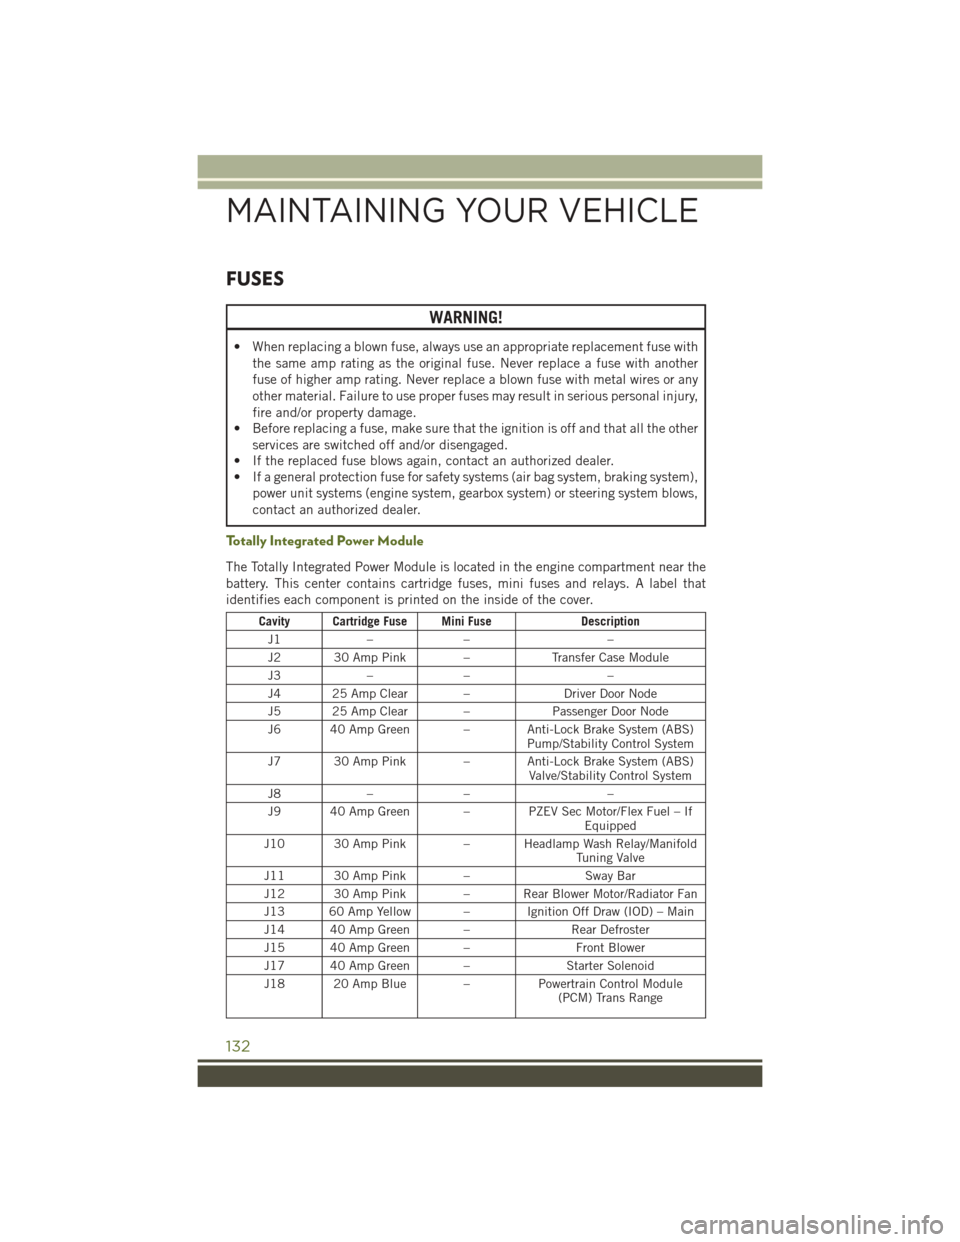
Totally Integrated Power Module
The Totally Integrated Power Module is located in the engine compartment near the
battery. This center contains cartridge fuses, mini fuses and relays. A label that
identifies each component is printed on the inside of the cover.
Cavity Cartridge Fuse Mini Fuse Description
J1 –– –
J2 30 Amp Pink – Transfer Case Module
J3 –– –
J4 25 Amp Clear – Driver Door Node
J5 25 Amp Clear – Passenger Door Node
J6 40 Amp Green – Anti-Lock Brake System (ABS) Pump/Stability Control System
J7 30 Amp Pink – Anti-Lock Brake System (ABS) Valve/Stability Control System
J8 –– –
J9 40 Amp Green – PZEV Sec Motor/Flex Fuel – If Equipped
J10 30 Amp Pink – Headlamp Wash Relay/Manifold Tuning Valve
J11 30 Amp Pink – Sway Bar
J12 30 Amp Pink – Rear Blower Motor/Radiator Fan
J13 60 Amp Yellow – Ignition Off Draw (IOD) – Main
J14 40 Amp Green – Rear Defroster
J15 40 Amp Green – Front Blower
J17 40 Amp Green – Starter Solenoid
J18 20 Amp Blue – Powertrain Control Module
(PCM) Trans Range
MAINTAINING YOUR VEHICLE
132
Page 138 of 156
WARNING!
• Overloading of your tires is dangerous. Overloading can cause tire failure,affect vehicle handling, and increase your stopping distance. Use tires of the
recommended load capacity for your vehicle. Never overload them.
•
Improperly inflated tires are dangerous and can cause collisions. Under-inflation is
the leading cause of tire failure and may result in severe cracking, component
separation, or “blow out”. Over-inflation reduces a tire’s ability to cushion shock.
Objects on the road and chuck holes can cause damage that results in tire failure.
Unequal tire pressures can cause steering problems. You could lose control of your
vehicle. Over-inflated or under-inflated tires can affect vehicle handling and can fail
suddenly, resulting in loss of vehicle control.
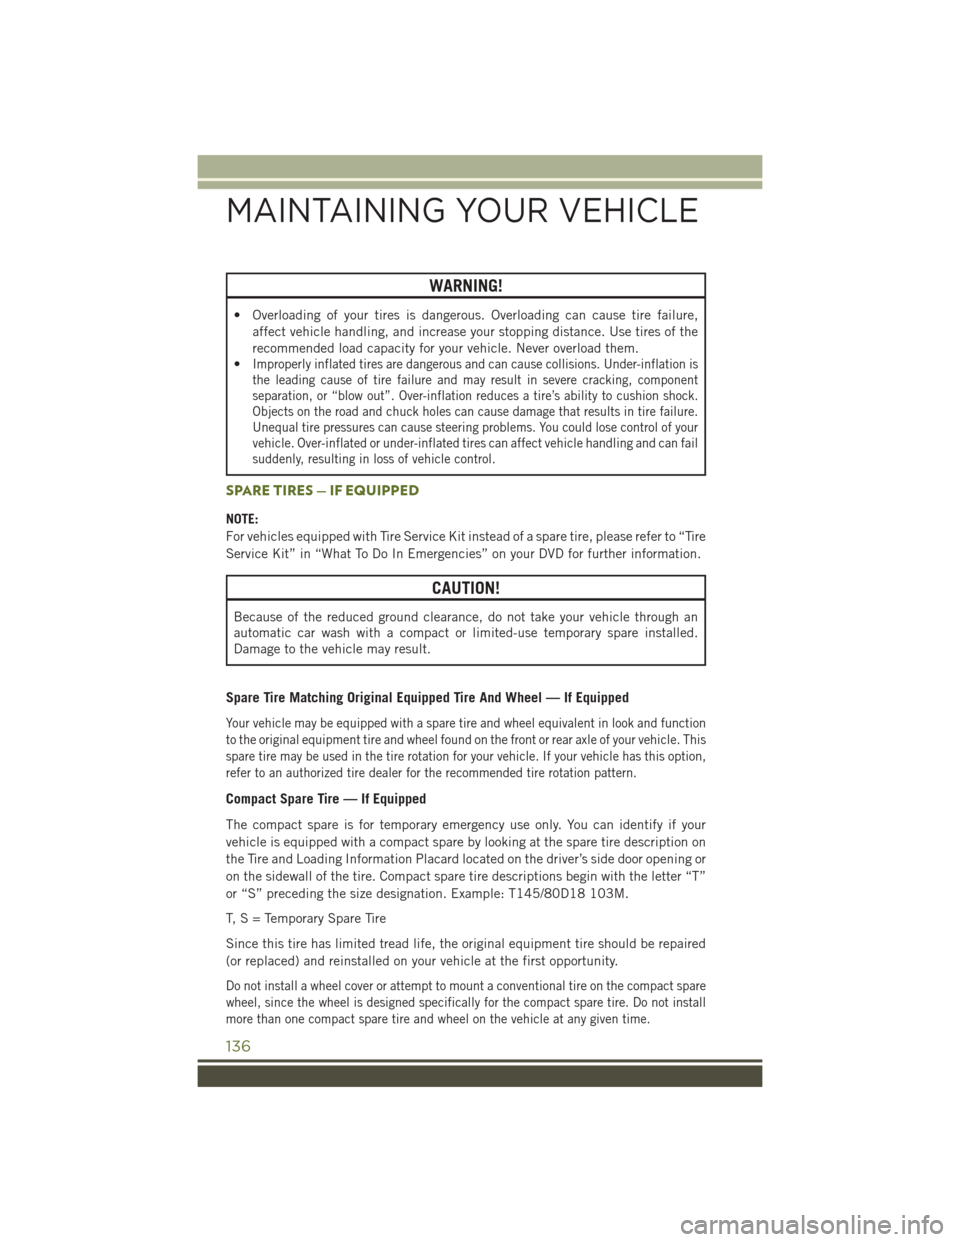
SPARE TIRES — IF EQUIPPED
NOTE:
For vehicles equipped with Tire Service Kit instead of a spare tire, please refer to “Tire
Service Kit” in “What To Do In Emergencies” on your DVD for further information.
CAUTION!
Because of the reduced ground clearance, do not take your vehicle through an
automatic car wash with a compact or limited-use temporary spare installed.
Damage to the vehicle may result.
Spare Tire Matching Original Equipped Tire And Wheel — If Equipped
Your vehicle may be equipped with a spare tire and wheel equivalent in look and function
to the original equipment tire and wheel found on the front or rear axle of your vehicle. This
spare tire may be used in the tire rotation for your vehicle. If your vehicle has this option,
refer to an authorized tire dealer for the recommended tire rotation pattern.
Compact Spare Tire — If Equipped
The compact spare is for temporary emergency use only. You can identify if your
vehicle is equipped with a compact spare by looking at the spare tire description on
the Tire and Loading Information Placard located on the driver’s side door opening or
on the sidewall of the tire. Compact spare tire descriptions begin with the letter “T”
or “S” preceding the size designation. Example: T145/80D18 103M.
T,S=T emporary Spare Tire
Since this tire has limited tread life, the original equipment tire should be repaired
(or replaced) and reinstalled on your vehicle at the first opportunity.
Do not install a wheel cover or attempt to mount a conventional tire on the compact spare
wheel, since the wheel is designed specifically for the compact spare tire. Do not install
more than one compact spare tire and wheel on the vehicle at any given time.
MAINTAINING YOUR VEHICLE
136
Page 148 of 156
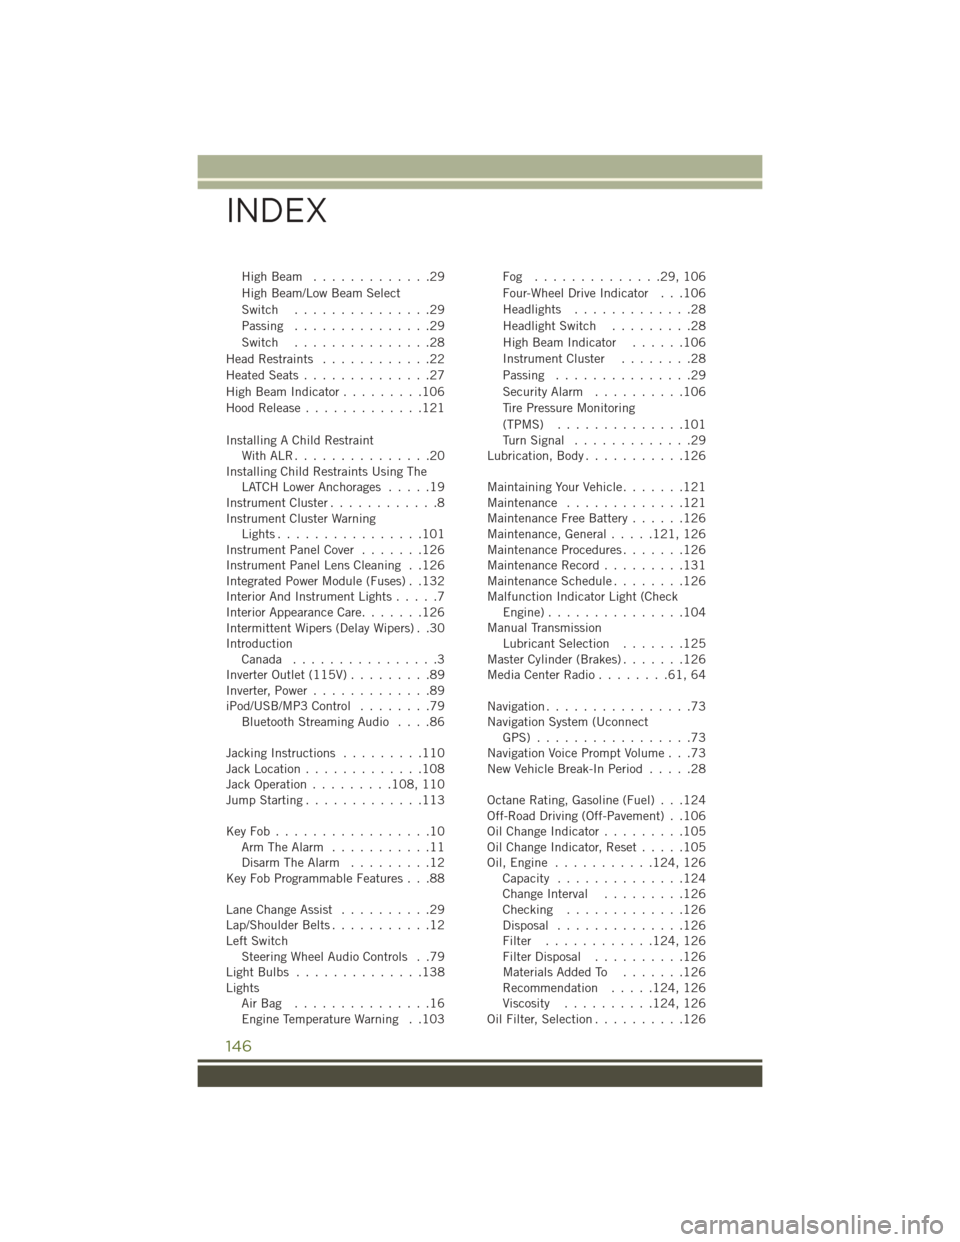
HighBeam .............29
High Beam/Low Beam Select
Switch...............29
Passing ...............29
Switch ...............28
Head Restraints ............22
Heated Seats ..............27
High Beam Indicator .........106
Hood Release .............121
Installing A Child Restraint WithALR...............20
Installing Child Restraints Using The LATCH Lower Anchorages .....19
Instrument Cluster ............8
Instrument Cluster Warning Lights................101
Instrument Panel Cover .......126
Instrument Panel Lens Cleaning . .126
Integrated Power Module (Fuses) . .132
Interior And Instrument Lights .....7
Interior Appearance Care .......126
Intermittent Wipers (Delay Wipers) . .30
Introduction Canada ................3
Inverter Outlet (115V) .........89
Inverter, Power .............89
iPod/USB/MP3 Control ........79
Bluetooth Streaming Audio ....86
Jacking Instructions .........110
Jack Location .............108
Jack Operation .........108, 110
Jump Starting .............113
KeyFob.................10 Arm The Alarm ...........11
Disarm The Alarm .........12
Key Fob Programmable Features . . .88
Lane Change Assist ..........29
Lap/Shoulder Belts ...........12
Left Switch Steering Wheel Audio Controls . .79
LightBulbs ..............138
Lights AirBag ...............16
Engine Temperature Warning . .103 Fog ..............29,106
Four-Wheel Drive Indicator . . .106
Headlights
.............28
Headlight Switch .........28
High Beam Indicator ......106
Instrument Cluster ........28
Passing ...............29
Security Alarm ..........106
Tire Pressure Monitoring
(TPMS) ..............101
TurnSignal .............29
Lubrication, Body ...........126
Maintaining Your Vehicle .......121
Maintenance .............121
Maintenance Free Battery ......126
Maintenance, General .....121, 126
Maintenance Procedures .......126
Maintenance Record .........131
Maintenance Schedule ........126
Malfunction Indicator Light (Check Engine)...............104
Manual Transmission Lubricant Selection .......125
Master
Cylinder (Brakes) .......126
MediaCenterRadio........61,64
Navigation ................73
Navigation System (Uconnect GPS) .................73
Navigation Voice Prompt Volume . . .73
New Vehicle Break-In Period .....28
Octane Rating, Gasoline (Fuel) . . .124
Off-Road Driving (Off-Pavement) . .106
Oil Change Indicator .........105
Oil Change Indicator, Reset .....105
Oil,Engine ........... 124, 126
Capacity ..............124
Change Interval .........126
Checking .............126
Disposal ..............126
Filter ............ 124, 126
Filter Disposal ..........126
Materials Added To .......126
Recommendation .....124, 126
Viscosity .......... 124, 126
Oil Filter, Selection ..........126
INDEX
146
Page 149 of 156
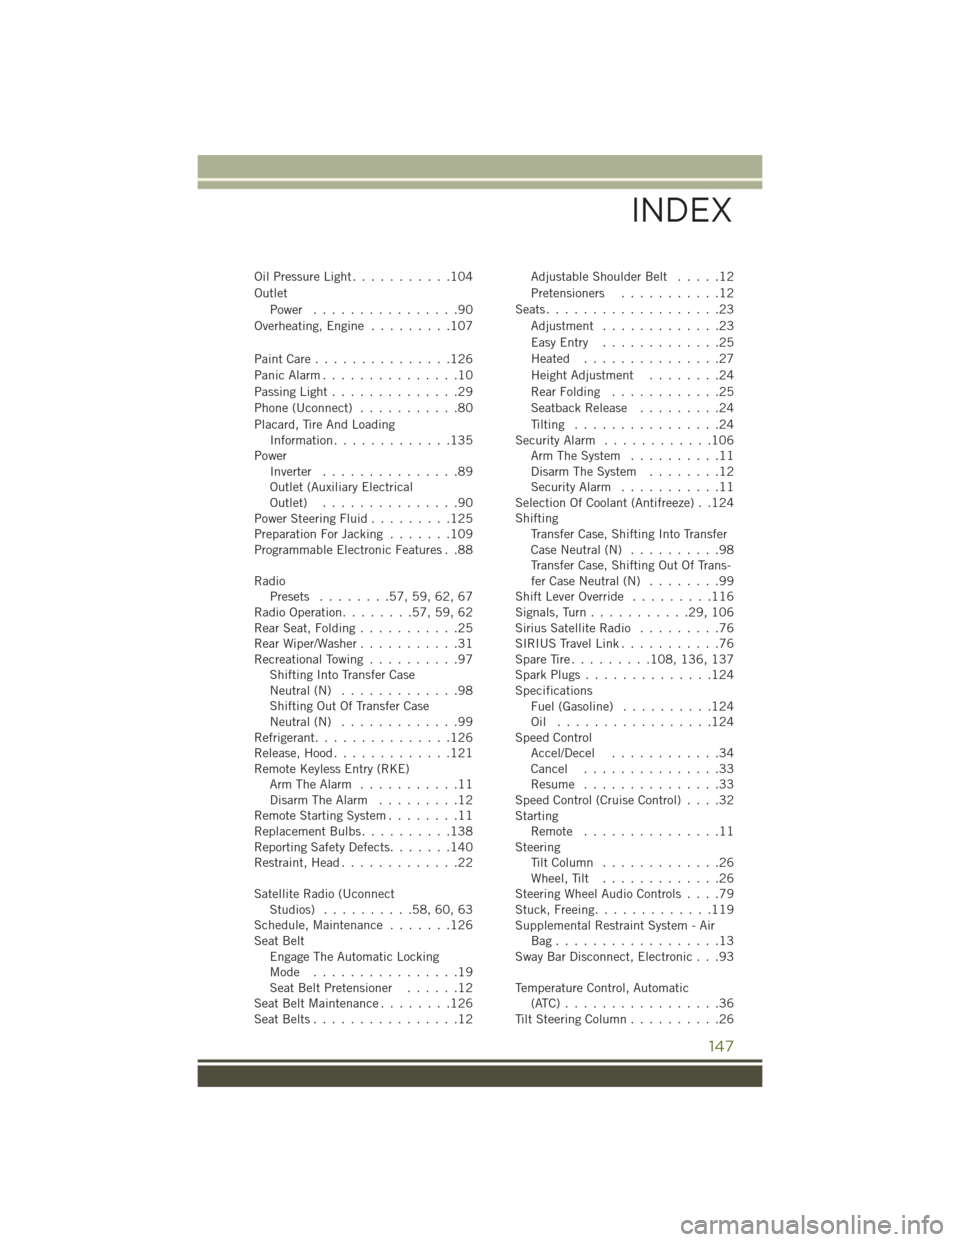
Oil Pressure Light...........104
Outlet Power ................90
Overheating, Engine .........107
PaintCare...............126
Panic Alarm ...............10
Passing Light ..............29
Phone (Uconnect) ...........80
Placard, Tire And Loading Information .............135
Power Inverter ...............89
Outlet (Auxiliary Electrical
Outlet) ...............90
Power Steering Fluid .........125
Preparation For Jacking .......109
Programmable Electronic Features . .88
Radio Presets ........57,59,62,67
Radio Operation ........57,59,62
Rear Seat, Folding ...........25
Rear Wiper/Washer ...........31
Recreational Towing ..........97
Shifting Into Transfer Case
Neutral (N) .............98
Shifting Out Of Transfer Case
Neutral (N) .............99
Refrigerant ...............126
Release, Hood .............121
Remote Keyless Entry (RKE) Arm The Alarm ...........11
Disarm The Alarm .........12
Remote Starting System ........11
Replacement Bulbs ..........138
Reporting Safety Defects .......140
Restraint, Head .............22
Satellite Radio (Uconnect Studios) ..........58,60,63
Schedule, Maintenance .......126
Seat Belt Engage The Automatic Locking
Mode ................19
Seat Belt Pretensioner ......12
SeatBeltMaintenance........126
Seat Belts ................12 Adjustable Shoulder Belt
.....12
Pretensioners ...........12
Seats ...................23
Adjustment .............23
EasyEntry .............25
Heated ...............27
Height Adjustment ........24
Rear Folding ............25
Seatback Release .........24
Tilting ................24
Security Alarm ............106
Arm The System ..........11
Disarm The System ........12
Security Alarm ...........11
Selection Of Coolant (Antifreeze) . .124
Shifting Transfer Case, Shifting Into Transfer
Case Neutral (N) ..........98
Transfer Case, Shifting Out Of Trans-
fer Case Neutral (N) ........99
Shift Lever Override .........116
Signals,
Turn ...........29,106
Sirius Satellite Radio .........76
SIRIUS Travel Link ...........76
SpareTire......... 108, 136, 137
SparkPlugs..............124
Specifications Fuel (Gasoline) ..........124
Oil .................124
Speed Control Accel/Decel ............34
Cancel ...............33
Resume ...............33
Speed Control (Cruise Control) ....32
Starting Remote ...............11
Steering TiltColumn .............26
Wheel, Tilt .............26
Steering Wheel Audio Controls ....79
Stuck, Freeing .............119
Supplemental Restraint System - Air Bag..................13
Sway Bar Disconnect, Electronic . . .93
Temperature Control, Automatic (ATC).................36
Tilt Steering Column ..........26
INDEX
147