jump start JEEP WRANGLER 2021 Owner handbook (in English)
[x] Cancel search | Manufacturer: JEEP, Model Year: 2021, Model line: WRANGLER, Model: JEEP WRANGLER 2021Pages: 276, PDF Size: 4.47 MB
Page 120 of 276
If Engine Fails To Start
WARNING!
• Never pour fuel or other flammable liq-
uid into the throttle body air inlet open-
ing in an attempt to start the vehicle.
This could result in flash fire causing
serious personal injury.
• Do not attempt to push or tow your
vehicle to get it started. Vehicles
equipped with an automatic transmis-
sion cannot be started this way. Un-
burned fuel could enter the catalytic
converter and once the engine has
started, ignite and damage the converter
and vehicle.
• If the vehicle has a discharged battery,
booster cables may be used to obtain a
start from a booster battery or the battery
in another vehicle. This type of start can
be dangerous if done improperly. Refer
to “Jump Starting Procedure” in “In
Case Of Emergency” for further informa-
tion.Without Tip Start — Manual Transmission Only
If the engine fails to start after you have
followed the “Normal Starting” or “Extreme
Cold Weather” procedures, it may be flooded.
Push the accelerator pedal all the way to the
floor and hold it there while cranking the
engine. This should clear any excess fuel in
case the engine is flooded.
CAUTION!
To prevent damage to the starter, do not
crank the engine for more than 15 seconds
at a time. Wait 10 to 15 seconds before
trying again.
If the engine has been flooded, it may start to
run, but not have enough power to continue
running when the key is released. If this
occurs, continue cranking with the accelera-
tor pedal pushed all the way to the floor.
Release the accelerator pedal and the key
once the engine is running smoothly.If the engine shows no sign of starting after
two 15-second periods of cranking with the
accelerator pedal held to the floor, repeat the
“Normal Starting” or “Extreme Cold
Weather” procedures.
With Tip Start — Automatic Transmission Only
If the engine fails to start after you have
followed the “Normal Starting” or “Extreme
Cold Weather” procedures, it may be flooded.
To clear any excess fuel, push the accelerator
pedal all the way to the floor and hold it.
Then, turn the ignition switch to the START
position and release it as soon as the starter
engages. The starter motor will disengage
automatically in 10 seconds. Once this oc-
curs, release the accelerator pedal, turn the
ignition switch to the LOCK position, wait
10 to 15 seconds, then repeat the “Normal
Starting” procedure.
CAUTION!
To prevent damage to the starter, wait
10 to 15 seconds before trying again.
STARTING AND OPERATING
118
Page 147 of 276
IN CASE OF EMERGENCY
HAZARD WARNING
FLASHERS................146
BULB REPLACEMENT........146
Replacement Bulbs............146
Bulb Replacement.............147
FUSES...................149
General Information.............150
Totally Integrated Power Module.....150
JACKING AND TIRE
CHANGING................154
Jack/Spare Tire Stowage..........154
Preparations For Jacking.........154
Jacking Instructions............155
Declaration Of Conformance.......157
Jack Usage Precautions..........160
JUMP STARTING............160
Preparations For Jump Start........161
Jump Starting Procedure..........162
IF YOUR ENGINE OVERHEATS . .163GEAR SELECTOR OVERRIDE . . .164
FREEING A STUCK VEHICLE . . .164
TOWING A DISABLED
VEHICLE..................165
Without The Ignition Key..........166
Four–Wheel Drive Models.........166
Tow Eye Usage................167
ENHANCED ACCIDENT RESPONSE
SYSTEM (EARS).............168
EVENT DATA RECORDER
(EDR)....................168
IN CASE OF EMERGENCY
145
Page 162 of 276
Jack Usage Precautions
To complete the Use and Maintenance Hand-
book to which this supplement is attached,
given below are some instructions on the
proper use of the jack.
WARNING!
When using the crank, make sure it turns
freely without the risk of scraping hands
against the ground.
Even the moving parts of the jack, the
“worm screw” and joints can cause inju-
ries: avoid contact with them. Clean it
thoroughly if dirtied with grease.
CAUTION!
The jack is a tool designed exclusively for
changing a wheel, in case of a puncture or
damage to a tire of the vehicle on which it
is fitted or on vehicles of the same model.
Any other use, e.g. to jack up other vehicle
models or different things, is strictly pro-
hibited. Never use it to carry out mainte-
nance or repairs under the vehicle or to
CAUTION!
change summer/winter wheels and vice
versa. Never go under the raised vehicle. If
any work under the vehicle is necessary,
contact the Fiat Service Network. Incor-
rect placing of the jack can cause the
vehicle to drop: use it only in the positions
indicated. Do not use the jack for loads
higher than that specified on the label.
Never start the engine with vehicle raised.
If the vehicle is raised more than neces-
sary, everything can become more un-
stable, with the risk of the vehicle drop-
ping violently. Therefore raise the vehicle
only as much as necessary for the wheel/
spare.
Maintenance
• Make sure grime does not build up on the
“worm screw.”
• Keep the “worm screw” lubricated.
• Never modify the jack.
Conditions Of Non-Use:
• Temperatures below −40°C.
• On sandy or muddy ground.• On uneven ground.
• On steep roads.
• In extreme weather conditions: thunder-
storms, typhoons, hurricanes, blizzards,
storms, etc.
JUMP STARTING
If your vehicle has a discharged battery, it can
be jump started using a set of jumper cables
and a battery in another vehicle, or by using a
portable battery booster pack. Jump starting
can be dangerous if done improperly, so
please follow the procedures in this section
carefully.
WARNING!
Do not attempt jump starting if the battery
is frozen. It could rupture or explode and
cause personal injury.
CAUTION!
Do not use a portable battery booster pack
or any other booster source with a system
IN CASE OF EMERGENCY
160
Page 163 of 276
CAUTION!
voltage greater than 12 Volts or damage to
the battery, starter motor, alternator or
electrical system may occur.
NOTE:
When using a portable battery booster pack,
follow the manufacturer's operating instruc-
tions and precautions.
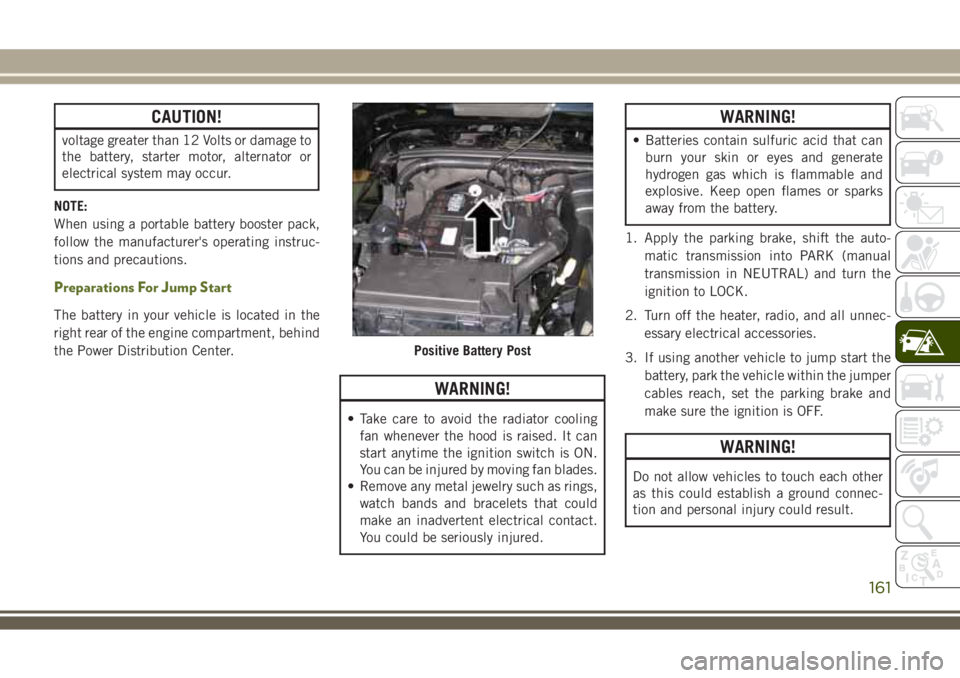
Preparations For Jump Start
The battery in your vehicle is located in the
right rear of the engine compartment, behind
the Power Distribution Center.
WARNING!
• Take care to avoid the radiator cooling
fan whenever the hood is raised. It can
start anytime the ignition switch is ON.
You can be injured by moving fan blades.
• Remove any metal jewelry such as rings,
watch bands and bracelets that could
make an inadvertent electrical contact.
You could be seriously injured.
WARNING!
• Batteries contain sulfuric acid that can
burn your skin or eyes and generate
hydrogen gas which is flammable and
explosive. Keep open flames or sparks
away from the battery.
1. Apply the parking brake, shift the auto-
matic transmission into PARK (manual
transmission in NEUTRAL) and turn the
ignition to LOCK.
2. Turn off the heater, radio, and all unnec-
essary electrical accessories.
3. If using another vehicle to jump start the
battery, park the vehicle within the jumper
cables reach, set the parking brake and
make sure the ignition is OFF.
WARNING!
Do not allow vehicles to touch each other
as this could establish a ground connec-
tion and personal injury could result.
Positive Battery Post
161
Page 164 of 276
Jump Starting Procedure
WARNING!
Failure to follow this jump starting proce-
dure could result in personal injury or
property damage due to battery explosion.
CAUTION!
Failure to follow these procedures could
result in damage to the charging system of
the booster vehicle or the discharged ve-
hicle.
NOTE:
Make sure at all times that unused ends of
jumper cables are not contacting each other
or either vehicle while making connections.
Connecting The Jumper Cables
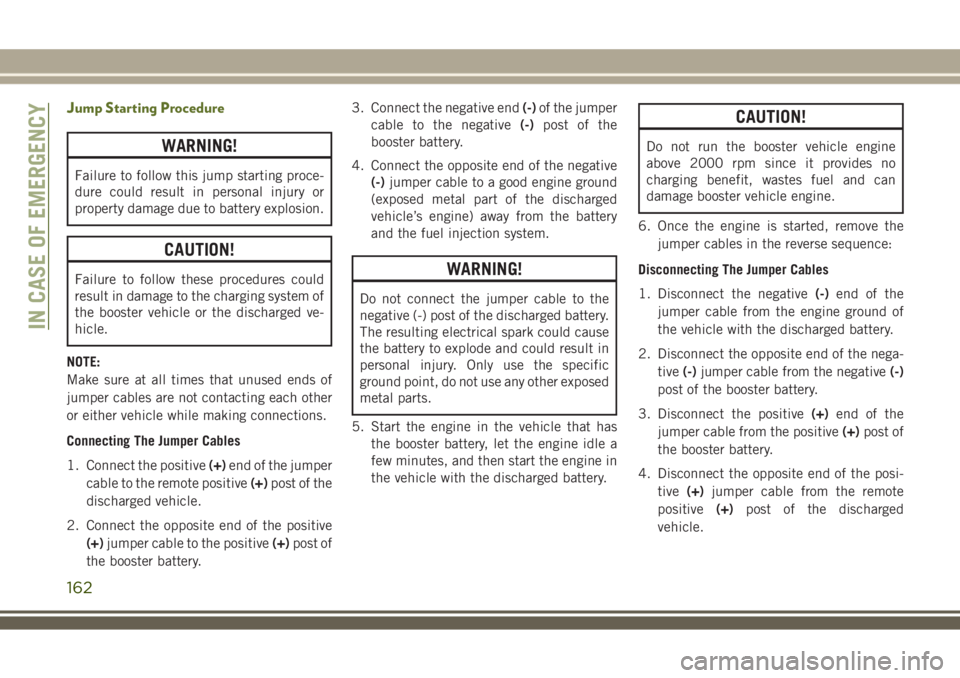
1. Connect the positive(+)end of the jumper
cable to the remote positive(+)post of the
discharged vehicle.
2. Connect the opposite end of the positive
(+)jumper cable to the positive(+)post of
the booster battery.3. Connect the negative end(-)of the jumper
cable to the negative(-)post of the
booster battery.
4. Connect the opposite end of the negative
(-)jumper cable to a good engine ground
(exposed metal part of the discharged
vehicle’s engine) away from the battery
and the fuel injection system.WARNING!
Do not connect the jumper cable to the
negative (-) post of the discharged battery.
The resulting electrical spark could cause
the battery to explode and could result in
personal injury. Only use the specific
ground point, do not use any other exposed
metal parts.
5. Start the engine in the vehicle that has
the booster battery, let the engine idle a
few minutes, and then start the engine in
the vehicle with the discharged battery.
CAUTION!
Do not run the booster vehicle engine
above 2000 rpm since it provides no
charging benefit, wastes fuel and can
damage booster vehicle engine.
6. Once the engine is started, remove the
jumper cables in the reverse sequence:
Disconnecting The Jumper Cables
1. Disconnect the negative(-)end of the
jumper cable from the engine ground of
the vehicle with the discharged battery.
2. Disconnect the opposite end of the nega-
tive(-)jumper cable from the negative(-)
post of the booster battery.
3. Disconnect the positive(+)end of the
jumper cable from the positive(+)post of
the booster battery.
4. Disconnect the opposite end of the posi-
tive(+)jumper cable from the remote
positive(+)post of the discharged
vehicle.
IN CASE OF EMERGENCY
162
Page 165 of 276
5. Reinstall the protective cover over the
remote positive(+)post of the discharged
vehicle.
If frequent jump starting is required to start
your vehicle you should have the battery and
charging system tested at an authorized
dealer.
CAUTION!
Accessories plugged into the vehicle
power outlets draw power from the vehi-
cle’s battery, even when not in use (i.e.,
cellular devices, etc.). Eventually, if
plugged in long enough without engine
operation, the vehicle’s battery will dis-
charge sufficiently to degrade battery life
and/or prevent the engine from starting.
IF YOUR ENGINE
OVERHEATS
In any of the following situations, you can
reduce the potential for overheating by taking
the appropriate action.
• On the highways — slow down.
• In city traffic — while stopped, shift trans-
mission into NEUTRAL, but do not increase
engine idle speed.
CAUTION!
Driving with a hot cooling system could
damage your vehicle. If the temperature
gauge reads HOT (H), pull over and stop
the vehicle. Idle the vehicle with the air
conditioner turned off until the pointer
drops back into the normal range. If the
pointer remains on HOT (H), and you hear
continuous chimes, turn the engine off
immediately and call for service.NOTE:
There are steps that you can take to slow
down an impending overheat condition:
• If your air conditioner (A/C) is on, turn it off.
The A/C system adds heat to the engine
cooling system and turning the A/C off can
help remove this heat.
• You can also turn the temperature control to
maximum heat, the mode control to floor
and the blower control to high. This allows
the heater core to act as a supplement to
the radiator and aids in removing heat from
the engine cooling system.WARNING!
You or others can be badly burned by hot
engine coolant (antifreeze) or steam from
your radiator. If you see or hear steam
coming from under the hood, do not open
the hood until the radiator has had time to
cool. Never try to open a cooling system
pressure cap when the radiator or coolant
bottle is hot.
163
Page 188 of 276
If you notice fluid leakage or transmission
malfunction, visit an authorized dealer im-
mediately to have the transmission fluid level
checked. Operating the vehicle with an im-
proper fluid level can cause severe transmis-
sion damage.
Maintenance-Free Battery
Your vehicle is equipped with a maintenance-
free battery. You will never have to add water,
nor is periodic maintenance required.
WARNING!
• Battery fluid is a corrosive acid solution
and can burn or even blind you. Do not
allow battery fluid to contact your eyes,
skin, or clothing. Do not lean over a
battery when attaching clamps. If acid
splashes in eyes or on skin, flush the
area immediately with large amounts of
water. Refer to “Jump Starting Proce-
dure” in “In Case Of Emergency” for
further information.
• Battery gas is flammable and explosive.
Keep flame or sparks away from the
battery. Do not use a booster battery or
WARNING!
any other booster source with an output
greater than 12 Volts. Do not allow cable
clamps to touch each other.
• Battery posts, terminals, and related ac-
cessories contain lead and lead com-
pounds. Wash hands after handling.
CAUTION!
• It is essential when replacing the cables
on the battery that the positive cable is
attached to the positive post and the
negative cable is attached to the nega-
tive post. Battery posts are marked posi-
tive (+) and negative (-) and are identi-
fied on the battery case. Cable clamps
should be tight on the terminal posts
and free of corrosion.
• If a “fast charger” is used while the
battery is in the vehicle, disconnect both
vehicle battery cables before connecting
the charger to the battery. Do not use
a “fast charger” to provide starting volt-
age.
Air Conditioner Maintenance
For best possible performance, your air con-
ditioner should be checked and serviced by
an authorized dealer at the start of each warm
season. This service should include cleaning
of the condenser fins and a performance test.
Drive belt tension should also be checked at
this time.
WARNING!
• Use only refrigerants and compressor
lubricants approved by the manufac-
turer for your air conditioning system.
Some unapproved refrigerants are flam-
mable and can explode, injuring you.
Other unapproved refrigerants or lubri-
cants can cause the system to fail, re-
quiring costly repairs. Refer to Warranty
Information Book, located in your own-
er’s information kit, for further warranty
information.
• The air conditioning system contains re-
frigerant under high pressure. To avoid
risk of personal injury or damage to the
system, adding refrigerant or any repair
SERVICING AND MAINTENANCE
186
Page 262 of 276
Cold Weather Operation..........117
Compact Spare Tire.............198
Connector
UCI ....................233
Universal Consumer Interface
(UCI)...................233
Cooling System...............182
Coolant Capacity............210
Inspection................182
Selection Of Coolant (Antifreeze) . .210
Customer Assistance............242
Daytime Running Lights...........29
Dealer Service................189
Defroster, Windshield............113
Delay (Intermittent) Wipers.........31
Diagnostic System, Onboard........64
Diesel Engine Maintenance........175
Diesel Fuel..................209
Diesel Fuel Requirements.........209
Dimmer Switch, Headlight.........29
Dipsticks
Oil (Engine)...............182
Disabled Vehicle Towing..........165
Disarming, Security System.........18
Doors......................19Driver's Seat Back Tilt............21
Electronic Brake Control System......69
Anti-Lock Brake System........68
Electronic Roll Mitigation.......75
Traction Control System........71
Electronic Speed Control (Cruise
Control)..................136
Electronic Stability Control (ESC).....71
Electronic Throttle Control Warning
Light.....................60
Emergency Brake..............121
Emergency, In Case Of
Jacking..............154, 192
Jump Starting..............160
Engine.....................180
Break-In Recommendations.....121
Compartment...........180, 181
Compartment Identification . .180, 181
Cooling.................
.182
Exhaust Gas Caution..........112
Fails To Start...............118
Flooded, Starting............118
Fuel Requirements...........210
Jump Starting..............160
Oil .....................210
Oil Change Interval...........58Oil Filler Cap..............180
Oil Selection..............210
Overheating...............163
Starting.................117
Enhanced Accident Response
Feature................98, 168
Exhaust Gas Caution............112
Exhaust System...............112
Exterior Lights.............28, 114
Fabric Care..................203
Fabric Top..................203
Filters
Air Conditioning..........38, 187
Flashers
Hazard Warning.............146
Turn Signal......64, 114, 148, 149
Flash-To-Pass.................29
Flooded Engine Starting..........118
Fluid, Brake.................211
Fluid Capacities...............210
Fluid Leaks..................114
Fluid Level Checks
Brake...................183
Engine Oil................182
Manual Transmission.........184
Fluids And Lubricants...........210
INDEX
260
Page 263 of 276
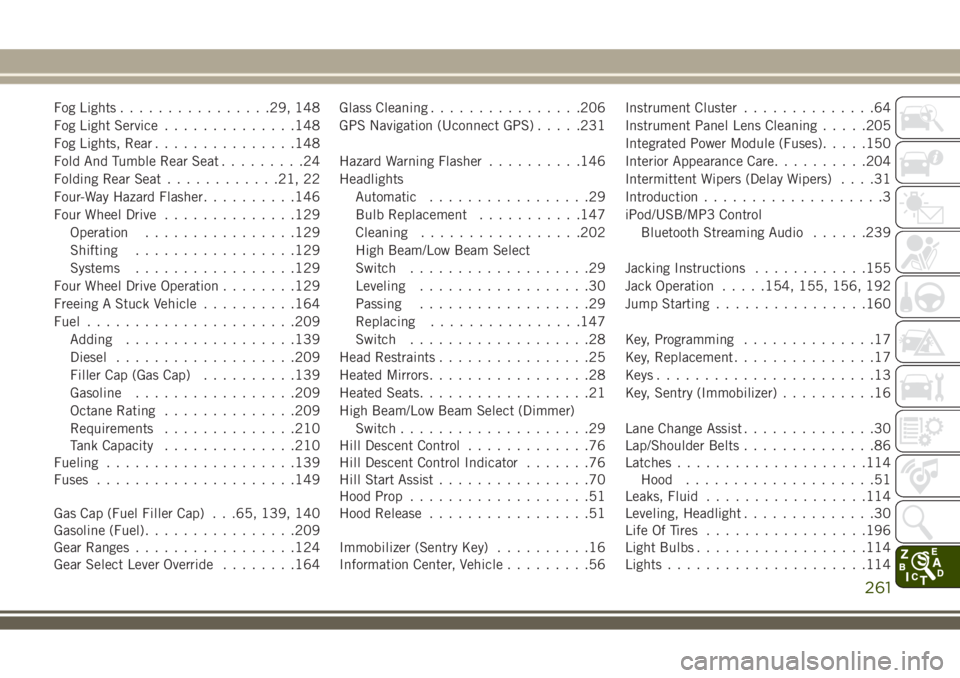
Fog Lights................29, 148
Fog Light Service..............148
Fog Lights, Rear...............148
Fold And Tumble Rear Seat.........24
Folding Rear Seat............21, 22
Four-Way Hazard Flasher..........146
Four Wheel Drive..............129
Operation................129
Shifting.................129
Systems.................129
Four Wheel Drive Operation........129
Freeing A Stuck Vehicle..........164
Fuel......................209
Adding..................139
Diesel...................209
Filler Cap (Gas Cap)..........139
Gasoline.................209
Octane Rating..............209
Requirements..............210
Tank Capacity..............210
Fueling....................139
Fuses.....................149
Gas Cap (Fuel Filler Cap) . . .65, 139, 140
Gasoline (Fuel)................209
Gear Ranges.................124
Gear Select Lever Override........164Glass Cleaning................206
GPS Navigation (Uconnect GPS).....231
Hazard Warning Flasher..........146
Headlights
Automatic.................29
Bulb Replacement...........147
Cleaning.................202
High Beam/Low Beam Select
Switch...................29
Leveling..................30
Passing..................29
Replacing
...............
.147
Switch...................28
Head Restraints................25
Heated Mirrors.................28
Heated Seats..................21
High Beam/Low Beam Select (Dimmer)
Switch....................29
Hill Descent Control.............76
Hill Descent Control Indicator.......76
Hill Start Assist................70
Hood Prop...................51
Hood Release.................51
Immobilizer (Sentry Key)..........16
Information Center, Vehicle.........56Instrument Cluster..............64
Instrument Panel Lens Cleaning.....205
Integrated Power Module (Fuses).....150
Interior Appearance Care..........204
Intermittent Wipers (Delay Wipers)....31
Introduction...................3
iPod/USB/MP3 Control
Bluetooth Streaming Audio......239
Jacking Instructions............155
Jack Operation.....154, 155, 156, 192
Jump Starting................160
Key, Programming..............17
Key, Replacement...............17
Keys.......................13
Key, Sentry (Immobilizer)..........16
Lane Change Assist..............30
Lap/Shoulder Belts..............86
Latches....................114
Hood....................51
Leaks, Fluid.................114
Leveling, Headlight..............30
Life Of Tires.................196
Light Bulbs..................114
Lights.....................114
261