technical specifications JEEP WRANGLER 2021 Owner handbook (in English)
[x] Cancel search | Manufacturer: JEEP, Model Year: 2021, Model line: WRANGLER, Model: JEEP WRANGLER 2021Pages: 276, PDF Size: 4.47 MB
Page 7 of 276
GRAPHICAL TABLE OF CONTENTS
GETTING TO KNOW YOUR VEHICLE
GETTING TO KNOW YOUR INSTRUMENT PANEL
SAFETY
STARTING AND OPERATING
IN CASE OF EMERGENCY
SERVICING AND MAINTENANCE
TECHNICAL SPECIFICATIONS
MULTIMEDIA
CUSTOMER ASSISTANCE
INDEX
Page 159 of 276
WARNING!
slip off the jack and hurt someone near it.
Raise the vehicle only enough to remove
the tire.
6. Remove the lug nuts and wheel.
7. Position the spare wheel/tire on the ve-
hicle and install the lug nuts with the
cone-shaped end toward the wheel.
Lightly tighten the lug nuts clockwise.
WARNING!
To avoid the risk of forcing the vehicle off
the jack, do not tighten the wheel nuts
fully until the vehicle has been lowered.
Failure to follow this warning may result in
serious injury.
8. Lower the vehicle by turning the jack
screw to the left, and remove the jack.9. Finish tightening the lug nuts. Push down
on the wrench while tightening for in-
creased leverage. Alternate nuts until
each nut has been tightened twice. Refer
to “Torque Specifications” in “Technical
Specifications” for correct lug nut torque.
10. Remove the jack assembly and wheel
blocks.
11. Secure the tire, jack, and tools in their
proper locations.
WARNING!
A loose tire or jack thrown forward in a
collision or hard stop, could endanger the
occupants of the vehicle. Always stow the
jack parts and the spare tire in the places
provided.
Declaration Of Conformance
1. The undersigned, Tony Fabiano, repre-
senting the manufacturer, herewith de-
clares that the machinery described below
fulfills all relevant provisions of:
• The EC-directive 2006/42/EC on
Machinery
2. Description of machinery.
a) Generic Denomination: Vehicle Jack
b) Function: Lifting Vehicle
d) Ve-
hicle
Modelc) Model
Codef) Work-
ing Loade) Jack
Type
Jeep
®
CompassMK 1200 kg
MaxFGMF1
Jeep
CherokeeKL 1000 kg
MaxFGLF1
Jeep
WranglerJK 1000 kg
MaxFGLF2
Jeep
Grand
CherokeeWK 1700 kg
MaxFGLF3
157
Page 186 of 276
WARNING!
• Use only manufacturer's recommended
brake fluid. Refer to “Fluids And Lubri-
cants” in “Technical Specifications” for
further information. Using the wrong
type of brake fluid can severely damage
your brake system and/or impair its per-
formance. The proper type of brake fluid
for your vehicle is also identified on the
original factory installed hydraulic mas-
ter cylinder reservoir.
• To avoid contamination from foreign
matter or moisture, use only new brake
fluid or fluid that has been in a tightly
closed container. Keep the master cylin-
der reservoir cap secured at all times.
Brake fluid in a open container absorbs
moisture from the air resulting in a lower
boiling point. This may cause it to boil
unexpectedly during hard or prolonged
braking, resulting in sudden brake fail-
ure. This could result in a collision.
• Overfilling the brake fluid reservoir can
result in spilling brake fluid on hot en-
gine parts, causing the brake fluid to
WARNING!
catch fire. Brake fluid can also damage
painted and vinyl surfaces, care should
be taken to avoid its contact with these
surfaces.
• Do not allow petroleum based fluid to
contaminate the brake fluid. Brake seal
components could be damaged, causing
partial or complete brake failure. This
could result in a collision.
Manual Transmission
Fluid Level Check
Check the fluid level by removing the fill
plug. The fluid level should be between the
bottom of the fill hole and a point not more
than 3/16 of an inch (4.76 mm) below the
bottom of the hole.
Add fluid, if necessary, to maintain the
proper level.
Automatic Transmission
Fluid Level Check — Gasoline Engine
It is best to check the fluid level when the
transmission is at normal operating tempera-
ture (approximately 180°F/82°C). This oc-
curs after at least 15 miles (25 km) of driv-
ing. At normal operating temperature, the
fluid cannot be held comfortably between the
fingertips.
Use the following procedure to check the
transmission fluid level properly:
1. Park the vehicle on level ground.
2. Remove the engine cover by pulling it up
off the mounting studs (two in the front
and two in the rear).
3. Run the engine at normal idle speed for at
least 60 seconds, and leave the engine
running for the rest of this procedure.
4. Fully apply the parking brake, and press
the brake pedal.
SERVICING AND MAINTENANCE
184
Page 187 of 276
5. Place the gear selector momentarily into
each gear position (allowing time for the
transmission to fully engage in each posi-
tion), ending with the transmission in
PARK.
6. Remove the dipstick, wipe it clean and
reinsert it until seated.
7. Remove the dipstick again and note the
fluid level on both sides. The fluid level
reading is only valid if there is a solid
coating of oil on both sides of the dipstick.
Note that the holes in the dipstick will be
full of fluid if the actual level is at or above
the hole. The fluid level should be be-
tween the HOT (upper) reference holes on
the dipstick at normal operating tempera-
ture. If the fluid level is low, add fluid
through the dipstick tube to bring it to the
proper level.Do not overfill.Use ONLY the
specified fluid (refer to "Fluids And Lubri-
cants" under “Technical Specifications”
for fluid specifications). After adding any
quantity of oil through the dipstick tube,
wait a minimum of two minutes for the oil
to fully drain into the transmission before
rechecking the fluid level.NOTE:
• The holes in the dipstick will be full of
fluid if the actual level is at or above the
hole.
• If it is necessary to check the transmis-
sion below the operating temperature,
the fluid level should be between the
two COLD (lower) holes on the dipstick
with the fluid at approximately 80°F
(27°C). If the fluid level is correctly
established at 80° F (27°C), it should
be between the HOT (upper) reference
holes when the transmission reaches
180° F (82°C). Remember it is best to
check the level at the normal operating
temperature.
CAUTION!
If the fluid temperature is below 50°F
(10°C) it may not register on the dipstick.
Do not add fluid until the temperature is
elevated enough to produce an accurate
reading. Run the engine at idle, in PARK,
to warm the fluid.8. Reinstall the engine cover and snap it
down securely onto the four mounting
studs.
9. Check for leaks. Release the parking
brake.
NOTE:
To prevent dirt and water from entering the
transmission after checking or replenishing
fluid, make sure that the dipstick cap is
properly reseated. It is normal for the dipstick
cap to spring back slightly from its fully
seated position, as long as its seal remains
engaged in the dipstick tube.
Fluid Level Check — 2.8L Turbo Diesel
Engine
The fluid level is preset at the factory and
does not require adjustment under normal
operating conditions. Routine fluid level
checks are not required, therefore the trans-
mission filler tube is capped and no dipstick
is provided. An authorized dealer can check
your transmission fluid level using a special
service dipstick.
185
Page 209 of 276
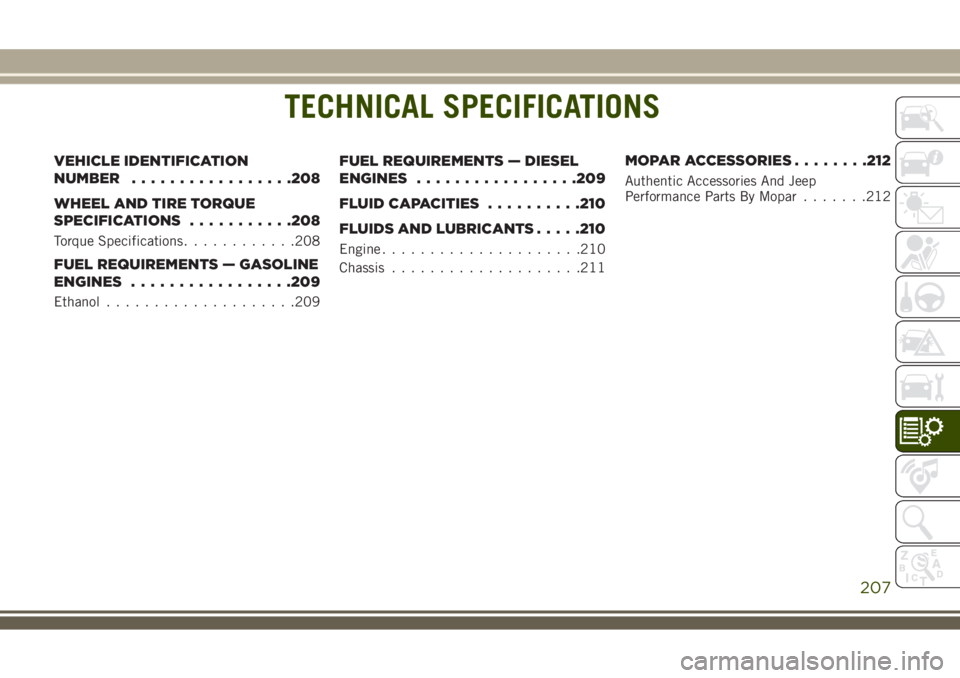
TECHNICAL SPECIFICATIONS
VEHICLE IDENTIFICATION
NUMBER.................208
WHEEL AND TIRE TORQUE
SPECIFICATIONS...........208
Torque Specifications............208
FUEL REQUIREMENTS — GASOLINE
ENGINES.................209
Ethanol....................209
FUEL REQUIREMENTS — DIESEL
ENGINES.................209
FLUID CAPACITIES..........210
FLUIDS AND LUBRICANTS.....210
Engine.....................210
Chassis....................211
MOPAR ACCESSORIES........212
Authentic Accessories And Jeep
Performance Parts By Mopar.......212
TECHNICAL SPECIFICATIONS
207
Page 210 of 276
VEHICLE IDENTIFICATION
NUMBER
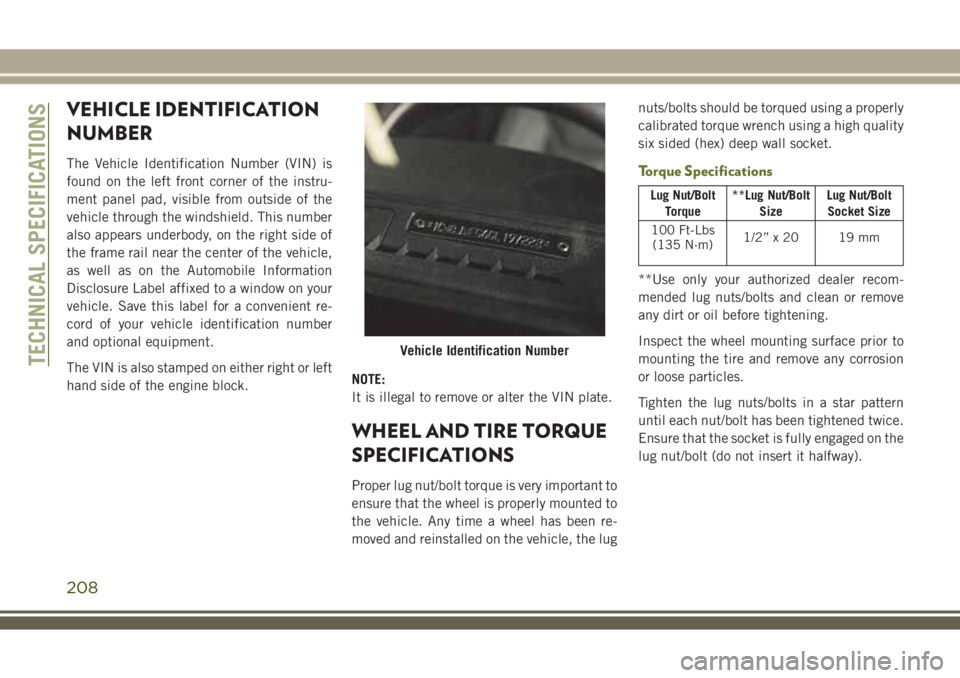
The Vehicle Identification Number (VIN) is
found on the left front corner of the instru-
ment panel pad, visible from outside of the
vehicle through the windshield. This number
also appears underbody, on the right side of
the frame rail near the center of the vehicle,
as well as on the Automobile Information
Disclosure Label affixed to a window on your
vehicle. Save this label for a convenient re-
cord of your vehicle identification number
and optional equipment.
The VIN is also stamped on either right or left
hand side of the engine block.NOTE:
It is illegal to remove or alter the VIN plate.
WHEEL AND TIRE TORQUE
SPECIFICATIONS
Proper lug nut/bolt torque is very important to
ensure that the wheel is properly mounted to
the vehicle. Any time a wheel has been re-
moved and reinstalled on the vehicle, the lugnuts/bolts should be torqued using a properly
calibrated torque wrench using a high quality
six sided (hex) deep wall socket.
Torque Specifications
Lug Nut/Bolt
Torque**Lug Nut/Bolt
SizeLug Nut/Bolt
Socket Size
100 Ft-Lbs
(135 N·m)1/2” x 20 19 mm
**Use only your authorized dealer recom-
mended lug nuts/bolts and clean or remove
any dirt or oil before tightening.
Inspect the wheel mounting surface prior to
mounting the tire and remove any corrosion
or loose particles.
Tighten the lug nuts/bolts in a star pattern
until each nut/bolt has been tightened twice.
Ensure that the socket is fully engaged on the
lug nut/bolt (do not insert it halfway).
Vehicle Identification NumberTECHNICAL SPECIFICATIONS
208
Page 212 of 276
FLUID CAPACITIES
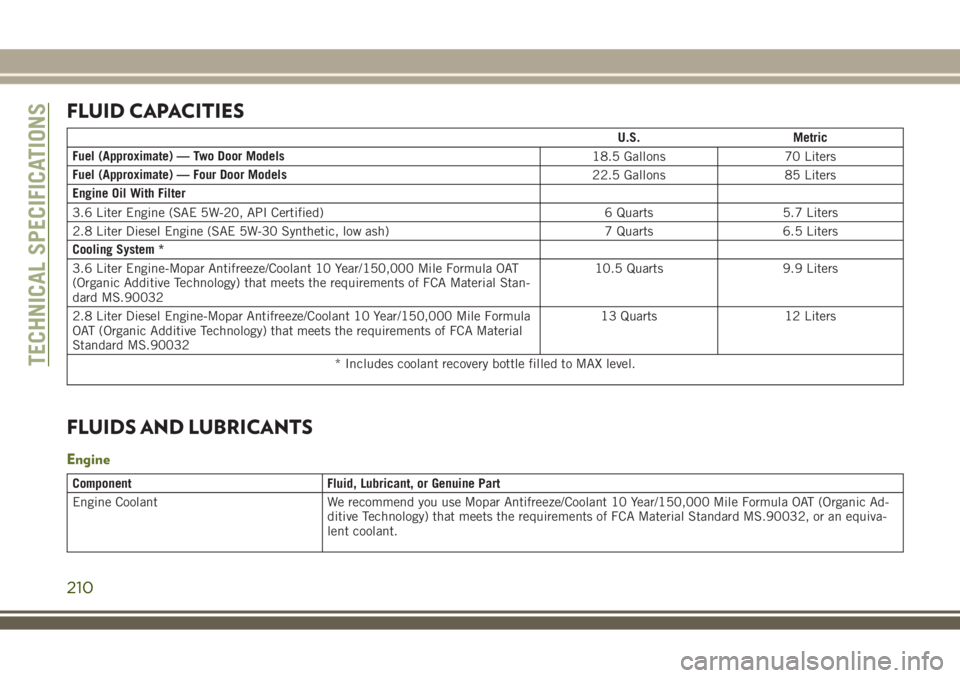
U.S. Metric
Fuel (Approximate) — Two Door Models
18.5 Gallons 70 Liters
Fuel (Approximate) — Four Door Models
22.5 Gallons 85 Liters
Engine Oil With Filter
3.6 Liter Engine (SAE 5W-20, API Certified) 6 Quarts 5.7 Liters
2.8 Liter Diesel Engine (SAE 5W-30 Synthetic, low ash) 7 Quarts 6.5 Liters
Cooling System *
3.6 Liter Engine-Mopar Antifreeze/Coolant 10 Year/150,000 Mile Formula OAT
(Organic Additive Technology) that meets the requirements of FCA Material Stan-
dard MS.9003210.5 Quarts 9.9 Liters
2.8 Liter Diesel Engine-Mopar Antifreeze/Coolant 10 Year/150,000 Mile Formula
OAT (Organic Additive Technology) that meets the requirements of FCA Material
Standard MS.9003213 Quarts 12 Liters
* Includes coolant recovery bottle filled to MAX level.
FLUIDS AND LUBRICANTS
Engine
Component Fluid, Lubricant, or Genuine Part
Engine Coolant We recommend you use Mopar Antifreeze/Coolant 10 Year/150,000 Mile Formula OAT (Organic Ad-
ditive Technology) that meets the requirements of FCA Material Standard MS.90032, or an equiva-
lent coolant.
TECHNICAL SPECIFICATIONS
210
Page 214 of 276
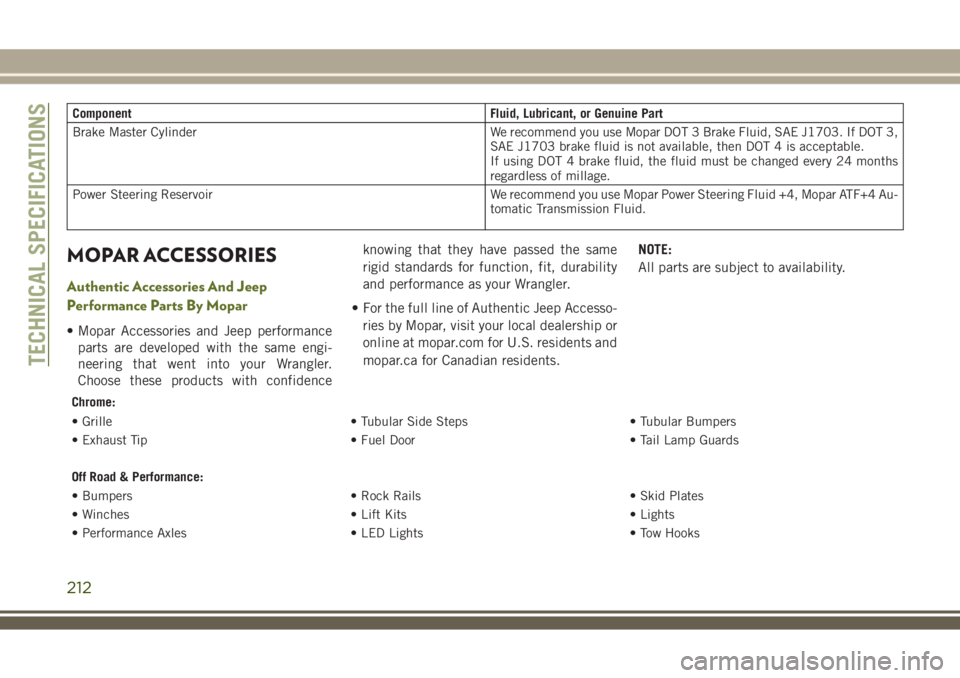
Component Fluid, Lubricant, or Genuine Part
Brake Master Cylinder We recommend you use Mopar DOT 3 Brake Fluid, SAE J1703. If DOT 3,
SAE J1703 brake fluid is not available, then DOT 4 is acceptable.
If using DOT 4 brake fluid, the fluid must be changed every 24 months
regardless of millage.
Power Steering Reservoir We recommend you use Mopar Power Steering Fluid +4, Mopar ATF+4 Au-
tomatic Transmission Fluid.
MOPAR ACCESSORIES
Authentic Accessories And Jeep
Performance Parts By Mopar
• Mopar Accessories and Jeep performance
parts are developed with the same engi-
neering that went into your Wrangler.
Choose these products with confidenceknowing that they have passed the same
rigid standards for function, fit, durability
and performance as your Wrangler.
• For the full line of Authentic Jeep Accesso-
ries by Mopar, visit your local dealership or
online at mopar.com for U.S. residents and
mopar.ca for Canadian residents.NOTE:
All parts are subject to availability.
Chrome:
• Grille • Tubular Side Steps • Tubular Bumpers
• Exhaust Tip • Fuel Door • Tail Lamp Guards
Off Road & Performance:
• Bumpers • Rock Rails • Skid Plates
• Winches • Lift Kits • Lights
• Performance Axles • LED Lights • Tow Hooks
TECHNICAL SPECIFICATIONS
212