ESC JEEP WRANGLER 2023 Owner's Manual
[x] Cancel search | Manufacturer: JEEP, Model Year: 2023, Model line: WRANGLER, Model: JEEP WRANGLER 2023Pages: 396, PDF Size: 25.15 MB
Page 138 of 396
136STARTING AND OPERATING
(Continued)
DOWNSHIFTING
Moving from a high gear down to a lower gear is
recommended to preserve brakes when driving down
steep hills. In addition, downshifting at the right time
provides better acceleration when you desire to resume
speed. Downshift progressively. Do not skip gears to avoid
overspeeding the engine and clutch.
NOTE:The manual transmission shift system is equipped with
gear blockers, which will prevent downshifts into FIRST or
SECOND gear above certain vehicle speeds.
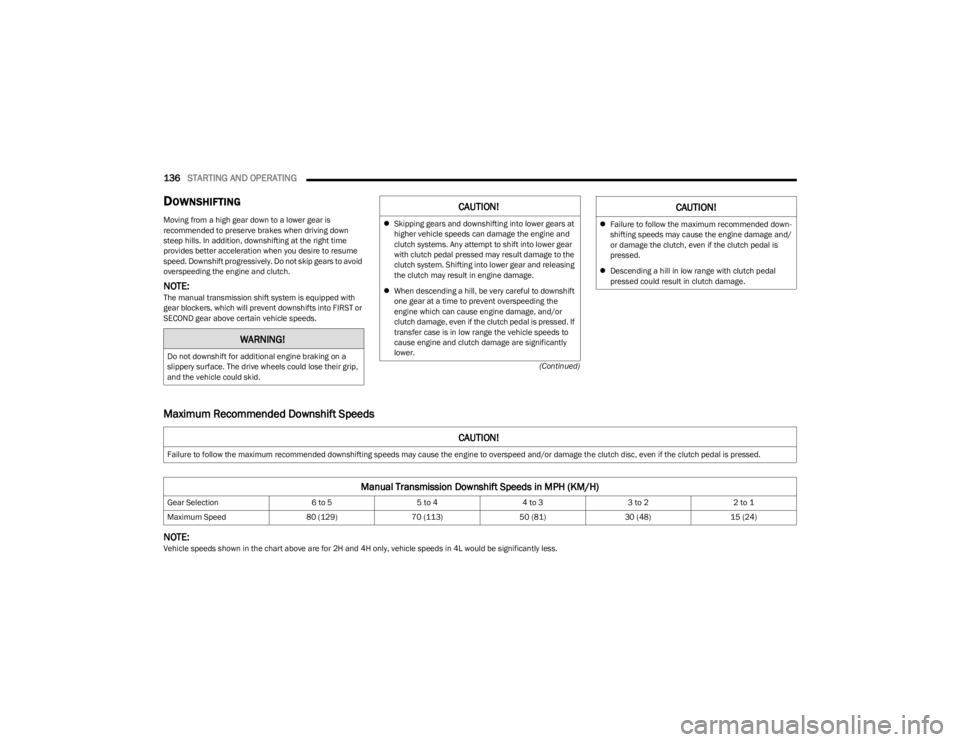
Maximum Recommended Downshift Speeds
NOTE:Vehicle speeds shown in the chart above are for 2H and 4H only, vehicle speeds in 4L would be significantly less.
WARNING!
Do not downshift for additional engine braking on a
slippery surface. The drive wheels could lose their grip,
and the vehicle could skid.
CAUTION!
Skipping gears and downshifting into lower gears at
higher vehicle speeds can damage the engine and
clutch systems. Any attempt to shift into lower gear
with clutch pedal pressed may result damage to the
clutch system. Shifting into lower gear and releasing
the clutch may result in engine damage.
When descending a hill, be very careful to downshift
one gear at a time to prevent overspeeding the
engine which can cause engine damage, and/or
clutch damage, even if the clutch pedal is pressed. If
transfer case is in low range the vehicle speeds to
cause engine and clutch damage are significantly
lower.Failure to follow the maximum recommended down-
shifting speeds may cause the engine damage and/
or damage the clutch, even if the clutch pedal is
pressed.
Descending a hill in low range with clutch pedal
pressed could result in clutch damage.
CAUTION!
CAUTION!
Failure to follow the maximum recommended downshifting speeds may cause the engine to overspeed and/or damage the clutch disc, even if the clutch pedal is pressed.
Manual Transmission Downshift Speeds in MPH (KM/H)
Gear Selection 6 to 55 to 44 to 33 to 22 to 1
Maximum Speed 80 (129)70 (113) 50 (81)30 (48)15 (24)
23_JL_OM_EN_USC_t.book Page 136
Page 142 of 396
140STARTING AND OPERATING
In the event of a momentary problem, the transmission
can be reset to regain all forward gears by performing the
following steps:
NOTE:
In cases where the instrument cluster message indi -
cates the transmission may not re-engage after engine
shutdown, perform this procedure only in a desired
location (preferably, at an authorized dealer).
Even if the transmission can be reset, we recommend
that you visit an authorized dealer at your earliest
possible convenience. An authorized dealer has diag-
nostic equipment to assess the condition of your trans -
mission.
If the transmission cannot be reset, authorized dealer
service is required.
1. Stop the vehicle.
2. Shift the transmission into PARK, if possible. If not, shift the transmission to NEUTRAL.
3. Push and hold the ignition switch until the engine turns off.
4. Wait approximately 30 seconds.
5. Restart the engine.
6. Shift into the desired gear range. If the problem is no longer detected, the transmission will return to
normal operation.
AutoStick
AutoStick is a driver-interactive transmission feature
providing manual shift control, giving you more control of
the vehicle. AutoStick allows you to maximize engine
braking, eliminate undesirable upshifts and downshifts, and improve overall vehicle performance. This feature can
also provide you with more control during passing, city
driving, cold slippery conditions, mountain driving, trailer
towing, and many other situations.
Operation
To activate AutoStick mode, move the gear selector into
the MANUAL (M) position (beside the DRIVE position). The
current transmission gear will be displayed in the
instrument cluster. In AutoStick mode, you can use the
gear selector (in the MANUAL position) to manually shift
the transmission.
AutoStick mode has the following operational benefits:
The transmission will automatically downshift as the
vehicle slows (to prevent engine lugging) and will
display the current gear.
The transmission will automatically downshift to FIRST
gear when coming to a stop. After a stop, the driver
should manually upshift (+) the transmission as the
vehicle is accelerated.
You can start out, from a stop, in FIRST or SECOND gear
(or THIRD gear, in 4L range). Tapping (+) (at a stop) will
allow starting in SECOND gear. Starting out in SECOND
or THIRD gear can be helpful in snowy or icy conditions.
If a requested downshift would cause the engine to
overspeed, that shift will not occur.
The system will ignore attempts to upshift at too low of
a vehicle speed.
Holding the gear selector in the (-) position will down -
shift the transmission to the lowest gear possible at the
current speed.
Transmission shifting will be more noticeable when
AutoStick is enabled.
The system may revert to automatic shift mode if a
fault or overheat condition is detected.
NOTE:When Hill Descent Control is enabled, AutoStick is not
active.
To disengage AutoStick mode, return the gear selector to
the DRIVE position. You can shift in or out of the AutoStick
position at any time without taking your foot off the
accelerator pedal.
FOUR–WHEEL DRIVE OPERATION
WARNING!
Do not downshift for additional engine braking on a
slippery surface. The drive wheels could lose their grip
and the vehicle could skid, causing a collision or
personal injury.
WARNING!
Failure to engage a transfer case position completely
can cause transfer case damage or loss of power and
vehicle control. You could have a collision. Do not drive
the vehicle unless the transfer case is fully engaged.
23_JL_OM_EN_USC_t.book Page 140
Page 147 of 396
STARTING AND OPERATING145
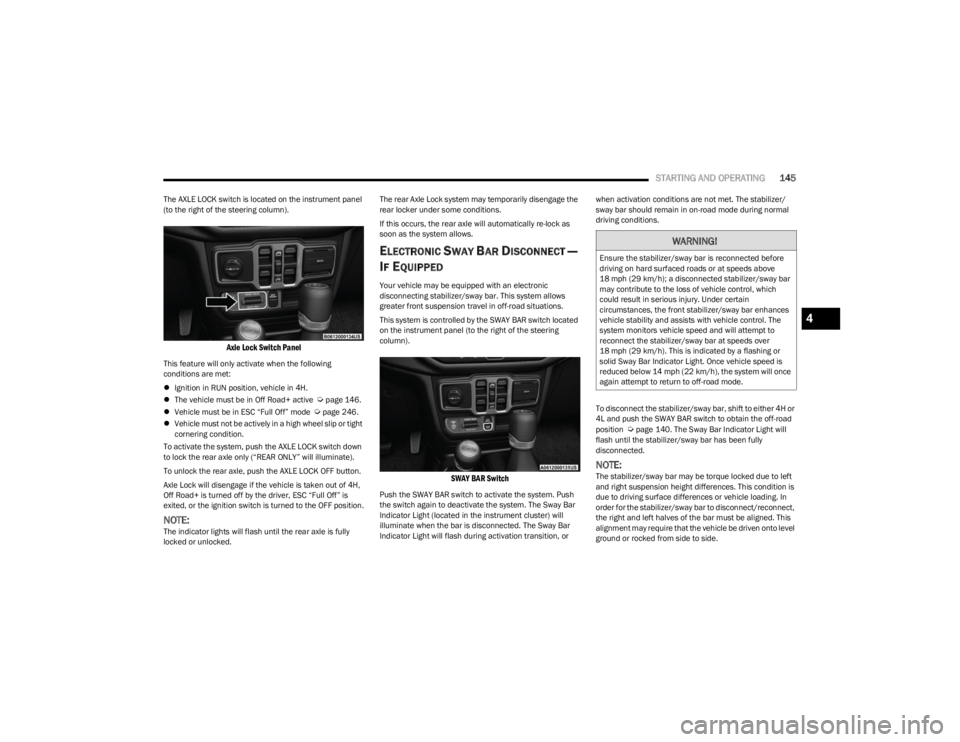
The AXLE LOCK switch is located on the instrument panel
(to the right of the steering column).
Axle Lock Switch Panel
This feature will only activate when the following
conditions are met:
Ignition in RUN position, vehicle in 4H.
The vehicle must be in Off Road+ active
Úpage 146.
Vehicle must be in ESC “Full Off” mode Úpage 246.
Vehicle must not be actively in a high wheel slip or tight
cornering condition.
To activate the system, push the AXLE LOCK switch down
to lock the rear axle only (“REAR ONLY” will illuminate).
To unlock the rear axle, push the AXLE LOCK OFF button.
Axle Lock will disengage if the vehicle is taken out of 4H,
Off Road+ is turned off by the driver, ESC “Full Off” is
exited, or the ignition switch is turned to the OFF position.
NOTE:The indicator lights will flash until the rear axle is fully
locked or unlocked. The rear Axle Lock system may temporarily disengage the
rear locker under some conditions.
If this occurs, the rear axle will automatically re-lock as
soon as the system allows.
ELECTRONIC SWAY BAR DISCONNECT —
I
F EQUIPPED
Your vehicle may be equipped with an electronic
disconnecting stabilizer/sway bar. This system allows
greater front suspension travel in off-road situations.
This system is controlled by the SWAY BAR switch located
on the instrument panel (to the right of the steering
column).
SWAY BAR Switch
Push the SWAY BAR switch to activate the system. Push
the switch again to deactivate the system. The Sway Bar
Indicator Light (located in the instrument cluster) will
illuminate when the bar is disconnected. The Sway Bar
Indicator Light will flash during activation transition, or when activation conditions are not met. The stabilizer/
sway bar should remain in on-road mode during normal
driving conditions.
To disconnect the stabilizer/sway bar, shift to either 4H or
4L and push the SWAY BAR switch to obtain the off-road
position
Úpage 140. The Sway Bar Indicator Light will
flash until the stabilizer/sway bar has been fully
disconnected.
NOTE:The stabilizer/sway bar may be torque locked due to left
and right suspension height differences. This condition is
due to driving surface differences or vehicle loading. In
order for the stabilizer/sway bar to disconnect/reconnect,
the right and left halves of the bar must be aligned. This
alignment may require that the vehicle be driven onto level
ground or rocked from side to side.
WARNING!
Ensure the stabilizer/sway bar is reconnected before
driving on hard surfaced roads or at speeds above
18 mph (29 km/h); a disconnected stabilizer/sway bar may contribute to the loss of vehicle control, which
could result in serious injury. Under certain
circumstances, the front stabilizer/sway bar enhances
vehicle stability and assists with vehicle control. The
system monitors vehicle speed and will attempt to
reconnect the stabilizer/sway bar at speeds over
18 mph (29 km/h). This is indicated by a flashing or solid Sway Bar Indicator Light. Once vehicle speed is
reduced below 14 mph (22 km/h), the system will once
again attempt to return to off-road mode.
4
23_JL_OM_EN_USC_t.book Page 145
Page 148 of 396
146STARTING AND OPERATING
To return to on-road mode, push the SWAY BAR switch
again.
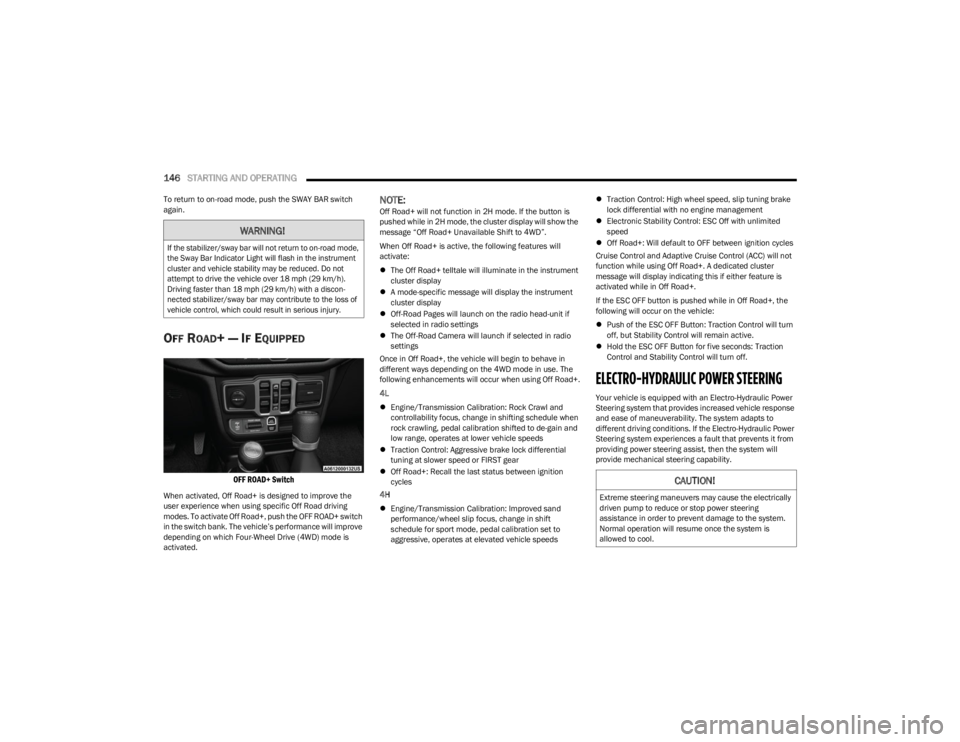
OFF ROAD+ — IF EQUIPPED
OFF ROAD+ Switch
When activated, Off Road+ is designed to improve the
user experience when using specific Off Road driving
modes. To activate Off Road+, push the OFF ROAD+ switch
in the switch bank. The vehicle’s performance will improve
depending on which Four-Wheel Drive (4WD) mode is
activated.
NOTE:Off Road+ will not function in 2H mode. If the button is
pushed while in 2H mode, the cluster display will show the
message “Off Road+ Unavailable Shift to 4WD”.
When Off Road+ is active, the following features will
activate:
The Off Road+ telltale will illuminate in the instrument
cluster display
A mode-specific message will display the instrument
cluster display
Off-Road Pages will launch on the radio head-unit if
selected in radio settings
The Off-Road Camera will launch if selected in radio
settings
Once in Off Road+, the vehicle will begin to behave in
different ways depending on the 4WD mode in use. The
following enhancements will occur when using Off Road+.
4L
Engine/Transmission Calibration: Rock Crawl and
controllability focus, change in shifting schedule when
rock crawling, pedal calibration shifted to de-gain and
low range, operates at lower vehicle speeds
Traction Control: Aggressive brake lock differential
tuning at slower speed or FIRST gear
Off Road+: Recall the last status between ignition
cycles
4H
Engine/Transmission Calibration: Improved sand
performance/wheel slip focus, change in shift
schedule for sport mode, pedal calibration set to
aggressive, operates at elevated vehicle speeds
Traction Control: High wheel speed, slip tuning brake
lock differential with no engine management
Electronic Stability Control: ESC Off with unlimited
speed
Off Road+: Will default to OFF between ignition cycles
Cruise Control and Adaptive Cruise Control (ACC) will not
function while using Off Road+. A dedicated cluster
message will display indicating this if either feature is
activated while in Off Road+.
If the ESC OFF button is pushed while in Off Road+, the
following will occur on the vehicle:
Push of the ESC OFF Button: Traction Control will turn
off, but Stability Control will remain active.
Hold the ESC OFF Button for five seconds: Traction
Control and Stability Control will turn off.
ELECTRO-HYDRAULIC POWER STEERING
Your vehicle is equipped with an Electro-Hydraulic Power
Steering system that provides increased vehicle response
and ease of maneuverability. The system adapts to
different driving conditions. If the Electro-Hydraulic Power
Steering system experiences a fault that prevents it from
providing power steering assist, then the system will
provide mechanical steering capability.
WARNING!
If the stabilizer/sway bar will not return to on-road mode,
the Sway Bar Indicator Light will flash in the instrument
cluster and vehicle stability may be reduced. Do not
attempt to drive the vehicle over 18 mph (29 km/h).
Driving faster than 18 mph (29 km/h) with a discon -
nected stabilizer/sway bar may contribute to the loss of
vehicle control, which could result in serious injury.
CAUTION!
Extreme steering maneuvers may cause the electrically
driven pump to reduce or stop power steering
assistance in order to prevent damage to the system.
Normal operation will resume once the system is
allowed to cool.
23_JL_OM_EN_USC_t.book Page 146
Page 156 of 396

154STARTING AND OPERATING
Adaptive Cruise Control Off
When ACC is deactivated, the display will read “Adaptive
Cruise Control Off.”
Adaptive Cruise Control Ready
When ACC is activated, but the vehicle speed setting has
not been selected, the display will read “Adaptive Cruise
Control Ready.”
Adaptive Cruise Control Set
When the SET (+) or the SET (-) button is pushed, the
display will read “ACC SET.”
When ACC is set, the set speed will show in the instrument
cluster display.
The ACC screen may display once again if any of the
following ACC activity occurs:
System Cancel
Driver Override
System Off
ACC Proximity Warning
ACC Unavailable Warning
The instrument cluster display will return to the last
display selected after five seconds of no ACC display
activity.
Activating Adaptive Cruise Control (ACC)
The minimum set speed for the ACC system is 20 mph
(32 km/h).
When the system is turned on and in the ready state, the
instrument cluster displays “ACC Ready.”
When the system is off, the instrument cluster displays
“Adaptive Cruise Control (ACC) Off.”
NOTE:You cannot engage ACC under the following conditions:
When in 4WD Low
When the brakes are applied
When the parking brake is applied
When the automatic transmission is in PARK, REVERSE
or NEUTRAL
When the manual transmission is in FIRST gear
When the vehicle speed is below 20 mph (32 km/h)
(manual transmission)
When the vehicle speed is below the minimum speed
range
When the brakes are overheated
When the driver’s door is open at low speeds
When the driver’s seat belt is unbuckled at low speeds
When ESC Full Off mode is active
When Off Road+ (if equipped) is active
To Activate/Deactivate
Push and release the Adaptive Cruise Control (ACC) on/off
button. The ACC menu in the instrument cluster display
will read “ACC Ready.”
To turn the system off, push and release the Adaptive
Cruise Control (ACC) on/off button again. At this time, the
system will turn off and the instrument cluster display will
read “Adaptive Cruise Control (ACC) Off.”
To Set A Desired Speed
When the vehicle reaches the speed desired, push the
SET (+) button or the SET (-) button and release. The
instrument cluster display will show the set speed.
NOTE:Fixed Speed Cruise Control can be used without ACC
enabled. To change between the different modes, push
the ACC on/off button which turns the ACC and the Fixed
Speed Cruise Control off. Pushing the Fixed Speed Cruise
Control on/off button will result in turning on (changing to)
Fixed Speed Cruise Control mode.
WARNING!
Leaving the Adaptive Cruise Control (ACC) system on
when not in use is dangerous. You could accidentally
set the system or cause it to go faster than you want.
You could lose control and have a collision. Always leave
the system off when you are not using it.
WARNING!
In Fixed Speed Cruise Control mode, the system will not
react to vehicles ahead. In addition, the proximity
warning does not activate and no alarm will sound even
if you are too close to the vehicle ahead since neither
the presence of the vehicle ahead nor the
vehicle-to-vehicle distance is detected. Be sure to
maintain a safe distance between your vehicle and the
vehicle ahead. Always be aware which mode is
selected.
23_JL_OM_EN_USC_t.book Page 154
Page 157 of 396

STARTING AND OPERATING155
If ACC is set when the vehicle speed is below 20 mph
(32 km/h), the set speed will default to 20 mph
(32 km/h).
NOTE:Fixed Speed Cruise Control cannot be set below 20 mph
(32 km/h).
If either system is set when the vehicle speed is above
20 mph (32 km/h), the set speed shall be the current speed of the vehicle.
On vehicles equipped with a manual transmission, the
ACC system cannot be set when the vehicle speed is below
20 mph (32 km/h) or when the vehicle is in FIRST gear.
NOTE:
Keeping your foot on the accelerator pedal can cause
the vehicle to continue to accelerate beyond the set
speed. If this occurs, the message “DRIVER OVERRIDE”
will display in the instrument cluster display.
If you continue to accelerate beyond the set speed
while ACC is enabled, the system will not be controlling
the distance between your vehicle and the vehicle
ahead. The vehicle speed will only be determined by
the position of the accelerator pedal.
To Cancel
The following conditions cancel the ACC or Fixed Speed
Cruise Control systems:
The brake pedal is applied
The CANC button is pushed
The Anti-Lock Brake System (ABS) activates
The gear selector is removed from the DRIVE position
The Electronic Stability Control/Traction Control
System (ESC/TCS) activates
The vehicle parking brake is applied
The braking temperature exceeds normal range (over -
heated)
The Trailer Sway Control (TSC) activates
The vehicle speed is less than 15 mph (24 km/h)
(manual transmission only)
The clutch is pressed for more than 10 seconds
(manual transmission only)
The vehicle is placed in NEUTRAL for more than
10 seconds (manual transmission only)
The driver shifts to FIRST gear (manual transmission
only)
The following conditions will only cancel the ACC system:
Driver seat belt is unbuckled at low speeds
Driver door is opened at low speeds
To Turn Off
The system will turn off and erase the set speed in
memory if:
The Adaptive Cruise Control (ACC) on/off button is
pushed
The Fixed Speed Cruise Control on/off button is pushed
The ignition is placed in the OFF position
4WD Low is engaged
To Resume
If there is a set speed in the memory, push the RES button
and then remove your foot from the accelerator pedal. The
instrument cluster display will show the last set speed. Resume can be used at any speed above 20 mph
(32 km/h) when only Fixed Speed Cruise Control is being
used.
Resume can be used at any speed above 0 mph (0 km/h)
when ACC is active.
NOTE:
While in ACC mode, when the vehicle comes to a
complete stop longer than two seconds, the system will
cancel. The driver will have to apply the brakes to keep
the vehicle at a standstill.
ACC cannot be resumed if there is a stationary vehicle
in front of your vehicle in close proximity.
To Vary The Speed Setting
To Increase Or Decrease The Set Speed
After setting a speed, you can increase the set speed by
pushing the SET (+) button, or decrease speed by pushing
the SET (-) button.
WARNING!
The Resume function should only be used if traffic and
road conditions permit. Resuming a set speed that is
too high or too low for prevailing traffic and road condi -
tions could cause the vehicle to accelerate or deceler -
ate too sharply for safe operation. Failure to follow
these warnings can result in a collision and death or
serious personal injury.
4
23_JL_OM_EN_USC_t.book Page 155
Page 158 of 396
156STARTING AND OPERATING
U.S. Speed (mph)
Pushing the SET (+), or SET (-) button once will result in
a 1 mph speed adjustment. Each subsequent tap of
the button results in an adjustment of 1 mph.
If the button is continually pushed, the set speed will
continue to adjust in 5 mph increments until the button
is released. The new set speed is reflected in the instru -
ment cluster display.
Metric Speed (km/h)
Pushing the SET (+), or SET (-) button once will result in
a 1 km/h speed adjustment. Each subsequent tap of
the button results in an adjustment of 1 km/h.
If the button is continually pushed, the set speed will
continue to adjust in 10 km/h increments until the
button is released. The new set speed is reflected in
the instrument cluster display.
NOTE:When you override and push the SET (+) button or SET (-)
buttons, the new set speed will be the current speed of the
vehicle.
When ACC Is Active
When you use the SET (-) button to decelerate, if the
engine’s braking power does not slow the vehicle suffi -
ciently to reach the set speed, the brake system will
automatically slow the vehicle.
The ACC system applies the brake down to a full stop
when following the vehicle in front. If your vehicle
follows the vehicle in front to a standstill, your vehicle
will release the brakes two seconds after coming to a
full stop.
The ACC system maintains set speed when driving
uphill and downhill. However, a slight speed change on moderate hills is normal. In addition, downshifting may
occur while climbing uphill or descending downhill. This
is normal operation and necessary to maintain set
speed. When driving uphill and downhill, the ACC
system will cancel if the braking temperature exceeds
normal range (overheated).
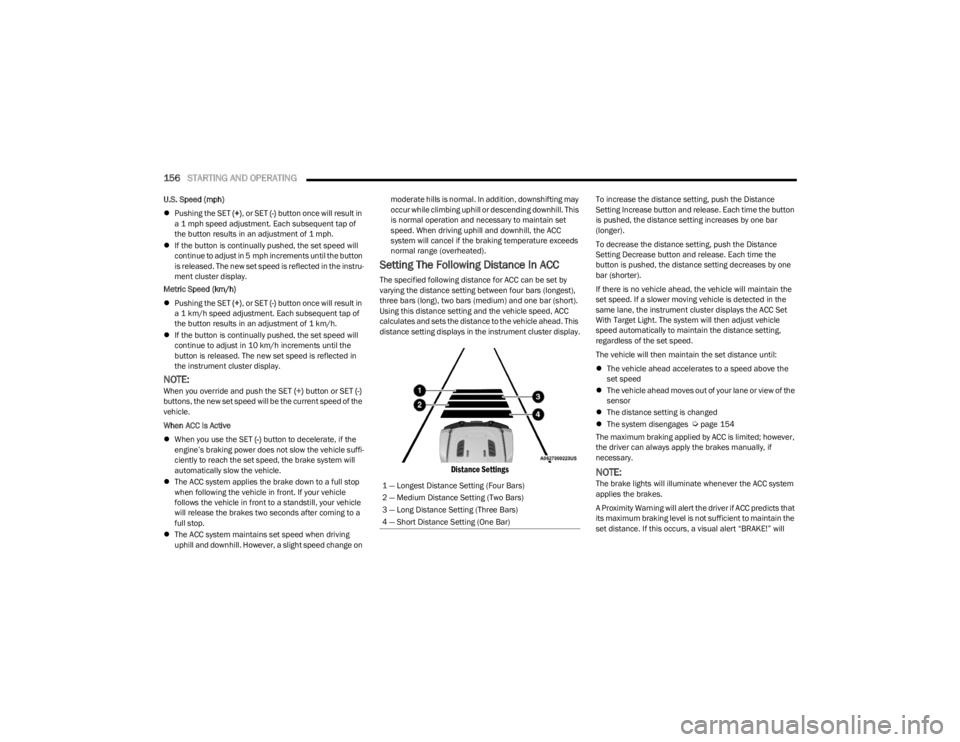
Setting The Following Distance In ACC
The specified following distance for ACC can be set by
varying the distance setting between four bars (longest),
three bars (long), two bars (medium) and one bar (short).
Using this distance setting and the vehicle speed, ACC
calculates and sets the distance to the vehicle ahead. This
distance setting displays in the instrument cluster display.
Distance Settings
To increase the distance setting, push the Distance
Setting Increase button and release. Each time the button
is pushed, the distance setting increases by one bar
(longer).
To decrease the distance setting, push the Distance
Setting Decrease button and release. Each time the
button is pushed, the distance setting decreases by one
bar (shorter).
If there is no vehicle ahead, the vehicle will maintain the
set speed. If a slower moving vehicle is detected in the
same lane, the instrument cluster displays the ACC Set
With Target Light. The system will then adjust vehicle
speed automatically to maintain the distance setting,
regardless of the set speed.
The vehicle will then maintain the set distance until:
The vehicle ahead accelerates to a speed above the
set speed
The vehicle ahead moves out of your lane or view of the
sensor
The distance setting is changed
The system disengages
Úpage 154
The maximum braking applied by ACC is limited; however,
the driver can always apply the brakes manually, if
necessary.
NOTE:The brake lights will illuminate whenever the ACC system
applies the brakes.
A Proximity Warning will alert the driver if ACC predicts that
its maximum braking level is not sufficient to maintain the
set distance. If this occurs, a visual alert “BRAKE!” will
1 — Longest Distance Setting (Four Bars)
2 — Medium Distance Setting (Two Bars)
3 — Long Distance Setting (Three Bars)
4 — Short Distance Setting (One Bar)
23_JL_OM_EN_USC_t.book Page 156
Page 168 of 396
166STARTING AND OPERATING
(Continued)
4. Fill the vehicle with fuel.
NOTE:
When the fuel nozzle “clicks” or shuts off, the fuel
tank is full.
Wait five seconds before removing the fuel nozzle
to allow excess fuel to drain from the nozzle.
5. Remove the fuel nozzle, reinstall fuel cap and close fuel filler door.
NOTE:
When the fuel nozzle “clicks” or shuts off, the fuel tank
is full.
Tighten the fuel filler cap about a quarter turn until you
hear one click. This is an indication that the cap is prop -
erly tightened.
If the fuel filler cap is not tightened properly, the MIL
will come on. Be sure the cap is tightened every time
the vehicle is refueled.
LOOSE FUEL FILLER CAP MESSAGE
After fuel has been added, the vehicle diagnostic system
can determine if the fuel filler cap is possibly loose,
improperly installed, or damaged. If the system detects a
malfunction, the “gASCAP” message will display in the
odometer display. Tighten the gas cap until a "clicking"
sound is heard. This is an indication that the gas cap is
properly tightened. Push the odometer reset button to turn
the message off. If the problem persists, the message will
appear the next time the vehicle is started. This might
indicate a damaged cap. If the problem is detected twice
in a row, the system will turn on the MIL. Resolving the
problem will turn the MIL off.
REFUELING THE VEHICLE — DIESEL ENGINE
(IF EQUIPPED)
The fuel filler cap is located on the driver's side of the
vehicle. If the fuel filler cap is lost or damaged, be sure the
replacement cap is the correct one for this vehicle.
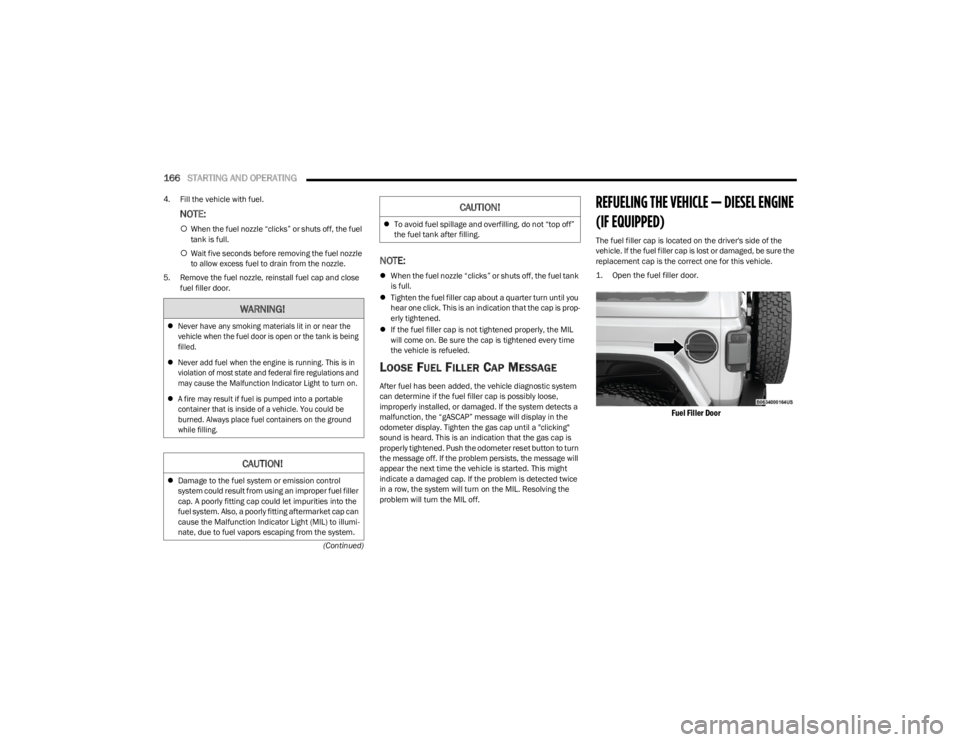
1. Open the fuel filler door.
Fuel Filler Door
WARNING!
Never have any smoking materials lit in or near the
vehicle when the fuel door is open or the tank is being
filled.
Never add fuel when the engine is running. This is in
violation of most state and federal fire regulations and
may cause the Malfunction Indicator Light to turn on.
A fire may result if fuel is pumped into a portable
container that is inside of a vehicle. You could be
burned. Always place fuel containers on the ground
while filling.
CAUTION!
Damage to the fuel system or emission control
system could result from using an improper fuel filler
cap. A poorly fitting cap could let impurities into the
fuel system. Also, a poorly fitting aftermarket cap can
cause the Malfunction Indicator Light (MIL) to illumi -
nate, due to fuel vapors escaping from the system.
To avoid fuel spillage and overfilling, do not “top off”
the fuel tank after filling.
CAUTION!
23_JL_OM_EN_USC_t.book Page 166
Page 173 of 396

STARTING AND OPERATING171
Gross Combination Weight Rating (GCWR)
The GCWR is the total permissible weight of your vehicle
and trailer when weighed in combination.
Gross Axle Weight Rating (GAWR)
The GAWR is the maximum capacity of the front and rear
axles. Distribute the load over the front and rear axles
evenly. Make sure that you do not exceed either front or
rear GAWR
Úpage 169.
Tongue Weight (TW)
The TW is the downward force exerted on the hitch ball by
the trailer. You must consider this as part of the load on
your vehicle.
Frontal Area
The frontal area is the maximum height multiplied by the
maximum width of the front of a trailer.
Trailer Sway Control (TSC) – If Equipped
The TSC is a telescoping link that can be installed between
the hitch receiver and the trailer tongue. It typically
provides adjustable friction associated with the
telescoping motion to dampen any unwanted trailer
swaying motions while traveling.
Weight-Carrying Hitch
A weight-carrying hitch supports the trailer tongue weight,
just as if it were luggage located at a hitch ball or some
other connecting point of the vehicle. These kinds of
hitches are commonly used to tow small and medium
sized trailers.
Weight-Distributing Hitch
A Weight-Distributing Hitch works by applying leverage
through spring (load) bars. They are typically used for
heavier loads to distribute trailer tongue weight to the tow
vehicle's front axle and the trailer axle(s). When used in
accordance with the manufacturer's directions, it provides
for a more level ride, offering more consistent steering and
brake control thereby enhancing towing safety. The
addition of a friction/hydraulic sway control also dampens
sway caused by traffic and crosswinds and contributes
positively to tow vehicle and trailer stability. Trailer sway control and a Weight-Distributing (load equalizing) Hitch
are recommended for heavier Tongue Weights (TW) and
may be required depending on vehicle and trailer
configuration/loading to comply with Gross Axle Weight
Rating (GAWR) requirements.
WARNING!
It is important that you do not exceed the maximum
front or rear GAWR. A dangerous driving condition can
result if either rating is exceeded.
WARNING!
An improperly adjusted Weight Distributing Hitch
system may reduce handling, stability, braking
performance, and could result in a collision.
Weight-Distributing Hitch Systems may not be
compatible with surge brake couplers. Consult with
your hitch and trailer manufacturer or a reputable
Recreational Vehicle dealer for additional informa -
tion.
4
23_JL_OM_EN_USC_t.book Page 171
Page 181 of 396
STARTING AND OPERATING179
(Continued)
The Basics Of Off-Road Driving
You will encounter many types of terrain driving off-road.
You should be familiar with the terrain and area before
proceeding. There are many types of surface conditions:
hard-packed dirt, gravel, rocks, grass, sand, mud, snow
and ice. Every surface has a different effect on your
vehicle's steering, handling and traction. Controlling your
vehicle is one of the keys to successful off-road driving, so
always keep a firm grip on the steering wheel and
maintain a good driving posture. Avoid sudden
accelerations, turns or braking. In most cases, there are
no road signs, posted speed limits or signal lights.
Therefore, you will need to use your own good judgment on
what is safe and what is not. When on a trail, you should
always be looking ahead for surface obstacles and
changes in terrain. The key is to plan your future driving
route while remembering what you are currently driving
over.
NOTE:It is recommended that the Stop/Start system and the
Forward Collision Warning (FCW) system (if equipped) be
disabled during off-road use.
When To Use 4L Range
When off-road driving, shift into 4L for additional traction
and control on slippery or difficult terrain, ascending or
descending steep hills, and to increase low speed pulling
power. This range should be limited to extreme situations
such as deep snow, mud, steep inclines, or sand where
additional low speed pulling power is needed. Vehicle
speeds in excess of 25 mph (40 km/h) should be avoided
when in 4L.
Simultaneous Brake And Throttle
Operation
Many off-road driving conditions require the simultaneous
use of the brake and throttle (two-footed driving). When
climbing rocks, logs, or other stepped objects, using light
brake pressure with light throttle will keep the vehicle from
jerking or lurching. This technique is also used when you
need to stop and restart a vehicle on a steep incline.
Driving In Snow, Mud And Sand
SNOW
In heavy snow or for additional control and traction at
slower speeds, shift the transmission into a low gear and
the transfer case into 4L if necessary. Do not shift to a
lower gear than necessary to maintain headway.
Over-revving the engine can spin the wheels and traction
will be lost. If you start to slow to a stop, try turning your
steering wheel no more than a 1/4 turn quickly back and
forth, while still applying throttle. This will allow the tires to
get fresh traction and help maintain your momentum.
MUD
Deep mud creates a great deal of suction around the tires
and is very difficult to get through. You should use DRIVE,
with the transfer case in the 4L position to maintain your
momentum. If you start to slow to a stop, try turning your
steering wheel no more than a 1/4 turn quickly back and
forth for additional traction. Mud holes pose an increased
threat of vehicle damage and getting stuck. They are
normally full of debris from previous vehicles getting
stuck. As a good practice before entering any mud hole,
get out and determine how deep it is, if there are any
hidden obstacles and if the vehicle can be safely
recovered if stuck.
WARNING!
Always wear your seat belt and firmly tie down cargo.
Unsecured cargo can become projectiles in an
off-road situation.
A malfunctioning catalytic converter can reach higher
temperatures than in normal operating conditions.
This can cause a fire if you drive slowly or park over
flammable substances such as dry plants, wood,
cardboard, etc. This could result in death or serious
injury to the driver, occupants or others.
CAUTION!
Do not use 4L when operating the vehicle on dry
pavement. Driveline hardware damage can result.
WARNING!
CAUTION!
On icy or slippery roads, do not downshift at high engine
RPM or vehicle speeds, because engine braking may
cause skidding and loss of control.
4
23_JL_OM_EN_USC_t.book Page 179