ECO mode JEEP WRANGLER 2023 Owner's Guide
[x] Cancel search | Manufacturer: JEEP, Model Year: 2023, Model line: WRANGLER, Model: JEEP WRANGLER 2023Pages: 396, PDF Size: 25.15 MB
Page 147 of 396
STARTING AND OPERATING145
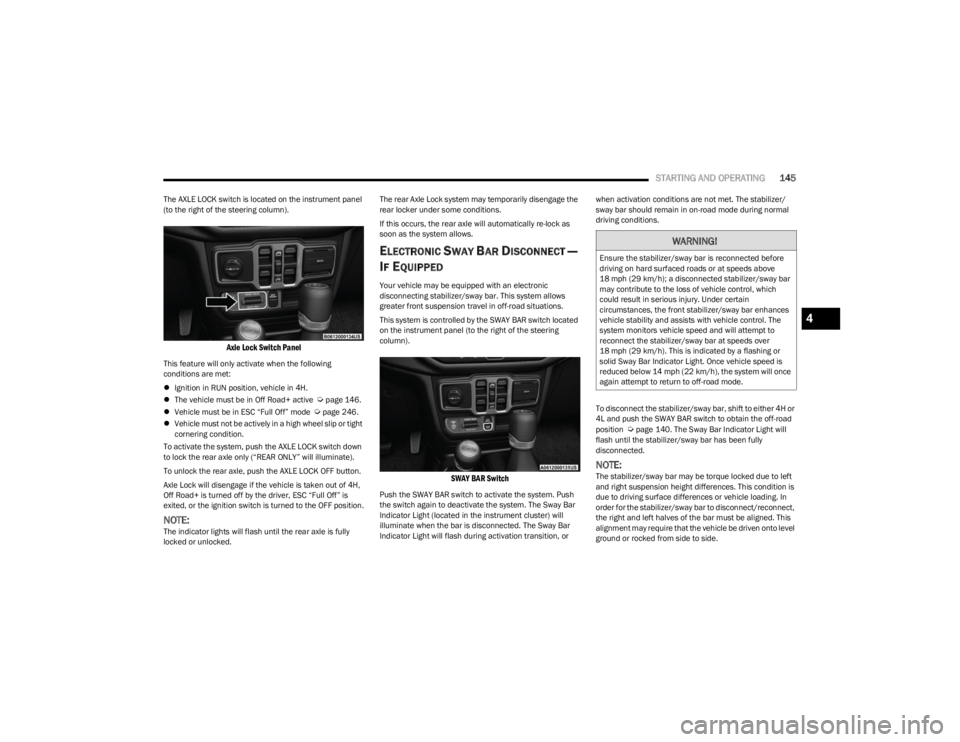
The AXLE LOCK switch is located on the instrument panel
(to the right of the steering column).
Axle Lock Switch Panel
This feature will only activate when the following
conditions are met:
Ignition in RUN position, vehicle in 4H.
The vehicle must be in Off Road+ active
Úpage 146.
Vehicle must be in ESC “Full Off” mode Úpage 246.
Vehicle must not be actively in a high wheel slip or tight
cornering condition.
To activate the system, push the AXLE LOCK switch down
to lock the rear axle only (“REAR ONLY” will illuminate).
To unlock the rear axle, push the AXLE LOCK OFF button.
Axle Lock will disengage if the vehicle is taken out of 4H,
Off Road+ is turned off by the driver, ESC “Full Off” is
exited, or the ignition switch is turned to the OFF position.
NOTE:The indicator lights will flash until the rear axle is fully
locked or unlocked. The rear Axle Lock system may temporarily disengage the
rear locker under some conditions.
If this occurs, the rear axle will automatically re-lock as
soon as the system allows.
ELECTRONIC SWAY BAR DISCONNECT —
I
F EQUIPPED
Your vehicle may be equipped with an electronic
disconnecting stabilizer/sway bar. This system allows
greater front suspension travel in off-road situations.
This system is controlled by the SWAY BAR switch located
on the instrument panel (to the right of the steering
column).
SWAY BAR Switch
Push the SWAY BAR switch to activate the system. Push
the switch again to deactivate the system. The Sway Bar
Indicator Light (located in the instrument cluster) will
illuminate when the bar is disconnected. The Sway Bar
Indicator Light will flash during activation transition, or when activation conditions are not met. The stabilizer/
sway bar should remain in on-road mode during normal
driving conditions.
To disconnect the stabilizer/sway bar, shift to either 4H or
4L and push the SWAY BAR switch to obtain the off-road
position
Úpage 140. The Sway Bar Indicator Light will
flash until the stabilizer/sway bar has been fully
disconnected.
NOTE:The stabilizer/sway bar may be torque locked due to left
and right suspension height differences. This condition is
due to driving surface differences or vehicle loading. In
order for the stabilizer/sway bar to disconnect/reconnect,
the right and left halves of the bar must be aligned. This
alignment may require that the vehicle be driven onto level
ground or rocked from side to side.
WARNING!
Ensure the stabilizer/sway bar is reconnected before
driving on hard surfaced roads or at speeds above
18 mph (29 km/h); a disconnected stabilizer/sway bar may contribute to the loss of vehicle control, which
could result in serious injury. Under certain
circumstances, the front stabilizer/sway bar enhances
vehicle stability and assists with vehicle control. The
system monitors vehicle speed and will attempt to
reconnect the stabilizer/sway bar at speeds over
18 mph (29 km/h). This is indicated by a flashing or solid Sway Bar Indicator Light. Once vehicle speed is
reduced below 14 mph (22 km/h), the system will once
again attempt to return to off-road mode.
4
23_JL_OM_EN_USC_t.book Page 145
Page 148 of 396
146STARTING AND OPERATING
To return to on-road mode, push the SWAY BAR switch
again.
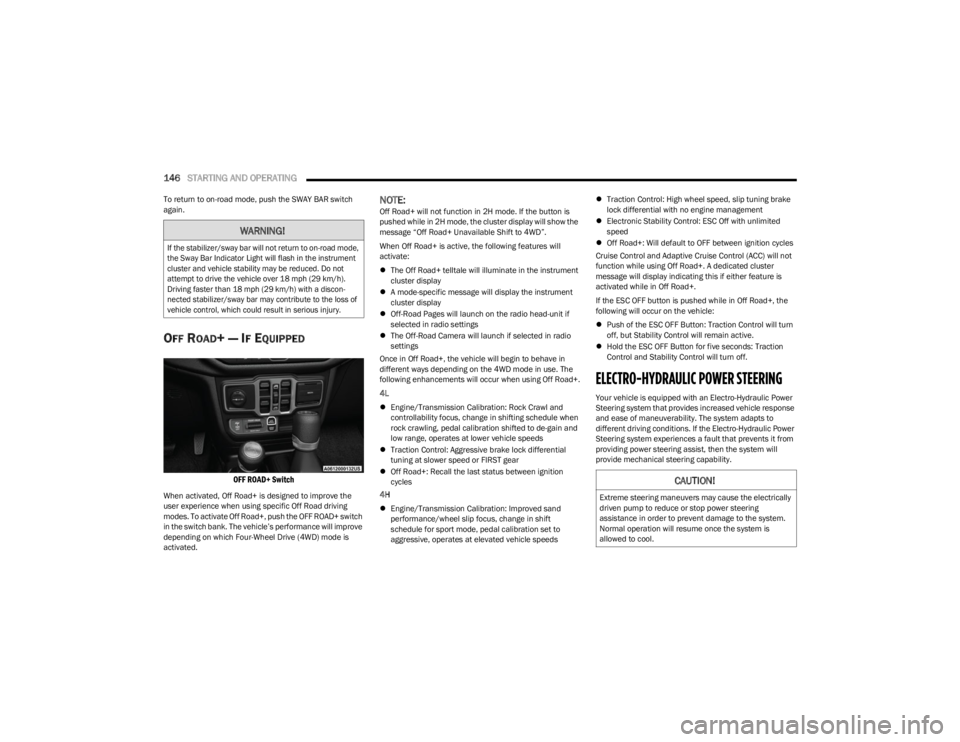
OFF ROAD+ — IF EQUIPPED
OFF ROAD+ Switch
When activated, Off Road+ is designed to improve the
user experience when using specific Off Road driving
modes. To activate Off Road+, push the OFF ROAD+ switch
in the switch bank. The vehicle’s performance will improve
depending on which Four-Wheel Drive (4WD) mode is
activated.
NOTE:Off Road+ will not function in 2H mode. If the button is
pushed while in 2H mode, the cluster display will show the
message “Off Road+ Unavailable Shift to 4WD”.
When Off Road+ is active, the following features will
activate:
The Off Road+ telltale will illuminate in the instrument
cluster display
A mode-specific message will display the instrument
cluster display
Off-Road Pages will launch on the radio head-unit if
selected in radio settings
The Off-Road Camera will launch if selected in radio
settings
Once in Off Road+, the vehicle will begin to behave in
different ways depending on the 4WD mode in use. The
following enhancements will occur when using Off Road+.
4L
Engine/Transmission Calibration: Rock Crawl and
controllability focus, change in shifting schedule when
rock crawling, pedal calibration shifted to de-gain and
low range, operates at lower vehicle speeds
Traction Control: Aggressive brake lock differential
tuning at slower speed or FIRST gear
Off Road+: Recall the last status between ignition
cycles
4H
Engine/Transmission Calibration: Improved sand
performance/wheel slip focus, change in shift
schedule for sport mode, pedal calibration set to
aggressive, operates at elevated vehicle speeds
Traction Control: High wheel speed, slip tuning brake
lock differential with no engine management
Electronic Stability Control: ESC Off with unlimited
speed
Off Road+: Will default to OFF between ignition cycles
Cruise Control and Adaptive Cruise Control (ACC) will not
function while using Off Road+. A dedicated cluster
message will display indicating this if either feature is
activated while in Off Road+.
If the ESC OFF button is pushed while in Off Road+, the
following will occur on the vehicle:
Push of the ESC OFF Button: Traction Control will turn
off, but Stability Control will remain active.
Hold the ESC OFF Button for five seconds: Traction
Control and Stability Control will turn off.
ELECTRO-HYDRAULIC POWER STEERING
Your vehicle is equipped with an Electro-Hydraulic Power
Steering system that provides increased vehicle response
and ease of maneuverability. The system adapts to
different driving conditions. If the Electro-Hydraulic Power
Steering system experiences a fault that prevents it from
providing power steering assist, then the system will
provide mechanical steering capability.
WARNING!
If the stabilizer/sway bar will not return to on-road mode,
the Sway Bar Indicator Light will flash in the instrument
cluster and vehicle stability may be reduced. Do not
attempt to drive the vehicle over 18 mph (29 km/h).
Driving faster than 18 mph (29 km/h) with a discon -
nected stabilizer/sway bar may contribute to the loss of
vehicle control, which could result in serious injury.
CAUTION!
Extreme steering maneuvers may cause the electrically
driven pump to reduce or stop power steering
assistance in order to prevent damage to the system.
Normal operation will resume once the system is
allowed to cool.
23_JL_OM_EN_USC_t.book Page 146
Page 149 of 396
STARTING AND OPERATING147
If the “SERVICE POWER STEERING” message and a
flashing icon are displayed on the instrument cluster
screen, it indicates that the vehicle needs to be taken to
an authorized dealer for service. It is likely the vehicle has
lost power steering assistance
Úpage 108.
If the “POWER STEERING HOT” message and an icon are
displayed on the instrument cluster screen, it indicates
that extreme steering maneuvers may have occurred,
which caused an over temperature condition in the power
steering system. You will lose power steering assistance
momentarily until the over temperature condition no
longer exists. Once driving conditions are safe, pull over
and let vehicle idle for a few moments until the light turns
off
Úpage 108.
NOTE:
Even if power steering assistance is no longer opera -
tional, it is still possible to steer the vehicle. Under
these conditions there will be a substantial increase in
steering effort, especially at very low vehicle speeds
and during parking maneuvers.
If the condition persists, see an authorized dealer for
service.
STOP/START SYSTEM — AUTOMATIC
TRANSMISSION (IF EQUIPPED)
The Engine Stop/Start (ESS) function is designed to
reduce fuel consumption. The system will stop the engine
automatically during a vehicle stop if the required
conditions are met. Releasing the brake pedal or pressing
the accelerator pedal will automatically restart the engine. ESS vehicles have been upgraded with a heavy-duty
starter, enhanced battery, and other upgraded engine
parts, to handle the additional engine starts. Vehicles
equipped with eTorque contain a heavy-duty motor
generator and an additional hybrid electric battery to store
energy from vehicle deceleration for use on engine startup
after a stop as well as providing launch torque assist.
NOTE:It is recommended that Stop/Start system be disabled
during off-road use.
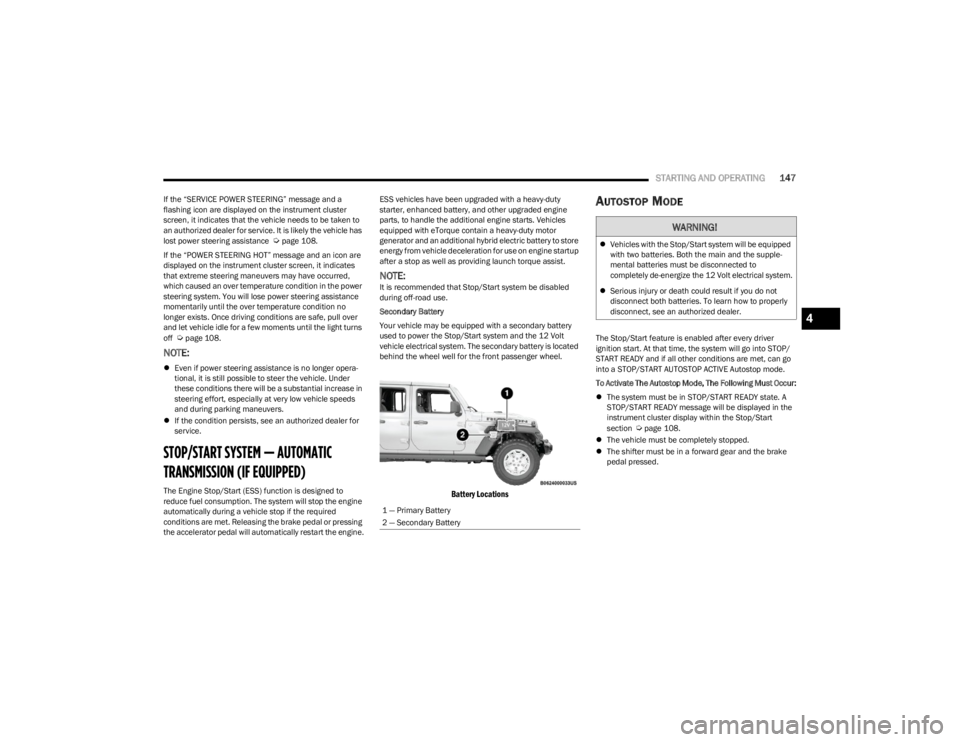
Secondary Battery
Your vehicle may be equipped with a secondary battery
used to power the Stop/Start system and the 12 Volt
vehicle electrical system. The secondary battery is located
behind the wheel well for the front passenger wheel.
Battery Locations
AUTOSTOP MODE
The Stop/Start feature is enabled after every driver
ignition start. At that time, the system will go into STOP/
START READY and if all other conditions are met, can go
into a STOP/START AUTOSTOP ACTIVE Autostop mode.
To Activate The Autostop Mode, The Following Must Occur:
The system must be in STOP/START READY state. A
STOP/START READY message will be displayed in the
instrument cluster display within the Stop/Start
section
Úpage 108.
The vehicle must be completely stopped.
The shifter must be in a forward gear and the brake
pedal pressed.
1 — Primary Battery
2 — Secondary Battery
WARNING!
Vehicles with the Stop/Start system will be equipped
with two batteries. Both the main and the supple -
mental batteries must be disconnected to
completely de-energize the 12 Volt electrical system.
Serious injury or death could result if you do not
disconnect both batteries. To learn how to properly
disconnect, see an authorized dealer.
4
23_JL_OM_EN_USC_t.book Page 147
Page 151 of 396
STARTING AND OPERATING149
TO MANUALLY TURN ON THE STOP/
S
TART SYSTEM
Push the Stop/Start OFF switch (located on the switch
bank). The light on the switch will turn off.
SYSTEM MALFUNCTION
If there is a malfunction in the Stop/Start system, the
system will not shut down the engine. A “SERVICE STOP/
START SYSTEM” message and a yellow Stop/Start telltale
will appear in the Instrument Cluster Display
Úpage 108.
If the “SERVICE STOP/START SYSTEM” message appears
in the instrument cluster display, have the system
checked by an authorized dealer.
If a malfunction occurs during an autostop, the vehicle
may not auto start and will need a key start.
STOP/START SYSTEM — MANUAL
TRANSMISSION (IF EQUIPPED)
The Engine Stop/Start (ESS) function is designed to
reduce fuel consumption. The system will stop the engine
automatically during a vehicle stop if the required
conditions are met. Pressing the clutch pedal will
automatically restart the vehicle.
ESS vehicles have been upgraded with a heavy-duty
starter, enhanced battery, and other upgraded engine
parts, to handle the additional engine starts. Vehicles
equipped with eTorque contain a heavy duty motor generator and an additional hybrid electric battery to store
energy from vehicle deceleration for use on engine startup
after a stop as well as providing launch torque assist.
NOTE:It is recommended that Stop/Start be disabled during
off-road use.
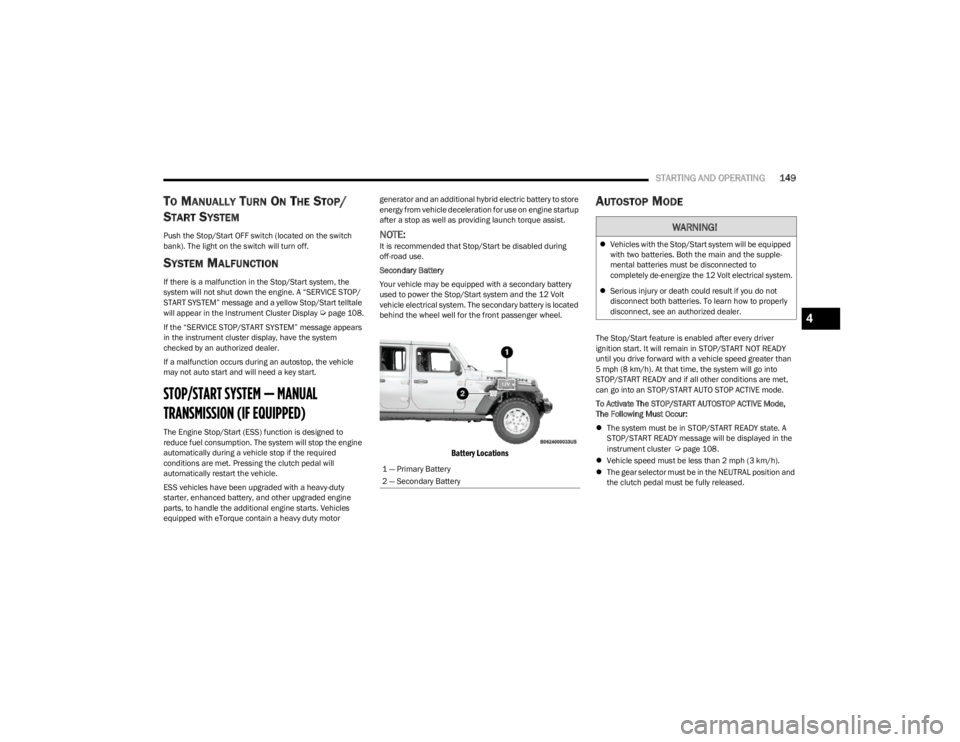
Secondary Battery
Your vehicle may be equipped with a secondary battery
used to power the Stop/Start system and the 12 Volt
vehicle electrical system. The secondary battery is located
behind the wheel well for the front passenger wheel.
Battery Locations
AUTOSTOP MODE
The Stop/Start feature is enabled after every driver
ignition start. It will remain in STOP/START NOT READY
until you drive forward with a vehicle speed greater than
5 mph (8 km/h). At that time, the system will go into
STOP/START READY and if all other conditions are met,
can go into an STOP/START AUTO STOP ACTIVE mode.
To Activate The STOP/START AUTOSTOP ACTIVE Mode,
The Following Must Occur:
The system must be in STOP/START READY state. A
STOP/START READY message will be displayed in the
instrument cluster
Úpage 108.
Vehicle speed must be less than 2 mph (3 km/h).
The gear selector must be in the NEUTRAL position and
the clutch pedal must be fully released.
1 — Primary Battery
2 — Secondary Battery
WARNING!
Vehicles with the Stop/Start system will be equipped
with two batteries. Both the main and the supple -
mental batteries must be disconnected to
completely de-energize the 12 Volt electrical system.
Serious injury or death could result if you do not
disconnect both batteries. To learn how to properly
disconnect, see an authorized dealer.
4
23_JL_OM_EN_USC_t.book Page 149
Page 156 of 396
154STARTING AND OPERATING
Adaptive Cruise Control Off
When ACC is deactivated, the display will read “Adaptive
Cruise Control Off.”
Adaptive Cruise Control Ready
When ACC is activated, but the vehicle speed setting has
not been selected, the display will read “Adaptive Cruise
Control Ready.”
Adaptive Cruise Control Set
When the SET (+) or the SET (-) button is pushed, the
display will read “ACC SET.”
When ACC is set, the set speed will show in the instrument
cluster display.
The ACC screen may display once again if any of the
following ACC activity occurs:
System Cancel
Driver Override
System Off
ACC Proximity Warning
ACC Unavailable Warning
The instrument cluster display will return to the last
display selected after five seconds of no ACC display
activity.
Activating Adaptive Cruise Control (ACC)
The minimum set speed for the ACC system is 20 mph
(32 km/h).
When the system is turned on and in the ready state, the
instrument cluster displays “ACC Ready.”
When the system is off, the instrument cluster displays
“Adaptive Cruise Control (ACC) Off.”
NOTE:You cannot engage ACC under the following conditions:
When in 4WD Low
When the brakes are applied
When the parking brake is applied
When the automatic transmission is in PARK, REVERSE
or NEUTRAL
When the manual transmission is in FIRST gear
When the vehicle speed is below 20 mph (32 km/h)
(manual transmission)
When the vehicle speed is below the minimum speed
range
When the brakes are overheated
When the driver’s door is open at low speeds
When the driver’s seat belt is unbuckled at low speeds
When ESC Full Off mode is active
When Off Road+ (if equipped) is active
To Activate/Deactivate
Push and release the Adaptive Cruise Control (ACC) on/off
button. The ACC menu in the instrument cluster display
will read “ACC Ready.”
To turn the system off, push and release the Adaptive
Cruise Control (ACC) on/off button again. At this time, the
system will turn off and the instrument cluster display will
read “Adaptive Cruise Control (ACC) Off.”
To Set A Desired Speed
When the vehicle reaches the speed desired, push the
SET (+) button or the SET (-) button and release. The
instrument cluster display will show the set speed.
NOTE:Fixed Speed Cruise Control can be used without ACC
enabled. To change between the different modes, push
the ACC on/off button which turns the ACC and the Fixed
Speed Cruise Control off. Pushing the Fixed Speed Cruise
Control on/off button will result in turning on (changing to)
Fixed Speed Cruise Control mode.
WARNING!
Leaving the Adaptive Cruise Control (ACC) system on
when not in use is dangerous. You could accidentally
set the system or cause it to go faster than you want.
You could lose control and have a collision. Always leave
the system off when you are not using it.
WARNING!
In Fixed Speed Cruise Control mode, the system will not
react to vehicles ahead. In addition, the proximity
warning does not activate and no alarm will sound even
if you are too close to the vehicle ahead since neither
the presence of the vehicle ahead nor the
vehicle-to-vehicle distance is detected. Be sure to
maintain a safe distance between your vehicle and the
vehicle ahead. Always be aware which mode is
selected.
23_JL_OM_EN_USC_t.book Page 154
Page 157 of 396
STARTING AND OPERATING155
If ACC is set when the vehicle speed is below 20 mph
(32 km/h), the set speed will default to 20 mph
(32 km/h).
NOTE:Fixed Speed Cruise Control cannot be set below 20 mph
(32 km/h).
If either system is set when the vehicle speed is above
20 mph (32 km/h), the set speed shall be the current speed of the vehicle.
On vehicles equipped with a manual transmission, the
ACC system cannot be set when the vehicle speed is below
20 mph (32 km/h) or when the vehicle is in FIRST gear.
NOTE:
Keeping your foot on the accelerator pedal can cause
the vehicle to continue to accelerate beyond the set
speed. If this occurs, the message “DRIVER OVERRIDE”
will display in the instrument cluster display.
If you continue to accelerate beyond the set speed
while ACC is enabled, the system will not be controlling
the distance between your vehicle and the vehicle
ahead. The vehicle speed will only be determined by
the position of the accelerator pedal.
To Cancel
The following conditions cancel the ACC or Fixed Speed
Cruise Control systems:
The brake pedal is applied
The CANC button is pushed
The Anti-Lock Brake System (ABS) activates
The gear selector is removed from the DRIVE position
The Electronic Stability Control/Traction Control
System (ESC/TCS) activates
The vehicle parking brake is applied
The braking temperature exceeds normal range (over -
heated)
The Trailer Sway Control (TSC) activates
The vehicle speed is less than 15 mph (24 km/h)
(manual transmission only)
The clutch is pressed for more than 10 seconds
(manual transmission only)
The vehicle is placed in NEUTRAL for more than
10 seconds (manual transmission only)
The driver shifts to FIRST gear (manual transmission
only)
The following conditions will only cancel the ACC system:
Driver seat belt is unbuckled at low speeds
Driver door is opened at low speeds
To Turn Off
The system will turn off and erase the set speed in
memory if:
The Adaptive Cruise Control (ACC) on/off button is
pushed
The Fixed Speed Cruise Control on/off button is pushed
The ignition is placed in the OFF position
4WD Low is engaged
To Resume
If there is a set speed in the memory, push the RES button
and then remove your foot from the accelerator pedal. The
instrument cluster display will show the last set speed. Resume can be used at any speed above 20 mph
(32 km/h) when only Fixed Speed Cruise Control is being
used.
Resume can be used at any speed above 0 mph (0 km/h)
when ACC is active.
NOTE:
While in ACC mode, when the vehicle comes to a
complete stop longer than two seconds, the system will
cancel. The driver will have to apply the brakes to keep
the vehicle at a standstill.
ACC cannot be resumed if there is a stationary vehicle
in front of your vehicle in close proximity.
To Vary The Speed Setting
To Increase Or Decrease The Set Speed
After setting a speed, you can increase the set speed by
pushing the SET (+) button, or decrease speed by pushing
the SET (-) button.
WARNING!
The Resume function should only be used if traffic and
road conditions permit. Resuming a set speed that is
too high or too low for prevailing traffic and road condi -
tions could cause the vehicle to accelerate or deceler -
ate too sharply for safe operation. Failure to follow
these warnings can result in a collision and death or
serious personal injury.
4
23_JL_OM_EN_USC_t.book Page 155
Page 158 of 396
156STARTING AND OPERATING
U.S. Speed (mph)
Pushing the SET (+), or SET (-) button once will result in
a 1 mph speed adjustment. Each subsequent tap of
the button results in an adjustment of 1 mph.
If the button is continually pushed, the set speed will
continue to adjust in 5 mph increments until the button
is released. The new set speed is reflected in the instru -
ment cluster display.
Metric Speed (km/h)
Pushing the SET (+), or SET (-) button once will result in
a 1 km/h speed adjustment. Each subsequent tap of
the button results in an adjustment of 1 km/h.
If the button is continually pushed, the set speed will
continue to adjust in 10 km/h increments until the
button is released. The new set speed is reflected in
the instrument cluster display.
NOTE:When you override and push the SET (+) button or SET (-)
buttons, the new set speed will be the current speed of the
vehicle.
When ACC Is Active
When you use the SET (-) button to decelerate, if the
engine’s braking power does not slow the vehicle suffi -
ciently to reach the set speed, the brake system will
automatically slow the vehicle.
The ACC system applies the brake down to a full stop
when following the vehicle in front. If your vehicle
follows the vehicle in front to a standstill, your vehicle
will release the brakes two seconds after coming to a
full stop.
The ACC system maintains set speed when driving
uphill and downhill. However, a slight speed change on moderate hills is normal. In addition, downshifting may
occur while climbing uphill or descending downhill. This
is normal operation and necessary to maintain set
speed. When driving uphill and downhill, the ACC
system will cancel if the braking temperature exceeds
normal range (overheated).
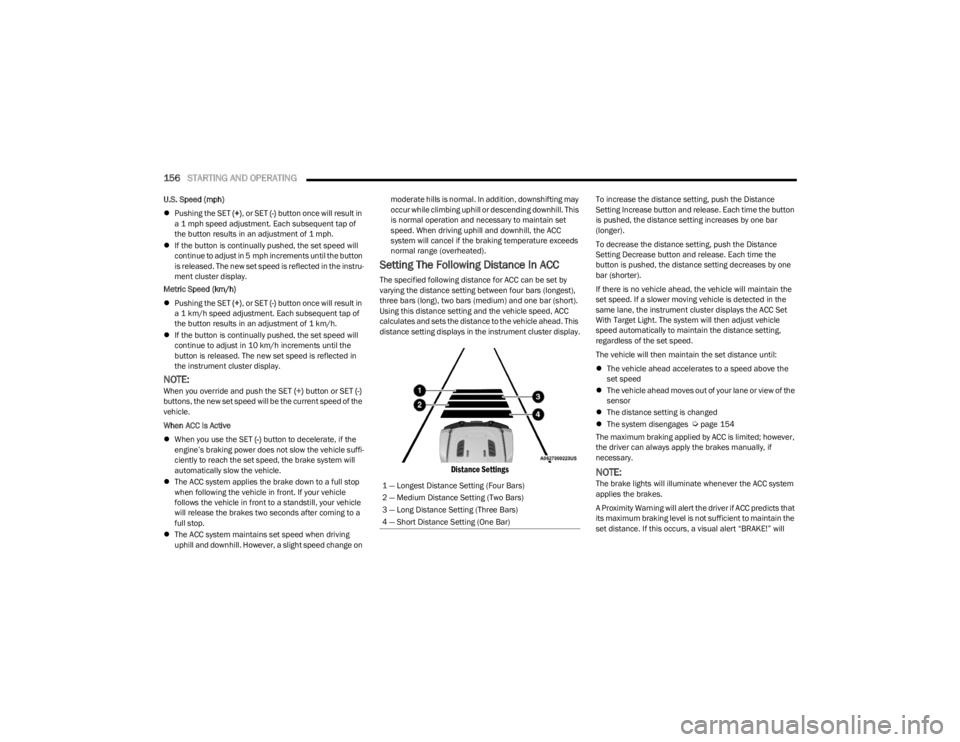
Setting The Following Distance In ACC
The specified following distance for ACC can be set by
varying the distance setting between four bars (longest),
three bars (long), two bars (medium) and one bar (short).
Using this distance setting and the vehicle speed, ACC
calculates and sets the distance to the vehicle ahead. This
distance setting displays in the instrument cluster display.
Distance Settings
To increase the distance setting, push the Distance
Setting Increase button and release. Each time the button
is pushed, the distance setting increases by one bar
(longer).
To decrease the distance setting, push the Distance
Setting Decrease button and release. Each time the
button is pushed, the distance setting decreases by one
bar (shorter).
If there is no vehicle ahead, the vehicle will maintain the
set speed. If a slower moving vehicle is detected in the
same lane, the instrument cluster displays the ACC Set
With Target Light. The system will then adjust vehicle
speed automatically to maintain the distance setting,
regardless of the set speed.
The vehicle will then maintain the set distance until:
The vehicle ahead accelerates to a speed above the
set speed
The vehicle ahead moves out of your lane or view of the
sensor
The distance setting is changed
The system disengages
Úpage 154
The maximum braking applied by ACC is limited; however,
the driver can always apply the brakes manually, if
necessary.
NOTE:The brake lights will illuminate whenever the ACC system
applies the brakes.
A Proximity Warning will alert the driver if ACC predicts that
its maximum braking level is not sufficient to maintain the
set distance. If this occurs, a visual alert “BRAKE!” will
1 — Longest Distance Setting (Four Bars)
2 — Medium Distance Setting (Two Bars)
3 — Long Distance Setting (Three Bars)
4 — Short Distance Setting (One Bar)
23_JL_OM_EN_USC_t.book Page 156
Page 166 of 396
164STARTING AND OPERATING
(Continued)
When the vehicle is shifted out of REVERSE with Camera
delay turned off, the rear Camera mode is exited and the
previous screen appears again.
When the vehicle is shifted out of REVERSE with Camera
delay turned on, the rear Camera image will be displayed
for up to 10 seconds unless the vehicle speed exceeds
8 mph (13 km/h), the transmission is shifted into PARK,
the ignition is placed in the OFF position, or the
touchscreen X button to disable display of the Rear View
Camera image is pressed.
Whenever the Rear View Camera image is activated
through the Back Up Camera button in the Controls menu,
and the vehicle speed is greater than, or equal to, 8 mph
(13 km/h), a display timer for the image is initiated. The
image will continue to be displayed until the display timer
exceeds 10 seconds.
NOTE:
If the vehicle speed remains below 8 mph (13 km/h),
the Rear View Camera image will be displayed continu -
ously until deactivated via the touchscreen X button,
the transmission is shifted into PARK, or the ignition is
placed in the OFF position.
The touchscreen X button to disable display of the
camera image is made available ONLY when the
vehicle is not in REVERSE.
When enabled, active guidelines are overlaid on the image
to illustrate the width of the vehicle and its projected back
up path based on the steering wheel position. A dashed
center line overlay indicates the center of the vehicle to
assist with parking or aligning to a hitch/receiver.
When enabled, fixed guidelines are overlaid on the image
to illustrate the width of the vehicle. Different colored zones indicate the distance to the rear of
the vehicle.
The following table shows the approximate distances for
each zone:
NOTE:If snow, ice, mud, or any foreign substance builds up on
the camera lens, clean the lens, rinse with water, and dry
with a soft cloth. Do not cover the lens.
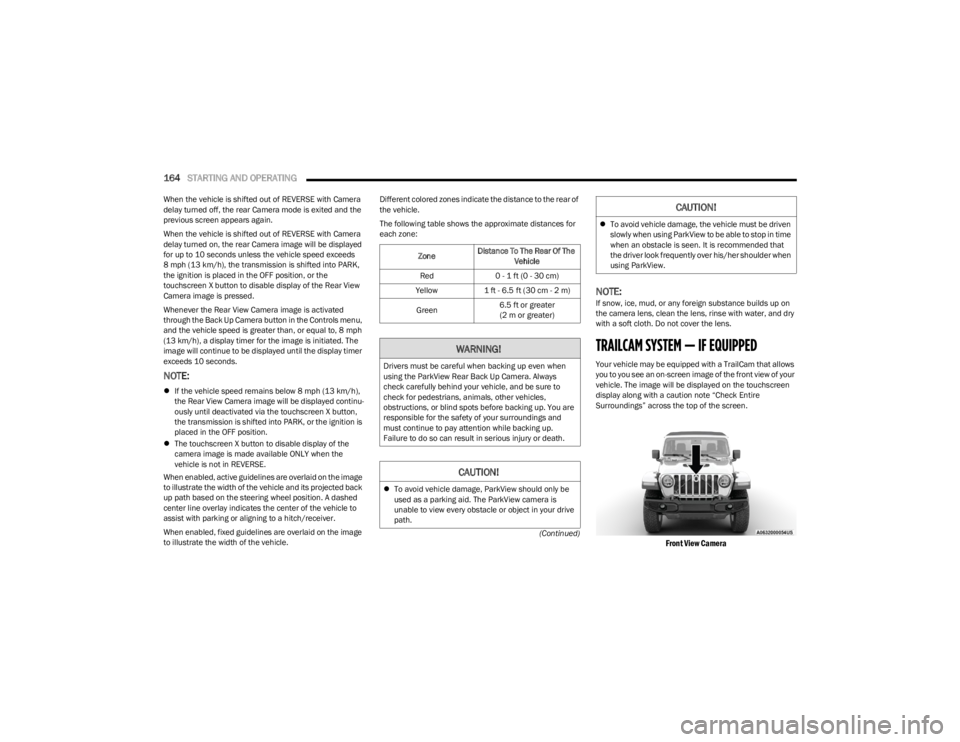
TRAILCAM SYSTEM — IF EQUIPPED
Your vehicle may be equipped with a TrailCam that allows
you to you see an on-screen image of the front view of your
vehicle. The image will be displayed on the touchscreen
display along with a caution note “Check Entire
Surroundings” across the top of the screen.
Front View Camera
Zone
Distance To The Rear Of The
Vehicle
Red 0 - 1 ft (0 - 30 cm)
Yellow 1 ft - 6.5 ft (30 cm - 2 m)
Green 6.5 ft or greater
(2 m or greater)
WARNING!
Drivers must be careful when backing up even when
using the ParkView Rear Back Up Camera. Always
check carefully behind your vehicle, and be sure to
check for pedestrians, animals, other vehicles,
obstructions, or blind spots before backing up. You are
responsible for the safety of your surroundings and
must continue to pay attention while backing up.
Failure to do so can result in serious injury or death.
CAUTION!
To avoid vehicle damage, ParkView should only be
used as a parking aid. The ParkView camera is
unable to view every obstacle or object in your drive
path.
To avoid vehicle damage, the vehicle must be driven
slowly when using ParkView to be able to stop in time
when an obstacle is seen. It is recommended that
the driver look frequently over his/her shoulder when
using ParkView.
CAUTION!
23_JL_OM_EN_USC_t.book Page 164
Page 167 of 396
STARTING AND OPERATING165
NOTE:The system will stay active while in 4WD Low.
The TrailCam system has programmable settings that may
be selected through the Uconnect system
Úpage 184.
Manual Activation Of The TrailCam
TrailCam view can be activated via the below methods:
Press the FWD Camera button on the controls screen.
Press the Forward Facing Camera button on the apps
menu.
Press the TrailCam button on the Off Road Pages.
Press the Off Road+ button when “Auto Launch Off
Road+” (if equipped) has been selected under camera
settings.
The TrailCam view can also be activated by pressing the icon on the Back Up Camera view. The Back Up
Camera view can also be activated by pressing the
icon on the TrailCam view.
When the vehicle is shifted out of REVERSE with Camera
Delay turned off and TrailCam view is active, the TrailCam
mode is exited and the previous screen appears again.
When the vehicle is shifted out of REVERSE with Camera
Delay turned on and the TrailCam view is active, the
TrailCam image will be displayed for up to 10 seconds
unless the vehicle speed exceeds 8 mph (13 km/h), the
transmission is shifted into PARK, the ignition is placed in
the OFF position, or the touchscreen X button to disable
display of the TrailCam view is pressed.
Whenever the TrailCam image is activated through the
Manual Activation Methods, and the vehicle speed is
greater than or equal to 8 mph (13 km/h), a display timer for the image is initiated. The image will continue to be
displayed until the display timer exceeds 10 seconds.
NOTE:
If the vehicle speed remains below 8 mph (13 km/h)
while in 2WD or 4WD High, the TrailCam image will be
displayed continuously until deactivated via the touch -
screen X button, the transmission is shifted into PARK,
or the ignition is placed in the OFF position.
The touchscreen X button to disable the display of the
camera image is made available ONLY when the
vehicle is not in REVERSE.
The TrailCam view will stay active regardless of the
vehicle speed and time while in 4WD Low.
Cleaning The TrailCam
Press and hold the Clean Camera button located on the
TrailCam view to wash the TrailCam. Washer fluid will stop
when the button is released.
The camera can be washed up to 20 seconds at a time
while holding the button.
The Clean Camera system is not available when wind -
shield washing is in process.
When enabled, active dynamic tire lines are projected on
the ground plane of the TrailCam view based on the
steering wheel position.
REFUELING THE VEHICLE — GASOLINE
ENGINE (IF EQUIPPED)
FUEL FILLER CAP
The fuel filler cap is located on the driver's side of the
vehicle. If the fuel filler cap is lost or damaged, be sure the
replacement cap is the correct one for this vehicle.
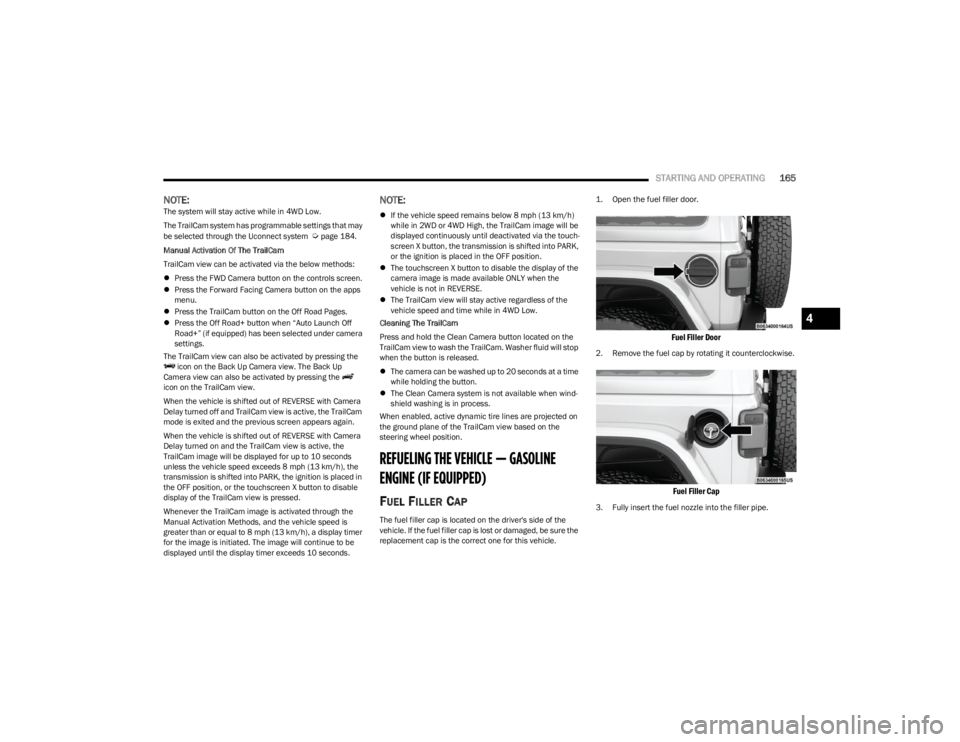
1. Open the fuel filler door.
Fuel Filler Door
2. Remove the fuel cap by rotating it counterclockwise.
Fuel Filler Cap
3. Fully insert the fuel nozzle into the filler pipe.
4
23_JL_OM_EN_USC_t.book Page 165
Page 188 of 396

186MULTIMEDIA
Display Brightness With Headlights ON/Brightness This setting will allow you to set the brightness when the headlights are on. To access this
setting, Display Mode must be set to Manual. The “+” setting will increase the brightness;
the “-” will decrease the brightness.
Display Brightness With Headlights OFF/Brightness This setting will allow you to set the brightness when the headlights are off. To access this
setting, Display Mode must be set to Manual. The “+” setting will increase the brightness;
the “-” will decrease the brightness.
Set Theme This setting will allow you to change the display theme.
Touchscreen Beep This setting will allow you to turn the touchscreen beep on or off.
Control Screen Timeout This setting allows you to set the Control Screen to turn off automatically after five
seconds or stay open until manually closed.
Navigation Turn-by-Turn Displayed in Cluster This setting will display navigation prompts in the Instrument Cluster Display.
Phone Pop-ups Displayed in Cluster This setting will display smartphone notifications and messages in the Instrument Cluster
Display.
Auto Launch with Off-Road+ This setting will determine how the Off-Road feature is launched through the radio when
turning the vehicle on. The options are “Off”, “Forward Camera” (if equipped), and “Off
Road Pages”.
SiriusXM® Travel Link Weather Alerts This setting will turn the weather alerts on or off.
Setting Name Description
23_JL_OM_EN_USC_t.book Page 186