lug pattern JEEP WRANGLER 2023 Owners Manual
[x] Cancel search | Manufacturer: JEEP, Model Year: 2023, Model line: WRANGLER, Model: JEEP WRANGLER 2023Pages: 396, PDF Size: 25.15 MB
Page 117 of 396
GETTING TO KNOW YOUR INSTRUMENT PANEL115
When load reduction is activated, the message “Battery
Saver On” or “Battery Saver Mode” will appear in the
instrument cluster display.
These messages indicate the vehicle battery has a low
state of charge and continues to lose electrical charge at
a rate that the charging system cannot sustain.
NOTE:
The charging system is independent from load reduc -
tion. The charging system performs a diagnostic on the
charging system continuously.
If the Battery Charge Warning Light is on it may indicate
a problem with the charging system
Úpage 117.
The electrical loads that may be switched off (if equipped),
and vehicle functions which can be effected by load
reduction:
Heated Seat/Vented Seats/Heated Wheel
Rear Defroster And Heated Mirrors
HVAC System
150W Power Inverter System
Audio and Telematics System
Loss of the battery charge may indicate one or more of the
following conditions:
The charging system cannot deliver enough electrical
power to the vehicle system because the electrical
loads are larger than the capability of the charging
system. The charging system is still functioning prop -
erly.
Turning on all possible vehicle electrical loads (e.g.
HVAC to max settings, exterior and interior lights, over -
loaded power outlets +12 Volt, 150W, USB ports)
during certain driving conditions (city driving, towing,
frequent stopping).
Installing options like additional lights, upfitter elec -
trical accessories, audio systems, alarms and similar
devices.
Unusual driving cycles (short trips separated by long
parking periods).
The vehicle was parked for an extended period of time
(weeks, months).
The battery was recently replaced and was not charged
completely.
The battery was discharged by an electrical load left on
when the vehicle was parked.
The battery was used for an extended period with the
engine not running to supply radio, lights, chargers,
+12 Volt portable appliances like vacuum cleaner’s,
game consoles and similar devices.
What to do when an electrical load reduction action
message is present (“Battery Saver On” or “Battery Saver
Mode”)
During a trip:
Reduce power to unnecessary loads if possible:
Turn off redundant lights (interior or exterior)
Check what may be plugged in to power outlets
+12 Volt, 150W, USB ports
Check HVAC settings (blower, temperature)
Check the audio settings (volume)
After a trip:
Check if any aftermarket equipment was installed
(additional lights, upfitter electrical accessories, audio
systems, alarms) and review specifications if any (load
and Ignition Off Draw currents).
Evaluate the latest driving cycles (distance, driving
time and parking time).
The vehicle should have service performed if the
message is still present during consecutive trips and
the evaluation of the vehicle and driving pattern did not
help to identify the cause.
DIESEL DISPLAYS
When the appropriate conditions exist, the following
messages display in the instrument cluster display:
Exhaust Filter Nearing Full Safely Drive at Consistent
Speeds to Clear
Exhaust Filter Full – Power Reduced See Dealer
Exhaust System Service Required – See Dealer
Exhaust System – Filter XX% Full Service Required See
Dealer
Exhaust System Regeneration in Process Continue
Driving
Exhaust System – Regeneration Completed
DIESEL PARTICULATE FILTER (DPF)
M
ESSAGES
This engine meets all required diesel engine emissions
standards. To achieve these emissions standards, your
vehicle is equipped with a state-of-the-art engine and
exhaust system. These systems are seamlessly integrated
into your vehicle and managed by the Powertrain Control
Module (PCM). The PCM manages engine combustion to
allow the exhaust system’s catalyst to trap and burn
Particulate Matter (PM) pollutants, with no input or
interaction on your part.
3
23_JL_OM_EN_USC_t.book Page 115
Page 292 of 396
290SAFETY
PERIODIC SAFETY CHECKS YOU SHOULD
M
AKE OUTSIDE THE VEHICLE
Tires
Examine tires for excessive tread wear and uneven wear
patterns. Check for stones, nails, glass, or other objects
lodged in the tread or sidewall. Inspect the tread for cuts
and cracks. Inspect sidewalls for cuts, cracks, and bulges.
Check the lug nut/bolt torque for tightness. Check the
tires (including spare) for proper cold inflation pressure.
Lights
Have someone observe the operation of brake lights and
exterior lights while you work the controls. Check turn
signal and high beam indicator lights on the instrument
panel.
Door Latches
Check for proper closing, latching, and locking.
Fluid Leaks
Check area under vehicle after overnight parking for fuel,
coolant, oil, or other fluid leaks. Also, if gasoline fumes are
detected or if fuel or brake fluid leaks are suspected, the
cause should be located and corrected immediately.
EXHAUST GAS
The best protection against carbon monoxide entry into
the vehicle body is a properly maintained engine exhaust
system.
Whenever a change is noticed in the sound of the exhaust
system, when exhaust fumes can be detected inside the
vehicle, or when the underside or rear of the vehicle is
damaged, have an authorized dealer inspect the complete
exhaust system and adjacent body areas for broken,
damaged, deteriorated, or mispositioned parts. Open seams or loose connections could permit exhaust fumes
to seep into the passenger compartment. In addition,
inspect the exhaust system each time the vehicle is raised
for lubrication or oil change. Replace as required.
CARBON MONOXIDE WARNINGS
WARNING!
Exhaust gases can injure or kill. They contain carbon
monoxide (CO), which is colorless and odorless.
Breathing it can make you unconscious and can
eventually poison you. To avoid breathing (CO), follow
these safety tips:
Do not run the engine in a closed garage or in
confined areas any longer than needed to move your
vehicle in or out of the area.
If you are required to drive with the trunk/liftgate/
rear doors open, make sure that all windows are
closed and the climate control BLOWER switch is set
at high speed. DO NOT use the recirculation mode.
If it is necessary to sit in a parked vehicle with the
engine running, adjust your heating or cooling
controls to force outside air into the vehicle. Set the
blower at high speed.
WARNING!
Carbon monoxide (CO) in exhaust gases is deadly.
Follow the precautions below to prevent carbon
monoxide poisoning:
Do not inhale exhaust gases. They contain carbon
monoxide, a colorless and odorless gas, which can
kill. Never run the engine in a closed area, such as a
garage, and never sit in a parked vehicle with the
engine running for an extended period. If the vehicle
is stopped in an open area with the engine running
for more than a short period, adjust the ventilation
system to force fresh, outside air into the vehicle.
Guard against carbon monoxide with proper mainte -
nance. Have the exhaust system inspected every
time the vehicle is raised. Have any abnormal condi -
tions repaired promptly. Until repaired, drive with all
side windows fully open.
When exiting the vehicle, always make sure the igni -
tion is in the OFF position, remove the key fob from
the vehicle and lock your vehicle.
23_JL_OM_EN_USC_t.book Page 290
Page 299 of 396
IN CASE OF EMERGENCY297
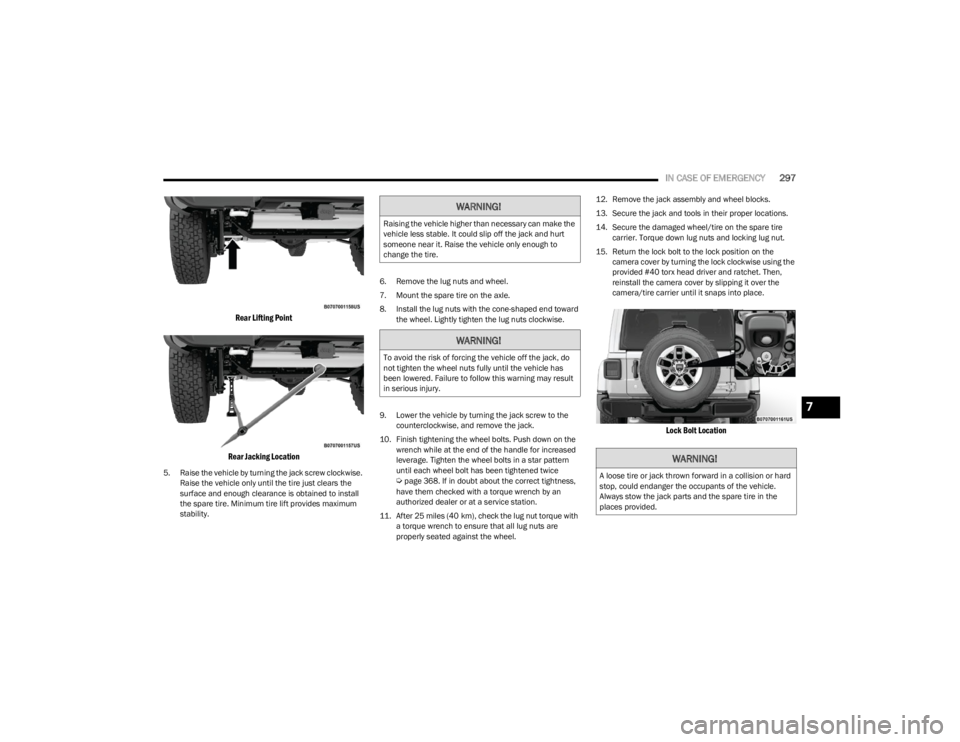
Rear Lifting Point
Rear Jacking Location
5. Raise the vehicle by turning the jack screw clockwise. Raise the vehicle only until the tire just clears the
surface and enough clearance is obtained to install
the spare tire. Minimum tire lift provides maximum
stability. 6. Remove the lug nuts and wheel.
7. Mount the spare tire on the axle.
8. Install the lug nuts with the cone-shaped end toward
the wheel. Lightly tighten the lug nuts clockwise.
9. Lower the vehicle by turning the jack screw to the counterclockwise, and remove the jack.
10. Finish tightening the wheel bolts. Push down on the wrench while at the end of the handle for increased
leverage. Tighten the wheel bolts in a star pattern
until each wheel bolt has been tightened twice Úpage 368. If in doubt about the correct tightness,
have them checked with a torque wrench by an
authorized dealer or at a service station.
11. After 25 miles (40 km), check the lug nut torque with a torque wrench to ensure that all lug nuts are
properly seated against the wheel. 12. Remove the jack assembly and wheel blocks.
13. Secure the jack and tools in their proper locations.
14. Secure the damaged wheel/tire on the spare tire
carrier. Torque down lug nuts and locking lug nut.
15. Return the lock bolt to the lock position on the camera cover by turning the lock clockwise using the
provided #40 torx head driver and ratchet. Then,
reinstall the camera cover by slipping it over the
camera/tire carrier until it snaps into place.
Lock Bolt Location
WARNING!
Raising the vehicle higher than necessary can make the
vehicle less stable. It could slip off the jack and hurt
someone near it. Raise the vehicle only enough to
change the tire.
WARNING!
To avoid the risk of forcing the vehicle off the jack, do
not tighten the wheel nuts fully until the vehicle has
been lowered. Failure to follow this warning may result
in serious injury.
WARNING!
A loose tire or jack thrown forward in a collision or hard
stop, could endanger the occupants of the vehicle.
Always stow the jack parts and the spare tire in the
places provided.
7
23_JL_OM_EN_USC_t.book Page 297
Page 354 of 396
352SERVICING AND MAINTENANCE
(Continued)
TIRES — GENERAL INFORMATION
Tire Pressure
Proper tire inflation pressure is essential to the safe and
satisfactory operation of your vehicle. Four primary areas
are affected by improper tire pressure:
Safety
Fuel Economy
Tread Wear
Ride Comfort and Vehicle Stability
Safety Both underinflation and overinflation affect the stability of
the vehicle and can produce a feeling of sluggish response
or over responsiveness in the steering.
NOTE:
Unequal tire pressures from side to side may cause
erratic and unpredictable steering response.
Unequal tire pressure from side to side may cause the
vehicle to drift left or right.
Fuel Economy
Underinflated tires will increase tire rolling resistance
resulting in higher fuel consumption.
Tread Wear
Improper cold tire inflation pressures can cause abnormal
wear patterns and reduced tread life, resulting in the need
for earlier tire replacement.
Ride Comfort And Vehicle Stability
Proper tire inflation contributes to a comfortable ride.
Overinflation produces a jarring and uncomfortable ride.
Tire Inflation Pressures
The proper cold tire inflation pressure is listed on the
driver's side B-pillar or rear edge of the driver's side door. At least once a month:
Check and adjust tire pressure with a good quality
pocket-type pressure gauge. Do not make a visual
judgement when determining proper inflation. Tires
may look properly inflated even when they are
under-inflated.
Inspect tires for signs of tire wear or visible damage.
Inflation pressures specified on the placard are always
“cold tire inflation pressure”. Cold tire inflation pressure is
defined as the tire pressure after the vehicle has not been
driven for at least three hours, or driven less than 1 mile
(1.6 km) after sitting for a minimum of three hours. The
cold tire inflation pressure must not exceed the maximum
inflation pressure molded into the tire sidewall.
Check tire pressures more often if subject to a wide range
of outdoor temperatures, as tire pressures vary with
temperature changes.
Tire pressures change by approximately 1 psi (7 kPa) per
12°F (7°C) of air temperature change. Keep this in mind
when checking tire pressure inside a garage, especially in
the Winter.
WARNING!
Improperly inflated tires are dangerous and can
cause collisions.
Underinflation increases tire flexing and can result in
overheating and tire failure.
Overinflation reduces a tire's ability to cushion shock.
Objects on the road and chuckholes can cause
damage that result in tire failure.
Overinflated or underinflated tires can affect vehicle
handling and can fail suddenly, resulting in loss of
vehicle control.
Unequal tire pressures can cause steering problems.
You could lose control of your vehicle.
Unequal tire pressures from one side of the vehicle
to the other can cause the vehicle to drift to the right
or left.
Always drive with each tire inflated to the recom -
mended cold tire inflation pressure.
WARNING!
CAUTION!
After inspecting or adjusting the tire pressure, always
reinstall the valve stem cap. This will prevent moisture
and dirt from entering the valve stem, which could
damage the valve stem.
23_JL_OM_EN_USC_t.book Page 352
Page 370 of 396
368
TECHNICAL SPECIFICATIONS
VEHICLE IDENTIFICATION NUMBER (VIN)
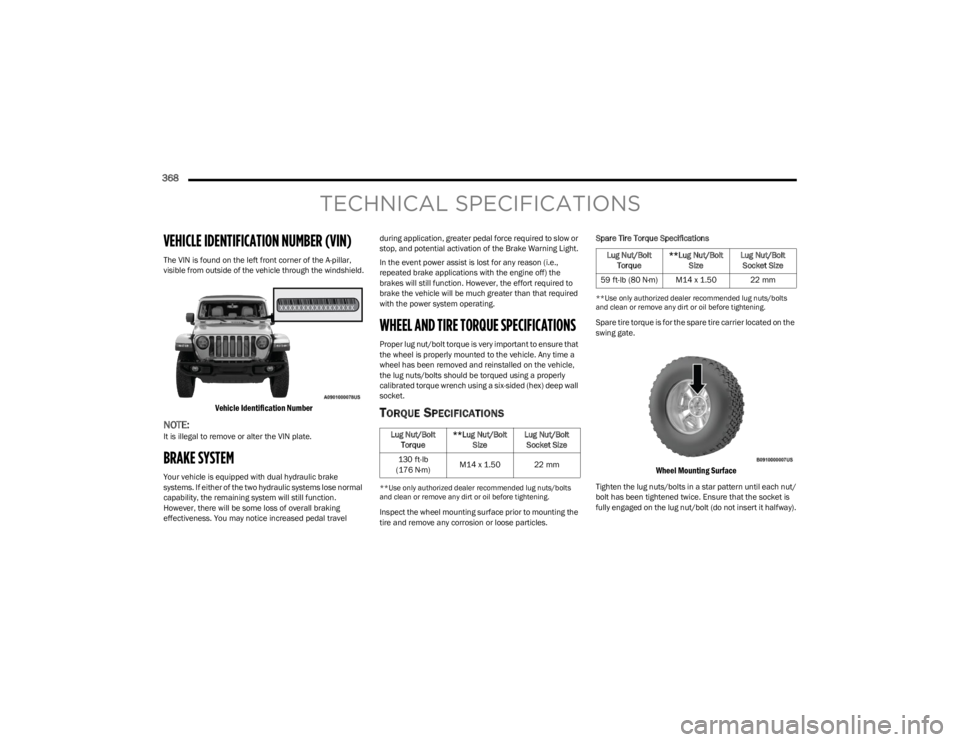
The VIN is found on the left front corner of the A-pillar,
visible from outside of the vehicle through the windshield.
Vehicle Identification Number
NOTE:It is illegal to remove or alter the VIN plate.
BRAKE SYSTEM
Your vehicle is equipped with dual hydraulic brake
systems. If either of the two hydraulic systems lose normal
capability, the remaining system will still function.
However, there will be some loss of overall braking
effectiveness. You may notice increased pedal travel during application, greater pedal force required to slow or
stop, and potential activation of the Brake Warning Light.
In the event power assist is lost for any reason (i.e.,
repeated brake applications with the engine off) the
brakes will still function. However, the effort required to
brake the vehicle will be much greater than that required
with the power system operating.
WHEEL AND TIRE TORQUE SPECIFICATIONS
Proper lug nut/bolt torque is very important to ensure that
the wheel is properly mounted to the vehicle. Any time a
wheel has been removed and reinstalled on the vehicle,
the lug nuts/bolts should be torqued using a properly
calibrated torque wrench using a six-sided (hex) deep wall
socket.
TORQUE SPECIFICATIONS
**Use only authorized dealer recommended lug nuts/bolts
and clean or remove any dirt or oil before tightening.
Inspect the wheel mounting surface prior to mounting the
tire and remove any corrosion or loose particles.Spare Tire Torque Specifications
**Use only authorized dealer recommended lug nuts/bolts
and clean or remove any dirt or oil before tightening.
Spare tire torque is for the spare tire carrier located on the
swing gate.
Wheel Mounting Surface
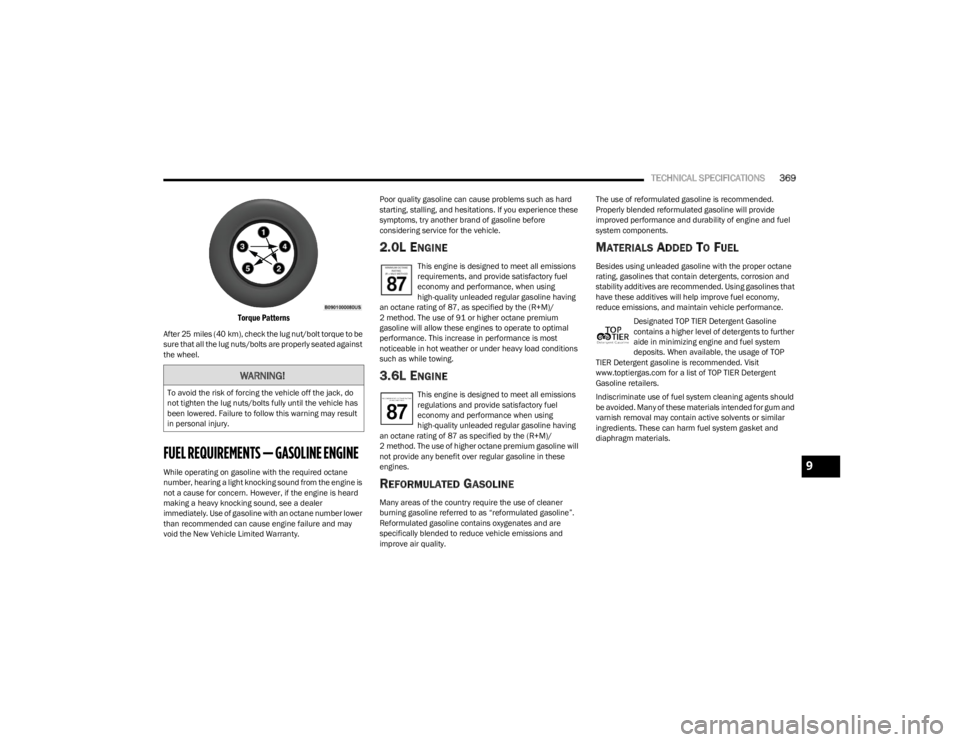
Tighten the lug nuts/bolts in a star pattern until each nut/
bolt has been tightened twice. Ensure that the socket is
fully engaged on the lug nut/bolt (do not insert it halfway).
Lug Nut/Bolt
Torque **Lug Nut/Bolt
Size Lug Nut/Bolt
Socket Size
130 ft-lb
(176 N·m) M14 x 1.50 22 mm
Lug Nut/Bolt
Torque **Lug Nut/Bolt
Size Lug Nut/Bolt
Socket Size
59 ft-lb (80 N·m) M14 x 1.50 22 mm
23_JL_OM_EN_USC_t.book Page 368
Page 371 of 396
TECHNICAL SPECIFICATIONS369
Torque Patterns
After 25 miles (40 km), check the lug nut/bolt torque to be
sure that all the lug nuts/bolts are properly seated against
the wheel.
FUEL REQUIREMENTS — GASOLINE ENGINE
While operating on gasoline with the required octane
number, hearing a light knocking sound from the engine is
not a cause for concern. However, if the engine is heard
making a heavy knocking sound, see a dealer
immediately. Use of gasoline with an octane number lower
than recommended can cause engine failure and may
void the New Vehicle Limited Warranty. Poor quality gasoline can cause problems such as hard
starting, stalling, and hesitations. If you experience these
symptoms, try another brand of gasoline before
considering service for the vehicle.
2.0L ENGINE
This engine is designed to meet all emissions
requirements, and provide satisfactory fuel
economy and performance, when using
high-quality unleaded regular gasoline having
an octane rating of 87, as specified by the (R+M)/
2 method. The use of 91 or higher octane premium
gasoline will allow these engines to operate to optimal
performance. This increase in performance is most
noticeable in hot weather or under heavy load conditions
such as while towing.
3.6L ENGINE
This engine is designed to meet all emissions
regulations and provide satisfactory fuel
economy and performance when using
high-quality unleaded regular gasoline having
an octane rating of 87 as specified by the (R+M)/
2 method. The use of higher octane premium gasoline will
not provide any benefit over regular gasoline in these
engines.
REFORMULATED GASOLINE
Many areas of the country require the use of cleaner
burning gasoline referred to as “reformulated gasoline”.
Reformulated gasoline contains oxygenates and are
specifically blended to reduce vehicle emissions and
improve air quality. The use of reformulated gasoline is recommended.
Properly blended reformulated gasoline will provide
improved performance and durability of engine and fuel
system components.
MATERIALS ADDED TO FUEL
Besides using unleaded gasoline with the proper octane
rating, gasolines that contain detergents, corrosion and
stability additives are recommended. Using gasolines that
have these additives will help improve fuel economy,
reduce emissions, and maintain vehicle performance.
Designated TOP TIER Detergent Gasoline
contains a higher level of detergents to further
aide in minimizing engine and fuel system
deposits. When available, the usage of TOP
TIER Detergent gasoline is recommended. Visit
www.toptiergas.com for a list of TOP TIER Detergent
Gasoline retailers.
Indiscriminate use of fuel system cleaning agents should
be avoided. Many of these materials intended for gum and
varnish removal may contain active solvents or similar
ingredients. These can harm fuel system gasket and
diaphragm materials.
WARNING!
To avoid the risk of forcing the vehicle off the jack, do
not tighten the lug nuts/bolts fully until the vehicle has
been lowered. Failure to follow this warning may result
in personal injury.
9
23_JL_OM_EN_USC_t.book Page 369