mirror controls JEEP WRANGLER 2023 Owners Manual
[x] Cancel search | Manufacturer: JEEP, Model Year: 2023, Model line: WRANGLER, Model: JEEP WRANGLER 2023Pages: 396, PDF Size: 25.15 MB
Page 48 of 396
46GETTING TO KNOW YOUR VEHICLE
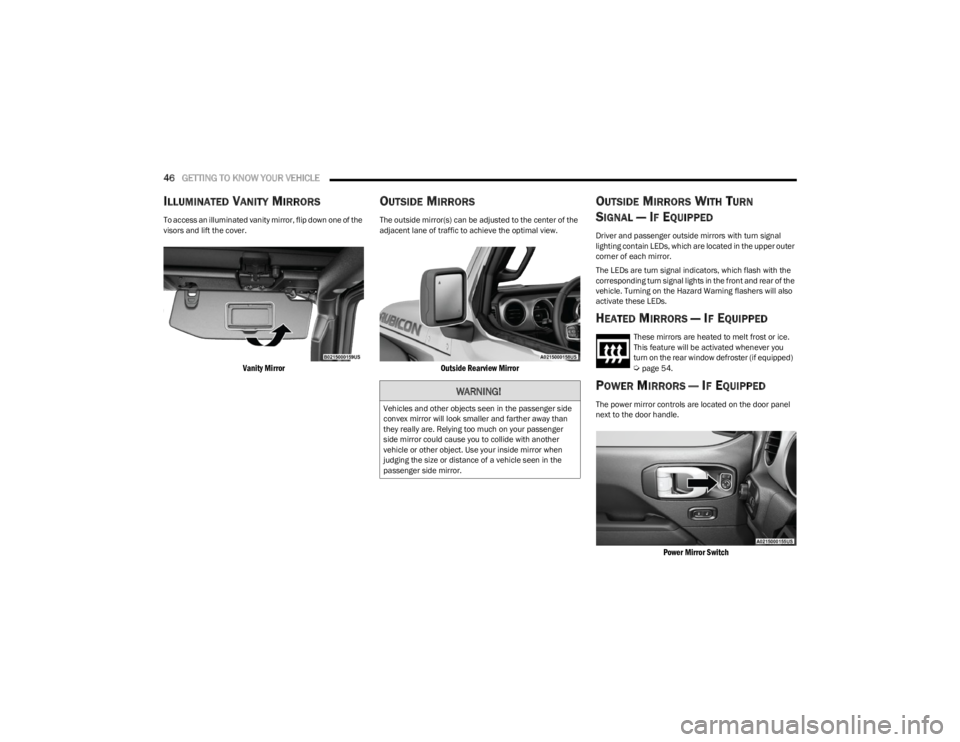
ILLUMINATED VANITY MIRRORS
To access an illuminated vanity mirror, flip down one of the
visors and lift the cover.
Vanity Mirror
OUTSIDE MIRRORS
The outside mirror(s) can be adjusted to the center of the
adjacent lane of traffic to achieve the optimal view.
Outside Rearview Mirror
OUTSIDE MIRRORS WITH TURN
SIGNAL — IF EQUIPPED
Driver and passenger outside mirrors with turn signal
lighting contain LEDs, which are located in the upper outer
corner of each mirror.
The LEDs are turn signal indicators, which flash with the
corresponding turn signal lights in the front and rear of the
vehicle. Turning on the Hazard Warning flashers will also
activate these LEDs.
HEATED MIRRORS — IF EQUIPPED
These mirrors are heated to melt frost or ice.
This feature will be activated whenever you
turn on the rear window defroster (if equipped)
Úpage 54.
POWER MIRRORS — IF EQUIPPED
The power mirror controls are located on the door panel
next to the door handle.
Power Mirror Switch
WARNING!
Vehicles and other objects seen in the passenger side
convex mirror will look smaller and farther away than
they really are. Relying too much on your passenger
side mirror could cause you to collide with another
vehicle or other object. Use your inside mirror when
judging the size or distance of a vehicle seen in the
passenger side mirror.
23_JL_OM_EN_USC_t.book Page 46
Page 49 of 396
GETTING TO KNOW YOUR VEHICLE47
The power mirror controls consist of mirror select buttons
and a four-way mirror control switch. To adjust a mirror,
push either the L (left) or R (right) button to select the
mirror that you want to adjust.
Using the mirror control switch, push any of the four
arrows for the direction that you want the mirror to move.
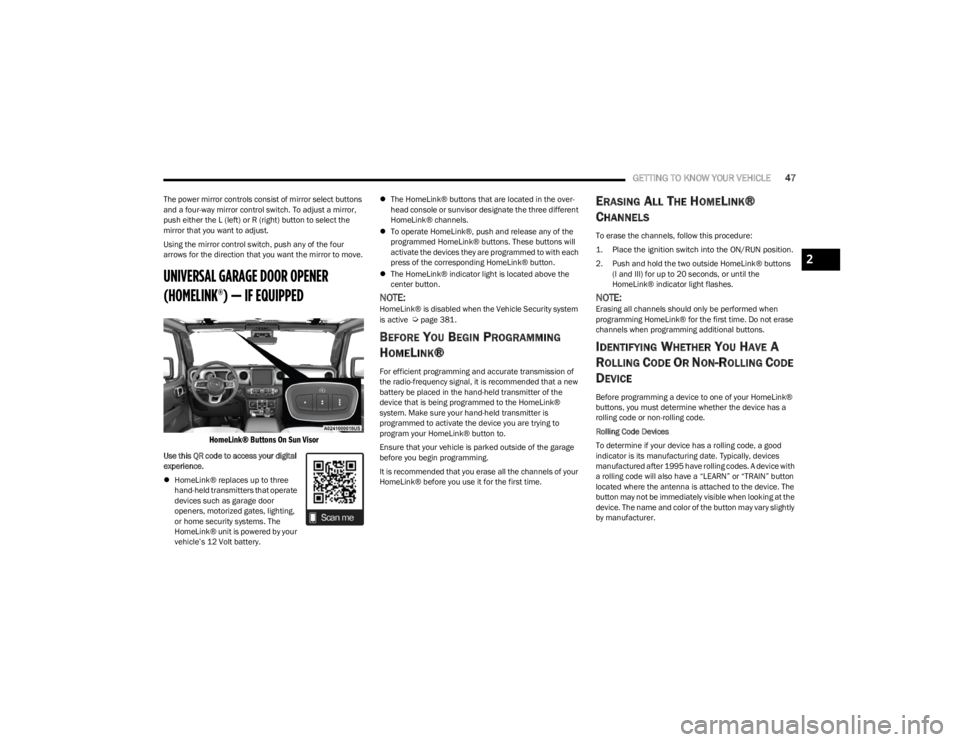
UNIVERSAL GARAGE DOOR OPENER
(HOMELINK®) — IF EQUIPPED
HomeLink® Buttons On Sun Visor
Use this QR code to access your digital
experience.
HomeLink® replaces up to three
hand-held transmitters that operate
devices such as garage door
openers, motorized gates, lighting,
or home security systems. The
HomeLink® unit is powered by your
vehicle’s 12 Volt battery.
The HomeLink® buttons that are located in the over -
head console or sunvisor designate the three different
HomeLink® channels.
To operate HomeLink®, push and release any of the
programmed HomeLink® buttons. These buttons will
activate the devices they are programmed to with each
press of the corresponding HomeLink® button.
The HomeLink® indicator light is located above the
center button.
NOTE:HomeLink® is disabled when the Vehicle Security system
is active Úpage 381.
BEFORE YOU BEGIN PROGRAMMING
H
OMELINK®
For efficient programming and accurate transmission of
the radio-frequency signal, it is recommended that a new
battery be placed in the hand-held transmitter of the
device that is being programmed to the HomeLink®
system. Make sure your hand-held transmitter is
programmed to activate the device you are trying to
program your HomeLink® button to.
Ensure that your vehicle is parked outside of the garage
before you begin programming.
It is recommended that you erase all the channels of your
HomeLink® before you use it for the first time.
ERASING ALL THE HOMELINK®
C
HANNELS
To erase the channels, follow this procedure:
1. Place the ignition switch into the ON/RUN position.
2. Push and hold the two outside HomeLink® buttons
(I and III) for up to 20 seconds, or until the
HomeLink® indicator light flashes.
NOTE:Erasing all channels should only be performed when
programming HomeLink® for the first time. Do not erase
channels when programming additional buttons.
IDENTIFYING WHETHER YOU HAVE A
R
OLLING CODE OR NON-ROLLING CODE
D
EVICE
Before programming a device to one of your HomeLink®
buttons, you must determine whether the device has a
rolling code or non-rolling code.
Rolling Code Devices
To determine if your device has a rolling code, a good
indicator is its manufacturing date. Typically, devices
manufactured after 1995 have rolling codes. A device with
a rolling code will also have a “LEARN” or “TRAIN” button
located where the antenna is attached to the device. The
button may not be immediately visible when looking at the
device. The name and color of the button may vary slightly
by manufacturer.
2
23_JL_OM_EN_USC_t.book Page 47
Page 59 of 396
GETTING TO KNOW YOUR VEHICLE57
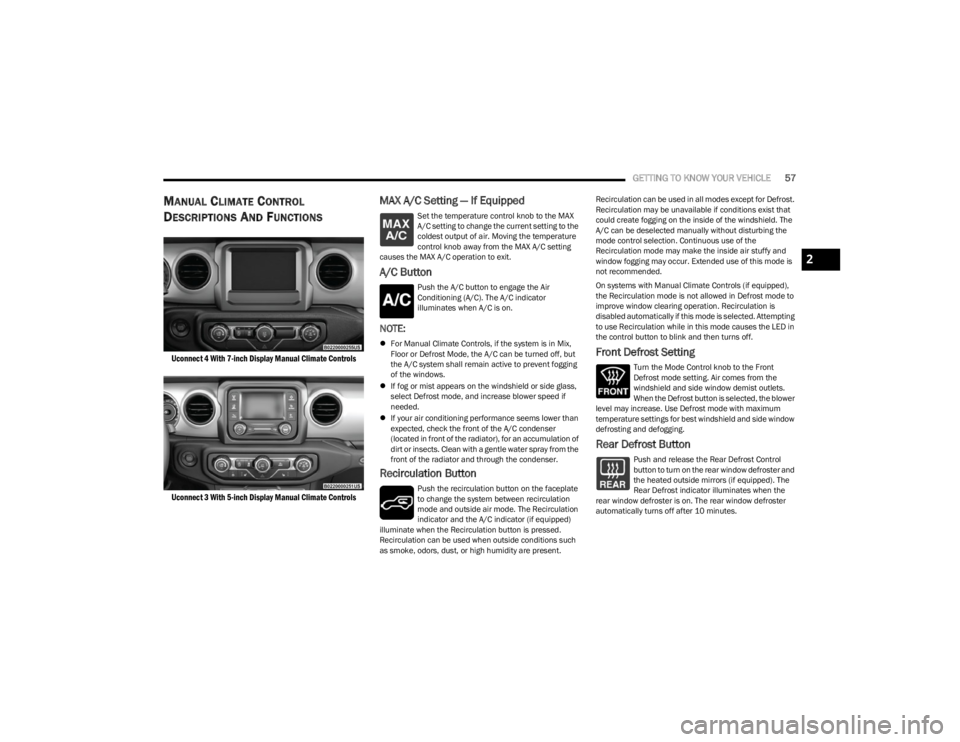
MANUAL CLIMATE CONTROL
D
ESCRIPTIONS AND FUNCTIONS
Uconnect 4 With 7-inch Display Manual Climate Controls
Uconnect 3 With 5-inch Display Manual Climate Controls
MAX A/C Setting — If Equipped
Set the temperature control knob to the MAX
A/C setting to change the current setting to the
coldest output of air. Moving the temperature
control knob away from the MAX A/C setting
causes the MAX A/C operation to exit.
A/C Button
Push the A/C button to engage the Air
Conditioning (A/C). The A/C indicator
illuminates when A/C is on.
NOTE:
For Manual Climate Controls, if the system is in Mix,
Floor or Defrost Mode, the A/C can be turned off, but
the A/C system shall remain active to prevent fogging
of the windows.
If fog or mist appears on the windshield or side glass,
select Defrost mode, and increase blower speed if
needed.
If your air conditioning performance seems lower than
expected, check the front of the A/C condenser
(located in front of the radiator), for an accumulation of
dirt or insects. Clean with a gentle water spray from the
front of the radiator and through the condenser.
Recirculation Button
Push the recirculation button on the faceplate
to change the system between recirculation
mode and outside air mode. The Recirculation
indicator and the A/C indicator (if equipped)
illuminate when the Recirculation button is pressed.
Recirculation can be used when outside conditions such
as smoke, odors, dust, or high humidity are present. Recirculation can be used in all modes except for Defrost.
Recirculation may be unavailable if conditions exist that
could create fogging on the inside of the windshield. The
A/C can be deselected manually without disturbing the
mode control selection. Continuous use of the
Recirculation mode may make the inside air stuffy and
window fogging may occur. Extended use of this mode is
not recommended.
On systems with Manual Climate Controls (if equipped),
the Recirculation mode is not allowed in Defrost mode to
improve window clearing operation. Recirculation is
disabled automatically if this mode is selected. Attempting
to use Recirculation while in this mode causes the LED in
the control button to blink and then turns off.
Front Defrost Setting
Turn the Mode Control knob to the Front
Defrost mode setting. Air comes from the
windshield and side window demist outlets.
When the Defrost button is selected, the blower
level may increase. Use Defrost mode with maximum
temperature settings for best windshield and side window
defrosting and defogging.
Rear Defrost Button
Push and release the Rear Defrost Control
button to turn on the rear window defroster and
the heated outside mirrors (if equipped). The
Rear Defrost indicator illuminates when the
rear window defroster is on. The rear window defroster
automatically turns off after 10 minutes.
2
23_JL_OM_EN_USC_t.book Page 57
Page 128 of 396
126
STARTING AND OPERATING
STARTING THE ENGINE — GASOLINE
ENGINE (IF EQUIPPED)
Before starting your vehicle, adjust your seat, adjust both
inside and outside mirrors, and fasten your seat belts.
MANUAL TRANSMISSION — IF EQUIPPED
Apply the parking brake, place the gear selector in
NEUTRAL, and press the clutch pedal before starting the
vehicle. This vehicle is equipped with a clutch interlocking
ignition system. It will not start unless the clutch pedal is
pressed to the floor.
Four-Wheel Drive Models Only
In 4L mode, if the vehicle is stalled, the engine will start
regardless of whether or not the clutch pedal is pressed to
the floor. This feature enhances off-road performance by
allowing the vehicle to start when in 4L without having to
press the clutch pedal. The 4L Indicator Light will
illuminate when the transfer case has been shifted into
this mode.
AUTOMATIC TRANSMISSION —
I
F EQUIPPED
Start the vehicle with the gear selector in the PARK
position (vehicle can also be started in NEUTRAL). Apply
the brake before shifting to any driving range.
NORMAL STARTING
To Turn On The Engine Using The ENGINE START/STOP
Button
1. The transmission must be in PARK or NEUTRAL.
2. Press and hold the brake pedal while pushing the
ENGINE START/STOP button once. 3. The system takes over and attempts to start the
vehicle. If the vehicle fails to start, the starter will
disengage automatically after 10 seconds.
4. If you wish to stop the cranking of the engine prior to the engine starting, push the button again.
NOTE:Normal starting of either a cold or a warm engine is
obtained without pumping or pressing the accelerator
pedal.
To Turn Off The Engine Using The ENGINE START/STOP
Button
1. Place the gear selector in PARK, then push and release the ENGINE START/STOP button.
2. The ignition will return to the OFF position.
3. If the gear selector is not in PARK (with vehicle stopped) and the ENGINE START/STOP button is
pushed once, the transmission will automatically
select PARK and the engine will turn off while the
ignition will remain in the ACC position (NOT the OFF
position). Never leave a vehicle out of the PARK
position, or it could roll.
4. If the gear selector is in NEUTRAL, and the vehicle speed is below 5 mph (8 km/h), pushing the START/
STOP button once will turn the engine off. The ignition
will remain in the ACC position.
5. If the vehicle speed is above 5 mph (8 km/h), the ENGINE START/STOP button must be held for two WARNING!
When exiting the vehicle, always remove the key fob
from the ignition and lock your vehicle.
Never leave children alone in a vehicle, or with
access to an unlocked vehicle.
Allowing children to be in a vehicle unattended is
dangerous for a number of reasons. A child or others
could be seriously or fatally injured. Children should
be warned not to touch the parking brake, brake
pedal or the gear selector.
Do not leave the key fob in or near the vehicle, or in
a location accessible to children. A child could
operate power windows, other controls, or move the
vehicle.
Do not leave children or animals inside parked vehi -
cles in hot weather. Interior heat buildup may cause
serious injury or death.
23_JL_OM_EN_USC_t.book Page 126
Page 131 of 396
STARTING AND OPERATING129
(Continued)
AFTER STARTING
The idle speed is controlled automatically and will
decrease as the engine warms up.
STARTING THE ENGINE — DIESEL ENGINE
(IF EQUIPPED)
Before starting your vehicle, adjust your seat, both inside
and outside mirrors, and fasten your seat belts.
The starter is allowed to crank for up to 25-second
intervals. Waiting two minutes between such intervals will
protect the starter from overheating.
NOTE:Engine start up in very low ambient temperature could
result in evident white smoke. This condition will
disappear as the engine warms up.
AUTOMATIC TRANSMISSION
Start the engine with the transmission gear selector in the
PARK (P) position. Apply the brake before shifting to any
driving range.
EXTREME COLD WEATHER
The cartridge block heater clips into the engine block near
the water jacket and transfers heat to the coolant. It
requires a 110–115 Volt AC electrical outlet with a
grounded, three-wire extension cord. Its use is
recommended for environments that routinely fall below
-10°F (-23°C). It should be used when the vehicle has not
been running overnight or longer periods and should be
plugged in for two hours prior to start. Its use is required
for cold starts with temperatures under -20°F (-28°C).
NOTE:The engine block heater and heater cord are
factory-installed options. If your vehicle is not equipped,
heater and heater cords are available from an authorized
Mopar® dealer.
A 12 Volt heater built into the fuel filter housing aids in
preventing fuel gelling. It is controlled by a built-in ther -
mostat.
A Diesel Pre-Heat system both improves engine
starting and reduces the amount of white smoke
generated by a warming engine.
WARNING!
Before exiting a vehicle, always come to a complete
stop, then shift the automatic transmission into
PARK and apply the parking brake.
Always make sure the ignition is in the OFF position,
key fob is removed from the vehicle and vehicle is
locked.
Never leave children alone in a vehicle, or with
access to an unlocked vehicle. Leaving children in a
vehicle unattended is dangerous for a number of
reasons. A child or others could be seriously or fatally
injured. Children should be warned not to touch the
parking brake, brake pedal or the gear selector.
Do not leave the key fob in or near the vehicle, or in
a location accessible to children, and do not leave
the ignition of a vehicle equipped with Keyless
Enter ‘n Go™ in the ACC or ON/RUN position. A child
could operate power windows, other controls, or
move the vehicle.
Do not leave children or animals inside parked vehi -
cles in hot weather. Interior heat buildup may cause
serious injury or death.
CAUTION!
The engine is allowed to crank as long as
25 seconds. If the engine fails to start during this
period, please wait at least two minutes for the
starter to cool before repeating start procedure.
If the Water in Fuel Indicator Light remains on, DO
NOT START engine before you drain the water from
the fuel filters to avoid engine damage
Úpage 321.
WARNING!
4
23_JL_OM_EN_USC_t.book Page 129
Page 389 of 396
387
Modifications/AlterationsVehicle .......................................................................... 8
Monitor, Tire Pressure System .................................... 257
Mopar Parts .................................................................. 379
NNew Vehicle Break-In Period ....................................... 133
OOccupant Restraints .................................................... 261
Octane Rating, Gasoline (Fuel) .......................... 369, 374
Off Road Pages ............................................................ 241 Accessory Gauges.......................................... 241
, 242
Drivetrain........................................................ 241, 242
Pitch And Roll ................................................. 241, 242
Status Bar ............................................................... 241
Oil Change Reset — If Equipped
S
.......................... 110
Oil Filter, Change .......................................................... 319
Oil Filter, Selection ....................................................... 319
Oil Pressure Light ......................................................... 118
Oil Reset ....................................................................... 110
Oil, Engine............................................................ 318
, 374
Capacity ................................................................... 373
Checking .................................................................. 317
Dipstick.................................................................... 317
Disposal................................................................... 319
Filter......................................................................... 319
Filter Disposal ......................................................... 319 Identification Logo .................................................. 318Materials Added To................................................. 319Pressure Warning Light .......................................... 118Recommendation .......................................... 318
, 373 Synthetic .................................................................. 318
Viscosity ...................................................................373
Onboard Diagnostic System......................................... 124
Operating Precautions..................................................124
Operator Manual Owner's Manual ....................................................... 380
Outside Rearview Mirrors............................................... 46
PPaddle Shifters ............................................................. 140
Paint Care...................................................................... 360
Pair (Link) Uconnect Phone To A Mobile
Phone
S
.....................................................................214
Parking Brake ............................................................... 133
ParkSense System, Rear.............................................. 160
Passive Entry................................................................... 21 Personalized Main Menu Bar....................................... 200
Pets ................................................................................ 288
Phone Mode .................................................................. 212
Placard, Tire And Loading Information ........................ 349
Power Brakes ...................................................................... 368
Door Locks ................................................................. 21
Inverter ....................................................................... 63
Mirrors ........................................................................ 46
Steering ....................................................................146 Windows..................................................................... 65
Power Sliding Top ........................................................... 91 Operation ................................................................... 91
Pinch Protect ............................................................. 91
Quarter Window Removal ......................................... 93
Power Steering Fluid ....................................................376 Po
w er Top Quarter Windows ......................................... 93
Pregnant Women And Seat Belts ................................ 265
Preparation For Jacking ............................................... 294
Presets .......................................................................... 207
Pretensioners Seat Belts ................................................................ 265
RRadial Ply Tires ............................................................. 353
Radiator Cap (Coolant Pressure Cap) ......................... 330
RadioPresets ..................................................................... 207
Radio Controls .............................................................. 201
Radio Mode .................................................................. 201
Radio Operation ..................................................201
, 240
Radio Remote Controls ................................................ 201
Raising The Soft Top
S
............................................... 77
Rear Axle (Differential) ................................................. 332
Rear Camera................................................................. 163
Rear Cross Path............................................................ 254
Rear ParkSense System .............................................. 160
Rear Seat Reminder Alert ............................................ 244
Rear Swing Gate ........................................................... 101
Rear Wiper/Washer ....................................................... 54 Recreational Towing ..................................................... 176 Shifting Into Transfer Case Neutral (N) ................. 177
Shifting Out Of Transfer Case Neutral (N) ............. 177
Reformulated Gasoline ................................................ 369
Refrigerant .................................................................... 325
Registering SiriusXM Guardian ................................... 226
Release, Hood .............................................................. 100
Reminder, Seat Belt ..................................................... 261
11
23_JL_OM_EN_USC_t.book Page 387
Page 392 of 396

390
Towing .........................................................170, 172, 303
Disabled Vehicle ..................................................... 303
Recreational ............................................................ 176
Weight...................................................................... 172
Towing Behind A Motorhome ...................................... 176
Trac-Lok Rear Axle ................................................................. 144
Traction Control............................................................ 251
Trailer Sway Control (TSC) ........................................... 251
Trailer Towing ............................................................... 170 Hitches .................................................................... 172
Minimum Requirements ........................................ 173
Trailer And Tongue Weight ............................ 172
, 173
Wiring....................................................................... 174
Trailer Towing Guide .................................................... 172
Trailer Weight ............................................................... 172
Transfer Case ............................................................... 332 Fluid ......................................................................... 376
Four-Wheel-Drive-Operation .......................... 141
, 142
Maintenance ........................................................... 332
Transmission ................................................................ 138 Automatic ....................................................... 138
, 333
Fluid ......................................................................... 376
Maintenance ........................................................... 333
Manual .................................................................... 134
Shifting .................................................................... 137
Transporting Pets ......................................................... 288
Tread Wear Indicators ................................................. 354
Turn Signals......................................................... 123
, 344
UUCI Connector .................................................................61 Uconnect Phone Call Features ............................................... 217 Things You Should Know About Your Uconnect
Phone .................................................................. 220
Uconnect Settings ..................................................... 18
Uconnect Phone ................................................. 214
, 215
Answer Or Ignore An Incoming Call — Call Currently In Progress ..................................219
Answer Or Ignore An Incoming Call — No Call Currently In Progress............................. 219
Bluetooth Communication Link .............................. 222
Call Continuation ..................................................... 220 Call Controls............................................................. 218
Call Termination ...................................................... 220
Cancel Command ....................................................214Connecting To A Particular Mobile Phone Or Audio
Device After Pairing............................................216
Help Command........................................................ 214
Join Calls .................................................................. 220
Making A Phone Or Audio Device A Favorite .........216 Making A Second Call While Current Call Is In Progress .............................................................. 220
Managing Your Favorites ........................................ 217
Natural Speech........................................................ 214
Operation ................................................................. 213
Overview...................................................................212 Pair (Link) Uconnect Phone To A Mobile Phone .... 214
Pair A Bluetooth Streaming Audio Device.............. 215
Phonebook Download ............................................. 217Place/Retrieve A Call From Hold ............................ 219
Power-Up .................................................................. 222
Recent Calls ............................................................. 218
Redial ....................................................................... 220
To Remove A Favorite ............................................. 217 Toggling Between Calls........................................... 220
Touch-Tone Number Entry ...................................... 218
Transfer Call To And From Mobile Phone .............. 220
Voice Command ...................................................... 220
Uconnect Settings ........................................................ 184 Customer Programmable Features ......... 18
, 21, 184
Passive Entry Programming ..................................... 21
Uconnect System.......................................................... 197
Uniform Tire Quality Grades ........................................ 358
Universal Consumer Interface (UCI) Connector ........... 61
Universal Garage Door Opener (HomeLink®) —
If Equipped
S
.............................................................. 47
Untwisting Procedure, Seat Belt.................................. 264
USB.................................................................................. 61
USB Port .......................................................................... 61
VVanity Mirrors ................................................................. 46
Vehicle Finder ......................................................233, 238
Vehicle Health Alert ...................................................... 235
Vehicle Health Report .................................................. 234
Vehicle Identification Number (VIN) ............................ 368
Vehicle Loading ...................................................169
, 349
Vehicle Maintenance ................................................... 318
Vehicle Modifications/Alterations ....................................8
Vehicle Notifications .................................................... 235
Vehicle Settings ............................................................ 184
Vehicle Storage............................................................. 359
Voice Command ........................................... 44
, 223, 225
Climate....................................................................... 59
Voice Recognition ........................................................... 44
Voice Recognition System (VR) ..................................... 44
23_JL_OM_EN_USC_t.book Page 390