child restraint JEEP WRANGLER 2DOORS 2018 Owner handbook (in English)
[x] Cancel search | Manufacturer: JEEP, Model Year: 2018, Model line: WRANGLER 2DOORS, Model: JEEP WRANGLER 2DOORS 2018Pages: 348, PDF Size: 6.5 MB
Page 13 of 348
GETTING TO KNOW YOUR VEHICLE
KEYS .....................13
KeyFob.....................13
IGNITION SWITCH............15
Keyless Enter-N-Go — Ignition.......15
REMOTE STARTING SYSTEM — IF
EQUIPPED.................16
How To Use Remote Start..........16
To Enter Remote Start Mode........17
VEHICLE SECURITY ALARM — IF
EQUIPPED..................17
To Arm The System.............17
To Disarm The System............18
DOORS....................18
Keyless Enter-N-Go — Passive Entry (If
Equipped)...................18
Child-Protection Door Lock System — Rear
Doors......................21
Front Door Removal.............22
Rear Door Removal (Four-Door Models) . .24
SEATS ....................26
Heated Seats — If Equipped........26Front Passenger Easy Entry Seat — Two
Door Models..................27
60/40 Split Folding Rear Seat — Four Door
Models.....................28
Fold And Tumble Rear Seat — Two Door
Models.....................29
HEAD RESTRAINTS...........30
Front Head Restraints............30
Rear Head Restraints — Two Door
Models.....................31
Rear Head Restraints — Four Door
Models.....................32
STEERING WHEEL............33
Tilt/Telescoping Steering Column......33
Heated Steering Wheel — If Equipped . .34
MIRRORS..................35
Heated Mirrors — If Equipped.......35
EXTERIOR LIGHTS...........35
Headlight Switch...............35
Daytime Running Lights — If Equipped .35
High/Low Beam Switch...........35
Flash-To-Pass.................36Automatic Headlights — If Equipped . . .36
Front And Rear Fog Lights — If
Equipped...................36
Turn Signals..................36
Lane Change Assist — If Equipped....37
Lights-On Reminder.............37
Headlight Leveling System — If
Equipped...................37
WINDSHIELD WIPERS AND WASH-
ERS ......................37
Windshield Wiper Operation.........38
CLIMATE CONTROLS..........39
Automatic Climate Controls Overview . . .39
Climate Control Functions..........44
Automatic Temperature Control (ATC) — If
Equipped....................44
Operating Tips................45
POWER WINDOWS — IF
EQUIPPED.................46
Auto-Down Feature..............46
Wind Buffeting................47
GETTING TO KNOW YOUR VEHICLE
11
Page 31 of 348
To Raise The Rear Seat
Raise the seatback and lock it into place.
Then, raise the head restraint until it locks
into place. If interference from the cargo area
prevents the seatback from fully locking, you
will have difficulty returning the seat to its
proper position.
WARNING!
Be certain that the seatback is securely
locked into position. If the seatback is not
securely locked into position the seat will
not provide the proper stability for child
seats and/or passengers. An improperly
latched seat could cause serious injury.
Fold And Tumble Rear Seat — Two Door
Models
NOTE:
• Prior to folding the rear seat, it may be
necessary to reposition the front seats.
• Be sure that the front seats are fully upright
and positioned forward. This will allow the
rear seat to fold down easily.Folding The Rear Seat
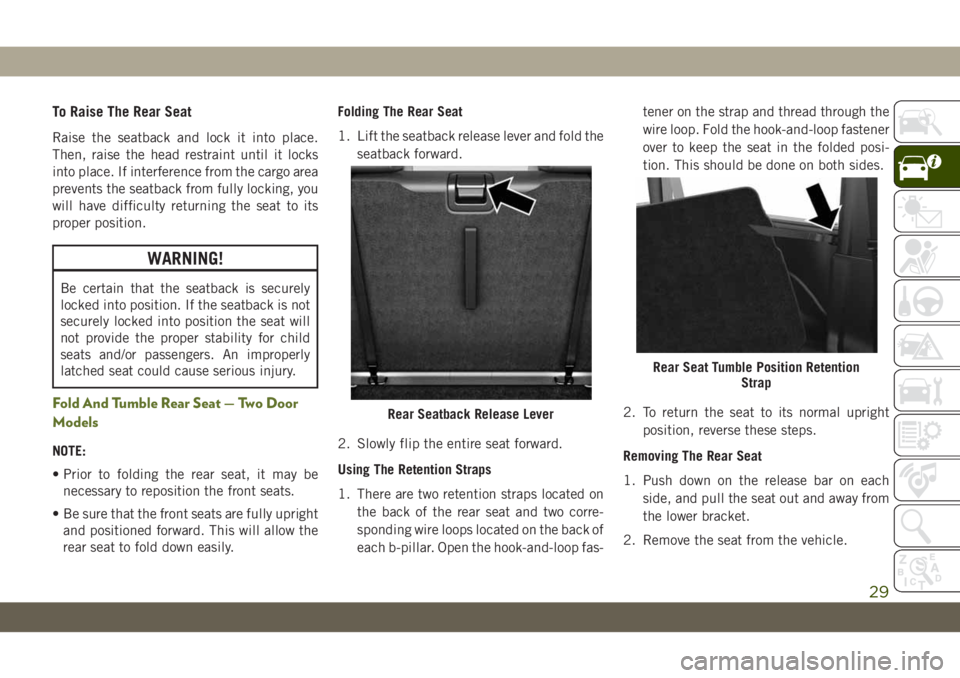
1. Lift the seatback release lever and fold the
seatback forward.
2. Slowly flip the entire seat forward.
Using The Retention Straps
1. There are two retention straps located on
the back of the rear seat and two corre-
sponding wire loops located on the back of
each b-pillar. Open the hook-and-loop fas-tener on the strap and thread through the
wire loop. Fold the hook-and-loop fastener
over to keep the seat in the folded posi-
tion. This should be done on both sides.
2. To return the seat to its normal upright
position, reverse these steps.
Removing The Rear Seat
1. Push down on the release bar on each
side, and pull the seat out and away from
the lower bracket.
2. Remove the seat from the vehicle.
Rear Seatback Release Lever
Rear Seat Tumble Position Retention
Strap
29
Page 34 of 348
To return the head restraint to its upward
position, lift up on the head restraint until it
locks into place.
Refer to “Occupant Restraint Systems” in
“Safety” for information on child seat tether
routing.
WARNING!
• Do not drive the vehicle without the rear
seat head restraints installed while pas-
sengers are occupying the rear seat. In a
collision, people riding in this area with-
out the head restraints installed are
more likely to be seriously injured or
killed.
• A loose head restraint thrown forward in
a collision or hard stop could cause
serious injury or death to occupants of
the vehicle. Always securely stow re-
moved head restraints in a location out-
side the occupant compartment.
• ALL the head restraints MUST be rein-
stalled in the vehicle to properly protect
the occupants. Follow the reinstallation
instructions above prior to operating the
vehicle or occupying a seat.
Rear Head Restraints — Four Door Models
The rear seat is equipped with nonadjustable,
but foldable, outboard head restraints, as
well as an adjustable, removable center head
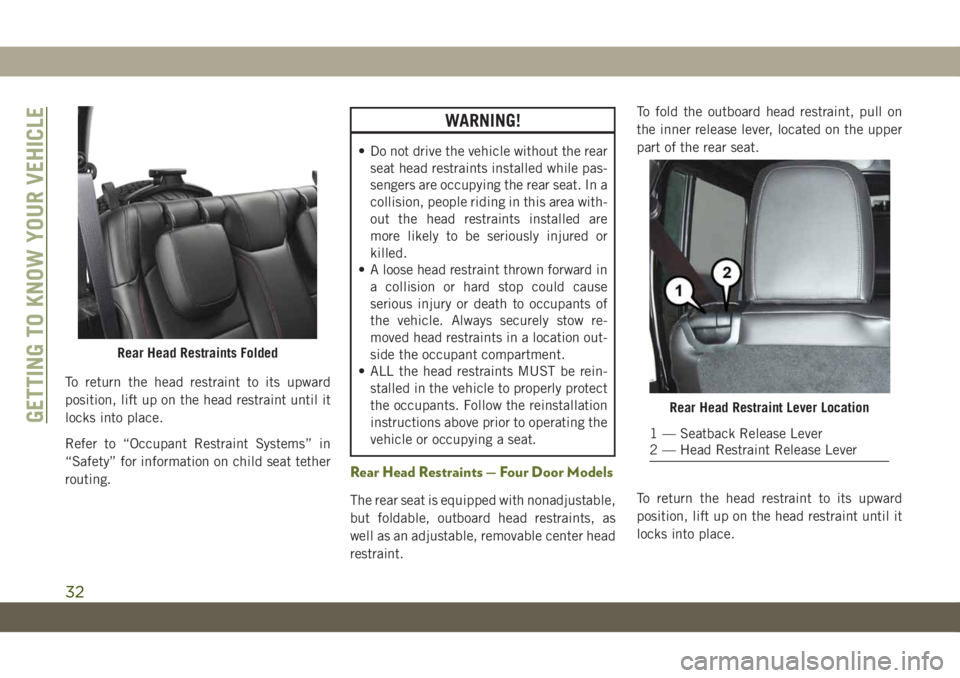
restraint.To fold the outboard head restraint, pull on
the inner release lever, located on the upper
part of the rear seat.
To return the head restraint to its upward
position, lift up on the head restraint until it
locks into place.
Rear Head Restraints Folded
Rear Head Restraint Lever Location
1 — Seatback Release Lever
2 — Head Restraint Release LeverGETTING TO KNOW YOUR VEHICLE
32
Page 35 of 348
To raise the center head restraint, lift up on
the head restraint. To lower the center head
restraint, push the adjustment button, lo-
cated at the base of the head restraint, and
push down on the head restraint.
To remove the center head restraint, push the
release button, located on the base of the
head restraint, and pull upward on the head
restraint.
To install the head restraint, hold the release
button while pushing downward on the head
restraint. Refer to “Occupant Restraint Sys-
tems” in “Safety” for information on child
seat tether routing.
NOTE:
Lower the center head restraint to avoid con-
tact with the center console when folding the
seat down.
WARNING!
• Do not drive the vehicle without the rear
seat head restraints installed while pas-
sengers are occupying the rear seat. In a
collision, people riding in this area with-
WARNING!
out the head restraints installed are
more likely to be seriously injured or
killed.
• A loose head restraint thrown forward in
a collision or hard stop could cause se-
rious injury or death to occupants of the
vehicle. Always securely stow removed
head restraints in a location outside the
occupant compartment.
• ALL the head restraints MUST be rein-
stalled in the vehicle to properly protect
the occupants. Follow the reinstallation
instructions above prior to operating the
vehicle or occupying a seat.
STEERING WHEEL
Tilt/Telescoping Steering Column
This feature allows you to tilt the steering
column upward or downward. It also allows
you to lengthen or shorten the steering col-
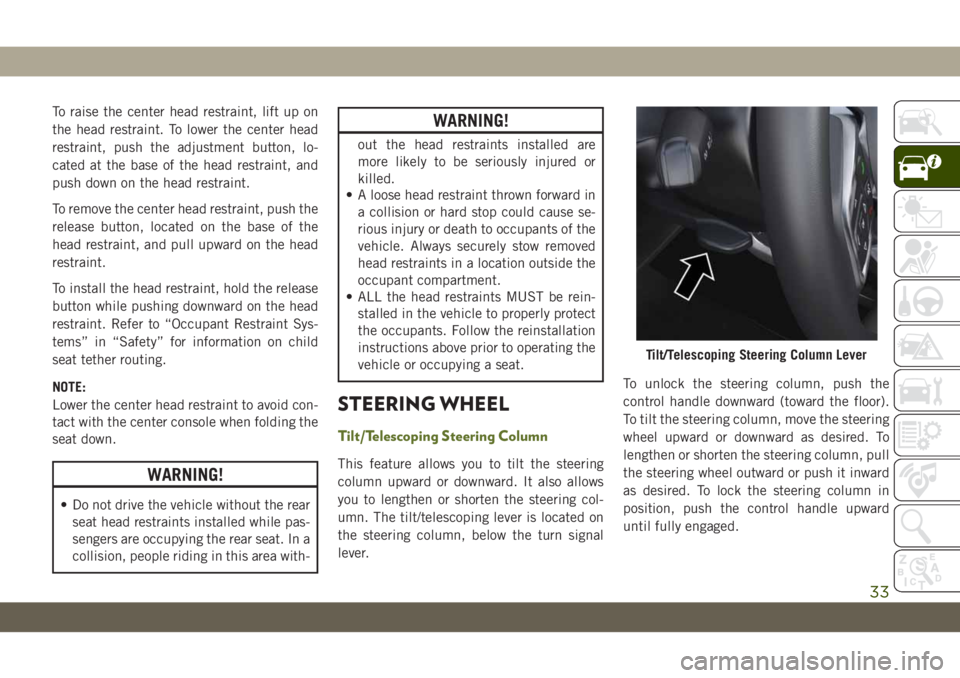
umn. The tilt/telescoping lever is located on
the steering column, below the turn signal
lever.To unlock the steering column, push the
control handle downward (toward the floor).
To tilt the steering column, move the steering
wheel upward or downward as desired. To
lengthen or shorten the steering column, pull
the steering wheel outward or push it inward
as desired. To lock the steering column in
position, push the control handle upward
until fully engaged.
Tilt/Telescoping Steering Column Lever
33
Page 83 of 348
SAFETY
SAFETY FEATURES...........82
Anti-Lock Brake System (ABS)......82
Electronic Brake Control System.....83
AUXILIARY DRIVING SYSTEMS. . .91
Blind Spot Monitoring (BSM) — If
Equipped...................91
Tire Pressure Monitor System (TPMS) . .94
OCCUPANT RESTRAINT SYSTEMS.99
Occupant Restraint Systems Features . .99
Important Safety Precautions.......99
Seat Belt Systems.............100
Supplemental Restraint Systems (SRS) . .108
Child Restraints — Carrying Children
Safely.....................121
Transporting Pets..............136
SAFETY TIPS..............136
Transporting Passengers..........136
Exhaust Gas.................137
Safety Checks You Should Make Inside
The Vehicle.................137
Periodic Safety Checks You Should Make
Outside The Vehicle.............139
SAFETY
81
Page 101 of 348
Beginning with the next ignition cycle, the
TPMS will no longer chime or display the
“SERVICE TIRE PRESSURE SYSTEM” mes-
sage in the instrument cluster but dashes (--)
will remain in place of the pressure values.
To reactivate the TPMS, replace all four
wheel and tire assemblies (road tires) with
tires equipped with TPMS sensors. Then,
drive the vehicle for up to 10 minutes above
15 mph (24 km/h). The TPMS will chime, the
TPMS Warning Light will flash on and off for
75 seconds and then turn off. The instrument
cluster will display the “SERVICE TIRE
PRESSURE SYSTEM” message and then dis-
play pressure values in place of the dashes.
On the next ignition cycle the "SERVICE TIRE
PRESSURE SYSTEM" message will no longer
be displayed as long as no system fault exists.
OCCUPANT RESTRAINT
SYSTEMS
Some of the most important safety features in
your vehicle are the restraint systems:
Occupant Restraint Systems Features
• Seat Belt Systems
• Supplemental Restraint Systems (SRS) Air
Bags
• Child Restraints
Some of the safety features described in this
section may be standard equipment on some
models, or may be optional equipment on
others. If you are not sure, ask an authorized
dealer.
Important Safety Precautions
Please pay close attention to the information
in this section. It tells you how to use your
restraint system properly, to keep you and
your passengers as safe as possible.
Here are some simple steps you can take to
minimize the risk of harm from a deploying
air bag:
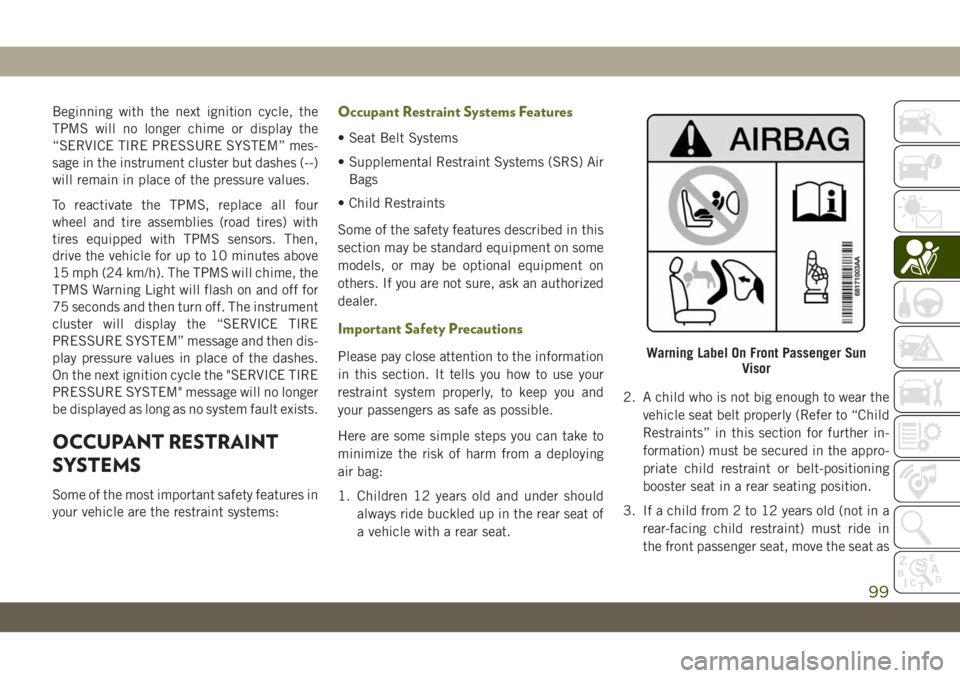
1. Children 12 years old and under should
always ride buckled up in the rear seat of
a vehicle with a rear seat.2. A child who is not big enough to wear the
vehicle seat belt properly (Refer to “Child
Restraints” in this section for further in-
formation) must be secured in the appro-
priate child restraint or belt-positioning
booster seat in a rear seating position.
3. If a child from 2 to 12 years old (not in a
rear-facing child restraint) must ride in
the front passenger seat, move the seat asWarning Label On Front Passenger Sun
Visor
99
Page 102 of 348
far back as possible and use the proper
child restraint (Refer to “Child Re-
straints” in this section for further
information).
4. Never allow children to slide the shoulder
belt behind them or under their arm.
5. You should read the instructions provided
with your child restraint to make sure that
you are using it properly.
6. All occupants should always wear their lap
and shoulder belts properly.
7. The driver and front passenger seats
should be moved back as far as practical
to allow the front air bags room to inflate.
8. Do not lean against the door or window. If
your vehicle has side air bags, and deploy-
ment occurs, the side air bags will inflate
forcefully into the space between occu-
pants and the door and occupants could
be injured.
9. If the air bag system in this vehicle needs
to be modified to accommodate a dis-
abled person, refer to the “Customer As-
sistance” section for customer service
contact information.WARNING!
• NEVER use a rearward facing child re-
straint on a seat protected by an ACTIVE
AIRBAG in front of it, DEATH or SERI-
OUS INJURY to the CHILD can occur.
• It is advisable to always carry children in
a child restraint system on the rear seat,
which is the most protected position in
the event of a collision.
• Should it be necessary to carry a child on
the passenger side front seat in a rear-
facing child restraint system, the pas-
senger side front air bag must be deac-
tivated. Always make sure the airbag
deactivation indicator light is illumi-
nated when using a child restraint sys-
tem. The passenger seat must also be
positioned backward as far as possible
to avoid the child restraint system from
coming into contact with the dashboard.
• A deploying passenger front air bag can
cause death or serious injury to a child
12 years or younger, including a child in
a rear-facing child restraint.
Seat Belt Systems
Buckle up even though you are an excellent
driver, even on short trips. Someone on the
road may be a poor driver and could cause a
collision that includes you. This can happen
far away from home or on your own street.
Research has shown that seat belts save
lives, and they can reduce the seriousness of
injuries in a collision. Some of the worst
injuries happen when people are thrown from
the vehicle. Seat belts reduce the possibility
of ejection and the risk of injury caused by
striking the inside of the vehicle. Everyone in
a motor vehicle should be belted at all times.
Enhanced Seat Belt Use Reminder System
(BeltAlert)
Front Seat and Second Row BeltAlert (If
Equipped)
BeltAlert is a feature intended to remind
the driver and outboard front seat passenger
to buckle their seat belts. The Belt Alert
feature is active whenever the ignition switch
is in the START or ON/RUN position.
SAFETY
100
Page 108 of 348
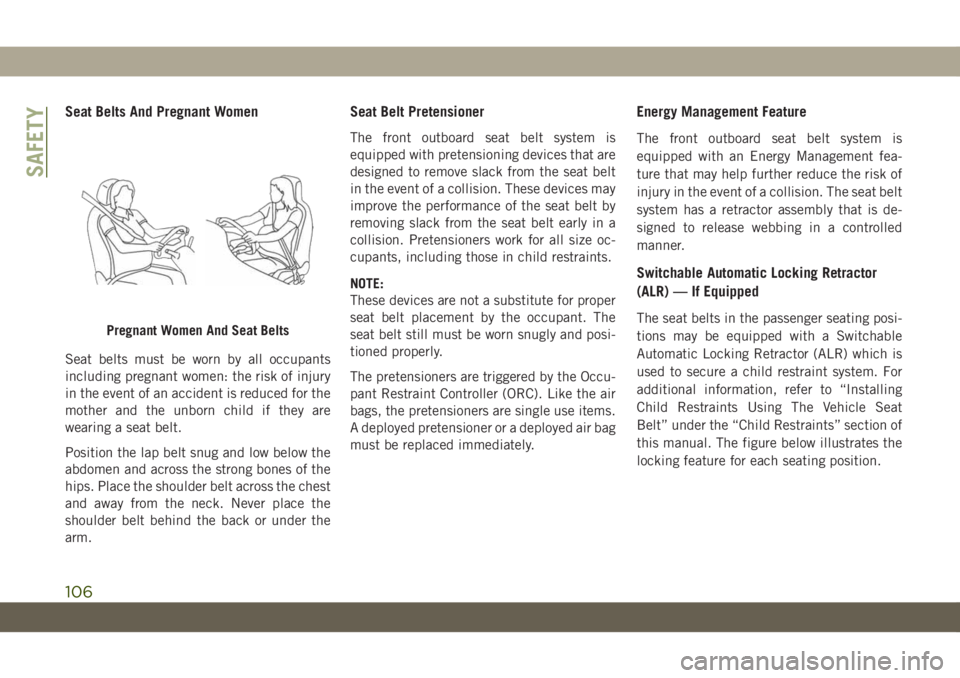
Seat Belts And Pregnant Women
Seat belts must be worn by all occupants
including pregnant women: the risk of injury
in the event of an accident is reduced for the
mother and the unborn child if they are
wearing a seat belt.
Position the lap belt snug and low below the
abdomen and across the strong bones of the
hips. Place the shoulder belt across the chest
and away from the neck. Never place the
shoulder belt behind the back or under the
arm.
Seat Belt Pretensioner
The front outboard seat belt system is
equipped with pretensioning devices that are
designed to remove slack from the seat belt
in the event of a collision. These devices may
improve the performance of the seat belt by
removing slack from the seat belt early in a
collision. Pretensioners work for all size oc-
cupants, including those in child restraints.
NOTE:
These devices are not a substitute for proper
seat belt placement by the occupant. The
seat belt still must be worn snugly and posi-
tioned properly.
The pretensioners are triggered by the Occu-
pant Restraint Controller (ORC). Like the air
bags, the pretensioners are single use items.
A deployed pretensioner or a deployed air bag
must be replaced immediately.
Energy Management Feature
The front outboard seat belt system is
equipped with an Energy Management fea-
ture that may help further reduce the risk of
injury in the event of a collision. The seat belt
system has a retractor assembly that is de-
signed to release webbing in a controlled
manner.
Switchable Automatic Locking Retractor
(ALR) — If Equipped
The seat belts in the passenger seating posi-
tions may be equipped with a Switchable
Automatic Locking Retractor (ALR) which is
used to secure a child restraint system. For
additional information, refer to “Installing
Child Restraints Using The Vehicle Seat
Belt” under the “Child Restraints” section of
this manual. The figure below illustrates the
locking feature for each seating position.Pregnant Women And Seat Belts
SAFETY
106
Page 109 of 348
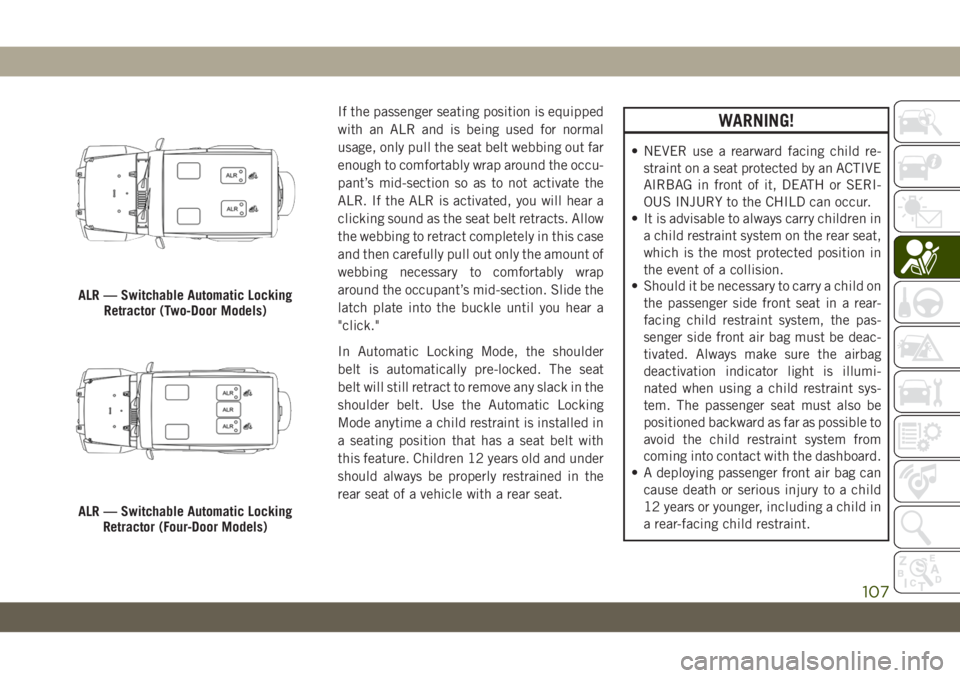
If the passenger seating position is equipped
with an ALR and is being used for normal
usage, only pull the seat belt webbing out far
enough to comfortably wrap around the occu-
pant’s mid-section so as to not activate the
ALR. If the ALR is activated, you will hear a
clicking sound as the seat belt retracts. Allow
the webbing to retract completely in this case
and then carefully pull out only the amount of
webbing necessary to comfortably wrap
around the occupant’s mid-section. Slide the
latch plate into the buckle until you hear a
"click."
In Automatic Locking Mode, the shoulder
belt is automatically pre-locked. The seat
belt will still retract to remove any slack in the
shoulder belt. Use the Automatic Locking
Mode anytime a child restraint is installed in
a seating position that has a seat belt with
this feature. Children 12 years old and under
should always be properly restrained in the
rear seat of a vehicle with a rear seat.WARNING!
• NEVER use a rearward facing child re-
straint on a seat protected by an ACTIVE
AIRBAG in front of it, DEATH or SERI-
OUS INJURY to the CHILD can occur.
• It is advisable to always carry children in
a child restraint system on the rear seat,
which is the most protected position in
the event of a collision.
• Should it be necessary to carry a child on
the passenger side front seat in a rear-
facing child restraint system, the pas-
senger side front air bag must be deac-
tivated. Always make sure the airbag
deactivation indicator light is illumi-
nated when using a child restraint sys-
tem. The passenger seat must also be
positioned backward as far as possible to
avoid the child restraint system from
coming into contact with the dashboard.
• A deploying passenger front air bag can
cause death or serious injury to a child
12 years or younger, including a child in
a rear-facing child restraint.
ALR — Switchable Automatic Locking
Retractor (Two-Door Models)
ALR — Switchable Automatic Locking
Retractor (Four-Door Models)
107
Page 110 of 348
How To Engage The Automatic Locking Mode
1. Buckle the combination lap and shoulder
belt.
2. Grasp the shoulder portion and pull down-
ward until the entire seat belt is extracted.
3. Allow the seat belt to retract. As the seat
belt retracts, you will hear a clicking
sound. This indicates the seat belt is now
in the Automatic Locking Mode.
How To Disengage The Automatic Locking Mode
Unbuckle the combination lap/shoulder belt
and allow it to retract completely to disen-
gage the Automatic Locking Mode and acti-
vate the vehicle sensitive (emergency) lock-
ing mode.
WARNING!
• The seat belt assembly must be replaced
if the switchable Automatic Locking Re-
tractor (ALR) feature or any other seat
belt function is not working properly
when checked according to the proce-
dures in the Service Manual.
WARNING!
• Failure to replace the seat belt assembly
could increase the risk of injury in colli-
sions.
• Do not use the Automatic Locking Mode
to restrain occupants who are wearing
the seat belt or children who are using
booster seats. The locked mode is only
used to install rear-facing or forward-
facing child restraints that have a har-
ness for restraining the child.
Supplemental Restraint Systems (SRS)
Some of the safety features described in this
section may be standard equipment on some
models, or may be optional equipment on
others. If you are not sure, ask an authorized
dealer.
The air bag system must be ready to protect
you in a collision. The Occupant Restraint
Controller (ORC) monitors the internal cir-
cuits and interconnecting wiring associated
with the electrical Air Bag System Compo-
nents. Your vehicle may be equipped with the
following Air Bag System Components:
Air Bag System Components
• Occupant Restraint Controller (ORC)
• Air Bag Warning Light
• Steering Wheel and Column
• Instrument Panel
• Knee Impact Bolsters
• Driver and Front Passenger Air Bags
• Seat Belt Buckle Switch
• Supplemental Side Air Bags
• Front and Side Impact Sensors
• Seat Belt Pretensioners
Air Bag Warning Light
The ORC monitors the readiness of the
electronic parts of the air bag system when-
ever the ignition switch is in the START or
ON/RUN position. If the ignition switch is in
the OFF position or in the ACC position, the
air bag system is not on and the air bags will
not inflate.
SAFETY
108