warning JEEP WRANGLER UNLIMITED 2015 Owner's Guide
[x] Cancel search | Manufacturer: JEEP, Model Year: 2015, Model line: WRANGLER UNLIMITED, Model: JEEP WRANGLER UNLIMITED 2015Pages: 695, PDF Size: 4.85 MB
Page 190 of 695
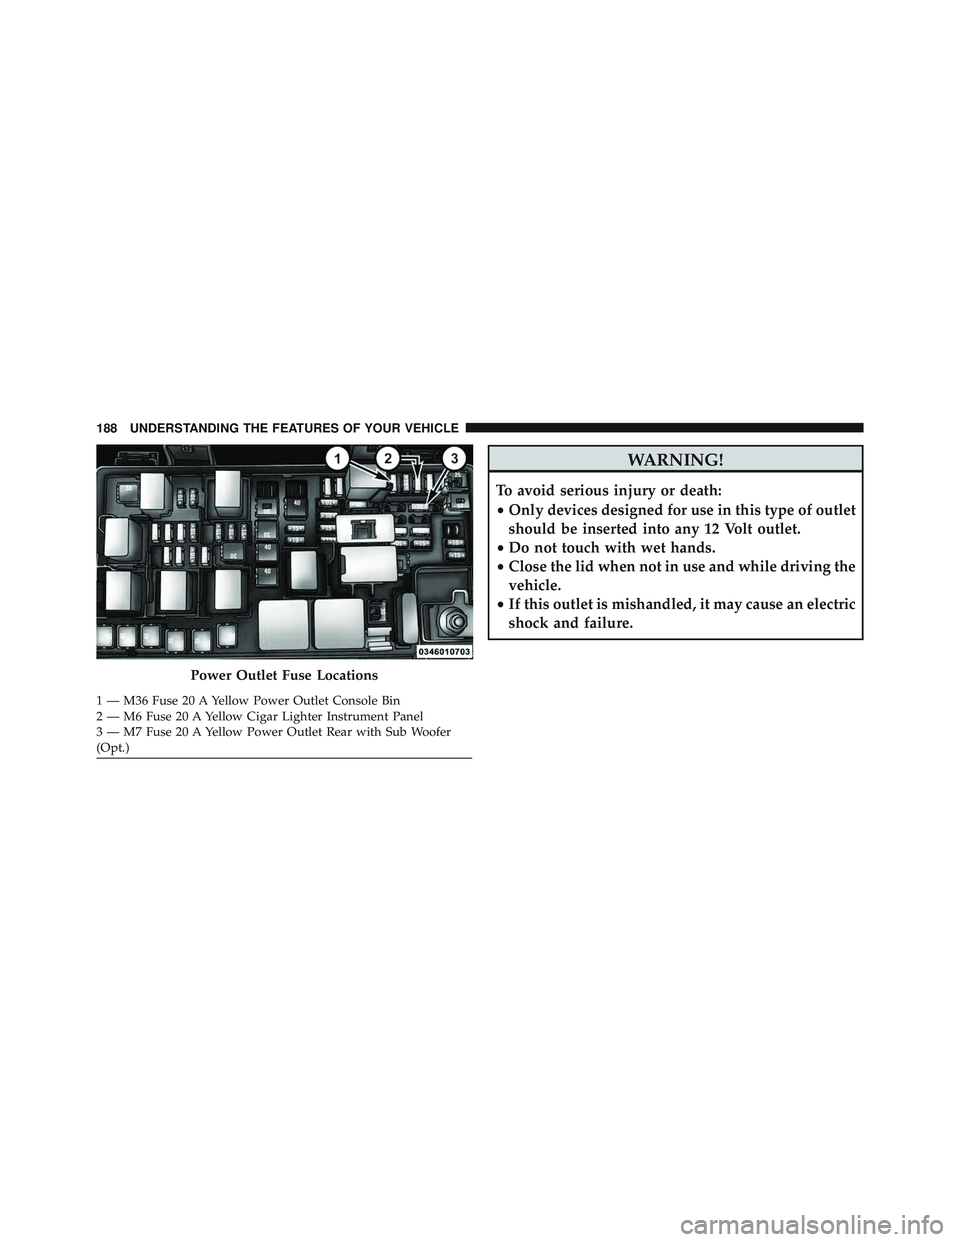
WARNING!
To avoid serious injury or death:
•Only devices designed for use in this type of outlet
should be inserted into any 12 Volt outlet.
• Do not touch with wet hands.
• Close the lid when not in use and while driving the
vehicle.
• If this outlet is mishandled, it may cause an electric
shock and failure.
Page 193 of 695
WARNING!
To avoid serious injury or death:
•Do not insert any objects into the receptacles.
• Do not touch with wet hands.
• Close the lid when not in use.
• If this outlet is mishandled, it may cause an electric
shock and failure.
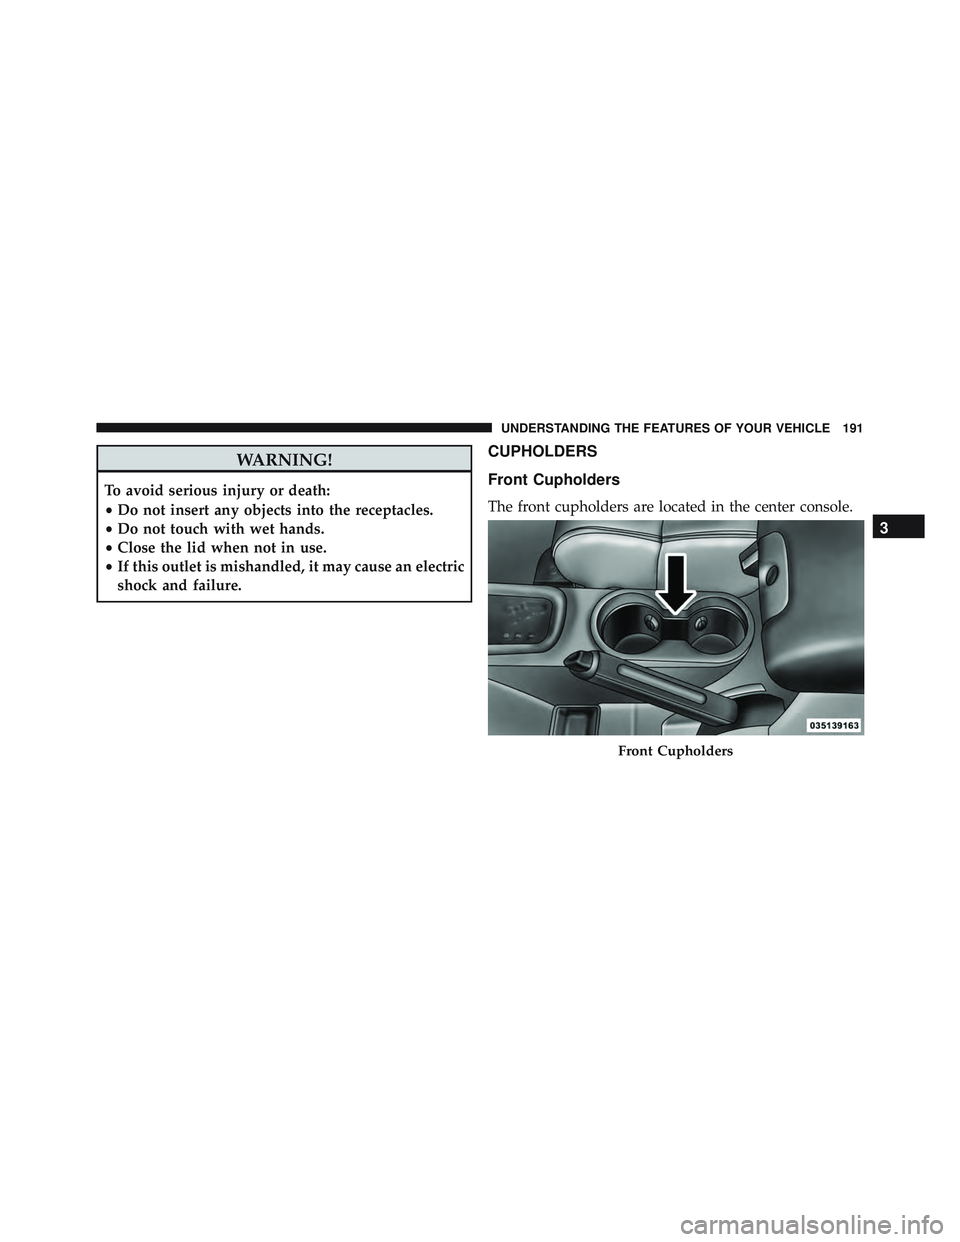
CUPHOLDERS
Front Cupholders
The front cupholders are located in the center console.
Page 222 of 695
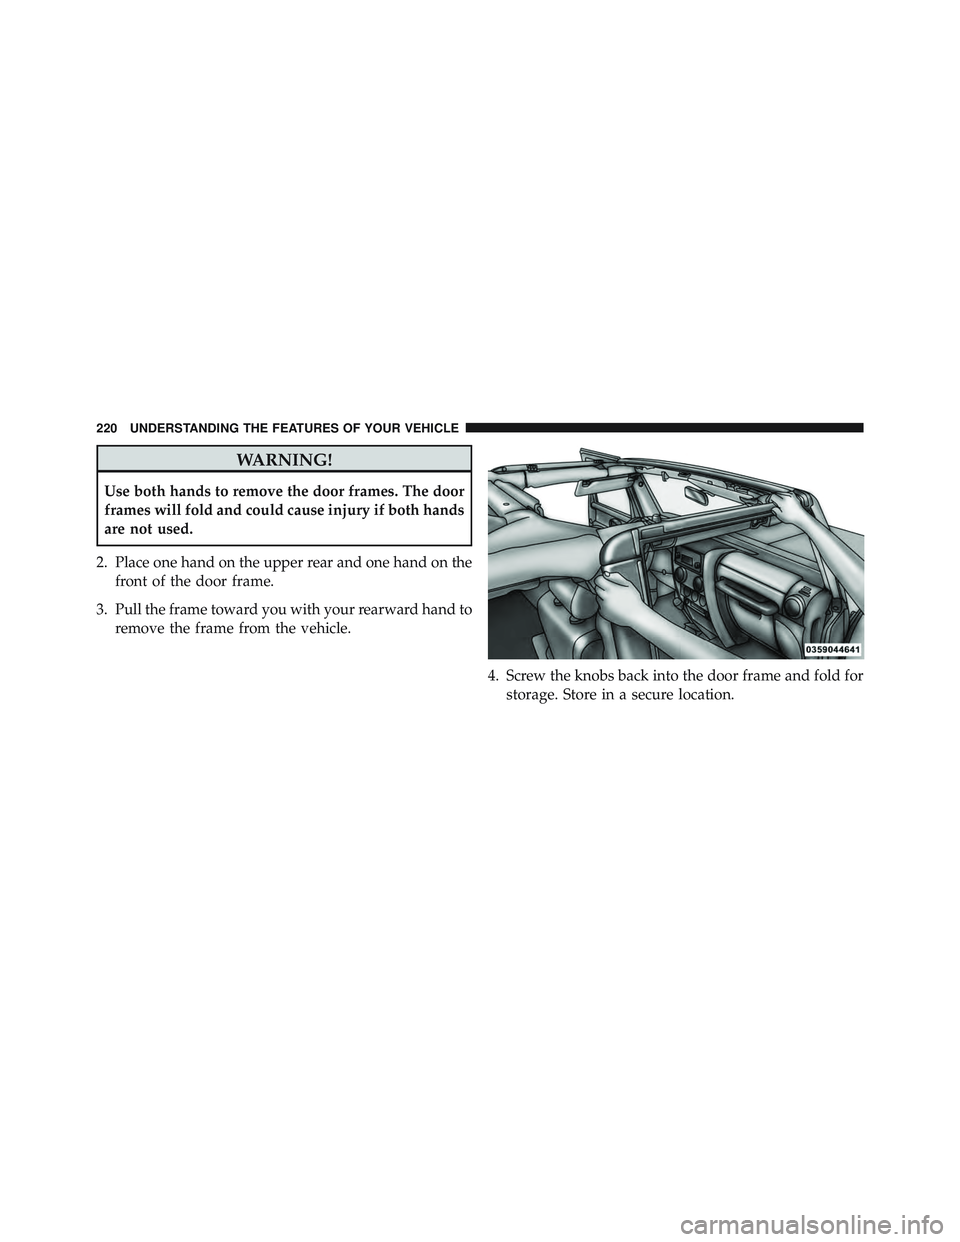
WARNING!
Use both hands to remove the door frames. The door
frames will fold and could cause injury if both hands
are not used.
2. Place one hand on the upper rear and one hand on the front of the door frame.
3. Pull the frame toward you with your rearward hand to remove the frame from the vehicle.
4. Screw the knobs back into the door frame and fold forstorage. Store in a secure location.
Page 223 of 695
WARNING!
•Do not drive your vehicle on public roads with the
door frame(s) removed as you will lose the protec-
tion that they can provide. This procedure is fur-
nished for use during off-road operation only.
(Continued)
3
UNDERSTANDING THE FEATURES OF YOUR VEHICLE 221
Page 297 of 695
WARNING!(Continued)
•If you remove the doors, store them outside the
vehicle. In the event of an accident, a loose door
may cause personal injury.
Lowering The Windshield And Removing Side
Bars
1. Lower the fabric top or remove the hard top following the instructions in this manual.
NOTE: To assist in properly reinstalling side bars, mark
the original locations prior to removing.
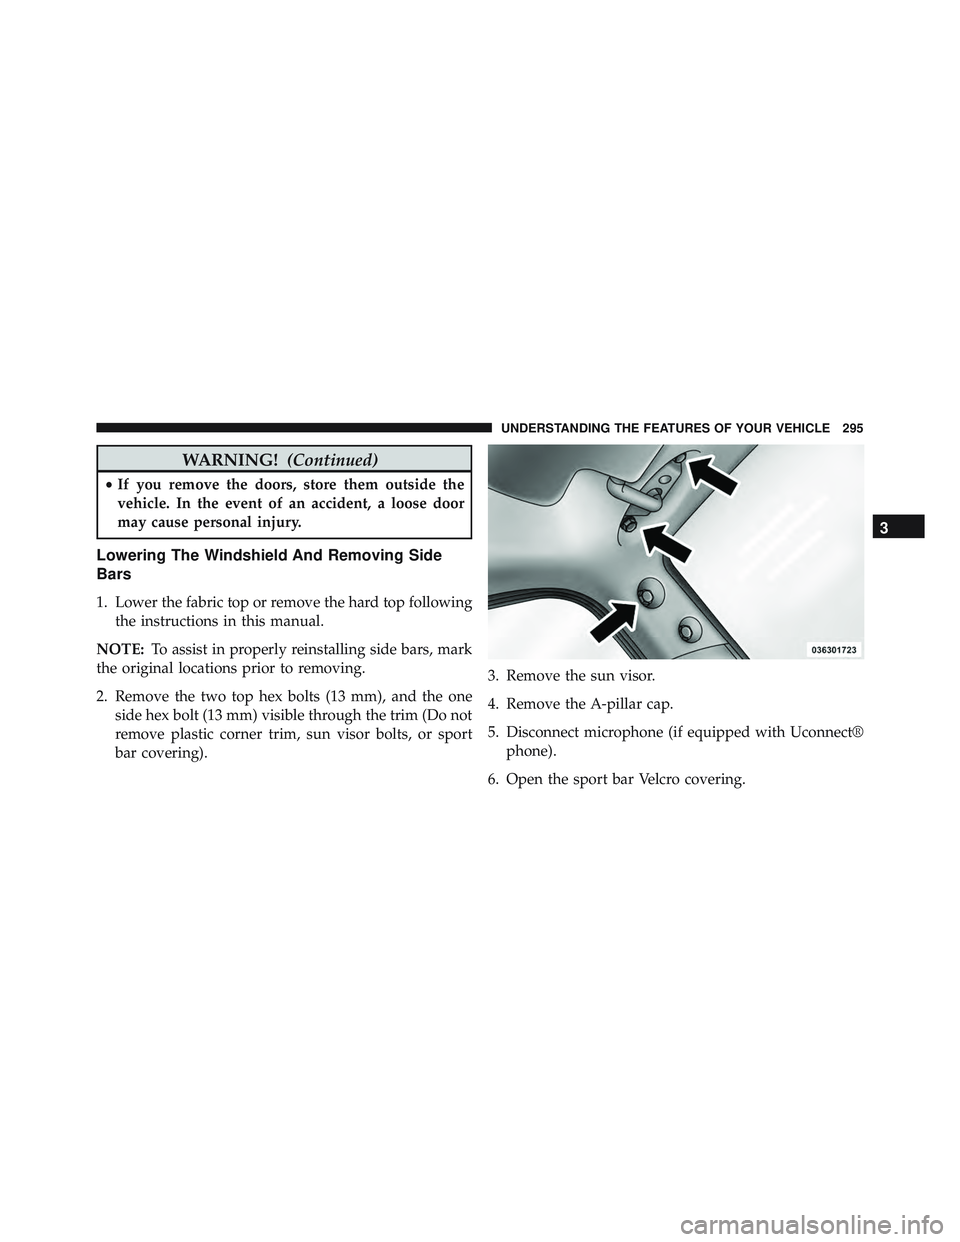
2. Remove the two top hex bolts (13 mm), and the one side hex bolt (13 mm) visible through the trim (Do not
remove plastic corner trim, sun visor bolts, or sport
bar covering). 3. Remove the sun visor.
4. Remove the A-pillar cap.
5. Disconnect microphone (if equipped with Uconnect®
phone).
6. Open the sport bar Velcro covering.
3
UNDERSTANDING THE FEATURES OF YOUR VEHICLE 295
Page 299 of 695
WARNING!
You or others could be injured if you carry the side
bars loose in your vehicle. Remove the side bars from
the vehicle or securely store them as described or
they may cause personal injury if an accident occurs.
See your authorized dealer for the cinch straps.
10. Remove the windshield wiper arms by first pulling the wiper away from the windshield and out to the
“lock” position. Unsnap the wiper arm nut caps, and
remove the retaining nuts. Lift the wiper arms off and
store them in the center console or securely behind
the rear seat.
NOTE: It may be necessary to use a battery terminal
puller tool in order to separate the wiper arms from the
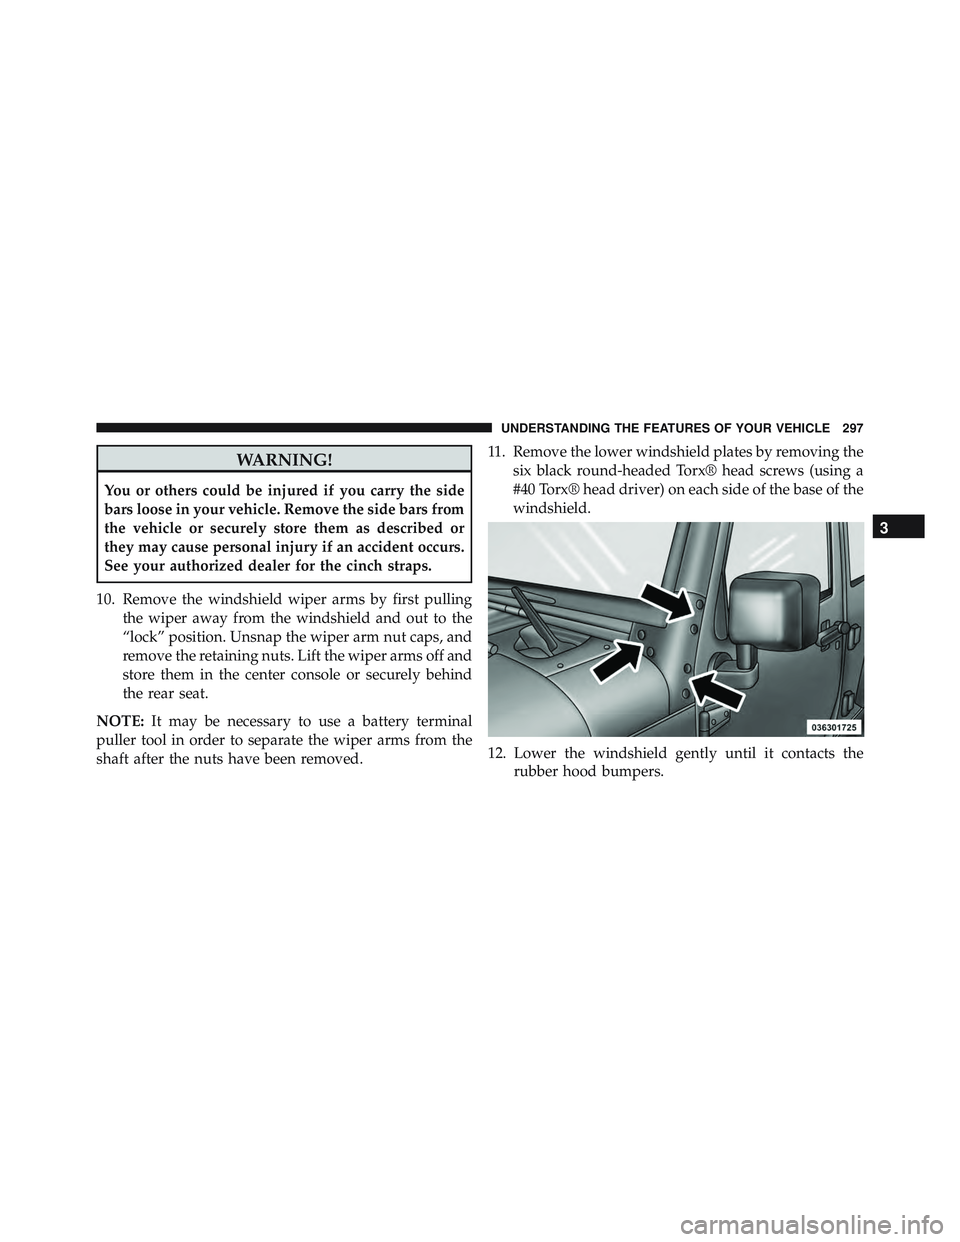
shaft after the nuts have been removed. 11. Remove the lower windshield plates by removing the
six black round-headed Torx® head screws (using a
#40 Torx® head driver) on each side of the base of the
windshield.
12. Lower the windshield gently until it contacts the rubber hood bumpers.
3
UNDERSTANDING THE FEATURES OF YOUR VEHICLE 297
Page 312 of 695
indicate that the parking brake is applied, that the brake
fluid level is low, or that there is a problem with the
anti-lock brake system reservoir.
If the light remains on when the parking brake has been
disengaged, and the fluid level is at the full mark on the
master cylinder reservoir, it indicates a possible brake
hydraulic system malfunction or that a problem with the
Brake Booster has been detected by the Anti-Lock Brake
System (ABS) / Electronic Stability Control (ESC) system.
In this case, the light will remain on until the condition
has been corrected. If the problem is related to the brake
booster, the ABS pump will run when applying the brake,
and a brake pedal pulsation may be felt during each stop.
The dual brake system provides a reserve braking capac-
ity in the event of a failure to a portion of the hydraulic
system. A leak in either half of the dual brake system is
indicated by the Brake Warning Light, which will turn on
when the brake fluid level in the master cylinder has
dropped below a specified level.The light will remain on until the cause is corrected.
NOTE:
The light may flash momentarily during sharp
cornering maneuvers, which change fluid level condi-
tions. The vehicle should have service performed, and
the brake fluid level checked.
If brake failure is indicated, immediate repair is neces-
sary.
Page 398 of 695
WARNING!
Do not plug in or remove the iPod® or external USB
device while driving. Failure to follow this warning
could result in an accident.
Bluetooth® Streaming Audio (BTSA)
Music can be streamed from your cellular phone to the
Uconnect® phone system.
Refer to the Uconnect® Radio Supplement for further
information on Bluetooth® connectivity.
Controlling BTSA Using Radio Buttons
To enter BTSA mode, push either “AUX” button on the
radio or push the VR
Page 432 of 695
WARNING!
•It is dangerous to shift out of PARK or NEUTRAL
if the engine speed is higher than idle speed. If
your foot is not firmly pressing the brake pedal, the
vehicle could accelerate quickly forward or in re-
verse. You could lose control of the vehicle and hit
someone or something. Only shift into gear when
the engine is idling normally and your foot is
firmly pressing the brake pedal.
(Continued)
Page 433 of 695
WARNING!(Continued)
•Never leave children alone in a vehicle, or with
access to an unlocked vehicle. Allowing children to
be in a vehicle unattended is dangerous for a
number of reasons. A child or others could be
seriously or fatally injured. Children should be
warned not to touch the parking brake, brake pedal
or the transmission gear selector.
• Do not leave the ignition key in or near the vehicle
(or in a location accessible to children). A child
could operate power windows, other controls, or
move the vehicle.
Key Ignition Park Interlock
This vehicle is equipped with a Key Ignition Park Inter-
lock which requires the transmission to be in PARK
before the ignition switch can be turned to the LOCK/ OFF (key removal) position. The key can only be re-
moved from the ignition when the ignition is in the
LOCK/OFF position, and once removed the transmission
is locked in PARK.
NOTE:
If a malfunction occurs, the system will trap the
key in the ignition switch to warn you that this safety
feature is inoperable. The engine can be started and
stopped but the key cannot be removed until you obtain
service.
Brake/Transmission Shift Interlock System
This vehicle is equipped with a Brake Transmission Shift
Interlock System (BTSI) that holds the shift lever in PARK
unless the brakes are applied. To shift the transmission
out of PARK, the ignition switch must be turned to the
ON/RUN position (engine running or not) and the brake
pedal must be pressed.
5
STARTING AND OPERATING 431