warning JEEP WRANGLER UNLIMITED 2019 Owner handbook (in English)
[x] Cancel search | Manufacturer: JEEP, Model Year: 2019, Model line: WRANGLER UNLIMITED, Model: JEEP WRANGLER UNLIMITED 2019Pages: 348, PDF Size: 6.5 MB
Page 40 of 348
Windshield Wiper Operation
Rotate the end of the lever upward to the
second detent past the intermittent settings
for low-speed wiper operation. Rotate the end
of the lever upward to the third detent past
the intermittent settings for high-speed wiper
operation.
CAUTION!
In cold weather, always turn off the wiper
switch and allow the wipers to return to the
park position before turning off the en-
gine. If the wiper switch is left on and the
wipers freeze to the windshield, damage to
the wiper motor may occur when the ve-
hicle is restarted.
NOTE:
Do not operate the windshield wipers with the
blades lifted from the windshield.
Intermittent Wiper System
Use the intermittent wiper when weather
conditions make a single wiping cycle, with a
variable pause between cycles, desirable. Ro-tate the end of the lever to the first detent
position for one of four intermittent settings.
The delay cycle can be set anywhere between
1 to 18 seconds.
NOTE:
The wiper delay times depend on vehicle
speed. If the vehicle is moving less than
10 mph (16 km/h), delay times will be
doubled.
Windshield Washers
To use the washer, pull the lever toward you
and hold while spray is desired. If the lever is
pulled while in the delay range, the wiper will
start and continue to operate for two or three
wipe cycles after the lever is released. Then,
the intermittent interval previously selected
will resume.
If the lever is pulled while in the off position,
the wipers will operate for two or three wipe
cycles. Then, the wipers will turn off.
WARNING!
Sudden loss of visibility through the wind-
shield could lead to a collision. You might
WARNING!
not see other vehicles or other obstacles.
To avoid sudden icing of the windshield
during freezing weather, warm the wind-
shield with the defroster before and during
windshield washer use.
Mist Feature
Push upward on the wiper lever to activate a
single wipe to clear off road mist or spray
from a passing vehicle. As long as the lever is
held up, the wipers will continue to operate.
NOTE:
The mist feature does not activate the washer
pump; therefore, no washer fluid will be
sprayed on the windshield. The wash func-
tion must be used in order to spray the
windshield with washer fluid.
Rear Window Wiper/Washer — If Equipped
A rotary switch on the center portion of the
windshield wiper/washer lever controls the
operation of the rear wiper/washer function.
GETTING TO KNOW YOUR VEHICLE
38
Page 48 of 348
POWER WINDOWS — IF
EQUIPPED
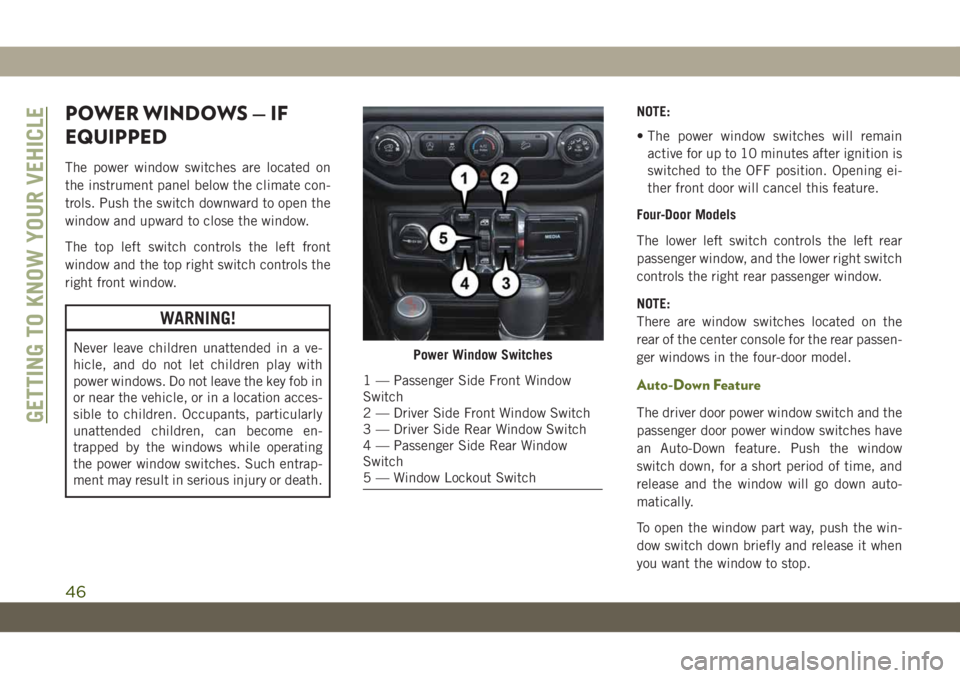
The power window switches are located on
the instrument panel below the climate con-
trols. Push the switch downward to open the
window and upward to close the window.
The top left switch controls the left front
window and the top right switch controls the
right front window.
WARNING!
Never leave children unattended in a ve-
hicle, and do not let children play with
power windows. Do not leave the key fob in
or near the vehicle, or in a location acces-
sible to children. Occupants, particularly
unattended children, can become en-
trapped by the windows while operating
the power window switches. Such entrap-
ment may result in serious injury or death.NOTE:
• The power window switches will remain
active for up to 10 minutes after ignition is
switched to the OFF position. Opening ei-
ther front door will cancel this feature.
Four-Door Models
The lower left switch controls the left rear
passenger window, and the lower right switch
controls the right rear passenger window.
NOTE:
There are window switches located on the
rear of the center console for the rear passen-
ger windows in the four-door model.
Auto-Down Feature
The driver door power window switch and the
passenger door power window switches have
an Auto-Down feature. Push the window
switch down, for a short period of time, and
release and the window will go down auto-
matically.
To open the window part way, push the win-
dow switch down briefly and release it when
you want the window to stop.
Power Window Switches
1 — Passenger Side Front Window
Switch
2 — Driver Side Front Window Switch
3 — Driver Side Rear Window Switch
4 — Passenger Side Rear Window
Switch
5 — Window Lockout Switch
GETTING TO KNOW YOUR VEHICLE
46
Page 49 of 348
To stop the window from going all the way
down during the Auto-Down operation, pull
up on the switch briefly.
WARNING!
There is no anti-pinch protection when the
window is almost closed. Be sure to clear
all objects from the window before closing.
Wind Buffeting
Wind buffeting can be described as the per-
ception of pressure on the ears or a
helicopter-type sound in the ears. Your ve-
hicle may exhibit wind buffeting with the
windows down in certain open or partially
open positions. This is a normal occurrence
and can be minimized by adjusting the win-
dow opening.
REMOVABLE TOP
INFORMATION
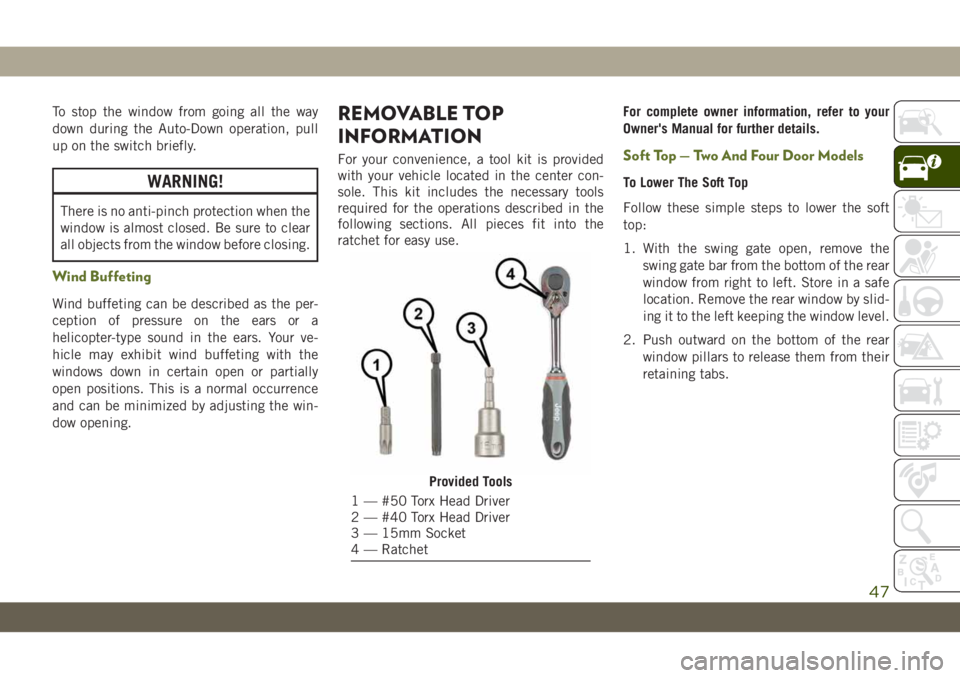
For your convenience, a tool kit is provided
with your vehicle located in the center con-
sole. This kit includes the necessary tools
required for the operations described in the
following sections. All pieces fit into the
ratchet for easy use.For complete owner information, refer to your
Owner's Manual for further details.Soft Top — Two And Four Door Models
To Lower The Soft Top
Follow these simple steps to lower the soft
top:
1. With the swing gate open, remove the
swing gate bar from the bottom of the rear
window from right to left. Store in a safe
location. Remove the rear window by slid-
ing it to the left keeping the window level.
2. Push outward on the bottom of the rear
window pillars to release them from their
retaining tabs.
Provided Tools
1 — #50 Torx Head Driver
2 — #40 Torx Head Driver
3 — 15mm Socket
4 — Ratchet
47
Page 57 of 348
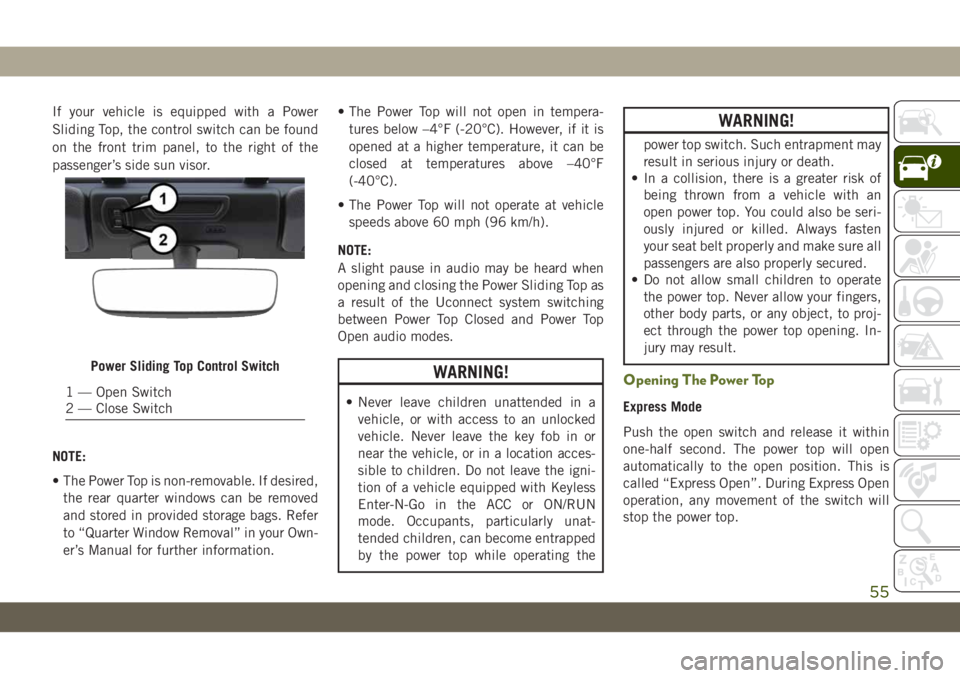
If your vehicle is equipped with a Power
Sliding Top, the control switch can be found
on the front trim panel, to the right of the
passenger’s side sun visor.
NOTE:
• The Power Top is non-removable. If desired,
the rear quarter windows can be removed
and stored in provided storage bags. Refer
to “Quarter Window Removal” in your Own-
er’s Manual for further information.• The Power Top will not open in tempera-
tures below –4°F (-20°C). However, if it is
opened at a higher temperature, it can be
closed at temperatures above –40°F
(-40°C).
• The Power Top will not operate at vehicle
speeds above 60 mph (96 km/h).
NOTE:
A slight pause in audio may be heard when
opening and closing the Power Sliding Top as
a result of the Uconnect system switching
between Power Top Closed and Power Top
Open audio modes.
WARNING!
• Never leave children unattended in a
vehicle, or with access to an unlocked
vehicle. Never leave the key fob in or
near the vehicle, or in a location acces-
sible to children. Do not leave the igni-
tion of a vehicle equipped with Keyless
Enter-N-Go in the ACC or ON/RUN
mode. Occupants, particularly unat-
tended children, can become entrapped
by the power top while operating the
WARNING!
power top switch. Such entrapment may
result in serious injury or death.
• In a collision, there is a greater risk of
being thrown from a vehicle with an
open power top. You could also be seri-
ously injured or killed. Always fasten
your seat belt properly and make sure all
passengers are also properly secured.
• Do not allow small children to operate
the power top. Never allow your fingers,
other body parts, or any object, to proj-
ect through the power top opening. In-
jury may result.
Opening The Power Top
Express Mode
Push the open switch and release it within
one-half second. The power top will open
automatically to the open position. This is
called “Express Open”. During Express Open
operation, any movement of the switch will
stop the power top.
Power Sliding Top Control Switch
1 — Open Switch
2 — Close Switch
55
Page 58 of 348
Manual Mode
To open the power top manually, push and
hold the open switch. The power top will stop
automatically at the open position. Any re-
lease of the switch will stop the movement.
The power top will remain in a partially
opened position until the switch is pushed
and held again.
Closing The Power Top
Express Mode
Push the close switch and release it within
one-half second. The power top will close
fully and stop automatically. This is called
“Express Close”. During Express Close opera-
tion, any movement of the switch will stop
the power top.
Manual Mode
To close the power top manually, push and
hold the close switch. The power top will
move forward and automatically stop at the
fully closed position. Any release of the
switch will stop the movement. The power top
will remain in a partially closed position until
the switch is pushed and held again.
Pinch Protect Feature
This feature will detect an obstruction in the
opening of the power top during Express
Close operation. If an obstruction in the path
of the power top is detected, the power top
will automatically retract. Remove the ob-
struction if this occurs. Next, push the close
switch and release to Express Close.
WARNING!
There is no anti-pinch protection when the
power top is almost closed. To avoid per-
sonal injury be sure to clear your arms,
hands, fingers and all objects from the
top’s path before closing.
NOTE:
• The Power Sliding Top may reverse motion
if closing during a severe headwind. If this
occurs, push the Power Sliding Top switch
again to close the top completely.
• If three consecutive power top close at-
tempts result in Pinch Protect reversals,
Pinch Protect will disable and the power
top must be closed in Manual Mode.
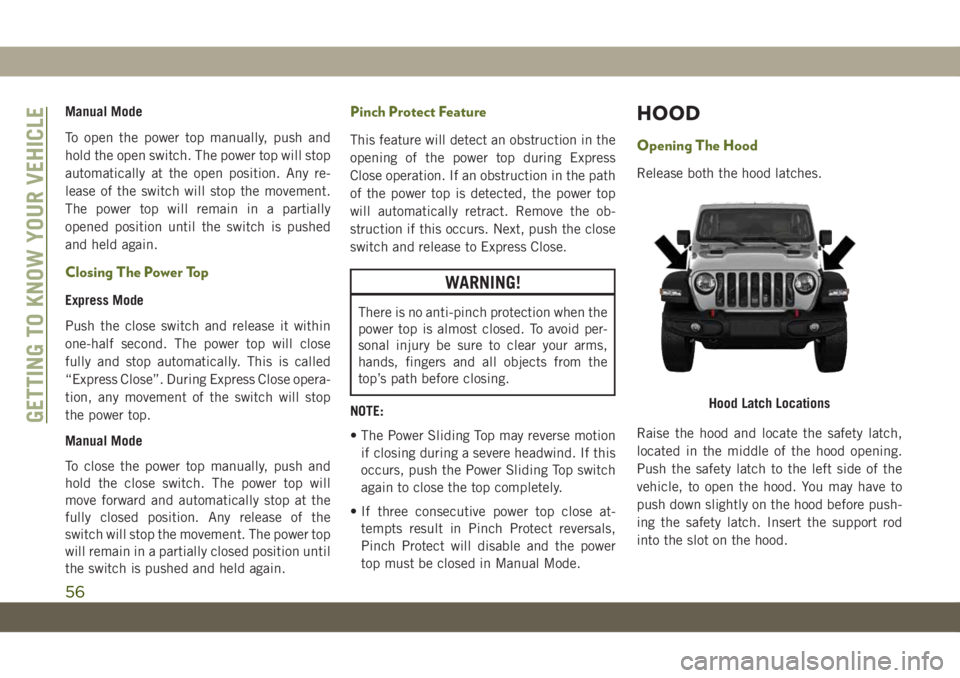
HOOD
Opening The Hood
Release both the hood latches.
Raise the hood and locate the safety latch,
located in the middle of the hood opening.
Push the safety latch to the left side of the
vehicle, to open the hood. You may have to
push down slightly on the hood before push-
ing the safety latch. Insert the support rod
into the slot on the hood.
Hood Latch LocationsGETTING TO KNOW YOUR VEHICLE
56
Page 59 of 348
Closing The Hood
To close the hood, remove the support rod
from the hood panel and place it in the
retaining clip. Lower the hood slowly. Secure
both of the hood latches.
WARNING!
Be sure the hood is fully latched before
driving your vehicle. If the hood is not fully
latched, it could open when the vehicle is
in motion and block your vision. Failure to
follow this warning could result in serious
injury or death.
REAR SWING GATE
The rear swing gate can be unlocked by using
the key, Remote Keyless Entry key fob, by
activating the power door lock switches lo-
cated on the front doors, or grabbing the
handle if equipped with Keyless Enter-N-Go.
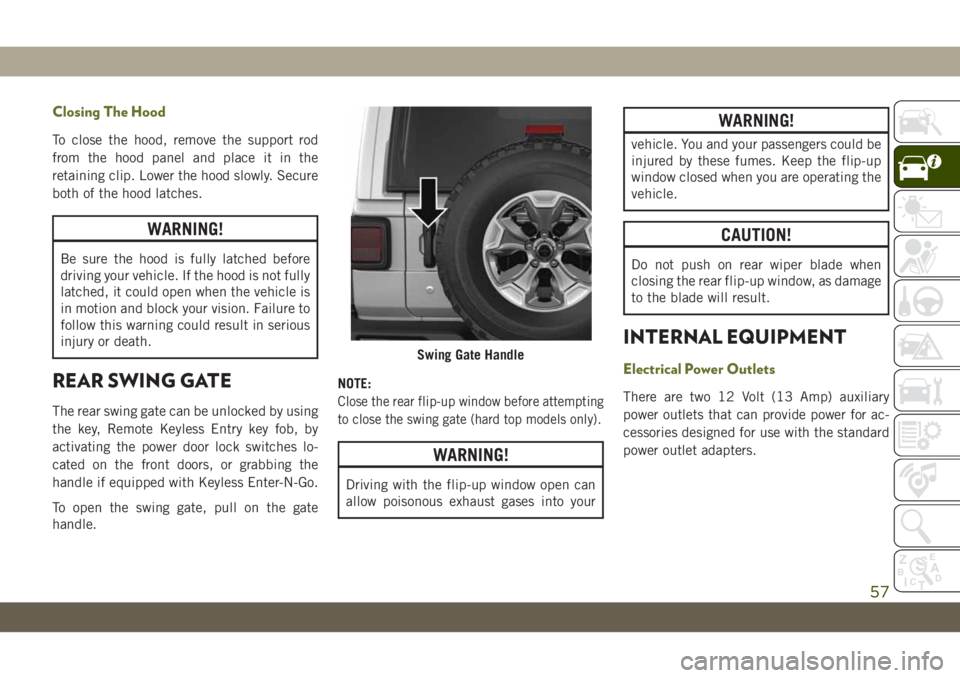
To open the swing gate, pull on the gate
handle.NOTE:Close the rear flip-up window before attempting
to close the swing gate (hard top models only).
WARNING!
Driving with the flip-up window open can
allow poisonous exhaust gases into your
WARNING!
vehicle. You and your passengers could be
injured by these fumes. Keep the flip-up
window closed when you are operating the
vehicle.
CAUTION!
Do not push on rear wiper blade when
closing the rear flip-up window, as damage
to the blade will result.
INTERNAL EQUIPMENT
Electrical Power Outlets
There are two 12 Volt (13 Amp) auxiliary
power outlets that can provide power for ac-
cessories designed for use with the standard
power outlet adapters.
Swing Gate Handle
57
Page 60 of 348
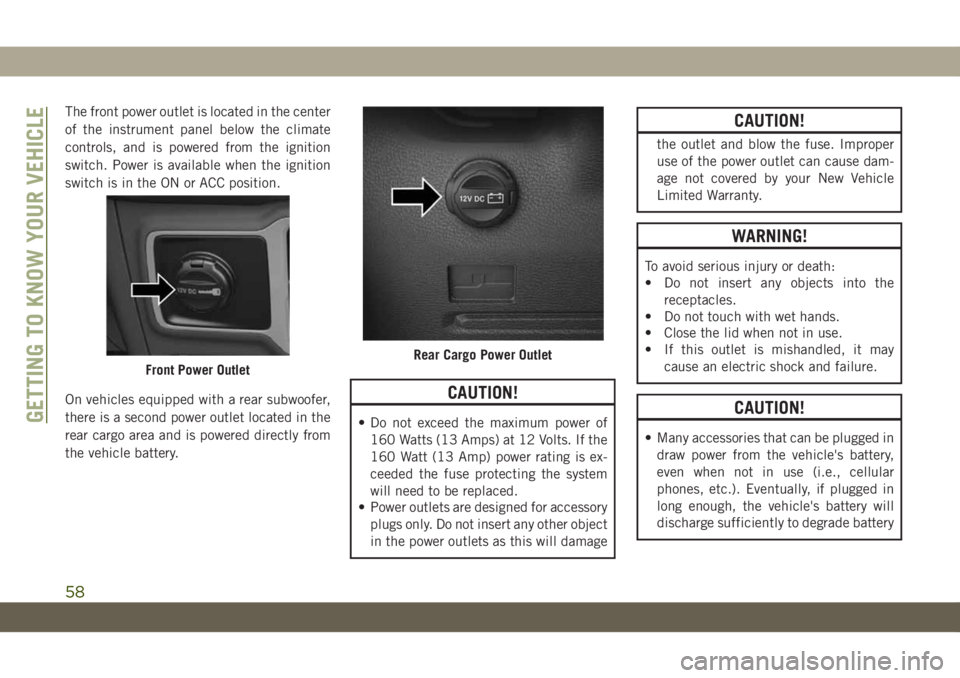
The front power outlet is located in the center
of the instrument panel below the climate
controls, and is powered from the ignition
switch. Power is available when the ignition
switch is in the ON or ACC position.
On vehicles equipped with a rear subwoofer,
there is a second power outlet located in the
rear cargo area and is powered directly from
the vehicle battery.
CAUTION!
• Do not exceed the maximum power of
160 Watts (13 Amps) at 12 Volts. If the
160 Watt (13 Amp) power rating is ex-
ceeded the fuse protecting the system
will need to be replaced.
• Power outlets are designed for accessory
plugs only. Do not insert any other object
in the power outlets as this will damage
CAUTION!
the outlet and blow the fuse. Improper
use of the power outlet can cause dam-
age not covered by your New Vehicle
Limited Warranty.
WARNING!
To avoid serious injury or death:
• Do not insert any objects into the
receptacles.
• Do not touch with wet hands.
• Close the lid when not in use.
• If this outlet is mishandled, it may
cause an electric shock and failure.
CAUTION!
• Many accessories that can be plugged in
draw power from the vehicle's battery,
even when not in use (i.e., cellular
phones, etc.). Eventually, if plugged in
long enough, the vehicle's battery will
discharge sufficiently to degrade battery
Front Power OutletRear Cargo Power Outlet
GETTING TO KNOW YOUR VEHICLE
58
Page 61 of 348
CAUTION!
life and/or prevent the engine from start-
ing.
• Accessories that draw higher power (i.e.,
coolers, vacuum cleaners, lights, etc.),
will degrade the battery even more
quickly. Only use these intermittently
and with greater caution.
• After the use of high power draw acces-
sories, or long periods of the vehicle not
being started (with accessories still
plugged in), the vehicle must be driven a
sufficient length of time to allow the
alternator to recharge the vehicle's bat-
tery.
• Power outlets are designed for accessory
plugs only. Do not hang any type of
accessory or accessory bracket from the
plug. Improper use of the power outlet
can cause damage.
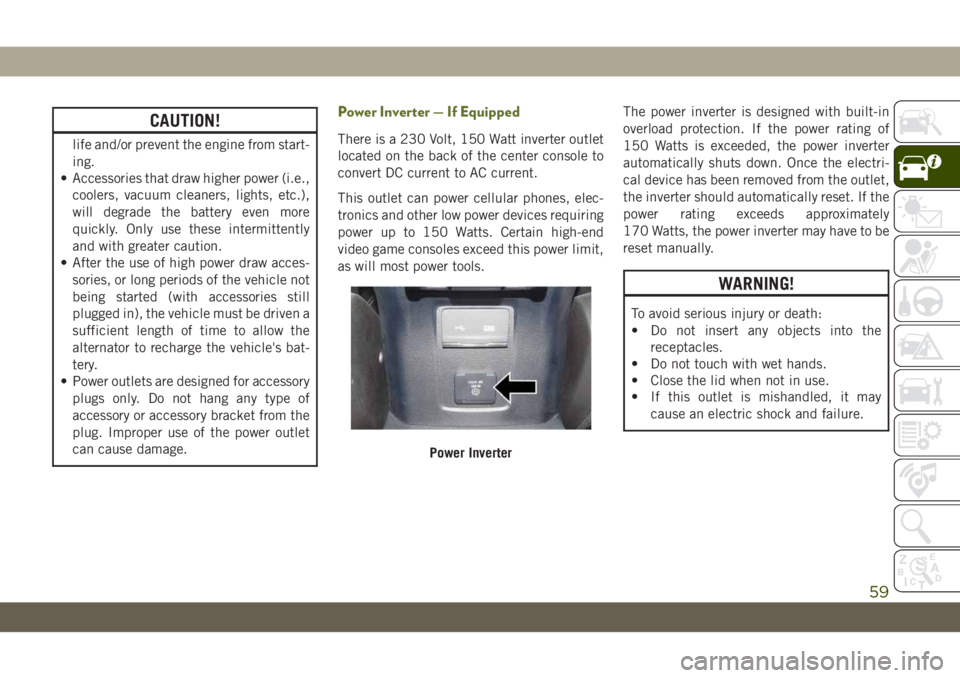
Power Inverter — If Equipped
There is a 230 Volt, 150 Watt inverter outlet
located on the back of the center console to
convert DC current to AC current.
This outlet can power cellular phones, elec-
tronics and other low power devices requiring
power up to 150 Watts. Certain high-end
video game consoles exceed this power limit,
as will most power tools.The power inverter is designed with built-in
overload protection. If the power rating of
150 Watts is exceeded, the power inverter
automatically shuts down. Once the electri-
cal device has been removed from the outlet,
the inverter should automatically reset. If the
power rating exceeds approximately
170 Watts, the power inverter may have to be
reset manually.
WARNING!
To avoid serious injury or death:
• Do not insert any objects into the
receptacles.
• Do not touch with wet hands.
• Close the lid when not in use.
• If this outlet is mishandled, it may
cause an electric shock and failure.
Power Inverter
59
Page 62 of 348
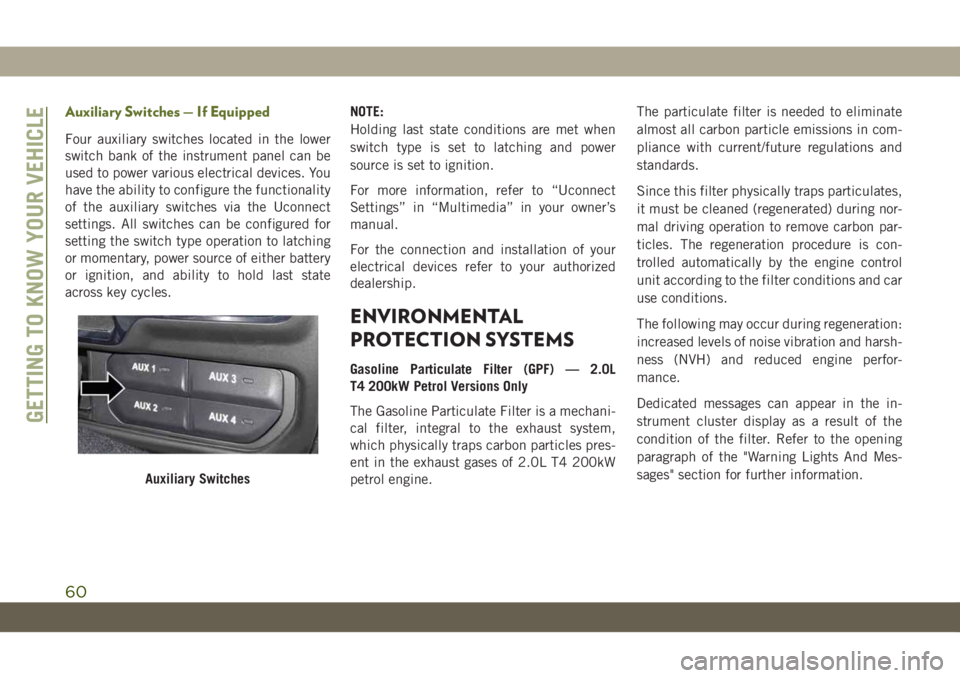
Auxiliary Switches — If Equipped
Four auxiliary switches located in the lower
switch bank of the instrument panel can be
used to power various electrical devices. You
have the ability to configure the functionality
of the auxiliary switches via the Uconnect
settings. All switches can be configured for
setting the switch type operation to latching
or momentary, power source of either battery
or ignition, and ability to hold last state
across key cycles.NOTE:
Holding last state conditions are met when
switch type is set to latching and power
source is set to ignition.
For more information, refer to “Uconnect
Settings” in “Multimedia” in your owner’s
manual.
For the connection and installation of your
electrical devices refer to your authorized
dealership.
ENVIRONMENTAL
PROTECTION SYSTEMS
Gasoline Particulate Filter (GPF) — 2.0L
T4 200kW Petrol Versions Only
The Gasoline Particulate Filter is a mechani-
cal filter, integral to the exhaust system,
which physically traps carbon particles pres-
ent in the exhaust gases of 2.0L T4 200kW
petrol engine.The particulate filter is needed to eliminate
almost all carbon particle emissions in com-
pliance with current/future regulations and
standards.
Since this filter physically traps particulates,
it must be cleaned (regenerated) during nor-
mal driving operation to remove carbon par-
ticles. The regeneration procedure is con-
trolled automatically by the engine control
unit according to the filter conditions and car
use conditions.
The following may occur during regeneration:
increased levels of noise vibration and harsh-
ness (NVH) and reduced engine perfor-
mance.
Dedicated messages can appear in the in-
strument cluster display as a result of the
condition of the filter. Refer to the opening
paragraph of the "Warning Lights And Mes-
sages" section for further information.
Auxiliary Switches
GETTING TO KNOW YOUR VEHICLE
60
Page 63 of 348
GETTING TO KNOW YOUR INSTRUMENT PANEL
INSTRUMENT CLUSTER DISPLAY. .62
Instrument Cluster Display Location And
Controls....................62
Oil Change Indicator System — If
Equipped....................63
Instrument Cluster Display Selectable
Items......................63
Gear Shift Indicator (GSI) — If
Equipped....................64Fuel System Messages............64WARNING LIGHTS AND MES-
SAGES ....................66
Red Warning Lights..............66
Yellow Warning Lights............70
Yellow Indicator Lights............74
Green Indicator Lights............75
White Indicator Lights............76Blue Indicator Lights.............77
Gray Indicator Lights.............78
ONBOARD DIAGNOSTIC SYSTEM —
OBDII ....................78
Onboard Diagnostic System (OBD II)
Cybersecurity.................78
EMISSIONS INSPECTION AND
MAINTENANCE PROGRAMS....79
GETTING TO KNOW YOUR INSTRUMENT PANEL
61