ignition JEEP WRANGLER UNLIMITED 2020 Owner handbook (in English)
[x] Cancel search | Manufacturer: JEEP, Model Year: 2020, Model line: WRANGLER UNLIMITED, Model: JEEP WRANGLER UNLIMITED 2020Pages: 330, PDF Size: 9.16 MB
Page 157 of 330
155
To Start The Engine While In Autostop
Mode
While in a forward gear, the engine will start
when the brake pedal is released or the
throttle pedal is depressed. The transmission
will automatically re-engage upon engine
restart.
Conditions That Will Cause The Engine To Start
Automatically While In Autostop Mode:
The transmission selector is moved out of
DRIVE.
To maintain cabin temperature comfort.
Actual cabin temperature is significantly
different than temperature set on Auto
HVAC.
HVAC is set to full defrost mode.
HVAC system temperature or fan speed is
manually adjusted.
Battery voltage drops too low.
Low brake vacuum (e.g. after several brake
pedal applications).
Stop/Start OFF switch is pushed.
A Stop/Start system error occurs.
STOP/START AUTO STOP ACTIVE time
exceeds 5 minutes.
4WD system is put into 4L or Neutral
mode.
Steering wheel is turned beyond
threshold. (ESS Models Only)
To Manually Turn Off The Stop/Start
System
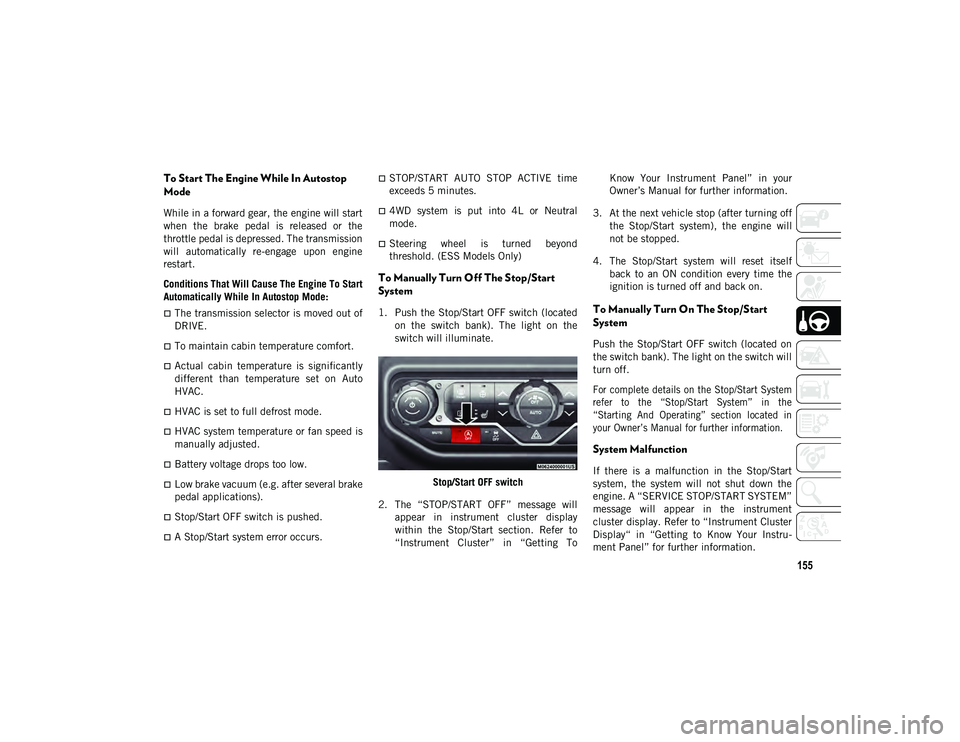
1. Push the Stop/Start OFF switch (located
on the switch bank). The light on the
switch will illuminate.
Stop/Start OFF switch
2. The “STOP/START OFF” message will appear in instrument cluster display
within the Stop/Start section. Refer to
“Instrument Cluster” in “Getting To Know Your Instrument Panel” in your
Owner’s Manual for further information.
3. At the next vehicle stop (after turning off the Stop/Start system), the engine will
not be stopped.
4. The Stop/Start system will reset itself back to an ON condition every time the
ignition is turned off and back on.To Manually Turn On The Stop/Start
System
Push the Stop/Start OFF switch (located on
the switch bank). The light on the switch will
turn off.
For complete details on the Stop/Start System
refer to the “Stop/Start System” in the
“Starting And Operating” section located in
your Owner’s Manual for further information.
System Malfunction
If there is a malfunction in the Stop/Start
system, the system will not shut down the
engine. A “SERVICE STOP/START SYSTEM”
message will appear in the instrument
cluster display. Refer to “Instrument Cluster
Display“ in “Getting to Know Your Instru -
ment Panel” for further information.
2020_JEEP_JL_WRANGLER_UG_RHD_UK.book Page 155
Page 163 of 330
161
To increase the distance setting, push the
Distance Setting — Increase button and
release. Each time the button is pushed, the
distance setting increases by one bar
(longer).
To decrease the distance setting, push the
Distance Setting — Decrease button and
release. Each time the button is pushed, the
distance setting decreases by one bar
(shorter).
PARKSENSE REAR PARK
ASSIST — IF EQUIPPED
The ParkSense Rear Park Assist system
provides visual and audible indications of
the distance between the rear fascia and a
detected obstacle when backing up (e.g.
during a parking maneuver). Refer to “Park-
Sense System Usage Precautions” in this
section for limitations of this system and
recommendations.
ParkSense will retain the last system state
(enabled or disabled) from the last ignition
cycle when the ignition is changed to the ON/
RUN position. ParkSense can be active only when the gear
selector is in REVERSE. If ParkSense is
enabled at this gear selector position, the
system will remain active until the vehicle
speed is increased to approximately 7 mph
(11 km/h) or above. When in REVERSE and
above the system's operating speed, a
warning will appear within the instrument
cluster display indicating the vehicle speed
is too fast. The system will become active
again if the vehicle speed is decreased to
speeds less than approximately 6 mph
(9 km/h).
ParkSense Sensors
The four ParkSense sensors, located in the
rear fascia/bumper, monitor the area behind
the vehicle that is within the sensors’ field of
view. The sensors can detect obstacles from
approximately 12 inches (30 cm) up to
79 inches (200 cm) from the rear fascia/
bumper in the horizontal direction,
depending on the location, type and orienta
-
tion of the obstacle.
Enabling And Disabling ParkSense
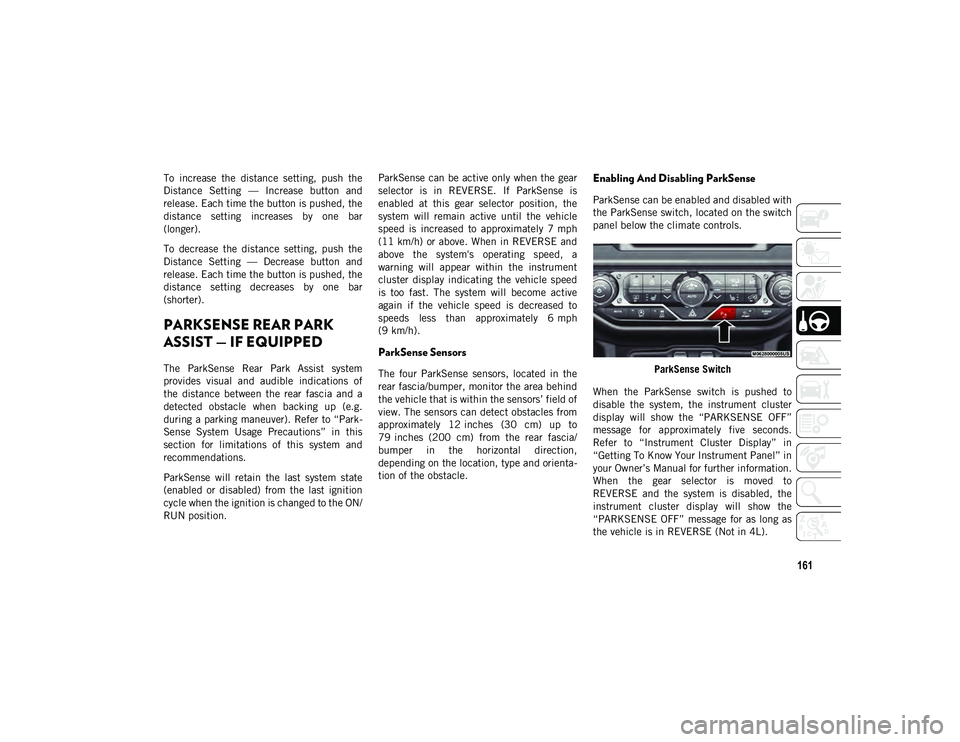
ParkSense can be enabled and disabled with
the ParkSense switch, located on the switch
panel below the climate controls.
ParkSense Switch
When the ParkSense switch is pushed to
disable the system, the instrument cluster
display will show the “PARKSENSE OFF”
message for approximately five seconds.
Refer to “Instrument Cluster Display” in
“Getting To Know Your Instrument Panel” in
your Owner’s Manual for further information.
When the gear selector is moved to
REVERSE and the system is disabled, the
instrument cluster display will show the
“PARKSENSE OFF” message for as long as
the vehicle is in REVERSE (Not in 4L).
2020_JEEP_JL_WRANGLER_UG_RHD_UK.book Page 161
Page 164 of 330
STARTING AND OPERATING
162
The ParkSense switch LED will be on when
ParkSense is disabled or requires service.
The ParkSense switch LED will be off when
the system is enabled. If the ParkSense
switch is pushed, and requires service, the
ParkSense switch LED will blink momen-
tarily, and then the LED will be on.
ParkSense System Usage Precautions
NOTE:
Ensure that the rear bumper is free of
snow, ice, mud, dirt and debris to keep the
ParkSense system operating properly.
Jackhammers, large trucks, and other
vibrations could affect the performance of
ParkSense.
When you turn ParkSense off, the instru -
ment cluster display will read “PARK -
SENSE OFF.” Furthermore, once you turn
ParkSense off, it remains off until you turn
it on again, even if you cycle the ignition.
ParkSense, when on, will reduce the
volume of the radio when it is sounding a
tone.
Clean the ParkSense sensors regularly,
taking care not to scratch or damage them.
The sensors must not be covered with ice,
snow, slush, mud, dirt or debris. Failure to
do so can result in the system not working
properly. The ParkSense system might not
detect an obstacle behind the fascia/
bumper, or it could provide a false indica-
tion that an obstacle is behind the fascia/
bumper.
Use the ParkSense switch to turn the
ParkSense system off if objects such as
bicycle carriers, trailer hitches, etc. are
placed within 12 inches (30 cm) from the
rear fascia/bumper. Failure to do so can
result in the system misinterpreting a
close object as a sensor problem, causing
the “PARKSENSE UNAVAILABLE
SERVICE REQUIRED” message to be
displayed in the instrument cluster
display.
WARNING!
Drivers must be careful when backing up
even when using ParkSense. Always
check carefully behind your vehicle, look
behind you, and be sure to check for
pedestrians, animals, other vehicles,
obstructions, and blind spots before
backing up. You are responsible for
safety and must continue to pay atten -
tion to your surroundings. Failure to do
so can result in serious injury or death.
Before using ParkSense, it is strongly
recommended that the ball mount and
hitch ball assembly is disconnected from
the vehicle when the vehicle is not used
for towing. Failure to do so can result in
injury or damage to vehicles or obstacles
because the hitch ball will be much
closer to the obstacle than the rear fascia
when the loudspeaker sounds the contin -
uous tone. Also, the sensors could detect
the ball mount and hitch ball assembly,
depending on its size and shape, giving
a false indication that an obstacle is
behind the vehicle.
2020_JEEP_JL_WRANGLER_UG_RHD_UK.book Page 162
Page 165 of 330
163
PARKSENSE FRONT AND
REAR PARK ASSIST — IF
EQUIPPED
The ParkSense Front & Rear Park Assist
system provides visual and audible indica-
tions of the distance between the rear and/or
front fascia and a detected obstacle when
backing up or moving forward (e.g. during a
parking maneuver). Refer to “ParkSense
System Usage Precautions” in this section
for limitations of this system and recommen -
dations. ParkSense will retain the last system state
(enabled or disabled) from the last ignition
cycle when the ignition is placed in the ON/
RUN position.
ParkSense can be active only when the gear
selector is in REVERSE or DRIVE. If Park
-
Sense is enabled at one of these gear
selector positions, the system will remain
active until the vehicle speed is increased to
approximately 7 mph (11 km/h) or above. If
the gear selector is in REVERSE, a warning
will appear in the instrument cluster display
indicating the vehicle is above ParkSense
operating speed. The system will become
active again if the vehicle speed is decreased
to speeds less than approximately 6 mph
(9 km/h).
ParkSense Sensors
The four ParkSense sensors, located in the
rear fascia/bumper, monitor the area behind
the vehicle that is within the sensors’ field of
view. The sensors can detect obstacles from
approximately 12 inches (30 cm) up to
79 inches (200 cm) from the rear fascia/
bumper in the horizontal direction,
depending on the location, type and orienta -
tion of the obstacle. The six ParkSense sensors, located in the
front fascia/bumper, monitor the area in
front of the vehicle that is within the sensors’
field of view. The sensors can detect obsta
-
cles from approximately 12 inches (30 cm)
up to 47 inches (120 cm) from the front
fascia/bumper in the horizontal direction,
depending on the location, type and orienta -
tion of the obstacle.
ParkSense Warning Display
The ParkSense Warning screen is located
within the instrument cluster display. It
provides visual warnings to indicate the
distance between the rear fascia/bumper
and/or front fascia/bumper and the detected
obstacle. Refer to “Instrument Cluster
Display” in “Getting To Know Your Instru -
ment Panel” for further information.
ParkSense Display
The warning display will turn on indicating
the system status when the vehicle is in
REVERSE or when the vehicle is in DRIVE
and an obstacle has been detected.
The system will indicate a detected obstacle
by showing a single arc in one or more
regions based on the obstacle’s distance and
location relative to the vehicle.
CAUTION!
ParkSense is only a parking aid and it is
unable to recognize every obstacle,
including small obstacles. Parking curbs
might be temporarily detected or not
detected at all. Obstacles located above
or below the sensors will not be detected
when they are in close proximity.
The vehicle must be driven slowly when
using ParkSense in order to be able to
stop in time when an obstacle is
detected. It is recommended that the
driver looks over his/her shoulder when
using ParkSense.
2020_JEEP_JL_WRANGLER_UG_RHD_UK.book Page 163
Page 167 of 330
165
NOTE:
ParkSense will reduce the volume of the
radio, if on, when the system is sounding an
audio tone.
Front Park Assist Audible Alerts
ParkSense will turn off the Front Park Assist
audible alert (chime) after approximately
three seconds when an obstacle has been
detected, the vehicle is stationary, and the
brake pedal is applied.
Adjustable Chime Volume Settings
The Front and Rear chime volume settings
are programmable.
The settings may be programmed through the
Uconnect System. Refer to “Uconnect Settings”
in “Multimedia” for further information.
The chime volume settings include low,
medium, and high. The factory default
volume setting is medium.
ParkSense will retain its last known configu
-
ration state through ignition cycles.
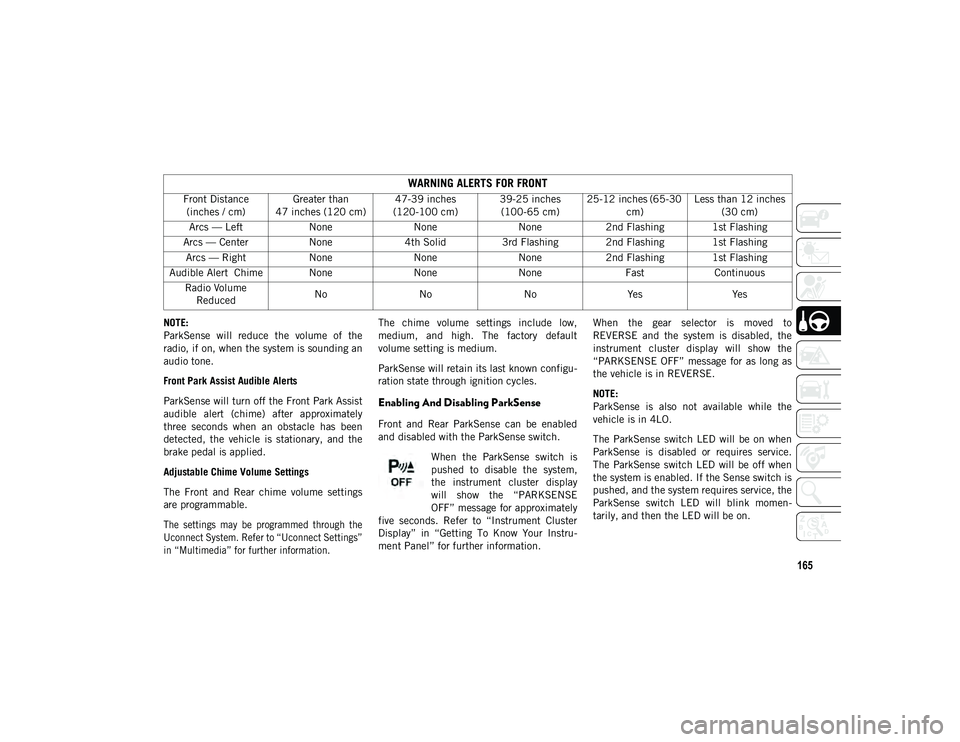
Enabling And Disabling ParkSense
Front and Rear ParkSense can be enabled
and disabled with the ParkSense switch.
When the ParkSense switch is
pushed to disable the system,
the instrument cluster display
will show the “PARKSENSE
OFF” message for approximately
five seconds. Refer to “Instrument Cluster
Display” in “Getting To Know Your Instru -
ment Panel” for further information. When the gear selector is moved to
REVERSE and the system is disabled, the
instrument cluster display will show the
“PARKSENSE OFF” message for as long as
the vehicle is in REVERSE.
NOTE:
ParkSense is also not available while the
vehicle is in 4LO.
The ParkSense switch LED will be on when
ParkSense is disabled or requires service.
The ParkSense switch LED will be off when
the system is enabled. If the Sense switch is
pushed, and the system requires service, the
ParkSense switch LED will blink momen
-
tarily, and then the LED will be on.
WARNING ALERTS FOR FRONT
Front Distance (inches / cm) Greater than
47 inches (120 cm) 47-39 inches
(120-100 cm) 39-25 inches
(100-65 cm) 25-12 inches (65-30
cm) Less than 12 inches
(30 cm)
Arcs — Left NoneNoneNone2nd Flashing 1st Flashing
Arcs — Center None4th Solid 3rd Flashing 2nd Flashing 1st Flashing
Arcs — Right NoneNoneNone2nd Flashing 1st Flashing
Audible Alert Chime None NoneNone FastContinuous
Radio Volume Reduced No
NoNoYes Yes
2020_JEEP_JL_WRANGLER_UG_RHD_UK.book Page 165
Page 168 of 330
STARTING AND OPERATING
166
Service The ParkSense Park Assist System
During vehicle start up, when the ParkSense
System has detected a faulted condition, the
instrument cluster will actuate a single
chime, once per ignition cycle, and it will
display the “PARKSENSE UNAVAILABLE
WIPE REAR SENSORS”, “PARKSENSE
UNAVAILABLE WIPE FRONT SENSORS” or
“PARKSENSE UNAVAILABLE SERVICE
REQUIRED” message. When the gear
selector is moved to REVERSE and the
system has detected a faulted condition, the
instrument cluster display will display a car
graphic with an overlay saying “Wipe Off” or
“Service”. Under this condition, ParkSense
will not operate. Refer to “Instrument Cluster
Display” in “Getting To Know Your Instru-
ment Panel” for further information.
If “PARKSENSE UNAVAILABLE WIPE REAR
SENSORS” or “PARKSENSE UNAVAILABLE
WIPE FRONT SENSORS” appears in the
instrument cluster display make sure the
outer surface and the underside of the rear
fascia/bumper and/or front fascia/bumper is
clean and clear of snow, ice, mud, dirt or
other obstruction and then cycle the ignition.
If the message continues to appear, see an
authorized dealer. If the “PARKSENSE UNAVAILABLE
SERVICE REQUIRED” message appears in
the instrument cluster display, see an autho
-
rized dealer.
Cleaning The ParkSense System
Clean the ParkSense sensors with water, car
wash soap, and a soft cloth. Do not use rough
or hard cloths. In washing stations, clean
sensors quickly keeping the vapor jet/high
pressure washing nozzles at least 4 inches
(10 cm) from the sensors. Do not scratch or
poke the sensors. Otherwise, you could
damage the sensors.
ParkSense System Usage Precautions
NOTE:
Ensure that the front and rear bumpers are
free of snow, ice, mud, dirt and debris to
keep the ParkSense system operating
properly.
Jackhammers, large trucks, and other
vibrations could affect the performance of
ParkSense.
When you turn ParkSense System off, the
instrument cluster display will show the
“ParkSense Off” message for two seconds.
Furthermore, once you turn ParkSense off, it remains off until you turn it on again,
even if you cycle the ignition.
When you move the gear selector to the
REVERSE position and ParkSense System
is turned off, the instrument cluster
display will show the “ParkSense Off”
message. This message will be displayed
for as long as the vehicle is in REVERSE.
NOTE:
The “ParkSense Off” message will not
display while the vehicle is in 4LO position.
ParkSense, when on, will reduce the
volume of the radio when it is sounding a
tone.
Clean the ParkSense sensors regularly,
taking care not to scratch or damage them.
The sensors must not be covered with ice,
snow, slush, mud, dirt or debris. Failure to
do so can result in the system not working
properly. The ParkSense system might not
detect an obstacle behind or in front of the
fascia/bumper, or it could provide a false
indication that an obstacle is behind or in
front of the fascia/bumper.
Use the ParkSense switch to turn the
ParkSense system off if obstacles such as
bicycle carriers, trailer hitches, etc. are
2020_JEEP_JL_WRANGLER_UG_RHD_UK.book Page 166
Page 170 of 330
STARTING AND OPERATING
168
Manual Activation Of The Rear View Camera
1. Press the “Controls” button located onthe bottom of the Uconnect display.
2. Press the “Backup Camera” button to turn the Rear View Camera system on.
When the vehicle is shifted out of REVERSE
(with Camera delay turned off), the rear
Camera mode is exited and the previous
screen appears again.
When the vehicle is shifted out of REVERSE
(with Camera delay turned on), the rear
Camera image will be displayed for up to 10
seconds unless the vehicle speed exceeds
8 mph (13 km/h), the transmission is shifted
into PARK, the ignition is placed in the OFF
position, or the touchscreen button “X” to
disable display of the Rear View Camera
image is pressed.
Whenever the Rear View Camera image is
activated through the “Backup Camera”
button in the “Controls” menu, and the
vehicle speed is greater than, or equal to,
8 mph (13 km/h), a display timer for the
image is initiated. The image will continue to
be displayed until the display timer exceeds
10 seconds. NOTE:
If the vehicle speed remains below 8 mph
(13 km/h), the Rear View Camera image
will be displayed continuously until deac-
tivated via the touchscreen button “X”,
the transmission is shifted into PARK, or
the ignition is placed in the OFF position.
The touchscreen button “X” to disable
display of the camera image is made avail
-
able ONLY when the vehicle is not in
REVERSE.
When enabled, active guide lines are overlaid
on the image to illustrate the width of the
vehicle and its projected backup path based
on the steering wheel position. A dashed
center line overlay indicates the center of the
vehicle to assist with parking or aligning to a
hitch/receiver.
When enabled, fixed guide lines are overlaid
on the image to illustrate the width of the
vehicle.
Different colored zones indicate the distance
to the rear of the vehicle. NOTE:
If snow, ice, mud, or any foreign substance
builds up on the camera lens, clean the lens,
rinse with water, and dry with a soft cloth. Do
not cover the lens.
WARNING!
Drivers must be careful when backing up
even when using the ParkView Rear Back
Up Camera. Always check carefully behind
your vehicle, and be sure to check for
pedestrians, animals, other vehicles,
obstructions, or blind spots before backing
up. You are responsible for the safety of
your surroundings and must continue to
pay attention while backing up. Failure to
do so can result in serious injury or death.
CAUTION!
To avoid vehicle damage, ParkView
should only be used as a parking aid. The
ParkView camera is unable to view every
obstacle or object in your drive path.
To avoid vehicle damage, the vehicle
must be driven slowly when using
ParkView to be able to stop in time when
an obstacle is seen. It is recommended
that the driver look frequently over his/
her shoulder when using ParkView.
2020_JEEP_JL_WRANGLER_UG_RHD_UK.book Page 168
Page 174 of 330
STARTING AND OPERATING
172
AdBlue® (UREA) Storage
AdBlue® (UREA) is considered a very stable
product with a long shelf life. If AdBlue®
(UREA) is kept in temperatures between 10°
and 90°F (-12° and 32°C), it will last a
minimum of one year.
AdBlue® (UREA) is subject to freezing at the
lowest temperatures. For example, AdBlue®
(UREA) may freeze at temperatures at or
below 12°F (-11°C). The system has been
designed to operate in this environment.
NOTE:
When working with AdBlue® (UREA), it is
important to know that:
Any containers or parts that come into
contact with AdBlue® (UREA) must be
AdBlue® (UREA) compatible (plastic or
stainless steel). Copper, brass, aluminum,
iron or non-stainless steel should be
avoided as they are subject to corrosion by
AdBlue® (UREA).
If AdBlue® (UREA) is spilled, it should be
wiped up completely.
Adding AdBlue® (UREA)
Preliminary Conditions
AdBlue® (UREA) freezes at temperatures
lower than 12°F (-11°C). If the car stands for
a long time at this temperature refilling
could be difficult. For this reason, it is
advised to park the vehicle in a garage and/
or heated environment and wait for the urea
to return to liquid state before topping up.
Proceed as follows:
Park the car on flat ground and stop the
engine by placing the ignition to the OFF
position.
Open the fuel door, undo and remove the
cap (blue) from the AdBlue® (UREA)
filler.
Refilling With Nozzles
You can fill up at any AdBlue® (UREA)
distributor.
Proceed as follows:
Insert the AdBlue® (UREA) nozzle in the
filler, start refilling and stop refilling at the
first shut-off (the shut-off indicates that the AdBlue® (UREA) tank is full). Do not
proceed with the refilling, to prevent
spillage of AdBlue® (UREA).
Extract the nozzle.
Refilling With Containers
Proceed as follows:
Check the expiration date.
Read the advice for use on the label before
pouring the content of the bottle into the
AdBlue® (UREA) tank.
If systems which cannot be screwed in
(e.g. tanks) are used for refilling, after the
indication appears on the instrument
panel display refer to “Warning lights And
Messages” in the “Getting To Know Your
Instrument Panel” for further information,
fill the AdBlue® (UREA) tank with no
more than 2 Gallons (8 liters).
If containers which can be screwed to the
filler are used, the reservoir is full when
the AdBlue® (UREA) level in the
container stops pouring out. Do not
proceed further.
2020_JEEP_JL_WRANGLER_UG_RHD_UK.book Page 172
Page 175 of 330
173
Operations After Refilling
Proceed as follows:
Fit the cap back on the AdBlue® (UREA)
filler by turning it clockwise and screwing
it completely.
Place the ignition in RUN (it is not neces-
sary to start the engine).
Wait for the indication on the instrument
panel to switch off before moving the car.
The indication may stay on for a few seconds
to approximately half a minute. If the engine
is started and the car is moved, the indica-
tion will remain on for longer. This will not
compromise engine operation.
If the AdBlue® (UREA) was topped up
when the tank was empty, wait for
2 minutes before starting the engine.
NOTE:
If AdBlue® (UREA) is spilled out of the
filler neck, clean up well the area and
proceed to filling up again. If the liquid
crystallizes, eliminate it with a sponge and
warm water.
DO NOT EXCEED THE MAXIMUM LEVEL:
this could cause damage to the reservoir.
AdBlue® (UREA) freezes at under 12°F
(-11°C). Although the system is designed
to operate below the freezing point of the
AdBlue® (UREA), it is advisable not to fill
the tank beyond the maximum level
because if the AdBlue® (UREA) freezes
the system can be damaged. Follow the
instructions in this section.
If the AdBlue® (UREA) is spilled on
painted surfaces or aluminum, immedi -
ately clean the area with water and use
absorbent material to collect the fluid that
has been spilled on the ground.
Do not try to start the engine if AdBlue®
(UREA) was accidentally added to the
diesel fuel tank, this can result in serious
engine damage, contact an authorized
dealer.
Do not add additives or other fluids to
AdBlue® (UREA), doing so could damage
the system.
The use of non-conforming or degraded
AdBlue® (UREA) may lead to indications
appearing on the instrument panel display
refer to “Warning Lights And Messages” in
the “Getting To Know Your Instrument
Panel” for further information.
Never pour AdBlue® (UREA) into another
container: it could be contaminated.
If the AdBlue® (UREA) runs out, see refer
to “Warning Lights And Messages” in the
“Getting To Know Your Instrument Panel”
for further information to continue using
the car normally.
2020_JEEP_JL_WRANGLER_UG_RHD_UK.book Page 173
Page 181 of 330
179
IN CASE OF EMERGENCY
HAZARD WARNING
FLASHERS
The Hazard Warning flasher switch is located
on the instrument panel below the climate
controls.Push the switch to turn on the
Hazard Warning flasher. When the
switch is activated, all directional turn signals will flash on and off to warn
oncoming traffic of an emergency. Push the
switch a second time to turn off the Hazard
Warning flashers.
This is an emergency warning system and it
should not be used when the vehicle is in
motion. Use it when your vehicle is disabled
and it is creating a safety hazard for other
motorists. When you must leave the vehicle to seek
assistance, the Hazard Warning flashers will
continue to operate even though the ignition
is placed in the OFF position.
NOTE:
With extended use the Hazard Warning
flashers may wear down your battery.
BULB REPLACEMENT
Replacement Bulbs
Interior Bulbs
Bulb Name Bulb Number
Automatic Transmission Indicator Lamp 658
Heater Control Lamps (2) 194
Rocker Switch Indicator Lamp (Rear Window Defogger, and Rear
Wash/Wipe) **
Soundbar Dome Lamp 912
** Bulbs only available from an authorized dealer.
2020_JEEP_JL_WRANGLER_UG_RHD_UK.book Page 179