display KIA Cadenza 2014 1.G Owner's Guide
[x] Cancel search | Manufacturer: KIA, Model Year: 2014, Model line: Cadenza, Model: KIA Cadenza 2014 1.GPages: 415, PDF Size: 5.09 MB
Page 141 of 415
473
Features of your vehicle
Overview
Description
The trip computer is a microcomput-
er-controlled driver information sys-
tem that displays information related
to driving.
✽ ✽NOTICE
Some driving information stored in
the trip computer (for example
Average Vehicle Speed) resets if the
battery is disconnected.
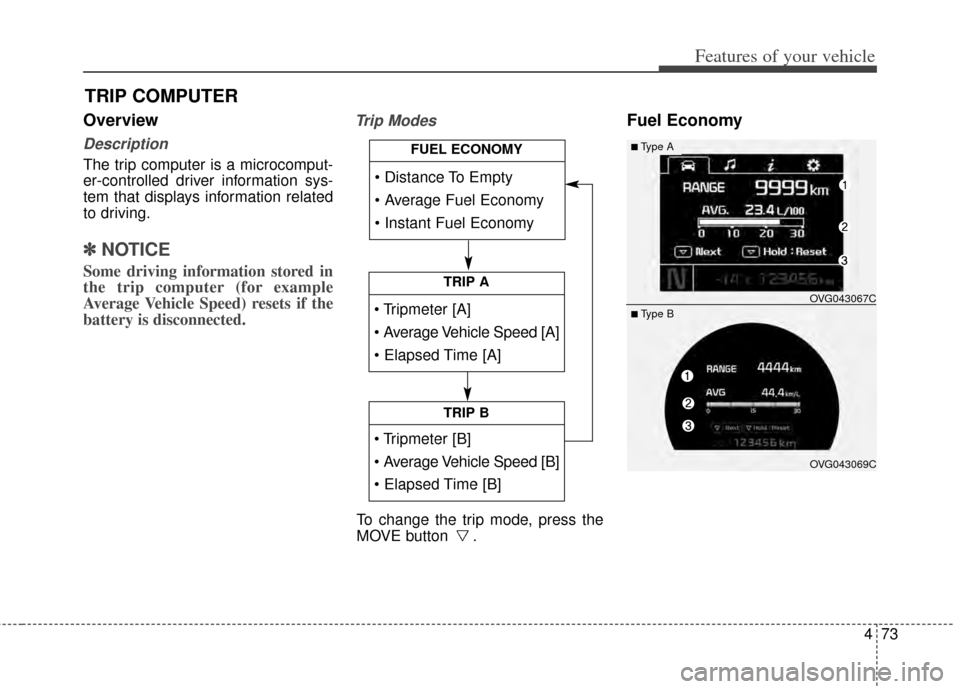
Trip ModesFuel Economy
TRIP COMPUTER
TRIP A
TRIP B
FUEL ECONOMY
To change the trip mode, press the
MOVE button .
■Type A
OVG043067C
OVG043069C
■ Type B
Page 142 of 415
Features of your vehicle
74
4
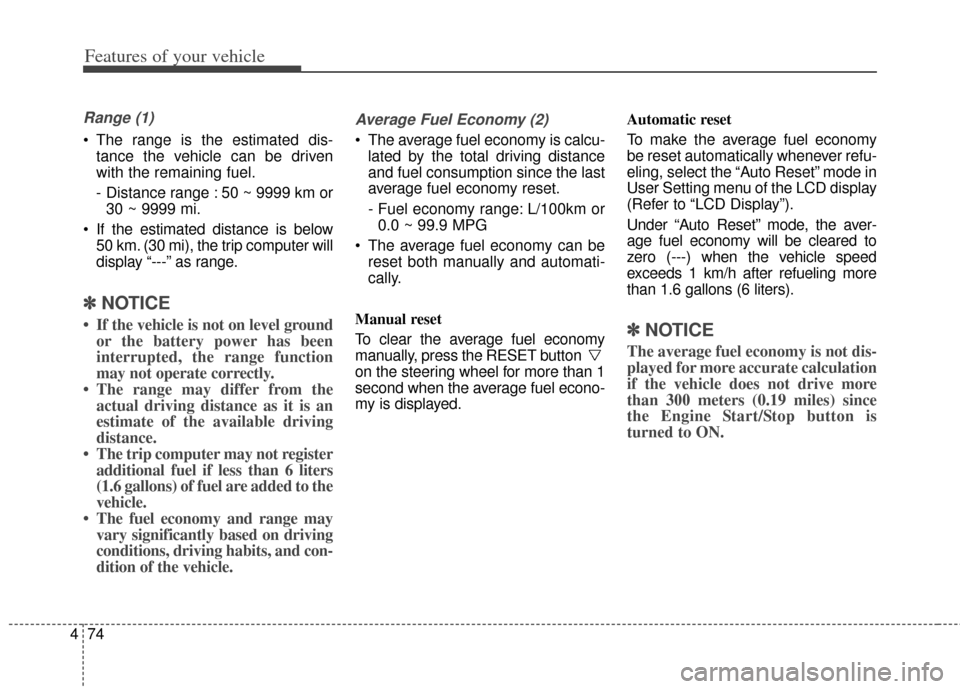
Range (1)
The range is the estimated dis-
tance the vehicle can be driven
with the remaining fuel.
- Distance range : 50 ~ 9999 km or30 ~ 9999 mi.
If the estimated distance is below 50 km. (30 mi), the trip computer will
display “---” as range.
✽ ✽ NOTICE
• If the vehicle is not on level ground
or the battery power has been
interrupted, the range function
may not operate correctly.
• The range may differ from the actual driving distance as it is an
estimate of the available driving
distance.
• The trip computer may not register additional fuel if less than 6 liters
(1.6 gallons) of fuel are added to the
vehicle.
• The fuel economy and range may vary significantly based on driving
conditions, driving habits, and con-
dition of the vehicle.
Average Fuel Economy (2)
The average fuel economy is calcu-
lated by the total driving distance
and fuel consumption since the last
average fuel economy reset.
- Fuel economy range: L/100km or0.0 ~ 99.9 MPG
The average fuel economy can be reset both manually and automati-
cally.
Manual reset
To clear the average fuel economy
manually, press the RESET button
on the steering wheel for more than 1
second when the average fuel econo-
my is displayed. Automatic reset
To make the average fuel economy
be reset automatically whenever refu-
eling, select the “Auto Reset” mode in
User Setting menu of the LCD display
(Refer to “LCD Display”).
Under “Auto Reset” mode, the aver-
age fuel economy will be cleared to
zero (---) when the vehicle speed
exceeds 1 km/h after refueling more
than 1.6 gallons (6 liters).
✽ ✽
NOTICE
The average fuel economy is not dis-
played for more accurate calculation
if the vehicle does not drive more
than 300 meters (0.19 miles) since
the Engine Start/Stop button is
turned to ON.
Page 143 of 415
475
Features of your vehicle
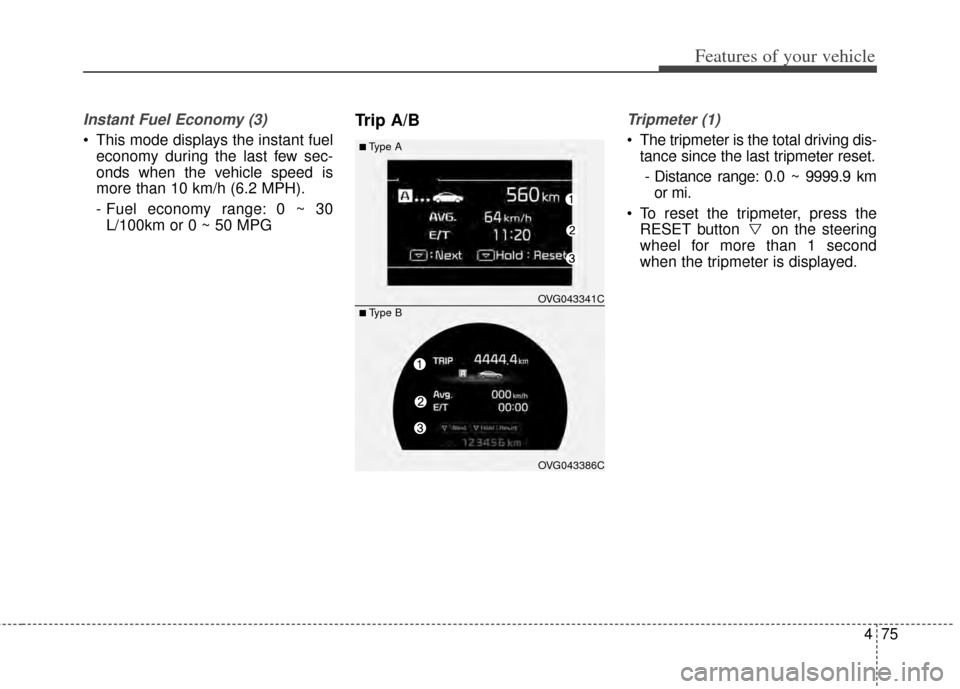
Instant Fuel Economy (3)
This mode displays the instant fueleconomy during the last few sec-
onds when the vehicle speed is
more than 10 km/h (6.2 MPH).
- Fuel economy range: 0 ~ 30L/100km or 0 ~ 50 MPG
Trip A/BTripmeter (1)
The tripmeter is the total driving dis- tance since the last tripmeter reset.
- Distance range: 0.0 ~ 9999.9 km or mi.
To reset the tripmeter, press the RESET button on the steering
wheel for more than 1 second
when the tripmeter is displayed.■Type A
OVG043341C
OVG043386C
■ Type B
Page 144 of 415

Features of your vehicle
76
4
Average Vehicle Speed (2)
The average vehicle speed is cal-
culated by the total driving dis-
tance and driving time since the
last average vehicle speed reset.
- Speed range: 0 ~ 999 km/h or MPH
To reset the average vehicle speed, press the RESET button on the
steering wheel for more than 1 sec-
ond when the average vehicle
speed is displayed.
✽ ✽ NOTICE
• The average vehicle speed is not dis-
played if the driving distance is less
than 300 meters (0.19 miles) since
the Engine Start/Stop button is
turned to ON.
• Even if the vehicle is not in motion, the average vehicle speed keeps
going while the engine is running.
Elapsed Time (3)
The elapsed time is the total driv-
ing time since the last elapsed time
reset.
- Time range (hh:mm): 00:00 ~ 99:59
To reset the elapsed time, press the RESET button on the steering
wheel for more than 1 second when
the elapsed time is displayed.
✽ ✽ NOTICE
Even if the vehicle is not in motion,
the elapsed time keeps going while
the engine is running.
Page 151 of 415
483
Features of your vehicle
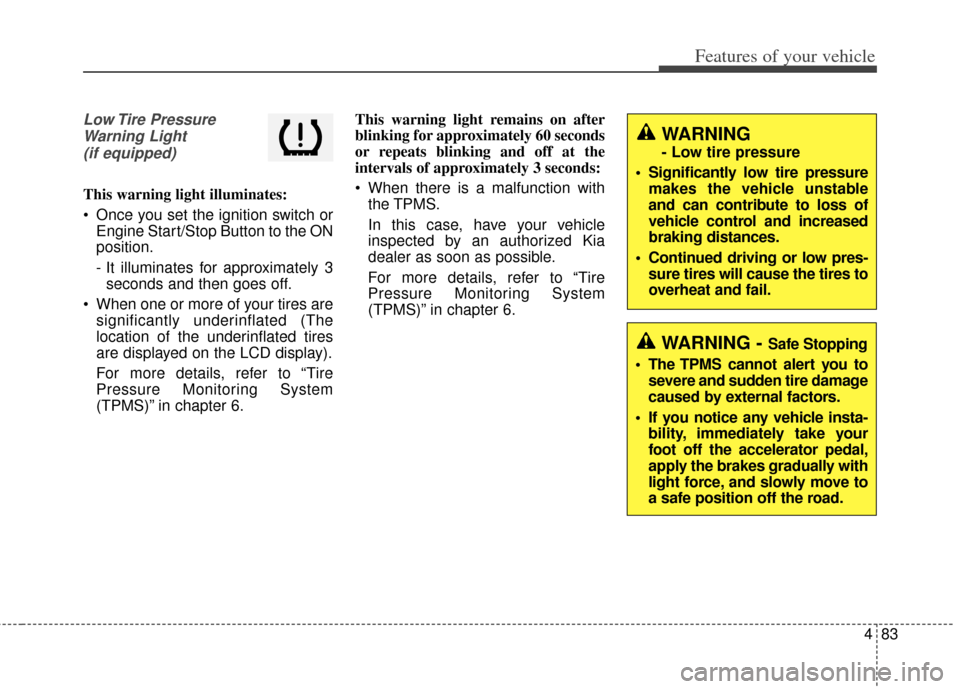
Low Tire PressureWarning Light(if equipped)
This warning light illuminates:
Once you set the ignition switch or Engine Start/Stop Button to the ON
position.
- It illuminates for approximately 3seconds and then goes off.
When one or more of your tires are significantly underinflated (The
location of the underinflated tires
are displayed on the LCD display).
For more details, refer to “Tire
Pressure Monitoring System
(TPMS)” in chapter 6. This warning light remains on after
blinking for approximately 60 seconds
or repeats blinking and off at the
intervals of approximately 3 seconds:
When there is a malfunction with
the TPMS.
In this case, have your vehicle
inspected by an authorized Kia
dealer as soon as possible.
For more details, refer to “Tire
Pressure Monitoring System
(TPMS)” in chapter 6.
WARNING - Safe Stopping
The TPMS cannot alert you to severe and sudden tire damage
caused by external factors.
If you notice any vehicle insta- bility, immediately take your
foot off the accelerator pedal,
apply the brakes gradually with
light force, and slowly move to
a safe position off the road.
WARNING
- Low tire pressure
Significantly low tire pressure makes the vehicle unstable
and can contribute to loss of
vehicle control and increased
braking distances.
Continued driving or low pres- sure tires will cause the tires to
overheat and fail.
Page 162 of 415
Features of your vehicle
94
4
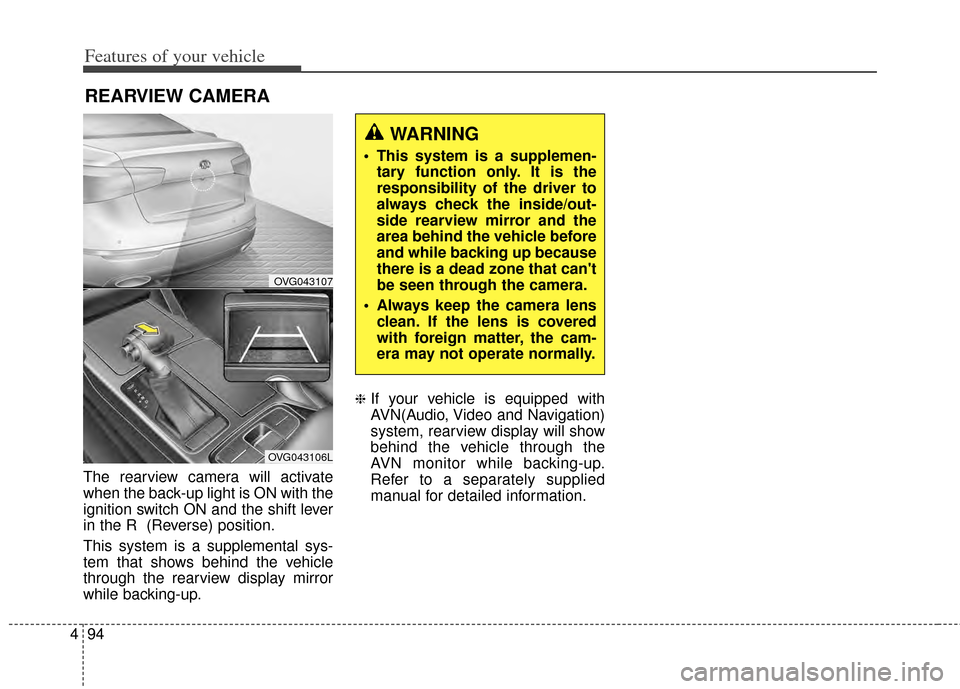
The rearview camera will activate
when the back-up light is ON with the
ignition switch ON and the shift lever
in the R (Reverse) position.
This system is a supplemental sys-
tem that shows behind the vehicle
through the rearview display mirror
while backing-up.
❈If your vehicle is equipped with
AVN(Audio, Video and Navigation)
system, rearview display will show
behind the vehicle through the
AVN monitor while backing-up.
Refer to a separately supplied
manual for detailed information.
REARVIEW CAMERA
OVG043107
OVG043106L
WARNING
This system is a supplemen-
tary function only. It is the
responsibility of the driver to
always check the inside/out-
side rearview mirror and the
area behind the vehicle before
and while backing up because
there is a dead zone that can't
be seen through the camera.
Always keep the camera lens clean. If the lens is covered
with foreign matter, the cam-
era may not operate normally.
Page 186 of 415

Features of your vehicle
118
4
Temperature control
The temperature will increase to the
maximum by pushing the up ( )
button.
The temperature will decrease to the
minimum by pushing the down ( )
button.
When pushing the button, the tem-
perature will increase or decrease by
0.5°C / 1°F. When set to the lowest
temperature setting, the air condi-
tioning will operate continuously. Adjusting the driver and passenger
side temperature individually
1. Press the DUAL button to operate
the driver and passenger side
temperature individually. Pressing
the right temperature control but-
ton will automatically switch to the
DUAL mode as well.
2. Operate the left temperature con- trol to adjust the driver side tem-
perature. Operate the right tem-
perature control to adjust the pas-
senger side temperature. Adjusting the driver and passenger
side temperature equally
1. Press the DUAL button again to
deactivate DUAL mode. The pas-
senger side temperature will be
set to the same temperature as
the driver side temperature.
2. Operate the driver side tempera- ture control button. The driver and
passenger side temperature will
be adjusted equally.
Temperature conversion
You can switch the temperature
mode from Centigrade to Fahrenheit
as follows:
While pressing the OFF button,
press the AUTO button for 3 seconds
or more.
The display will change from
Centigrade to Fahrenheit, or from
Fahrenheit to Centigrade.
If the battery has been discharged or
disconnected, the temperature mode
display will reset to Fahrenheit.
OVG043129
■Driver’s side■Passenger’s side
OVG043130
Page 190 of 415
Features of your vehicle
122
4
Climate information screen selec-
tion (if equipped)
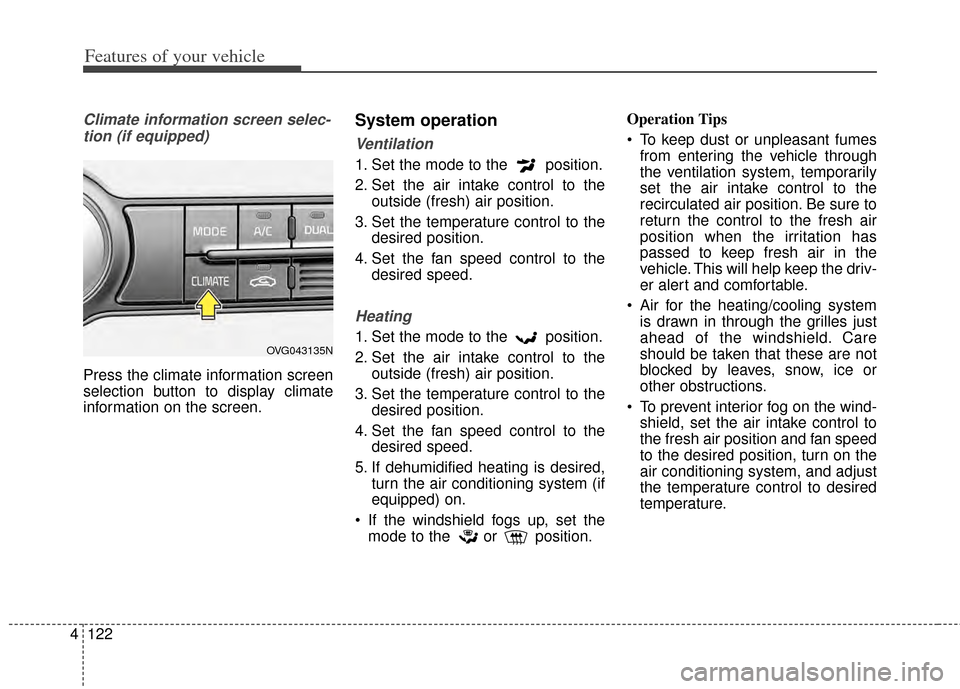
Press the climate information screen
selection button to display climate
information on the screen.
System operation
Ventilation
1. Set the mode to the position.
2. Set the air intake control to the outside (fresh) air position.
3. Set the temperature control to the desired position.
4. Set the fan speed control to the desired speed.
Heating
1. Set the mode to the position.
2. Set the air intake control to theoutside (fresh) air position.
3. Set the temperature control to the desired position.
4. Set the fan speed control to the desired speed.
5. If dehumidified heating is desired, turn the air conditioning system (if
equipped) on.
If the windshield fogs up, set the mode to the or position. Operation Tips
To keep dust or unpleasant fumes
from entering the vehicle through
the ventilation system, temporarily
set the air intake control to the
recirculated air position. Be sure to
return the control to the fresh air
position when the irritation has
passed to keep fresh air in the
vehicle. This will help keep the driv-
er alert and comfortable.
Air for the heating/cooling system is drawn in through the grilles just
ahead of the windshield. Care
should be taken that these are not
blocked by leaves, snow, ice or
other obstructions.
To prevent interior fog on the wind- shield, set the air intake control to
the fresh air position and fan speed
to the desired position, turn on the
air conditioning system, and adjust
the temperature control to desired
temperature.OVG043135N
Page 209 of 415
4141
Features of your vehicle
Steering wheel remote con-
troller
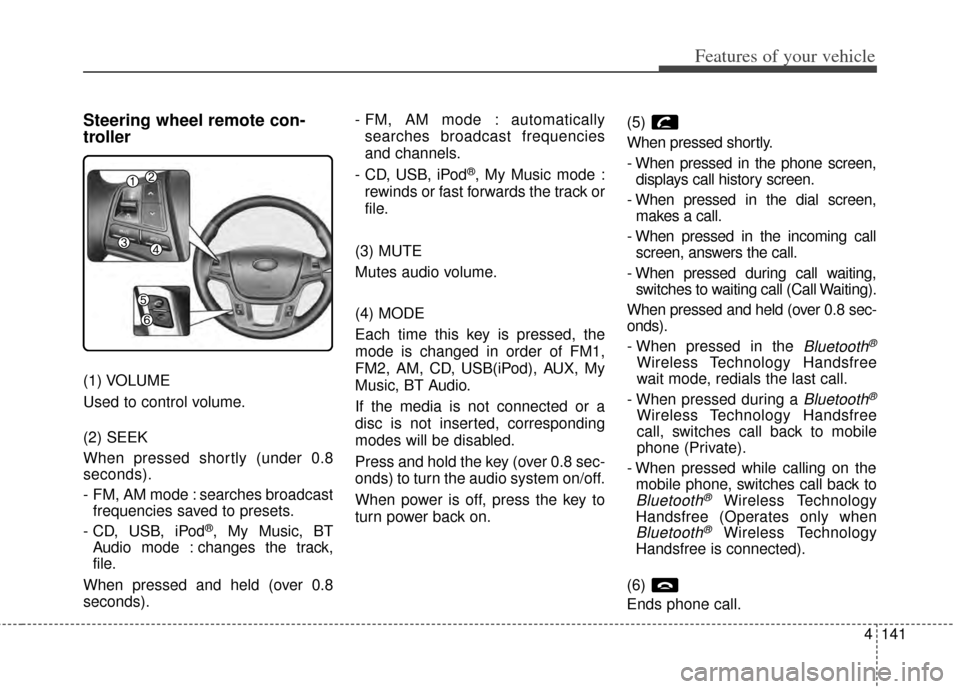
(1) VOLUME
Used to control volume.
(2) SEEK
When pressed shortly (under 0.8
seconds).
- FM, AM mode : searches broadcastfrequencies saved to presets.
- CD, USB, iPod
®, My Music, BT
Audio mode : changes the track,
file.
When pressed and held (over 0.8
seconds). - FM, AM mode : automatically
searches broadcast frequencies
and channels.
- CD, USB, iPod
®, My Music mode :
rewinds or fast forwards the track or
file.
(3) MUTE
Mutes audio volume.
(4) MODE
Each time this key is pressed, the
mode is changed in order of FM1,
FM2, AM, CD, USB(iPod), AUX, My
Music, BT Audio.
If the media is not connected or a
disc is not inserted, corresponding
modes will be disabled.
Press and hold the key (over 0.8 sec-
onds) to turn the audio system on/off.
When power is off, press the key to
turn power back on. (5)
When pressed shortly.
- When pressed in the phone screen,
displays call history screen.
- When pressed in the dial screen, makes a call.
- When pressed in the incoming call screen, answers the call.
- When pressed during call waiting, switches to waiting call (Call Waiting).
When pressed and held (over 0.8 sec-
onds).
- When pressed in the
Bluetooth®
Wireless Technology Handsfree
wait mode, redials the last call.
- When pressed during a
Bluetooth®
Wireless Technology Handsfree
call, switches call back to mobile
phone (Private).
- When pressed while calling on the mobile phone, switches call back to
Bluetooth®Wireless Technology
Handsfree (Operates only when
Bluetooth®Wireless Technology
Handsfree is connected).
(6)
Ends phone call.
Page 218 of 415

Driving your vehicle
85
Starting the engine with a
smart key
1.Carry the smart key or leave itinside the vehicle.
2.Make sure the parking brake is firmly applied
3.Place the transaxle shift lever in P (Park).
4.Press the ENGINE START/STOP button while depressing the brake
pedal.
5.In extremely cold weather (below 0°F / -18°C) or after the vehicle has
not been operated for several days,
let the engine warm up without
depressing the accelerator. Whether the engine is cold or warm,
it should be started without depress-
ing the accelerator.
Even if the smart key is in the vehi-
cle, but is far away from you, the
engine may not start.
When the ENGINE START/STOP button is in the ACC position or
above, if any door is opened, the
system checks for the smart key. If
the smart key is not in the vehi-
cle,the “ ” indicator will blink or
the warning "Key not in vehicle" will
illuminate on the LCD display. And
if all doors are closed, the chime
will sound for 5 seconds. The indi-
cator or warning will turn off while
the vehicle is moving. Always have
the smart key with you.
The engine will start only when the
smart key is in the vehicle.
STARTING THE ENGINE
WARNING - Proper footwear
Always wear appropriate shoes
when operating your vehicle.
Unsuitable shoes (high heels,
ski boots, sandals, etc.) may
interfere with your ability to use
the brake and accelerator ped-
als.