ignition KIA CADENZA 2018 User Guide
[x] Cancel search | Manufacturer: KIA, Model Year: 2018, Model line: CADENZA, Model: KIA CADENZA 2018Pages: 502, PDF Size: 9.77 MB
Page 188 of 502
4107
Features of your vehicle
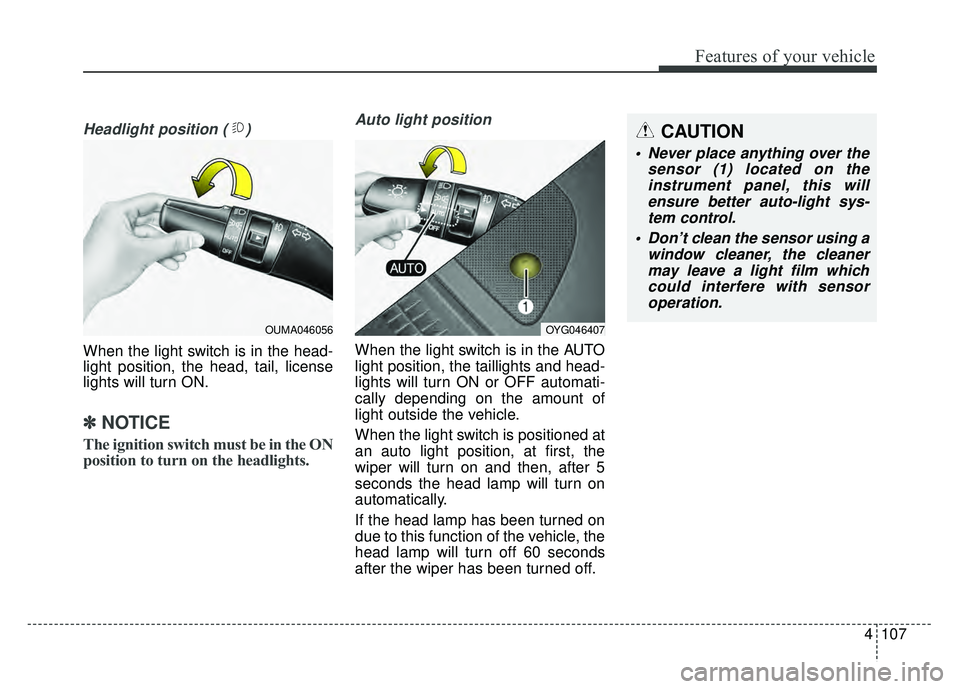
Headlight position ( )
When the light switch is in the head-
light position, the head, tail, license
lights will turn ON.
✽ ✽NOTICE
The ignition switch must be in the ON
position to turn on the headlights.
Auto light position
When the light switch is in the AUTO
light position, the taillights and head-
lights will turn ON or OFF automati-
cally depending on the amount of
light outside the vehicle.
When the light switch is positioned at
an auto light position, at first, the
wiper will turn on and then, after 5
seconds the head lamp will turn on
automatically.
If the head lamp has been turned on
due to this function of the vehicle, the
head lamp will turn off 60 seconds
after the wiper has been turned off.
OUMA046056OYG046407
CAUTION
Never place anything over the
sensor (1) located on theinstrument panel, this willensure better auto-light sys-tem control.
Don’t clean the sensor using a window cleaner, the cleanermay leave a light film whichcould interfere with sensoroperation.
Page 191 of 502
Features of your vehicle
110
4
When driving downhill or uphill.
When only part of the vehicle in
front is visible on a crossroad or
curved road.
When there is a traffic light, reflect- ing sign, flashing sign or mirror.
When the road conditions are bad such as being wet or covered with
snow.
When the front vehicle’s head- lamps are off but the fog lamps on.
When a vehicle suddenly appears from a curve.
When the vehicle is tilted from a flat tire or being towed.
When the LDWS (lane departure warning system) warning light illu-
minates. (if equipped)✽ ✽ NOTICE
• Do not place any accessories,
stickers or tint the windshield.
• Have the windshield glass replaced from an authorized dealer.
• Do not remove or damage related parts of the High Beam Assist sys-
tem.
• Be careful that water doesn’t get into the High Beam Assist unit.
• Do not place objects on the dash- board that reflect light such as
mirrors, white paper, etc. The sys-
tem may malfunction if sunlight is
reflected.
• At times, the Smart High Beam system may not work properly,
always check the road conditions
for your safety. When the system
does not operate normally, manu-
ally change between the high
beam and low beam.
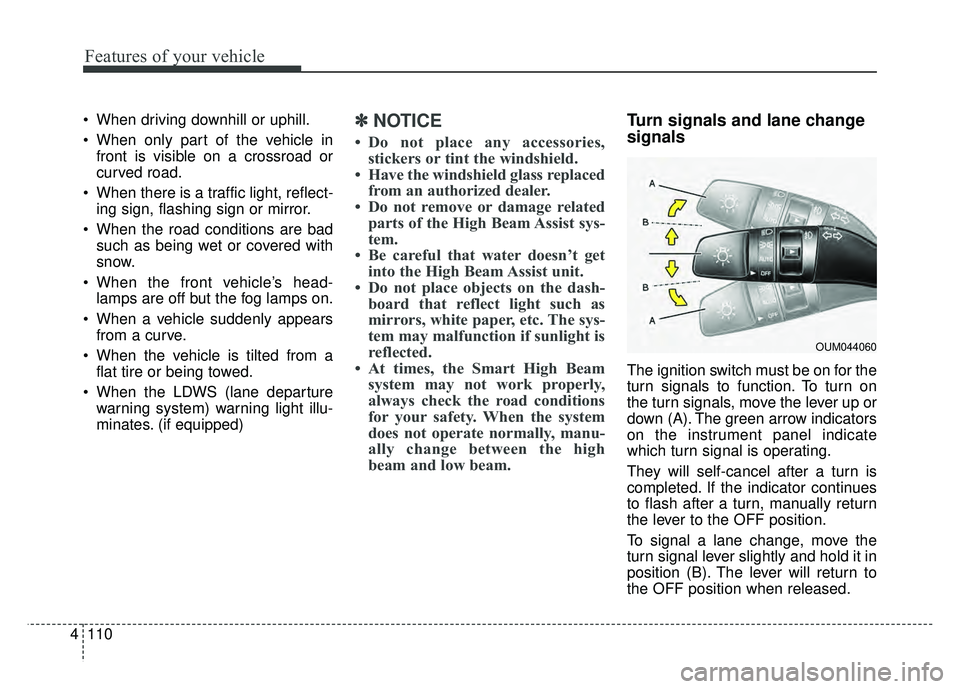
Turn signals and lane change
signals
The ignition switch must be on for the
turn signals to function. To turn on
the turn signals, move the lever up or
down (A). The green arrow indicators
on the instrument panel indicate
which turn signal is operating.
They will self-cancel after a turn is
completed. If the indicator continues
to flash after a turn, manually return
the lever to the OFF position.
To signal a lane change, move the
turn signal lever slightly and hold it in
position (B). The lever will return to
the OFF position when released.
OUM044060
Page 195 of 502
Features of your vehicle
114
4
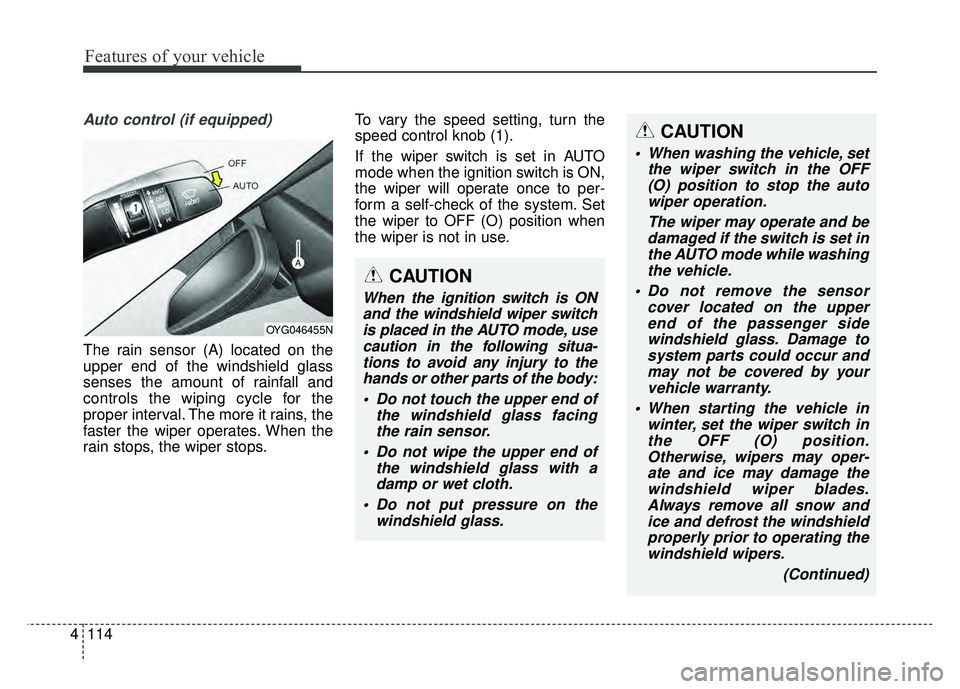
Auto control (if equipped)
The rain sensor (A) located on the
upper end of the windshield glass
senses the amount of rainfall and
controls the wiping cycle for the
proper interval. The more it rains, the
faster the wiper operates. When the
rain stops, the wiper stops. To vary the speed setting, turn the
speed control knob (1).
If the wiper switch is set in AUTO
mode when the ignition switch is ON,
the wiper will operate once to per-
form a self-check of the system. Set
the wiper to OFF (O) position when
the wiper is not in use.
OYG046455N
CAUTION
When the ignition switch is ON
and the windshield wiper switchis placed in the AUTO mode, usecaution in the following situa-tions to avoid any injury to thehands or other parts of the body:
Do not touch the upper end of the windshield glass facingthe rain sensor.
Do not wipe the upper end of the windshield glass with adamp or wet cloth.
Do not put pressure on the windshield glass.
CAUTION
When washing the vehicle, setthe wiper switch in the OFF(O) position to stop the autowiper operation.
The wiper may operate and bedamaged if the switch is set inthe AUTO mode while washingthe vehicle.
Do not remove the sensor cover located on the upperend of the passenger sidewindshield glass. Damage tosystem parts could occur andmay not be covered by yourvehicle warranty.
When starting the vehicle in winter, set the wiper switch inthe OFF (O) position.Otherwise, wipers may oper-ate and ice may damage thewindshield wiper blades.Always remove all snow andice and defrost the windshieldproperly prior to operating thewindshield wipers.
(Continued)
Page 198 of 502
4117
Features of your vehicle
Do not use the interior lights for
extended periods when the engine is
not running.
It may cause battery discharge.Automatic turn off function
(if equipped)
The interior lights automatically turn
off approximately 20 minutes after
the ignition switch is turned off, if the
lights are in the ON position.
If your vehicle is equipped with the
theft alarm system, the interior lights
automatically turn off approximately
5 seconds after the system in armed
stage.
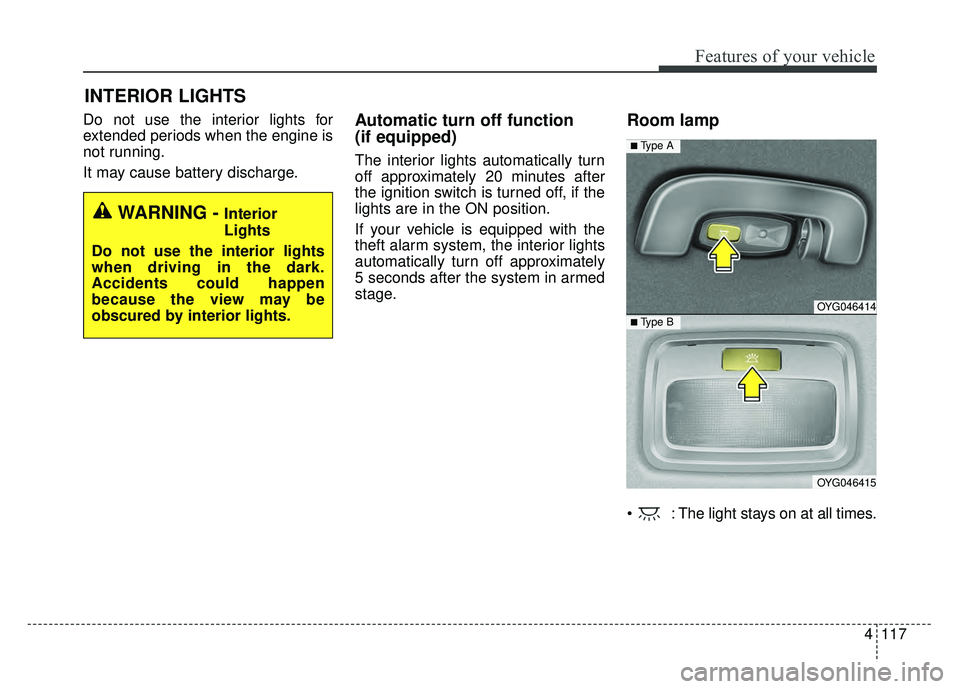
Room lamp
: The light stays on at all times.
INTERIOR LIGHTS
WARNING - Interior
Lights
Do not use the interior lights
when driving in the dark.
Accidents could happen
because the view may be
obscured by interior lights.
OYG046414
OYG046415
■ Type B
■ Type A
Page 199 of 502
Features of your vehicle
118
4
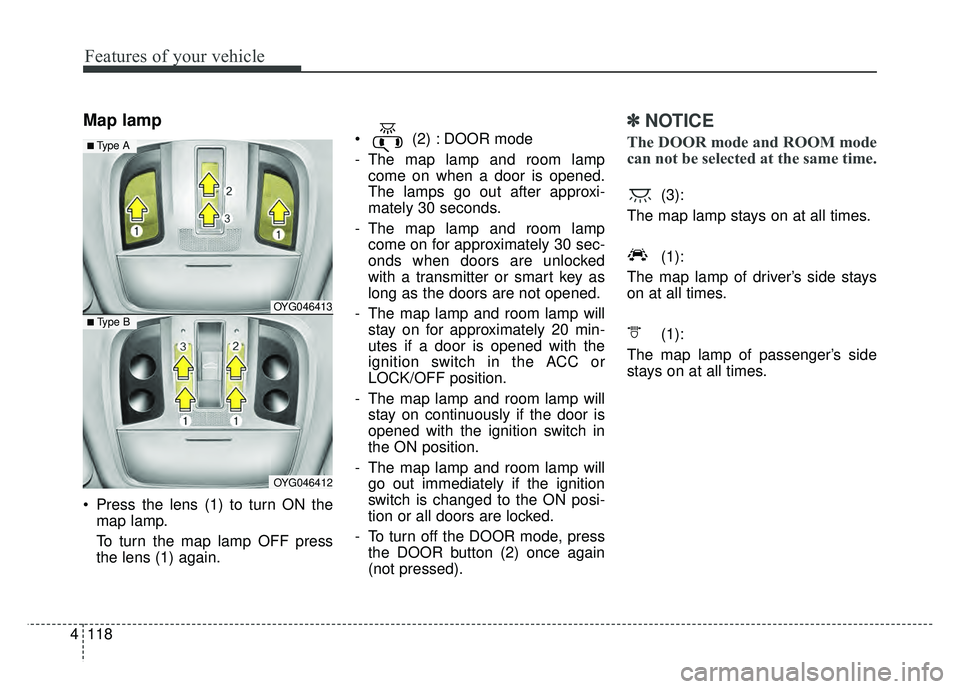
Map lamp
Press the lens (1) to turn ON the
map lamp.
To turn the map lamp OFF press
the lens (1) again. (2) : DOOR mode
- The map lamp and room lamp
come on when a door is opened.
The lamps go out after approxi-
mately 30 seconds.
- The map lamp and room lamp come on for approximately 30 sec-
onds when doors are unlocked
with a transmitter or smart key as
long as the doors are not opened.
- The map lamp and room lamp will stay on for approximately 20 min-
utes if a door is opened with the
ignition switch in the ACC or
LOCK/OFF position.
- The map lamp and room lamp will stay on continuously if the door is
opened with the ignition switch in
the ON position.
- The map lamp and room lamp will go out immediately if the ignition
switch is changed to the ON posi-
tion or all doors are locked.
- To turn off the DOOR mode, press the DOOR button (2) once again
(not pressed).
✽ ✽ NOTICE
The DOOR mode and ROOM mode
can not be selected at the same time.
(3):
The map lamp stays on at all times.
(1):
The map lamp of driver’s side stays
on at all times.
(1):
The map lamp of passenger’s side
stays on at all times.
OYG046413
OYG046412
■ Type B
■ Type A
Page 202 of 502
4121
Features of your vehicle
If you want to defrost and defog the
front windshield, refer to “Windshield
defrosting and defogging” in this sec-
tion.
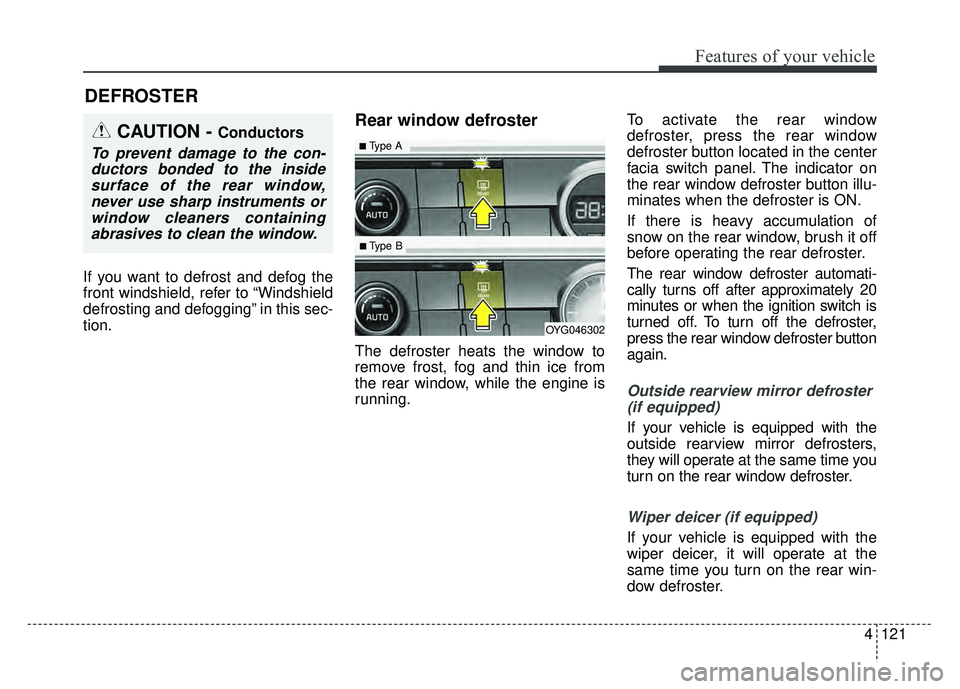
Rear window defroster
The defroster heats the window to
remove frost, fog and thin ice from
the rear window, while the engine is
running.To activate the rear window
defroster, press the rear window
defroster button located in the center
facia switch panel. The indicator on
the rear window defroster button illu-
minates when the defroster is ON.
If there is heavy accumulation of
snow on the rear window, brush it off
before operating the rear defroster.
The rear window defroster automati-
cally turns off after approximately 20
minutes or when the ignition switch is
turned off. To turn off the defroster,
press the rear window defroster button
again.
Outside rearview mirror defroster
(if equipped)
If your vehicle is equipped with the
outside rearview mirror defrosters,
they will operate at the same time you
turn on the rear window defroster.
Wiper deicer (if equipped)
If your vehicle is equipped with the
wiper deicer, it will operate at the
same time you turn on the rear win-
dow defroster.
DEFROSTER
CAUTION - Conductors
To prevent damage to the con-ductors bonded to the insidesurface of the rear window,never use sharp instruments orwindow cleaners containingabrasives to clean the window.
OYG046302
■Type A
■ Type B
Page 203 of 502
Features of your vehicle
122
4
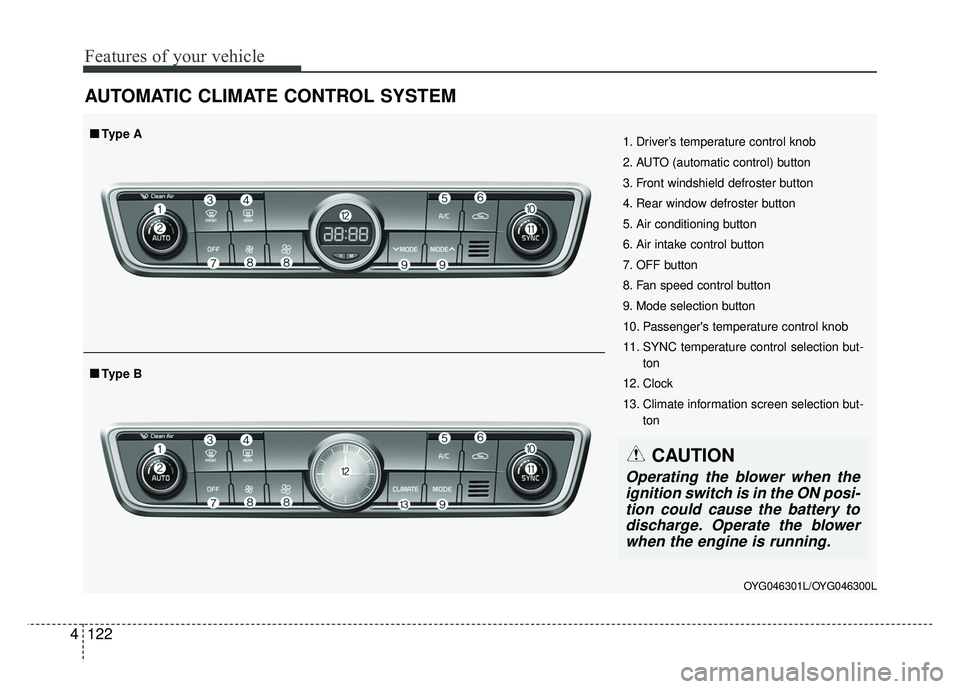
AUTOMATIC CLIMATE CONTROL SYSTEM
OYG046301L/OYG046300L
1. Driver’s temperature control knob
2. AUTO (automatic control) button
3. Front windshield defroster button
4. Rear window defroster button
5. Air conditioning button
6. Air intake control button
7. OFF button
8. Fan speed control button
9. Mode selection button
10. Passenger's temperature control knob
11. SYNC temperature control selection but-
ton
12. Clock
13. Climate information screen selection but- ton
■
■Type B
■
■Type A
CAUTION
Operating the blower when the
ignition switch is in the ON posi-tion could cause the battery todischarge. Operate the blowerwhen the engine is running.
Page 211 of 502
Features of your vehicle
130
4
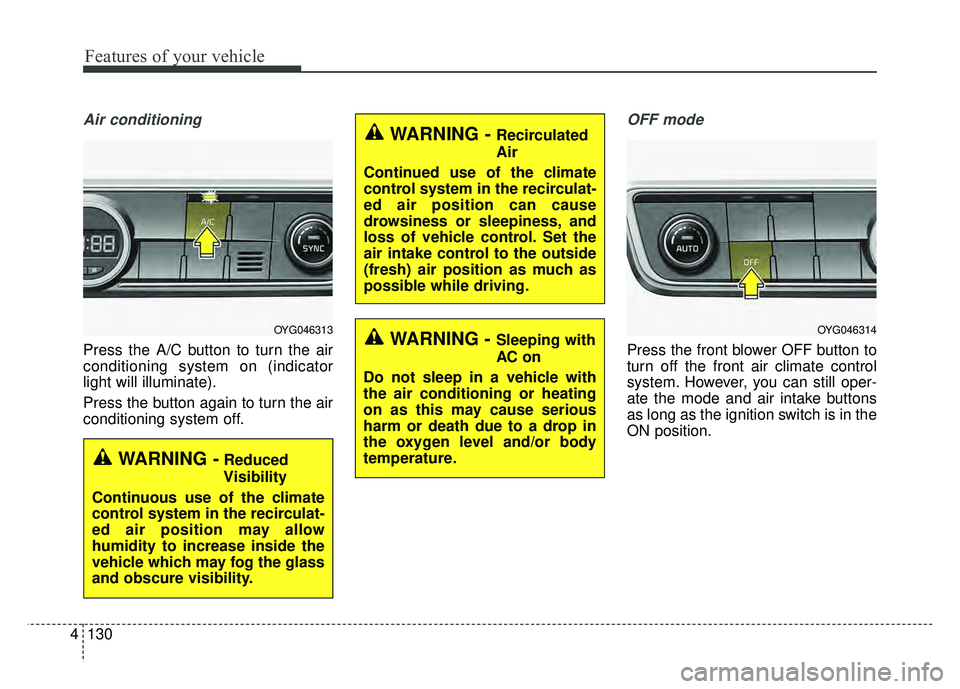
Air conditioning
Press the A/C button to turn the air
conditioning system on (indicator
light will illuminate).
Press the button again to turn the air
conditioning system off.
OFF mode
Press the front blower OFF button to
turn off the front air climate control
system. However, you can still oper-
ate the mode and air intake buttons
as long as the ignition switch is in the
ON position.
OYG046313
WARNING -Reduced
Visibility
Continuous use of the climate
control system in the recirculat-
ed air position may allow
humidity to increase inside the
vehicle which may fog the glass
and obscure visibility.
WARNING - Recirculated
Air
Continued use of the climate
control system in the recirculat-
ed air position can cause
drowsiness or sleepiness, and
loss of vehicle control. Set the
air intake control to the outside
(fresh) air position as much as
possible while driving.
WARNING - Sleeping with
AC on
Do not sleep in a vehicle with
the air conditioning or heating
on as this may cause serious
harm or death due to a drop in
the oxygen level and/or body
temperature.OYG046314
Page 218 of 502
4137
Features of your vehicle
Automatic climate control system
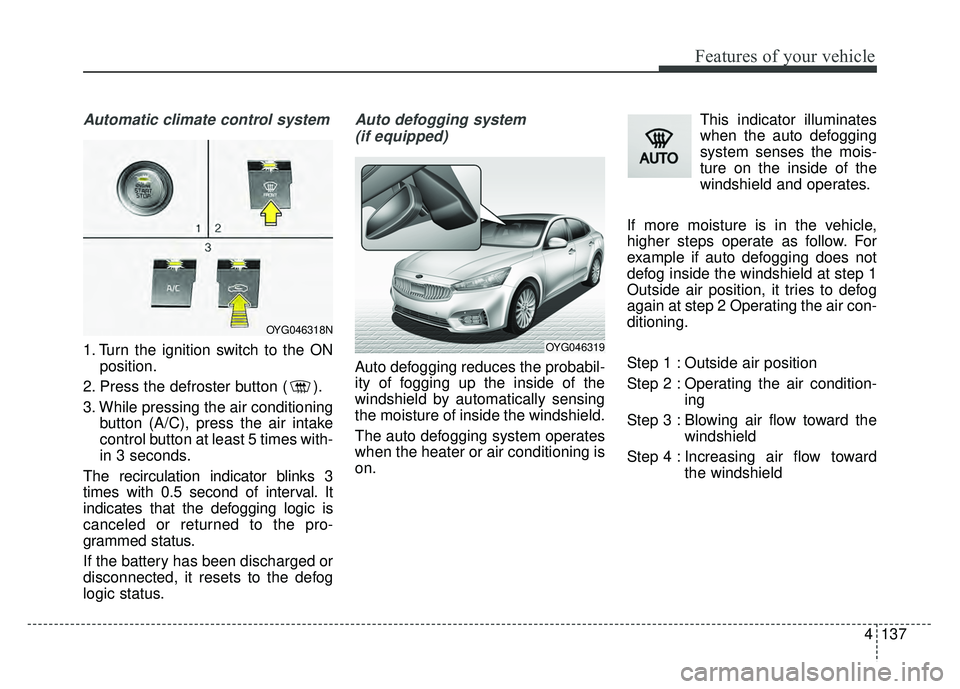
1. Turn the ignition switch to the ONposition.
2. Press the defroster button ( ).
3. While pressing the air conditioning button (A/C), press the air intake
control button at least 5 times with-
in 3 seconds.
The recirculation indicator blinks 3
times with 0.5 second of interval. It
indicates that the defogging logic is
canceled or returned to the pro-
grammed status.
If the battery has been discharged or
disconnected, it resets to the defog
logic status.
Auto defogging system (if equipped)
Auto defogging reduces the probabil-
ity of fogging up the inside of the
windshield by automatically sensing
the moisture of inside the windshield.
The auto defogging system operates
when the heater or air conditioning is
on. This indicator illuminates
when the auto defogging
system senses the mois-
ture on the inside of the
windshield and operates.
If more moisture is in the vehicle,
higher steps operate as follow. For
example if auto defogging does not
defog inside the windshield at step 1
Outside air position, it tries to defog
again at step 2 Operating the air con-
ditioning.
Step 1 : Outside air position
Step 2 : Operating the air condition- ing
Step 3 : Blowing air flow toward the windshield
Step 4 : Increasing air flow toward the windshield
OYG046318N
OYG046319
Page 220 of 502
4139
Features of your vehicle
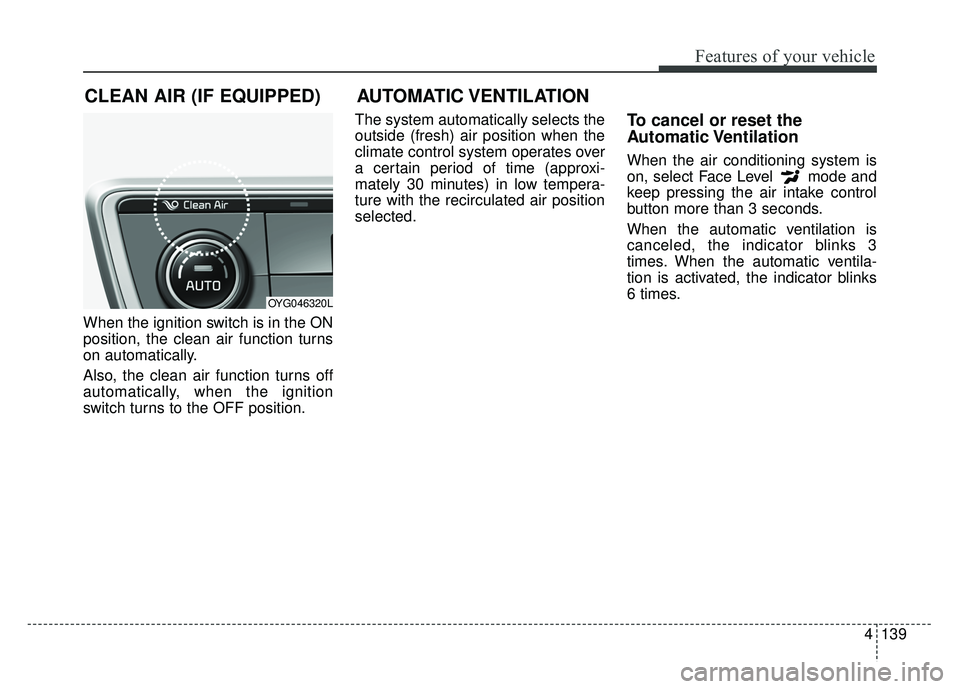
When the ignition switch is in the ON
position, the clean air function turns
on automatically.
Also, the clean air function turns off
automatically, when the ignition
switch turns to the OFF position.The system automatically selects the
outside (fresh) air position when the
climate control system operates over
a certain period of time (approxi-
mately 30 minutes) in low tempera-
ture with the recirculated air position
selected.
To cancel or reset the
Automatic Ventilation
When the air conditioning system is
on, select Face Level mode and
keep pressing the air intake control
button more than 3 seconds.
When the automatic ventilation is
canceled, the indicator blinks 3
times. When the automatic ventila-
tion is activated, the indicator blinks
6 times.
CLEAN AIR (IF EQUIPPED)
OYG046320L
AUTOMATIC VENTILATION