KIA CADENZA 2018 Owners Manual
Manufacturer: KIA, Model Year: 2018, Model line: CADENZA, Model: KIA CADENZA 2018Pages: 502, PDF Size: 9.77 MB
Page 231 of 502
Features of your vehicle
150
4
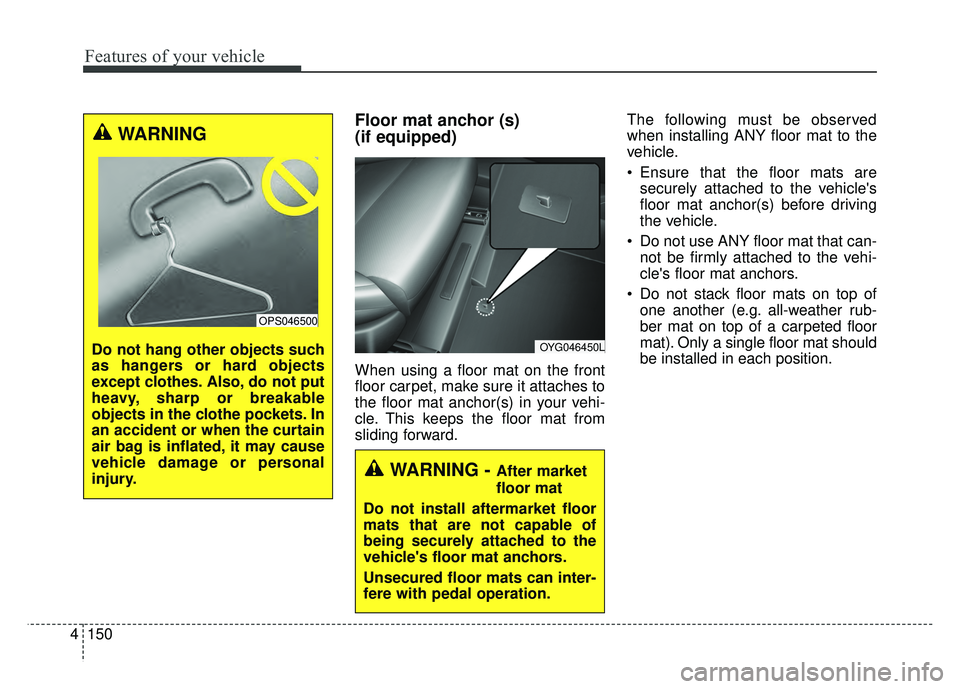
Floor mat anchor (s)
(if equipped)
When using a floor mat on the front
floor carpet, make sure it attaches to
the floor mat anchor(s) in your vehi-
cle. This keeps the floor mat from
sliding forward. The following must be observed
when installing ANY floor mat to the
vehicle.
Ensure that the floor mats are
securely attached to the vehicle's
floor mat anchor(s) before driving
the vehicle.
Do not use ANY floor mat that can- not be firmly attached to the vehi-
cle's floor mat anchors.
Do not stack floor mats on top of one another (e.g. all-weather rub-
ber mat on top of a carpeted floor
mat). Only a single floor mat should
be installed in each position.
OYG046450L
WARNING - After market
floor mat
Do not install aftermarket floor
mats that are not capable of
being securely attached to the
vehicle's floor mat anchors.
Unsecured floor mats can inter-
fere with pedal operation.
WARNING
Do not hang other objects such
as hangers or hard objects
except clothes. Also, do not put
heavy, sharp or breakable
objects in the clothe pockets. In
an accident or when the curtain
air bag is inflated, it may cause
vehicle damage or personal
injury.
OPS046500
Page 232 of 502
4151
Features of your vehicle
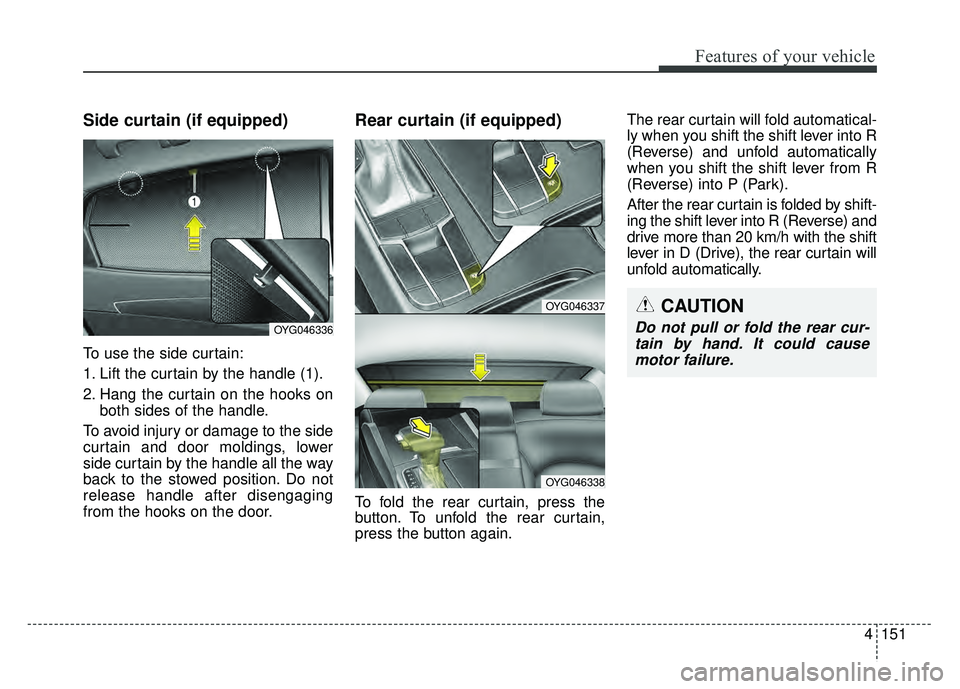
Side curtain (if equipped)
To use the side curtain:
1. Lift the curtain by the handle (1).
2. Hang the curtain on the hooks onboth sides of the handle.
To avoid injury or damage to the side
curtain and door moldings, lower
side curtain by the handle all the way
back to the stowed position. Do not
release handle after disengaging
from the hooks on the door.
Rear curtain (if equipped)
To fold the rear curtain, press the
button. To unfold the rear curtain,
press the button again. The rear curtain will fold automatical-
ly when you shift the shift lever into R
(Reverse) and unfold automatically
when you shift the shift lever from R
(Reverse) into P (Park).
After the rear curtain is folded by shift-
ing the shift lever into R (Reverse) and
drive more than 20 km/h with the shift
lever in D (Drive), the rear curtain will
unfold automatically.
OYG046337
OYG046338
CAUTION
Do not pull or fold the rear cur-
tain by hand. It could causemotor failure.OYG046336
Page 233 of 502
Features of your vehicle
152
4
Clock
Whenever the battery terminals or
related fuses are disconnected, you
must reset the time.
When the ignition switch is in the
ACC or ON position, the clock but-
tons operate as follows:
■ ■
Type A
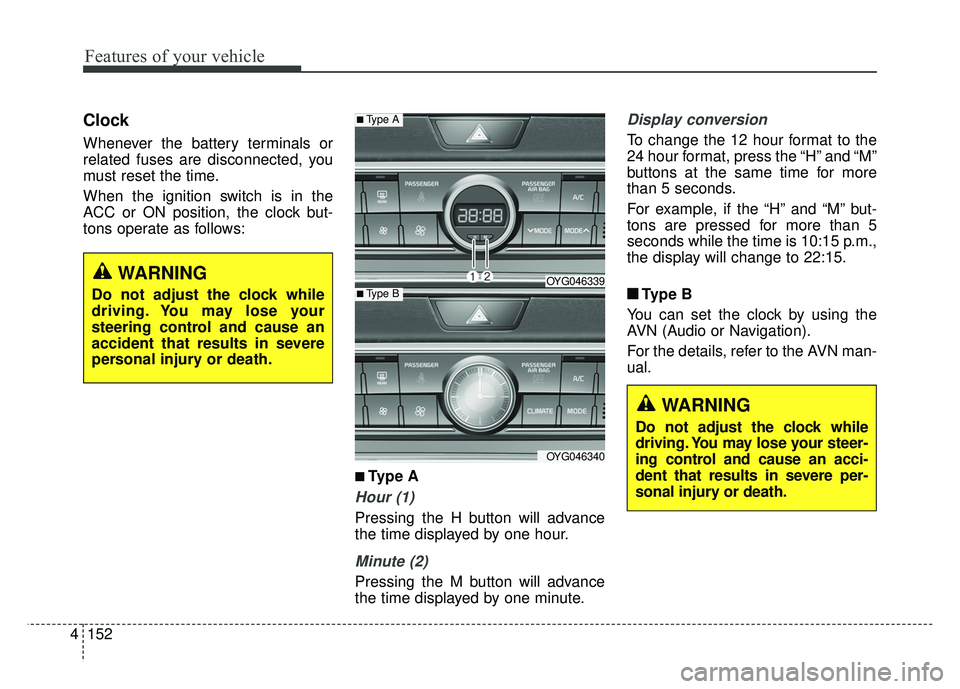
Hour (1)
Pressing the H button will advance
the time displayed by one hour.
Minute (2)
Pressing the M button will advance
the time displayed by one minute.
Display conversion
To change the 12 hour format to the
24 hour format, press the “H” and “M”
buttons at the same time for more
than 5 seconds.
For example, if the “H” and “M” but-
tons are pressed for more than 5
seconds while the time is 10:15 p.m.,
the display will change to 22:15.
■ ■ Type B
You can set the clock by using the
AVN (Audio or Navigation).
For the details, refer to the AVN man-
ual.
■Type A
OYG046339
OYG046340
■Type B
WARNING
Do not adjust the clock while
driving. You may lose your steer-
ing control and cause an acci-
dent that results in severe per-
sonal injury or death.
WARNING
Do not adjust the clock while
driving. You may lose your
steering control and cause an
accident that results in severe
personal injury or death.
Page 234 of 502
4153
Features of your vehicle
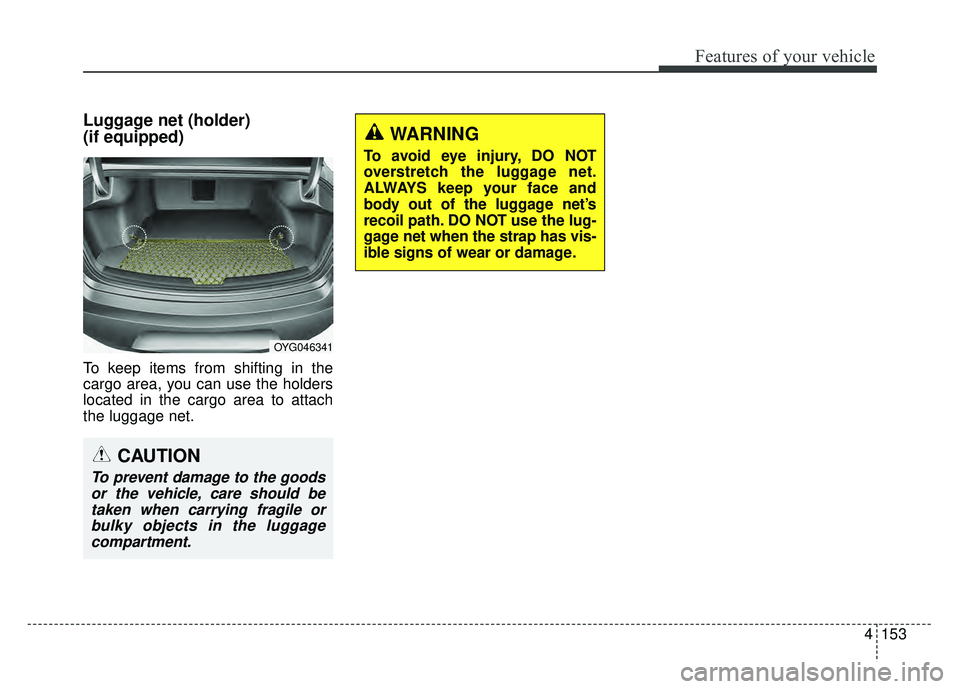
Luggage net (holder)
(if equipped)
To keep items from shifting in the
cargo area, you can use the holders
located in the cargo area to attach
the luggage net.
WARNING
To avoid eye injury, DO NOT
overstretch the luggage net.
ALWAYS keep your face and
body out of the luggage net’s
recoil path. DO NOT use the lug-
gage net when the strap has vis-
ible signs of wear or damage.
OYG046341
CAUTION
To prevent damage to the goodsor the vehicle, care should betaken when carrying fragile orbulky objects in the luggagecompartment.
Page 235 of 502
Features of your vehicle
154
4
✽
✽
NOTICE
If you install an after market HID
head lamp, your vehicle’s audio and
electronic device may malfunction.
❈ If your vehicle is equipped with
AVN(Audio, Video and Navigation)
system, refer to a separately sup-
plied manual for detailed informa-
tion.
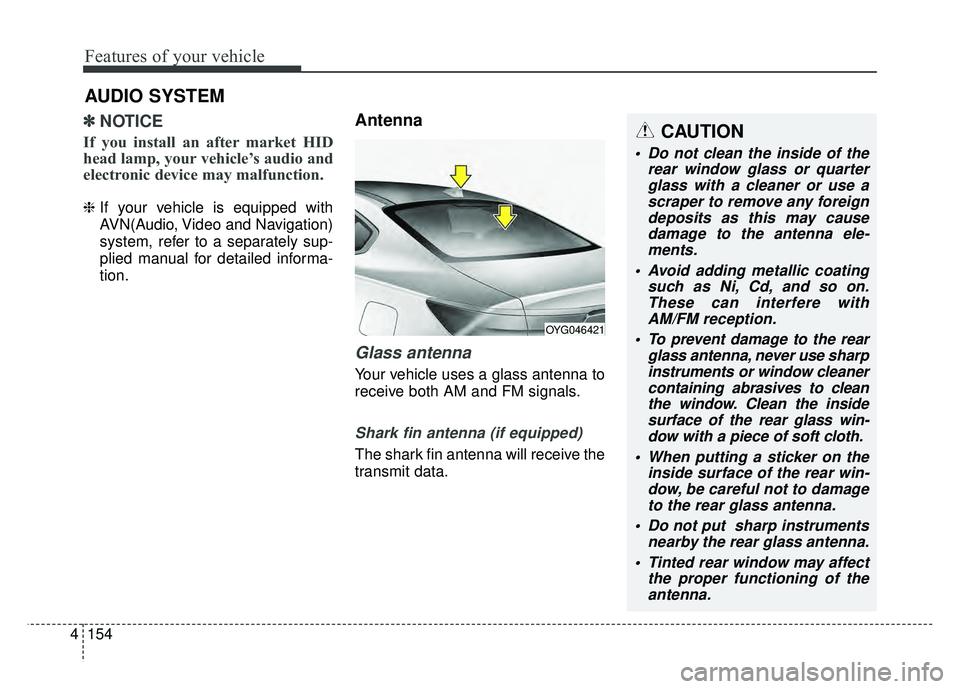
Antenna
Glass antenna
Your vehicle uses a glass antenna to
receive both AM and FM signals.
Shark fin antenna (if equipped)
The shark fin antenna will receive the
transmit data.
AUDIO SYSTEM
OYG046421
CAUTION
Do not clean the inside of the
rear window glass or quarterglass with a cleaner or use ascraper to remove any foreigndeposits as this may causedamage to the antenna ele-ments.
Avoid adding metallic coating such as Ni, Cd, and so on.These can interfere withAM/FM reception.
To prevent damage to the rear glass antenna, never use sharpinstruments or window cleanercontaining abrasives to cleanthe window. Clean the insidesurface of the rear glass win-dow with a piece of soft cloth.
When putting a sticker on the inside surface of the rear win-dow, be careful not to damageto the rear glass antenna.
Do not put sharp instruments nearby the rear glass antenna.
Tinted rear window may affect the proper functioning of theantenna.
Page 236 of 502
4155
Features of your vehicle
Steering wheel audio controls
(if equipped)
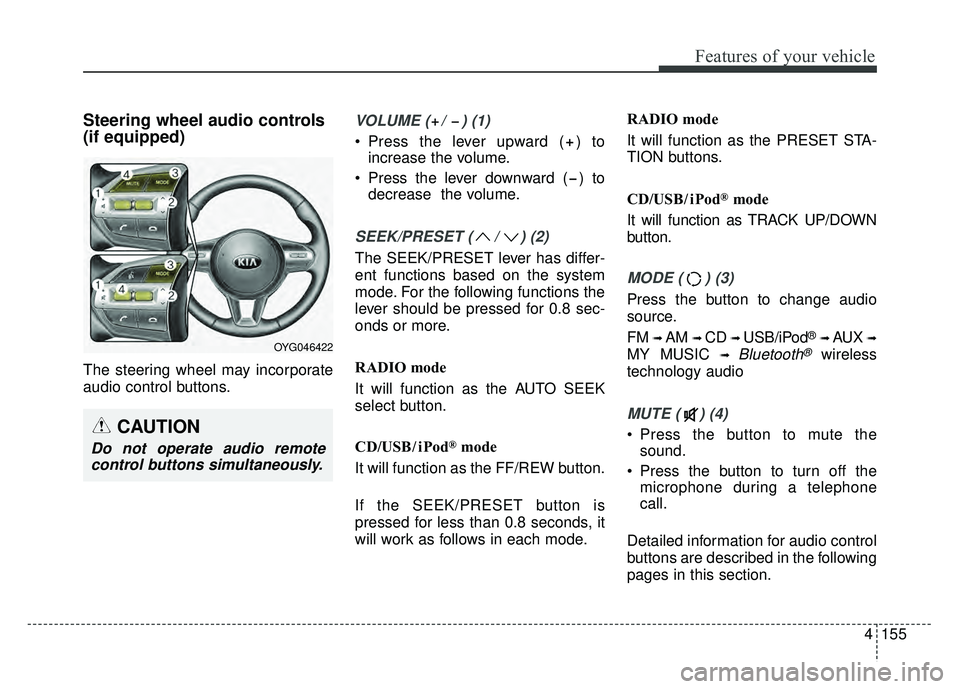
The steering wheel may incorporate
audio control buttons.
VOLUME ( / ) (1)
Press the lever upward ( ) toincrease the volume.
Press the lever downward ( ) to decrease the volume.
SEEK/PRESET ( / ) (2)
The SEEK/PRESET lever has differ-
ent functions based on the system
mode. For the following functions the
lever should be pressed for 0.8 sec-
onds or more.
RADIO mode
It will function as the AUTO SEEK
select button.
CD/USB/ iPod
®mode
It will function as the FF/REW button.
If the SEEK/PRESET button is
pressed for less than 0.8 seconds, it
will work as follows in each mode. RADIO mode
It will function as the PRESET STA-
TION buttons.
CD/USB/ iPod
®mode
It will function as TRACK UP/DOWN
button.
MODE ( ) (3)
Press the button to change audio
source.
FM
➟ AM ➟ CD ➟ USB/iPod®➟ AUX ➟
MY MUSIC ➟ Bluetooth®wireless
technology audio
MUTE ( ) (4)
Press the button to mute the sound.
Press the button to turn off the microphone during a telephone
call.
Detailed information for audio control
buttons are described in the following
pages in this section.CAUTION
Do not operate audio remote control buttons simultaneously.
OYG046422
Page 237 of 502
Features of your vehicle
156
4
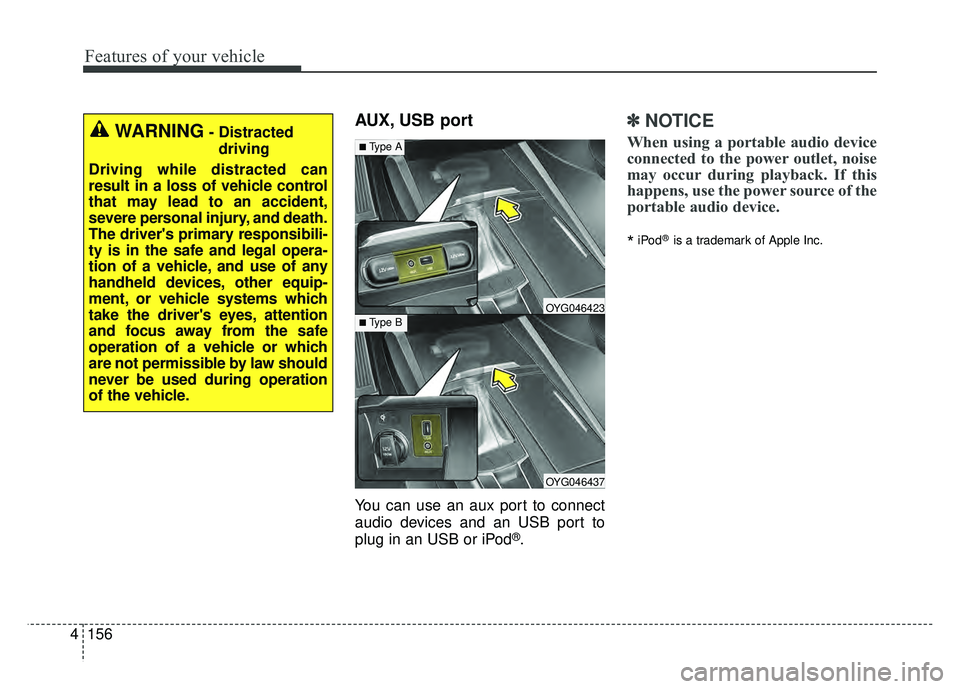
AUX, USB port
You can use an aux port to connect
audio devices and an USB port to
plug in an USB or iPod
®.
✽ ✽
NOTICE
When using a portable audio device
connected to the power outlet, noise
may occur during playback. If this
happens, use the power source of the
portable audio device.
*iPod®is a trademark of Apple Inc.
OYG046437
OYG046423
■Type A
■Type B
WARNING- Distracted
driving
Driving while distracted can
result in a loss of vehicle control
that may lead to an accident,
severe personal injury, and death.
The driver's primary responsibili-
ty is in the safe and legal opera-
tion of a vehicle, and use of any
handheld devices, other equip-
ment, or vehicle systems which
take the driver's eyes, attention
and focus away from the safe
operation of a vehicle or which
are not permissible by law should
never be used during operation
of the vehicle.
Page 238 of 502
4157
Features of your vehicle
Declaration of Conformity
FCC
This equipment has been tested and found to comply with the limits for a Class B digital device, pursuant to part 15
of the FCC Rules. These limits are designed to provide reasonable protection against harmful interference in a resi-
dential installation.
This equipment generates, uses and can radiate radio frequency energy and, if not installed and used in accordance
with the instructions,may cause harmful interference to radio communications. However, there is no guarantee that
interference will not occur in a particular installation. If this equipment does cause harmful interference to radio or tel-
evision reception, which can be determined by turning the equipment off and on, the user is encouraged to try to cor-
rect the interference by one or more of the following measures : Reorient or relocate the receiving antenna.
Increase the separation between the equipment and receiver.
Connect the equipment into an outlet on a circuit different from that to which the receiver is connected.
Consult the dealer or an experienced radio/TV technician for help.
Caution: Any changes or modifications to this device not explicitly approved by manufacturer could void
your authority to operate this equipment.
Page 239 of 502
Features of your vehicle
158
4
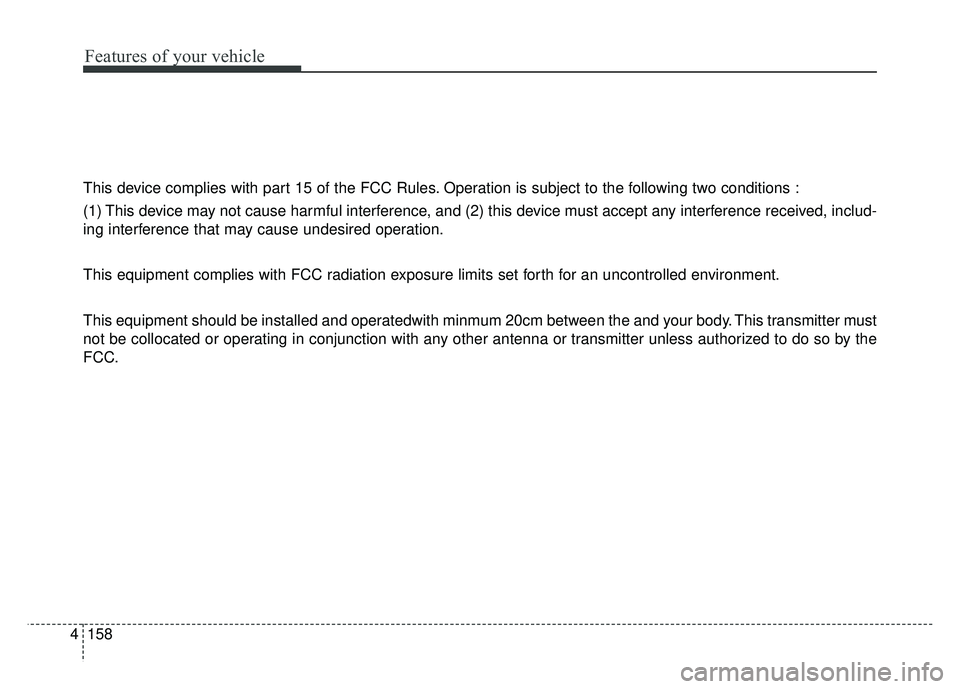
This device complies with part 15 of the FCC Rules. Operation is subject to the following two conditions :
(1) This device may not cause harmful interference, and (2) this device must accept any interference received, includ-
ing interference that may cause undesired operation.
This equipment complies with FCC radiation exposure limits set forth for an uncontrolled environment.
This equipment should be installed and operatedwith minmum 20cm between the and your body. This transmitter must
not be collocated or operating in conjunction with any other antenna or transmitter unless authorized to do so by the
FCC.
Page 240 of 502
Driving your vehicle
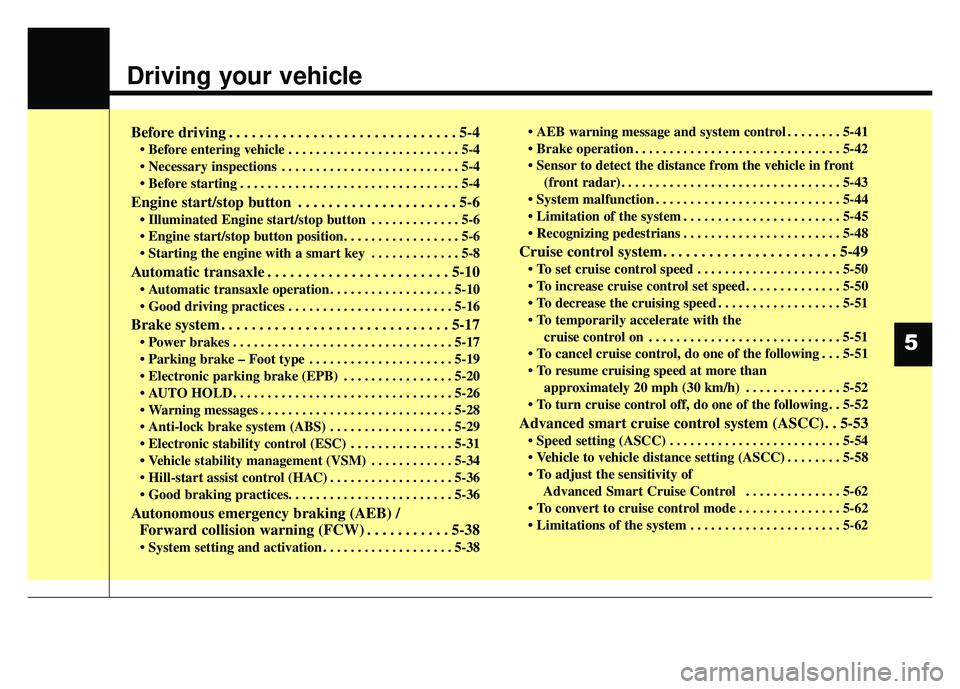
Before driving . . . . . . . . . . . . . . . . . . . . . . . . . . . . . . 5-4
• Before entering vehicle . . . . . . . . . . . . . . . . . . . . . . . . . 5-4
. . . . . . . . . . . . . . . . . . . . . . . . . . 5-4
. . . . . . . . . . . . . . . . . . . . . . . . . . . . . . . . 5-4
Engine start/stop button . . . . . . . . . . . . . . . . . . . . . 5-6
. . . . . . . . . . . . . 5-6
position. . . . . . . . . . . . . . . . . 5-6
. . . . . . . . . . . . . 5-8
Automatic transaxle . . . . . . . . . . . . . . . . . . . . . . . . 5-10
. . . . . . . . . . . . . . . . . . 5-10
. . . . . . . . . . . . . . . . . . . . . . . . 5-16
Brake system . . . . . . . . . . . . . . . . . . . . . . . . . . . . . . 5-17
. . . . . . . . . . . . . . . . . . . . . . . . . . . . . . . . 5-17
. . . . . . . . . . . . . . . . . . . . . 5-19
. . . . . . . . . . . . . . . . 5-20
. . . . . . . . . . . . . . . . . . . . . . . . . . . . . . . . 5-26
. . . . . . . . . . . . . . . . . . . . . . . . . . . . 5-28
. . . . . . . . . . . . . . . . . . 5-29
. . . . . . . . . . . . . . . 5-31
. . . . . . . . . . . . 5-34
. . . . . . . . . . . . . . . . . . 5-36
Autonomous emergency braking (AEB) / Forward collision warning (FCW) . . . . . . . . . . . 5-38
. . . . . . . . . . . . . . . . . . . 5-38 . . . . . . . . 5-41
. . . . . . . . . . . . . . . . . . . . . . . . . . . . . . 5-42
(front radar). . . . . . . . . . . . . . . . . . . . . . . . . . . . . . . . 5-43
. . . . . . . . . . . . . . . . . . . . . . . . . . . 5-44
. . . . . . . . . . . . . . . . . . . . . . . 5-45
. . . . . . . . . . . . . . . . . . . . . . . 5-48
Cruise control system. . . . . . . . . . . . . . . . . . . . . . . 5-49
. . . . . . . . . . . . . . . . . . . . . 5-50
. . . . . . . . . . . . . . . . . . 5-51
cruise control on . . . . . . . . . . . . . . . . . . . . . . . . . . . . 5-51
do one of the following . . . 5-51
approximately 20 mph (30 km/h) . . . . . . . . . . . . . . 5-52
do one of the following . . 5-52
Advanced smart cruise control system (ASCC) . . 5-53
. . . . . . . . . . . . . . . . . . . . . . . . . 5-54
. . . . . . . . 5-58
Advanced Smart Cruise Control . . . . . . . . . . . . . . 5-62
. . . . . . . . . . . . . . . 5-62
. . . . . . . . . . . . . . . . . . . . . . 5-62
5