grommet KIA CARNIVAL 2007 Workshop Manual
[x] Cancel search | Manufacturer: KIA, Model Year: 2007, Model line: CARNIVAL, Model: KIA CARNIVAL 2007Pages: 1575, PDF Size: 44.86 MB
Page 581 of 1575

2007 > 2.7L V6 GASOLINE >
TROUBLESHOOTING
Symptom Probable cause Remedy
Excessive play in
steering Loose yoke plug
Retighten
Loose steering gear mounting bolts Retighten
Loose or worn tie rod end Retighten or replace as necessary
Steering wheel
operation is not
smooth (Insufficient
power assist) V- belt slippage
Readjust
Damaged V- belt Replace
Low fluid level Replenish
Air in the fluid Bleed air
Twisted or damaged hoses Correct the routing or replace
Insufficient oil pump pressure Repair or replace the oil pump
Sticky flow control valve Replace
Excessive internal oil pump leakage Replace the damaged parts
Excessive oil leaks from rack and pinion in
gear box Replace the damaged parts
Distorted or damaged gear box or valve body
seals Replace
Steering wheel does
not return properly Excessive turning resistance of tierod end
Replace
Yoke plug excessively tight Adjust
Tie rod and/or ball joint cannot turn smoothly Replace
Loose mounting of gear box mounting bracket
Worn steering shaft joint and/or Retighten
Worn steering shaft joint and/or body
grommet Correct or replace
Distorted rack Replace
Damaged pinion bearing Replace
Twisted or damaged hoses Reposition or replace
Damaged oil pressure control valve Replace
Damaged oil pump input shaft bearing Replace
Noise Hissing Noise in Steering Gear
There is some noise with all power steering systems. One of the most common is a hissing
sound when the steering wheel is turned and the car is not moving. This noise will be most
evident when turning the wheel while the brakes are being applied. There is no relationship
between this noise and steering performance. Do not replace the valve unless the "hissing"
noise becomes extreme. A replaced valve will also make a slight noise, and is not always a
solution for the condition.
Rattling or chucking
noise in the rack and
pinion Interference with hoses from vehicle body
Reposition
Loose gear box bracket Retighten
Loose tie rod end and/or ball joint Retighten
Worn tie rod and/or ball joint Replace
Noise in the oil pump Low fluid level Replenish
Air in the fluid Bleed air
Loose pump mounting bolts Retighten
Page 715 of 1575

14.Remove the evaporator core(A).
15.Be careful that the inlet and outlet pipe are not bent during heater core removal, and pull out the heater core.
16. Install the heater core in the reverse order of removal.
17. Installation is the reverse order of removal, and note these items :
a. If you're installing a new evaporator, add refrigerant oil (ND - OIL8).
b. Replace the O - rings with new ones at each fitting, and apply a thin coat of refrigerant oil before installing
them. Be sure to use the right O - rings for R- 134a to avoid leakage.
c. Immediately after using the oil, replace the cap on the container, and seal it to avoid moisture absorption.
d. Do not spill the refrigerant oil on the vehicle ; it may damage the paint ; if the refrigerant oil contacts the paint,
wash it off immediately
e. Apply sealant to the grommets.
f. Make sure that there is no air leakage.
g. Charge the system and test its performance.
h. Do not interchange the inlet and outlet heater hoses and install the hose clamps securely.
i. Refill the cooling system with engine coolant.
Page 884 of 1575
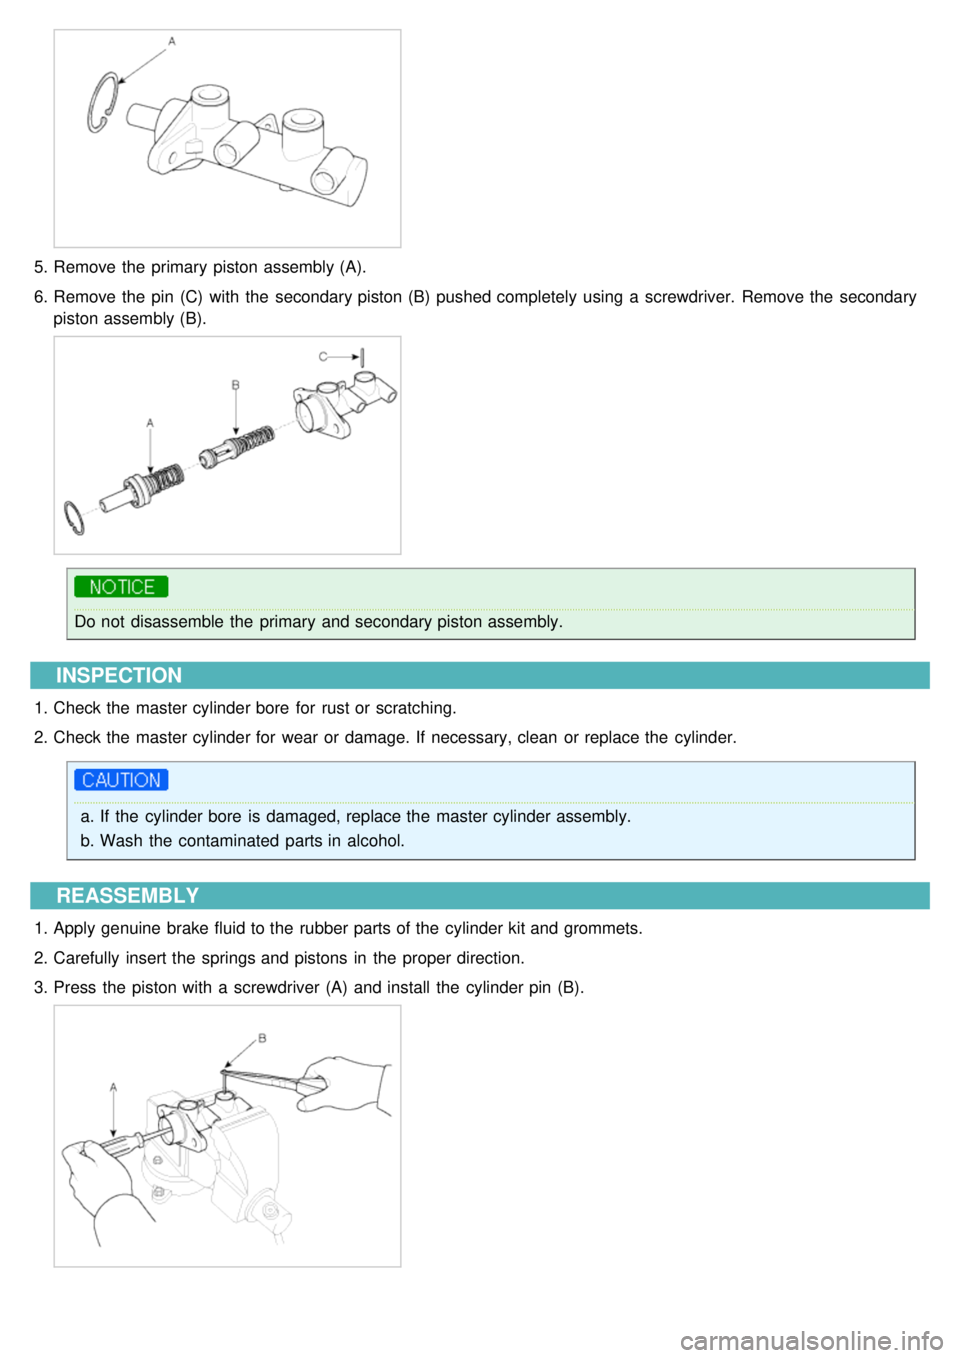
5.Remove the primary piston assembly (A).
6. Remove the pin (C) with the secondary piston (B) pushed completely using a screwdriver. Remove the secondary
piston assembly (B).
Do not disassemble the primary and secondary piston assembly.
INSPECTION
1.Check the master cylinder bore for rust or scratching.
2. Check the master cylinder for wear or damage. If necessary, clean or replace the cylinder.
a.If the cylinder bore is damaged, replace the master cylinder assembly.
b. Wash the contaminated parts in alcohol.
REASSEMBLY
1.Apply genuine brake fluid to the rubber parts of the cylinder kit and grommets.
2. Carefully insert the springs and pistons in the proper direction.
3. Press the piston with a screwdriver (A) and install the cylinder pin (B).
Page 885 of 1575
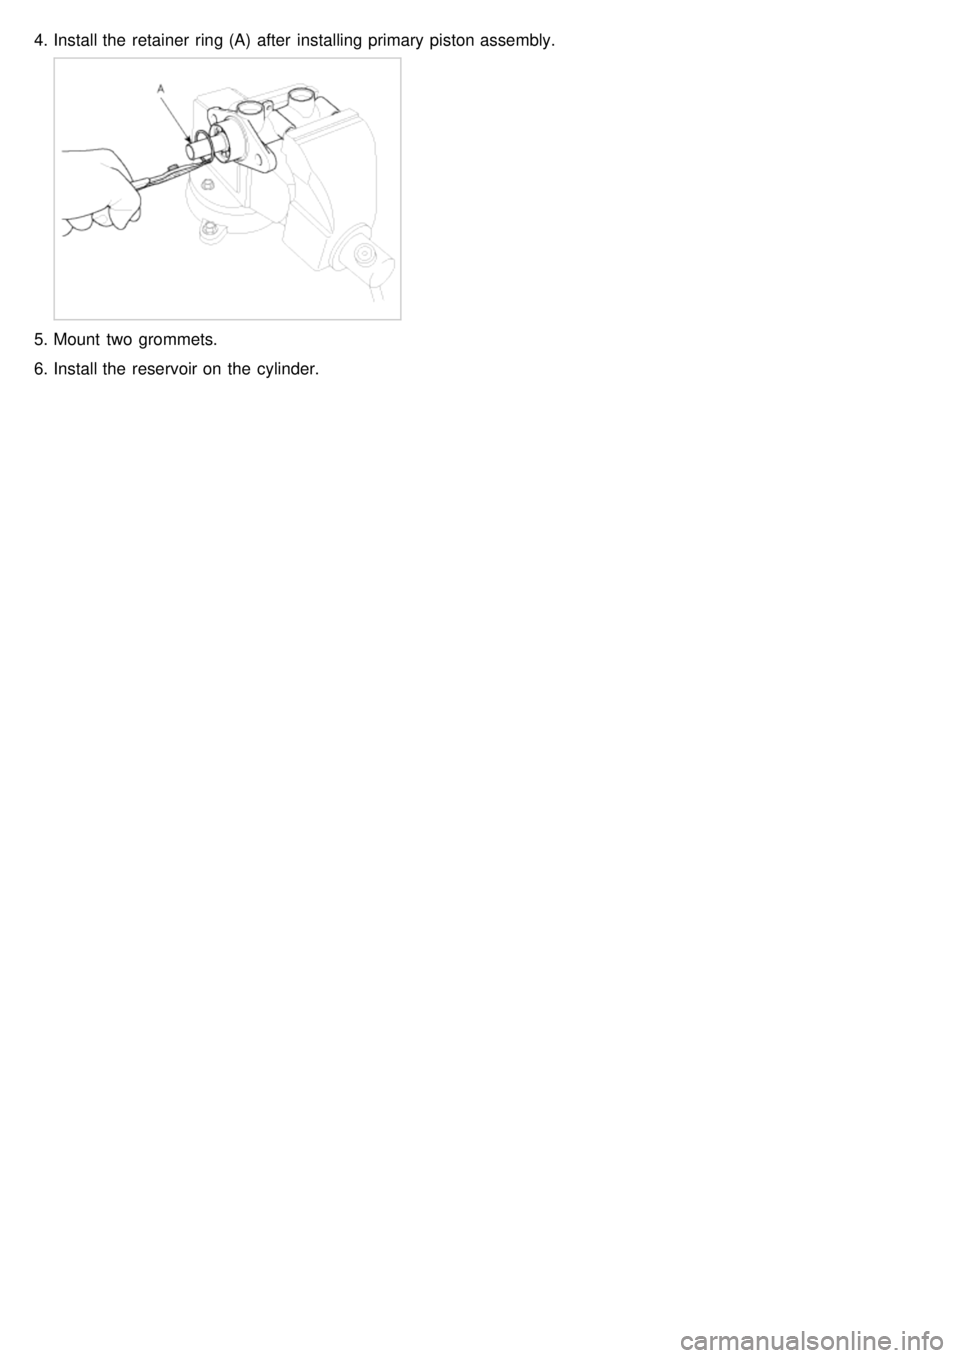
4.Install the retainer ring (A) after installing primary piston assembly.
5.Mount two grommets.
6. Install the reservoir on the cylinder.
Page 1154 of 1575
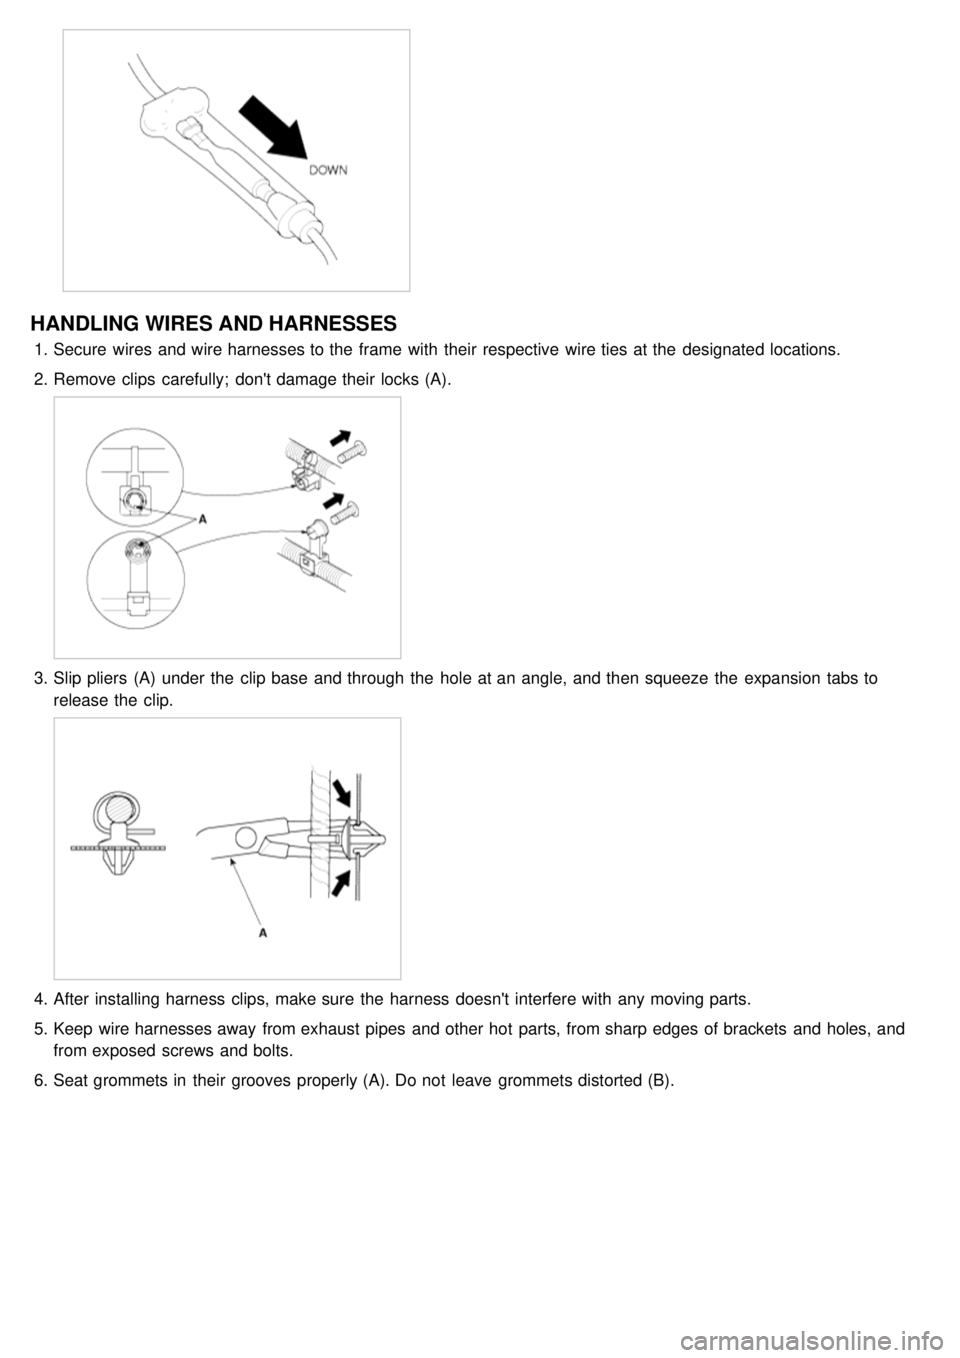
HANDLING WIRES AND HARNESSES
1.Secure wires and wire harnesses to the frame with their respective wire ties at the designated locations.
2. Remove clips carefully; don't damage their locks (A).
3.Slip pliers (A) under the clip base and through the hole at an angle, and then squeeze the expansion tabs to
release the clip.
4.After installing harness clips, make sure the harness doesn't interfere with any moving parts.
5. Keep wire harnesses away from exhaust pipes and other hot parts, from sharp edges of brackets and holes, and
from exposed screws and bolts.
6. Seat grommets in their grooves properly (A). Do not leave grommets distorted (B).