windshield arm KIA CEED 2010 Owners Manual
[x] Cancel search | Manufacturer: KIA, Model Year: 2010, Model line: CEED, Model: KIA CEED 2010Pages: 442, PDF Size: 28.25 MB
Page 72 of 442
4
Key / 4-2
Remote keyless entry / 4-5
Theft-alarm system / 4-8
Door locks / 4-10
Tailgate / 4-14
Windows / 4-16
Hood / 4-21
Fuel filler lid / 4-23
Sunroof / 4-26
Steering wheel / 4-30
Mirrors / 4-32
Instrument cluster / 4-36
Rear parking assist system /4-55
Hazard warning flasher / 4-57
Lighting / 4-58
Wipers and washers / 4-64
Interior light / 4-68
Defroster / 4-69
Manual climate control system / 4-70
Automatic climate control system / 4-79
Windshield defrosting and defogging / 4-87
Storage compartment / 4-90
Interior features / 4-93
Barrier net / 4-99
Tonneau cover / 4-101
Mounting bracket for roof carrier / 4-102
Exterior feature / 4-103
Audio system / 4-104
Features of your vehicle
Page 137 of 442

Features of your vehicle
66
4
Windshield washers (front)
In the O (OFF) position, pull the lever
gently toward you to spray washer fluid
on the windshield and to run the wipers
1-3 cycles. Use this function when the windshield is
dirty.
The spray and wiper operation will con-
tinue until you release the lever.
If the washer does not work, check the
washer fluid level. If the fluid level, you
will need to add appropriate non-abra-
sive windshield washer fluid to the wash-
er reservoir.
The reservoir filler neck is located in the
front of the engine compartment on the
passenger side.
OED040907
WARNING
Do not use the washer in freezing
temperatures without first warming
the windshield with the defrosters;
the washer solution could freeze on
the windshield and obscure yourvision.
CAUTION
To prevent possible damage to the wipers or windshield, do notoperate the wipers when the
windshield is dry.
To prevent damage to the wiper blades, do not use gasoline,
kerosene, paint thinner, or othersolvents on or near them.
To prevent damage to the wiper arms and other components, do
not attempt to move the wipersmanually.
CAUTION
To prevent possible damage to the
washer pump, do not operate the
washer when the fluid reservoir isempty.
Page 144 of 442
473
Features of your vehicle
Floor/Defrost-Level (A, C, E, D)
Most of the air flow is directed to the floor and the windshield with a small amount
directed to the side window defrosters.
Defrost-Level (A, D)
Most of the air flow is directed to thewindshield with a small amount of air
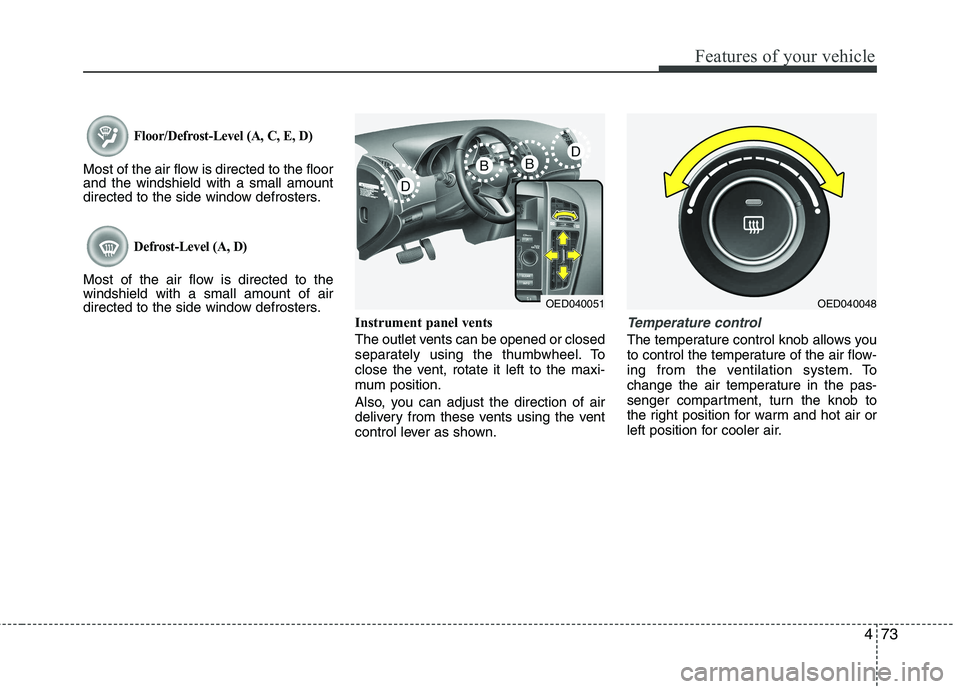
directed to the side window defrosters.Instrument panel vents
The outlet vents can be opened or closed
separately using the thumbwheel. To
close the vent, rotate it left to the maxi-
mum position.
Also, you can adjust the direction of air
delivery from these vents using the vent
control lever as shown.
Temperature control
The temperature control knob allows you
to control the temperature of the air flow-
ing from the ventilation system. To
change the air temperature in the pas-
senger compartment, turn the knob to
the right position for warm and hot air or
left position for cooler air.
OED040051OED040048
Page 147 of 442
Features of your vehicle
76
4
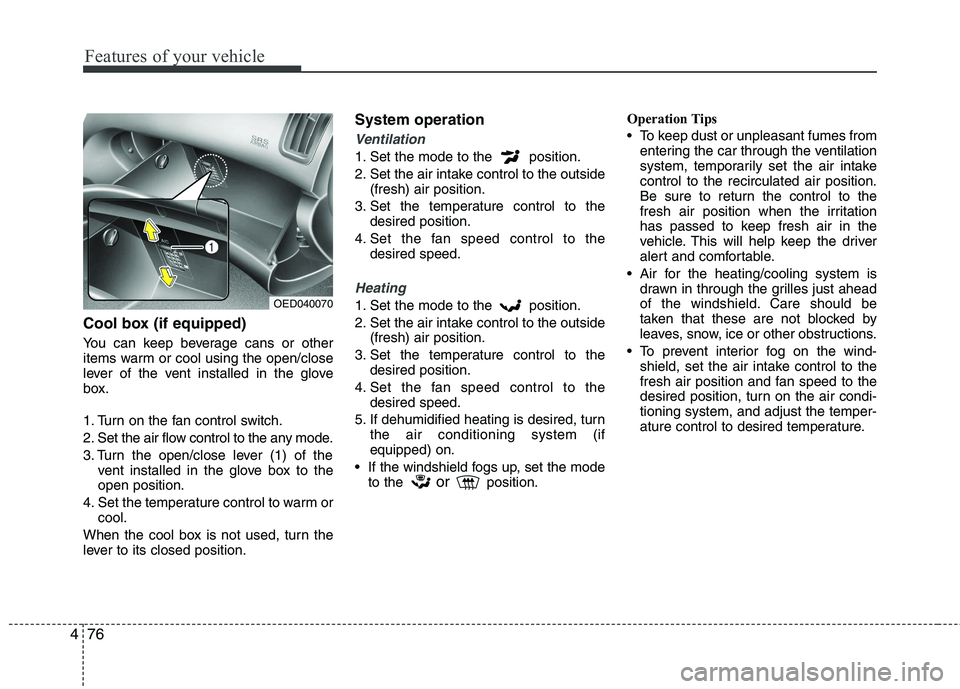
Cool box (if equipped)
You can keep beverage cans or other
items warm or cool using the open/close
lever of the vent installed in the glove
box.
1. Turn on the fan control switch.
2. Set the air flow control to the any mode.
3. Turn the open/close lever (1) of the
vent installed in the glove box to the open position.
4. Set the temperature control to warm or cool.
When the cool box is not used, turn the
lever to its closed position. System operation
Ventilation
1. Set the mode to the position.
2. Set the air intake control to the outside
(fresh) air position.
3. Set the temperature control to the desired position.
4. Set the fan speed control to the desired speed.
Heating
1. Set the mode to the position.
2. Set the air intake control to the outside(fresh) air position.
3. Set the temperature control to the desired position.
4. Set the fan speed control to the desired speed.
5. If dehumidified heating is desired, turn the air conditioning system (if equipped) on.
If the windshield fogs up, set the mode to the or
position. Operation Tips
To keep dust or unpleasant fumes from
entering the car through the ventilation
system, temporarily set the air intakecontrol to the recirculated air position.
Be sure to return the control to the
fresh air position when the irritation
has passed to keep fresh air in the
vehicle. This will help keep the driver
alert and comfortable.
Air for the heating/cooling system is drawn in through the grilles just ahead
of the windshield. Care should be
taken that these are not blocked by
leaves, snow, ice or other obstructions.
To prevent interior fog on the wind- shield, set the air intake control to the
fresh air position and fan speed to the
desired position, turn on the air condi-tioning system, and adjust the temper-
ature control to desired temperature.OED040070
Page 158 of 442

487
Features of your vehicle
For maximum defrosting, set the tem-perature control to the extreme
right/hot position and the fan speedcontrol to the highest speed.
If warm air to the floor is desired while defrosting or defogging, set the modeto the floor-defrost position.
Before driving, clear all snow and ice from the windshield, rear window, out-
side rear view mirrors, and all side win-
dows.
Clear all snow and ice from the hood and air inlet in the cowl grill to improveheater and defroster efficiency and to
reduce the probability of fogging upinside of the windshield. Manual climate control system
To defog inside windshield
1. Select any fan speed except “0” posi-
tion.
2. Select desired temperature.
3. Select the or position.
4. The outside (fresh) air and air condi- tioning will be selected automatically.
If the air conditioning and outside (fresh) air position are not selected automatical-
ly, press the corresponding button manu-
ally.
WINDSHIELD DEFROSTING AND DEFOGGING
WARNING - Windshield
heating
Do not use the or position during cooling operation in
extremely humid weather. The dif-
ference between the temperature ofthe outside air and that of the wind-shield could cause the outer sur-
face of the windshield to fog up,
causing loss of visibility. In this
case, set the mode selection knob
or button to the position and
fan speed control knob or button to
the lower speed.
OED040064
Page 385 of 442
Maintenance
50
7
WIPER BLADES
CAUTION
To prevent damage to the wiper
arms or other components, do not
attempt to move the wipers manual-ly.
CAUTION
The use of a non-specified wiperblade could result in wiper malfunc- tion and failure.Blade inspection
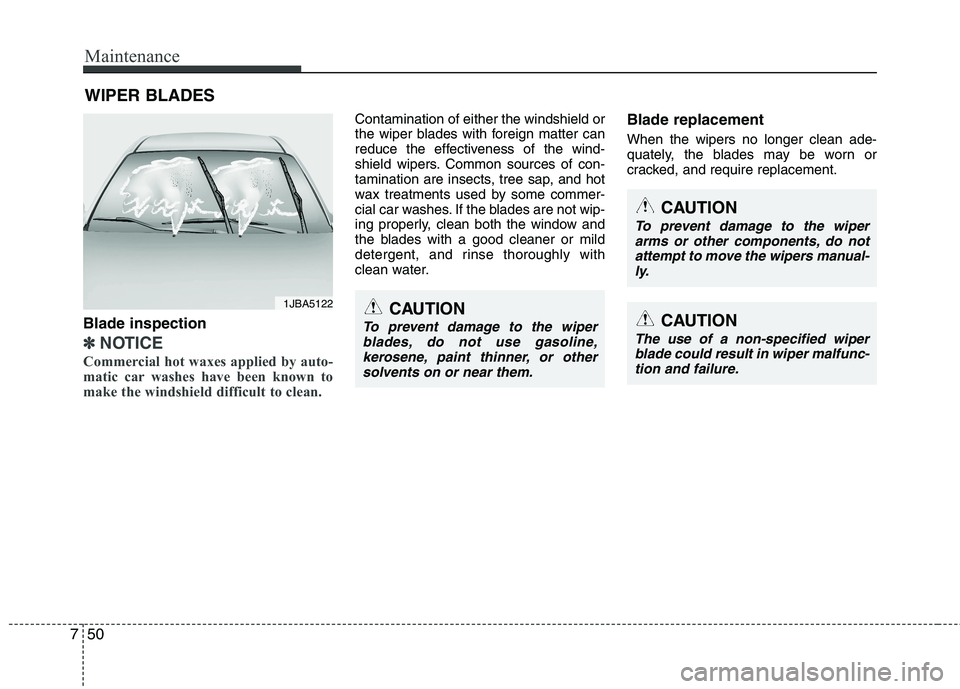
✽✽ NOTICE
Commercial hot waxes applied by auto-
matic car washes have been known to
make the windshield difficult to clean.
Contamination of either the windshield or
the wiper blades with foreign matter can
reduce the effectiveness of the wind-
shield wipers. Common sources of con-
tamination are insects, tree sap, and hot
wax treatments used by some commer-
cial car washes. If the blades are not wip-
ing properly, clean both the window and
the blades with a good cleaner or mild
detergent, and rinse thoroughly with
clean water. Blade replacement When the wipers no longer clean ade-
quately, the blades may be worn or
cracked, and require replacement.
1JBA5122CAUTION
To prevent damage to the wiper
blades, do not use gasoline,kerosene, paint thinner, or other
solvents on or near them.
Page 386 of 442
751
Maintenance
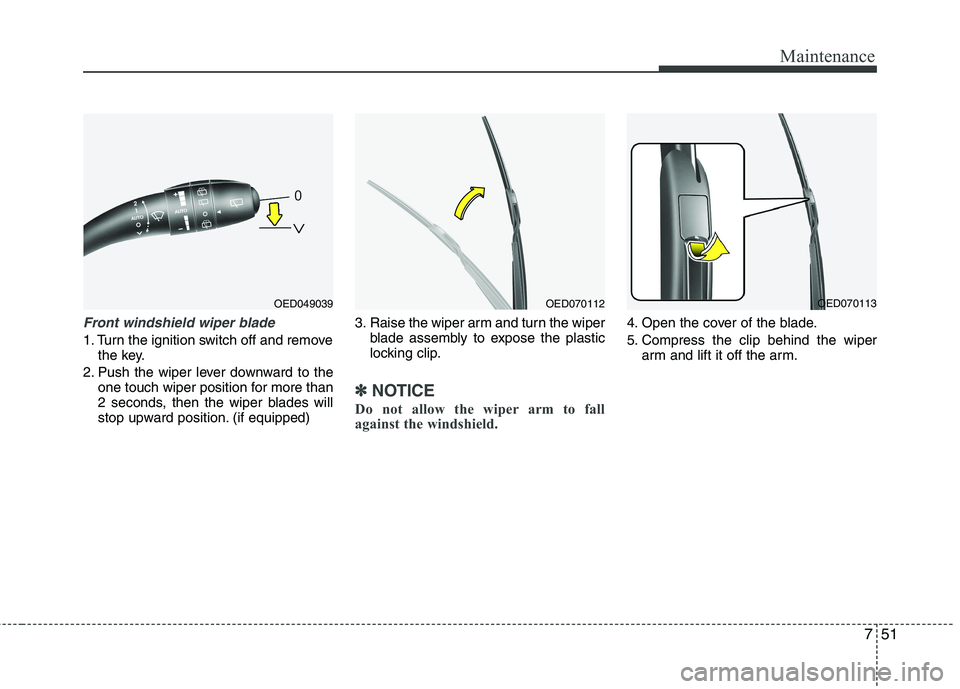
Front windshield wiper blade
1. Turn the ignition switch off and removethe key.
2. Push the wiper lever downward to the one touch wiper position for more than
2 seconds, then the wiper blades will
stop upward position. (if equipped) 3. Raise the wiper arm and turn the wiper
blade assembly to expose the plastic
locking clip.
✽✽ NOTICE
Do not allow the wiper arm to fall
against the windshield.
4. Open the cover of the blade.
5. Compress the clip behind the wiper arm and lift it off the arm.
OED049039OED070112OED070113
Page 442 of 442
Index
4
I
Tailgate . . . . . . . . . . . . . . . . . . . . . . . . . . . . . . . . . . . . . 4-14
Theft-alarm system . . . . . . . . . . . . . . . . . . . . . . . . . . . . 4-8
Tire Pressure Monitoring System (TPMS). . . . . . . . 6-15
Tire specification and pressure label . . . . . . . . . . . . . 8-8
Tires and wheels . . . . . . . . . . . . . . . . . . . . . . . . . . 7-56/8-4
Tonneau cover . . . . . . . . . . . . . . . . . . . . . . . . . . . . . . 4-101
Towing . . . . . . . . . . . . . . . . . . . . . . . . . . . . . . . . . . . . . 6-20
Trailer towing . . . . . . . . . . . . . . . . . . . . . . . . . . . . . . . 5-44
Vehicle weight. . . . . . . . . . . . . . . . . . . . . . . . . . . . . . . 5-52
Vehicle break-in process . . . . . . . . . . . . . . . . . . . . . . . . 1-5
Vehicle certification label . . . . . . . . . . . . . . . . . . . . . . . 8-7
Vehicle identification number (VIN). . . . . . . . . . . . . . 8-7
Washer fluid . . . . . . . . . . . . . . . . . . . . . . . . . . . . . . . . 7-44
Windows . . . . . . . . . . . . . . . . . . . . . . . . . . . . . . . . . . . 4-16
Windshield defrosting and defogging . . . . . . . . . . . . 4-87
Winter driving . . . . . . . . . . . . . . . . . . . . . . . . . . . . . . . 5-40
Wiper blades . . . . . . . . . . . . . . . . . . . . . . . . . . . . . . . . 7-50
Wipers and washers . . . . . . . . . . . . . . . . . . . . . . . . . . 4-64
T
V
W