KIA CEED 2013 Owners Manual
Manufacturer: KIA, Model Year: 2013, Model line: CEED, Model: KIA CEED 2013Pages: 1168, PDF Size: 48.01 MB
Page 241 of 1168
Features of your vehicle
162
4
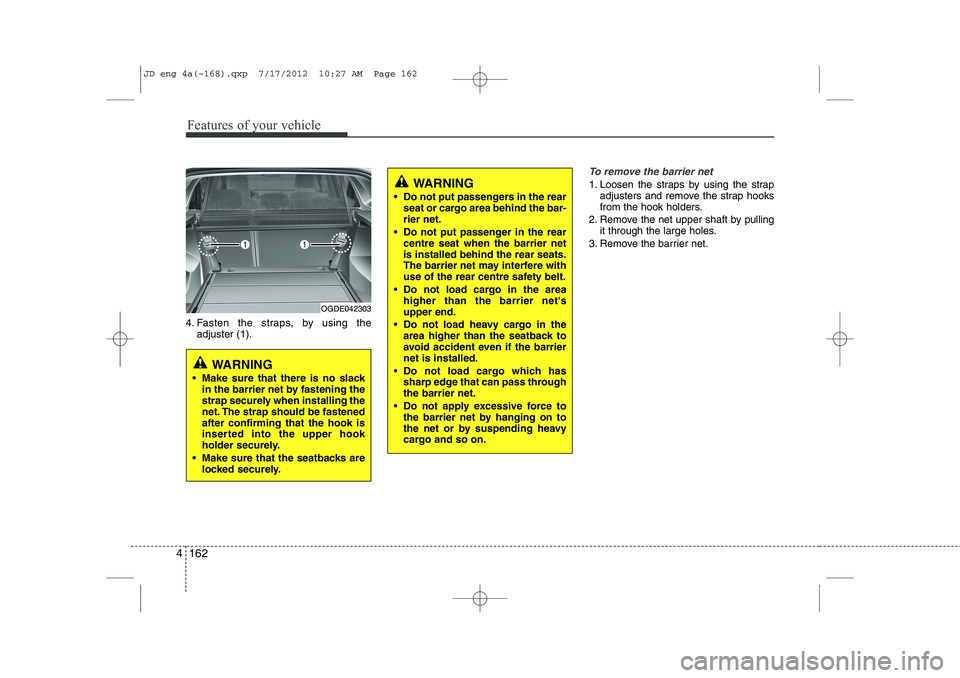
4. Fasten the straps, by using the
adjuster (1).
To remove the barrier net
1. Loosen the straps by using the strap adjusters and remove the strap hooks
from the hook holders.
2. Remove the net upper shaft by pulling it through the large holes.
3. Remove the barrier net.
OGDE042303
WARNING
Make sure that there is no slack in the barrier net by fastening the
strap securely when installing the
net. The strap should be fastenedafter confirming that the hook is
inserted into the upper hook
holder securely.
Make sure that the seatbacks are locked securely.
WARNING
Do not put passengers in the rear seat or cargo area behind the bar- rier net.
Do not put passenger in the rear centre seat when the barrier netis installed behind the rear seats.
The barrier net may interfere with
use of the rear centre safety belt.
Do not load cargo in the area higher than the barrier net'supper end.
Do not load heavy cargo in the area higher than the seatback to
avoid accident even if the barriernet is installed.
Do not load cargo which has sharp edge that can pass throughthe barrier net.
Do not apply excessive force to the barrier net by hanging on to
the net or by suspending heavy
cargo and so on.
JD eng 4a(~168).qxp 7/17/2012 10:27 AM Page 162
Page 242 of 1168
4 163
Features of your vehicle
Cargo security screen (wagon) (if equipped)
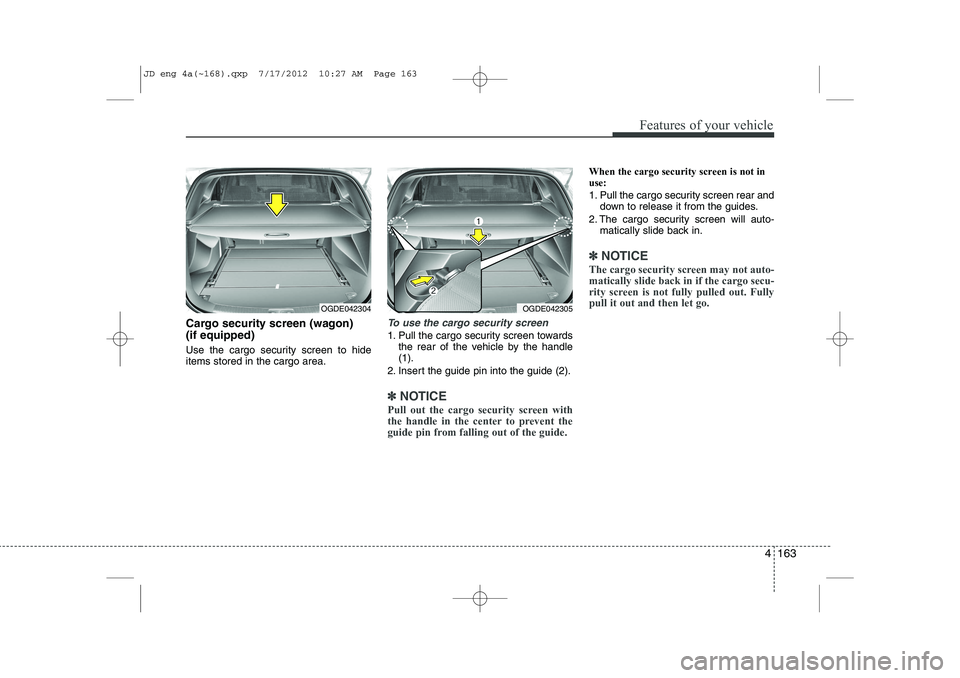
Use the cargo security screen to hide items stored in the cargo area.To use the cargo security screen
1. Pull the cargo security screen towardsthe rear of the vehicle by the handle (1).
2. Insert the guide pin into the guide (2).
✽✽ NOTICE
Pull out the cargo security screen with
the handle in the center to prevent the
guide pin from falling out of the guide.
When the cargo security screen is not in use:
1. Pull the cargo security screen rear and down to release it from the guides.
2. The cargo security screen will auto- matically slide back in.
✽✽ NOTICE
The cargo security screen may not auto- matically slide back in if the cargo secu-
rity screen is not fully pulled out. Fullypull it out and then let go.
OGDE042304OGDE042305
JD eng 4a(~168).qxp 7/17/2012 10:27 AM Page 163
Page 243 of 1168
Features of your vehicle
164
4
To remove the cargo security screen
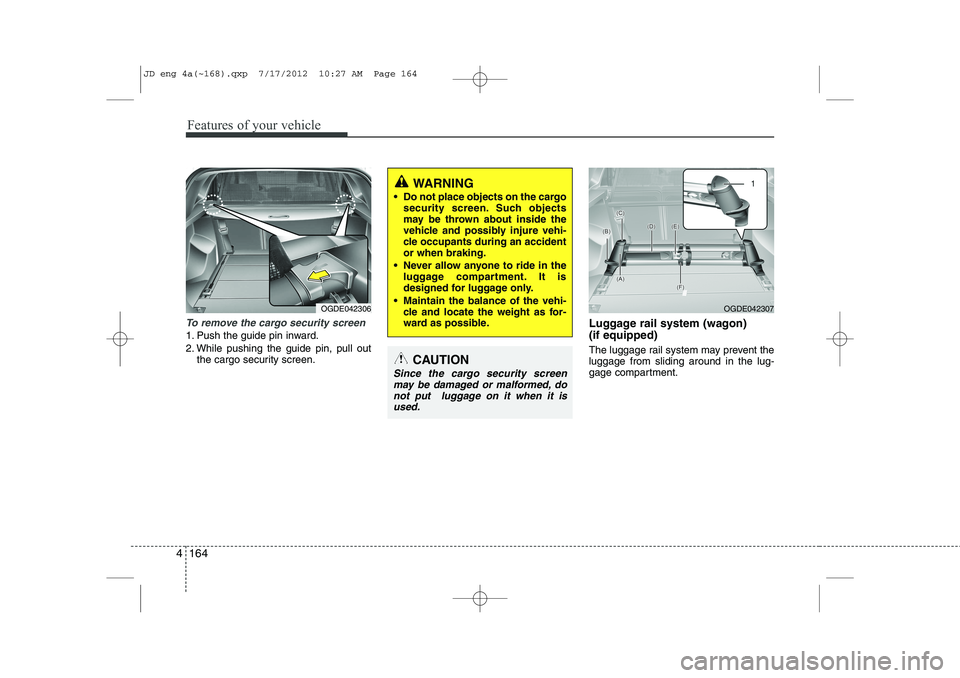
1. Push the guide pin inward.
2. While pushing the guide pin, pull out
the cargo security screen. Luggage rail system (wagon) (if equipped)
The luggage rail system may prevent the luggage from sliding around in the lug-
gage compartment.
WARNING
Do not place objects on the cargo security screen. Such objects
may be thrown about inside the
vehicle and possibly injure vehi-
cle occupants during an accidentor when braking.
Never allow anyone to ride in the luggage compartment. It is
designed for luggage only.
Maintain the balance of the vehi- cle and locate the weight as for-
ward as possible.
CAUTION
Since the cargo security screen
may be damaged or malformed, do
not put luggage on it when it is used.
OGDE042306OGDE042307
JD eng 4a(~168).qxp 7/17/2012 10:27 AM Page 164
Page 244 of 1168
4 165
Features of your vehicle
Build in segmentation bar
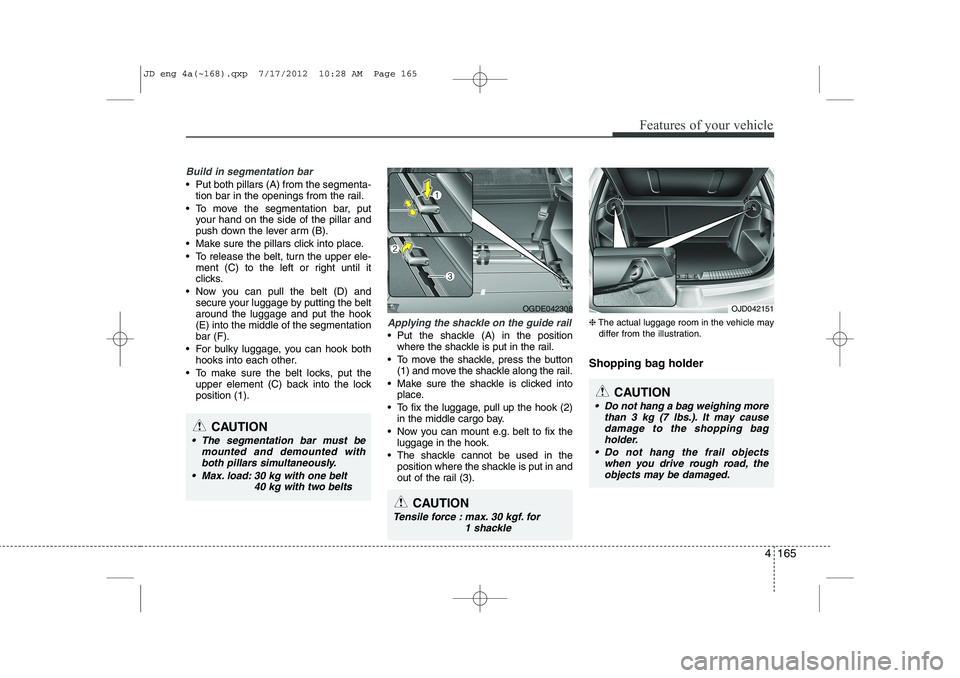
Put both pillars (A) from the segmenta-tion bar in the openings from the rail.
To move the segmentation bar, put your hand on the side of the pillar and
push down the lever arm (B).
Make sure the pillars click into place.
To release the belt, turn the upper ele- ment (C) to the left or right until it
clicks.
Now you can pull the belt (D) and secure your luggage by putting the beltaround the luggage and put the hook(E) into the middle of the segmentationbar (F).
For bulky luggage, you can hook both hooks into each other.
To make sure the belt locks, put the upper element (C) back into the lockposition (1).
Applying the shackle on the guide rail
Put the shackle (A) in the positionwhere the shackle is put in the rail.
To move the shackle, press the button (1) and move the shackle along the rail.
Make sure the shackle is clicked into place.
To fix the luggage, pull up the hook (2) in the middle cargo bay.
Now you can mount e.g. belt to fix the luggage in the hook.
The shackle cannot be used in the position where the shackle is put in and
out of the rail (3). ❈
The actual luggage room in the vehicle may
differ from the illustration.
Shopping bag holder
CAUTION
The segmentation bar must be mounted and demounted withboth pillars simultaneously.
Max. load: 30 kg with one belt 40 kg with two belts
OGDE042308
CAUTION
Do not hang a bag weighing morethan 3 kg (7 lbs.). It may causedamage to the shopping bag
holder.
Do not hang the frail objects when you drive rough road, theobjects may be damaged.
OJD042151
CAUTION
Tensile force : max. 30 kgf. for 1 shackle
JD eng 4a(~168).qxp 7/17/2012 10:28 AM Page 165
Page 245 of 1168
Features of your vehicle
166
4
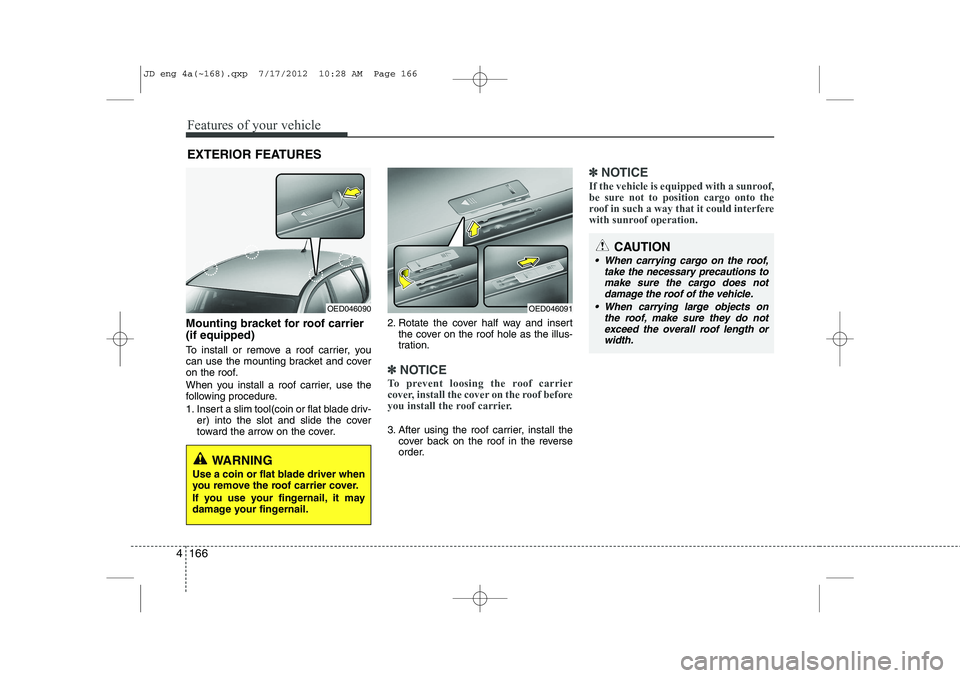
Mounting bracket for roof carrier (if equipped)
To install or remove a roof carrier, you
can use the mounting bracket and cover
on the roof.
When you install a roof carrier, use the
following procedure.
1. Insert a slim tool(coin or flat blade driv-
er) into the slot and slide the cover
toward the arrow on the cover. 2. Rotate the cover half way and insert
the cover on the roof hole as the illus-
tration.
✽✽ NOTICE
To prevent loosing the roof carrier
cover, install the cover on the roof before
you install the roof carrier.
3. After using the roof carrier, install the cover back on the roof in the reverse
order.
✽✽ NOTICE
If the vehicle is equipped with a sunroof,
be sure not to position cargo onto the
roof in such a way that it could interfere
with sunroof operation.
EXTERIOR FEATURES
OED046090OED046091
WARNING
Use a coin or flat blade driver when
you remove the roof carrier cover.
If you use your fingernail, it may
damage your fingernail.
CAUTION
When carrying cargo on the roof, take the necessary precautions to
make sure the cargo does notdamage the roof of the vehicle.
When carrying large objects on the roof, make sure they do not
exceed the overall roof length or width.
JD eng 4a(~168).qxp 7/17/2012 10:28 AM Page 166
Page 246 of 1168
4 167
Features of your vehicle
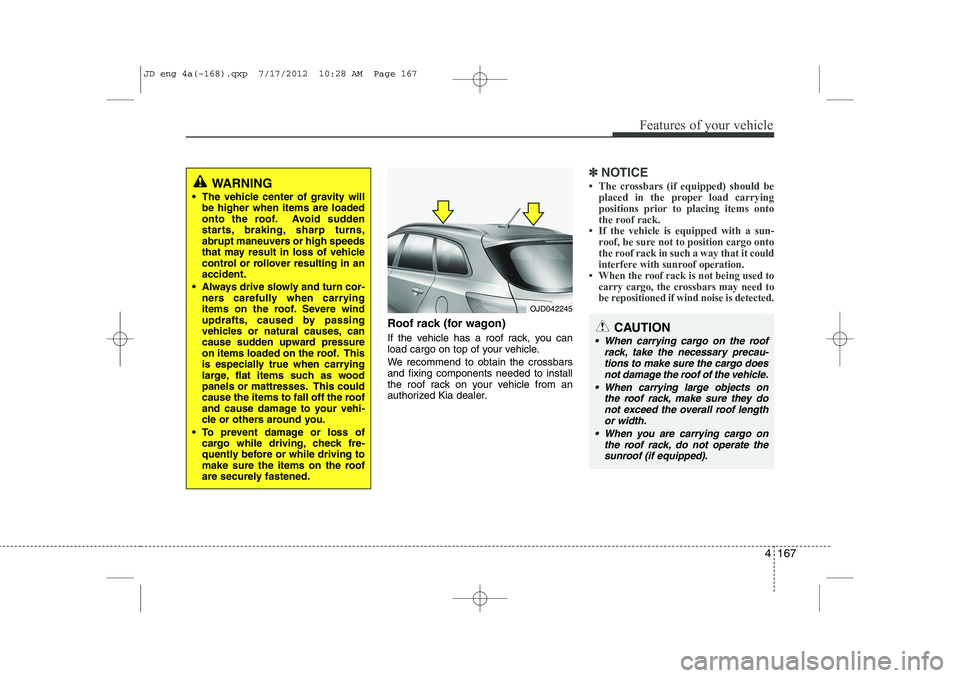
Roof rack (for wagon)
If the vehicle has a roof rack, you can
load cargo on top of your vehicle.
We recommend to obtain the crossbars and fixing components needed to install
the roof rack on your vehicle from an
authorized Kia dealer.
✽✽NOTICE
Page 247 of 1168
Features of your vehicle
168
4
(Continued)
Always drive slowly and turn cor-
ners carefully when carrying
items on the roof rack. Severe
wind updrafts, caused by passing
vehicles or natural causes, can
cause sudden upward pressure
on items loaded on the roof rack.
This is especially true when car-
rying large, flat items such as
wood panels or mattresses. Thiscould cause the items to fall off
the roof rack and cause damage
to your vehicle or others around
you.
To prevent damage or loss of cargo while driving, check fre-
quently before or while driving to
make sure the items on the roof
rack are securely fastened.WARNING
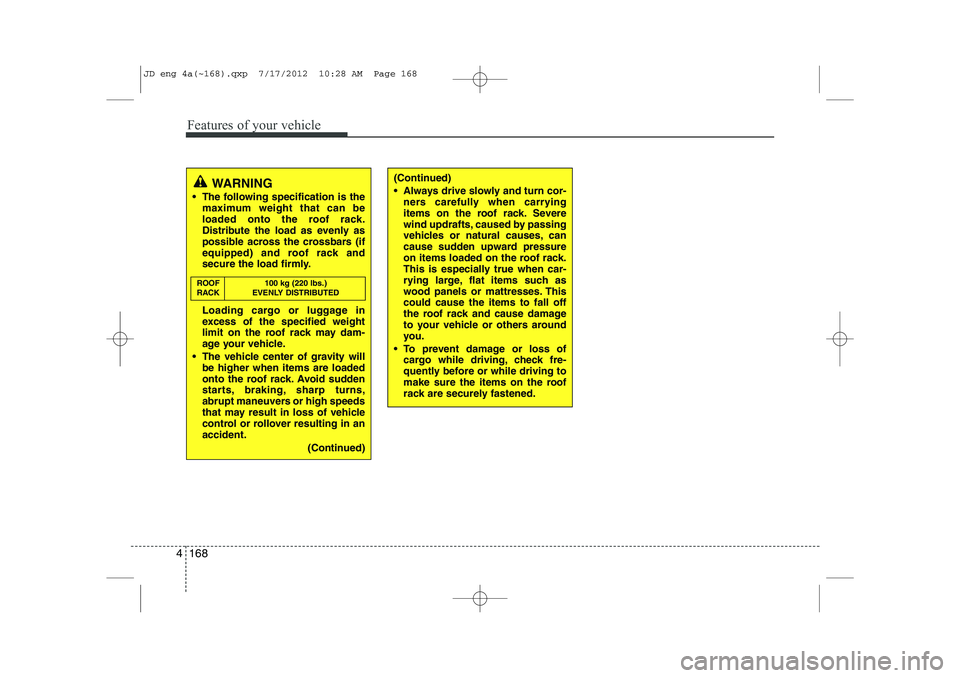
The following specification is the maximum weight that can be
loaded onto the roof rack.
Distribute the load as evenly as
possible across the crossbars (if
equipped) and roof rack and
secure the load firmly.
Loading cargo or luggage in
excess of the specified weight
limit on the roof rack may dam-
age your vehicle.
The vehicle center of gravity will be higher when items are loaded
onto the roof rack. Avoid sudden
starts, braking, sharp turns,
abrupt maneuvers or high speeds
that may result in loss of vehicle
control or rollover resulting in anaccident.
(Continued)
ROOF 100 kg (220 lbs.)
RACK EVENLY DISTRIBUTED
JD eng 4a(~168).qxp 7/17/2012 10:28 AM Page 168
Page 248 of 1168
4 169
Features of your vehicle
✽✽NOTICE
If you install an aftermarket HID head
lamp, your vehicle’s audio and electron-ic device may malfunction.
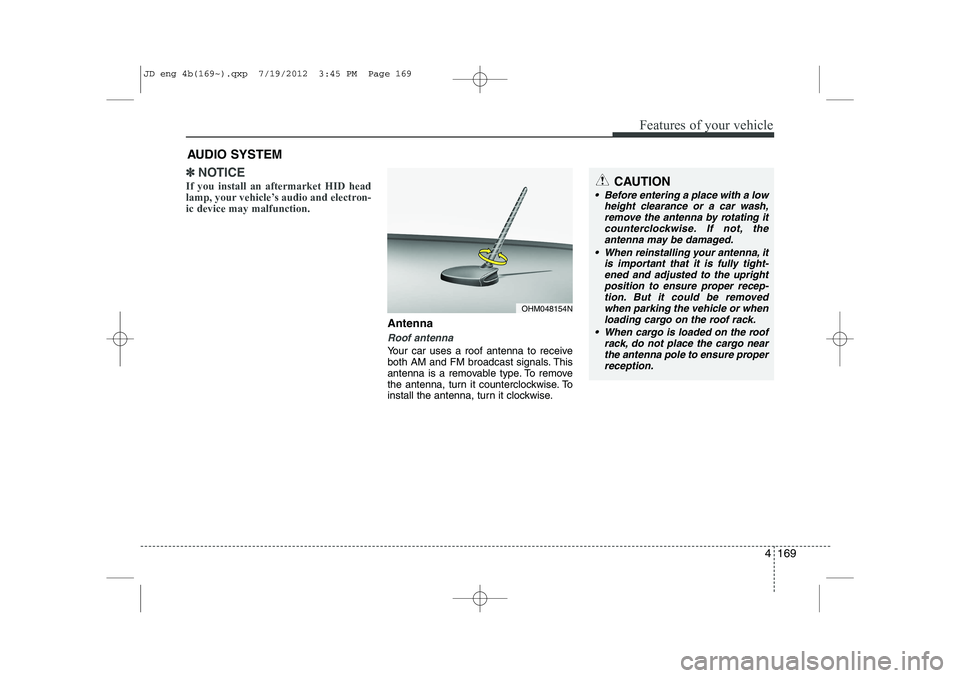
Antenna
Roof antenna
Your car uses a roof antenna to receive
both AM and FM broadcast signals. This
antenna is a removable type. To remove
the antenna, turn it counterclockwise. To
install the antenna, turn it clockwise.
AUDIO SYSTEM
CAUTION
• Before entering a place with a low
height clearance or a car wash,
remove the antenna by rotating itcounterclockwise. If not, theantenna may be damaged.
When reinstalling your antenna, it is important that it is fully tight-ened and adjusted to the upright position to ensure proper recep-tion. But it could be removed
when parking the vehicle or whenloading cargo on the roof rack.
When cargo is loaded on the roof rack, do not place the cargo near
the antenna pole to ensure proper reception.
OHM048154N
JD eng 4b(169~).qxp 7/19/2012 3:45 PM Page 169
Page 249 of 1168
Features of your vehicle
170
4
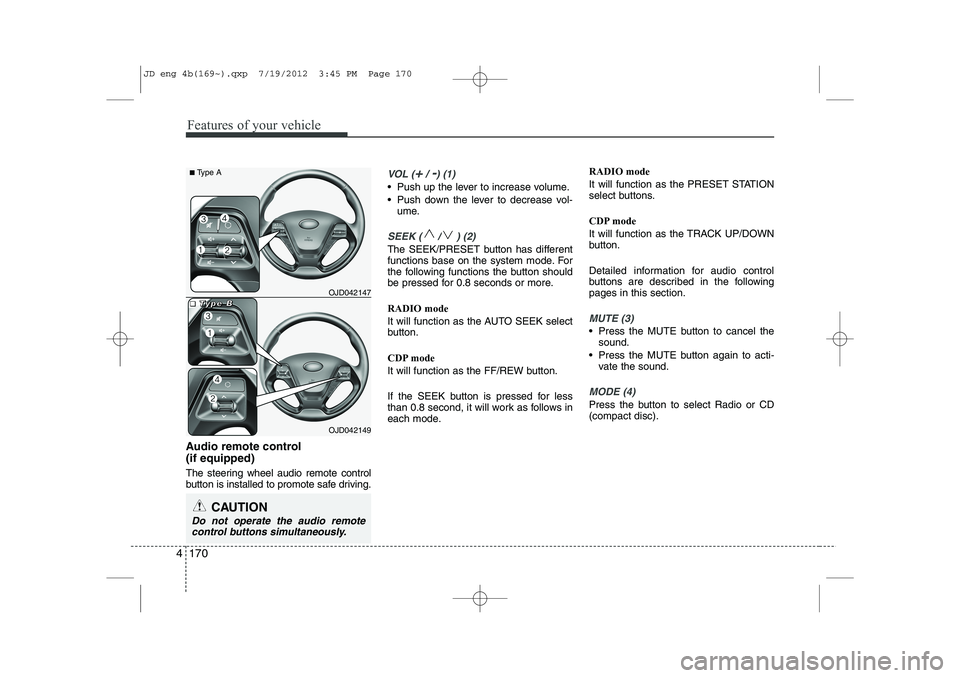
Audio remote control (if equipped)
The steering wheel audio remote control
button is installed to promote safe driving.
VOL (+/ -) (1)
• Push up the lever to increase volume.
Push down the lever to decrease vol-
ume.
SEEK ( / ) (2)
The SEEK/PRESET button has different
functions base on the system mode. For
the following functions the button should
be pressed for 0.8 seconds or more. RADIO mode
It will function as the AUTO SEEK select
button.
CDP mode
It will function as the FF/REW button.
If the SEEK button is pressed for less
than 0.8 second, it will work as follows in
each mode. RADIO mode
It will function as the PRESET STATION
select buttons.
CDP mode
It will function as the TRACK UP/DOWN
button.
Detailed information for audio control
buttons are described in the followingpages in this section.
MUTE (3)
Press the MUTE button to cancel the
sound.
Press the MUTE button again to acti- vate the sound.
MODE (4)
Press the button to select Radio or CD (compact disc).
CAUTION
Do not operate the audio remote
control buttons simultaneously.
OJD042149
■
■■■TTTTyyyyppppeeee BBBBOJD042147
■
Type A
JD eng 4b(169~).qxp 7/19/2012 3:45 PM Page 170
Page 250 of 1168
4 171
Features of your vehicle
How car audio works
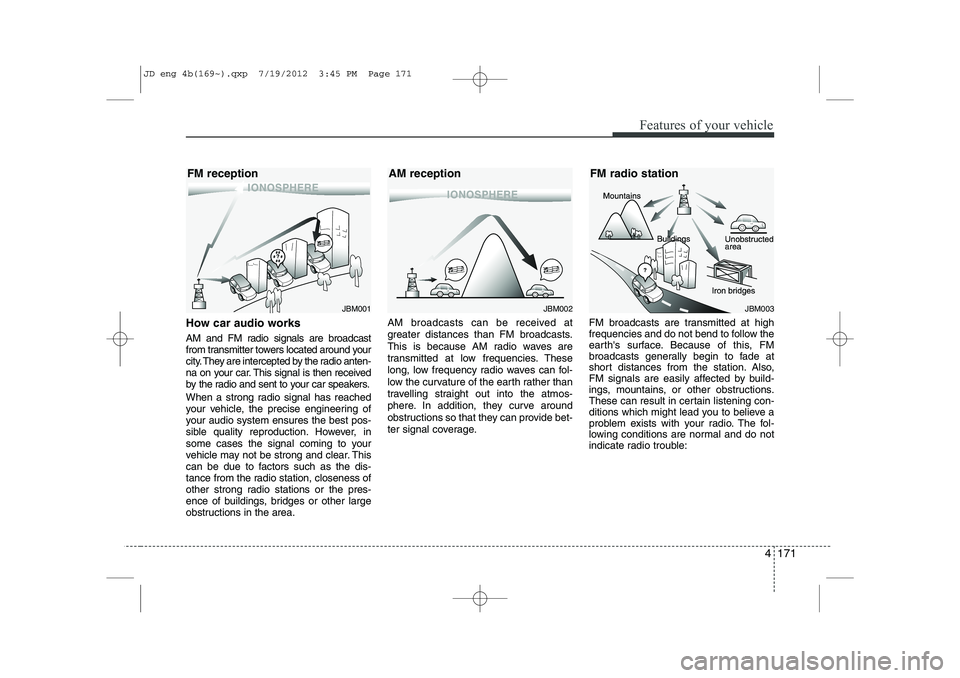
AM and FM radio signals are broadcast
from transmitter towers located around your
city. They are intercepted by the radio anten-
na on your car. This signal is then received
by the radio and sent to your car speakers.
When a strong radio signal has reached
your vehicle, the precise engineering of
your audio system ensures the best pos-
sible quality reproduction. However, in
some cases the signal coming to your
vehicle may not be strong and clear. This
can be due to factors such as the dis-
tance from the radio station, closeness of
other strong radio stations or the pres-
ence of buildings, bridges or other large
obstructions in the area.AM broadcasts can be received at
greater distances than FM broadcasts.
This is because AM radio waves are
transmitted at low frequencies. These
long, low frequency radio waves can fol-
low the curvature of the earth rather than
travelling straight out into the atmos-
phere. In addition, they curve around
obstructions so that they can provide bet-
ter signal coverage.
FM broadcasts are transmitted at high
frequencies and do not bend to follow the
earth's surface. Because of this, FM
broadcasts generally begin to fade at
short distances from the station. Also,
FM signals are easily affected by build-
ings, mountains, or other obstructions.
These can result in certain listening con-
ditions which might lead you to believe a
problem exists with your radio. The fol-
lowing conditions are normal and do not
indicate radio trouble:
JBM001JBM002JBM003
FM reception AM reception FM radio station
JD eng 4b(169~).qxp 7/19/2012 3:45 PM Page 171