Jack KIA CEED 2014 User Guide
[x] Cancel search | Manufacturer: KIA, Model Year: 2014, Model line: CEED, Model: KIA CEED 2014Pages: 1206, PDF Size: 50.15 MB
Page 1011 of 1206
Driving your vehicle
62
5
ECONOMICAL OPERATION
Your vehicle's fuel economy depends
mainly on your style of driving, where you
drive and when you drive.
Each of these factors affects how many
kilometers (miles) you can get from a
litre (gallon) of fuel. To operate your vehi-
cle as economically as possible, use the
following driving suggestions to help
save money in both fuel and repairs:
Drive smoothly. Accelerate at a moder- ate rate. Do not make "jack-rabbit"
starts or full-throttle shifts and maintain
a steady cruising speed. Do not race
between stoplights. Try to adjust your
speed to the traffic so you do not have
to change speeds unnecessarily. Avoid
heavy traffic whenever possible.
Always maintain a safe distance from
other vehicles so you can avoid unnec-
essary braking. This also reduces
brake wear.
Drive at a moderate speed. The faster you drive, the more fuel your vehicle
uses. Driving at a moderate speed,
especially on the highway, is one of the
most effective ways to reduce fuel con-sumption. Do not "ride" the brake or clutch pedal.
This can increase fuel consumption
and also increase wear on these com-
ponents. In addition, driving with your
foot resting on the brake pedal may
cause the brakes to overheat, which
reduces their effectiveness and may
lead to more serious consequences.
Take care of your tyres. Keep them inflated to the recommended pressure.
Incorrect inflation, either too much or
too little, results in unnecessary tyre
wear. Check the tyre pressures at leastonce a month.
Be sure that the wheels are aligned correctly. Improper alignment can
result from hitting curbs or driving too
fast over irregular surfaces. Poor align-
ment causes faster tyre wear and may
also result in other problems as well as
greater fuel consumption. Keep your vehicle in good condition.
For better fuel economy and reduced
maintenance costs, maintain your vehi-cle in accordance with the mainte-
nance schedule. If you drive your vehi-
cle in severe conditions, more frequentmaintenance is required.
Keep your vehicle clean. For maximum service, your vehicle should be kept
clean and free of corrosive materials. It
is especially important that mud, dirt,
ice, etc. not be allowed to accumulate
on the underside of the vehicle. This
extra weight can result in increased
fuel consumption and also contributeto corrosion.
Travel lightly. Do not carry unnecessary weight in your vehicle. Weight reduces
fuel economy.
Do not let the engine idle longer than necessary. If you are waiting (and not
in traffic), turn off your engine and
restart only when you're ready to go.
JD RHD 5.QXP 4/29/2013 11:28 AM Page 62
Page 1038 of 1206
69
What to do in an emergency
IF YOU HAVE A FLAT TYRE (WITH SPARE TYRE, IF EQUIPPED)
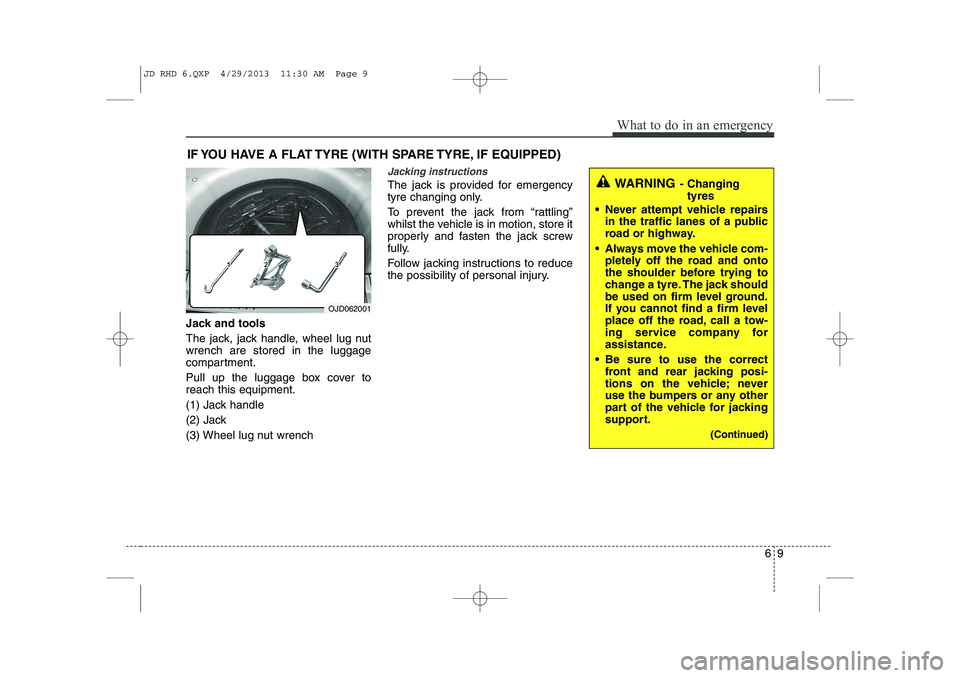
Jack and tools
The jack, jack handle, wheel lug nut wrench are stored in the luggage
compartment.
Pull up the luggage box cover to reach this equipment.
(1) Jack handle
(2) Jack
(3) Wheel lug nut wrench
Jacking instructions
The jack is provided for emergency
tyre changing only.
To prevent the jack from “rattling”
whilst the vehicle is in motion, store it
properly and fasten the jack screw
fully.
Follow jacking instructions to reduce
the possibility of personal injury.
OJD062001
WARNING - Changing
tyres
Never attempt vehicle repairs in the traffic lanes of a public
road or highway.
Always move the vehicle com- pletely off the road and onto
the shoulder before trying to
change a tyre. The jack should
be used on firm level ground.
If you cannot find a firm level
place off the road, call a tow-
ing service company for
assistance.
Be sure to use the correct front and rear jacking posi-
tions on the vehicle; never
use the bumpers or any other
part of the vehicle for jacking
support.
(Continued)
JD RHD 6.QXP 4/29/2013 11:30 AM Page 9
Page 1039 of 1206
What to do in an emergency
10
6
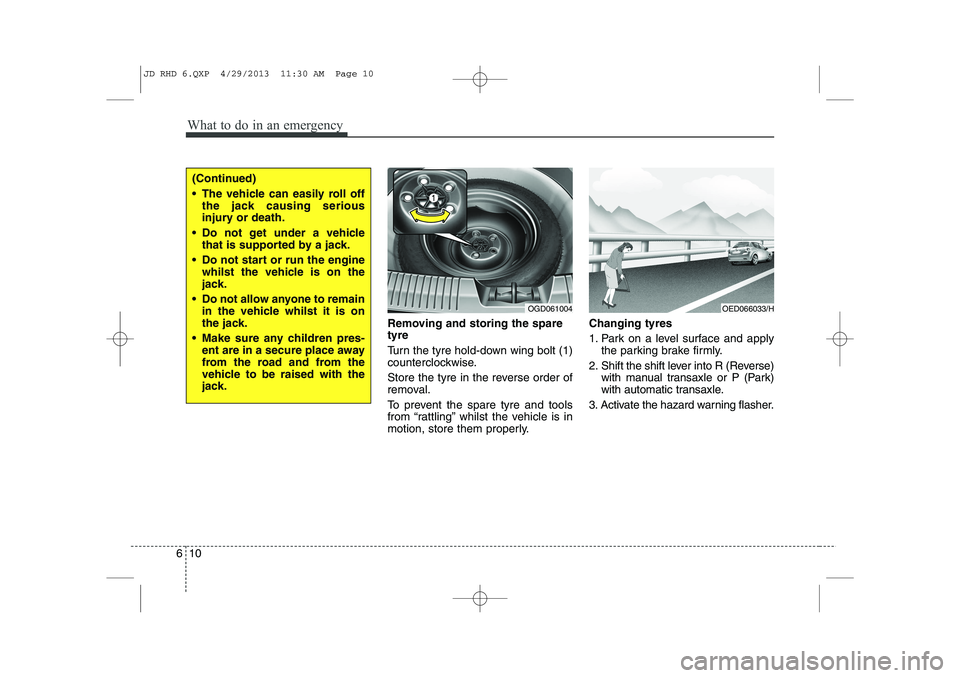
Removing and storing the spare tyre
Turn the tyre hold-down wing bolt (1)
counterclockwise.
Store the tyre in the reverse order of
removal.
To prevent the spare tyre and tools
from “rattling” whilst the vehicle is in
motion, store them properly. Changing tyres
1. Park on a level surface and apply
the parking brake firmly.
2. Shift the shift lever into R (Reverse) with manual transaxle or P (Park)
with automatic transaxle.
3. Activate the hazard warning flasher.
OGD061004
(Continued)
The vehicle can easily roll off the jack causing serious
injury or death.
Do not get under a vehicle that is supported by a jack.
Do not start or run the engine whilst the vehicle is on the
jack.
Do not allow anyone to remain in the vehicle whilst it is on
the jack.
Make sure any children pres- ent are in a secure place away
from the road and from the
vehicle to be raised with the
jack.
OED066033/H
JD RHD 6.QXP 4/29/2013 11:30 AM Page 10
Page 1040 of 1206

611
What to do in an emergency
4. Remove the wheel lug nut wrench,jack, jack handle, and spare tyre
from the vehicle.
5. Block both the front and rear of the wheel that is diagonally opposite
the jack position. 6. Loosen the wheel lug nuts coun-
terclockwise one turn each, but do
not remove any nut until the tyre
has been raised off the ground.
WARNING - Changing a tyre
To prevent vehicle movement
whilst changing a tyre, always
set the parking brake fully,
and always block the wheel
diagonally opposite the wheel
being changed.
We recommend that the wheels of the vehicle be
chocked, and that no person
remain in a vehicle that is
being jacked.
OJD062003OJD062004
JD RHD 6.QXP 4/29/2013 11:30 AM Page 11
Page 1041 of 1206
What to do in an emergency
12
6
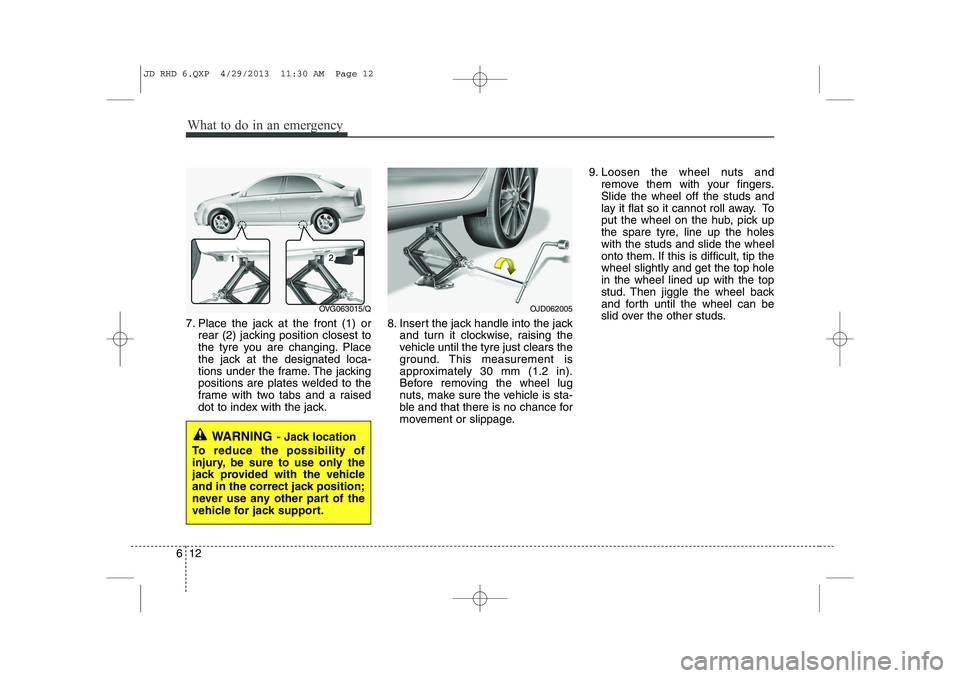
7. Place the jack at the front (1) or
rear (2) jacking position closest to
the tyre you are changing. Place
the jack at the designated loca-
tions under the frame. The jacking
positions are plates welded to the
frame with two tabs and a raised
dot to index with the jack. 8. Insert the jack handle into the jack
and turn it clockwise, raising the
vehicle until the tyre just clears the
ground. This measurement is
approximately 30 mm (1.2 in).
Before removing the wheel lug
nuts, make sure the vehicle is sta-
ble and that there is no chance for
movement or slippage. 9. Loosen the wheel nuts and
remove them with your fingers.Slide the wheel off the studs and
lay it flat so it cannot roll away. To
put the wheel on the hub, pick up
the spare tyre, line up the holeswith the studs and slide the wheel
onto them. If this is difficult, tip thewheel slightly and get the top holein the wheel lined up with the top
stud. Then jiggle the wheel back
and forth until the wheel can be
slid over the other studs.
WARNING - Jack location
To reduce the possibility of
injury, be sure to use only the
jack provided with the vehicle
and in the correct jack position;
never use any other part of the
vehicle for jack support.
OJD062005OVG063015/Q
JD RHD 6.QXP 4/29/2013 11:30 AM Page 12
Page 1043 of 1206
What to do in an emergency
14
6
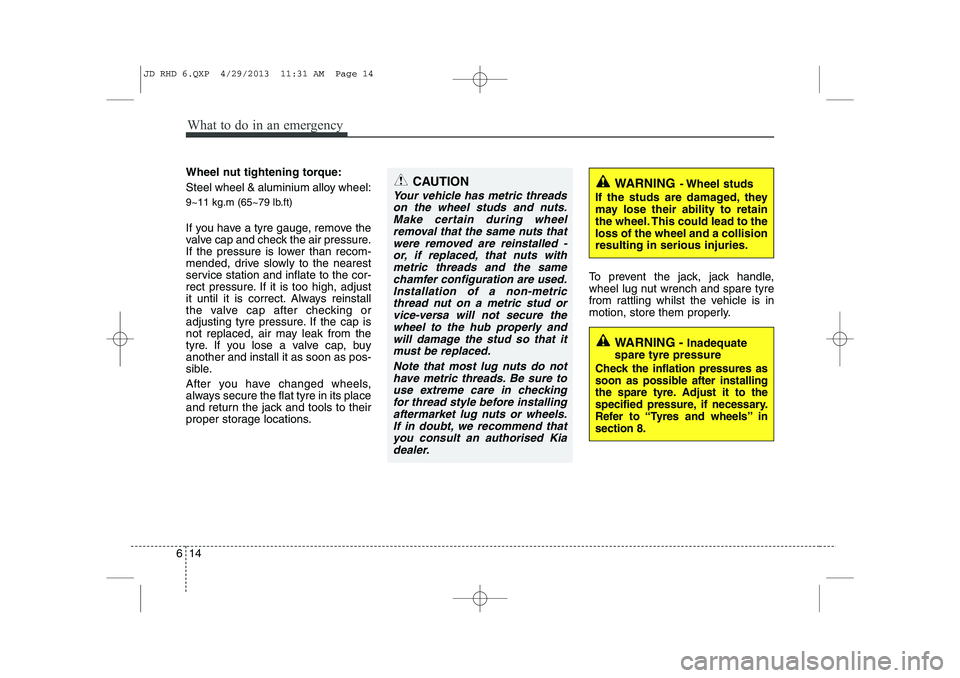
Wheel nut tightening torque:
Steel wheel & aluminium alloy wheel:
9~11 kg.m (65~79 lb.ft)
If you have a tyre gauge, remove the
valve cap and check the air pressure.
If the pressure is lower than recom-
mended, drive slowly to the nearest
service station and inflate to the cor-
rect pressure. If it is too high, adjust
it until it is correct. Always reinstall
the valve cap after checking or
adjusting tyre pressure. If the cap is
not replaced, air may leak from the
tyre. If you lose a valve cap, buyanother and install it as soon as pos-
sible.
After you have changed wheels,
always secure the flat tyre in its place
and return the jack and tools to their
proper storage locations. To prevent the jack, jack handle,
wheel lug nut wrench and spare tyre
from rattling whilst the vehicle is in
motion, store them properly.CAUTION
Your vehicle has metric threads
on the wheel studs and nuts.Make certain during wheel removal that the same nuts thatwere removed are reinstalled -or, if replaced, that nuts with metric threads and the samechamfer configuration are used.Installation of a non-metric thread nut on a metric stud orvice-versa will not secure thewheel to the hub properly andwill damage the stud so that it must be replaced.
Note that most lug nuts do nothave metric threads. Be sure touse extreme care in checking for thread style before installingaftermarket lug nuts or wheels.If in doubt, we recommend thatyou consult an authorised Kia dealer.
WARNING - Wheel studs
If the studs are damaged, they
may lose their ability to retain
the wheel. This could lead to theloss of the wheel and a collisionresulting in serious injuries.
WARNING - Inadequate
spare tyre pressure
Check the inflation pressures as
soon as possible after installing
the spare tyre. Adjust it to the
specified pressure, if necessary.
Refer to “Tyres and wheels” insection 8.
JD RHD 6.QXP 4/29/2013 11:31 AM Page 14
Page 1198 of 1206
I5
Index
Emergency Stop Signal (ESS) . . . . . . . . . . . . . . . . . . 5-48
Emergency whilst driving . . . . . . . . . . . . . . . . . . . . . . 6-3
Emission control system . . . . . . . . . . . . . . . . . . . . . . 7-116
Crankcase emission control system . . . . . . . . . . . 7-116
Evaporative emission control System . . . . . . . . . . 7-116
Exhaust emission control system. . . . . . . . . . . . . . 7-117
Engine . . . . . . . . . . . . . . . . . . . . . . . . . . . . . . . . . . . . . . 8-3
Engine compartment . . . . . . . . . . . . . . . . . . . . . . . . . . 2-6
Engine compartment panel fuse . . . . . . . . . . . . . . . . 7-68
Engine coolant . . . . . . . . . . . . . . . . . . . . . . . . . . . . . . . 7-39
Engine coolant temperature gauge (Normal vision) . . 4-48
Engine coolant temperature gauge (Super vision) . . 4-63
Engine number . . . . . . . . . . . . . . . . . . . . . . . . . . . . . . 8-12
Engine oil . . . . . . . . . . . . . . . . . . . . . . . . . . . . . . . . . . . 7-37
Engine overheats . . . . . . . . . . . . . . . . . . . . . . . . . . . . . . 6-8
Engine start/stop button. . . . . . . . . . . . . . . . . . . . . . . . 5-9
Engine will not start . . . . . . . . . . . . . . . . . . . . . . . . . . . 6-4
Evaporative emission control System . . . . . . . . . . . 7-116
Exhaust emission control system . . . . . . . . . . . . . . . 7-117
Explanation of scheduled maintenance items . . . . . 7-34
Exterior care . . . . . . . . . . . . . . . . . . . . . . . . . . . . . . . 7-110
Exterior features
Mounting bracket for roof carrier . . . . . . . . . . . . 4-169
Roof rack . . . . . . . . . . . . . . . . . . . . . . . . . . . . . . . . . 4-170
Exterior overview(front) . . . . . . . . . . . . . . . . . . . . . . . 2-2
Exterior overview(rear) . . . . . . . . . . . . . . . . . . . . . . . . 2-3 Flat tyre (with spare tyre) . . . . . . . . . . . . . . . . . . . . . . 6-9
Changing tyres . . . . . . . . . . . . . . . . . . . . . . . . . . . . . 6-10
Compact spare tyre . . . . . . . . . . . . . . . . . . . . . . . . . 6-15
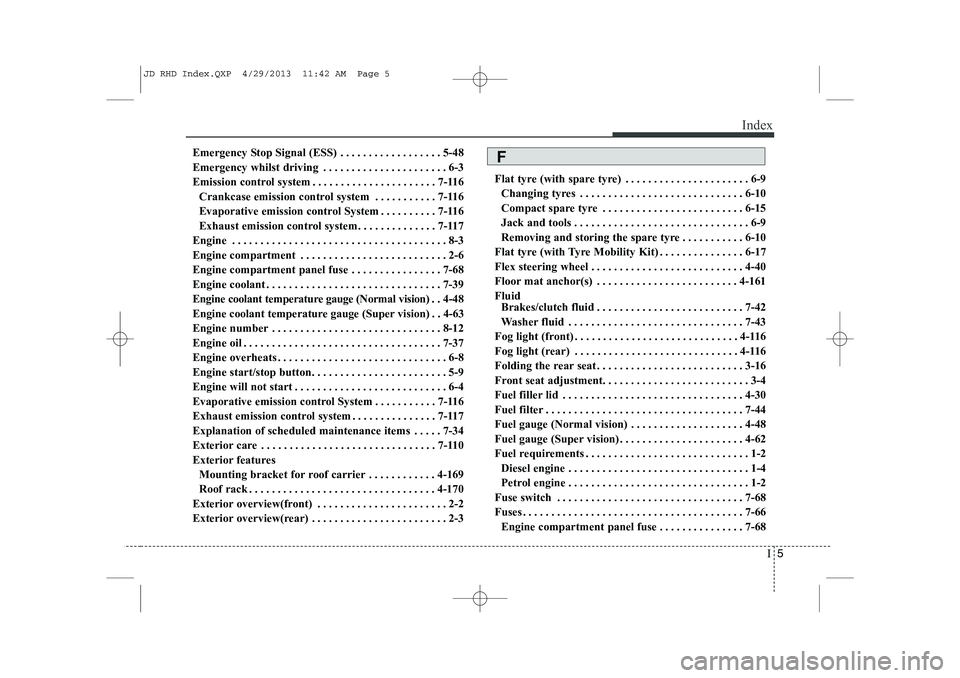
Jack and tools . . . . . . . . . . . . . . . . . . . . . . . . . . . . . . . 6-9
Removing and storing the spare tyre . . . . . . . . . . . 6-10
Flat tyre (with Tyre Mobility Kit) . . . . . . . . . . . . . . . 6-17
Flex steering wheel . . . . . . . . . . . . . . . . . . . . . . . . . . . 4-40
Floor mat anchor(s) . . . . . . . . . . . . . . . . . . . . . . . . . 4-161Fluid Brakes/clutch fluid . . . . . . . . . . . . . . . . . . . . . . . . . . 7-42
Washer fluid . . . . . . . . . . . . . . . . . . . . . . . . . . . . . . . 7-43
Fog light (front) . . . . . . . . . . . . . . . . . . . . . . . . . . . . . 4-116
Fog light (rear) . . . . . . . . . . . . . . . . . . . . . . . . . . . . . 4-116
Folding the rear seat . . . . . . . . . . . . . . . . . . . . . . . . . . 3-16
Front seat adjustment. . . . . . . . . . . . . . . . . . . . . . . . . . 3-4
Fuel filler lid . . . . . . . . . . . . . . . . . . . . . . . . . . . . . . . . 4-30
Fuel filter . . . . . . . . . . . . . . . . . . . . . . . . . . . . . . . . . . . 7-44
Fuel gauge (Normal vision) . . . . . . . . . . . . . . . . . . . . 4-48
Fuel gauge (Super vision) . . . . . . . . . . . . . . . . . . . . . . 4-62
Fuel requirements . . . . . . . . . . . . . . . . . . . . . . . . . . . . . 1-2 Diesel engine . . . . . . . . . . . . . . . . . . . . . . . . . . . . . . . . 1-4
Petrol engine . . . . . . . . . . . . . . . . . . . . . . . . . . . . . . . . 1-2
Fuse switch . . . . . . . . . . . . . . . . . . . . . . . . . . . . . . . . . 7-68
Fuses . . . . . . . . . . . . . . . . . . . . . . . . . . . . . . . . . . . . . . . 7-66 Engine compartment panel fuse . . . . . . . . . . . . . . . 7-68F
JD RHD Index.QXP 4/29/2013 11:42 AM Page 5
Page 1200 of 1206

I7
Index
Trip computer . . . . . . . . . . . . . . . . . . . . . . . . . . . . . . 4-51
User Settings . . . . . . . . . . . . . . . . . . . . . . . . . . . . . . . 4-56
Instrument cluster (Super vision) . . . . . . . . . . . . . . . 4-59 Automatic transaxle shift position indicator . . . . . 4-65
Cluster display mode conversion . . . . . . . . . . . . . . 4-61
Double clutch transmission shift indicator . . . . . . 4-65
Engine torque gauge. . . . . . . . . . . . . . . . . . . . . . . . . 4-63
Fuel gauge . . . . . . . . . . . . . . . . . . . . . . . . . . . . . . . . . 4-62
Instrument panel illumination . . . . . . . . . . . . . . . . 4-61
Manual transaxle shift indicator. . . . . . . . . . . . . . . 4-64
Odometer . . . . . . . . . . . . . . . . . . . . . . . . . . . . . . . . . . 4-66
Speed limiter indicator. . . . . . . . . . . . . . . . . . . . . . . 4-66
Speedometer . . . . . . . . . . . . . . . . . . . . . . . . . . . . . . . 4-62
Tachometer . . . . . . . . . . . . . . . . . . . . . . . . . . . . . . . . 4-61
Trip computer . . . . . . . . . . . . . . . . . . . . . . . . . . . . . . 4-66
Turbo boost pressure gauge. . . . . . . . . . . . . . . . . . . 4-63
Inner panel fuse. . . . . . . . . . . . . . . . . . . . . . . . . . . . . . 7-67
Instrument panel illumination (Normal vision). . . . 4-46
Instrument panel illumination (Super vision) . . . . . 4-59
Instrument panel overview . . . . . . . . . . . . . . . . . . . . . 2-5
Interior care . . . . . . . . . . . . . . . . . . . . . . . . . . . . . . . . 7-115
Interior features . . . . . . . . . . . . . . . . . . . . . . . . . . . . 4-156 Ashtray . . . . . . . . . . . . . . . . . . . . . . . . . . . . . . . . . . 4-156
Aux, USB and iPod . . . . . . . . . . . . . . . . . . . . . . . . . 4-160
Barrier net . . . . . . . . . . . . . . . . . . . . . . . . . . . . . . . . 4-163
Bottle holder . . . . . . . . . . . . . . . . . . . . . . . . . . . . . . 4-158 Cargo area cover . . . . . . . . . . . . . . . . . . . . . . . . . . 4-162
Cargo security screen . . . . . . . . . . . . . . . . . . . . . . . 4-166
Cigarette lighter . . . . . . . . . . . . . . . . . . . . . . . . . . . 4-156
Clothes hanger . . . . . . . . . . . . . . . . . . . . . . . . . . . . 4-161
Cup holder. . . . . . . . . . . . . . . . . . . . . . . . . . . . . . . . 4-157
Floor mat anchor(s) . . . . . . . . . . . . . . . . . . . . . . . . 4-161
Luggage net (holder) . . . . . . . . . . . . . . . . . . . . . . . 4-162
Luggage rail system . . . . . . . . . . . . . . . . . . . . . . . . 4-167
Power outlet . . . . . . . . . . . . . . . . . . . . . . . . . . . . . . 4-159
Shopping bag holder . . . . . . . . . . . . . . . . . . . . . . . 4-168
Sunvisor . . . . . . . . . . . . . . . . . . . . . . . . . . . . . . . . . . 4-158
Interior light . . . . . . . . . . . . . . . . . . . . . . . . . . . . . . . 4-123 Glove box lamp . . . . . . . . . . . . . . . . . . . . . . . . . . . . 4-125
Luggage room lamp . . . . . . . . . . . . . . . . . . . . . . . . 4-125
Map lamp . . . . . . . . . . . . . . . . . . . . . . . . . . . . . . . . 4-123
Room lamp . . . . . . . . . . . . . . . . . . . . . . . . . . . . . . . 4-124
Vanity mirror lamp . . . . . . . . . . . . . . . . . . . . . . . . 4-124
Interior overview. . . . . . . . . . . . . . . . . . . . . . . . . . . . . . 2-4
ISG (Idle stop and go) system . . . . . . . . . . . . . . . . . . 5-15
ISOFIX system . . . . . . . . . . . . . . . . . . . . . . . . . . . . . . 3-35
Jack and tools . . . . . . . . . . . . . . . . . . . . . . . . . . . . . . . . 6-9
Jump starting . . . . . . . . . . . . . . . . . . . . . . . . . . . . . . . . 6-5
J
JD RHD Index.QXP 4/29/2013 11:42 AM Page 7