Door KIA CEED 2014 Repair Manual
[x] Cancel search | Manufacturer: KIA, Model Year: 2014, Model line: CEED, Model: KIA CEED 2014Pages: 1206, PDF Size: 50.15 MB
Page 359 of 1206

513
Driving your vehicle
3. Press the engine start/stop buttonwhile depressing the brake pedal.
4. Continue depressing the brake pedal until the illuminated glow indicator
goes off. (approximately 5 seconds)
5. The engine starts running when the glow indicator goes off.
✽✽
NOTICE
If the engine start/stop button is pressed
once more while the engine is pre-heat-ing, the engine may start.
Starting and stopping the engine for tur-
bocharger intercooler
1. Do not race or accelerate the engine immediately after starting.
If the engine is cold, idle for several
seconds before sufficient lubrication isensured in the turbocharger unit.
2. After high speed or extended driving, requiring a heavy engine load, idle the
engine about 1 minute before turning it
off.
This idle time will allow the tur- bocharger to cool prior to shutting the
engine off. Even if the smart key is in the vehicle,
if it is far away from you, the engine
may not start.
When the engine start/stop button is in the ACC position or above, if any door is
opened, the system checks for the
smart key. If the smart key is not in the
vehicle, a message “Key not in vehicle”
will appear on the LCD display. And if alldoors are closed, the chime will sound
for 5 seconds. The indicator or warning
will turn off while the vehicle is moving.
Always have the smart key with you.
WARNING
The engine will start, only when the
smart key is in the vehicle.
Never allow children or any person
who is unfamiliar with the vehicle
touch the engine start/stop button
or related parts.
CAUTION
Do not turn the engine off immedi- ately after it has been subjected toa heavy load. Doing so may causesevere damage to the engine or tur-
bocharger unit.
W-60
Glow indicator light
JD eng 5.QXP 5/6/2013 10:07 AM Page 13
Page 362 of 1206

Driving your vehicle
16
5
Also, a message "Auto Stop" will appear
on the LCD display.
✽✽
NOTICE
You must reach a speed of at least 10 km/h (6 mph) since last idle stop. ✽
✽
NOTICE
If you unfasten the seatbelt or open the
driver's door (or engine hood) in autostop mode, the following will happen:
Page 364 of 1206

Driving your vehicle
18
5
Condition of ISG system opera- tion
The ISG system will operate under
the following condition:
- The driver’s seat belt is fastened.
- The driver’s door and engine hood are closed.
- The brake vaccum pressure is ade- quate.
- The battery is sufficiently charged.
- The outside temperature is between -2°C to 35°C (28.4°F to 95°F).
- The engine coolant temperature is not too low.
✽✽ NOTICE
Page 384 of 1206

Driving your vehicle
38
5
To release EPB (electric parking brake) automatically:
Manual transaxle vehicle
1. Start the engine.
2. Fasten the driver's seat belt.
3. Close the driver's door, engine hood and tailgate.
4. Depress the clutch pedal with the gear engaged.
5. Depress the accelerator pedal while releasing the clutch pedal.
Automatic transaxle vehicle 1. Start the engine.
2. Fasten the driver's seat belt.
3. Close the driver's door, engine hood and tailgate.
4. Depress the accelerator pedal while the shift lever is in R (Rear), D
(Drive).
Shift lever in P (Park) With the engine running depress thebrake pedal and shift out of P (Park) to
R (Rear) or D (Drive).
Shift lever in N (Neutral) With the engine running depress the
brake pedal and shift out of N (Neutral)
to R (Rear) or D (Drive).
Make sure the brake warning light goes
off.✽✽ NOTICE
Page 385 of 1206

539
Driving your vehicle
EPB (electric parking brake) may be automatically applied when:
The EPB is overheated
Requested by other systems If you try to drive off depressing theaccelerator pedal with the EPB applied,
but doesn't release automatically, a
warning will sound and a message will
appear.
If the driver's seat belt is not fastened and any door, the engine hood or tail-
gate is opened, a warning will sound
and a message will appear.
If there is a problem with the vehicle, a warning may sound and a message
may appear.
If the above situation occurs, depress the
brake pedal and release EPB by pressing
the EPB switch.
WARNING
To prevent unintentional move- ment when stopped and leaving
the vehicle, do not use the shift
lever in place of the parking
brake. Set the parking brake and
make sure the shift lever is
securely positioned in P (Park).
Never allow anyone who is unfa- miliar with the vehicle to touch
the parking brake. If the parking
brake is released unintentionally,
serious injury may occur.
All vehicles should always have the parking brake fully engaged
when parking to avoid inadver-
tent movement of the car whichcan injure occupants or pedestri-ans.
OJD052035/OJD042195
■
Normal vision
■Supervision
JD eng 5.QXP 5/6/2013 10:08 AM Page 39
Page 423 of 1206
577
Driving your vehicle
If you do decide to pull a trailer
Here are some important points if you decide to pull a trailer:
Consider using a sway control. You can ask a hitch dealer about sway control.
Do not do any towing with your car during its first 2,000 km (1,200 miles) in order to allow the engine to properly break in. Failure
to heed this caution may result in serious engine or transaxle damage.
When towing a trailer, we recommend that you consult an authorized Kia dealer on additional requirements such as a towing kit, etc.
Always drive your vehicle at a moderate speed (less than 100 km/h (60 mph)).
On a long uphill grade, do not exceed 70 km/h (45 mph) or the posted towing speed limit, whichever is lower.
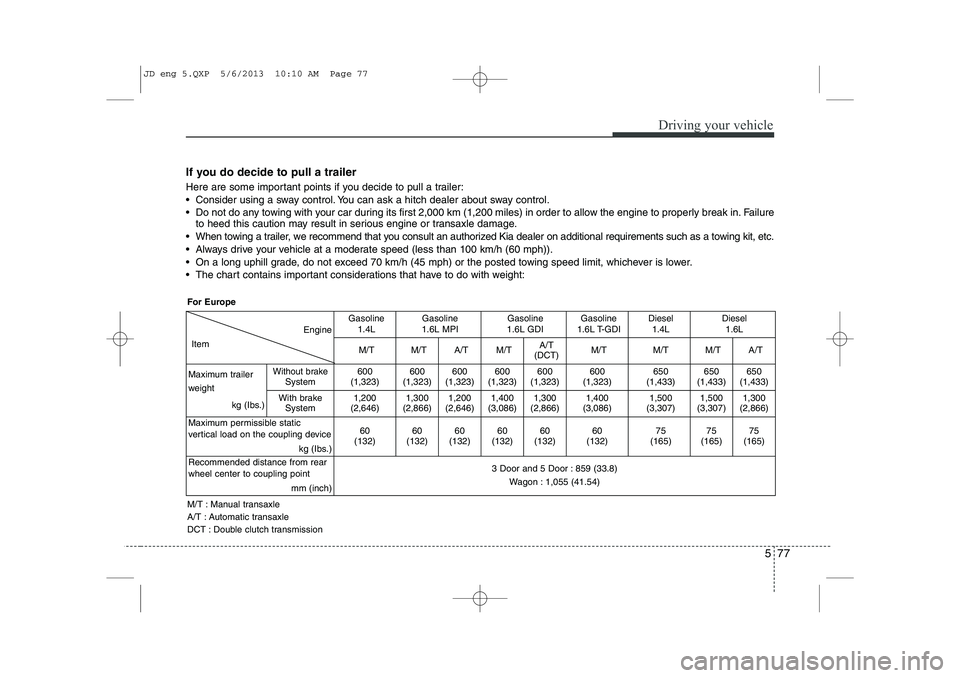
The chart contains important considerations that have to do with weight:
Engine
Item
Gasoline 1.4LGasoline
1.6L MPI Gasoline
1.6L GDIGasoline
1.6L T-GDIDiesel 1.4L Diesel
1.6L
M/TM/TA/T M/T A/T
(DCT)M/TM/T M/T A/T
Maximum trailer
weight kg (Ibs.)
Without brakeSystem600
(1,323)600
(1,323)600
(1,323) 600
(1,323) 600
(1,323)600
(1,323)650
(1,433) 650
(1,433) 650
(1,433)
With brake System
1,200
(2,646)1,300
(2,866)1,200
(2,646) 1,400
(3,086) 1,300
(2,866)1,400
(3,086)1,500
(3,307) 1,500
(3,307) 1,300
(2,866)
Maximum permissible static
vertical load on the coupling device kg (Ibs.)
60
(132)60
(132)60
(132) 60
(132) 60
(132)60
(132)75
(165) 75
(165) 75
(165)
Recommended distance from rear wheel center to coupling point mm (inch)
3 Door and 5 Door : 859 (33.8)Wagon : 1,055 (41.54)
For Europe
M/T : Manual transaxle
A/T : Automatic transaxle
DCT : Double clutch transmission
JD eng 5.QXP 5/6/2013 10:10 AM Page 77
Page 426 of 1206
Driving your vehicle
80
5
This chapter will guide you in the proper
loading of your vehicle and/or trailer, to
keep your loaded vehicle weight within its
design rating capability, with or without a
trailer. Properly loading your vehicle will
provide maximum return of the vehicle
design performance. Before loading your
vehicle, familiarize yourself with the fol-
lowing terms for determining your vehi-
cle's weight ratings, with or without a
trailer, from the vehicle's specifications
and the certification label: Base curb weight
This is the weight of the vehicle including a full tank of fuel and all standard equip-
ment. It does not include passengers,
cargo, or optional equipment.
Vehicle curb weight
This is the weight of your new vehicle
when you picked it up from your dealer
plus any aftermarket equipment.
Cargo weight
This figure includes all weight added to
the Base Curb Weight, including cargoand optional equipment. GAW (Gross axle weight)
This is the total weight placed on each
axle (front and rear) - including vehicle
curb weight and all payload.
GAWR (Gross axle weight rating)
This is the maximum allowable weight
that can be carried by a single axle (front
or rear). These numbers are shown on
the certification label.
The total load on each axle must never
exceed its GAWR.
GVW (Gross vehicle weight)
This is the Base Curb Weight plus actual
Cargo Weight plus passengers.
GVWR (Gross vehicle weight rat- ing)
This is the maximum allowable weight of
the fully loaded vehicle (including all
options, equipment, passengers and
cargo). The GVWR is shown on the cer-tification label.
Overloading
VEHICLE WEIGHT
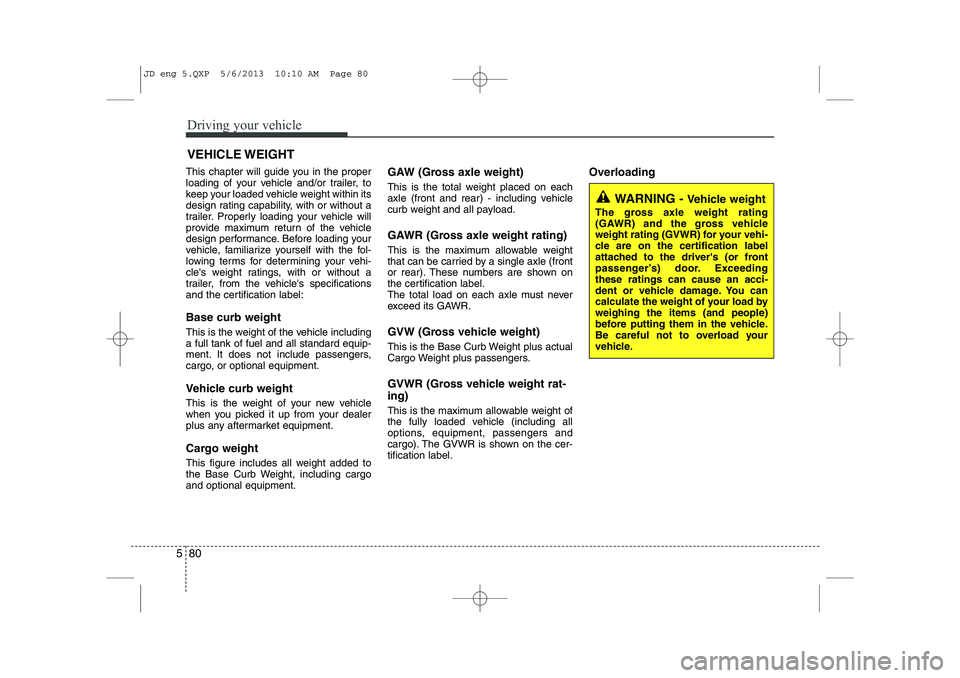
WARNING -
Vehicle weight
The gross axle weight rating
(GAWR) and the gross vehicle
weight rating (GVWR) for your vehi-
cle are on the certification label
attached to the driver's (or front
passenger’s) door. Exceedingthese ratings can cause an acci-
dent or vehicle damage. You can
calculate the weight of your load byweighing the items (and people)
before putting them in the vehicle.
Be careful not to overload your
vehicle.
JD eng 5.QXP 5/6/2013 10:10 AM Page 80
Page 447 of 1206
621
What to do in an emergency
- To reduce the inflation pres-sure: Press the button 8 on the
compressor. Notes on the safe use of the Tire Mobility Kit
Park your car at the side of the
road so that you can work with the
Tire Mobility Kit away from moving
traffic. Place your warning triangle
in a prominent place to make pass-
ing vehicles aware of your location.
To be sure your vehicle won't move, even when you're on fairly
level ground, always set your park-
ing brake.
Only use the Tire Mobility Kit for sealing/inflation passenger car
tires. Do not use on motorcycles,
bicycles or any other type of tires.
Do not remove any foreign objects- such as nails or screws -that have
penetrated the tire.
Before using the Tire Mobility Kit, read the precautionary advice
printed on the sealant bottle!
Provided the car is outdoors, leave the engine running. Otherwise
operating the compressor may
eventually drain the car battery. Never leave the Tire Mobility Kit
unattended while it is being used.
Do not leave the compressor run- ning for more than 10 min. at a time
or it may overheat.
Do not use the Tire Mobility Kit if the ambient temperature is below -30°C (-22°F).
Do not use the sealing compound after its expiration date which can
be found on the label of the bottle.
Keep away from children.
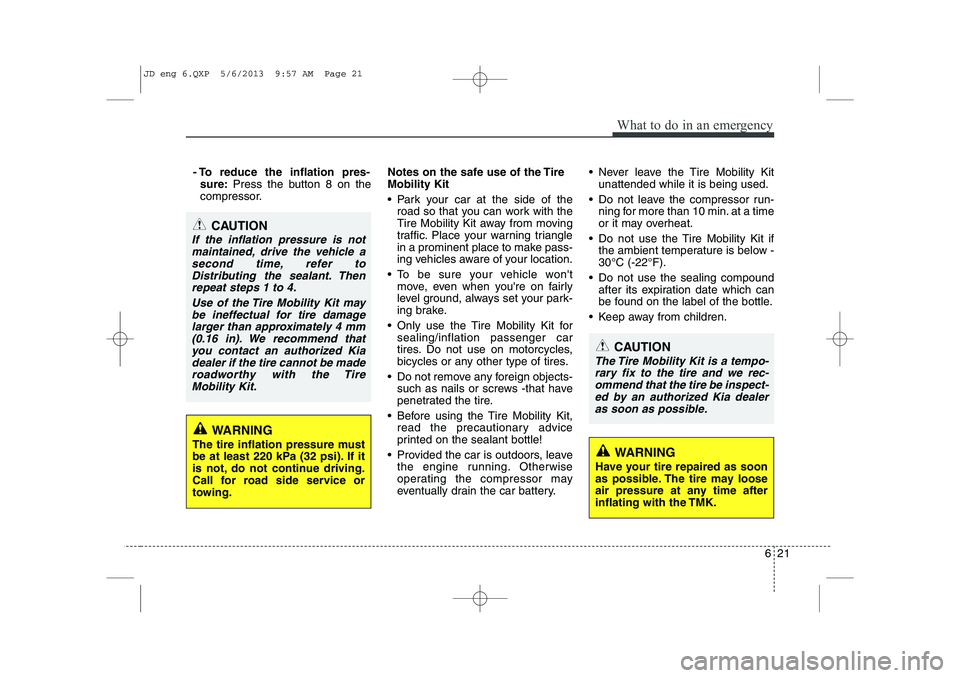
WARNING
The tire inflation pressure must
be at least 220 kPa (32 psi). If it
is not, do not continue driving.
Call for road side service or
towing.
CAUTION
If the inflation pressure is not maintained, drive the vehicle asecond time, refer to Distributing the sealant. Thenrepeat steps 1 to 4.
Use of the Tire Mobility Kit maybe ineffectual for tire damagelarger than approximately 4 mm (0.16 in). We recommend thatyou contact an authorized Kiadealer if the tire cannot be made roadworthy with the TireMobility Kit.
WARNING
Have your tire repaired as soon
as possible. The tire may loose
air pressure at any time after
inflating with the TMK.
CAUTION
The Tire Mobility Kit is a tempo- rary fix to the tire and we rec-ommend that the tire be inspect-ed by an authorized Kia dealer as soon as possible.
JD eng 6.QXP 5/6/2013 9:57 AM Page 21
Page 455 of 1206

629
What to do in an emergency
When towing your vehicle in an emer- gency without wheel dollies :
1. Set the ignition switch in the ACC posi-tion.
2. Place the transaxle shift lever in N (Neutral).
3. Release the parking brake.
Removable towing hook (if equipped)
1. Open the tailgate/trunk, and removethe towing hook from the tool case.
2. Remove the hole cover pressing the lower part of the cover on the front
bumper.
3. Install the towing hook by turning it clockwise into the hole until it is fullysecured.
4. Remove the towing hook and install the cover after use.
Emergency towing
CAUTION
Failure to place the transaxle shiftlever in N (Neutral) may cause inter-
nal damage to the transaxle.
OJD062008
■ Rear (3 Door and 5 Door)
OJD062012
■Rear (wagon)
■ Front
OJD062009
OJD062010
JD eng 6.QXP 5/6/2013 9:58 AM Page 29
Page 467 of 1206
79
Maintenance
At least monthly:
Check coolant level in the enginecoolant reservoir.
Check the operation of all exterior lights, including the stoplights, turn sig-
nals and hazard warning flashers.
Check the inflation pressures of all tires including the spare.
At least twice a year
(i.e., every Spring and Fall) :
Check radiator, heater and air condi- tioning hoses for leaks or damage.
Check windshield washer spray and wiper operation. Clean wiper blades
with clean cloth dampened with wash-er fluid.
Check headlight alignment.
Check muffler, exhaust pipes, shields and clamps.
Check the lap/shoulder belts for wear and function.
Check for worn tires and loose wheel lug nuts.
At least once a year :
Clean body and door drain holes.
Lubricate door hinges and checks, andhood hinges.
Lubricate door and hood locks and latches.
Lubricate door rubber weatherstrips.
Check the air conditioning system.
Inspect and lubricate automatic transaxle linkage and controls.
Clean battery and terminals.
Check the brake (and clutch) fluid level.
JD eng 7.QXP 5/6/2013 9:48 AM Page 9