KIA CERATO 2006 Manual Online
Manufacturer: KIA, Model Year: 2006, Model line: CERATO, Model: KIA CERATO 2006Pages: 315, PDF Size: 11.29 MB
Page 81 of 315

Knowing your vehicle
70
3
1 23456789
In order to help provide protection
in a severe collision, the airbags
must inflate rapidly. The speed of
airbag inflation reduces the likeli-
hood of serious or life-threatening
injuries and is thus a mandatory
part of the airbag design.
However, airbag inflation can also
cause injuries which normally can
include facial abrasions, bruises
and broken bones, because thatspeed also causes the airbags to
expand with a great deal force.
There are even circumstances under which contact with the
steering wheel airbag can cause
fatal injuries, especially if the
occupant is positioned exces-
sively close to the steeringwheel. Noise and smoke
When the airbags inflate, they make
a loud noise and they leave smoke
and powder in the air inside of the
vehicle. This is normal and is a result
of the ignition of the airbag inflator.
After the airbag inflates, you may feel
substantial discomfort in breathing
due to the contact of your chest to
both the safety belt and the airbag,
as well as from breathing the smoke
and powder.
We strongly urge you
to open your doors and/or win-
dows as soon as possible after
impact in order to reduce discom-
fort and prevent prolonged expo-
sure to the smoke and powder.
Though smoke and powder are non-
toxic, it may cause irritation to the
skin (eyes, nose and throat etc). If
this is the case, wash and rinse with
the cold water immediately and con-sult the doctor if the symptom per-
sists.WARNING
Driver should sit as far back (at least 250 mm (10 inches)
away) from the steering wheel
airbag as possible to reduce
the risk of injury or death in a
collision. The front passenger
should always move their seat
as far back as possible and sit
back in their seat.
Airbag inflates instantly in an event of collision, passengers
may be injured by the airbag
expansion force if they are not
in proper position.
Airbag inflation may cause injuries which normally
include facial or bodily abra-
sions, injuries by the broken
glasses or burns by the explo-sives.
Page 82 of 315
371
1 23456789
Knowing your vehicle
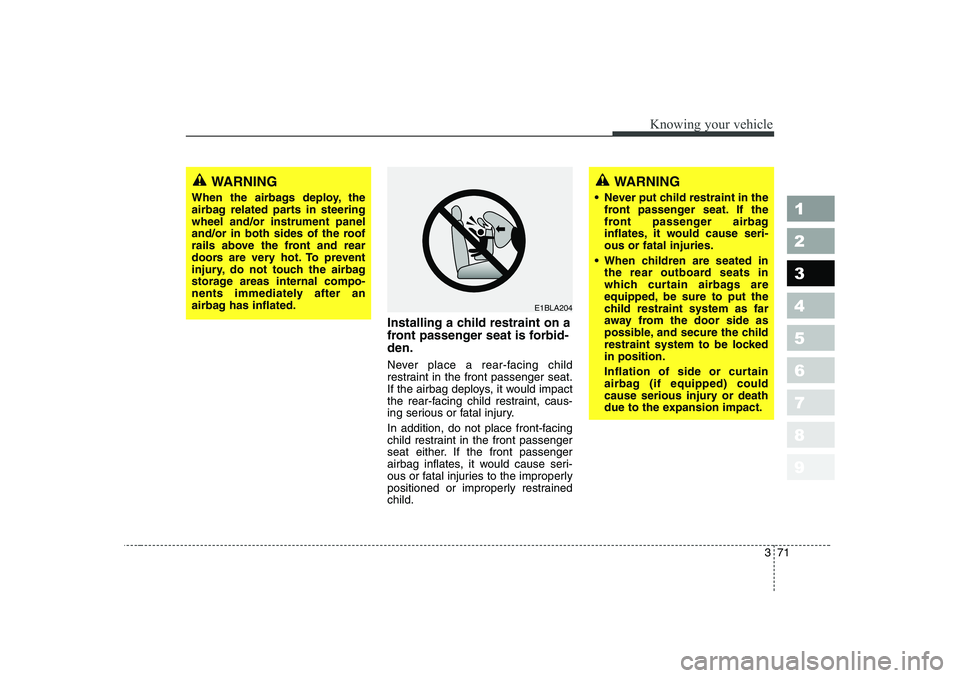
Installing a child restraint on a
front passenger seat is forbid-den.
Never place a rear-facing child
restraint in the front passenger seat.
If the airbag deploys, it would impact
the rear-facing child restraint, caus-
ing serious or fatal injury.
In addition, do not place front-facing
child restraint in the front passenger
seat either. If the front passenger
airbag inflates, it would cause seri-
ous or fatal injuries to the improperly
positioned or improperly restrainedchild.
WARNING
Never put child restraint in the front passenger seat. If the
front passenger airbag
inflates, it would cause seri-ous or fatal injuries.
When children are seated in the rear outboard seats in
which curtain airbags are
equipped, be sure to put the
child restraint system as far
away from the door side as
possible, and secure the child
restraint system to be lockedin position.
Inflation of side or curtain
airbag (if equipped) could
cause serious injury or death
due to the expansion impact.WARNING
When the airbags deploy, the
airbag related parts in steeringwheel and/or instrument panel
and/or in both sides of the roof
rails above the front and rear
doors are very hot. To prevent
injury, do not touch the airbag
storage areas internal compo-
nents immediately after an
airbag has inflated.
E1BLA204
Page 83 of 315
Knowing your vehicle
72
3
1 23456789
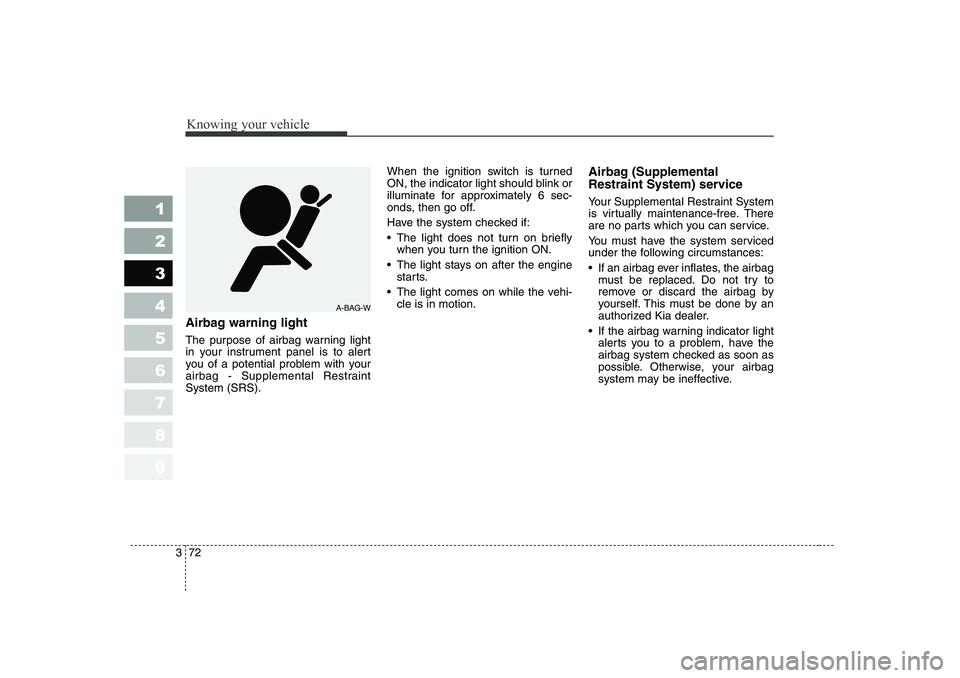
Airbag warning light
The purpose of airbag warning light
in your instrument panel is to alert
you of a potential problem with your
airbag - Supplemental RestraintSystem (SRS). When the ignition switch is turned
ON, the indicator light should blink or
illuminate for approximately 6 sec-
onds, then go off.
Have the system checked if:
The light does not turn on briefly
when you turn the ignition ON.
The light stays on after the engine starts.
The light comes on while the vehi- cle is in motion. Airbag (Supplemental
Restraint System) service
Your Supplemental Restraint System
is virtually maintenance-free. There
are no parts which you can service.
You must have the system serviced
under the following circumstances:
If an airbag ever inflates, the airbag
must be replaced. Do not try to
remove or discard the airbag by
yourself. This must be done by an
authorized Kia dealer.
If the airbag warning indicator light alerts you to a problem, have the
airbag system checked as soon as
possible. Otherwise, your airbag
system may be ineffective.
A-BAG-W
Page 84 of 315
373
1 23456789
Knowing your vehicle
When repairing or scrapping thevehicles
Repairing steering wheel, instru- ment panel, center console or
roofs, or installing car audio aroundcenter console or painting front
metal sheet could disable the
airbag system. Have them checked
by an authorized Kia dealer.
When leaving the vehicle at an authorized Kia dealer, inform that
the vehicle is equipped with airbag
system, and leave the owner’s
manual in the vehicle.
Since airbag system contains explosive chemical substances,
contact an authorized Kia dealer
when scrapping the vehicle.
CAUTION
Do not modify any part of the
Supplemental Restraint System. Excessive modification couldmake the airbag system ineffec-tive.
WARNING
Do not modify your steering wheel, seat or any other part of the Supplemental Restraint
System. Modification could
make the system inoperable.
Do not work on the system’s components or wiring. This
could cause the airbags to
inflate inadvertently, possibly
seriously injuring someone.
Working on the system could
also disable the system so
that the airbags would not
deploy in a collision.
Any work on the SRS system, such as removing, installing,
repairing, or any work on the
steering wheel must be per-
formed by a qualified Kia tech-
nician. Improper handling of
the airbag system may result
in serious personal injury.
Page 85 of 315
Knowing your vehicle
74
3
1 23456789
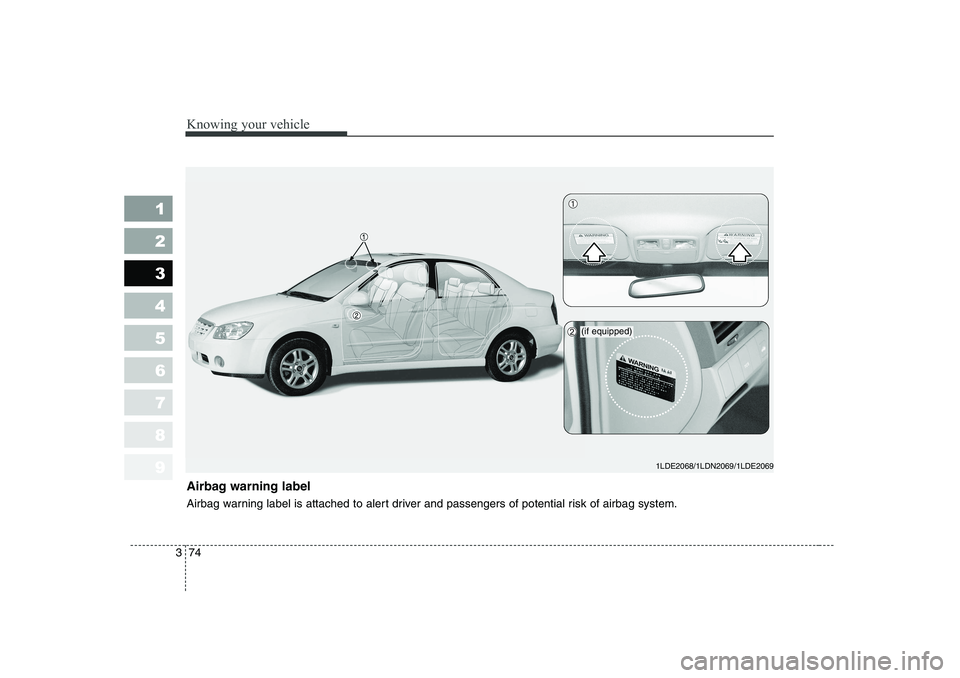
Airbag warning label
Airbag warning label is attached to alert driver and passengers of potential risk of airbag system.
1LDE2068/1LDN2069/1LDE2069
➀
➁(if equipped)
Page 86 of 315
375
1 23456789
Knowing your vehicle
Outside the vehicle
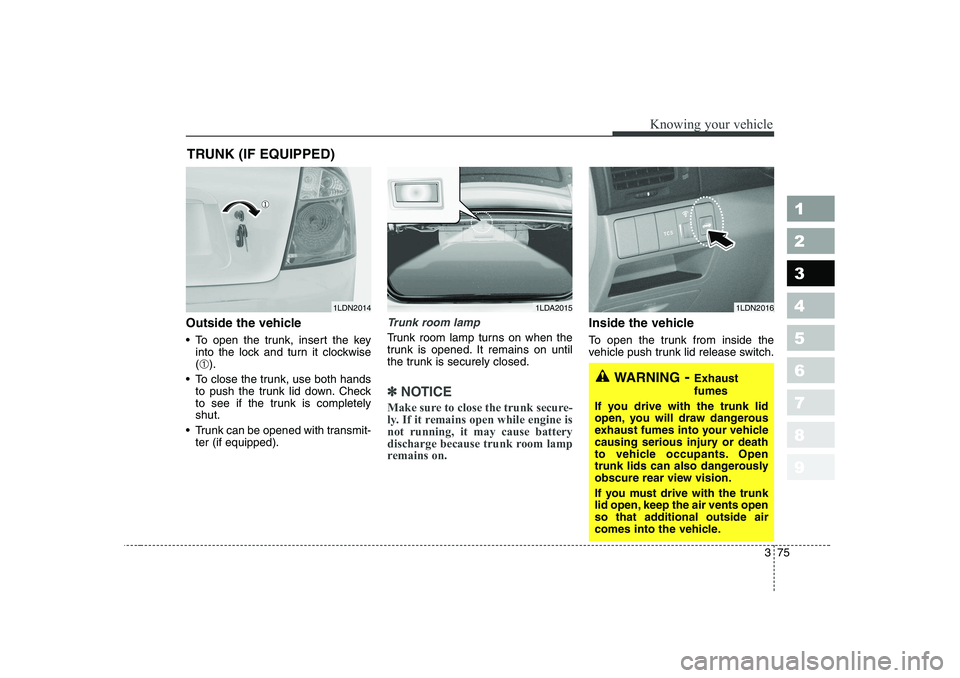
To open the trunk, insert the keyinto the lock and turn it clockwise (➀ ).
To close the trunk, use both hands to push the trunk lid down. Check
to see if the trunk is completelyshut.
Trunk can be opened with transmit- ter (if equipped).Trunk room lamp
Trunk room lamp turns on when the
trunk is opened. It remains on until
the trunk is securely closed.
✽✽ NOTICE
Make sure to close the trunk secure-
ly. If it remains open while engine isnot running, it may cause battery
discharge because trunk room lamp
remains on.
Inside the vehicle
To open the trunk from inside the
vehicle push trunk lid release switch.
TRUNK (IF EQUIPPED)
1LDN20141LDA2015
WARNING
- Exhaust fumes
If you drive with the trunk lid
open, you will draw dangerous
exhaust fumes into your vehicle
causing serious injury or death
to vehicle occupants. Open
trunk lids can also dangerously
obscure rear view vision.
If you must drive with the trunk
lid open, keep the air vents open
so that additional outside air
comes into the vehicle.
1LDN2016
Page 87 of 315
Knowing your vehicle
76
3
1 23456789
WARNING
No one should be allowed to
occupy the trunk of the vehicle
at any time. If the trunk is par-
tially or totally latched and the
person is unable to get out,
severe injury or death could
occur due to lack of ventilation,
exhaust fumes and rapid heat
build-up, or because of expo-sure to cold weather conditions.
The trunk is also a highly dan-
gerous location in the event of a
crash because it is not a pro-
tected occupant space but
merely a part of the vehicle’s
crush zone.CAUTION
We recommend that cars be kept locked and keys be keptout of the reach of children, andthat parents teach their children about the dangers of playing intrunks.
Page 88 of 315
377
1 23456789
Knowing your vehicle
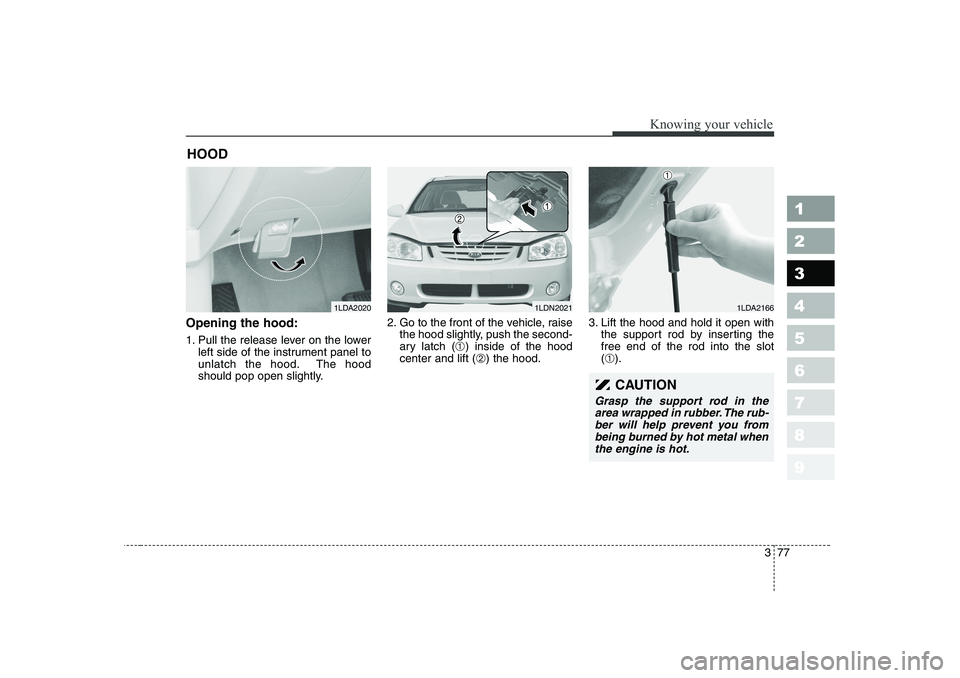
Opening the hood:
1. Pull the release lever on the lowerleft side of the instrument panel to
unlatch the hood. The hood
should pop open slightly. 2. Go to the front of the vehicle, raise
the hood slightly, push the second-
ary latch ( ➀) inside of the hood
center and lift ( ➁) the hood. 3. Lift the hood and hold it open with
the support rod by inserting thefree end of the rod into the slot(➀ ).
HOOD
1LDA20201LDN20211LDA2166
CAUTION
Grasp the support rod in the
area wrapped in rubber. The rub-ber will help prevent you from being burned by hot metal whenthe engine is hot.
➀
Page 89 of 315
Knowing your vehicle
78
3
1 23456789
Closing the hood
1. Before closing the hood, check the
following:
All filler caps in engine compart- ment must be correctly installed.
Gloves, rags or any other com- bustible material must be
removed from the engine com-
partment.
2. Secure the support rod in its clip.
3. Lower the hood to about 30 cm (12 inches) height and then let it
drop to properly lock in place.
Make sure the hood is properly
locked before driving.CAUTION
Before closing the hood, make sure that all engine parts andtools have been removed from the engine area and that noone’s hands are near the hoodopening.
Do not leave gloves, rags or any other combustible materi-al in the engine compartment.Doing so may cause a heat-induced fire.
Page 90 of 315
379
1 23456789
Knowing your vehicle
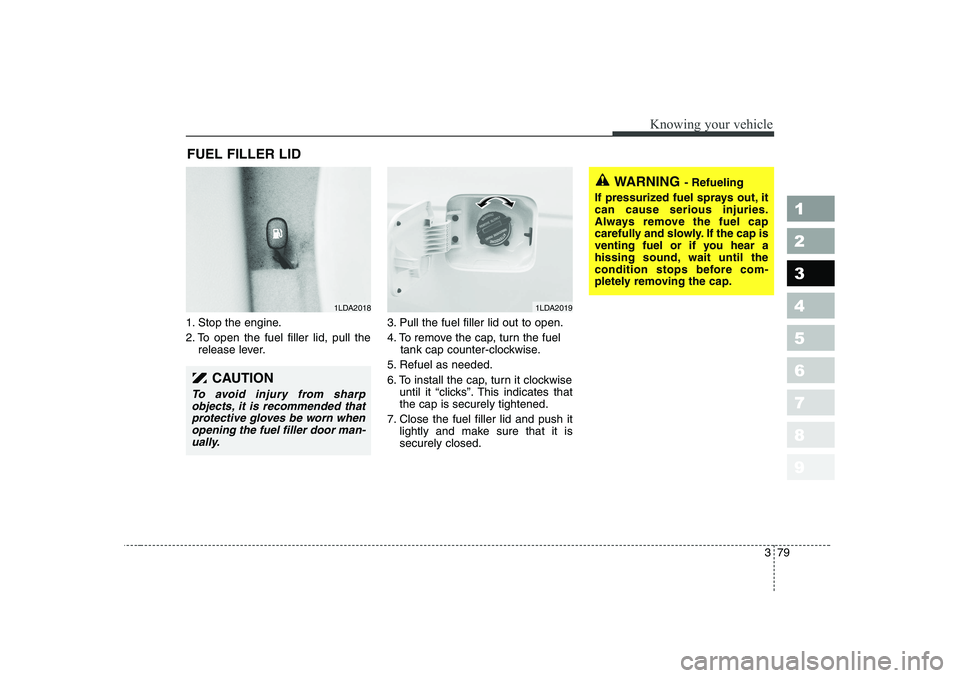
1. Stop the engine.
2. To open the fuel filler lid, pull therelease lever. 3. Pull the fuel filler lid out to open.
4. To remove the cap, turn the fuel
tank cap counter-clockwise.
5. Refuel as needed.
6. To install the cap, turn it clockwise until it “clicks”. This indicates that the cap is securely tightened.
7. Close the fuel filler lid and push it lightly and make sure that it issecurely closed.
FUEL FILLER LID
1LDA20181LDA2019
CAUTION
To avoid injury from sharp
objects, it is recommended that protective gloves be worn whenopening the fuel filler door man-ually.
WARNING - Refueling
If pressurized fuel sprays out, it can cause serious injuries.
Always remove the fuel cap
carefully and slowly. If the cap is
venting fuel or if you hear a
hissing sound, wait until the
condition stops before com-
pletely removing the cap.