AC VENT KIA Cerato 2011 1.G Owner's Guide
[x] Cancel search | Manufacturer: KIA, Model Year: 2011, Model line: Cerato, Model: KIA Cerato 2011 1.GPages: 342, PDF Size: 7.23 MB
Page 92 of 342
Features of your vehicle
18
4
D070100AFD
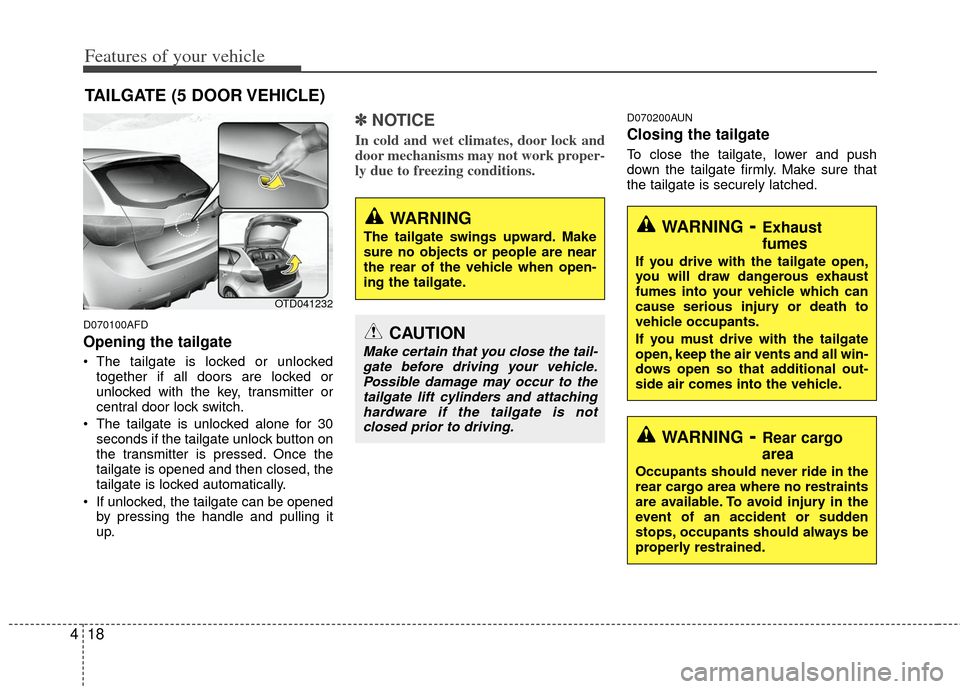
Opening the tailgate
The tailgate is locked or unlocked
together if all doors are locked or
unlocked with the key, transmitter or
central door lock switch.
The tailgate is unlocked alone for 30 seconds if the tailgate unlock button on
the transmitter is pressed. Once the
tailgate is opened and then closed, the
tailgate is locked automatically.
If unlocked, the tailgate can be opened by pressing the handle and pulling it
up.
✽ ✽ NOTICE
In cold and wet climates, door lock and
door mechanisms may not work proper-
ly due to freezing conditions.
D070200AUN
Closing the tailgate
To close the tailgate, lower and push
down the tailgate firmly. Make sure that
the tailgate is securely latched.
TAILGATE (5 DOOR VEHICLE)
OTD041232
WARNING
The tailgate swings upward. Make
sure no objects or people are near
the rear of the vehicle when open-
ing the tailgate.
CAUTION
Make certain that you close the tail-
gate before driving your vehicle.Possible damage may occur to thetailgate lift cylinders and attachinghardware if the tailgate is not closed prior to driving.
WARNING- Exhaust
fumes
If you drive with the tailgate open,
you will draw dangerous exhaust
fumes into your vehicle which can
cause serious injury or death to
vehicle occupants.
If you must drive with the tailgate
open, keep the air vents and all win-
dows open so that additional out-
side air comes into the vehicle.
WARNING- Rear cargo
area
Occupants should never ride in the
rear cargo area where no restraints
are available. To avoid injury in the
event of an accident or sudden
stops, occupants should always be
properly restrained.
Page 93 of 342
419
Features of your vehicle
D070300AUN
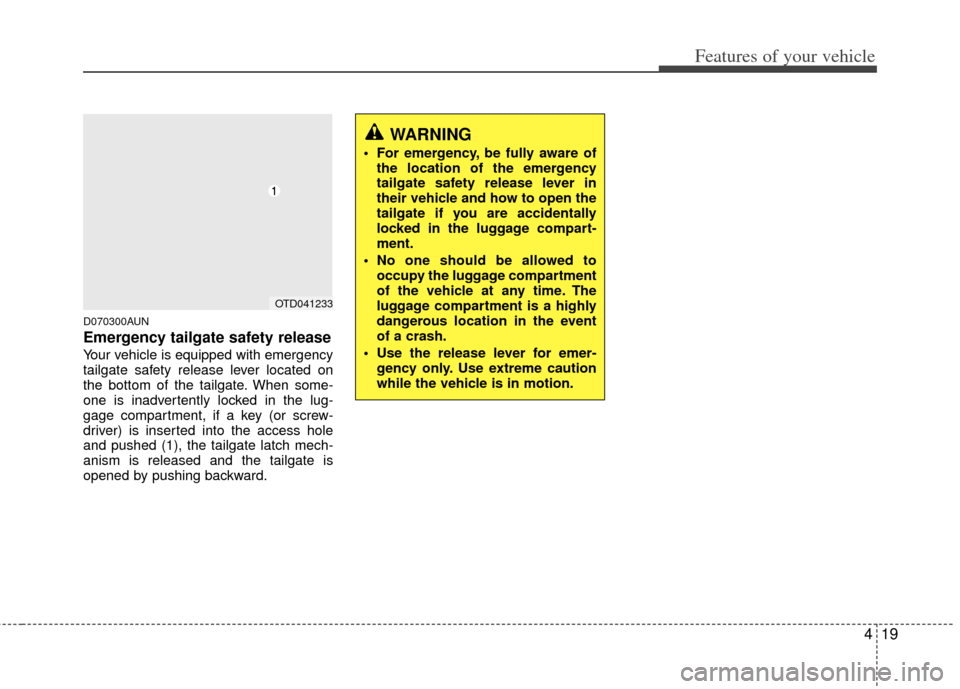
Emergency tailgate safety release
Your vehicle is equipped with emergency
tailgate safety release lever located on
the bottom of the tailgate. When some-
one is inadvertently locked in the lug-
gage compartment, if a key (or screw-
driver) is inserted into the access hole
and pushed (1), the tailgate latch mech-
anism is released and the tailgate is
opened by pushing backward.
WARNING
For emergency, be fully aware ofthe location of the emergency
tailgate safety release lever in
their vehicle and how to open the
tailgate if you are accidentally
locked in the luggage compart-
ment.
No one should be allowed to occupy the luggage compartment
of the vehicle at any time. The
luggage compartment is a highly
dangerous location in the event
of a crash.
Use the release lever for emer- gency only. Use extreme caution
while the vehicle is in motion.
OTD041233
Page 96 of 342

Features of your vehicle
22
4
D080200AFD
Manual windows (if equipped)
To raise or lower the window, turn the
window regulator handle clockwise or
counterclockwise.
CAUTION
To prevent possible damage to
the power window system, do notopen or close two windows ormore at the same time. This willalso ensure the longevity of the fuse.
Never try to operate the main switch on the driver's door andthe individual door windowswitch in opposing directions atthe same time. If this is done, thewindow will stop and cannot beopened or closed.WARNING - Windows
NEVER leave the ignition key in the vehicle.
NEVER leave any child unattend- ed in the vehicle. Even very
young children may inadvertently
cause the vehicle to move, entan-
gle themselves in the windows,
or otherwise injure themselves or
others.
Always double check to make sure all arms, hands, head and
other obstructions are safely out
of the way before closing a win-
dow.
Do not allow children to play with the power windows. Keep the dri-
ver’s door power window lock
switch in the LOCK position
(pressed). Serious injury can
result from unintentional window
operation by the child.
Do not extend any head or arms outside the window while driving.
WARNING
When opening or closing the win-
dows, make sure your passenger's
arms, hands and body are safely
out of the way.
B050A01E
Page 97 of 342
423
Features of your vehicle
D090100TD
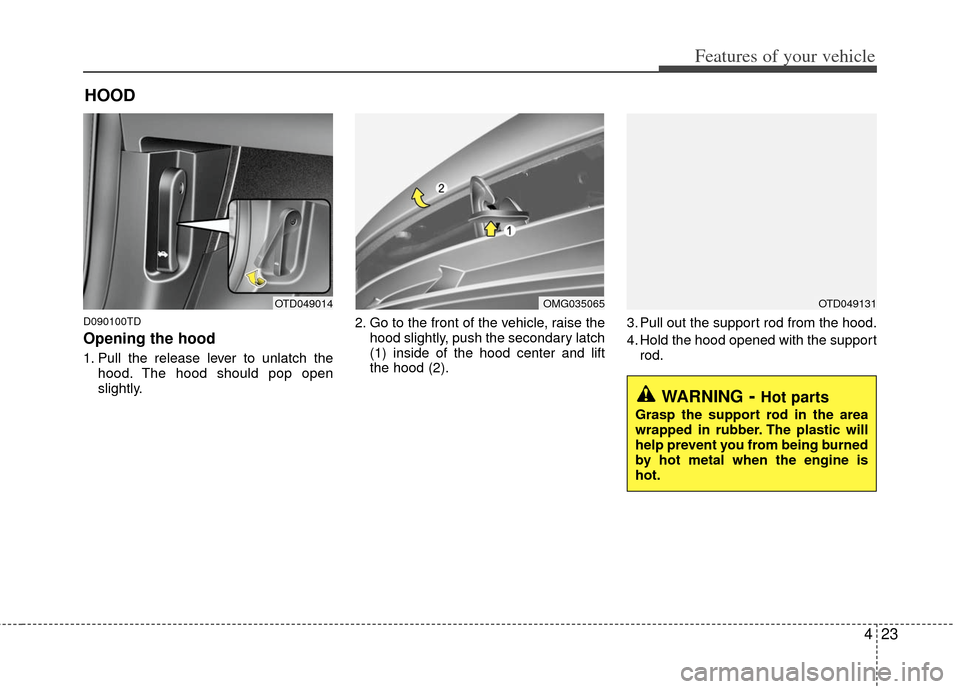
Opening the hood
1. Pull the release lever to unlatch thehood. The hood should pop open
slightly. 2. Go to the front of the vehicle, raise the
hood slightly, push the secondary latch
(1) inside of the hood center and lift
the hood (2). 3. Pull out the support rod from the hood.
4. Hold the hood opened with the support
rod.
HOOD
OTD049014OMG035065OTD049131
WARNING- Hot parts
Grasp the support rod in the area
wrapped in rubber. The plastic will
help prevent you from being burned
by hot metal when the engine is
hot.
Page 98 of 342
Features of your vehicle
24
4
D090200AAM
Closing the hood
1. Before closing the hood, check the fol-
lowing:
ment must be correctly installed.
bustible material must be removed
from the engine compartment.
2. Return the support rod to its clip to prevent it from rattling.
3. Lower the hood until it is about 30 cm (1 ft.) above the closed position and let
it drop. Make sure that it locks into
place.
WARNING - Hood
Before closing the hood, ensurethat all obstructions are removed
from the hood opening. Closing
the hood with an obstruction
present in the hood opening may
result in property damage or
severe personal injury.
Do not leave gloves, rags or any other combustible material in the
engine compartment. Doing so
may cause a heat-induced fire.
WARNING
Always double check to be surethat the hood is firmly latched
before driving away. If it is not
latched, the hood could open
while the vehicle is being driven,
causing a total loss of visibility,
which might result in an accident.
The support rod must be inserted completely into the hole whenev-
er you inspect the engine com-
partment. This will prevent the
hood from falling and possibly
injuring you.
Do not move the vehicle with the hood raised. The view will be
blocked and the hood could fall
or be damaged.
Page 99 of 342
425
Features of your vehicle
D100100ATD
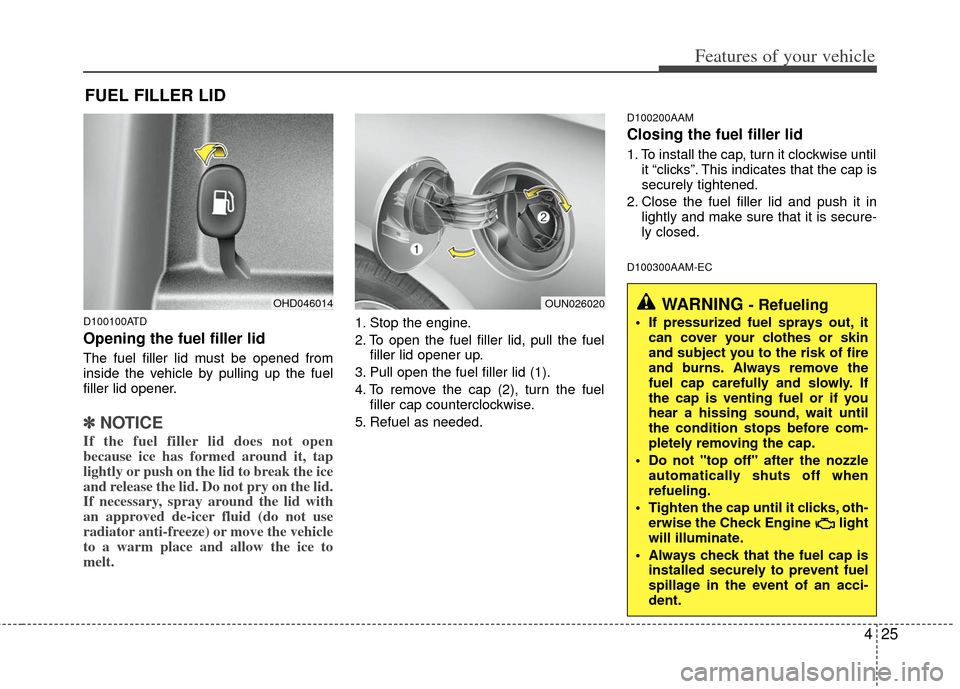
Opening the fuel filler lid
The fuel filler lid must be opened from
inside the vehicle by pulling up the fuel
filler lid opener.
✽ ✽NOTICE
If the fuel filler lid does not open
because ice has formed around it, tap
lightly or push on the lid to break the ice
and release the lid. Do not pry on the lid.
If necessary, spray around the lid with
an approved de-icer fluid (do not use
radiator anti-freeze) or move the vehicle
to a warm place and allow the ice to
melt.
1. Stop the engine.
2. To open the fuel filler lid, pull the fuel
filler lid opener up.
3. Pull open the fuel filler lid (1).
4. To remove the cap (2), turn the fuel filler cap counterclockwise.
5. Refuel as needed.
D100200AAM
Closing the fuel filler lid
1. To install the cap, turn it clockwise until it “clicks”. This indicates that the cap is
securely tightened.
2. Close the fuel filler lid and push it in lightly and make sure that it is secure-
ly closed.
D100300AAM-EC
FUEL FILLER LID
OHD046014OUN026020WARNING - Refueling
If pressurized fuel sprays out, itcan cover your clothes or skin
and subject you to the risk of fire
and burns. Always remove the
fuel cap carefully and slowly. If
the cap is venting fuel or if you
hear a hissing sound, wait until
the condition stops before com-
pletely removing the cap.
Do not "top off" after the nozzle automatically shuts off when
refueling.
Tighten the cap until it clicks, oth- erwise the Check Engine light
will illuminate.
Always check that the fuel cap is installed securely to prevent fuel
spillage in the event of an acci-
dent.
Page 101 of 342
427
Features of your vehicle
(Continued)
If a fire breaks out during refuel-ing, leave the vicinity of the vehi-
cle, and immediately contact the
manager of the gas station and
then contact the local fire depart-
ment. Follow any safety instruc-
tions they provide.CAUTION
Make sure to refuel your vehicle according to the "Fuel require-ments" suggested in section 1.
If the fuel filler cap requires replacement, use only a genuineKIA cap or the equivalent speci-fied for your vehicle. An incorrect fuel filler cap can result in a seri-ous malfunction of the fuel sys-tem or emission control system.
Do not spill fuel on the exterior surfaces of the vehicle. Any typeof fuel spilled on painted surfacesmay damage the paint.
After refueling, make sure the fuel cap is installed securely to pre-vent fuel spillage in the event ofan accident.
Page 110 of 342
Features of your vehicle
36
4
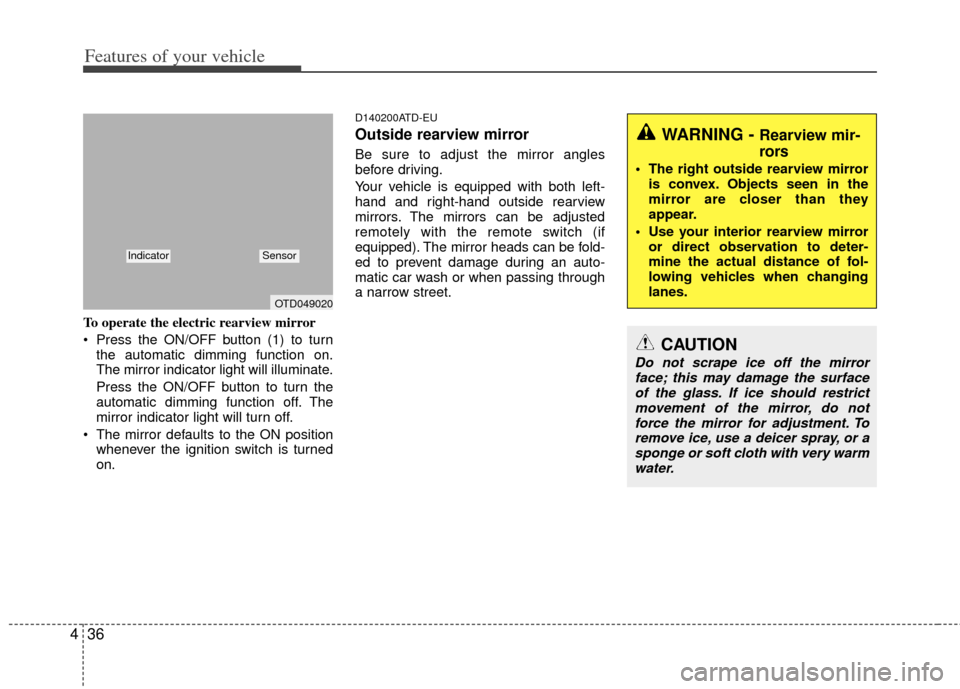
To operate the electric rearview mirror
Press the ON/OFF button (1) to turn
the automatic dimming function on.
The mirror indicator light will illuminate.
Press the ON/OFF button to turn the
automatic dimming function off. The
mirror indicator light will turn off.
The mirror defaults to the ON position whenever the ignition switch is turned
on.
D140200ATD-EU
Outside rearview mirror
Be sure to adjust the mirror angles
before driving.
Your vehicle is equipped with both left-
hand and right-hand outside rearview
mirrors. The mirrors can be adjusted
remotely with the remote switch (if
equipped). The mirror heads can be fold-
ed to prevent damage during an auto-
matic car wash or when passing through
a narrow street.
WARNING - Rearview mir-
rors
The right outside rearview mirroris convex. Objects seen in the
mirror are closer than they
appear.
Use your interior rearview mirror or direct observation to deter-
mine the actual distance of fol-
lowing vehicles when changing
lanes.
CAUTION
Do not scrape ice off the mirrorface; this may damage the surfaceof the glass. If ice should restrict movement of the mirror, do notforce the mirror for adjustment. To remove ice, use a deicer spray, or asponge or soft cloth with very warmwater.
OTD049020
IndicatorSensor
Page 111 of 342
437
Features of your vehicle
D140201APB
Remote control
Manual type (if equipped)
To adjust an outside mirror, move the
control lever.
D140201ATD
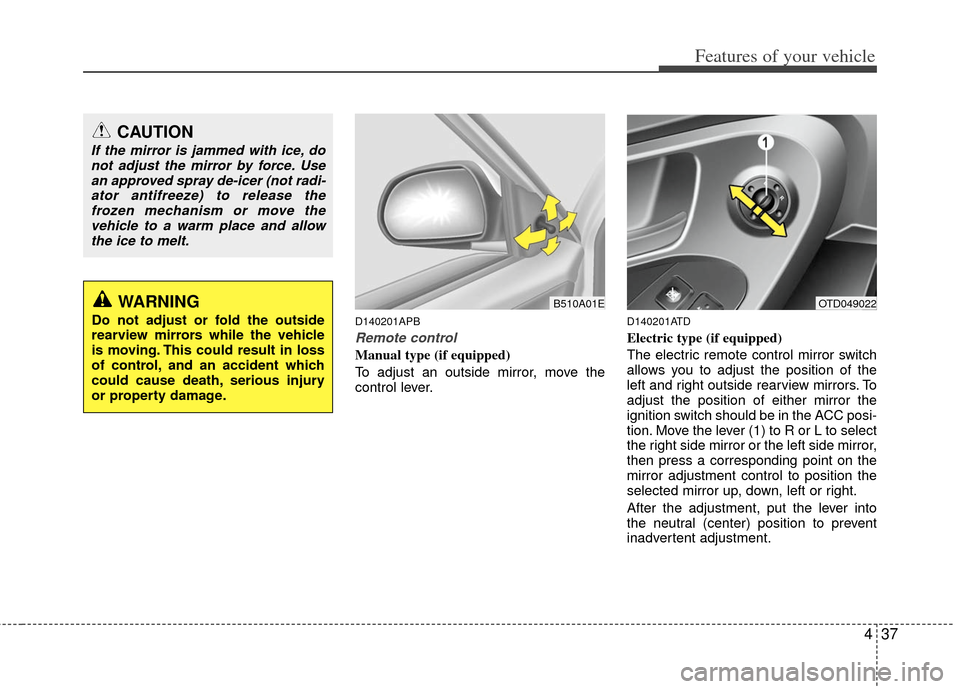
Electric type (if equipped)
The electric remote control mirror switch
allows you to adjust the position of the
left and right outside rearview mirrors. To
adjust the position of either mirror the
ignition switch should be in the ACC posi-
tion. Move the lever (1) to R or L to select
the right side mirror or the left side mirror,
then press a corresponding point on the
mirror adjustment control to position the
selected mirror up, down, left or right.
After the adjustment, put the lever into
the neutral (center) position to prevent
inadvertent adjustment.
CAUTION
If the mirror is jammed with ice, donot adjust the mirror by force. Usean approved spray de-icer (not radi-ator antifreeze) to release thefrozen mechanism or move the vehicle to a warm place and allowthe ice to melt.
WARNING
Do not adjust or fold the outside
rearview mirrors while the vehicle
is moving. This could result in loss
of control, and an accident which
could cause death, serious injury
or property damage.
OTD049022B510A01E
Page 114 of 342
Features of your vehicle
40
4
D150100ATD-EU
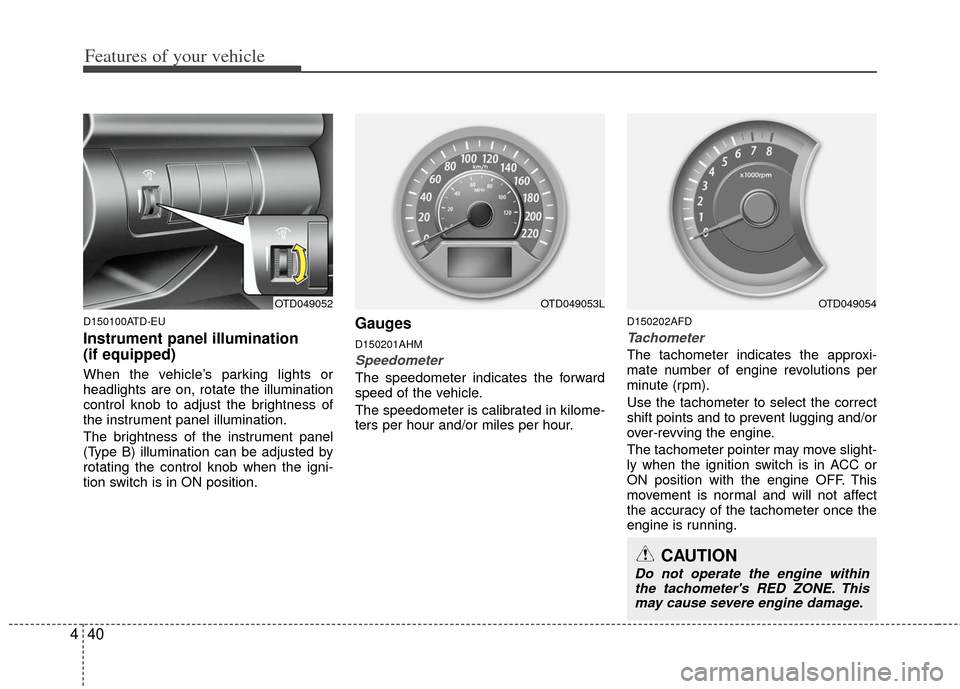
Instrument panel illumination
(if equipped)
When the vehicle’s parking lights or
headlights are on, rotate the illumination
control knob to adjust the brightness of
the instrument panel illumination.
The brightness of the instrument panel
(Type B) illumination can be adjusted by
rotating the control knob when the igni-
tion switch is in ON position.
Gauges
D150201AHM
Speedometer
The speedometer indicates the forward
speed of the vehicle.
The speedometer is calibrated in kilome-
ters per hour and/or miles per hour.
D150202AFD
Tachometer
The tachometer indicates the approxi-
mate number of engine revolutions per
minute (rpm).
Use the tachometer to select the correct
shift points and to prevent lugging and/or
over-revving the engine.
The tachometer pointer may move slight-
ly when the ignition switch is in ACC or
ON position with the engine OFF. This
movement is normal and will not affect
the accuracy of the tachometer once the
engine is running.
OTD049052OTD049053L
CAUTION
Do not operate the engine within
the tachometer's RED ZONE. Thismay cause severe engine damage.
OTD049054