driving conditions KIA Cerato 2012 1.G Owner's Manual
[x] Cancel search | Manufacturer: KIA, Model Year: 2012, Model line: Cerato, Model: KIA Cerato 2012 1.GPages: 353, PDF Size: 7.3 MB
Page 6 of 353
I3
Index
In case of an emergency while driving В·В·В·В·В·В·В·В·В·В·В·В·В·В·В·В·В·В·\
В·В·В·В·В·В·В·В·В·В·6-2
Indicator symbols on the instrument cluster В·В·В·В·В·В·В·В·В·В·В·В·В·В·В·В·В·В·\
В·1-5
Instrument cluster В·В·В·В·В·В·В·В·В·В·В·В·В·В·В·В·В·В·\
В·В·В·В·В·В·В·В·В·В·В·В·В·В·В·В·В·В·\
В·В·В·В·В·В·В·В·В·В·В·В·В·В·В·В·В·В·\
В·В·В·В·4-39
Instrument panel overviewВ·В·В·В·В·В·В·В·В·В·В·В·В·В·В·В·В·В·\
В·В·В·В·В·В·В·В·В·В·В·В·В·В·В·В·В·В·\
В·В·В·В·В·В·В·В·В·В·В·2-3
Interior featuresВ·В·В·В·В·В·В·В·В·В·В·В·В·В·В·В·В·В·\
В·В·В·В·В·В·В·В·В·В·В·В·В·В·В·В·В·В·\
В·В·В·В·В·В·В·В·В·В·В·В·В·В·В·В·В·В·\
В·В·В·В·В·В·В·В·4-96
Interior light В·В·В·В·В·В·В·В·В·В·В·В·В·В·В·В·В·В·\
В·В·В·В·В·В·В·В·В·В·В·В·В·В·В·В·В·В·\
В·В·В·В·В·В·В·В·В·В·В·В·В·В·В·В·В·В·\
В·В·В·В·В·В·В·В·В·В·В·В·В·4-66
Interior overviewВ·В·В·В·В·В·В·В·В·В·В·В·В·В·В·В·В·В·\
В·В·В·В·В·В·В·В·В·В·В·В·В·В·В·В·В·В·\
В·В·В·В·В·В·В·В·В·В·В·В·В·В·В·В·В·В·\
В·В·В·В·В·В·В·В·2-2
Key positions В·В·В·В·В·В·В·В·В·В·В·В·В·В·В·В·В·В·\
В·В·В·В·В·В·В·В·В·В·В·В·В·В·В·В·В·В·\
В·В·В·В·В·В·В·В·В·В·В·В·В·В·В·В·В·В·\
В·В·В·В·В·В·В·В·В·В·В·В·В·5-4
Keys В·В·В·В·В·В·В·В·В·В·В·В·В·В·В·В·В·В·\
В·В·В·В·В·В·В·В·В·В·В·В·В·В·В·В·В·В·\
В·В·В·В·В·В·В·В·В·В·В·В·В·В·В·В·В·В·\
В·В·В·В·В·В·В·В·В·В·В·В·В·В·В·В·В·В·\
В·В·В·В·В·В·В·В·В·4-2
LightingВ·В·В·В·В·В·В·В·В·В·В·В·В·В·В·В·В·В·\
В·В·В·В·В·В·В·В·В·В·В·В·В·В·В·В·В·В·\
В·В·В·В·В·В·В·В·В·В·В·В·В·В·В·В·В·В·\
В·В·В·В·В·В·В·В·В·В·В·В·В·В·В·В·В·В·\
В·В·4-59
Maintenance scheduleВ·В·В·В·В·В·В·В·В·В·В·В·В·В·В·В·В·В·\
В·В·В·В·В·В·В·В·В·В·В·В·В·В·В·В·В·В·\
В·В·В·В·В·В·В·В·В·В·В·В·В·В·В·В·В·В·\
7-6
Maintenance services В·В·В·В·В·В·В·В·В·В·В·В·В·В·В·В·В·В·\
В·В·В·В·В·В·В·В·В·В·В·В·В·В·В·В·В·В·\
В·В·В·В·В·В·В·В·В·В·В·В·В·В·В·В·В·В·\
В·7-3
Manual climate control systemВ·В·В·В·В·В·В·В·В·В·В·В·В·В·В·В·В·В·\
В·В·В·В·В·В·В·В·В·В·В·В·В·В·В·В·В·В·\
В·В·4-69
Manual transaxleВ·В·В·В·В·В·В·В·В·В·В·В·В·В·В·В·В·В·\
В·В·В·В·В·В·В·В·В·В·В·В·В·В·В·В·В·В·\
В·В·В·В·В·В·В·В·В·В·В·В·В·В·В·В·В·В·\
В·В·В·В·В·В·5-12
Mirrors В·В·В·В·В·В·В·В·В·В·В·В·В·В·В·В·В·В·\
В·В·В·В·В·В·В·В·В·В·В·В·В·В·В·В·В·В·\
В·В·В·В·В·В·В·В·В·В·В·В·В·В·В·В·В·В·\
В·В·В·В·В·В·В·В·В·В·В·В·В·В·В·В·В·В·\
В·В·В·4-35
Owner maintenance В·В·В·В·В·В·В·В·В·В·В·В·В·В·В·В·В·В·\
В·В·В·В·В·В·В·В·В·В·В·В·В·В·В·В·В·В·\
В·В·В·В·В·В·В·В·В·В·В·В·В·В·В·В·В·В·\
В·В·В·7-4Parking brake В·В·В·В·В·В·В·В·В·В·В·В·В·В·В·В·В·В·\
В·В·В·В·В·В·В·В·В·В·В·В·В·В·В·В·В·В·\
В·В·В·В·В·В·В·В·В·В·В·В·В·В·В·В·В·В·\
В·В·В·В·В·В·В·В·В·В·В·7-31
Power steering fluid В·В·В·В·В·В·В·В·В·В·В·В·В·В·В·В·В·В·\
В·В·В·В·В·В·В·В·В·В·В·В·В·В·В·В·В·В·\
В·В·В·В·В·В·В·В·В·В·В·В·В·В·В·В·В·В·\
В·7-29
Rearview cameraВ·В·В·В·В·В·В·В·В·В·В·В·В·В·В·В·В·В·\
В·В·В·В·В·В·В·В·В·В·В·В·В·В·В·В·В·В·\
В·В·В·В·В·В·В·В·В·В·В·В·В·В·В·В·В·В·\
В·В·В·В·В·В·4-58
Recommended lubricants and capacities В·В·В·В·В·В·В·В·В·В·В·В·В·В·В·В·В·В·\
В·В·В·В·В·В·В·8-4
Remote keyless entry В·В·В·В·В·В·В·В·В·В·В·В·В·В·В·В·В·В·\
В·В·В·В·В·В·В·В·В·В·В·В·В·В·В·В·В·В·\
В·В·В·В·В·В·В·В·В·В·В·В·В·В·В·В·В·В·\
В·4-8
Road warning В·В·В·В·В·В·В·В·В·В·В·В·В·В·В·В·В·В·\
В·В·В·В·В·В·В·В·В·В·В·В·В·В·В·В·В·В·\
В·В·В·В·В·В·В·В·В·В·В·В·В·В·В·В·В·В·\
В·В·В·В·В·В·В·В·В·В·В·В·В·6-2
SeatВ·В·В·В·В·В·В·В·В·В·В·В·В·В·В·В·В·В·\
В·В·В·В·В·В·В·В·В·В·В·В·В·В·В·В·В·В·\
В·В·В·В·В·В·В·В·В·В·В·В·В·В·В·В·В·В·\
В·В·В·В·В·В·В·В·В·В·В·В·В·В·В·В·В·В·\
В·В·В·В·В·В·В·В·В·В·В·3-2
Seat belts В·В·В·В·В·В·В·В·В·В·В·В·В·В·В·В·В·В·\
В·В·В·В·В·В·В·В·В·В·В·В·В·В·В·В·В·В·\
В·В·В·В·В·В·В·В·В·В·В·В·В·В·В·В·В·В·\
В·В·В·В·В·В·В·В·В·В·В·В·В·В·В·В·В·В·\
3-15
Smart key В·В·В·В·В·В·В·В·В·В·В·В·В·В·В·В·В·В·\
В·В·В·В·В·В·В·В·В·В·В·В·В·В·В·В·В·В·\
В·В·В·В·В·В·В·В·В·В·В·В·В·В·В·В·В·В·\
В·В·В·В·В·В·В·В·В·В·В·В·В·В·В·В·В·В·\
В·4-6
Special driving conditions В·В·В·В·В·В·В·В·В·В·В·В·В·В·В·В·В·В·\
В·В·В·В·В·В·В·В·В·В·В·В·В·В·В·В·В·В·\
В·В·В·В·В·В·В·В·В·5-39
Starting the engine В·В·В·В·В·В·В·В·В·В·В·В·В·В·В·В·В·В·\
В·В·В·В·В·В·В·В·В·В·В·В·В·В·В·В·В·В·\
В·В·В·В·В·В·В·В·В·В·В·В·В·В·В·В·В·В·\
В·В·В·В·В·5-9
Steering wheel В·В·В·В·В·В·В·В·В·В·В·В·В·В·В·В·В·В·\
В·В·В·В·В·В·В·В·В·В·В·В·В·В·В·В·В·В·\
В·В·В·В·В·В·В·В·В·В·В·В·В·В·В·В·В·В·\
В·В·В·В·В·В·В·В·В·4-32
Storage compartment В·В·В·В·В·В·В·В·В·В·В·В·В·В·В·В·В·В·\
В·В·В·В·В·В·В·В·В·В·В·В·В·В·В·В·В·В·\
В·В·В·В·В·В·В·В·В·В·В·В·В·В·В·В·В·4-88\
SunroofВ·В·В·В·В·В·В·В·В·В·В·В·В·В·В·В·В·В·\
В·В·В·В·В·В·В·В·В·В·В·В·В·В·В·В·В·В·\
В·В·В·В·В·В·В·В·В·В·В·В·В·В·В·В·В·В·\
В·В·В·В·В·В·В·В·В·В·В·В·В·В·В·В·В·В·\
В·В·В·4-28
Tire specification and pressure label В·В·В·В·В·В·В·В·В·В·В·В·В·В·В·В·В·В·\
В·В·В·В·В·В·В·В·В·В·В·В·В·8-7
Tires and wheels В·В·В·В·В·В·В·В·В·В·В·В·В·В·В·В·В·В·\
В·В·В·В·В·В·В·В·В·В·В·В·В·В·В·В·В·В·\
В·В·В·В·В·В·В·В·В·В·В·В·В·В·В·В·В·В·\
7-37/8-3
Towing В·В·В·В·В·В·В·В·В·В·В·В·В·В·В·В·В·В·\
В·В·В·В·В·В·В·В·В·В·В·В·В·В·В·В·В·В·\
В·В·В·В·В·В·В·В·В·В·В·В·В·В·В·В·В·В·\
В·В·В·В·В·В·В·В·В·В·В·В·В·В·В·В·В·В·\
В·В·В·6-15
Trailer towingВ·В·В·В·В·В·В·В·В·В·В·В·В·В·В·В·В·В·\
В·В·В·В·В·В·В·В·В·В·В·В·В·В·В·В·В·В·\
В·В·В·В·В·В·В·В·В·В·В·В·В·В·В·В·В·В·\
В·В·В·В·В·В·В·В·В·В·В·5-45
K
L
M
O
P
R
S
T
Page 9 of 353
Introduction
21
A010000AAM
We want to help you get the greatest
possible driving pleasure from your vehi-
cle. Your Owner’s Manual can assist you
in many ways. We strongly recommend
that you read the entire manual. In order
to minimize the chance of death or injury,
you must read the WARNING and CAU-
TION sections in the manual.
Illustrations complement the words in this
manual to best explain how to enjoy your
vehicle. By reading your manual, you will
learn about features, important safety
information, and driving tips under vari-
ous road conditions.The general layout of the manual is pro-
vided in the Table of Contents. Use the
index when looking for a specific area or
subject; it has an alphabetical listing of all
information in your manual.
Sections: This manual has eight sections
plus an index. Each section begins with a
brief list of contents so you can tell at a
glance if that section has the information
you want.
You will find various WARNINGs,
CAUTIONs, and NOTICEs in this manu-
al. These WARNINGs were prepared to
enhance your personal safety. You should
carefully read and follow ALL procedures
and recommendations provided in these
WARNINGS, CAUTIONS and NOTICES.
вњЅ вњЅ
NOTICE
A NOTICE indicates interesting or help-
ful information is being provided.
HOW TO USE THIS MANUAL
WARNING
A WARNING indicates a situation in
which harm, serious bodily injury or
death could result if the warning is
ignored.
CAUTION
A CAUTION indicates a situation in
which damage to your vehicle couldresult if the caution is ignored.
Page 57 of 353
341
Safety features of your vehicle
C040300ATD
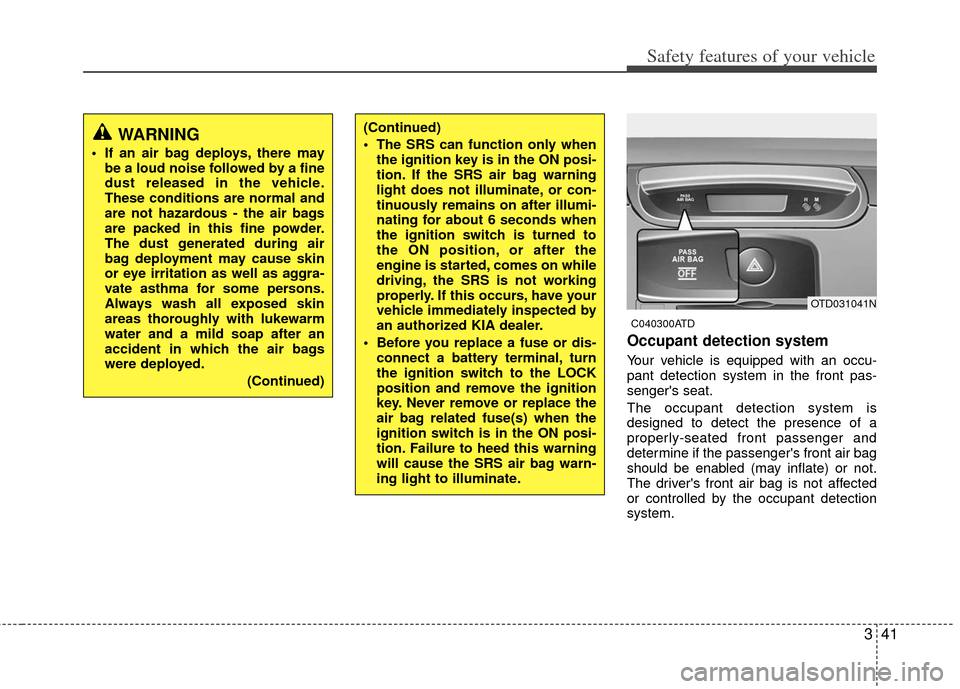
Occupant detection system
Your vehicle is equipped with an occu-
pant detection system in the front pas-
senger's seat.
The occupant detection system is
designed to detect the presence of a
properly-seated front passenger and
determine if the passenger's front air bag
should be enabled (may inflate) or not.
The driver's front air bag is not affected
or controlled by the occupant detection
system.
(Continued)
The SRS can function only whenthe ignition key is in the ON posi-
tion. If the SRS air bag warning
light does not illuminate, or con-
tinuously remains on after illumi-
nating for about 6 seconds when
the ignition switch is turned to
the ON position, or after the
engine is started, comes on while
driving, the SRS is not working
properly. If this occurs, have your
vehicle immediately inspected by
an authorized KIA dealer.
Before you replace a fuse or dis- connect a battery terminal, turn
the ignition switch to the LOCK
position and remove the ignition
key. Never remove or replace the
air bag related fuse(s) when the
ignition switch is in the ON posi-
tion. Failure to heed this warning
will cause the SRS air bag warn-
ing light to illuminate.WARNING
If an air bag deploys, there maybe a loud noise followed by a fine
dust released in the vehicle.
These conditions are normal and
are not hazardous - the air bags
are packed in this fine powder.
The dust generated during air
bag deployment may cause skin
or eye irritation as well as aggra-
vate asthma for some persons.
Always wash all exposed skin
areas thoroughly with lukewarm
water and a mild soap after an
accident in which the air bags
were deployed.
(Continued)
OTD031041N
Page 96 of 353
Features of your vehicle
18
4
D070100AFD
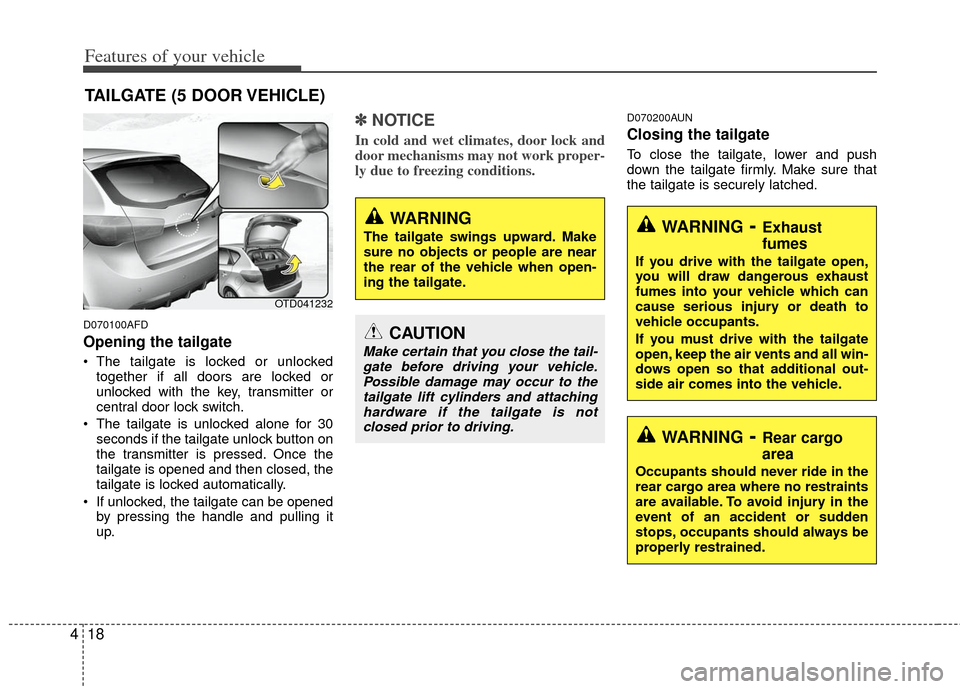
Opening the tailgate
The tailgate is locked or unlocked
together if all doors are locked or
unlocked with the key, transmitter or
central door lock switch.
The tailgate is unlocked alone for 30 seconds if the tailgate unlock button on
the transmitter is pressed. Once the
tailgate is opened and then closed, the
tailgate is locked automatically.
If unlocked, the tailgate can be opened by pressing the handle and pulling it
up.
вњЅ вњЅ NOTICE
In cold and wet climates, door lock and
door mechanisms may not work proper-
ly due to freezing conditions.
D070200AUN
Closing the tailgate
To close the tailgate, lower and push
down the tailgate firmly. Make sure that
the tailgate is securely latched.
TAILGATE (5 DOOR VEHICLE)
OTD041232
WARNING
The tailgate swings upward. Make
sure no objects or people are near
the rear of the vehicle when open-
ing the tailgate.
CAUTION
Make certain that you close the tail-
gate before driving your vehicle.Possible damage may occur to thetailgate lift cylinders and attachinghardware if the tailgate is not closed prior to driving.
WARNING- Exhaust
fumes
If you drive with the tailgate open,
you will draw dangerous exhaust
fumes into your vehicle which can
cause serious injury or death to
vehicle occupants.
If you must drive with the tailgate
open, keep the air vents and all win-
dows open so that additional out-
side air comes into the vehicle.
WARNING- Rear cargo
area
Occupants should never ride in the
rear cargo area where no restraints
are available. To avoid injury in the
event of an accident or sudden
stops, occupants should always be
properly restrained.
Page 106 of 353
Features of your vehicle
28
4
D110000AHM-EE
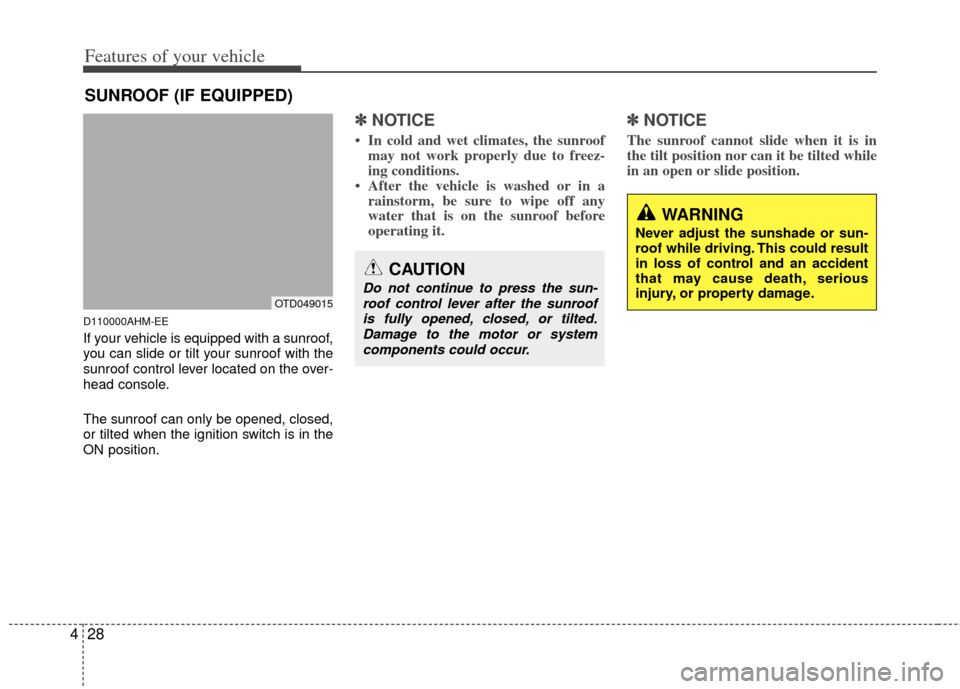
If your vehicle is equipped with a sunroof,
you can slide or tilt your sunroof with the
sunroof control lever located on the over-
head console.
The sunroof can only be opened, closed,
or tilted when the ignition switch is in the
ON position.
вњЅ вњЅ
NOTICE
• In cold and wet climates, the sunroof
may not work properly due to freez-
ing conditions.
• After the vehicle is washed or in a rainstorm, be sure to wipe off any
water that is on the sunroof before
operating it.
вњЅ вњЅ NOTICE
The sunroof cannot slide when it is in
the tilt position nor can it be tilted while
in an open or slide position.
SUNROOF (IF EQUIPPED)
OTD049015
CAUTION
Do not continue to press the sun-
roof control lever after the sunroofis fully opened, closed, or tilted.Damage to the motor or systemcomponents could occur.
WARNING
Never adjust the sunshade or sun-
roof while driving. This could result
in loss of control and an accident
that may cause death, serious
injury, or property damage.
Page 113 of 353
435
Features of your vehicle
D140100ATD
Inside rearview mirror
Adjust the rearview mirror so that the
center view through the rear window is
seen. Make this adjustment before you
start driving.
D140101AHM
Day/night rearview mirror (if equipped)
Make this adjustment before you start
driving and while the day/night lever is in
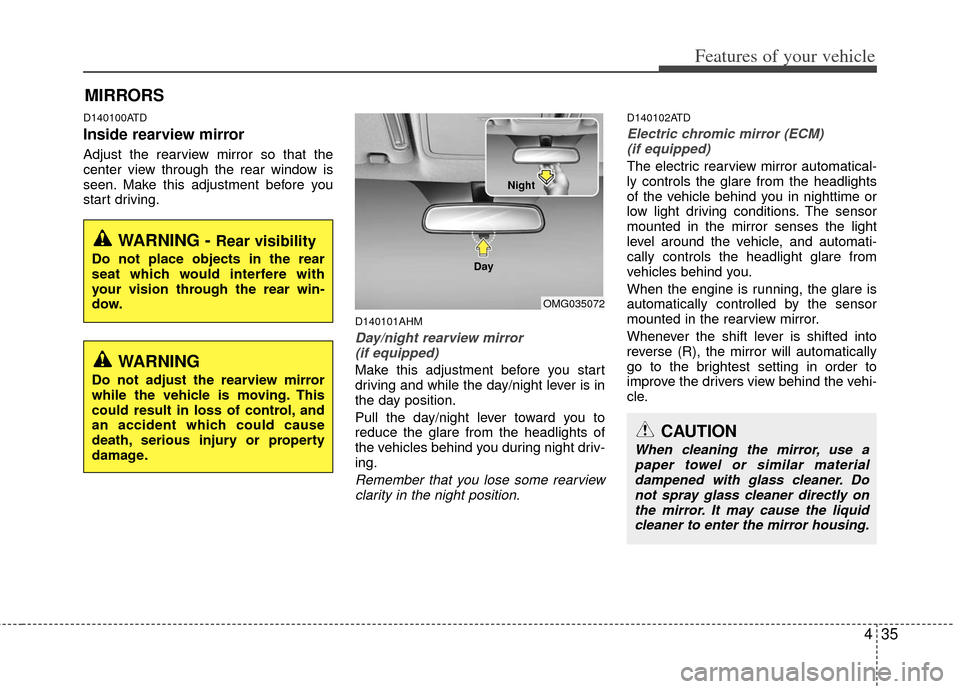
the day position.
Pull the day/night lever toward you to
reduce the glare from the headlights of
the vehicles behind you during night driv-
ing.
Remember that you lose some rearviewclarity in the night position.
D140102ATD
Electric chromic mirror (ECM)(if equipped)
The electric rearview mirror automatical-
ly controls the glare from the headlights
of the vehicle behind you in nighttime or
low light driving conditions. The sensor
mounted in the mirror senses the light
level around the vehicle, and automati-
cally controls the headlight glare from
vehicles behind you.
When the engine is running, the glare is
automatically controlled by the sensor
mounted in the rearview mirror.
Whenever the shift lever is shifted into
reverse (R), the mirror will automatically
go to the brightest setting in order to
improve the drivers view behind the vehi-
cle.
MIRRORS
WARNING - Rear visibility
Do not place objects in the rear
seat which would interfere with
your vision through the rear win-
dow.
OMG035072
CAUTION
When cleaning the mirror, use a paper towel or similar materialdampened with glass cleaner. Do not spray glass cleaner directly onthe mirror. It may cause the liquid cleaner to enter the mirror housing.
WARNING
Do not adjust the rearview mirror
while the vehicle is moving. This
could result in loss of control, and
an accident which could cause
death, serious injury or property
damage.
Night
Day
Page 123 of 353
445
Features of your vehicle
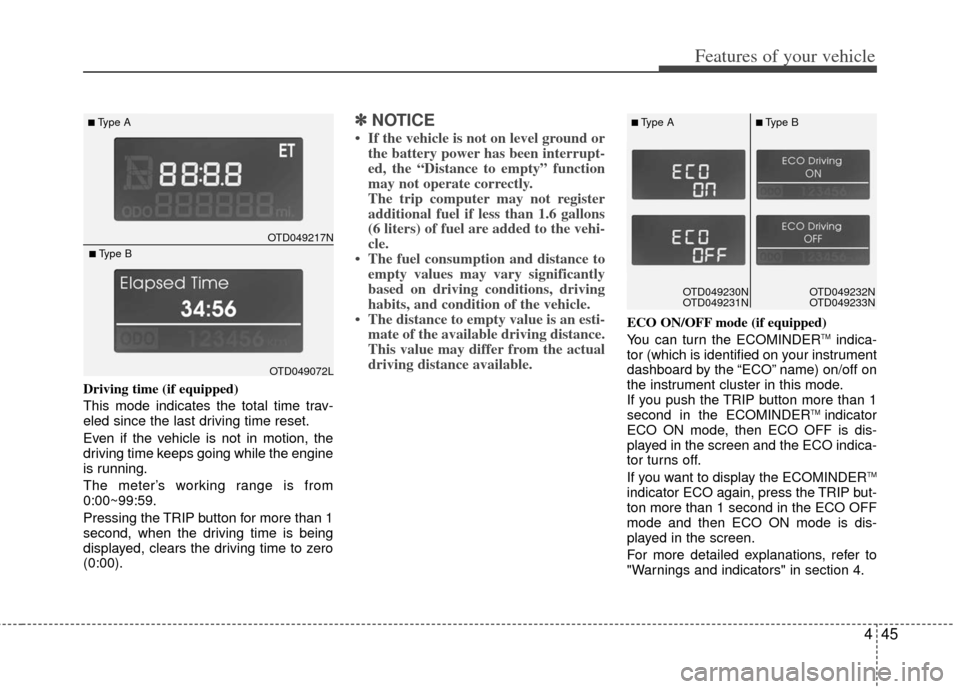
Driving time (if equipped)
This mode indicates the total time trav-
eled since the last driving time reset.
Even if the vehicle is not in motion, the
driving time keeps going while the engine
is running.
The meter’s working range is from
0:00~99:59.
Pressing the TRIP button for more than 1
second, when the driving time is being
displayed, clears the driving time to zero
(0:00).
вњЅ вњЅNOTICE
• If the vehicle is not on level ground or
the battery power has been interrupt-
ed, the “Distance to empty” function
may not operate correctly.
The trip computer may not register
additional fuel if less than 1.6 gallons
(6 liters) of fuel are added to the vehi-
cle.
• The fuel consumption and distance to empty values may vary significantly
based on driving conditions, driving
habits, and condition of the vehicle.
• The distance to empty value is an esti- mate of the available driving distance.
This value may differ from the actual
driving distance available.
ECO ON/OFF mode (if equipped)
You can turn the ECOMINDERTMindica-
tor (which is identified on your instrument
dashboard by the “ECO” name) on/off on
the instrument cluster in this mode.
If you push the TRIP button more than 1
second in the ECOMINDER
TM indicator
ECO ON mode, then ECO OFF is dis-
played in the screen and the ECO indica-
tor turns off.
If you want to display the ECOMINDER
TM
indicator ECO again, press the TRIP but-
ton more than 1 second in the ECO OFF
mode and then ECO ON mode is dis-
played in the screen.
For more detailed explanations, refer to
"Warnings and indicators" in section 4.
OTD049217N
в– Type A
OTD049072L
в– Type B
OTD049230N
OTD049231NOTD049230N
OTD049231N
в– Type Aв– Type B
OTD049232N
OTD049233N
Page 130 of 353
Features of your vehicle
52
4
D150320ATD
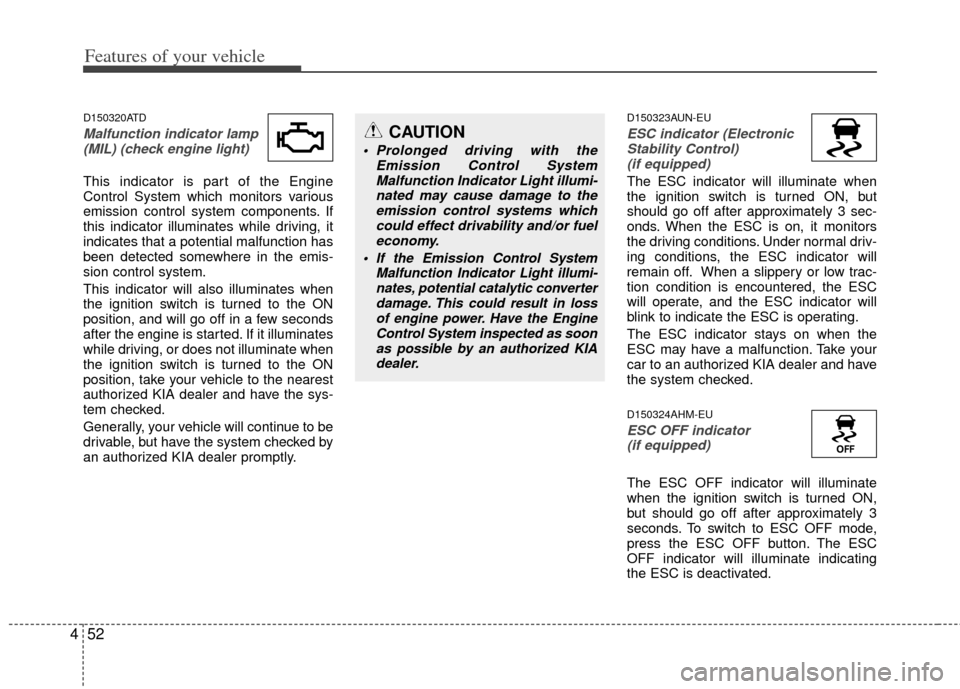
Malfunction indicator lamp
(MIL) (check engine light)
This indicator is part of the Engine
Control System which monitors various
emission control system components. If
this indicator illuminates while driving, it
indicates that a potential malfunction has
been detected somewhere in the emis-
sion control system.
This indicator will also illuminates when
the ignition switch is turned to the ON
position, and will go off in a few seconds
after the engine is started. If it illuminates
while driving, or does not illuminate when
the ignition switch is turned to the ON
position, take your vehicle to the nearest
authorized KIA dealer and have the sys-
tem checked.
Generally, your vehicle will continue to be
drivable, but have the system checked by
an authorized KIA dealer promptly.
D150323AUN-EU
ESC indicator (ElectronicStability Control) (if equipped)
The ESC indicator will illuminate when
the ignition switch is turned ON, but
should go off after approximately 3 sec-
onds. When the ESC is on, it monitors
the driving conditions. Under normal driv-
ing conditions, the ESC indicator will
remain off. When a slippery or low trac-
tion condition is encountered, the ESC
will operate, and the ESC indicator will
blink to indicate the ESC is operating.
The ESC indicator stays on when the
ESC may have a malfunction. Take your
car to an authorized KIA dealer and have
the system checked.
D150324AHM-EU
ESC OFF indicator (if equipped)
The ESC OFF indicator will illuminate
when the ignition switch is turned ON,
but should go off after approximately 3
seconds. To switch to ESC OFF mode,
press the ESC OFF button. The ESC
OFF indicator will illuminate indicating
the ESC is deactivated.
CAUTION
Prolonged driving with the
Emission Control SystemMalfunction Indicator Light illumi-nated may cause damage to theemission control systems which could effect drivability and/or fueleconomy.
If the EmissionControl System
Malfunction Indicator Light illumi- nates, potential catalytic converterdamage. This could result in lossof engine power. Have the EngineControl System inspected as soonas possible by an authorized KIAdealer.
Page 140 of 353
Features of your vehicle
62
4
If an indicator stays on and does not
flash or if it flashes abnormally, one of the
turn signal bulbs may be burned out and
will require replacement.
вњЅ вњЅ
NOTICE
If an indicator flash is abnormally quick
or slow, a bulb may be burned out or
have a poor electrical connection in the
circuit.
D190700ATD-EU
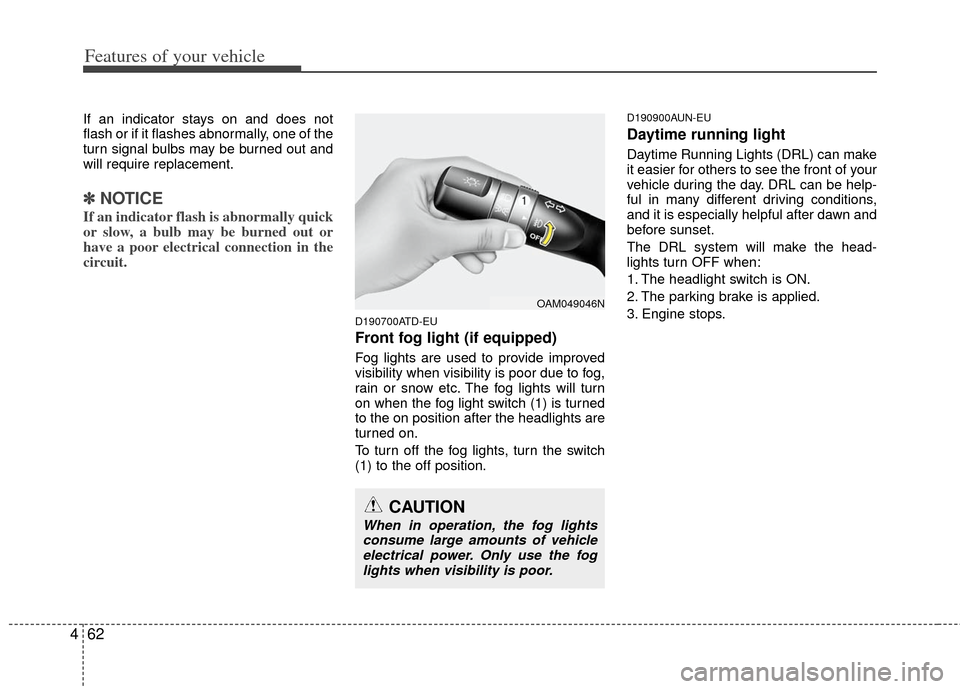
Front fog light (if equipped)
Fog lights are used to provide improved
visibility when visibility is poor due to fog,
rain or snow etc. The fog lights will turn
on when the fog light switch (1) is turned
to the on position after the headlights are
turned on.
To turn off the fog lights, turn the switch
(1) to the off position.
D190900AUN-EU
Daytime running light
Daytime Running Lights (DRL) can make
it easier for others to see the front of your
vehicle during the day. DRL can be help-
ful in many different driving conditions,
and it is especially helpful after dawn and
before sunset.
The DRL system will make the head-
lights turn OFF when:
1. The headlight switch is ON.
2. The parking brake is applied.
3. Engine stops.
OAM049046N
CAUTION
When in operation, the fog lights
consume large amounts of vehicle electrical power. Only use the foglights when visibility is poor.
Page 211 of 353
5
Before driving / 5-3
Key positions / 5-4
ENGINE START/STOP button / 5-6
Starting the engine / 5-9
Manual transaxle / 5-12
Automatic transaxle / 5-15
Brake system / 5-23
Cruise control system / 5-33
Economical operation / 5-37
Special driving conditions / 5-39
Winter driving / 5-43
Trailer towing / 5-45
Vehicle load limit / 5-46
Vehicle weight / 5-51
Driving your vehicle