lock KIA Cerato 2015 2.G User Guide
[x] Cancel search | Manufacturer: KIA, Model Year: 2015, Model line: Cerato, Model: KIA Cerato 2015 2.GPages: 452, PDF Size: 7.85 MB
Page 31 of 452
Safety features of your vehicle
16
3
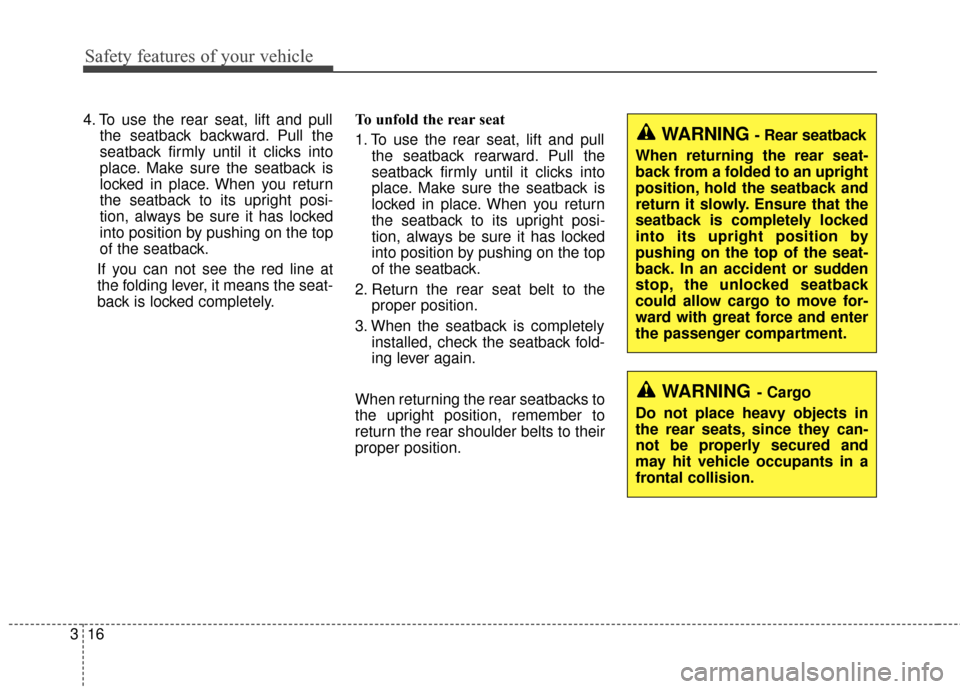
4. To use the rear seat, lift and pull
the seatback backward. Pull the
seatback firmly until it clicks into
place. Make sure the seatback is
locked in place. When you return
the seatback to its upright posi-
tion, always be sure it has locked
into position by pushing on the top
of the seatback.
If you can not see the red line at
the folding lever, it means the seat-
back is locked completely. To unfold the rear seat
1. To use the rear seat, lift and pull
the seatback rearward. Pull the
seatback firmly until it clicks into
place. Make sure the seatback is
locked in place. When you return
the seatback to its upright posi-
tion, always be sure it has locked
into position by pushing on the top
of the seatback.
2. Return the rear seat belt to the proper position.
3. When the seatback is completely installed, check the seatback fold-
ing lever again.
When returning the rear seatbacks to
the upright position, remember to
return the rear shoulder belts to their
proper position.
WARNING- Cargo
Do not place heavy objects in
the rear seats, since they can-
not be properly secured and
may hit vehicle occupants in a
frontal collision.
WARNING - Rear seatback
When returning the rear seat-
back from a folded to an upright
position, hold the seatback and
return it slowly. Ensure that the
seatback is completely locked
into its upright position by
pushing on the top of the seat-
back. In an accident or sudden
stop, the unlocked seatback
could allow cargo to move for-
ward with great force and enter
the passenger compartment.
Page 33 of 452
Safety features of your vehicle
18
3
Seat belt warning
(for driver’s seat)
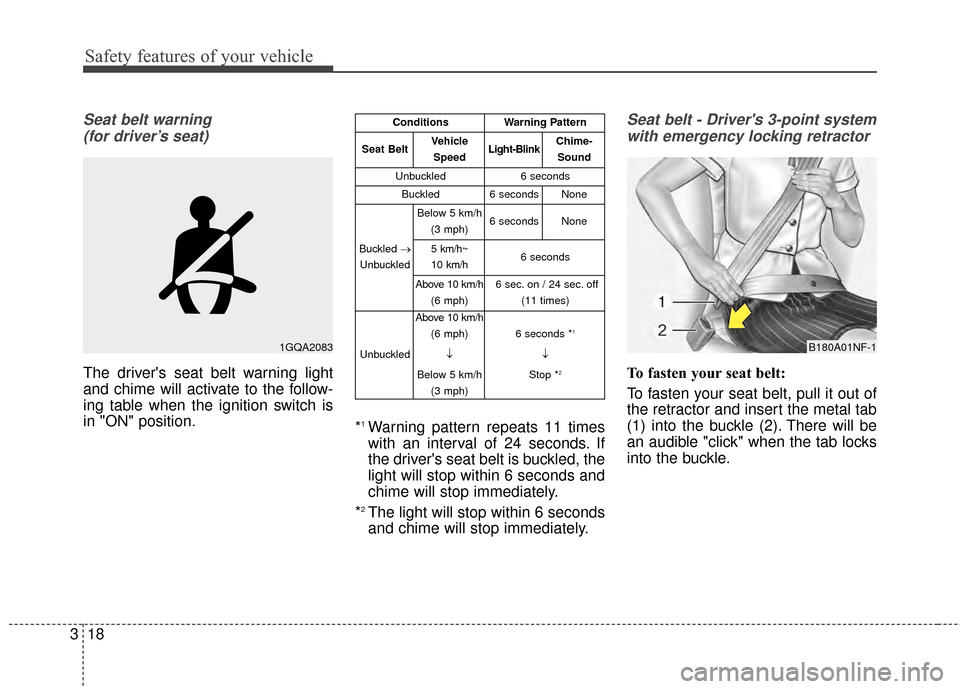
The driver's seat belt warning light
and chime will activate to the follow-
ing table when the ignition switch is
in "ON" position. *
1Warning pattern repeats 11 times
with an interval of 24 seconds. If
the driver's seat belt is buckled, the
light will stop within 6 seconds and
chime will stop immediately.
*
2The light will stop within 6 seconds
and chime will stop immediately.
Seat belt - Driver's 3-point system with emergency locking retractor
To fasten your seat belt:
To fasten your seat belt, pull it out of
the retractor and insert the metal tab
(1) into the buckle (2). There will be
an audible "click" when the tab locks
into the buckle.
1GQA2083B180A01NF-1
ConditionsWarning Pattern
Seat BeltVehicle
SpeedLight-BlinkChime-Sound
Unbuckled6 seconds
Buckled6 secondsNone
Buckled →
Unbuckled
Below 5 km/h (3 mph)6 secondsNone
5 km/h~
10 km/h6 seconds
Above 10 km/h (6 mph)6 sec. on / 24 sec. off (11 times)
Unbuckled
Above 10 km/h(6 mph)
↓
Below 5 km/h (3 mph)
6 seconds *1
↓
Stop *
2
Page 34 of 452
319
Safety features of your vehicle
The seat belt automatically adjusts to
the proper length only after the lap
belt portion is adjusted manually so
that it fits snugly around your hips. If
you lean forward in a slow, easy
motion, the belt will extend and let
you move around. If there is a sud-
den stop or impact, however, the belt
will lock into position. It will also lock
if you try to lean forward too quickly.
If you are unable to pull out the seat
belt from the retractor, firmly pull the
belt out and release it. Then you will
be able to pull the belt out smoothly.Height adjustment
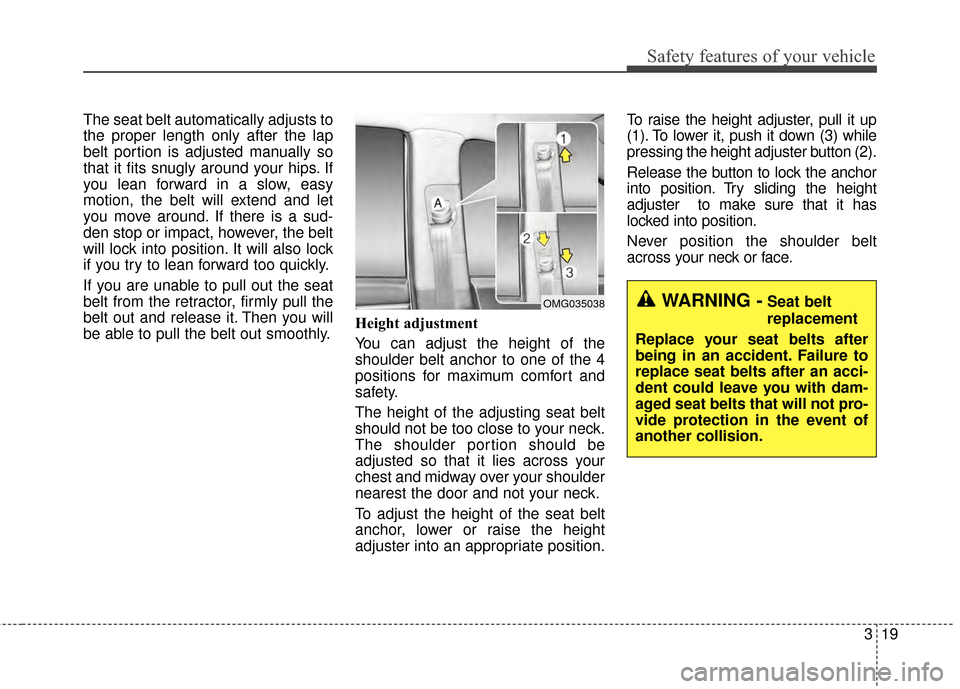
You can adjust the height of the
shoulder belt anchor to one of the 4
positions for maximum comfort and
safety.
The height of the adjusting seat belt
should not be too close to your neck.
The shoulder portion should be
adjusted so that it lies across your
chest and midway over your shoulder
nearest the door and not your neck.
To adjust the height of the seat belt
anchor, lower or raise the height
adjuster into an appropriate position.To raise the height adjuster, pull it up
(1). To lower it, push it down (3) while
pressing the height adjuster button (2).
Release the button to lock the anchor
into position. Try sliding the height
adjuster to make sure that it has
locked into position.
Never position the shoulder belt
across your neck or face.
WARNING -Seat belt
replacement
Replace your seat belts after
being in an accident. Failure to
replace seat belts after an acci-
dent could leave you with dam-
aged seat belts that will not pro-
vide protection in the event of
another collision.OMG035038
Page 35 of 452
Safety features of your vehicle
20
3
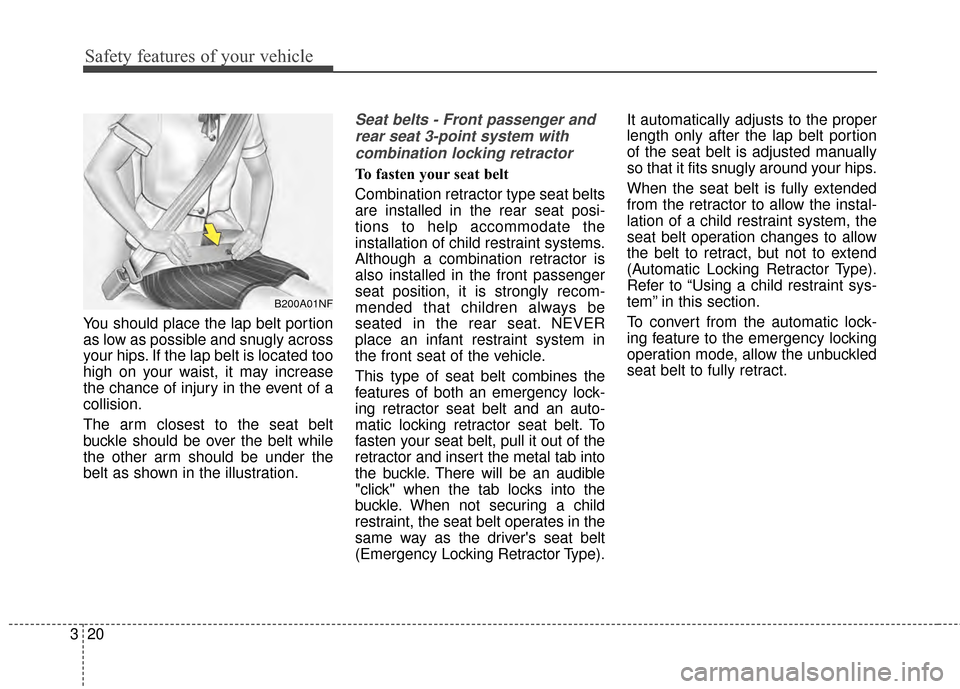
You should place the lap belt portion
as low as possible and snugly across
your hips. If the lap belt is located too
high on your waist, it may increase
the chance of injury in the event of a
collision.
The arm closest to the seat belt
buckle should be over the belt while
the other arm should be under the
belt as shown in the illustration.
Seat belts - Front passenger and
rear seat 3-point system withcombination locking retractor
To fasten your seat belt
Combination retractor type seat belts
are installed in the rear seat posi-
tions to help accommodate the
installation of child restraint systems.
Although a combination retractor is
also installed in the front passenger
seat position, it is strongly recom-
mended that children always be
seated in the rear seat. NEVER
place an infant restraint system in
the front seat of the vehicle.
This type of seat belt combines the
features of both an emergency lock-
ing retractor seat belt and an auto-
matic locking retractor seat belt. To
fasten your seat belt, pull it out of the
retractor and insert the metal tab into
the buckle. There will be an audible
"click" when the tab locks into the
buckle. When not securing a child
restraint, the seat belt operates in the
same way as the driver's seat belt
(Emergency Locking Retractor Type). It automatically adjusts to the proper
length only after the lap belt portion
of the seat belt is adjusted manually
so that it fits snugly around your hips.
When the seat belt is fully extended
from the retractor to allow the instal-
lation of a child restraint system, the
seat belt operation changes to allow
the belt to retract, but not to extend
(Automatic Locking Retractor Type).
Refer to “Using a child restraint sys-
tem” in this section.
To convert from the automatic lock-
ing feature to the emergency locking
operation mode, allow the unbuckled
seat belt to fully retract.
B200A01NF
Page 36 of 452
321
Safety features of your vehicle
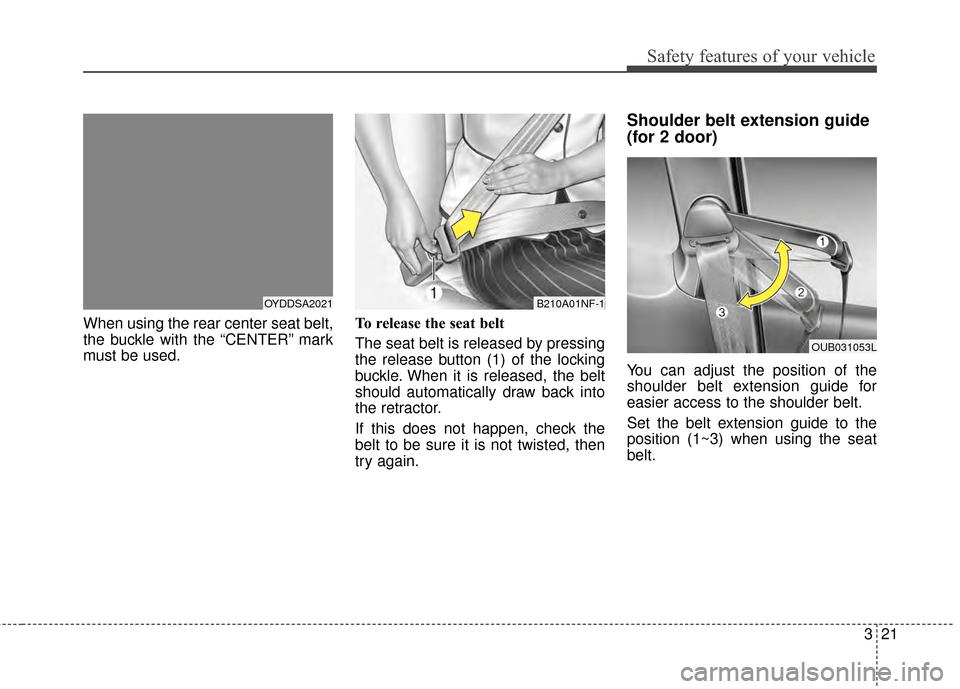
When using the rear center seat belt,
the buckle with the “CENTER” mark
must be used.To release the seat belt
The seat belt is released by pressing
the release button (1) of the locking
buckle. When it is released, the belt
should automatically draw back into
the retractor.
If this does not happen, check the
belt to be sure it is not twisted, then
try again.
Shoulder belt extension guide
(for 2 door)
You can adjust the position of the
shoulder belt extension guide for
easier access to the shoulder belt.
Set the belt extension guide to the
position (1~3) when using the seat
belt.
OYDDSA2021B210A01NF-1
OUB031053L
Page 37 of 452
Safety features of your vehicle
22
3
Pre-tensioner seat belt
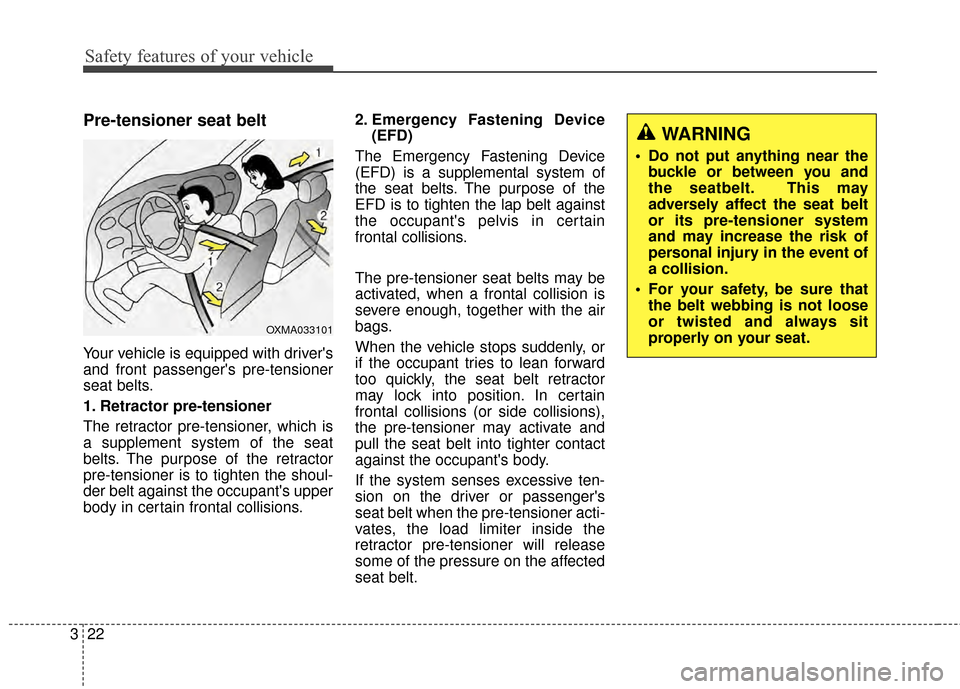
Your vehicle is equipped with driver's
and front passenger's pre-tensioner
seat belts.
1. Retractor pre-tensioner
The retractor pre-tensioner, which is
a supplement system of the seat
belts. The purpose of the retractor
pre-tensioner is to tighten the shoul-
der belt against the occupant's upper
body in certain frontal collisions. 2. Emergency Fastening Device
(EFD)
The Emergency Fastening Device
(EFD) is a supplemental system of
the seat belts. The purpose of the
EFD is to tighten the lap belt against
the occupant's pelvis in certain
frontal collisions.
The pre-tensioner seat belts may be
activated, when a frontal collision is
severe enough, together with the air
bags.
When the vehicle stops suddenly, or
if the occupant tries to lean forward
too quickly, the seat belt retractor
may lock into position. In certain
frontal collisions (or side collisions),
the pre-tensioner may activate and
pull the seat belt into tighter contact
against the occupant's body.
If the system senses excessive ten-
sion on the driver or passenger's
seat belt when the pre-tensioner acti-
vates, the load limiter inside the
retractor pre-tensioner will release
some of the pressure on the affected
seat belt.
OXMA033101
WARNING
Do not put anything near the buckle or between you and
the seatbelt. This may
adversely affect the seat belt
or its pre-tensioner system
and may increase the risk of
personal injury in the event of
a collision.
For your safety, be sure that the belt webbing is not loose
or twisted and always sit
properly on your seat.
Page 43 of 452
Safety features of your vehicle
28
3
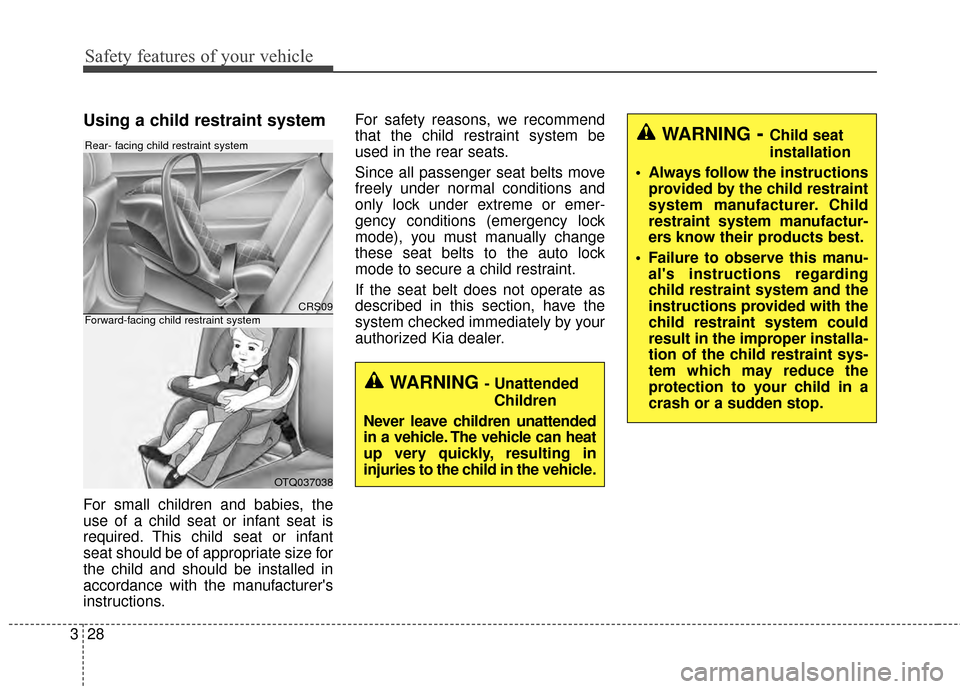
Using a child restraint system
For small children and babies, the
use of a child seat or infant seat is
required. This child seat or infant
seat should be of appropriate size for
the child and should be installed in
accordance with the manufacturer's
instructions. For safety reasons, we recommend
that the child restraint system be
used in the rear seats.
Since all passenger seat belts move
freely under normal conditions and
only lock under extreme or emer-
gency conditions (emergency lock
mode), you must manually change
these seat belts to the auto lock
mode to secure a child restraint.
If the seat belt does not operate as
described in this section, have the
system checked immediately by your
authorized Kia dealer.
CRS09
OTQ037038
Rear- facing child restraint system
Forward-facing child restraint system
WARNING - Unattended
Children
Never leave children unattended
in a vehicle. The vehicle can heat
up very quickly, resulting in
injuries to the child in the vehicle.
WARNING- Child seat
installation
Always follow the instructions provided by the child restraint
system manufacturer. Child
restraint system manufactur-
ers know their products best.
Failure to observe this manu- al's instructions regarding
child restraint system and the
instructions provided with the
child restraint system could
result in the improper installa-
tion of the child restraint sys-
tem which may reduce the
protection to your child in a
crash or a sudden stop.
Page 44 of 452
329
Safety features of your vehicle
Placing a passenger seat beltinto the auto lock mode
The auto lock mode will help prevent
the normal movement of the child in
the vehicle from causing the seat belt
to loosen and compromise the child
restraint system. To secure a child
restraint system, use the following
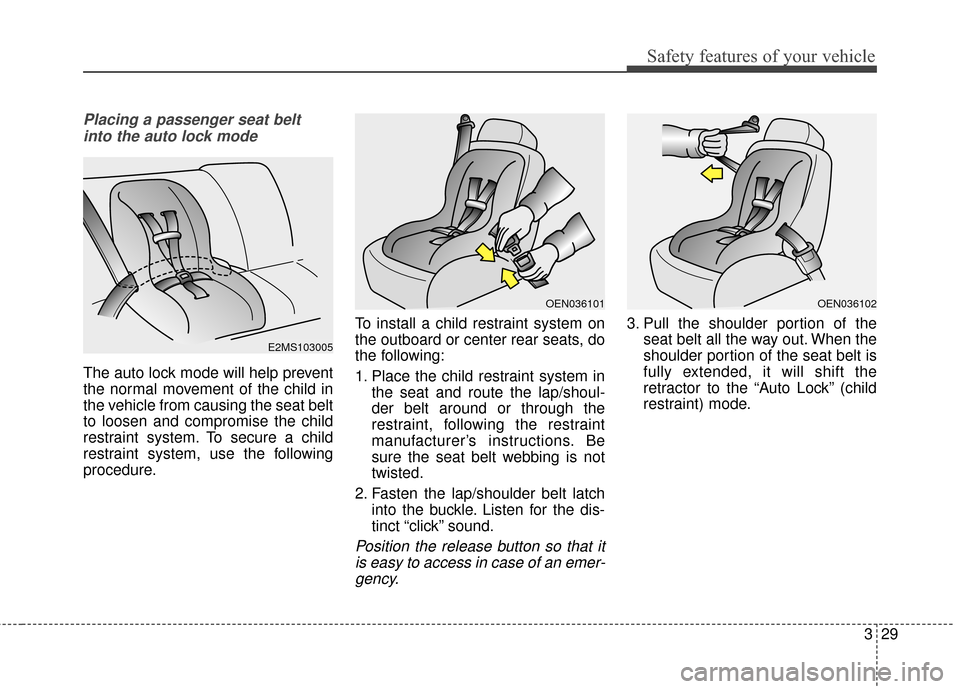
procedure. To install a child restraint system on
the outboard or center rear seats, do
the following:
1. Place the child restraint system in
the seat and route the lap/shoul-
der belt around or through the
restraint, following the restraint
manufacturer’s instructions. Be
sure the seat belt webbing is not
twisted.
2. Fasten the lap/shoulder belt latch into the buckle. Listen for the dis-
tinct “click” sound.
Position the release button so that itis easy to access in case of an emer-gency.
3. Pull the shoulder portion of the seat belt all the way out. When the
shoulder portion of the seat belt is
fully extended, it will shift the
retractor to the “Auto Lock” (child
restraint) mode.
E2MS103005
OEN036101OEN036102
Page 45 of 452
Safety features of your vehicle
30
3
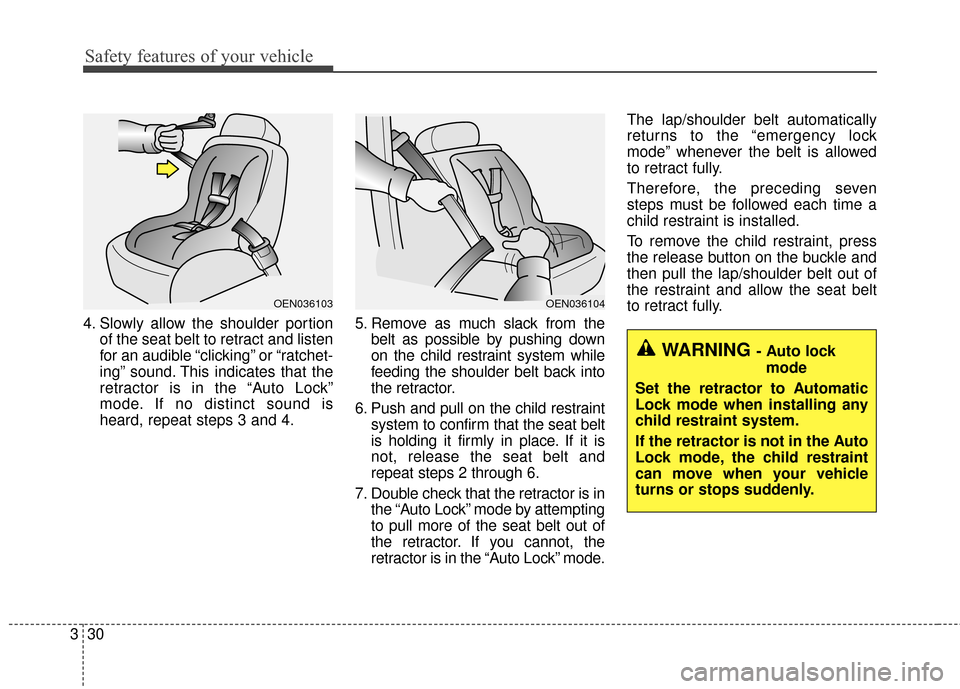
4. Slowly allow the shoulder portion
of the seat belt to retract and listen
for an audible “clicking” or “ratchet-
ing” sound. This indicates that the
retractor is in the “Auto Lock”
mode. If no distinct sound is
heard, repeat steps 3 and 4. 5. Remove as much slack from the
belt as possible by pushing down
on the child restraint system while
feeding the shoulder belt back into
the retractor.
6. Push and pull on the child restraint system to confirm that the seat belt
is holding it firmly in place. If it is
not, release the seat belt and
repeat steps 2 through 6.
7. Double check that the retractor is in the “Auto Lock” mode by attempting
to pull more of the seat belt out of
the retractor. If you cannot, the
retractor is in the “Auto Lock” mode. The lap/shoulder belt automatically
returns to the “emergency lock
mode” whenever the belt is allowed
to retract fully.
Therefore, the preceding seven
steps must be followed each time a
child restraint is installed.
To remove the child restraint, press
the release button on the buckle and
then pull the lap/shoulder belt out of
the restraint and allow the seat belt
to retract fully.
OEN036103OEN036104
WARNING - Auto lock
mode
Set the retractor to Automatic
Lock mode when installing any
child restraint system.
If the retractor is not in the Auto
Lock mode, the child restraint
can move when your vehicle
turns or stops suddenly.
Page 48 of 452
333
Safety features of your vehicle
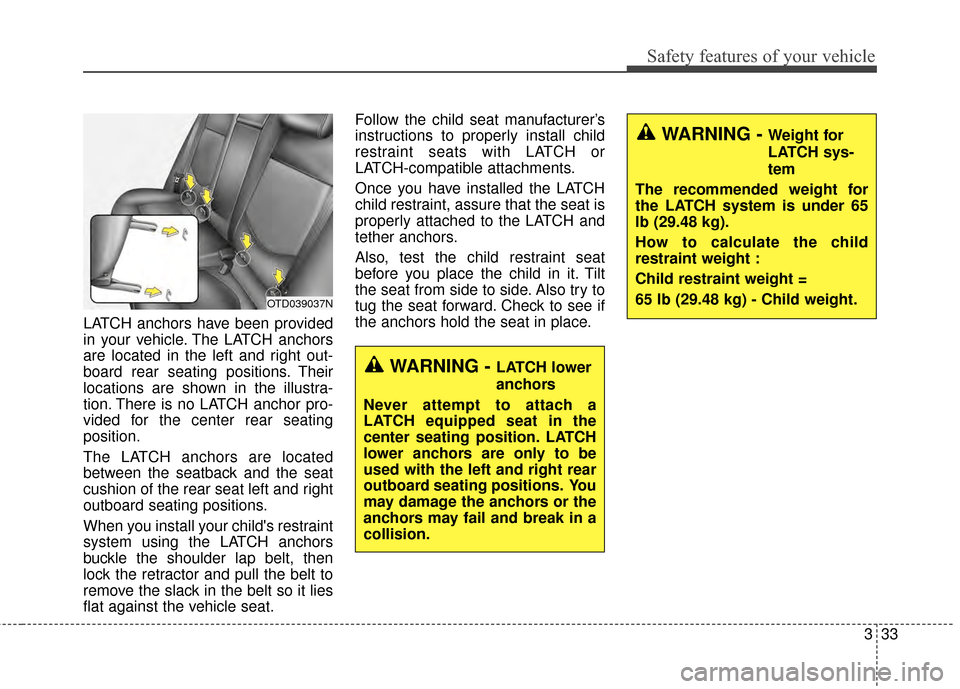
LATCH anchors have been provided
in your vehicle. The LATCH anchors
are located in the left and right out-
board rear seating positions. Their
locations are shown in the illustra-
tion. There is no LATCH anchor pro-
vided for the center rear seating
position.
The LATCH anchors are located
between the seatback and the seat
cushion of the rear seat left and right
outboard seating positions.
When you install your child's restraint
system using the LATCH anchors
buckle the shoulder lap belt, then
lock the retractor and pull the belt to
remove the slack in the belt so it lies
flat against the vehicle seat.Follow the child seat manufacturer’s
instructions to properly install child
restraint seats with LATCH or
LATCH-compatible attachments.
Once you have installed the LATCH
child restraint, assure that the seat is
properly attached to the LATCH and
tether anchors.
Also, test the child restraint seat
before you place the child in it. Tilt
the seat from side to side. Also try to
tug the seat forward. Check to see if
the anchors hold the seat in place.
OTD039037N
WARNING - LATCH lower
anchors
Never attempt to attach a
LATCH equipped seat in the
center seating position. LATCH
lower anchors are only to be
used with the left and right rear
outboard seating positions. You
may damage the anchors or the
anchors may fail and break in a
collision.
WARNING - Weight for
LATCH sys-
tem
The recommended weight for
the LATCH system is under 65
lb (29.48 kg).
How to calculate the child
restraint weight :
Child restraint weight =
65 lb (29.48 kg) - Child weight.