wheel KIA Forte 2012 1.G Workshop Manual
[x] Cancel search | Manufacturer: KIA, Model Year: 2012, Model line: Forte, Model: KIA Forte 2012 1.GPages: 353, PDF Size: 7.3 MB
Page 272 of 353
611
What to do in an emergency
10. To install the wheel, hold it on thestuds, put the wheel nuts on the
studs and tighten them finger
tight. Jiggle the tire to be sure it is
completely seated, then tighten
the nuts as much as possible
with your fingers again.
11. Lower the vehicle to the ground by turning the wheel nut wrench
counterclockwise.
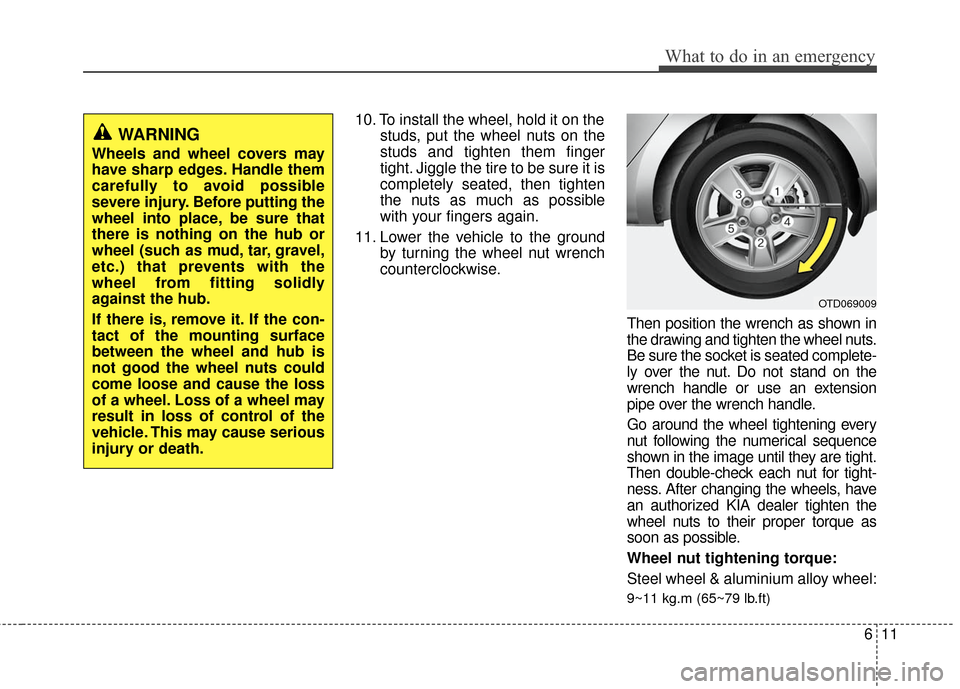
Then position the wrench as shown in
the drawing and tighten the wheel nuts.
Be sure the socket is seated complete-
ly over the nut. Do not stand on the
wrench handle or use an extension
pipe over the wrench handle.
Go around the wheel tightening every
nut following the numerical sequence
shown in the image until they are tight.
Then double-check each nut for tight-
ness. After changing the wheels, have
an authorized KIA dealer tighten the
wheel nuts to their proper torque as
soon as possible.
Wheel nut tightening torque:
Steel wheel & aluminium alloy wheel:
9~11 kg.m (65~79 lb.ft)
OTD069009
WARNING
Wheels and wheel covers may
have sharp edges. Handle them
carefully to avoid possible
severe injury. Before putting the
wheel into place, be sure that
there is nothing on the hub or
wheel (such as mud, tar, gravel,
etc.) that prevents with the
wheel from fitting solidly
against the hub.
If there is, remove it. If the con-
tact of the mounting surface
between the wheel and hub is
not good the wheel nuts could
come loose and cause the loss
of a wheel. Loss of a wheel may
result in loss of control of the
vehicle. This may cause serious
injury or death.
Page 273 of 353

What to do in an emergency
12
6
If you have a tire gauge, remove the
valve cap and check the air pressure.
If the pressure is lower than recom-
mended, drive slowly to the nearest
service station and inflate to the cor-
rect pressure. If it is too high, adjust
it until it is correct. Always reinstall
the valve cap after checking or
adjusting the tire pressure. If the cap
is not replaced, air may leak from the
tire. If you lose a valve cap, buy
another and install it as soon as pos-
sible.
After you have changed wheels,
always secure the flat tire in its place
and return the jack and tools to their
proper storage locations. To prevent the jack, jack handle,
wheel lug nut wrench and spare tire
from rattling while the vehicle is in
motion, store them properly.CAUTION
Your vehicle has metric threads
on the wheel studs and nuts.Make certain during wheelremoval that the same nuts thatwere removed are reinstalled -or, if replaced, that nuts withmetric threads and the samechamfer configuration are used.Installation of a non-metricthread nut on a metric stud orvice-versa will not secure thewheel to the hub properly andwill damage the stud so that itmust be replaced.
Note that most lug nuts do nothave metric threads. Be sure touse extreme care in checkingfor thread style before installingaftermarket lug nuts or wheels.If in doubt, consult an author-ized KIA dealer.
WARNING- Wheel studs
If the studs are damaged, they
may lose their ability to retain
the wheel. This could lead to the
loss of the wheel and a collision
resulting in serious injuries.
WARNING - Inadequate
spare tire pressure
Check the inflation pressures as
soon as possible after installing
the spare tire. Adjust it to the
specified pressure, if necessary.
Refer to “Tires and wheels” in
section 8.
Page 275 of 353
What to do in an emergency
14
6
Do not take this vehicle through an
automatic car wash while the com-
pact spare tire is installed.
The compact spare tire should not be installed on the front axle if the
vehicle must be driven in snow or
on ice.
Do not use the compact spare tire on any other vehicle because this
tire has been designed especially
for your vehicle.
The compact spare tire’s tread life is shorter than a regular tire.
Inspect your compact spare tire
regularly and replace worn com-
pact spare tires with the same size
and design, mounted on the same
wheel. The compact spare tire should not
be used on any other wheels, nor
should standard tires, snow tires,
wheel covers or trim rings be used
with the compact spare wheel. If
such use is attempted, damage to
these items or other car compo-
nents may occur.
Do not use more than one compact spare tire at a time.
Do not tow a trailer while the com- pact spare tire is installed.
Page 276 of 353

615
What to do in an emergency
TOWING
F080100ATD-EU
Towing service
If emergency towing is necessary, we
recommend having it done by an author-
ized KIA dealer or a commercial tow-
truck service. Proper lifting and towing
procedures are necessary to prevent
damage to the vehicle. The use of wheel
dollies or flatbed is recommended.
For trailer towing guidelines information,refer to “Trailer towing” in section 5.
It is acceptable to tow the vehicle with the
rear wheels on the ground (without dol-
lies) and the front wheels off the ground.
If any of the loaded wheels or suspen-
sion components are damaged or the
vehicle is being towed with the front
wheels on the ground, use a towing dolly
under the front wheels.
When being towed by a commercial tow
truck and wheel dollies are not used, the
front of the vehicle should always be lift-
ed, not the rear.
OMC045012
OTD069010
OBH068015
CAUTION
Do not tow the vehicle backwards with the front wheels on theground as this may cause dam- age to the vehicle.
Do not tow with sling-type equip- ment. Use wheel lift or flatbedequipment.
dolly
Page 277 of 353
What to do in an emergency
16
6
When towing your vehicle in an emer-
gency without wheel dollies :
1. Set the ignition switch in the ACC posi-
tion.
2. Place the transaxle shift lever in N (Neutral).
3. Release the parking brake.
F080300ATD-EU
Emergency towing
If towing is necessary, we recommend
you to have it done by an authorized
KIA dealer or a commercial tow truck
service. If towing service is not available in an
emergency, your vehicle may be tem-
porarily towed using a cable or chain
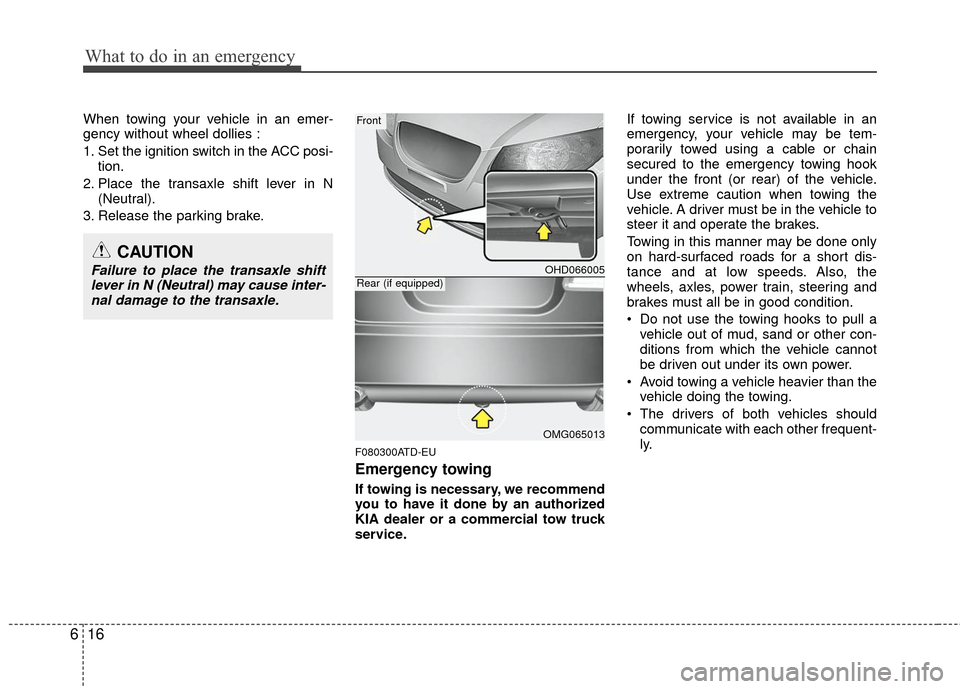
secured to the emergency towing hook
under the front (or rear) of the vehicle.
Use extreme caution when towing the
vehicle. A driver must be in the vehicle to
steer it and operate the brakes.
Towing in this manner may be done only
on hard-surfaced roads for a short dis-
tance and at low speeds. Also, the
wheels, axles, power train, steering and
brakes must all be in good condition.
Do not use the towing hooks to pull a
vehicle out of mud, sand or other con-
ditions from which the vehicle cannot
be driven out under its own power.
Avoid towing a vehicle heavier than the vehicle doing the towing.
The drivers of both vehicles should communicate with each other frequent-
ly.
CAUTION
Failure to place the transaxle shiftlever in N (Neutral) may cause inter- nal damage to the transaxle.OHD066005
OMG065013
Front
Rear (if equipped)
Page 279 of 353
What to do in an emergency
18
6
F080301AUN-EU
Emergency towing precautions
Turn the ignition switch to ACC so the
steering wheel isn’t locked.
Place the transaxle shift lever in N (Neutral).
Release the parking brake.
Press the brake pedal with more force than normal since you will have
reduced brake performance.
More steering effort will be required because the power steering system
will be disabled.
If you are driving down a long hill, the brakes may overheat and brake per-
formance will be reduced. Stop often
and let the brakes cool off.
F080400ATD
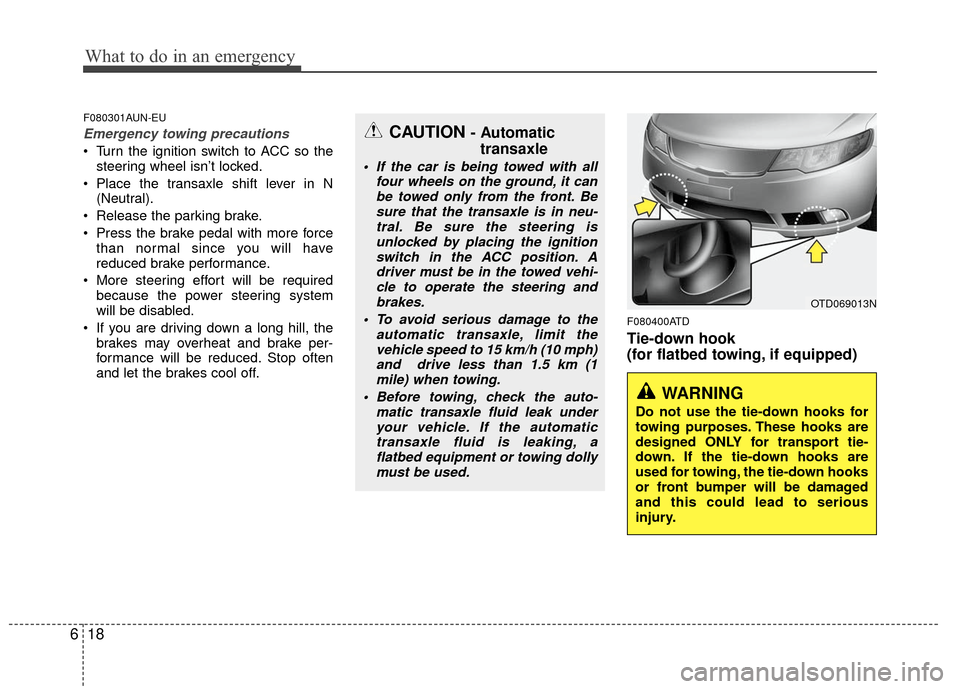
Tie-down hook
(for flatbed towing, if equipped)
CAUTION - Automatictransaxle
If the car is being towed with all
four wheels on the ground, it canbe towed only from the front. Besure that the transaxle is in neu-tral. Be sure the steering is unlocked by placing the ignitionswitch in the ACC position. Adriver must be in the towed vehi-cle to operate the steering andbrakes.
To avoid serious damage to the automatic transaxle, limit thevehicle speed to 15 km/h (10 mph)and drive less than 1.5 km (1mile) when towing.
Before towing, check the auto- matic transaxle fluid leak underyour vehicle. If the automatic transaxle fluid is leaking, aflatbed equipment or towing dollymust be used.
WARNING
Do not use the tie-down hooks for
towing purposes. These hooks are
designed ONLY for transport tie-
down. If the tie-down hooks are
used for towing, the tie-down hooks
or front bumper will be damaged
and this could lead to serious
injury.
OTD069013N
Page 280 of 353
7
Engine compartment / 7-2
Maintenance services / 7-3
Owner maintenance / 7-4
Maintenance schedule / 7-6
Explanation of scheduled maintenance items / 7-21
Engine oil / 7-24
Engine coolant / 7-25
Brake/clutch fluid / 7-28
Power steering fluid / 7-29
Automatic transaxle fluid / 7-30
Washer fluid / 7-30
Parking brake / 7-31
Air cleaner / 7-31
Climate control air filter / 7-32
Wiper blades / 7-32
Battery / 7-34
Tires and wheels / 7-37
Fuses / 7-50
Appearance care / 7-59
Emission control system / 7-65
Maintenance
Page 284 of 353
75
Maintenance
G030102ATD
While operating your vehicle:
Note any changes in the sound of theexhaust or any smell of exhaust fumes
in the vehicle.
Check for vibrations in the steering wheel. Notice any increased steering
effort or looseness in the steering
wheel, or change in its straight-ahead
position.
Notice if your vehicle constantly turns slightly or “pulls” to one side when trav-
eling on smooth, level road.
When stopping, listen and check for unusual sounds, pulling to one side,
increased brake pedal travel or “hard-
to-push” brake pedal.
If any slipping or changes in the oper- ation of your transaxle occurs, check
the transaxle fluid level.
Check the automatic transaxle P (Park) function.
Check the parking brake.
Check for fluid leaks under your vehicle (water dripping from the air condition-
ing system during or after use is nor-
mal).
G030103AHM
At least monthly:
Check the coolant level in the enginecoolant reservoir.
Check the operation of all exterior lights, including the stoplights, turn sig-
nals and hazard warning flashers.
Check the inflation pressures of all tires including the spare.
G030104AHM
At least twice a year (i.e., every Spring and Fall) :
Check the radiator, heater and air con- ditioning hoses for leaks or damage.
Check the windshield washer spray and wiper operation. Clean the wiper
blades with clean cloth dampened with
washer fluid.
Check the headlight alignment.
Check the muffler, exhaust pipes, shields and clamps.
Check the lap/shoulder belts for wear and function.
Check for worn tires and loose wheel lug nuts.
G030105ATD
At least once a year :
Clean the body and door drain holes.
Lubricate the door hinges and checks,and hood hinges.
Lubricate the door and hood locks and latches.
Lubricate the door rubber weather- strips.
Check the air conditioning system.
Check the power steering fluid level.
Inspect and lubricate automatic transaxle linkage and controls.
Clean the battery and terminals.
Check the brake/clutch fluid level.
Page 302 of 353

723
Maintenance
G051800APA
Rear brake drums and linings
(if equipped)
Check the rear brake drums and linings
for scoring, burning, leaking fluid, broken
parts, and excessive wear.
G051900ATD
Brake pads, calipers and rotors
Check the pads for excessive wear, discs
for run out and wear, and calipers for fluid
leakage.
G052100AUN
Suspension mounting bolts
Check the suspension connections for
looseness or damage. Retighten to the
specified torque.
G052200AUN
Steering gear box, linkage &
boots/lower arm ball joint
With the vehicle stopped and engine off,
check for excessive free-play in the
steering wheel.
Check the linkage for bends or damage.
Check the dust boots and ball joints for
deterioration, cracks, or damage.
Replace any damaged parts.
G052400AUN
Drive shafts and boots
Check the drive shafts, boots and clamps
for cracks, deterioration, or damage.
Replace any damaged parts and, if nec-
essary, repack the grease.
G052500AUN
Air conditioning refrigerant
(if equipped)
Check the air conditioning lines and con-
nections for leakage and damage.
G052300AEN
Power steering pump, belt and
hoses (if equipped)
Check the power steering pump and
hoses for leakage and damage. Replace
any damaged or leaking parts immedi-
ately. Inspect the power steering belt (or
drive belt) for evidence of cuts, cracks,
excessive wear, oiliness and proper ten-
sion. Replace or adjust it if necessary.
Page 316 of 353
737
Maintenance
TIRES AND WHEELS
G200100AUN
Tire care
For proper maintenance, safety, and
maximum fuel economy, you must
always maintain recommended tire
inflation pressures and stay within
the load limits and weight distribution
recommended for your vehicle.
G200200AUN-EU
Recommended cold tire inflation
pressures
All tire pressures (including the
spare) should be checked when the
tires are cold. “Cold Tires” means the
vehicle has not been driven for at
least three hours or driven less than
one mile (1.6 km).
Recommended pressures must be
maintained for the best ride, top vehi-
cle handling, and minimum tire wear.
For recommended inflation pressure
refer to “Tire and wheels” in section
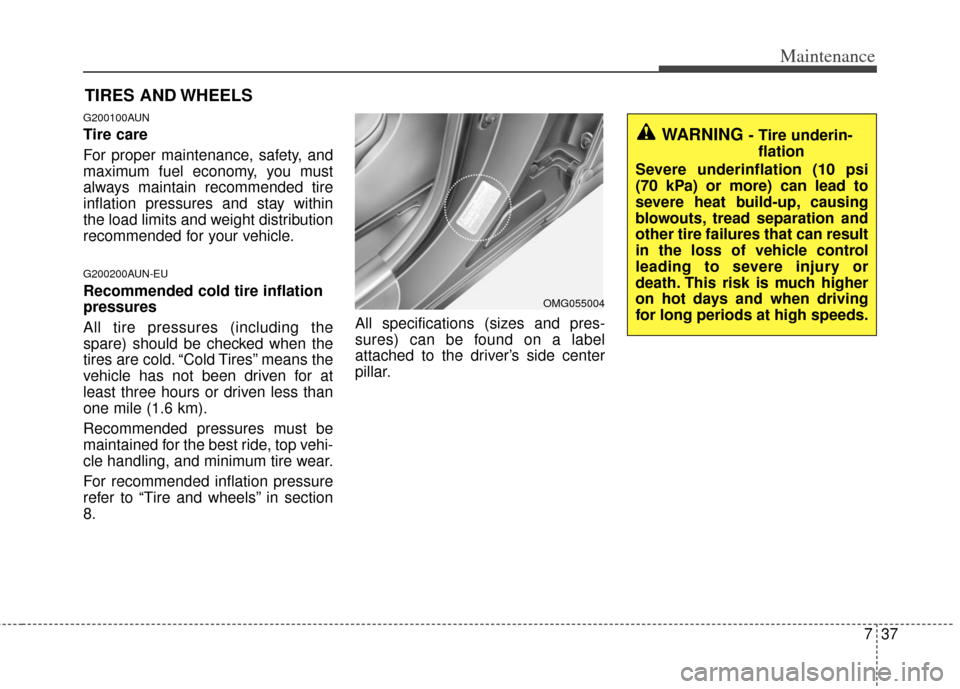
8.All specifications (sizes and pres-
sures) can be found on a label
attached to the driver’s side center
pillar.
WARNING - Tire underin-
flation
Severe underinflation (10 psi
(70 kPa) or more) can lead to
severe heat build-up, causing
blowouts, tread separation and
other tire failures that can result
in the loss of vehicle control
leading to severe injury or
death. This risk is much higher
on hot days and when driving
for long periods at high speeds.
OMG055004