KIA Forte 2015 2.G Owner's Manual
Manufacturer: KIA, Model Year: 2015, Model line: Forte, Model: KIA Forte 2015 2.GPages: 452, PDF Size: 7.85 MB
Page 111 of 452
Features of your vehicle
40
4
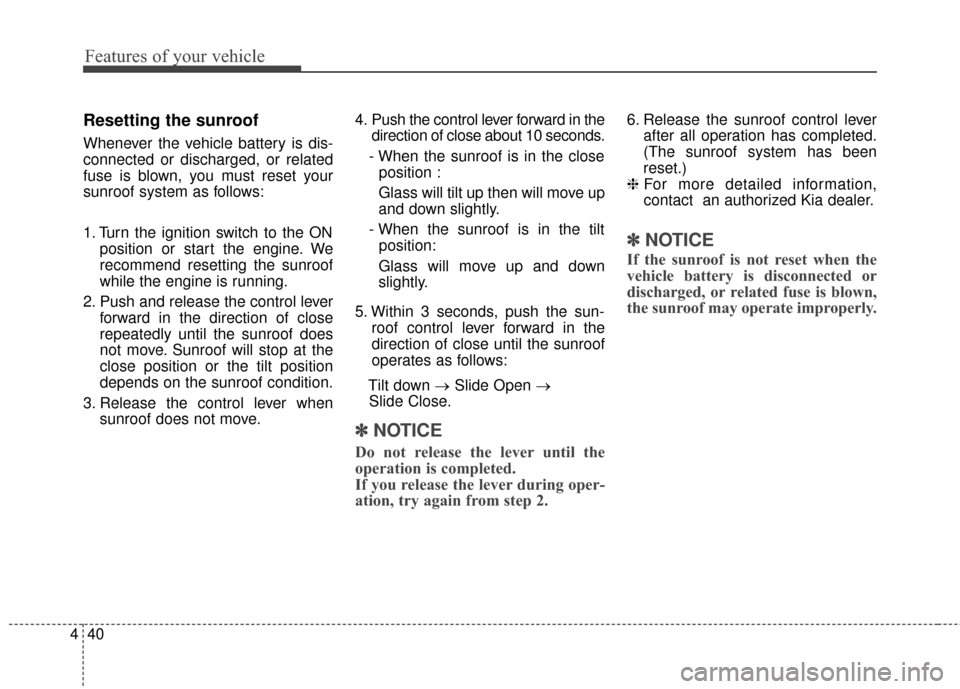
Resetting the sunroof
Whenever the vehicle battery is dis-
connected or discharged, or related
fuse is blown, you must reset your
sunroof system as follows:
1. Turn the ignition switch to the ON
position or start the engine. We
recommend resetting the sunroof
while the engine is running.
2. Push and release the control lever forward in the direction of close
repeatedly until the sunroof does
not move. Sunroof will stop at the
close position or the tilt position
depends on the sunroof condition.
3. Release the control lever when sunroof does not move. 4. Push the control lever forward in the
direction of close about 10 seconds.
- When the sunroof is in the close position :
Glass will tilt up then will move up
and down slightly.
- When the sunroof is in the tilt position:
Glass will move up and down
slightly.
5. Within 3 seconds, push the sun- roof control lever forward in the
direction of close until the sunroof
operates as follows:
Tilt down → Slide Open →
Slide Close.
✽ ✽ NOTICE
Do not release the lever until the
operation is completed.
If you release the lever during oper-
ation, try again from step 2.
6. Release the sunroof control lever
after all operation has completed.
(The sunroof system has been
reset.)
❈ For more detailed information,
contact an authorized Kia dealer.
✽ ✽
NOTICE
If the sunroof is not reset when the
vehicle battery is disconnected or
discharged, or related fuse is blown,
the sunroof may operate improperly.
Page 112 of 452
441
Features of your vehicle
Electric power steering (EPS)
Power steering uses the motor to
assist you in steering the vehicle. If
the engine is off or if the power steer-
ing system becomes inoperative, the
vehicle may still be steered, but it will
require increased steering effort.
The motor driven power steering is
controlled by the power steering con-
trol unit which senses the steering
wheel torque and vehicle speed to
command the motor.
The steering wheel becomes heavier
as the vehicle’s speed increases and
becomes lighter as the vehicle’s
speed decreases for better control of
the steering wheel.
Should you notice any change in the
effort required to steer during normal
vehicle operation, have the power
steering checked by an authorized
Kia dealer.
✽ ✽NOTICE
The following symptoms may occur
during normal vehicle operation:
• The steering effort is increased
immediately after turning the igni-
tion switch on. This happens as the
system performs the EPS system
diagnostics. When the diagnostics
are completed, the steering wheel
will return to its normal condition
• A click noise may be heard from the EPS relay after the ignition
switch is turned to the ON or
LOCK position.
• Motor noise may be heard when the vehicle is at a stop or at a low
driving speed.
• The steering effort increases if the steering wheel is rotated continu-
ously when the vehicle is not in
motion. However, after a few min-
utes, it will return to its normal
condition.
• When you operate the steering wheel in low temperature, noise
may occur. If the temperature
rises, the noise will likely disap-
pear. This is a normal condition. (Continued)(Continued)
• When the charging system warn-
ing light comes on or the battery
voltage is low (when the alternator
or battery does not operate nor-
mally), the steering wheel may get
heavy and become difficult to con-
trol operate abnormally.
If the Electric Power Steering System
does not operate normally, the warn-
ing light will illuminate on the instru-
ment cluster. The steering wheel may
require increased steering effort.
Take your vehicle to an authorized
Kia dealer and have the vehicle
checked as soon as possible.
STEERING WHEEL
Page 113 of 452
Features of your vehicle
42
4
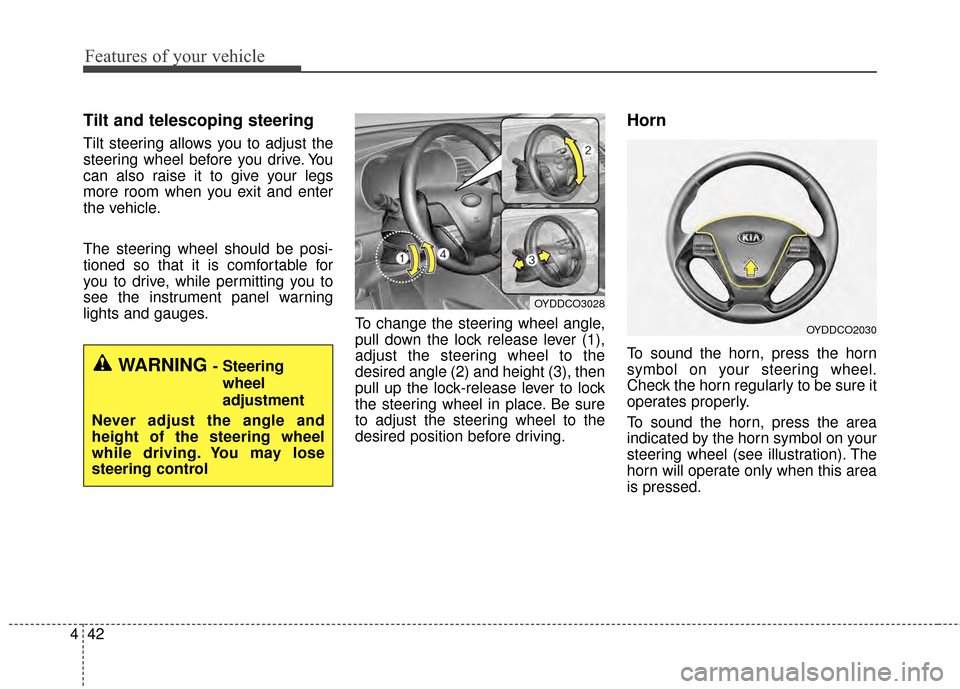
Tilt and telescoping steering
Tilt steering allows you to adjust the
steering wheel before you drive. You
can also raise it to give your legs
more room when you exit and enter
the vehicle.
The steering wheel should be posi-
tioned so that it is comfortable for
you to drive, while permitting you to
see the instrument panel warning
lights and gauges.
To change the steering wheel angle,
pull down the lock release lever (1),
adjust the steering wheel to the
desired angle (2) and height (3), then
pull up the lock-release lever to lock
the steering wheel in place. Be sure
to adjust the steering wheel to the
desired position before driving.
Horn
To sound the horn, press the horn
symbol on your steering wheel.
Check the horn regularly to be sure it
operates properly.
To sound the horn, press the area
indicated by the horn symbol on your
steering wheel (see illustration). The
horn will operate only when this area
is pressed.WARNING - Steering
wheel
adjustment
Never adjust the angle and
height of the steering wheel
while driving. You may lose
steering control
OYDDCO3028
OYDDCO2030
Page 114 of 452
443
Features of your vehicle
Heated steering wheel
(if equipped)
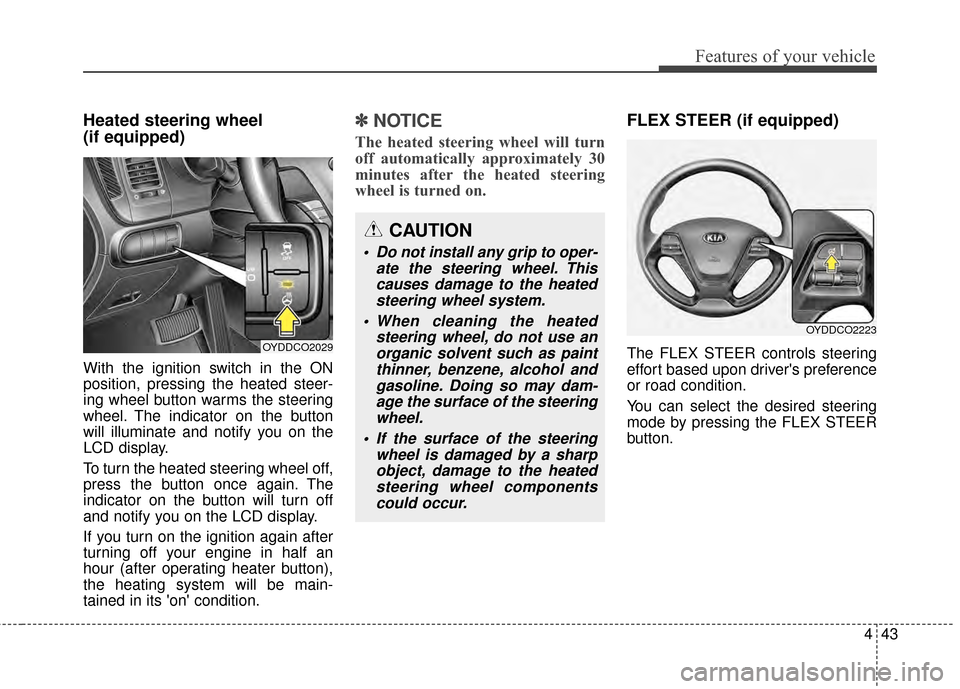
With the ignition switch in the ON
position, pressing the heated steer-
ing wheel button warms the steering
wheel. The indicator on the button
will illuminate and notify you on the
LCD display.
To turn the heated steering wheel off,
press the button once again. The
indicator on the button will turn off
and notify you on the LCD display.
If you turn on the ignition again after
turning off your engine in half an
hour (after operating heater button),
the heating system will be main-
tained in its 'on' condition.
✽ ✽NOTICE
The heated steering wheel will turn
off automatically approximately 30
minutes after the heated steering
wheel is turned on.
FLEX STEER (if equipped)
The FLEX STEER controls steering
effort based upon driver's preference
or road condition.
You can select the desired steering
mode by pressing the FLEX STEER
button.
CAUTION
Do not install any grip to oper-
ate the steering wheel. Thiscauses damage to the heatedsteering wheel system.
When cleaning the heated steering wheel, do not use anorganic solvent such as paintthinner, benzene, alcohol andgasoline. Doing so may dam-age the surface of the steeringwheel.
If the surface of the steering wheel is damaged by a sharpobject, damage to the heatedsteering wheel componentscould occur.
OYDDCO2029
OYDDCO2223
Page 115 of 452
Features of your vehicle
44
4
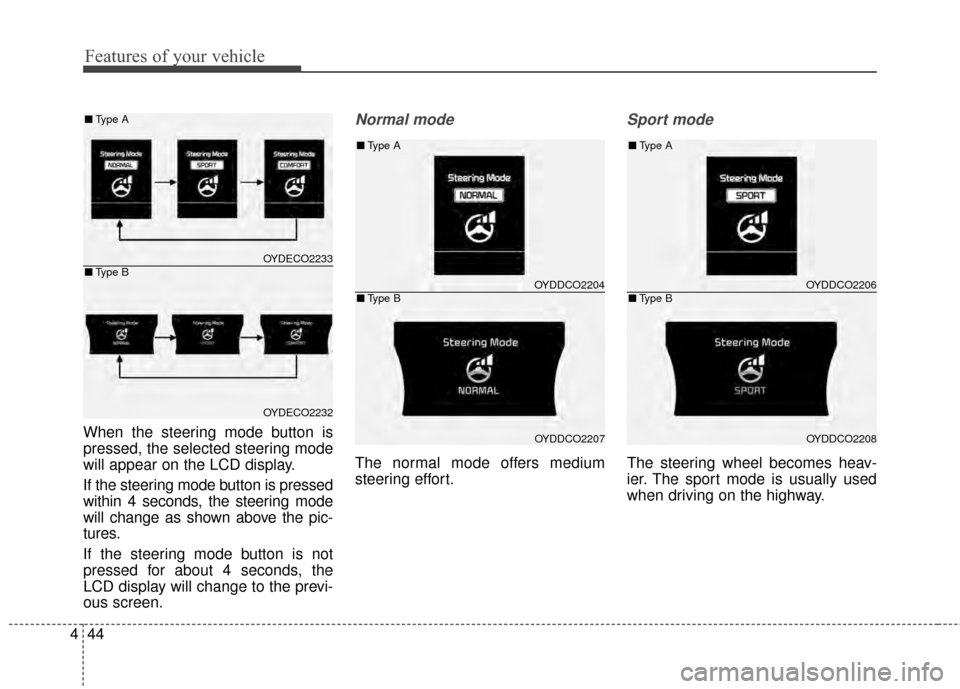
When the steering mode button is
pressed, the selected steering mode
will appear on the LCD display.
If the steering mode button is pressed
within 4 seconds, the steering mode
will change as shown above the pic-
tures.
If the steering mode button is not
pressed for about 4 seconds, the
LCD display will change to the previ-
ous screen.
Normal mode
The normal mode offers medium
steering effort.
Sport mode
The steering wheel becomes heav-
ier. The sport mode is usually used
when driving on the highway.
OYDDCO2204
OYDDCO2207
■ Type A
■Type B
OYDECO2233
OYDECO2232
■Type A
■Type BOYDDCO2206
OYDDCO2208
■Type A
■Type B
Page 116 of 452
445
Features of your vehicle
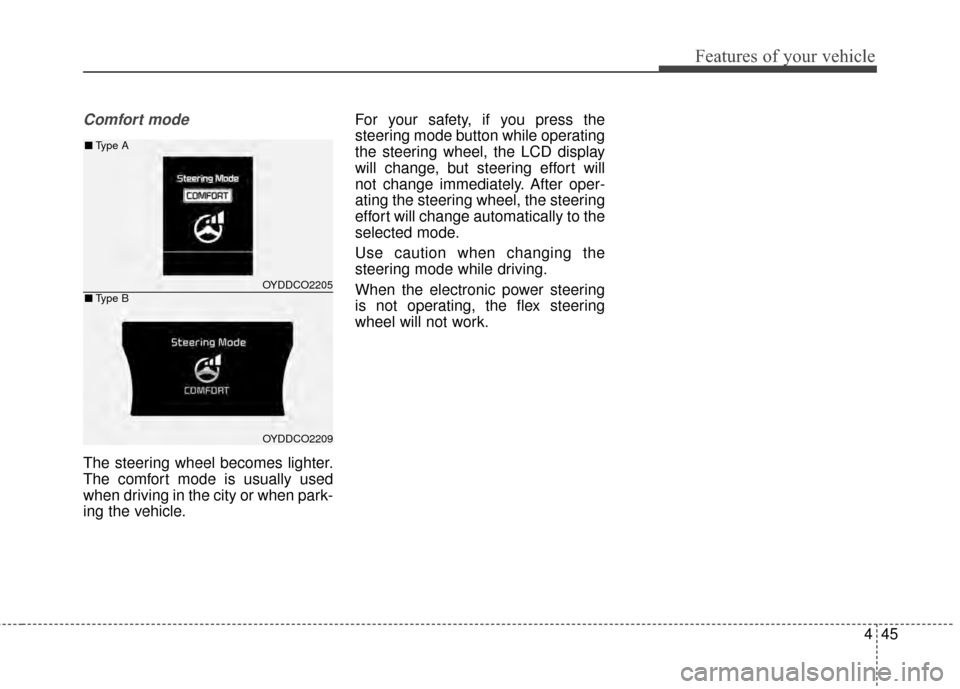
Comfort mode
The steering wheel becomes lighter.
The comfort mode is usually used
when driving in the city or when park-
ing the vehicle.For your safety, if you press the
steering mode button while operating
the steering wheel, the LCD display
will change, but steering effort will
not change immediately. After oper-
ating the steering wheel, the steering
effort will change automatically to the
selected mode.
Use caution when changing the
steering mode while driving.
When the electronic power steering
is not operating, the flex steering
wheel will not work.
OYDDCO2205
OYDDCO2209
■
Type A
■Type B
Page 117 of 452
Features of your vehicle
46
4
Inside rearview mirror
Adjust the rearview mirror so that the
center view through the rear window
is seen. Make this adjustment before
you start driving.
Do not place objects in the rear seat
which would interfere with your vision
through the rear window.
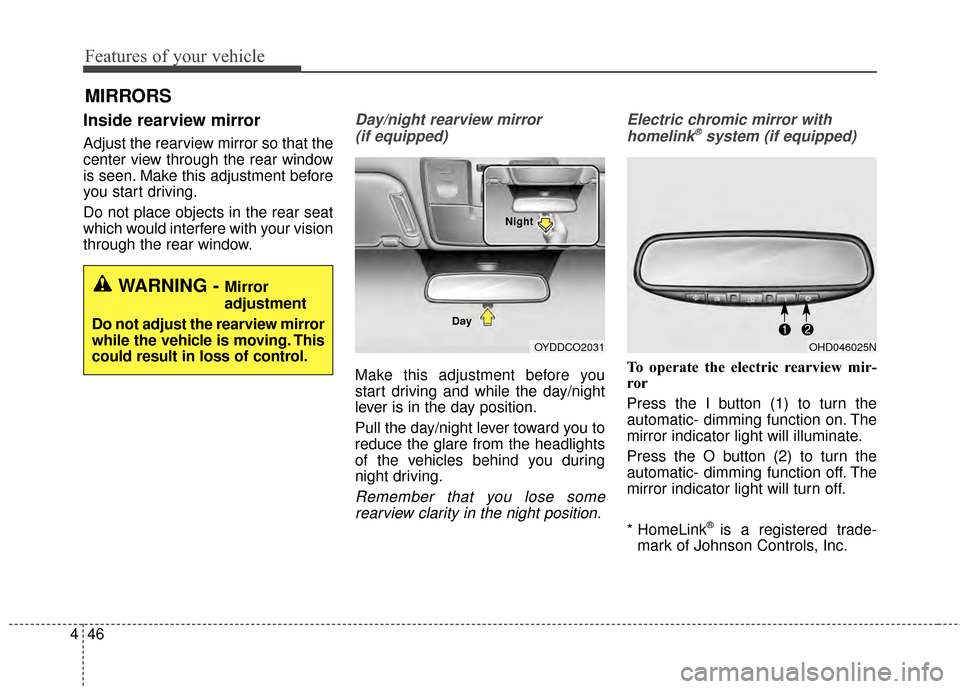
Day/night rearview mirror
(if equipped)
Make this adjustment before you
start driving and while the day/night
lever is in the day position.
Pull the day/night lever toward you to
reduce the glare from the headlights
of the vehicles behind you during
night driving.
Remember that you lose somerearview clarity in the night position. Electric chromic mirror with
homelink
®system (if equipped)
To operate the electric rearview mir-
ror
Press the I button (1) to turn the
automatic- dimming function on. The
mirror indicator light will illuminate.
Press the O button (2) to turn the
automatic- dimming function off. The
mirror indicator light will turn off.
* HomeLink
®is a registered trade-
mark of Johnson Controls, Inc.
MIRRORS
WARNING - Mirror
adjustment
Do not adjust the rearview mirror
while the vehicle is moving. This
could result in loss of control.
OYDDCO2031
Day NightOHD046025N
Page 118 of 452
447
Features of your vehicle
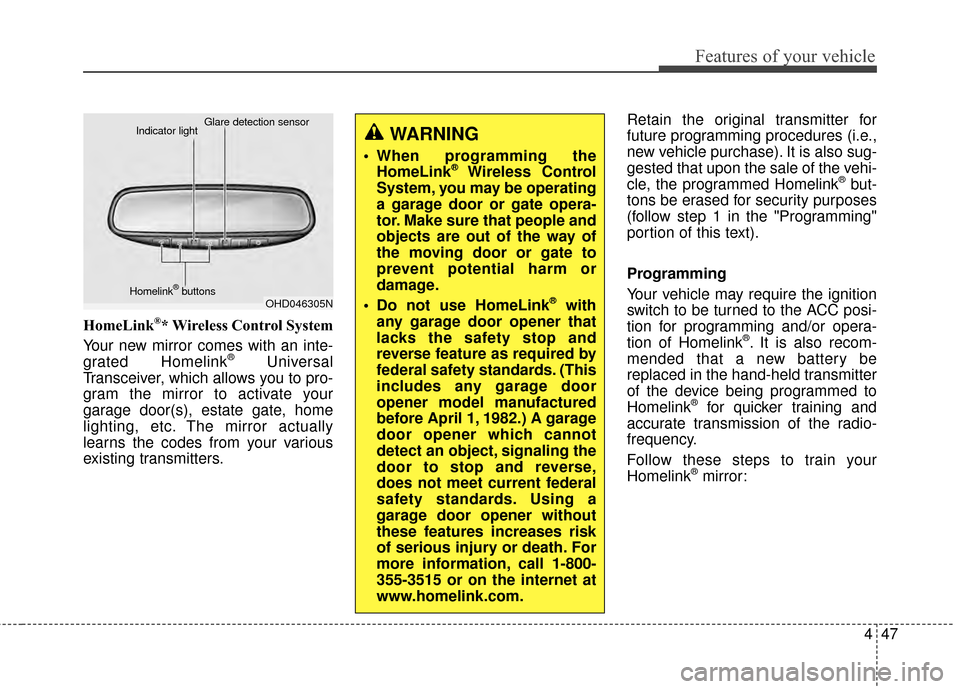
HomeLink®* Wireless Control System
Your new mirror comes with an inte-
grated Homelink
®Universal
Transceiver, which allows you to pro-
gram the mirror to activate your
garage door(s), estate gate, home
lighting, etc. The mirror actually
learns the codes from your various
existing transmitters. Retain the original transmitter for
future programming procedures (i.e.,
new vehicle purchase). It is also sug-
gested that upon the sale of the vehi-
cle, the programmed Homelink
®but-
tons be erased for security purposes
(follow step 1 in the "Programming"
portion of this text).
Programming
Your vehicle may require the ignition
switch to be turned to the ACC posi-
tion for programming and/or opera-
tion of Homelink
®. It is also recom-
mended that a new battery be
replaced in the hand-held transmitter
of the device being programmed to
Homelink
®for quicker training and
accurate transmission of the radio-
frequency.
Follow these steps to train your
Homelink
®mirror:
OHD046305N
Glare detection sensor
Indicator light
Homelink
®buttons
WARNING
When programming the HomeLink®Wireless Control
System, you may be operating
a garage door or gate opera-
tor. Make sure that people and
objects are out of the way of
the moving door or gate to
prevent potential harm or
damage.
Do not use HomeLink
®with
any garage door opener that
lacks the safety stop and
reverse feature as required by
federal safety standards. (This
includes any garage door
opener model manufactured
before April 1, 1982.) A garage
door opener which cannot
detect an object, signaling the
door to stop and reverse,
does not meet current federal
safety standards. Using a
garage door opener without
these features increases risk
of serious injury or death. For
more information, call 1-800-
355-3515 or on the internet at
www.homelink.com.
Page 119 of 452
Features of your vehicle
48
4
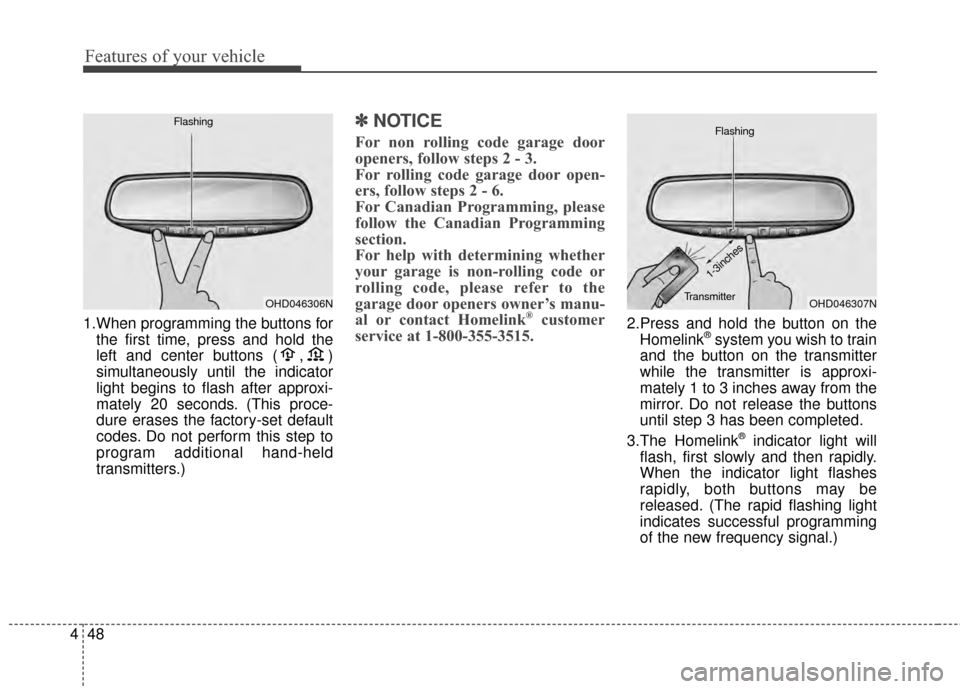
1.When programming the buttons for
the first time, press and hold the
left and center buttons ( , )
simultaneously until the indicator
light begins to flash after approxi-
mately 20 seconds. (This proce-
dure erases the factory-set default
codes. Do not perform this step to
program additional hand-held
transmitters.)
✽ ✽ NOTICE
For non rolling code garage door
openers, follow steps 2 - 3.
For rolling code garage door open-
ers, follow steps 2 - 6.
For Canadian Programming, please
follow the Canadian Programming
section.
For help with determining whether
your garage is non-rolling code or
rolling code, please refer to the
garage door openers owner’s manu-
al or contact Homelink
®customer
service at 1-800-355-3515.2.Press and hold the button on the
Homelink®system you wish to train
and the button on the transmitter
while the transmitter is approxi-
mately 1 to 3 inches away from the
mirror. Do not release the buttons
until step 3 has been completed.
3.The Homelink
®indicator light will
flash, first slowly and then rapidly.
When the indicator light flashes
rapidly, both buttons may be
released. (The rapid flashing light
indicates successful programming
of the new frequency signal.)
OHD046306N
FlashingOHD046307N
Flashing
1-3inches
Transmitter
Page 120 of 452
449
Features of your vehicle
✽
✽NOTICE
Some gate operators and garage
door openers may require you to
replace step #3 with the "cycling"
procedure noted in the "Canadian
Programming" section of this docu-
ment.
Rolling code programming
To train a garage door opener (or
other rolling code equipped devices)
with the rolling code feature, follow
these instructions after completing
the "Programming" portion of this
text. (A second person may make the
following training procedures quicker
& easier.)
4. Locate the "learn" or "smart" but-
ton on the device’s motor head
unit. Exact location and color of
the button may vary by product
brand. If there is difficulty locating
the "learn" or "smart" button, refer-
ence the device’s owner’s manual
or contact Homelink
®at 1-800-
355-3515 or on the internet at
www.homelink.com.
5. Press and release the "learn" or "smart" button on the device’s
motor head unit. You have 30 sec-
onds to complete step number 6. 6. Return to the vehicle and firmly
press and release the pro-
grammed Homelink
®button up to
three times. The rolling code
equipped device should now rec-
ognize the Homelink
®signal and
activate when the Homelink®but-
ton is pressed. The remaining two
buttons may now be programmed
if this has not previously been
done. Refer to the "Programming"
portion of this text.
Operating Homelink
®
To operate, simply press the pro-
grammed Homelink®button.
Activation will now occur for the
trained product (garage door, securi-
ty system, entry door lock, estate
gate, or home or office lighting). For
convenience, the hand-held trans-
mitter of the device may also be used
at any time. The Homelink
®Wireless
Controls System (once programmed)
or the original hand-held transmitter
may be used to activate the device
(e.g. garage door, entry door lock,
etc.). In the event that there are still
programming difficulties, contact
Homelink
®at 1-800-355-3515 or on
the internet at www.homelink.com.