KIA Forte 2015 2.G Owner's Manual
Manufacturer: KIA, Model Year: 2015, Model line: Forte, Model: KIA Forte 2015 2.GPages: 452, PDF Size: 7.85 MB
Page 211 of 452
Features of your vehicle
140
4
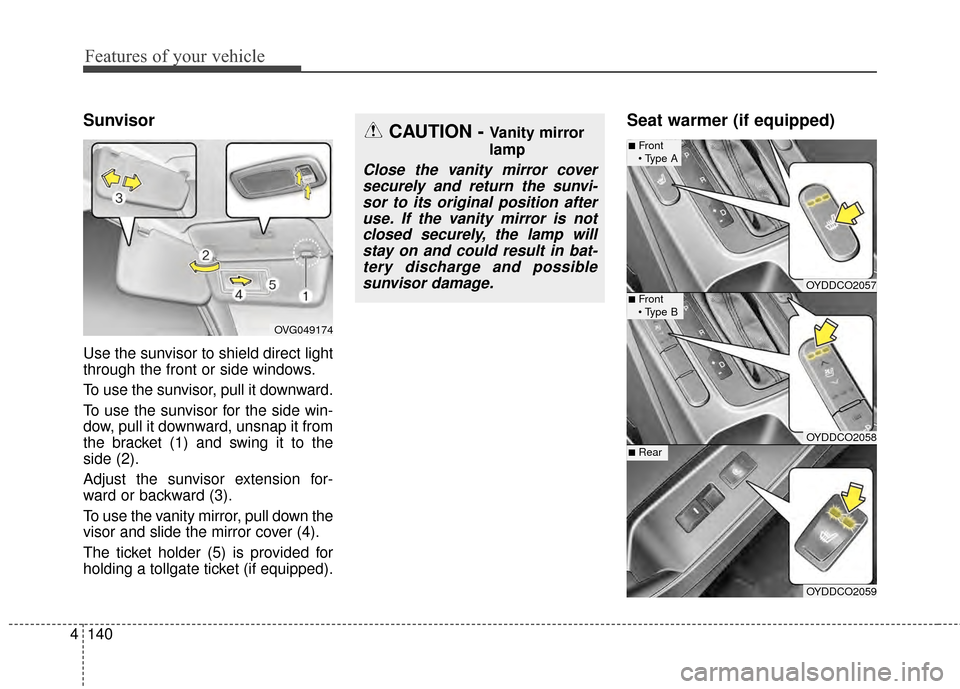
Sunvisor
Use the sunvisor to shield direct light
through the front or side windows.
To use the sunvisor, pull it downward.
To use the sunvisor for the side win-
dow, pull it downward, unsnap it from
the bracket (1) and swing it to the
side (2).
Adjust the sunvisor extension for-
ward or backward (3).
To use the vanity mirror, pull down the
visor and slide the mirror cover (4).
The ticket holder (5) is provided for
holding a tollgate ticket (if equipped).
Seat warmer (if equipped)CAUTION - Vanity mirror
lamp
Close the vanity mirror cover
securely and return the sunvi-sor to its original position afteruse. If the vanity mirror is notclosed securely, the lamp willstay on and could result in bat-tery discharge and possiblesunvisor damage.
OVG049174
OYDDCO2057
OYDDCO2058
■Front
■Front
OYDDCO2059
■Rear
Page 212 of 452
4141
Features of your vehicle
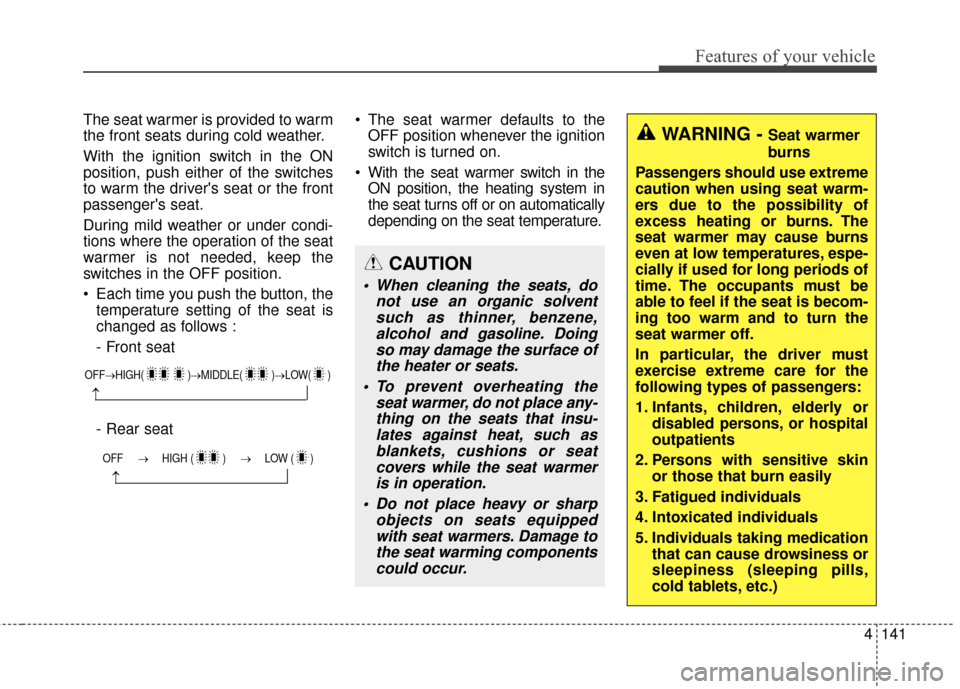
The seat warmer is provided to warm
the front seats during cold weather.
With the ignition switch in the ON
position, push either of the switches
to warm the driver's seat or the front
passenger's seat.
During mild weather or under condi-
tions where the operation of the seat
warmer is not needed, keep the
switches in the OFF position.
Each time you push the button, thetemperature setting of the seat is
changed as follows :
- Front seat
- Rear seat The seat warmer defaults to the
OFF position whenever the ignition
switch is turned on.
With the seat warmer switch in the ON position, the heating system in
the seat turns off or on automatically
depending on the seat temperature.
OFF→ HIGH( )→ MIDDLE( )→LOW( )
→
OFF → HIGH ( ) → LOW ( )
→
CAUTION
When cleaning the seats, do
not use an organic solventsuch as thinner, benzene,alcohol and gasoline. Doingso may damage the surface ofthe heater or seats.
To prevent overheating the seat warmer, do not place any-thing on the seats that insu-lates against heat, such asblankets, cushions or seatcovers while the seat warmeris in operation.
Do not place heavy or sharp objects on seats equippedwith seat warmers. Damage tothe seat warming componentscould occur.
WARNING - Seat warmer
burns
Passengers should use extreme
caution when using seat warm-
ers due to the possibility of
excess heating or burns. The
seat warmer may cause burns
even at low temperatures, espe-
cially if used for long periods of
time. The occupants must be
able to feel if the seat is becom-
ing too warm and to turn the
seat warmer off.
In particular, the driver must
exercise extreme care for the
following types of passengers:
1. Infants, children, elderly or disabled persons, or hospital
outpatients
2. Persons with sensitive skin or those that burn easily
3. Fatigued individuals
4. Intoxicated individuals
5. Individuals taking medication that can cause drowsiness or
sleepiness (sleeping pills,
cold tablets, etc.)
Page 213 of 452
Features of your vehicle
142
4
Climate control seat
(if equipped)
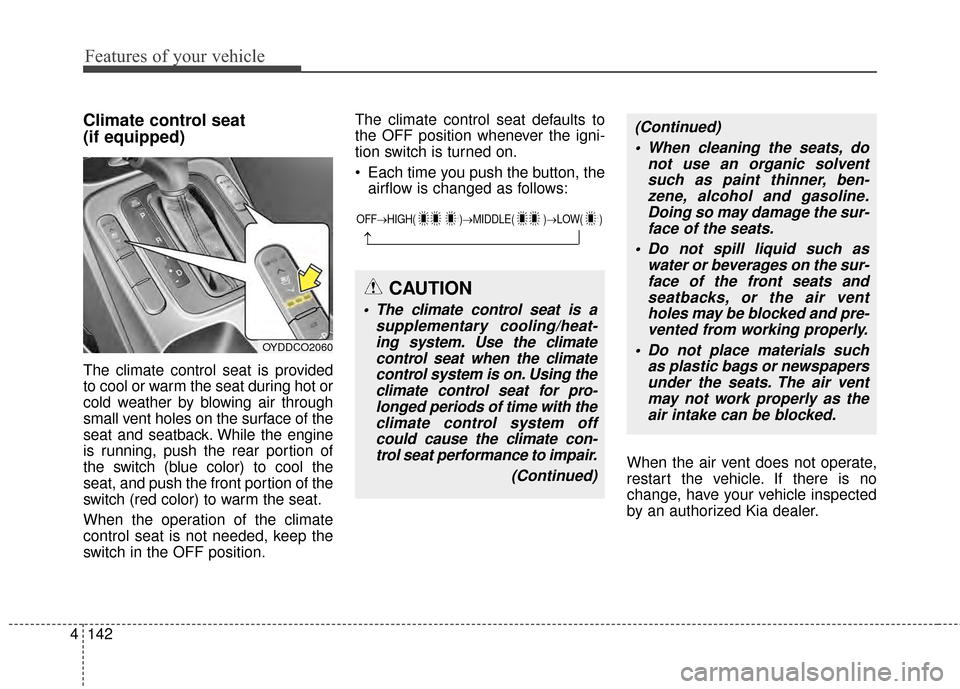
The climate control seat is provided
to cool or warm the seat during hot or
cold weather by blowing air through
small vent holes on the surface of the
seat and seatback. While the engine
is running, push the rear portion of
the switch (blue color) to cool the
seat, and push the front portion of the
switch (red color) to warm the seat.
When the operation of the climate
control seat is not needed, keep the
switch in the OFF position. The climate control seat defaults to
the OFF position whenever the igni-
tion switch is turned on.
Each time you push the button, the
airflow is changed as follows:
When the air vent does not operate,
restart the vehicle. If there is no
change, have your vehicle inspected
by an authorized Kia dealer.
OYDDCO2060
OFF→HIGH( )→ MIDDLE( )→LOW( )
→
CAUTION
The climate control seat is a
supplementary cooling/heat-ing system. Use the climatecontrol seat when the climatecontrol system is on. Using theclimate control seat for pro-longed periods of time with theclimate control system offcould cause the climate con-trol seat performance to impair.
(Continued)
(Continued) When cleaning the seats, do not use an organic solventsuch as paint thinner, ben-zene, alcohol and gasoline.Doing so may damage the sur-face of the seats.
Do not spill liquid such as water or beverages on the sur-face of the front seats andseatbacks, or the air ventholes may be blocked and pre-vented from working properly.
Do not place materials such as plastic bags or newspapersunder the seats. The air ventmay not work properly as theair intake can be blocked.
Page 214 of 452
4143
Features of your vehicle
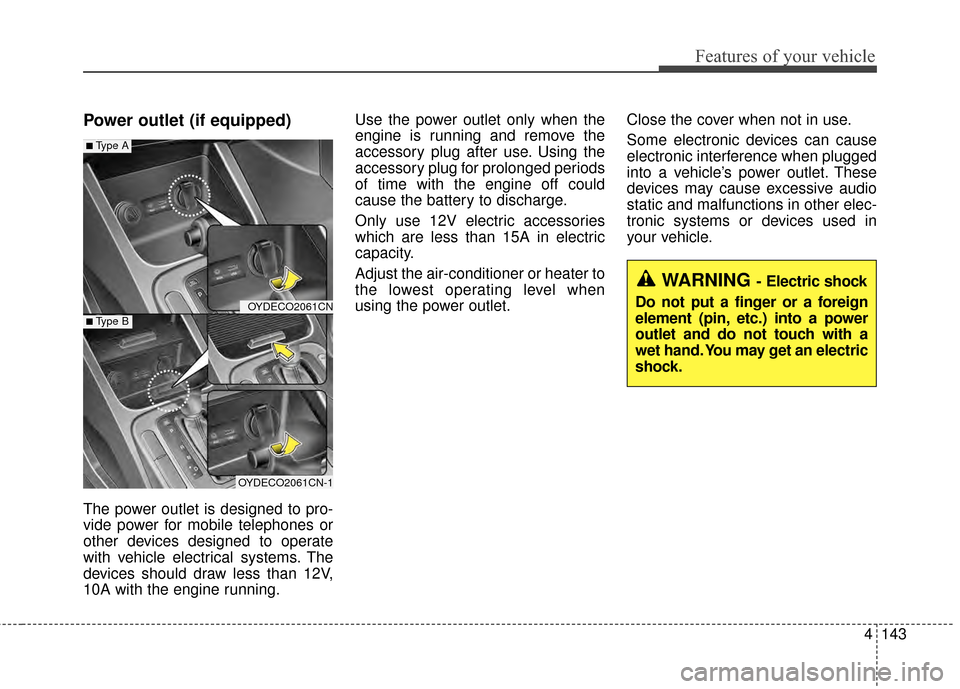
Power outlet (if equipped)
The power outlet is designed to pro-
vide power for mobile telephones or
other devices designed to operate
with vehicle electrical systems. The
devices should draw less than 12V,
10A with the engine running.Use the power outlet only when the
engine is running and remove the
accessory plug after use. Using the
accessory plug for prolonged periods
of time with the engine off could
cause the battery to discharge.
Only use 12V electric accessories
which are less than 15A in electric
capacity.
Adjust the air-conditioner or heater to
the lowest operating level when
using the power outlet.
Close the cover when not in use.
Some electronic devices can cause
electronic interference when plugged
into a vehicle’s power outlet. These
devices may cause excessive audio
static and malfunctions in other elec-
tronic systems or devices used in
your vehicle.
OYDECO2061CN
OYDECO2061CN-1
■Type A
■Type B
WARNING - Electric shock
Do not put a finger or a foreign
element (pin, etc.) into a power
outlet and do not touch with a
wet hand. You may get an electric
shock.
Page 215 of 452
Features of your vehicle
144
4
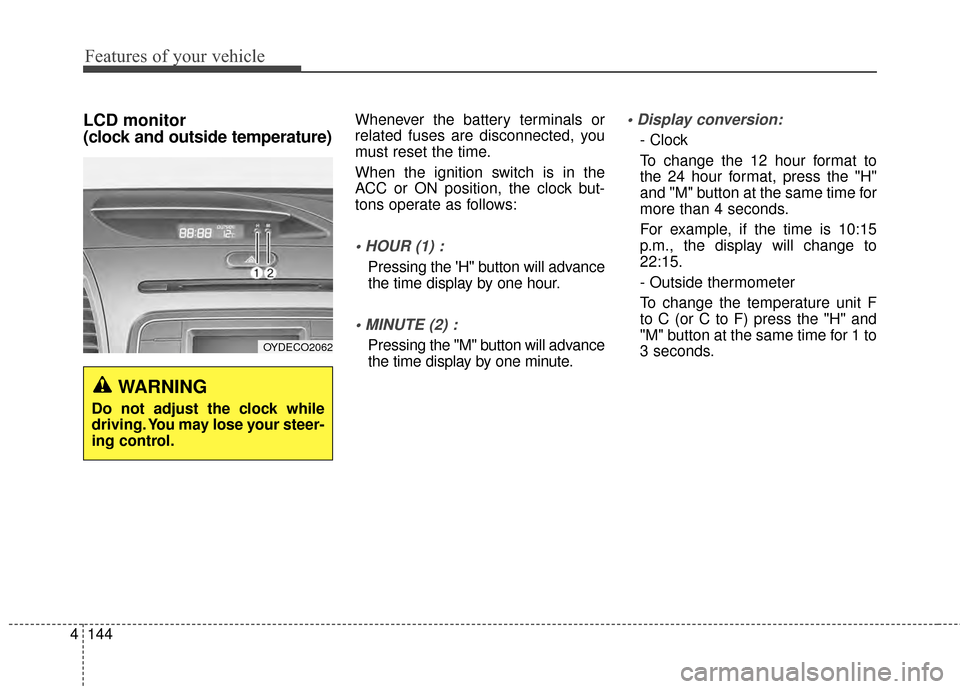
LCD monitor
(clock and outside temperature)Whenever the battery terminals or
related fuses are disconnected, you
must reset the time.
When the ignition switch is in the
ACC or ON position, the clock but-
tons operate as follows:
Pressing the 'H" button will advance
the time display by one hour.
Pressing the "M" button will advance
the time display by one minute.
- Clock
To change the 12 hour format to
the 24 hour format, press the "H"
and "M" button at the same time for
more than 4 seconds.
For example, if the time is 10:15
p.m., the display will change to
22:15.
- Outside thermometer
To change the temperature unit F
to C (or C to F) press the "H" and
"M" button at the same time for 1 to
3 seconds.
WARNING
Do not adjust the clock while
driving. You may lose your steer-
ing control.
OYDECO2062
Page 216 of 452
4145
Features of your vehicle
Clothes hanger (if equipped)
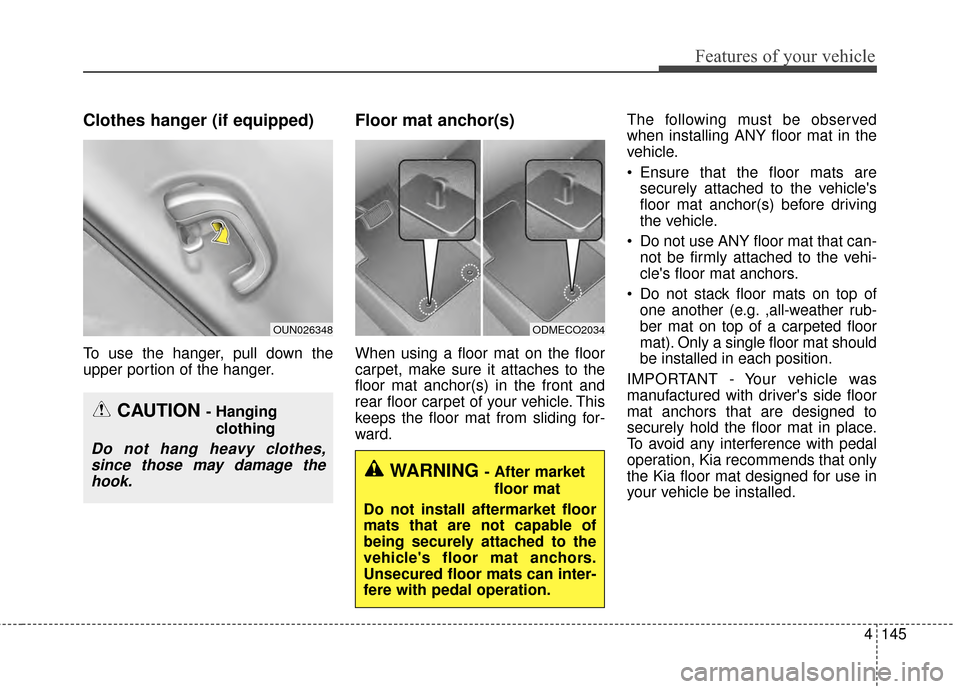
To use the hanger, pull down the
upper portion of the hanger.
Floor mat anchor(s)
When using a floor mat on the floor
carpet, make sure it attaches to the
floor mat anchor(s) in the front and
rear floor carpet of your vehicle. This
keeps the floor mat from sliding for-
ward.The following must be observed
when installing ANY floor mat in the
vehicle.
Ensure that the floor mats are
securely attached to the vehicle's
floor mat anchor(s) before driving
the vehicle.
Do not use ANY floor mat that can- not be firmly attached to the vehi-
cle's floor mat anchors.
Do not stack floor mats on top of one another (e.g. ,all-weather rub-
ber mat on top of a carpeted floor
mat). Only a single floor mat should
be installed in each position.
IMPORTANT - Your vehicle was
manufactured with driver's side floor
mat anchors that are designed to
securely hold the floor mat in place.
To avoid any interference with pedal
operation, Kia recommends that only
the Kia floor mat designed for use in
your vehicle be installed.
OUN026348
CAUTION - Hanging clothing
Do not hang heavy clothes,since those may damage thehook.
ODMECO2034
WARNING - After market
floor mat
Do not install aftermarket floor
mats that are not capable of
being securely attached to the
vehicle's floor mat anchors.
Unsecured floor mats can inter-
fere with pedal operation.
Page 217 of 452
Features of your vehicle
146
4
Navigation system (if equipped)
The navigation system identifies the
present position of our vehicle by
using GPS information and can help
guide you to a selected destination.
Detailed information for the naviga-
tion system is described in a sepa-
rately supplied manual.
Page 218 of 452
4147
Features of your vehicle
✽
✽NOTICE
If you install an after market HID
head lamp, your vehicle’s audio and
electronic device may malfunction.
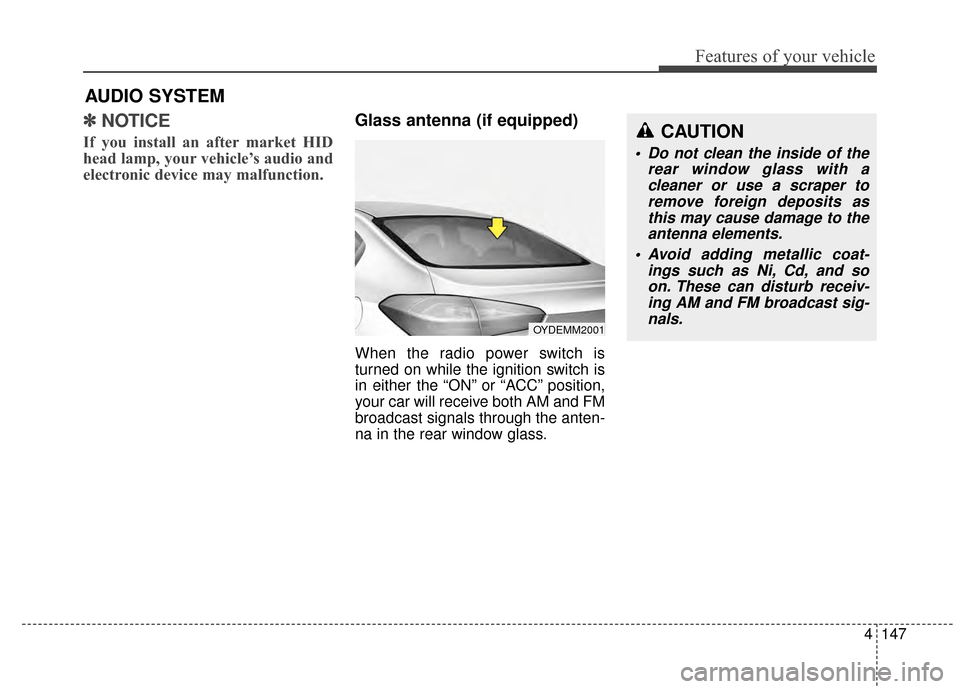
Glass antenna (if equipped)
When the radio power switch is
turned on while the ignition switch is
in either the “ON” or “ACC” position,
your car will receive both AM and FM
broadcast signals through the anten-
na in the rear window glass.
AUDIO SYSTEM
CAUTION
• Do not clean the inside of the
rear window glass with acleaner or use a scraper toremove foreign deposits asthis may cause damage to theantenna elements.
Avoid adding metallic coat- ings such as Ni, Cd, and soon. These can disturb receiv-ing AM and FM broadcast sig-nals.
OYDEMM2001
Page 219 of 452
Features of your vehicle
148
4
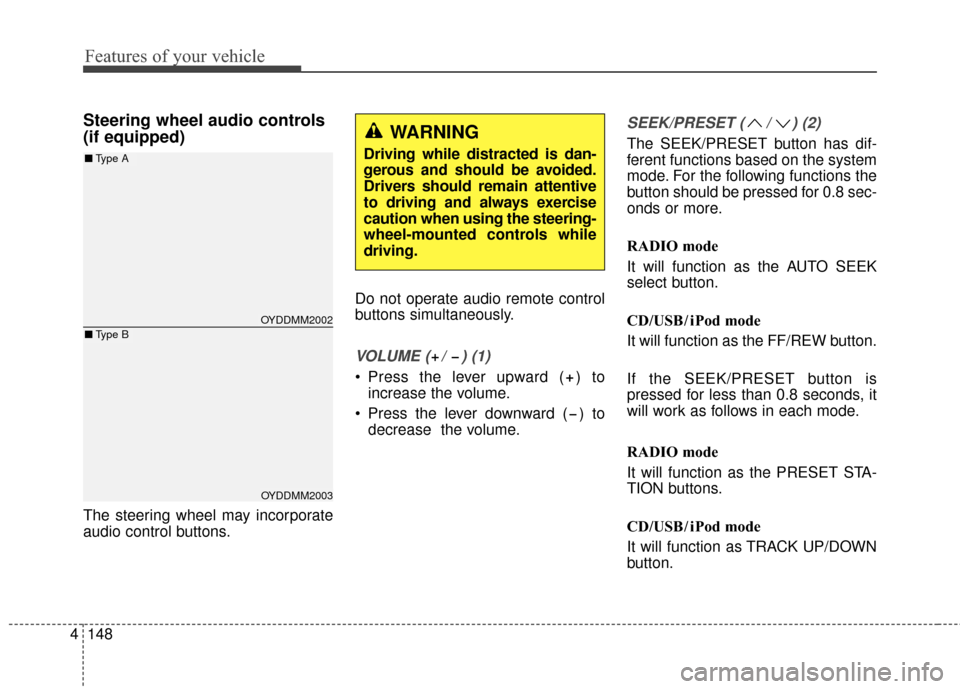
Steering wheel audio controls
(if equipped)
The steering wheel may incorporate
audio control buttons. Do not operate audio remote control
buttons simultaneously.
VOLUME ( / ) (1)
Press the lever upward ( ) to
increase the volume.
Press the lever downward ( ) to decrease the volume.
SEEK/PRESET ( / ) (2)
The SEEK/PRESET button has dif-
ferent functions based on the system
mode. For the following functions the
button should be pressed for 0.8 sec-
onds or more.
RADIO mode
It will function as the AUTO SEEK
select button.
CD/USB/ iPod mode
It will function as the FF/REW button.
If the SEEK/PRESET button is
pressed for less than 0.8 seconds, it
will work as follows in each mode.
RADIO mode
It will function as the PRESET STA-
TION buttons.
CD/USB/ iPod mode
It will function as TRACK UP/DOWN
button.
OYDDMM2002
OYDDMM2003
■ Type A
■Type B
WARNING
Driving while distracted is dan-
gerous and should be avoided.
Drivers should remain attentive
to driving and always exercise
caution when using the steering-
wheel-mounted controls while
driving.
Page 220 of 452
4149
Features of your vehicle
MODE (3)
Press the button to change audio
source.
FM(1~2)
➟AM➟SAT(1~3)➟CD➟USB
AUX(iPod)
➟FM...
In addition to mode change, Power
on/off can be made by pressing this
button when the ignition switch is on
ACC or ON.
- Power ON: Press the button when the audio is off
- Power OFF: Press the button for more than 0.8 seconds when the
audio is on.
MUTE (4, if equipped)
Press the button to mute thesound.
Press the button to turn off the microphone during a telephone
call.
Detailed information for audio control
buttons are described in the following
pages in this chapter.
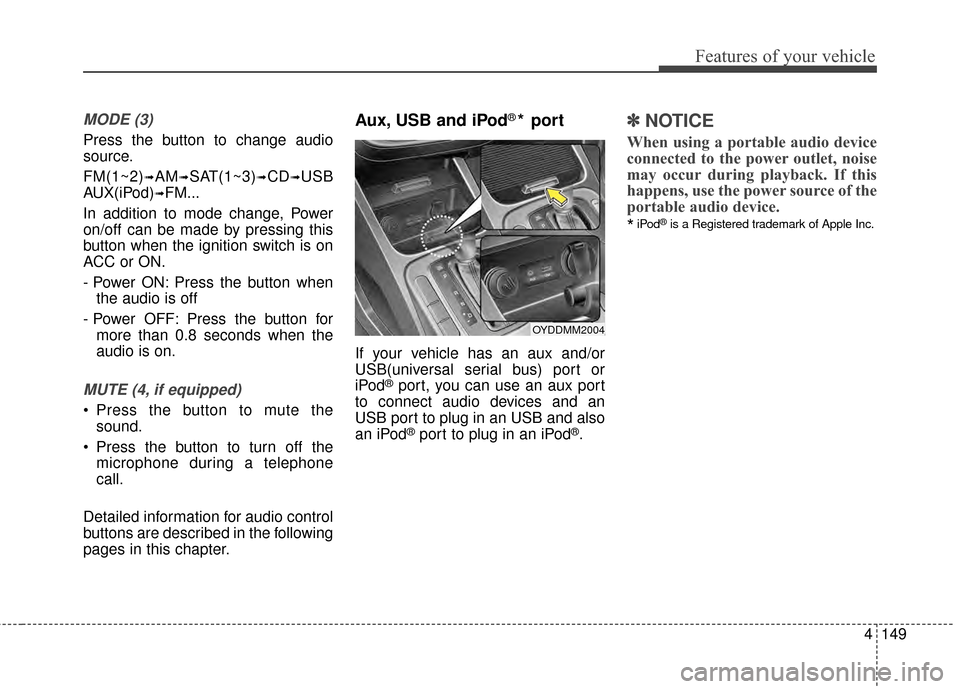
Aux, USB and iPod®* port
If your vehicle has an aux and/or
USB(universal serial bus) port or
iPod
®port, you can use an aux port
to connect audio devices and an
USB port to plug in an USB and also
an iPod
®port to plug in an iPod®.
✽ ✽ NOTICE
When using a portable audio device
connected to the power outlet, noise
may occur during playback. If this
happens, use the power source of the
portable audio device.
*iPod®is a Registered trademark of Apple Inc.
OYDDMM2004