instrument cluster KIA FORTE 2019 Owners Manual
[x] Cancel search | Manufacturer: KIA, Model Year: 2019, Model line: FORTE, Model: KIA FORTE 2019Pages: 550, PDF Size: 11.66 MB
Page 15 of 550
25
Your vehicle at a glance
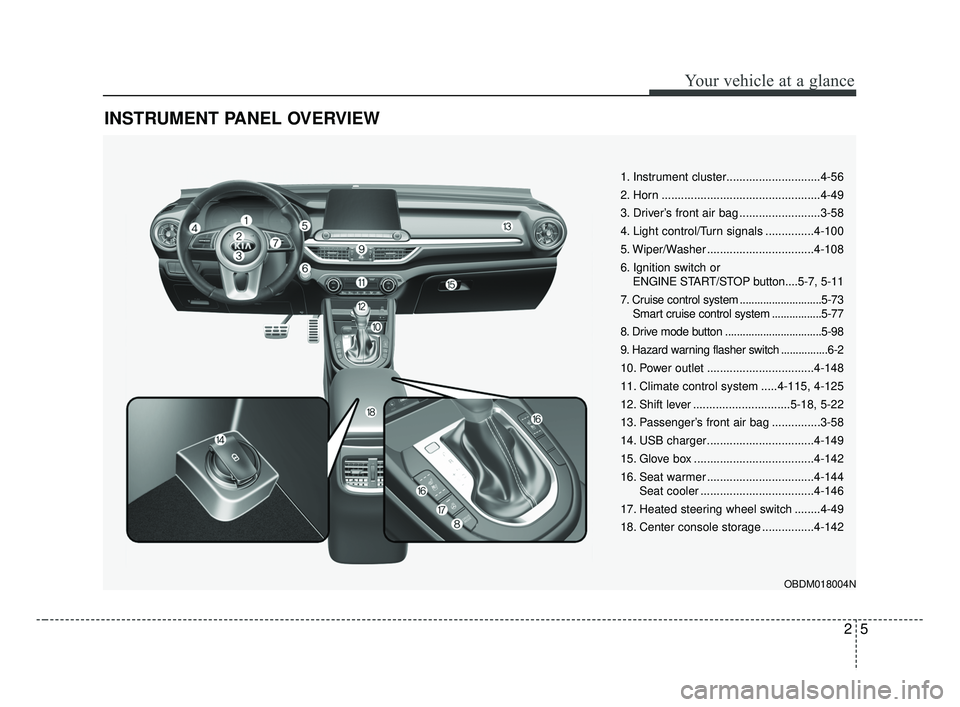
INSTRUMENT PANEL OVERVIEW
OBDM018004N
1. Instrument cluster.............................4-56
2. Horn .................................................4-49
3. Driver’s front air bag .........................3-58
4. Light control/Turn signals ...............4-100
5. Wiper/Washer .................................4-108
6. Ignition switch or ENGINE START/STOP button....5-7, 5-11
7. Cruise control system ............................5-73 Smart cruise control system .................5-77
8. Drive mode button .................................5-98
9. Hazard warning flasher switch ................6-2
10. Power outlet .................................4-148
11. Climate control system .....4-115, 4-125
12. Shift lever ..............................5-18, 5-22
13. Passenger’s front air bag ...............3-58
14. USB charger.................................4-149
15. Glove box .....................................4-142
16. Seat warmer .................................4-144 Seat cooler ...................................4-146
17. Heated steering wheel switch ........4-49
18. Center console storage ................4-142
BDm CAN (ENG) 2.qxp 6/30/2018 1:39 PM Page 5
Page 87 of 550
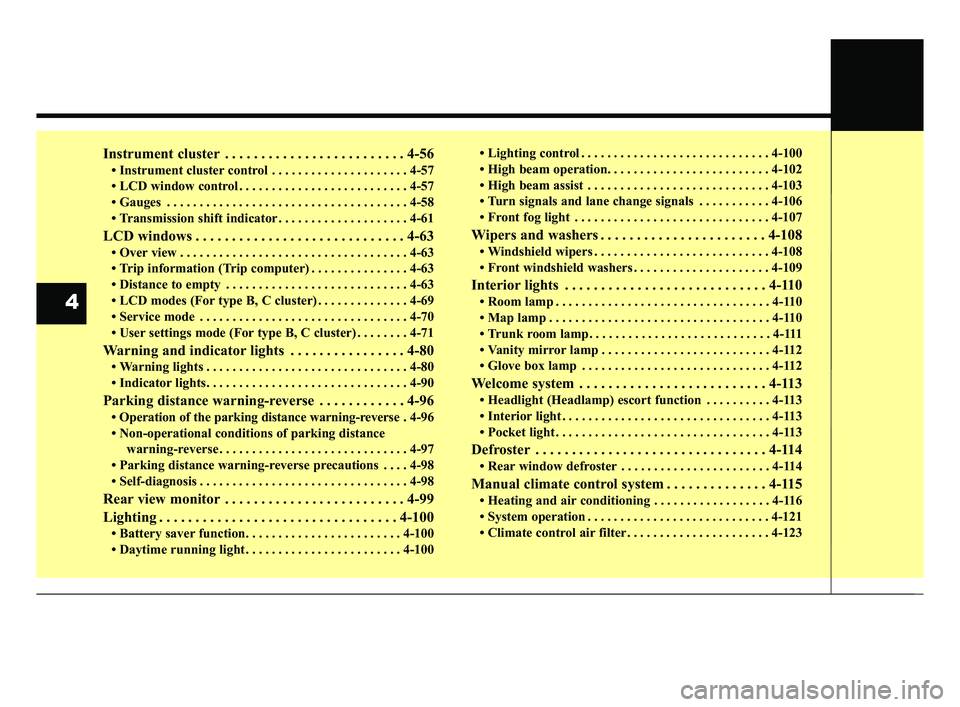
Instrument cluster . . . . . . . . . . . . . . . . . . . . . . . . . 4-56
• Instrument cluster control . . . . . . . . . . . . . . . . . . . . . 4-57
• LCD window control . . . . . . . . . . . . . . . . . . . . . . . . . . 4-57
• Gauges . . . . . . . . . . . . . . . . . . . . . . . . . . . . . . . . . . . . \
. 4-58
• Transmission shift indicator . . . . . . . . . . . . . . . . . . . . 4-61
LCD windows . . . . . . . . . . . . . . . . . . . . . . . . . . . . . 4-63
• Over view . . . . . . . . . . . . . . . . . . . . . . . . . . . . . . . . . . . 4-\
63
• Trip information (Trip computer) . . . . . . . . . . . . . . . 4-63
• Distance to empty . . . . . . . . . . . . . . . . . . . . . . . . . . . . 4-63
• LCD modes (For type B, C cluster) . . . . . . . . . . . . . . 4-69
• Service mode . . . . . . . . . . . . . . . . . . . . . . . . . . . . . . . . 4-70
• User settings mode (For type B, C cluster) . . . . . . . . 4-71
Warning and indicator lights . . . . . . . . . . . . . . . . 4-80
• Warning lights . . . . . . . . . . . . . . . . . . . . . . . . . . . . . . . 4-80
• Indicator lights. . . . . . . . . . . . . . . . . . . . . . . . . . . . . . . 4-90
Parking distance warning-reverse . . . . . . . . . . . . 4-96
• Operation of the parking distance warning-reverse. 4-96
• Non-operational conditions of parking distance warning-reverse . . . . . . . . . . . . . . . . . . . . . . . . . . . . . 4-97
• Parking distance warning-reverse precautions . . . . 4-98
• Self-diagnosis . . . . . . . . . . . . . . . . . . . . . . . . . . . . . . . . 4-98
Rear view monitor . . . . . . . . . . . . . . . . . . . . . . . . . 4-99
Lighting . . . . . . . . . . . . . . . . . . . . . . . . . . . . . . . . . 4-100
• Battery saver function. . . . . . . . . . . . . . . . . . . . . . . . 4-100
• Daytime running light . . . . . . . . . . . . . . . . . . . . . . . . 4-100 • Lighting control . . . . . . . . . . . . . . . . . . . . . . . . . . . . . 4-100
• High beam operation. . . . . . . . . . . . . . . . . . . . . . . . . 4-102
• High beam assist . . . . . . . . . . . . . . . . . . . . . . . . . . . . 4-103
• Turn signals and lane change signals . . . . . . . . . . . 4-106
• Front fog light . . . . . . . . . . . . . . . . . . . . . . . . . . . . . . 4-107
Wipers and washers . . . . . . . . . . . . . . . . . . . . . . . 4-108
• Windshield wipers . . . . . . . . . . . . . . . . . . . . . . . . . . . 4-108
• Front windshield washers . . . . . . . . . . . . . . . . . . . . . 4-109
Interior lights . . . . . . . . . . . . . . . . . . . . . . . . . . . . 4-110
• Room lamp . . . . . . . . . . . . . . . . . . . . . . . . . . . . . . . . . 4-110
• Map lamp . . . . . . . . . . . . . . . . . . . . . . . . . . . . . . . . . . 4-110
• Trunk room lamp. . . . . . . . . . . . . . . . . . . . . . . . . . . . 4-111
• Vanity mirror lamp . . . . . . . . . . . . . . . . . . . . . . . . . . 4-112
• Glove box lamp . . . . . . . . . . . . . . . . . . . . . . . . . . . . . 4-112
Welcome system . . . . . . . . . . . . . . . . . . . . . . . . . . 4-113
• Headlight (Headlamp) escort function . . . . . . . . . . 4-113
• Interior light . . . . . . . . . . . . . . . . . . . . . . . . . . . . . . . . 4-113
• Pocket light . . . . . . . . . . . . . . . . . . . . . . . . . . . . . . . . . 4-113
Defroster . . . . . . . . . . . . . . . . . . . . . . . . . . . . . . . . 4-114
• Rear window defroster . . . . . . . . . . . . . . . . . . . . . . . 4-114
Manual climate control system . . . . . . . . . . . . . . 4-115
• Heating and air conditioning . . . . . . . . . . . . . . . . . . 4-116
• System operation . . . . . . . . . . . . . . . . . . . . . . . . . . . . 4-121
• Climate control air filter . . . . . . . . . . . . . . . . . . . . . . 4-123
4
BDm CAN (ENG) 4.qxp 7/4/2018 10:03 AM Page 2
Page 139 of 550
Features of your vehicle
54
4
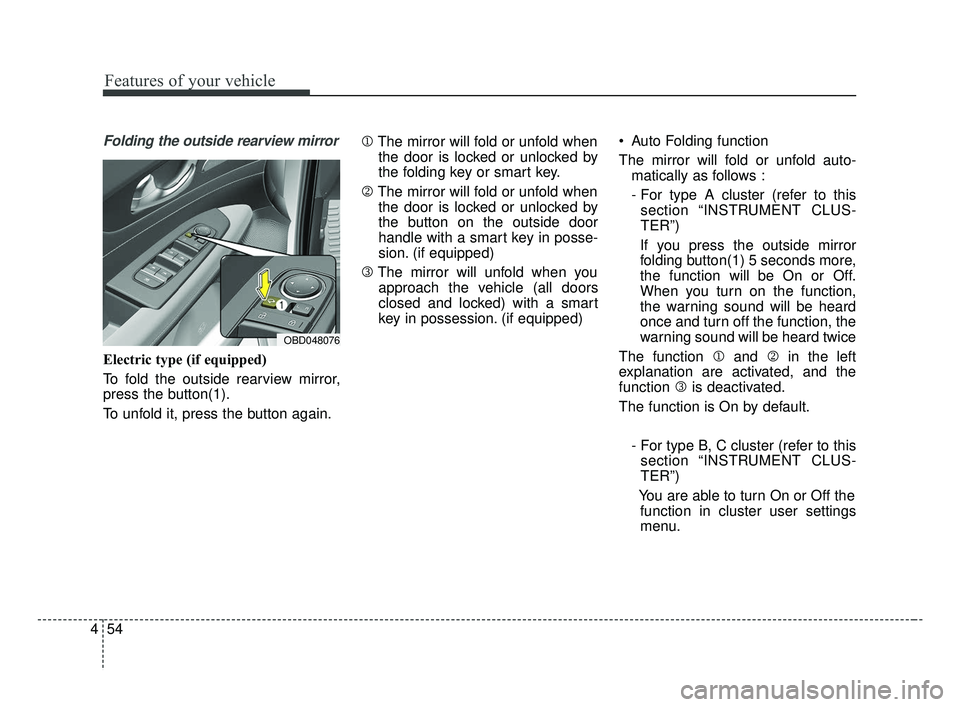
Folding the outside rearview mirror
Electric type (if equipped)
To fold the outside rearview mirror,
press the button(1).
To unfold it, press the button again. 1
The mirror will fold or unfold when
the door is locked or unlocked by
the folding key or smart key.
2 The mirror will fold or unfold when
the door is locked or unlocked by
the button on the outside door
handle with a smart key in posse-
sion. (if equipped)
3 The mirror will unfold when you
approach the vehicle (all doors
closed and locked) with a smart
key in possession. (if equipped) Auto Folding function
The mirror will fold or unfold auto-
matically as follows :
- For type A cluster (refer to thissection “INSTRUMENT CLUS-
TER”)
If you press the outside mirror
folding button(1) 5 seconds more,
the function will be On or Off.
When you turn on the function,
the warning sound will be heard
once and turn off the function, the
warning sound will be heard twice
The function 1 and 2in the left
explanation are activated, and the
function 3is deactivated.
The function is On by default.
- For type B, C cluster (refer to thissection “INSTRUMENT CLUS-
TER”)
You are able to turn On or Off the function in cluster user settings
menu.
OBD048076
BDm CAN (ENG) 4.qxp 7/4/2018 10:05 AM Page 54
Page 141 of 550
Features of your vehicle
56
4
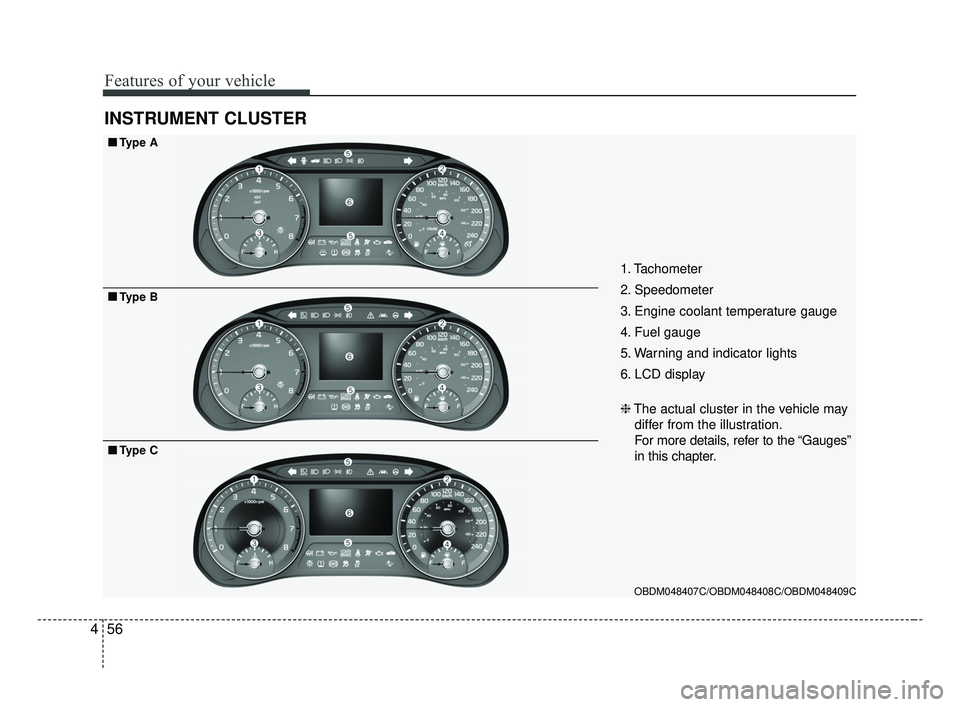
INSTRUMENT CLUSTER
1. Tachometer
2. Speedometer
3. Engine coolant temperature gauge
4. Fuel gauge
5. Warning and indicator lights
6. LCD display
OBDM048407C/OBDM048408C/OBDM048409C
■ ■
Type A
❈ The actual cluster in the vehicle may
differ from the illustration.
For more details, refer to the “Gauges”
in this chapter.
■ ■ Type B
■ ■Type C
BDm CAN (ENG) 4.qxp 7/4/2018 10:05 AM Page 56
Page 142 of 550
457
Features of your vehicle
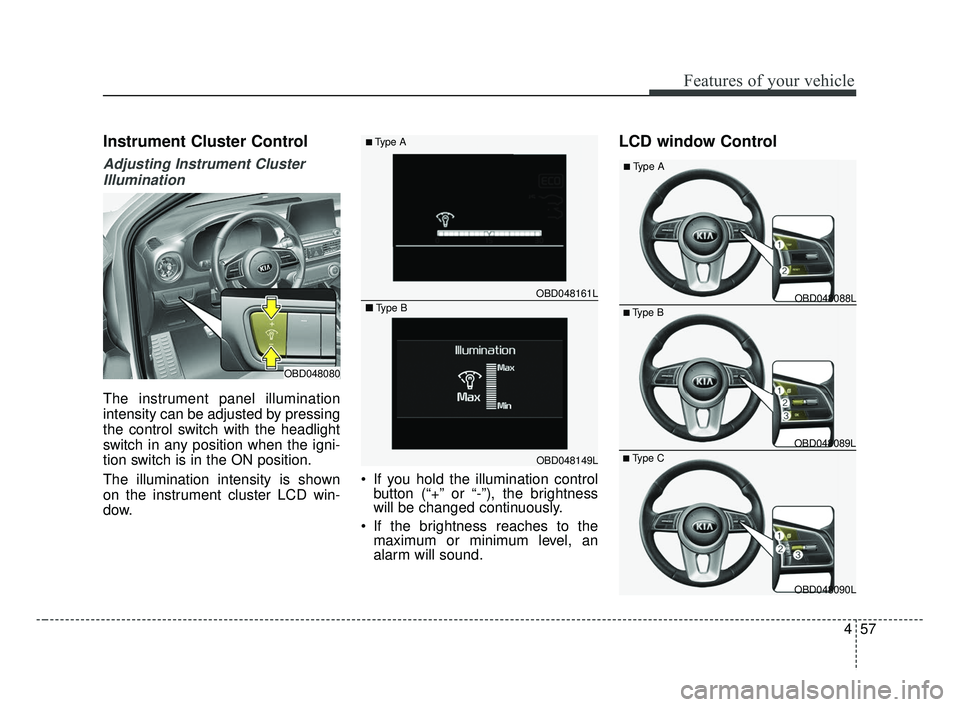
Instrument Cluster Control
Adjusting Instrument ClusterIllumination
The instrument panel illumination
intensity can be adjusted by pressing
the control switch with the headlight
switch in any position when the igni-
tion switch is in the ON position.
The illumination intensity is shown
on the instrument cluster LCD win-
dow. If you hold the illumination control
button (“+” or “-”), the brightness
will be changed continuously.
If the brightness reaches to the maximum or minimum level, an
alarm will sound.
LCD window Control
OBD048080
OBD048149L
OBD048161L
■Type A
■
Type BOBD048088L
OBD048089L
OBD048090L
■Type B
■Type A
■Type C
BDm CAN (ENG) 4.qxp 7/4/2018 10:06 AM Page 57
Page 160 of 550
475
Features of your vehicle
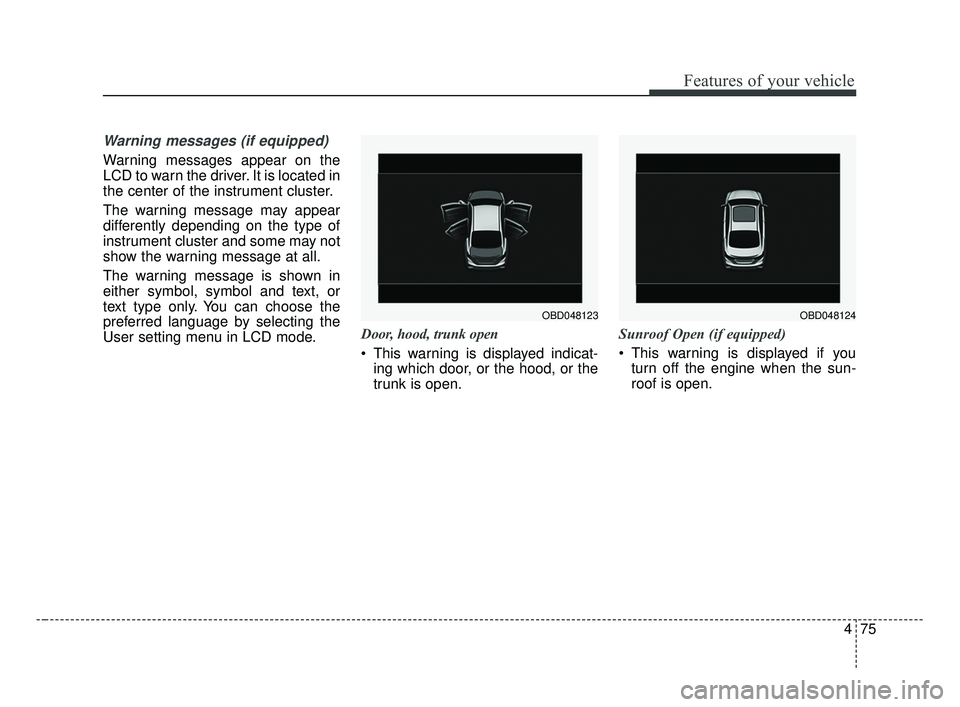
Warning messages (if equipped)
Warning messages appear on the
LCD to warn the driver. It is located in
the center of the instrument cluster.
The warning message may appear
differently depending on the type of
instrument cluster and some may not
show the warning message at all.
The warning message is shown in
either symbol, symbol and text, or
text type only. You can choose the
preferred language by selecting the
User setting menu in LCD mode.Door, hood, trunk open
This warning is displayed indicat-
ing which door, or the hood, or the
trunk is open. Sunroof Open (if equipped)
This warning is displayed if you
turn off the engine when the sun-
roof is open.
OBD048124OBD048123
BDm CAN (ENG) 4.qxp 7/4/2018 10:07 AM Page 75
Page 236 of 550
4151
Features of your vehicle
Wireless smart phone charging
1. Remove any object on the smartphone charging pad including the
smart key. If there is any foreign
object on the pad other than a
smart phone, the wireless charging
function may not operate properly.
2. Place the smart phone on the cen- ter of the wireless charging pad.
3. The indicator light will change to orange once the wireless charging
begins. After the charging is com-
plete, the orange light will change
to green.
4. You can choose to turn the wireless charging function to either ON or
OFF by selecting the USM on the
instrument cluster. (Please refer to
“Instrument Cluster” for details).
If the wireless charging does not
work, gently move your smart phone
around the pad until the charging indi-
cator light turns yellow. Depending on
the smart phone, the charging indica-
tor light may not turn green even after
the charging is complete. If the wireless charging is not func-
tioning properly, the orange light will
blink and flash for ten seconds then
turn off. In such cases, remove the
smart phone from the pad and
replace it on the pad again, or double
check the charging status.
If you leave the smart phone on the
charging pad when the vehicle igni-
tion is in OFF, the vehicle will alert
you through warning messages and
sound (applicable for vehicles with
voice guidance function) after the
‘Good bye’ function on the instru-
ment cluster ends.WARNING - Distracted
driving
Driving while distracted can
result in a loss of vehicle con-
trol that may lead to an acci-
dent, severe personal injury,
and death. The driver’s primary
responsibility is in the safe and
legal operation of a vehicle, and
use of any handheld devices,
other equipment, or vehicle sys-
tems which take the driver’s
eyes, attention and focus away
from the safe operation of a
vehicle or which are not permis-
sible by law should never be
used during operation of the
vehicle.
BDm CAN (ENG) 4.qxp 7/4/2018 10:10 AM Page 151
Page 261 of 550
515
Driving your vehicle
Starting the engine
1. Carry the smart key or place itinside the vehicle.
2. Make sure the parking brake is firmly applied.
3. Manual Transmission - Depress
the clutch pedal fully and shift the
transmission into Neutral. Keep the
clutch pedal and brake pedal
depressed while starting the
engine.
Intelligent Variable Transmission
- Place the transmission shift lever in
P (Park). Depress the brake pedal
fully.
You can also start the engine when the shift lever is in the N(Neutral) position.
4. Press the engine start/stop button.
It should be started without depress-ing the accelerator pedal.
5. Do not wait for the engine to warm
up while the vehicle remains sta-
tionary. Start driving at moderate
engine speeds. (Steep accelerat-
ing and decelerating should be
avoided.)
Starting and stopping the engine
for turbocharger intercooler
1. Do not race or accelerate the engine immediately after starting.
If the engine is cold, idle for sever-
al seconds before sufficient lubri-
cation is ensured in the tur-
bocharger unit.
2. After high speed or extended driv- ing, requiring a heavy engine load,
idle the engine about 1 minute
before turning it off.
This idle time will allow the tur- bocharger to cool prior to shutting
the engine off.
Starting the engine with smart key
Even if the smart key is in the vehi- cle, if it is far away from you, the
engine may not start.
When the engine start/stop button is in the ACC position or above, if
any door is opened, the system
checks for the smart key. If the
smart key is not in the vehicle, the
“ ” indicator and a message
“Key is not in the vehicle” will appear
on the instrument cluster and LCD
window. And if all doors are closed,
the chime will sound for 5 seconds.
The indicator or warning will turn off
while the vehicle is moving. Always
have the smart key with you.
CAUTION
Do not turn the engine off imme-diately after it has been subject-ed to a heavy load. Doing somay cause severe damage tothe engine or turbocharger unit.
BDm CAN (ENG) 5.QXP 7/4/2018 10:13 AM Page 15
Page 288 of 550
Driving your vehicle
42
5
✽ ✽
NOTICE
• When operating the vehicle on a
dynamometer, ensure that the
ESC is turned off (ESC OFF light
illuminated). If the ESC is left on,
it may prevent the vehicle speed
from increasing, and result in false
diagnosis.
• Turning the ESC off does not affect ABS or brake system opera-
tion.
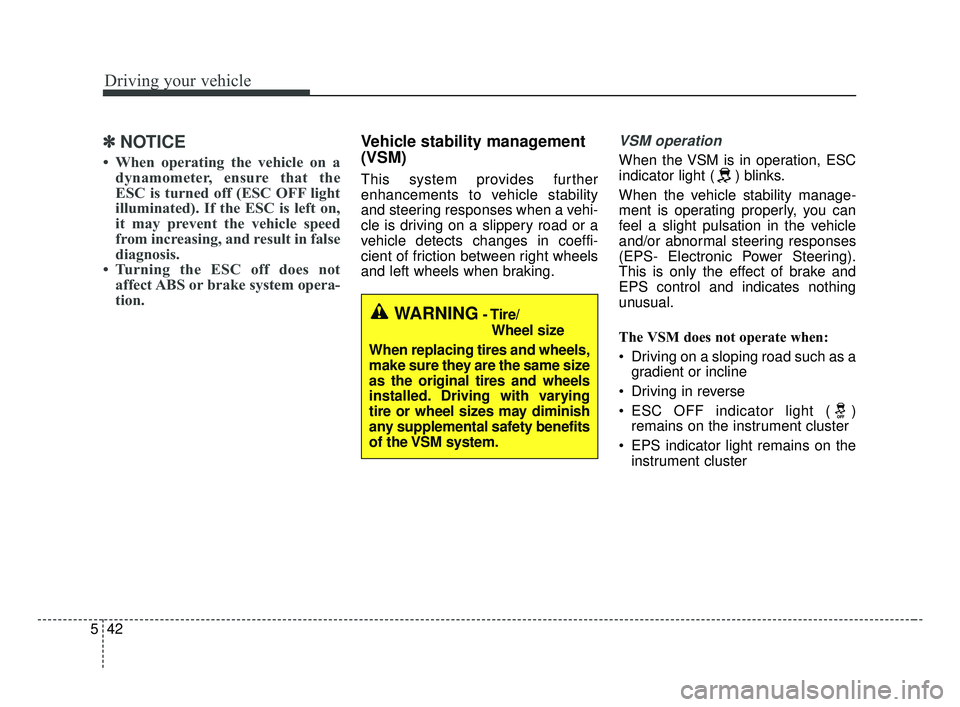
Vehicle stability management
(VSM)
This system provides further
enhancements to vehicle stability
and steering responses when a vehi-
cle is driving on a slippery road or a
vehicle detects changes in coeffi-
cient of friction between right wheels
and left wheels when braking.
VSM operation
When the VSM is in operation, ESC
indicator light ( ) blinks.
When the vehicle stability manage-
ment is operating properly, you can
feel a slight pulsation in the vehicle
and/or abnormal steering responses
(EPS- Electronic Power Steering).
This is only the effect of brake and
EPS control and indicates nothing
unusual.
The VSM does not operate when:
Driving on a sloping road such as a
gradient or incline
Driving in reverse
ESC OFF indicator light ( ) remains on the instrument cluster
EPS indicator light remains on the instrument cluster
WARNING- Tire/
Wheel size
When replacing tires and wheels,
make sure they are the same size
as the original tires and wheels
installed. Driving with varying
tire or wheel sizes may diminish
any supplemental safety benefits
of the VSM system.
BDm CAN (ENG) 5.QXP 7/4/2018 10:13 AM Page 42
Page 293 of 550
547
Driving your vehicle
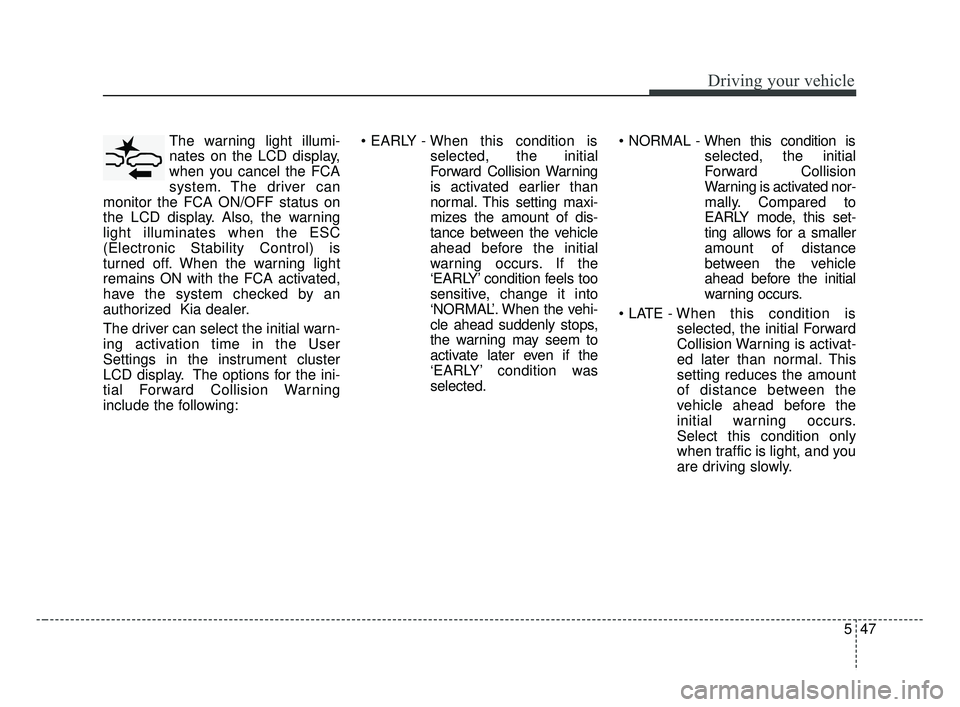
The warning light illumi-
nates on the LCD display,
when you cancel the FCA
system. The driver can
monitor the FCA ON/OFF status on
the LCD display. Also, the warning
light illuminates when the ESC
(Electronic Stability Control) is
turned off. When the warning light
remains ON with the FCA activated,
have the system checked by an
authorized Kia dealer.
The driver can select the initial warn-
ing activation time in the User
Settings in the instrument cluster
LCD display. The options for the ini-
tial Forward Collision Warning
include the following:
selected, the initial
Forward Collision Warning
is activated earlier than
normal. This setting maxi-
mizes the amount of dis-
tance between the vehicle
ahead before the initial
warning occurs. If the
‘EARLY’ condition feels too
sensitive, change it into
‘NORMAL’. When the vehi-
cle ahead suddenly stops,
the warning may seem to
activate later even if the
‘EARLY’ condition was
selected.
selected, the initial
Forward Collision
Warning is activated nor-
mally. Compared to
EARLY mode, this set-
ting allows for a smaller
amount of distance
between the vehicle
ahead before the initial
warning occurs.
selected, the initial Forward
Collision Warning is activat-
ed later than normal. This
setting reduces the amount
of distance between the
vehicle ahead before the
initial warning occurs.
Select this condition only
when traffic is light, and you
are driving slowly.
BDm CAN (ENG) 5.QXP 7/4/2018 10:13 AM Page 47