OBD port KIA FORTE 2020 Owner's Manual
[x] Cancel search | Manufacturer: KIA, Model Year: 2020, Model line: FORTE, Model: KIA FORTE 2020Pages: 568, PDF Size: 8.58 MB
Page 241 of 568

Features of your vehicle
156
4
AUX, USB port (if equipped)
You can use the AUX port to connect
audio devices and the USB port to
plug in a USB device or iPod
®.
✽ ✽
NOTICE
When using a portable audio device
connected to the power outlet, noise
may occur during playback. If this
happens, use the power source of the
portable audio device.
How vehicle audio works
AM and FM radio signals are broad-
cast from transmitter towers located
around your city. They are intercept-
ed by the radio antenna on your vehi-
cle. This signal is then received by
the radio and sent to your vehicle
speakers.
When a strong radio signal has
reached your vehicle, the precise
engineering of your audio system
ensures the best possible quality
reproduction. However, in some
cases the signal coming to your vehi-
cle may not be strong and clear. This can be due to many factors,
such as the distance from the radio
station, closeness of other strong
radio stations or the presence of
buildings, bridges or other large
obstructions in the area.
OBD048329JBM001
FM reception
Page 279 of 568
![KIA FORTE 2020 Owners Manual 533
Driving your vehicle
With the shift lever in the D position
The paddle shifter will operate when
the vehicle speed is more than 10
km/h (6.2 mph).
Pull the [+] or [-] paddle shifter once
to shift KIA FORTE 2020 Owners Manual 533
Driving your vehicle
With the shift lever in the D position
The paddle shifter will operate when
the vehicle speed is more than 10
km/h (6.2 mph).
Pull the [+] or [-] paddle shifter once
to shift](/img/2/40395/w960_40395-278.png)
533
Driving your vehicle
With the shift lever in the D position
The paddle shifter will operate when
the vehicle speed is more than 10
km/h (6.2 mph).
Pull the [+] or [-] paddle shifter once
to shift up or down one gear and the
system changes from automatic
mode to manual mode.
When the vehicle speed is lower than
10 km/h (6.2 mph), if you depress the
accelerator pedal for more than 5
seconds or if you move the shift lever
from D (Drive) to manual Mode and
move it from manual Mode to D
(Drive) again, the system changes
from manual mode to automatic
mode.
With the shift lever in the sports mode
Pull the [+] or [-] paddle shifter once
to shift up or down one gear.
✽ ✽NOTICE
If the [+] and [-] paddle shifters are
pulled at the same time, gear shift
may not occur.
Shift-lock override
If the shift lever cannot be moved
from the P (Park) position into the R
(Reverse) position with the brake
pedal depressed, continue depress-
ing the brake, then do the following: 1. Place the ignition switch in the
LOCK/OFF position.
2. Apply the parking brake.
3. Carefully remove the cap (1) cov- ering the shift-lock release access
hole.
4. Insert a tool (e.g. flathead screw- driver) into the access hole and
press down on the tool.
5. Move the shift lever.
6. Remove the tool from the shiftlock override access hole then install
the cap.
7. Have the system inspected by a professional workshop. Kia recom-
mends to visit an authorized Kia
dealer/service partner.
Ignition key interlock system
(if equipped)
The ignition key cannot be removed
unless the shift lever is in the P
(Park) position.
OBDM059006
■Type A
■Type B
OBDM059157
Page 284 of 568

Driving your vehicle
38
5
D (Drive)
This is the normal forward driving
position. The transmission will auto-
matically shift, providing the best fuel
economy and power.
For extra power when passing anoth-
er vehicle or climbing grades,
depress the accelerator fully, at which
time the transmission will automati-
cally downshift to the next lower gear.
✽ ✽
NOTICE
Always come to a complete stop
before shifting into D (Drive).
Sports mode
Whether the vehicle is stationary or in
motion, sports mode is selected by
pushing the shift lever from the D (Drive)
position into the manual gate. To return
to D (Drive) range operation, push the
shift lever back into the main gate.
SPORT mode manages the driving
dynamics by automatically adjusting the
steering effort and the engine and trans-
mission control logic for enhanced driv-
er performance.
OBD058007
S S
S S
p p
p p
o o
o o
r r
r r
t t
t t
s s
s s
m m
m m
o o
o o
d d
d d
e e
e e
WARNING
With the exception of parking
in neutral gear, always park
the vehicle in “P” (Park) for
safety and engage the parking
brake.
Before parking in “N” (Neutral) gear, first make sure the park-
ing ground is level and flat. Do
not park in “N” gear on any
slopes or gradients.
If parked and left in “N” on a
slope or gradient, the vehicle
may move and cause serious
damage and injury.
Page 336 of 568
Driving your vehicle
90
5
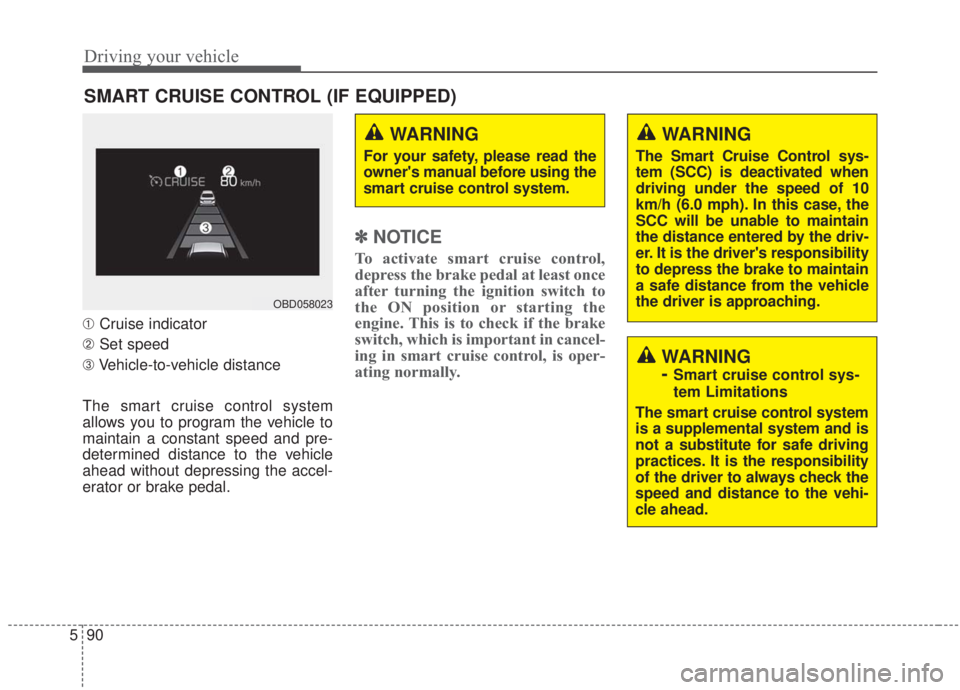
➀ Cruise indicator
➁ Set speed
\b Vehicle-to-vehicle distance
The smart cruise control system
allows you to program the vehicle to
maintain a constant speed and pre-
determined distance to the vehicle
ahead without depressing the accel-
erator or brake pedal.
✽ ✽ NOTICE
To activate smart cruise control,
depress the brake pedal at least once
after turning the ignition switch to
the ON position or starting the
engine. This is to check if the brake
switch, which is important in cancel-
ing in smart cruise control, is oper-
ating normally.
SMART CRUISE CONTROL (IF EQUIPPED)
WARNING
For your safety, please read the
owner's manual before using the
smart cruise control system.
WARNING
The Smart Cruise Control sys-
tem (SCC) is deactivated when
driving under the speed of 10
km/h (6.0 mph). In this case, the
SCC will be unable to maintain
the distance entered by the driv-
er. It is the driver's responsibility
to depress the brake to maintain
a safe distance from the vehicle
the driver is approaching.
WARNING
-
Smart cruise control sys-
tem Limitations
The smart cruise control system
is a supplemental system and is
not a substitute for safe driving
practices. It is the responsibility
of the driver to always check the
speed and distance to the vehi-
cle ahead.
OBD058023
Page 357 of 568
5111
Driving your vehicle
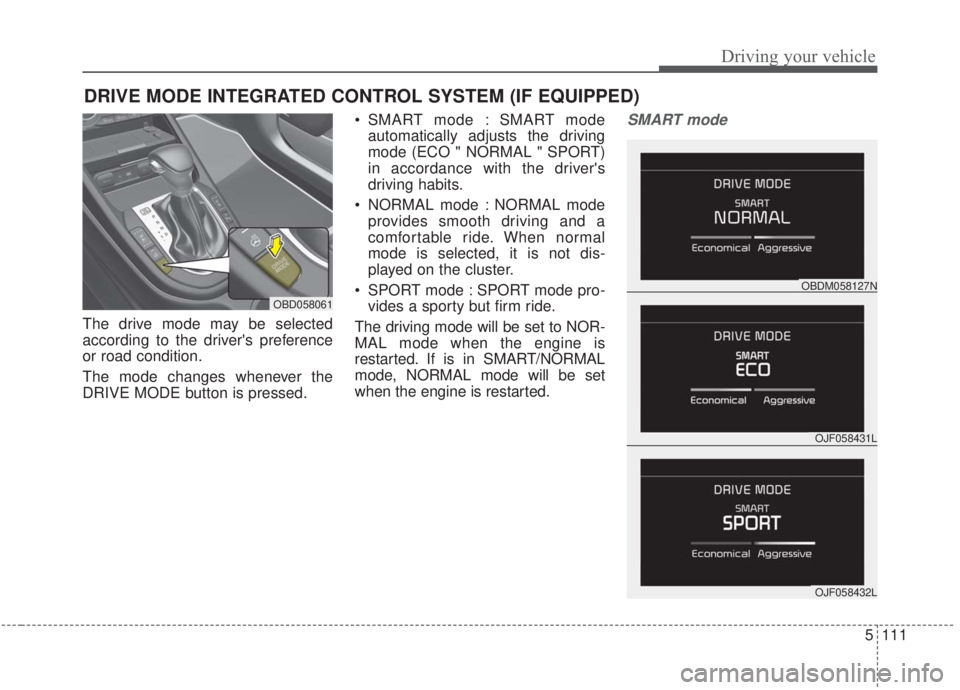
The drive mode may be selected
according to the driver's preference
or road condition.
The mode changes whenever the
DRIVE MODE button is pressed. SMART mode : SMART mode
automatically adjusts the driving
mode (ECO " NORMAL " SPORT)
in accordance with the driver's
driving habits.
NORMAL mode : NORMAL mode provides smooth driving and a
comfortable ride. When normal
mode is selected, it is not dis-
played on the cluster.
SPORT mode : SPORT mode pro- vides a sporty but firm ride.
The driving mode will be set to NOR-
MAL mode when the engine is
restarted. If is in SMART/NORMAL
mode, NORMAL mode will be set
when the engine is restarted.
SMART mode
DRIVE MODE INTEGRATED CONTROL SYSTEM (IF EQUIPPED)
OBD058061
OJF058431L
OBDM058127N
OJF058432L
Page 388 of 568
Driving your vehicle
142
5
The ESC system should be turned
OFF prior to rocking the vehicle.
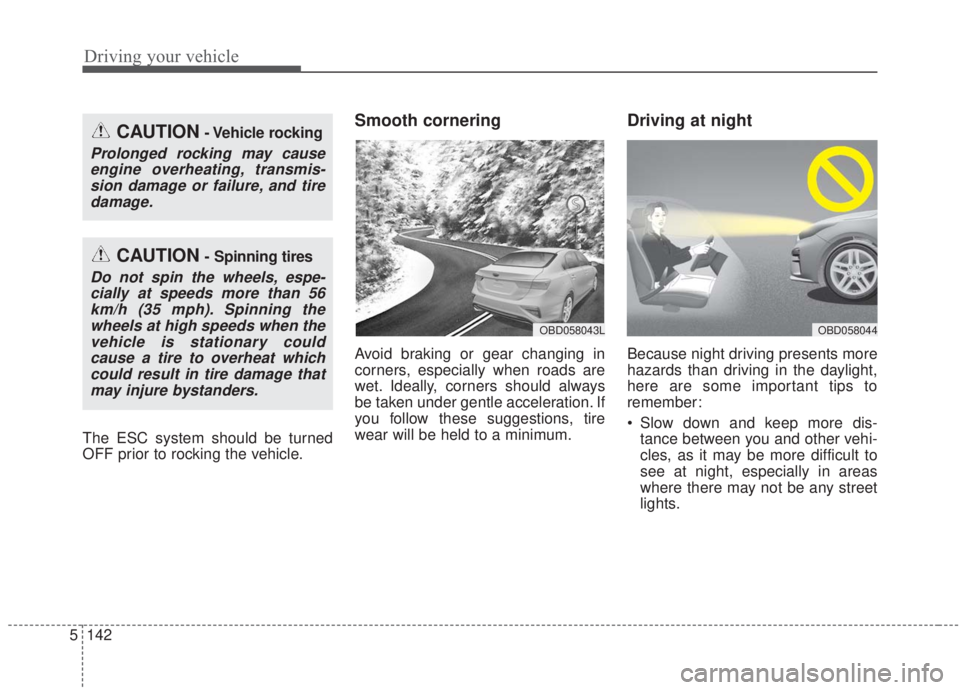
Smooth cornering
Avoid braking or gear changing in
corners, especially when roads are
wet. Ideally, corners should always
be taken under gentle acceleration. If
you follow these suggestions, tire
wear will be held to a minimum.
Driving at night
Because night driving presents more
hazards than driving in the daylight,
here are some important tips to
remember:
Slow down and keep more dis-
tance between you and other vehi-
cles, as it may be more difficult to
see at night, especially in areas
where there may not be any street
lights.
CAUTION- Vehicle rocking
Prolonged rocking may causeengine overheating, transmis-sion damage or failure, and tiredamage.
CAUTION- Spinning tires
Do not spin the wheels, espe-cially at speeds more than 56km/h (35 mph). Spinning thewheels at high speeds when thevehicle is stationary couldcause a tire to overheat whichcould result in tire damage thatmay injure bystanders.
OBD058043LOBD058044
Page 409 of 568

What to do in an emergency
10
6
✽ ✽
NOTICE
If the TPMS, Low Tire Pressure
indicator does not illuminate for 3
seconds when the ignition switch is
turned to the ON position, or if it
they remain illuminated after com-
ing on for approximately 3 seconds,
take your vehicle to your nearest
authorized Kia dealer and have the
system checked.
Low tire pressure
telltale
Low tire pressure position tell-
tale
When the tire pressure monitoring
system warning indicators are illumi-
nated, one or more of your tires is
significantly under-inflated.
If the telltale illuminates, immediately
reduce your speed, avoid hard cor-
nering and anticipate increased stop-
ping distances. You should stop and
check your tires as soon as possible. Inflate the tires to the proper pres-
sure as indicated on the vehicle’s
placard or tire inflation pressure label
located on the driver’s side center pil-
lar outer panel. If you cannot reach a
service station or if the tire cannot
hold the newly added air, replace the
low pressure tire with the spare tire.
Then the TPMS malfunction indicator
and the Low Tire Pressure telltale
may turn on and illuminate after
restarting and for about 20 minutes
of continuous driving before you
have the low pressure tire repaired
and replaced on the vehicle.
In winter or cold weather, the low tire
pressure telltale may be illuminated if
the tire pressure was adjusted to the
recommended tire inflation pressure
in warm weather. It does not mean
your TPMS is malfunctioning
because the decreased temperature
leads to a proportional lowering of
tire pressure.
OBDM068035
Page 413 of 568
What to do in an emergency
14
6
IF YOU HAVE A FLAT TIRE
Jack and tools (if equipped)
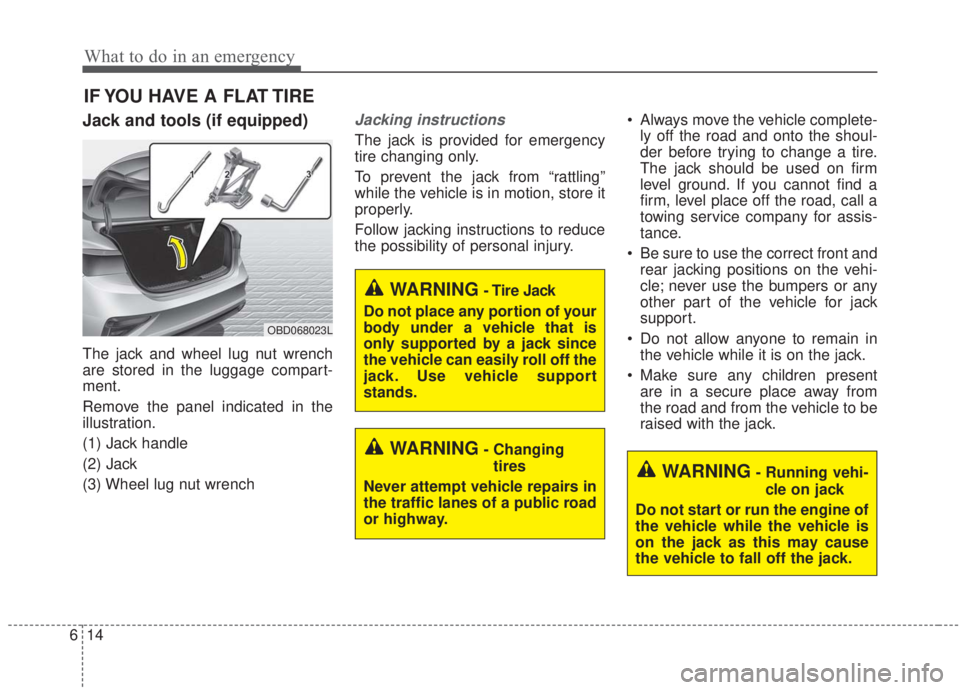
The jack and wheel lug nut wrench
are stored in the luggage compart-
ment.
Remove the panel indicated in the
illustration.
(1) Jack handle
(2) Jack
(3) Wheel lug nut wrench
Jacking instructions
The jack is provided for emergency
tire changing only.
To prevent the jack from “rattling”
while the vehicle is in motion, store it
properly.
Follow jacking instructions to reduce
the possibility of personal injury. Always move the vehicle complete-
ly off the road and onto the shoul-
der before trying to change a tire.
The jack should be used on firm
level ground. If you cannot find a
firm, level place off the road, call a
towing service company for assis-
tance.
Be sure to use the correct front and rear jacking positions on the vehi-
cle; never use the bumpers or any
other part of the vehicle for jack
support.
Do not allow anyone to remain in the vehicle while it is on the jack.
Make sure any children present are in a secure place away from
the road and from the vehicle to be
raised with the jack.
WARNING- Changing
tires
Never attempt vehicle repairs in
the traffic lanes of a public road
or highway.
OBD068023L
WARNING- Tire Jack
Do not place any portion of your
body under a vehicle that is
only supported by a jack since
the vehicle can easily roll off the
jack. Use vehicle support
stands.
WARNING- Running vehi- cle on jack
Do not start or run the engine of
the vehicle while the vehicle is
on the jack as this may cause
the vehicle to fall off the jack.
Page 435 of 568
What to do in an emergency
36
6
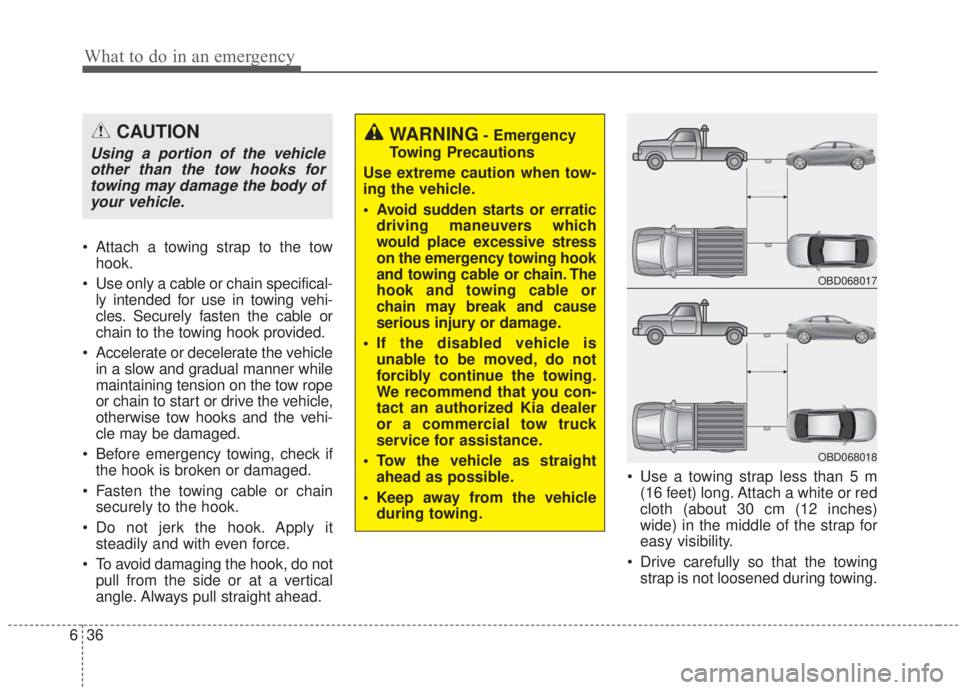
Attach a towing strap to the tow
hook.
Use only a cable or chain specifical- ly intended for use in towing vehi-
cles. Securely fasten the cable or
chain to the towing hook provided.
Accelerate or decelerate the vehicle in a slow and gradual manner while
maintaining tension on the tow rope
or chain to start or drive the vehicle,
otherwise tow hooks and the vehi-
cle may be damaged.
Before emergency towing, check if the hook is broken or damaged.
Fasten the towing cable or chain securely to the hook.
Do not jerk the hook. Apply it steadily and with even force.
To avoid damaging the hook, do not pull from the side or at a vertical
angle. Always pull straight ahead. Use a towing strap less than 5 m
(16 feet) long. Attach a white or red
cloth (about 30 cm (12 inches)
wide) in the middle of the strap for
easy visibility.
Drive carefully so that the towing strap is not loosened during towing.
CAUTION
Using a portion of the vehicleother than the tow hooks fortowing may damage the body ofyour vehicle.
WARNING- Emergency
Towing Precautions
Use extreme caution when tow-
ing the vehicle.
Avoid sudden starts or erratic driving maneuvers which
would place excessive stress
on the emergency towing hook
and towing cable or chain. The
hook and towing cable or
chain may break and cause
serious injury or damage.
If the disabled vehicle is unable to be moved, do not
forcibly continue the towing.
We recommend that you con-
tact an authorized Kia dealer
or a commercial tow truck
service for assistance.
Tow the vehicle as straight ahead as possible.
Keep away from the vehicle during towing.
OBD068017
OBD068018
Page 474 of 568
737
Maintenance
CLIMATE CONTROL AIR FILTER
Filter inspection
The climate control air filter should
be replaced according to the
Maintenance Schedule. If the vehicle
is operated in severely air-polluted
cities or on dusty rough roads for a
long period, it should be inspected
more frequently and replaced earlier.
When you replace the climate control
air filter, replace it performing the fol-
lowing procedure, and be careful to
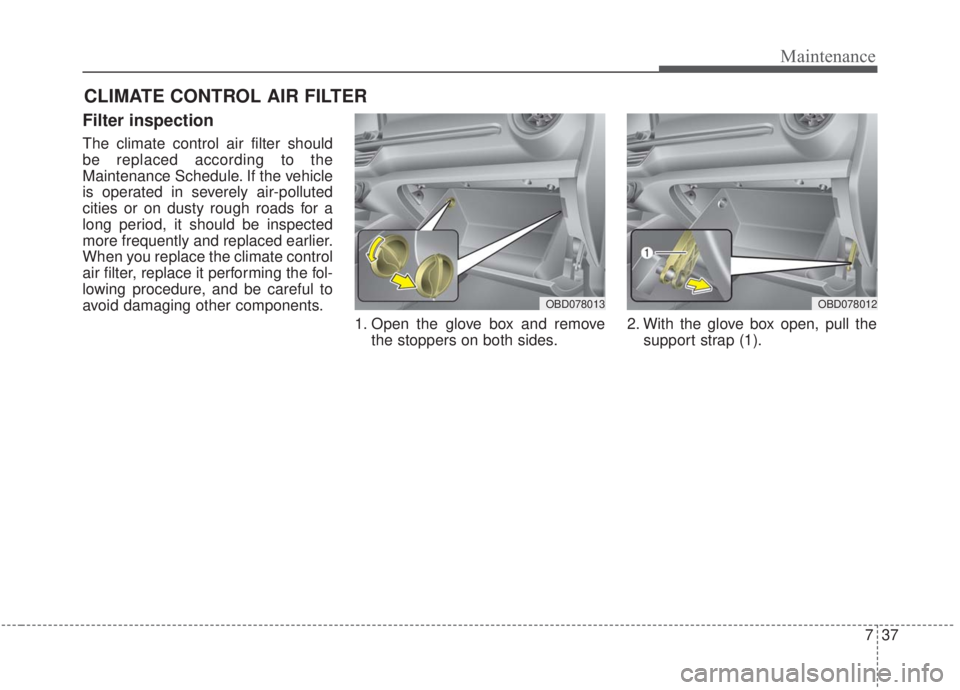
avoid damaging other components.1. Open the glove box and removethe stoppers on both sides. 2. With the glove box open, pull the
support strap (1).
OBD078012OBD078013