KIA K900 2015 1.G Owner's Manual
Manufacturer: KIA, Model Year: 2015, Model line: K900, Model: KIA K900 2015 1.GPages: 522, PDF Size: 7.92 MB
Page 241 of 522
Features of your vehicle
4-162
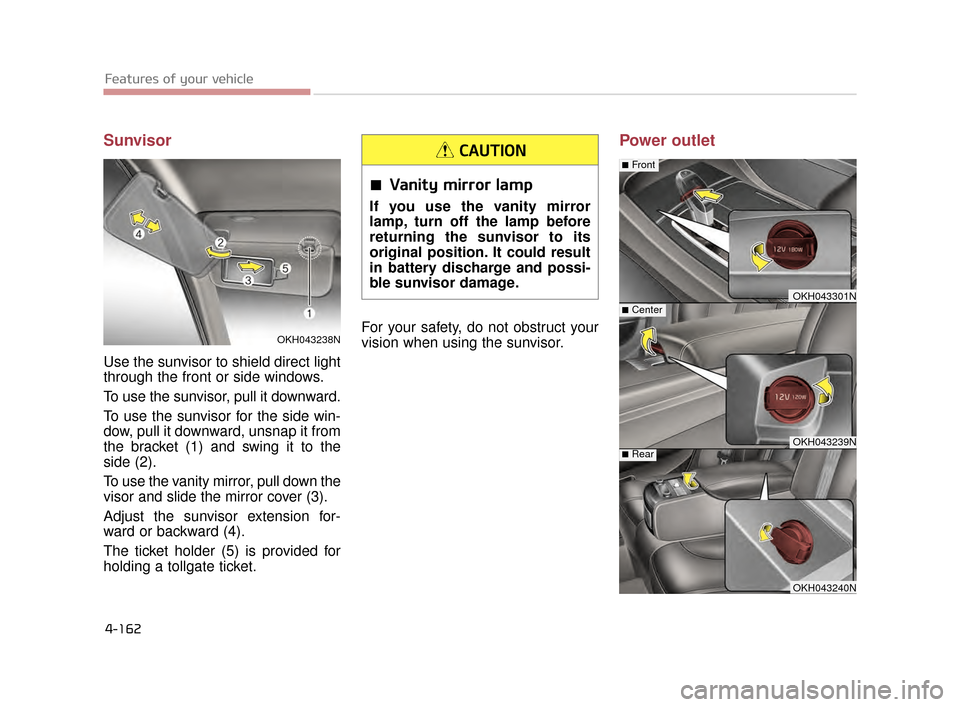
Sunvisor
Use the sunvisor to shield direct light
through the front or side windows.
To use the sunvisor, pull it downward.
To use the sunvisor for the side win-
dow, pull it downward, unsnap it from
the bracket (1) and swing it to the
side (2).
To use the vanity mirror, pull down the
visor and slide the mirror cover (3).
Adjust the sunvisor extension for-
ward or backward (4).
The ticket holder (5) is provided for
holding a tollgate ticket.For your safety, do not obstruct your
vision when using the sunvisor.
Power outlet
OKH043301N
OKH043239N
■Center
■Rear
■Front
OKH043240N
Vanity mirror lamp
If you use the vanity mirror
lamp, turn off the lamp before
returning the sunvisor to its
original position. It could result
in battery discharge and possi-
ble sunvisor damage.
CAUTION
OKH043238N
KH CAN (ENG) 4:2015 3/26/2015 10:47 AM Page 162
Page 242 of 522
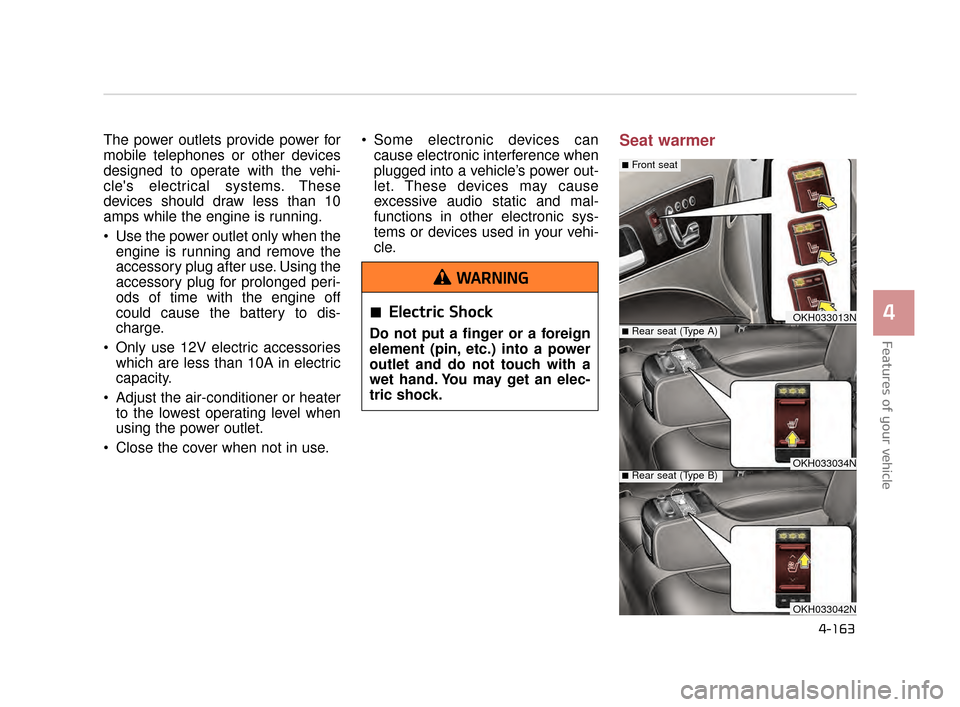
The power outlets provide power for
mobile telephones or other devices
designed to operate with the vehi-
cle's electrical systems. These
devices should draw less than 10
amps while the engine is running.
Use the power outlet only when theengine is running and remove the
accessory plug after use. Using the
accessory plug for prolonged peri-
ods of time with the engine off
could cause the battery to dis-
charge.
Only use 12V electric accessories which are less than 10A in electric
capacity.
Adjust the air-conditioner or heater to the lowest operating level when
using the power outlet.
Close the cover when not in use. Some electronic devices can
cause electronic interference when
plugged into a vehicle’s power out-
let. These devices may cause
excessive audio static and mal-
functions in other electronic sys-
tems or devices used in your vehi-
cle.Seat warmer
Features of your vehicle
4
4-163
Electric Shock
Do not put a finger or a foreign
element (pin, etc.) into a power
outlet and do not touch with a
wet hand. You may get an elec-
tric shock.
WARNING
OKH033013N
OKH033034N
■Rear seat (Type A)
■Rear seat (Type B)
■Front seat
OKH033042N
KH CAN (ENG) 4:2015 3/26/2015 10:47 AM Page 163
Page 243 of 522
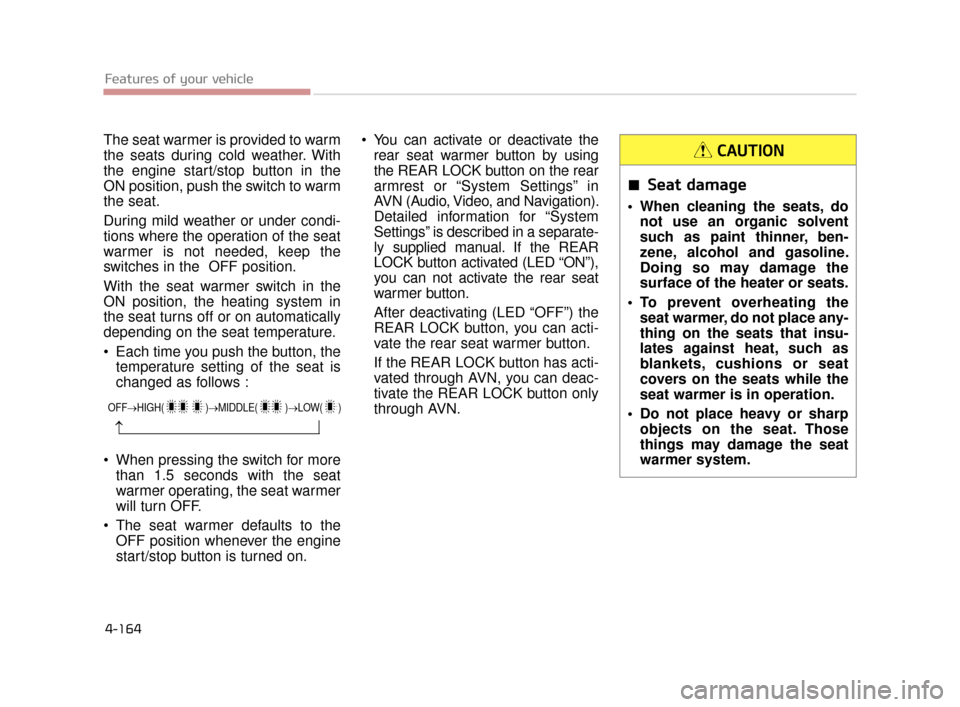
The seat warmer is provided to warm
the seats during cold weather. With
the engine start/stop button in the
ON position, push the switch to warm
the seat.
During mild weather or under condi-
tions where the operation of the seat
warmer is not needed, keep the
switches in the OFF position.
With the seat warmer switch in the
ON position, the heating system in
the seat turns off or on automatically
depending on the seat temperature.
Each time you push the button, thetemperature setting of the seat is
changed as follows :
When pressing the switch for more than 1.5 seconds with the seat
warmer operating, the seat warmer
will turn OFF.
The seat warmer defaults to the OFF position whenever the engine
start/stop button is turned on. You can activate or deactivate the
rear seat warmer button by using
the REAR LOCK button on the rear
armrest or “System Settings” in
AVN (Audio, Video, and Navigation).
Detailed information for “System
Settings” is described in a separate-
ly supplied manual. If the REAR
LOCK button activated (LED “ON”),
you can not activate the rear seat
warmer button.
After deactivating (LED “OFF”) the
REAR LOCK button, you can acti-
vate the rear seat warmer button.
If the REAR LOCK button has acti-
vated through AVN, you can deac-
tivate the REAR LOCK button only
through AVN.
Features of your vehicle
4-164
OFF→ HIGH( )→ MIDDLE( )→LOW( )
→
Seat damage
When cleaning the seats, do
not use an organic solvent
such as paint thinner, ben-
zene, alcohol and gasoline.
Doing so may damage the
surface of the heater or seats.
To prevent overheating the seat warmer, do not place any-
thing on the seats that insu-
lates against heat, such as
blankets, cushions or seat
covers on the seats while the
seat warmer is in operation.
Do not place heavy or sharp objects on the seat. Those
things may damage the seat
warmer system.
CAUTION
KH CAN (ENG) 4:2015 3/26/2015 10:47 AM Page 164
Page 244 of 522
Features of your vehicle
4
4-165
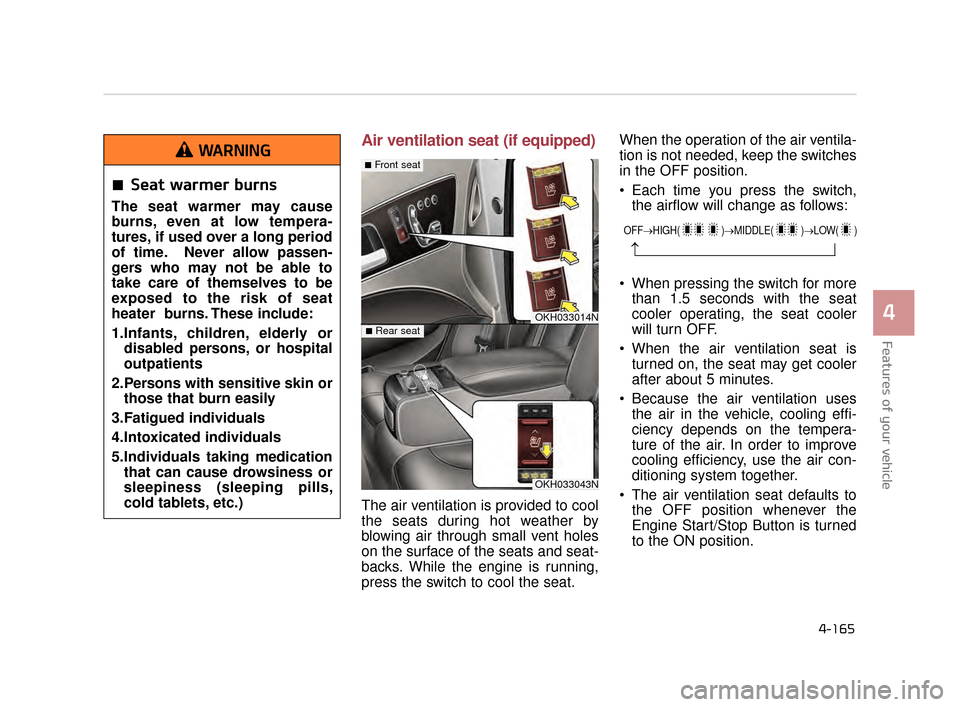
Air ventilation seat (if equipped)
The air ventilation is provided to cool
the seats during hot weather by
blowing air through small vent holes
on the surface of the seats and seat-
backs. While the engine is running,
press the switch to cool the seat. When the operation of the air ventila-
tion is not needed, keep the switches
in the OFF position.
Each time you press the switch,
the airflow will change as follows:
When pressing the switch for more than 1.5 seconds with the seat
cooler operating, the seat cooler
will turn OFF.
When the air ventilation seat is turned on, the seat may get cooler
after about 5 minutes.
Because the air ventilation uses the air in the vehicle, cooling effi-
ciency depends on the tempera-
ture of the air. In order to improve
cooling efficiency, use the air con-
ditioning system together.
The air ventilation seat defaults to the OFF position whenever the
Engine Start/Stop Button is turned
to the ON position.
Seat warmer burns
The seat warmer may cause
burns, even at low tempera-
tures, if used over a long period
of time. Never allow passen-
gers who may not be able to
take care of themselves to be
exposed to the risk of seat
heater burns. These include:
1.Infants, children, elderly ordisabled persons, or hospital
outpatients
2.Persons with sensitive skin or those that burn easily
3.Fatigued individuals
4.Intoxicated individuals
5.Individuals taking medication that can cause drowsiness or
sleepiness (sleeping pills,
cold tablets, etc.)
WARNING
OKH033014N
OKH033043N
■Front seat
■Rear seat
OFF→ HIGH( )→ MIDDLE( )→LOW( )
→
KH CAN (ENG) 4:2015 3/26/2015 10:47 AM Page 165
Page 245 of 522
Features of your vehicle
4-166
You can activate or deactivate therear air ventilation button by using
the REAR LOCK button on the rear
armrest or “System Settings” in
AVN (Audio, Video, and
Navigation). Detailed information
for “System Settings” is described
in a separately supplied manual. If
the REAR LOCK button activated
(LED “ON”), you can not activate
the rear air ventilation button.
After deactivating (LED “OFF”) the
REAR LOCK button, you can acti-
vate the rear air ventilation button.
If the REAR LOCK button has acti-
vated through AVN, you can deacti-
vate the REAR LOCK button only
through AVN.
The air ventilation seat is a supple- mentary cooling/heating system.
Use the air ventilation seat when
the climate control system is on.
Using the air ventilation seat for
prolonged periods of time with the
climate control system off could
cause the air ventilation seat per-
formance to impair. Do not place materials such as
plastic bags or newspapers under
the seats. The air vent may not
work properly as the air intake can
be blocked.✽ NOTICE - Air intake
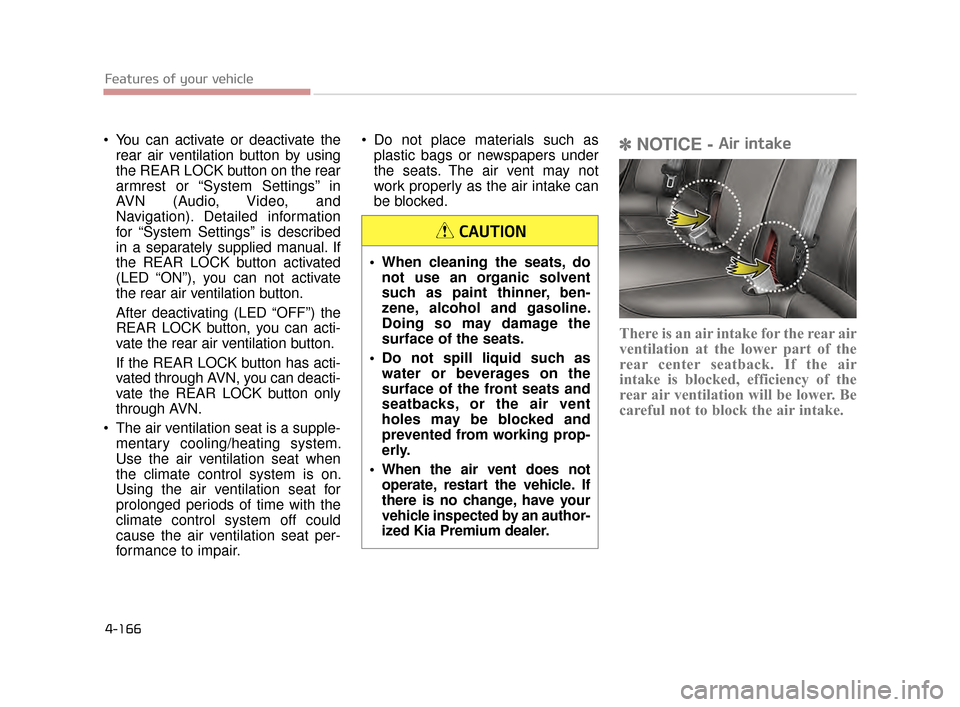
There is an air intake for the rear air
ventilation at the lower part of the
rear center seatback. If the air
intake is blocked, efficiency of the
rear air ventilation will be lower. Be
careful not to block the air intake.
When cleaning the seats, do
not use an organic solvent
such as paint thinner, ben-
zene, alcohol and gasoline.
Doing so may damage the
surface of the seats.
Do not spill liquid such as water or beverages on the
surface of the front seats and
seatbacks, or the air vent
holes may be blocked and
prevented from working prop-
erly.
When the air vent does not operate, restart the vehicle. If
there is no change, have your
vehicle inspected by an author-
ized Kia Premium dealer.
CAUTION
KH CAN (ENG) 4:2015 3/26/2015 10:47 AM Page 166
Page 246 of 522
Features of your vehicle
4
4-167
Clock
Whenever the battery terminals or
related fuses are disconnected, you
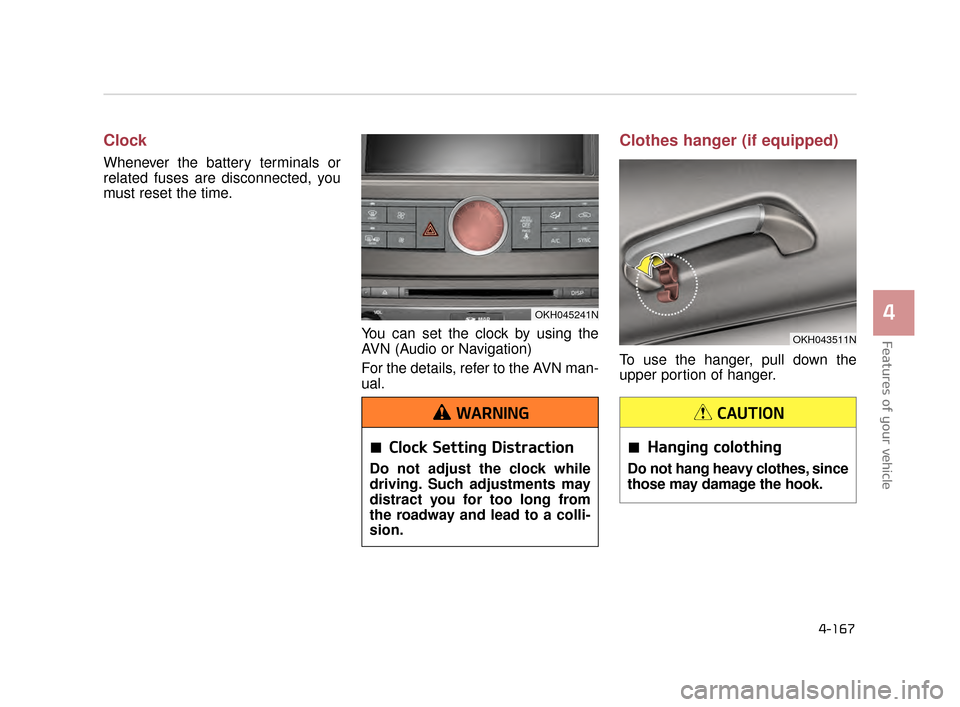
must reset the time.You can set the clock by using the
AVN (Audio or Navigation)
For the details, refer to the AVN man-
ual.
Clothes hanger (if equipped)
To use the hanger, pull down the
upper portion of hanger.
OKH045241N
Clock Setting Distraction
Do not adjust the clock while
driving. Such adjustments may
distract you for too long from
the roadway and lead to a colli-
sion.
WARNING
OKH043511N
Hanging colothing
Do not hang heavy clothes, since
those may damage the hook.
CAUTION
KH CAN (ENG) 4:2015 3/26/2015 10:48 AM Page 167
Page 247 of 522
Features of your vehicle
4-168
Floor mat anchor(s)
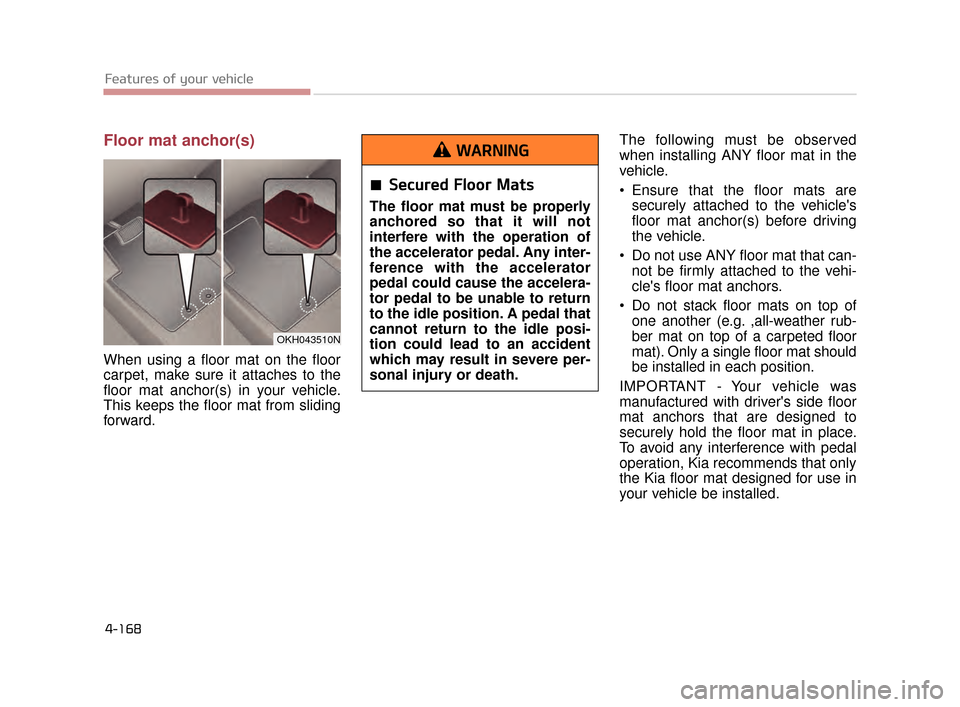
When using a floor mat on the floor
carpet, make sure it attaches to the
floor mat anchor(s) in your vehicle.
This keeps the floor mat from sliding
forward.The following must be observed
when installing ANY floor mat in the
vehicle.
Ensure that the floor mats are
securely attached to the vehicle's
floor mat anchor(s) before driving
the vehicle.
Do not use ANY floor mat that can- not be firmly attached to the vehi-
cle's floor mat anchors.
Do not stack floor mats on top of one another (e.g. ,all-weather rub-
ber mat on top of a carpeted floor
mat). Only a single floor mat should
be installed in each position.
IMPORTANT - Your vehicle was
manufactured with driver's side floor
mat anchors that are designed to
securely hold the floor mat in place.
To avoid any interference with pedal
operation, Kia recommends that only
the Kia floor mat designed for use in
your vehicle be installed.
OKH043510N
Secured Floor Mats
The floor mat must be properly
anchored so that it will not
interfere with the operation of
the accelerator pedal. Any inter-
ference with the accelerator
pedal could cause the accelera-
tor pedal to be unable to return
to the idle position. A pedal that
cannot return to the idle posi-
tion could lead to an accident
which may result in severe per-
sonal injury or death.
WARNING
KH CAN (ENG) 4:2015 3/26/2015 10:48 AM Page 168
Page 248 of 522
Features of your vehicle
4
4-169
Rear vanity mirror (if equipped)
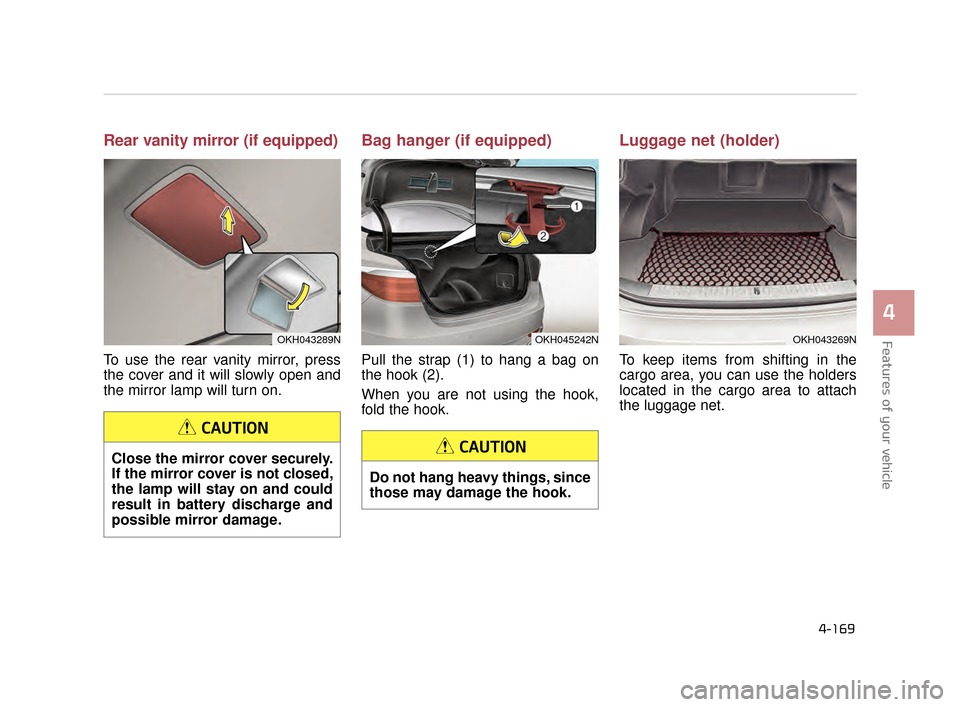
To use the rear vanity mirror, press
the cover and it will slowly open and
the mirror lamp will turn on.
Bag hanger (if equipped)
Pull the strap (1) to hang a bag on
the hook (2).
When you are not using the hook,
fold the hook.
Luggage net (holder)
To keep items from shifting in the
cargo area, you can use the holders
located in the cargo area to attach
the luggage net.
OKH043289N
Close the mirror cover securely.
If the mirror cover is not closed,
the lamp will stay on and could
result in battery discharge and
possible mirror damage.
CAUTION
Do not hang heavy things, since
those may damage the hook.
CAUTION
OKH045242NOKH043269N
KH CAN (ENG) 4:2015 3/26/2015 10:48 AM Page 169
Page 249 of 522
Features of your vehicle
4-170
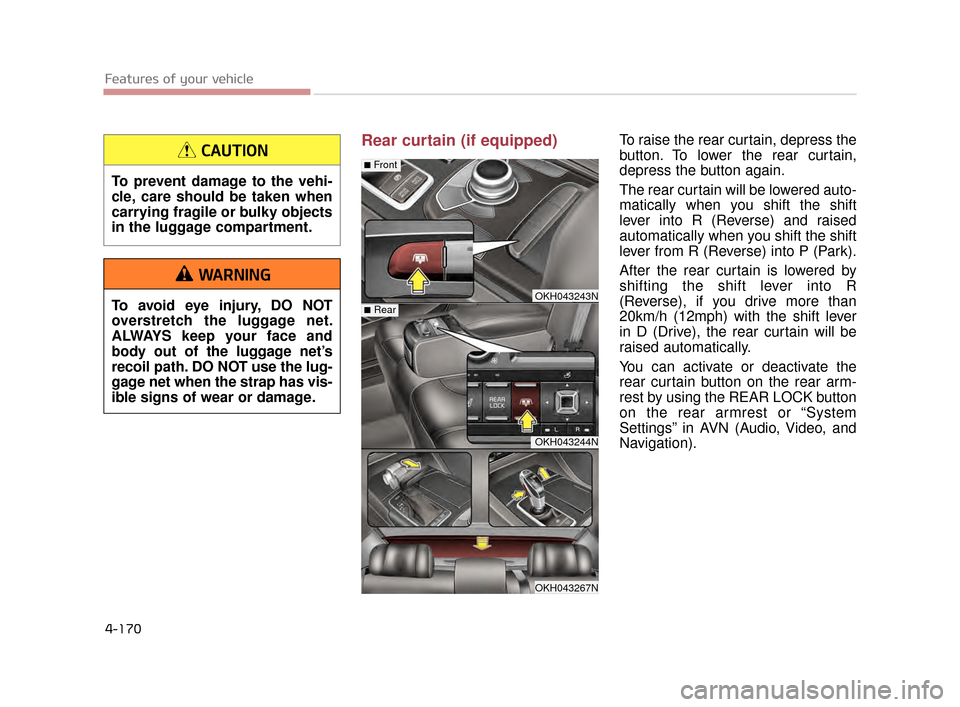
Rear curtain (if equipped)To raise the rear curtain, depress the
button. To lower the rear curtain,
depress the button again.
The rear curtain will be lowered auto-
matically when you shift the shift
lever into R (Reverse) and raised
automatically when you shift the shift
lever from R (Reverse) into P (Park).
After the rear curtain is lowered by
shifting the shift lever into R
(Reverse), if you drive more than
20km/h (12mph) with the shift lever
in D (Drive), the rear curtain will be
raised automatically.
You can activate or deactivate the
rear curtain button on the rear arm-
rest by using the REAR LOCK button
on the rear armrest or “System
Settings” in AVN (Audio, Video, and
Navigation).
OKH043243N
OKH043244N
OKH043267N
■Rear
■Front
To prevent damage to the vehi-
cle, care should be taken when
carrying fragile or bulky objects
in the luggage compartment.
CAUTION
To avoid eye injury, DO NOT
overstretch the luggage net.
ALWAYS keep your face and
body out of the luggage net’s
recoil path. DO NOT use the lug-
gage net when the strap has vis-
ible signs of wear or damage.
WARNING
KH CAN (ENG) 4:2015 3/26/2015 10:48 AM Page 170
Page 250 of 522
Features of your vehicle
4
4-171
Detailed information for “System
Settings” is described in a separately
supplied manual.
If the REAR LOCK button activated
(LED “ON”), you can not activate the
rear curtain button.
After deactivating (LED “OFF”) the
REAR LOCK button, you can acti-
vate the rear curtain button.
If the REAR LOCK button has acti-
vated through AVN, you can deacti-
vate the REAR LOCK button only
through AVN.Side curtain (if equipped)
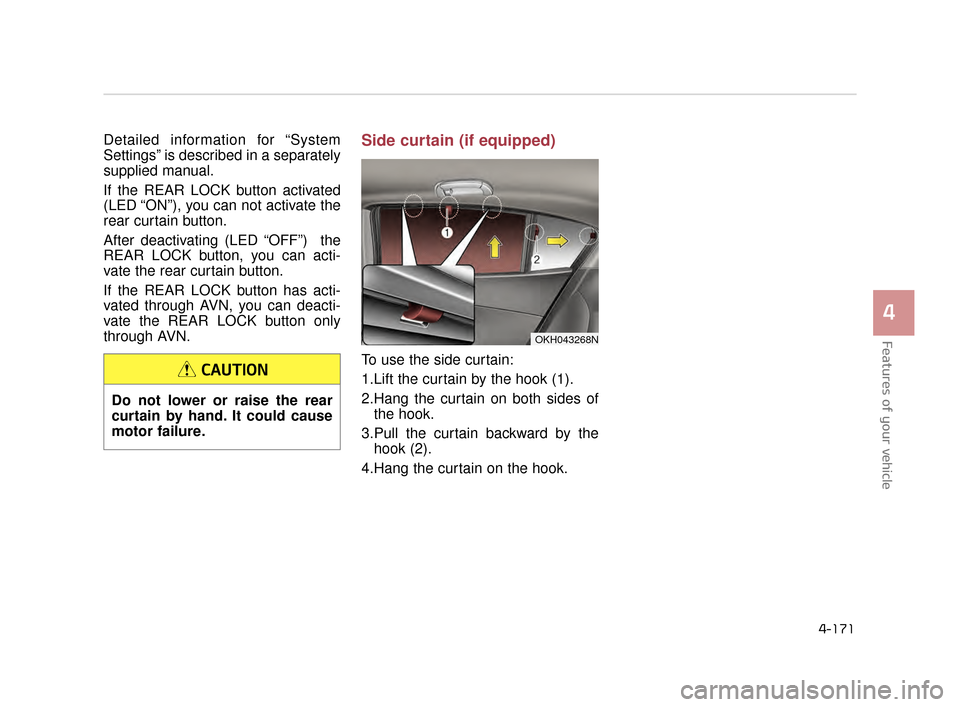
To use the side curtain:
1.Lift the curtain by the hook (1).
2.Hang the curtain on both sides ofthe hook.
3.Pull the curtain backward by the hook (2).
4.Hang the curtain on the hook.
OKH043268N
Do not lower or raise the rear
curtain by hand. It could cause
motor failure.
CAUTION
KH CAN (ENG) 4:2015 3/26/2015 10:48 AM Page 171